- Capabilities
- Getting started
- Architecture center
- Platform updates
Use the Ontology SDK (OSDK) in Slate
The Ontology Software Development Kit (OSDK) allows builders to leverage the full power of the Ontology within Slate's code environment. The OSDK is accessible as a library within the Functions editor, providing type-safe access to object types, link types, actions, and functions from your Ontology.
The OSDK in Slate uses the same underlying APIs as the TypeScript OSDK. Slate uses JavaScript but provides IntelliSense for code completion and type hints.
Overview
The OSDK panel in Slate enables you to:
- Select an Ontology to work with
- Configure data entities including object types, link types, action types, and functions
- Generate a custom OSDK library tailored to your selected entities
- View documentation and code snippets for each entity
- Track changes before committing them to your application
Getting started
Access the OSDK panel
- Open your Slate application in edit mode.
- In the left sidebar, select the OSDK icon to open the OSDK panel.
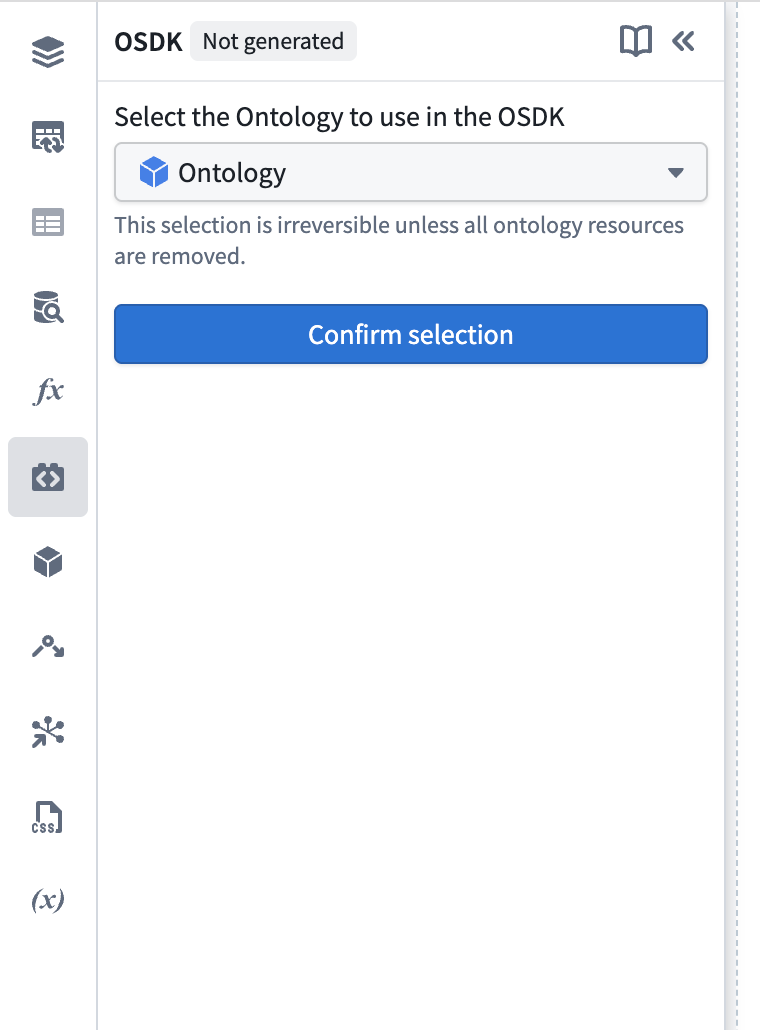
- If you have not yet configured an OSDK, you will see the Ontology selection screen.
Select your Ontology
- From the Select Ontology dropdown, choose the Ontology you want to access.
- Select Confirm selection to save your selection.
The available Ontologies depend on your platform setup and permissions. You may only have access to one Ontology. You will have to delete and reconfigure the OSDK to switch to a different Ontology later.
Add data entities
Once you have selected an Ontology, you can add four types of entities to your OSDK configuration:
Object types and link types
Object types represent the core data entities in your Ontology. Link types define relationships between object types and appear nested under their parent object type.
- In the Object Types section, select the + button.
- Use the search dialog to find and select object types.
- When you select an object type, any associated link types are automatically available.
- Dependencies are resolved automatically, so if you add a link type, the required object types are included.
Action types
Action types allow you to execute operations that modify Ontology data.
- In the Action Types section, select the + button.
- Search for and select the action types you need.
- Object type dependencies required by the action are automatically added.
Functions
Functions let you call custom logic defined in your Ontology.
- In the Functions section, select the + button.
- Browse and select the functions you want to include.
Functions without an API name or those that edit the Ontology cannot be selected.
Generate the OSDK
After configuring your entities:
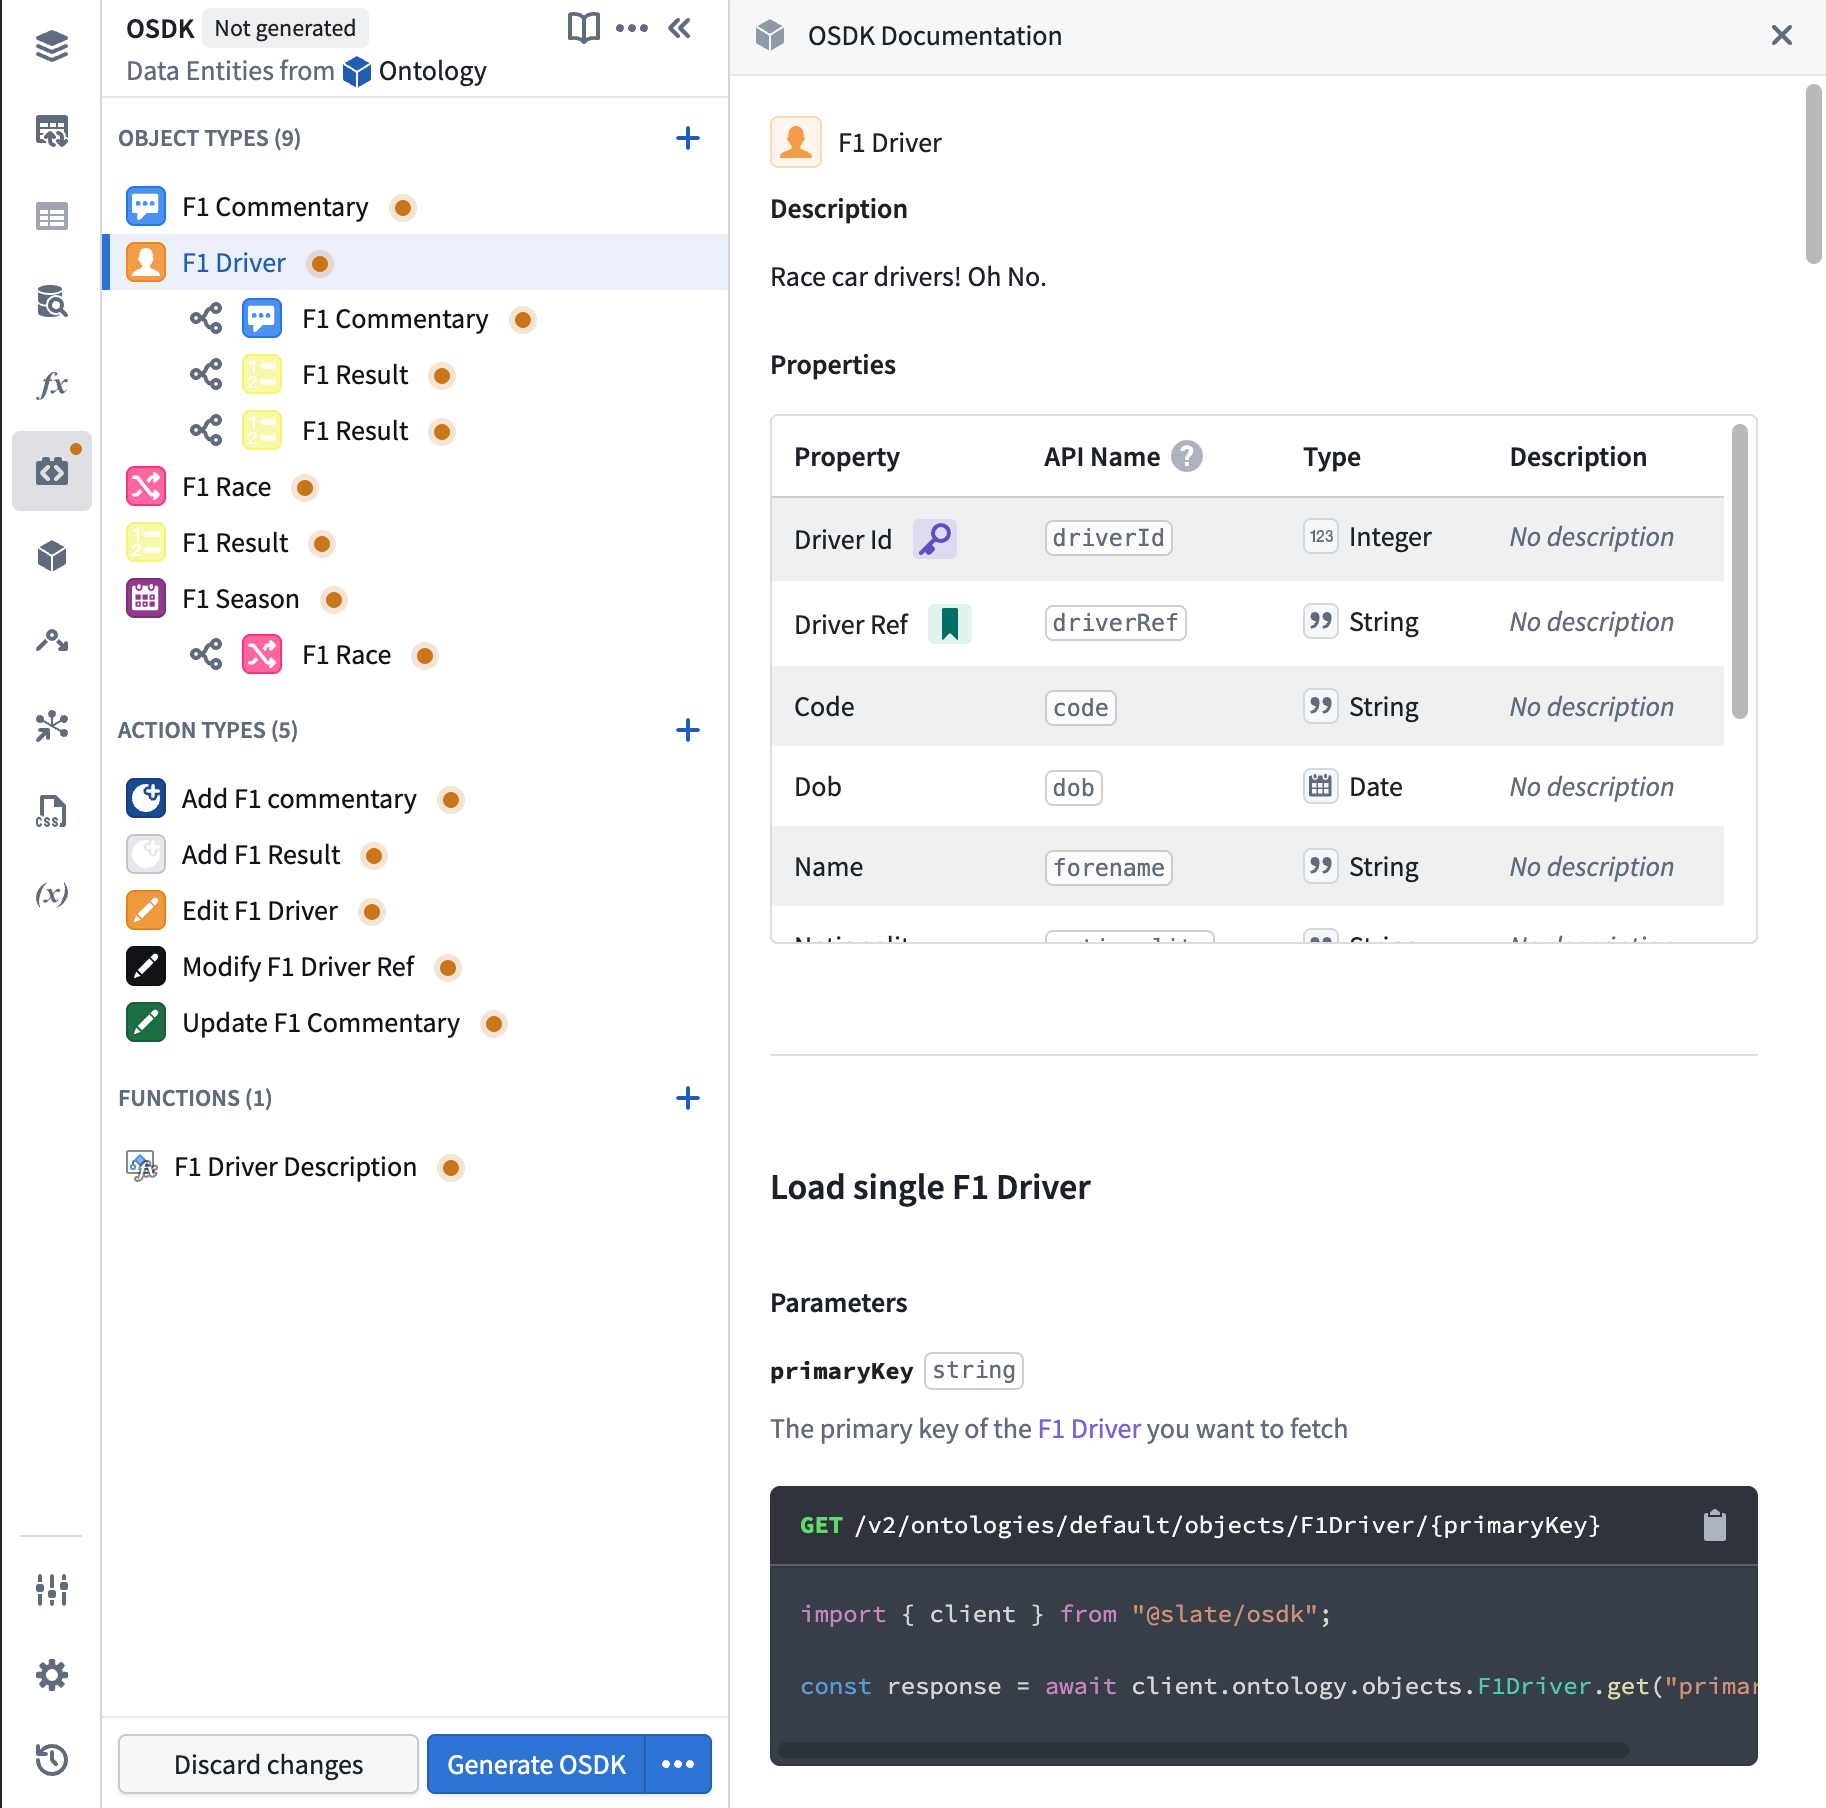
- Review your selections. Entities marked with an orange indicator have unsaved changes.
- Select Generate OSDK to create your custom OSDK library.
- Wait for the generation process to complete.
- Once generated, the OSDK is available for use in your Slate functions.
The generation tag displays the application's OSDK version.
Using the OSDK in Slate functions
The Functions editor allows you to access and transform data fetched through the OSDK. To get started, select any entity in the OSDK panel to view its documentation and code snippets in the right panel. These snippets are tailored to your specific configuration and can be copied directly into your Slate functions.
For example, selecting an object type displays:
- A list of all properties with their API names and types.
- Code snippets for loading single objects, fetching pages, filtering, and more.
- The exact import statement and method calls for your generated OSDK.
For detailed syntax reference on filtering, aggregations, actions, and other operations, see the TypeScript OSDK guide. Slate uses OSDK version 1 and is in JavaScript, so type annotations are omitted.
Traverse links with pivotTo
After you configure link types in your OSDK, use the pivotTo method to traverse a link from every object in an object set to its linked objects.
For example, if you have a Dealer object type with an orders link to an Order object type, you can retrieve the related orders for a set of dealers:
Copied!1 2 3 4 5import { client } from "@slate/osdk"; const linkedOrders = await client.ontology.objects.Dealer .pivotTo("orders") .fetchPage({ pageSize: 30 });
To traverse a link from a single object instead, access the link directly on that object:
Copied!1 2 3 4 5import { client } from "@slate/osdk"; function getLinkedOrders(source) { return source.orders.fetchPageWithErrors({ pageSize: 30 }); }
To use pivotTo:
- Include the link type in your OSDK configuration.
- In the OSDK panel, add an object type and select the relevant links in the bottom-right section.
- Generate the OSDK. The
pivotTomethod is then available and type-safe for the configured link names.
Select a link type in the OSDK panel to view the generated snippets for that link, including the exact object type and link API names for your configuration.
Managing your OSDK configuration
Viewing entity documentation
Select any entity in the OSDK panel to view detailed documentation in the right panel, including:
- Property definitions for object types
- Parameter specifications for actions and functions
- Code snippets customized for your selected entities
Tracking changes
The OSDK panel displays indicators for unsaved changes:
- Added entities show an orange indicator until generated
- Removed entities appear crossed out with an undo option
- Select Discard changes to revert to the last generated configuration
Regenerating the OSDK
If you need to regenerate the OSDK (for example, after Ontology changes):
- Select the dropdown arrow next to Generate OSDK.
- Select Regenerate last OSDK.
Viewing generation logs
To troubleshoot generation issues:
- Select the dropdown arrow next to Generate OSDK.
- Select View latest generation logs.
Troubleshooting OSDK loading errors
If the OSDK fails to load, Slate displays the errors in the health check dialog.
- Open the health check dialog by selecting the issues icon in the action bar.
- Select the OSDK tab to view detailed error information and guidance.
- Use the direct link in the dialog to open the OSDK configuration panel and fix the issue.
For more information about the health check dialog, see Debug applications.
OSDK behavior when importing or duplicating applications
When you import or duplicate a Slate application that uses the OSDK, the behavior of the OSDK bundle varies:
- Importing applications: JSON imports do not automatically include the OSDK bundle. You may need to regenerate the bundle after import by selecting Regenerate last OSDK from the Generate OSDK dropdown.
- Duplicating applications: Using Save as from the File dropdown copies the existing OSDK bundle from the source application. If the OSDK fails to load after you save a copy, Slate displays a tooltip instructing you to regenerate the SDK or refresh the page.
Deleting the OSDK
To remove the OSDK configuration entirely:
- Select the More menu (three dots) in the panel header.
- Select Delete OSDK.
- Confirm the deletion.
Deleting the OSDK removes all configuration and generated code. This action cannot be undone, and you will need to reconfigure the OSDK if needed later.
Best practices
- Start small: Add only the object types and actions you need. You can always add more later.
- Use error handling: Always check response types to handle errors gracefully.
- Paginate large datasets: Use
fetchPage()with appropriate page sizes instead of loading all objects at once. - Leverage the documentation panel: Select entities to see up-to-date code snippets for your specific configuration.
- Save your application: After generating the OSDK, save your Slate application to persist the configuration.
Related documentation
- Ontology SDK overview: Learn about the OSDK across all supported languages.
- TypeScript OSDK migration guide: Detailed syntax reference for TypeScript/JavaScript OSDK operations.
- Define and run Slate functions: Learn more about using JavaScript functions in Slate.