- Capabilities
- Getting started
- Architecture center
- Platform updates
Branching Workshop modules
Workshop integrates with Global Branching so you can develop modules and their configurations safely and in isolation. This page covers how to work with Workshop modules on branches, including adding resources to a branch, resource protection and approvals, and rebasing and conflict resolution.
For general information on Global Branching concepts and workflows, refer to the Global Branching documentation.
Adding Workshop modules to a branch
To add a Workshop module to a branch, use the branch selector to switch to that branch, open the module, then save any changes. The module is now a resource on the branch.
If your Workshop module contains non-Workshop elements for which Global Branching is not available, such as Quiver dashboards, these elements will not be modifiable on a branch.
Resource protection
When on the main branch, protected Workshop modules show a Save to new branch option instead of Save and publish, requiring all changes to be made on a branch rather than directly to main.
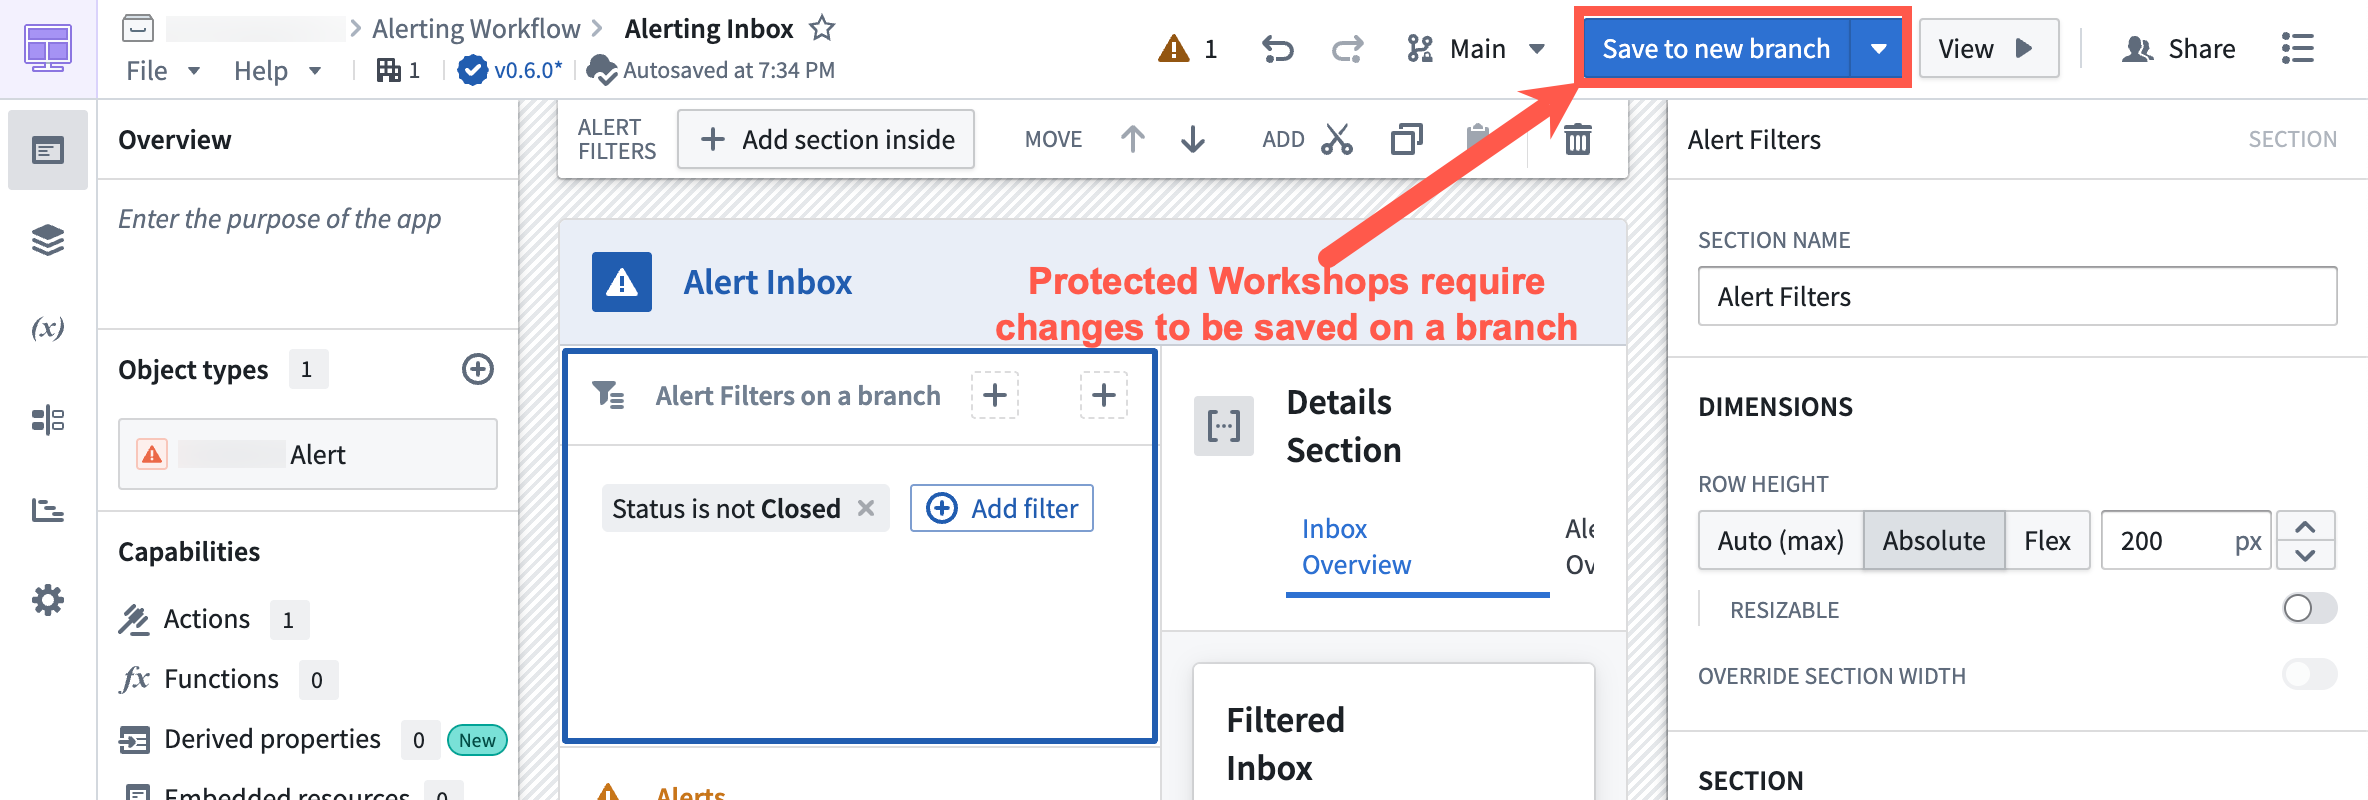
Select Save to new branch to open the new-branch dialog. Name the branch and select an ontology for it.
When you are ready to merge your changes to main, create a proposal.
Merge requirements
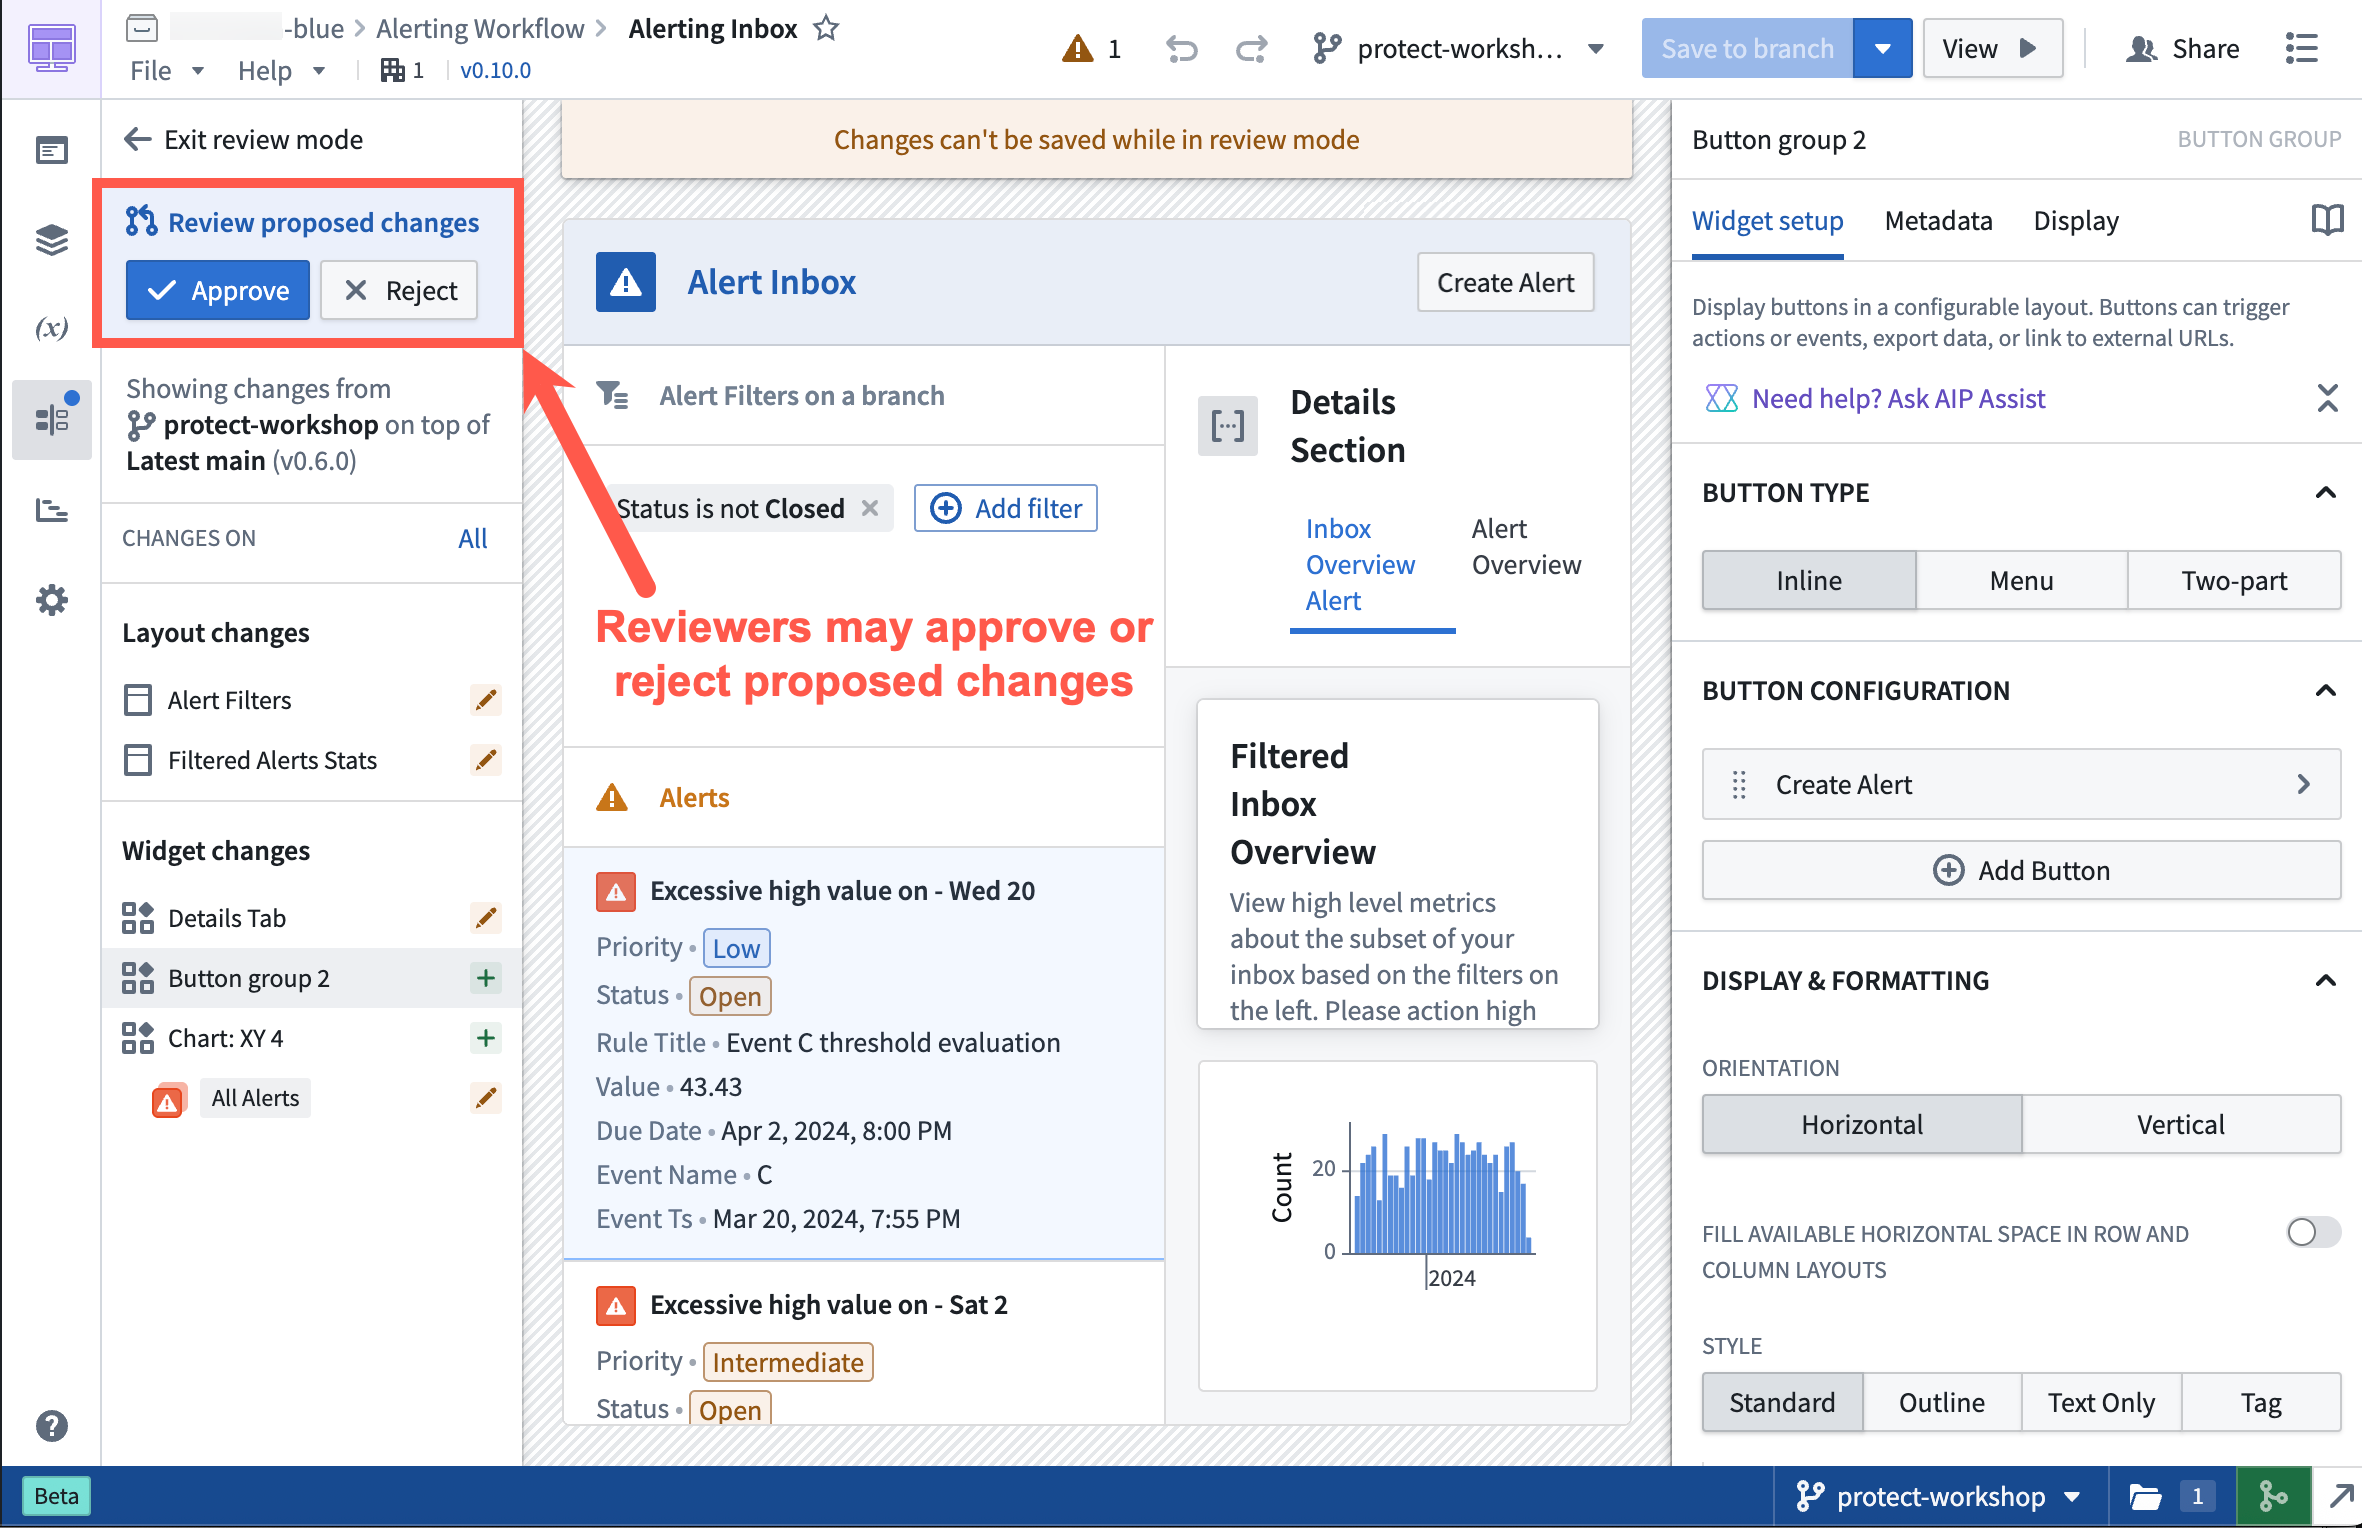
Approval process
After a proposal is created, assigned reviewers are notified to review the changes. Navigating to the branched version of the Workshop module directs reviewers to the Changelog tab in Workshop.
Within the Changelog tab, reviewers can see the changes made to the module. Reviewers can then approve or reject the change by selecting the appropriate Approve or Reject button on the left panel in the Review proposed changes section.
Rebasing and conflict resolution
Workshop rebasing enables multiple builders to edit a single module at the same time without needing to worry about overriding each other's changes.
Before you merge Workshop changes on a branch into main, you must rebase if a change occurred on main after the module was saved on a branch.
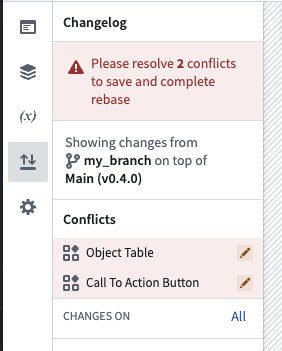
The rebasing user interface uses the Changelog panel to depict the changes made in the module.
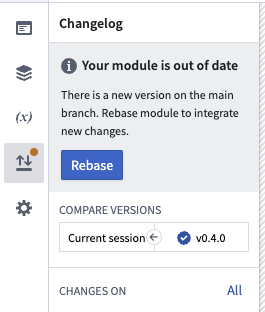
Start the rebase
If a rebase is required before merging, the Changelog panel displays a visual notification dot. Select the panel to show an option that begins the rebase.
Unsaved Workshop edits are not preserved through a rebase. Save your changes to the branch before starting the rebase; any in-progress edits that have not been saved will be lost.
Rebasing applies the changes made on the branch to the latest main version of the module. Resolve any merge conflicts manually to proceed.
Resolve a merge conflict
A change is marked as a merge conflict when it is edited on both main and the branch.
Workshop auto-merges changes that do not overlap. A change is only flagged as a merge conflict when the same widget, variable, section, or layout position was edited on both main and your branch; for those, you must pick a version manually as described below.
Common examples of merge conflicts include:
- A widget or variable was modified on both
mainand your branch. - A section was deleted on
mainand edited on the branch. - A widget was moved from location
AtoBonmainand fromAtoCon your branch.
To resolve a merge conflict, switch between three states to test how each option affects the module in real time:
- Main: The modification as it appears on
main. - Branch: The modification as it appears on the branch.
- Modification: Edits you make to the component during the rebase, useful for combining changes from
mainwith your branch.
Finish rebase
When you are satisfied with how your module looks and have resolved any merge conflicts, save the module to finish rebasing.
After this is complete, you can safely merge your Workshop changes from your branch into main.
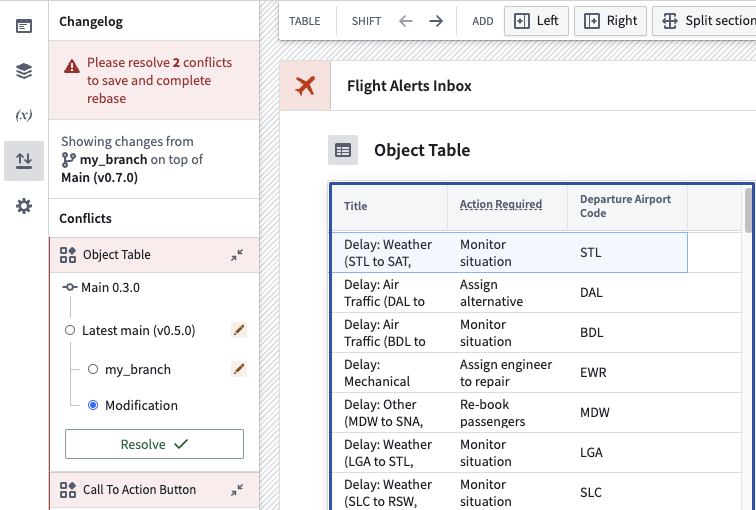
Example
In the example below, a merge conflict occurs in the object table widget during a rebase. main adds a new column, Departure airport code, while the current working branch adds a column, Action required.
Main:

Branch:

To keep both columns, first select main, then manually add the Action required column to resolve the conflict.