- Capabilities
- Getting started
- Architecture center
- Platform updates
Subgraphs in Pipeline Builder
Subgraphs in Pipeline Builder are in the beta phase of development and may not be available on your enrollment. Functionality may change during active development.
The subgraph feature in Pipeline Builder lets you package one or more transforms into a reusable block. You can then apply that block anywhere in a pipeline without rebuilding the logic each time. Subgraphs offer several benefits:
- Reuse logic: Package complex logic and apply it across multiple pipelines or branches.
- Reduce duplication: Update a subgraph once to affect all its instances.
- Simplify pipelines: Replace long chains of nodes with a single subgraph node, making graphs easier to read and maintain.
This guide covers how to:
- Create a new subgraph from scratch
- Add a subgraph to your pipeline
- Create a subgraph from existing nodes
- Add a multi-input subgraph
Create a new subgraph from scratch
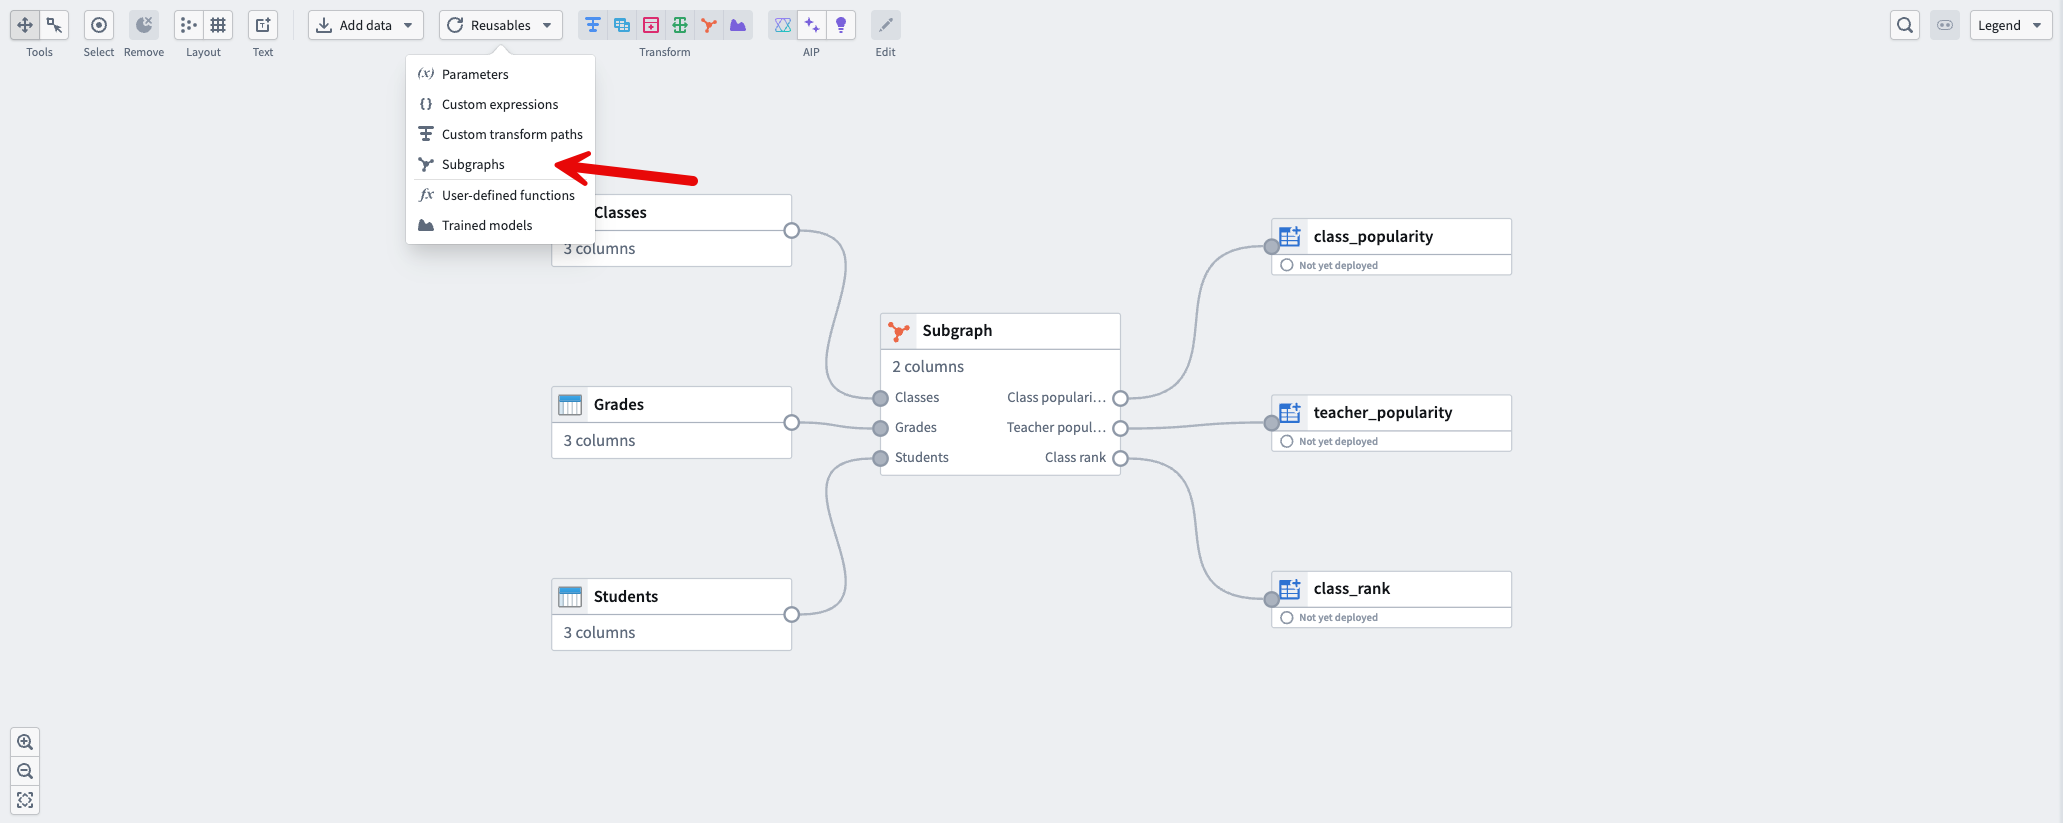
You create and manage reusable subgraphs from the Reusables menu.
-
In Pipeline Builder, open the pipeline where you want to define the subgraph.
-
At the top of the graph, select Reusables, then select Subgraphs.
-
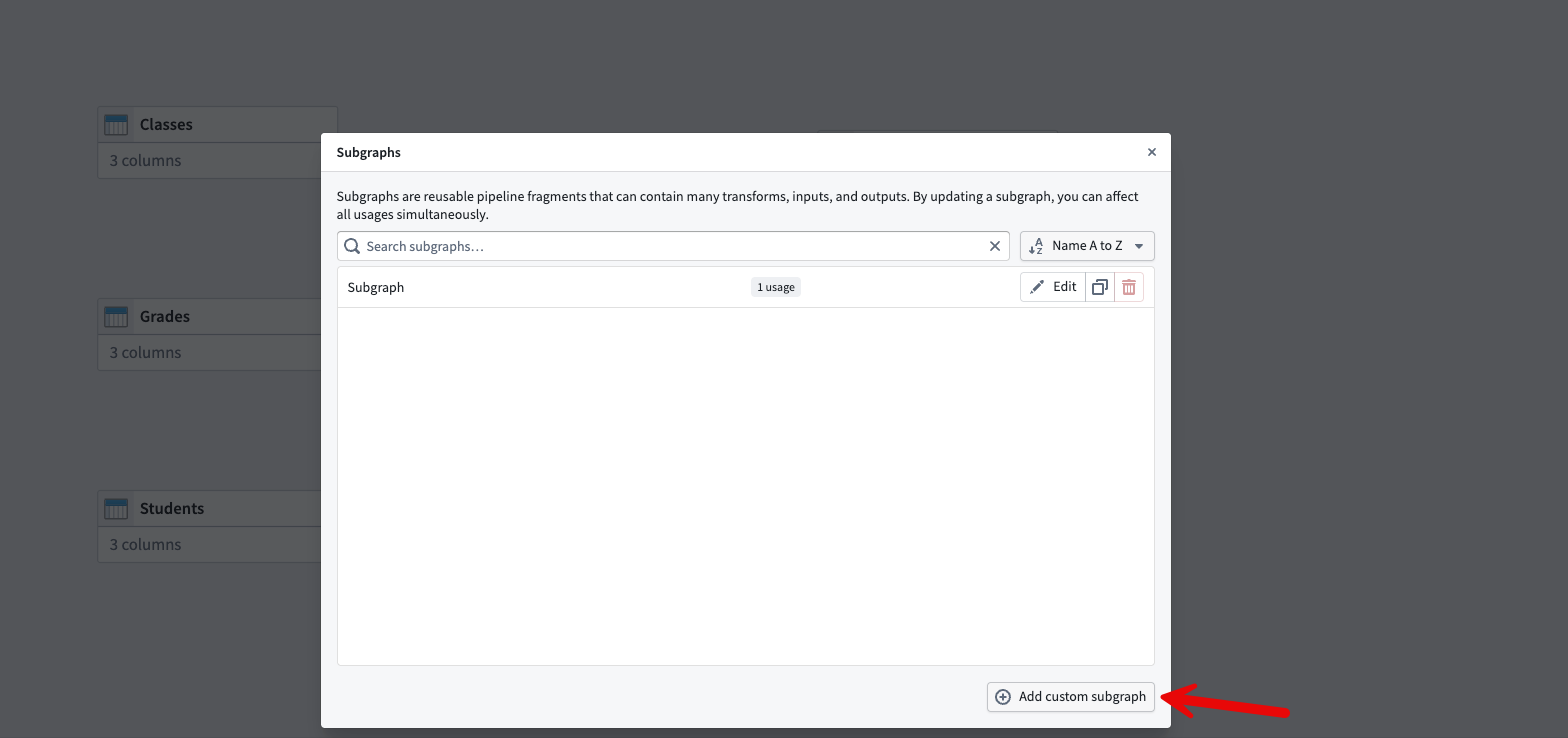
In the Subgraphs window, select Add custom subgraph.
Configure the subgraph inputs
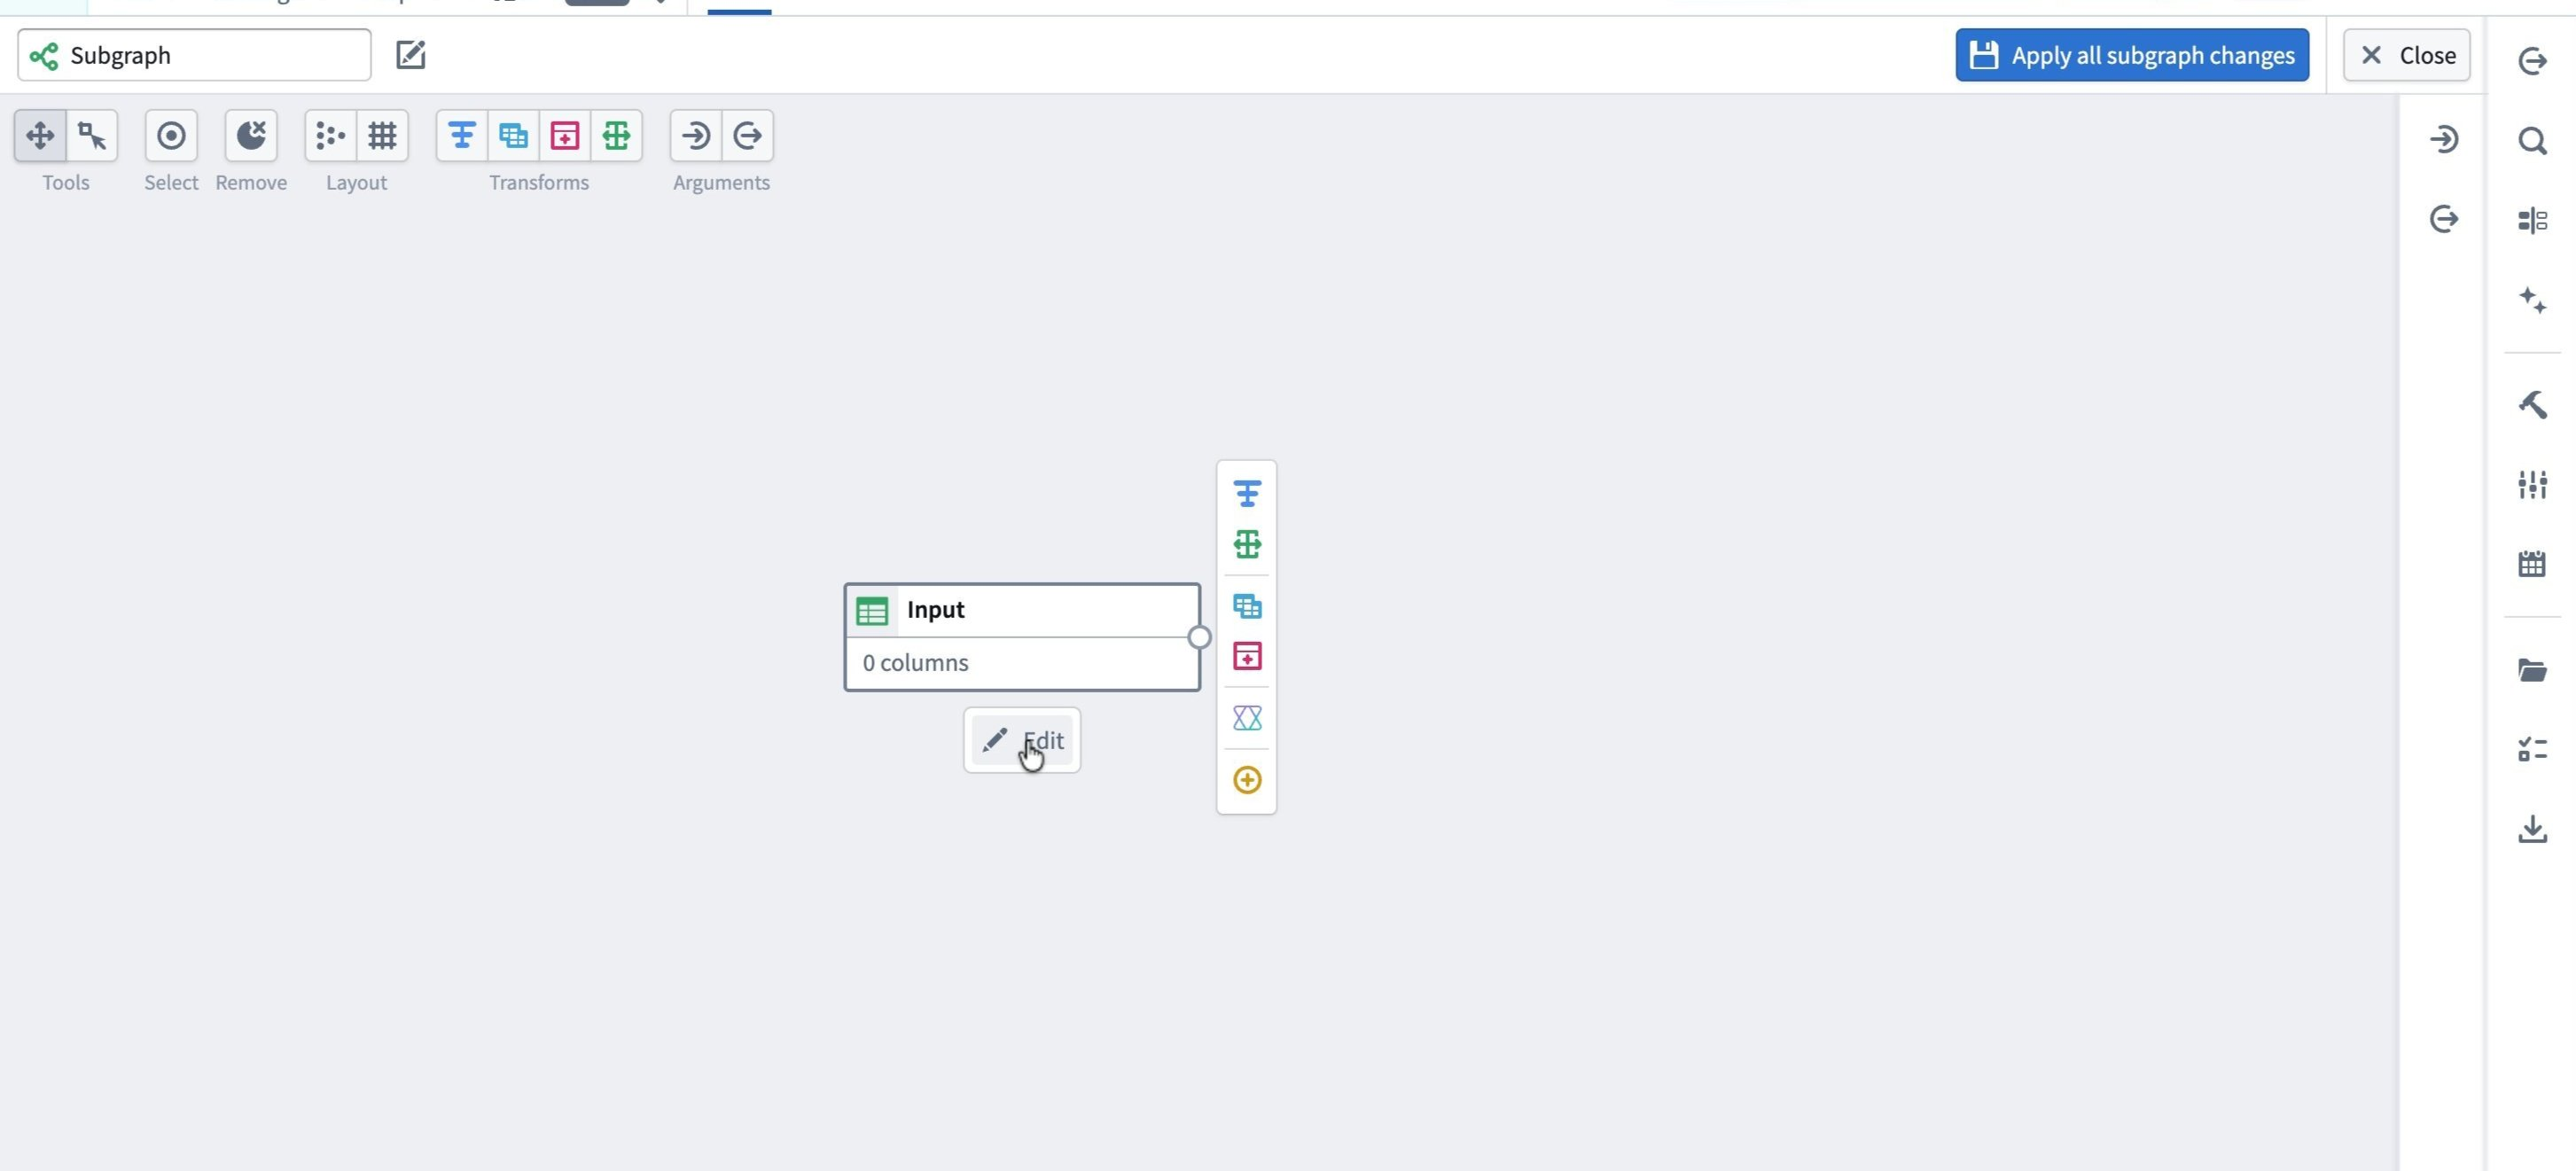
A new, empty subgraph opens.
-
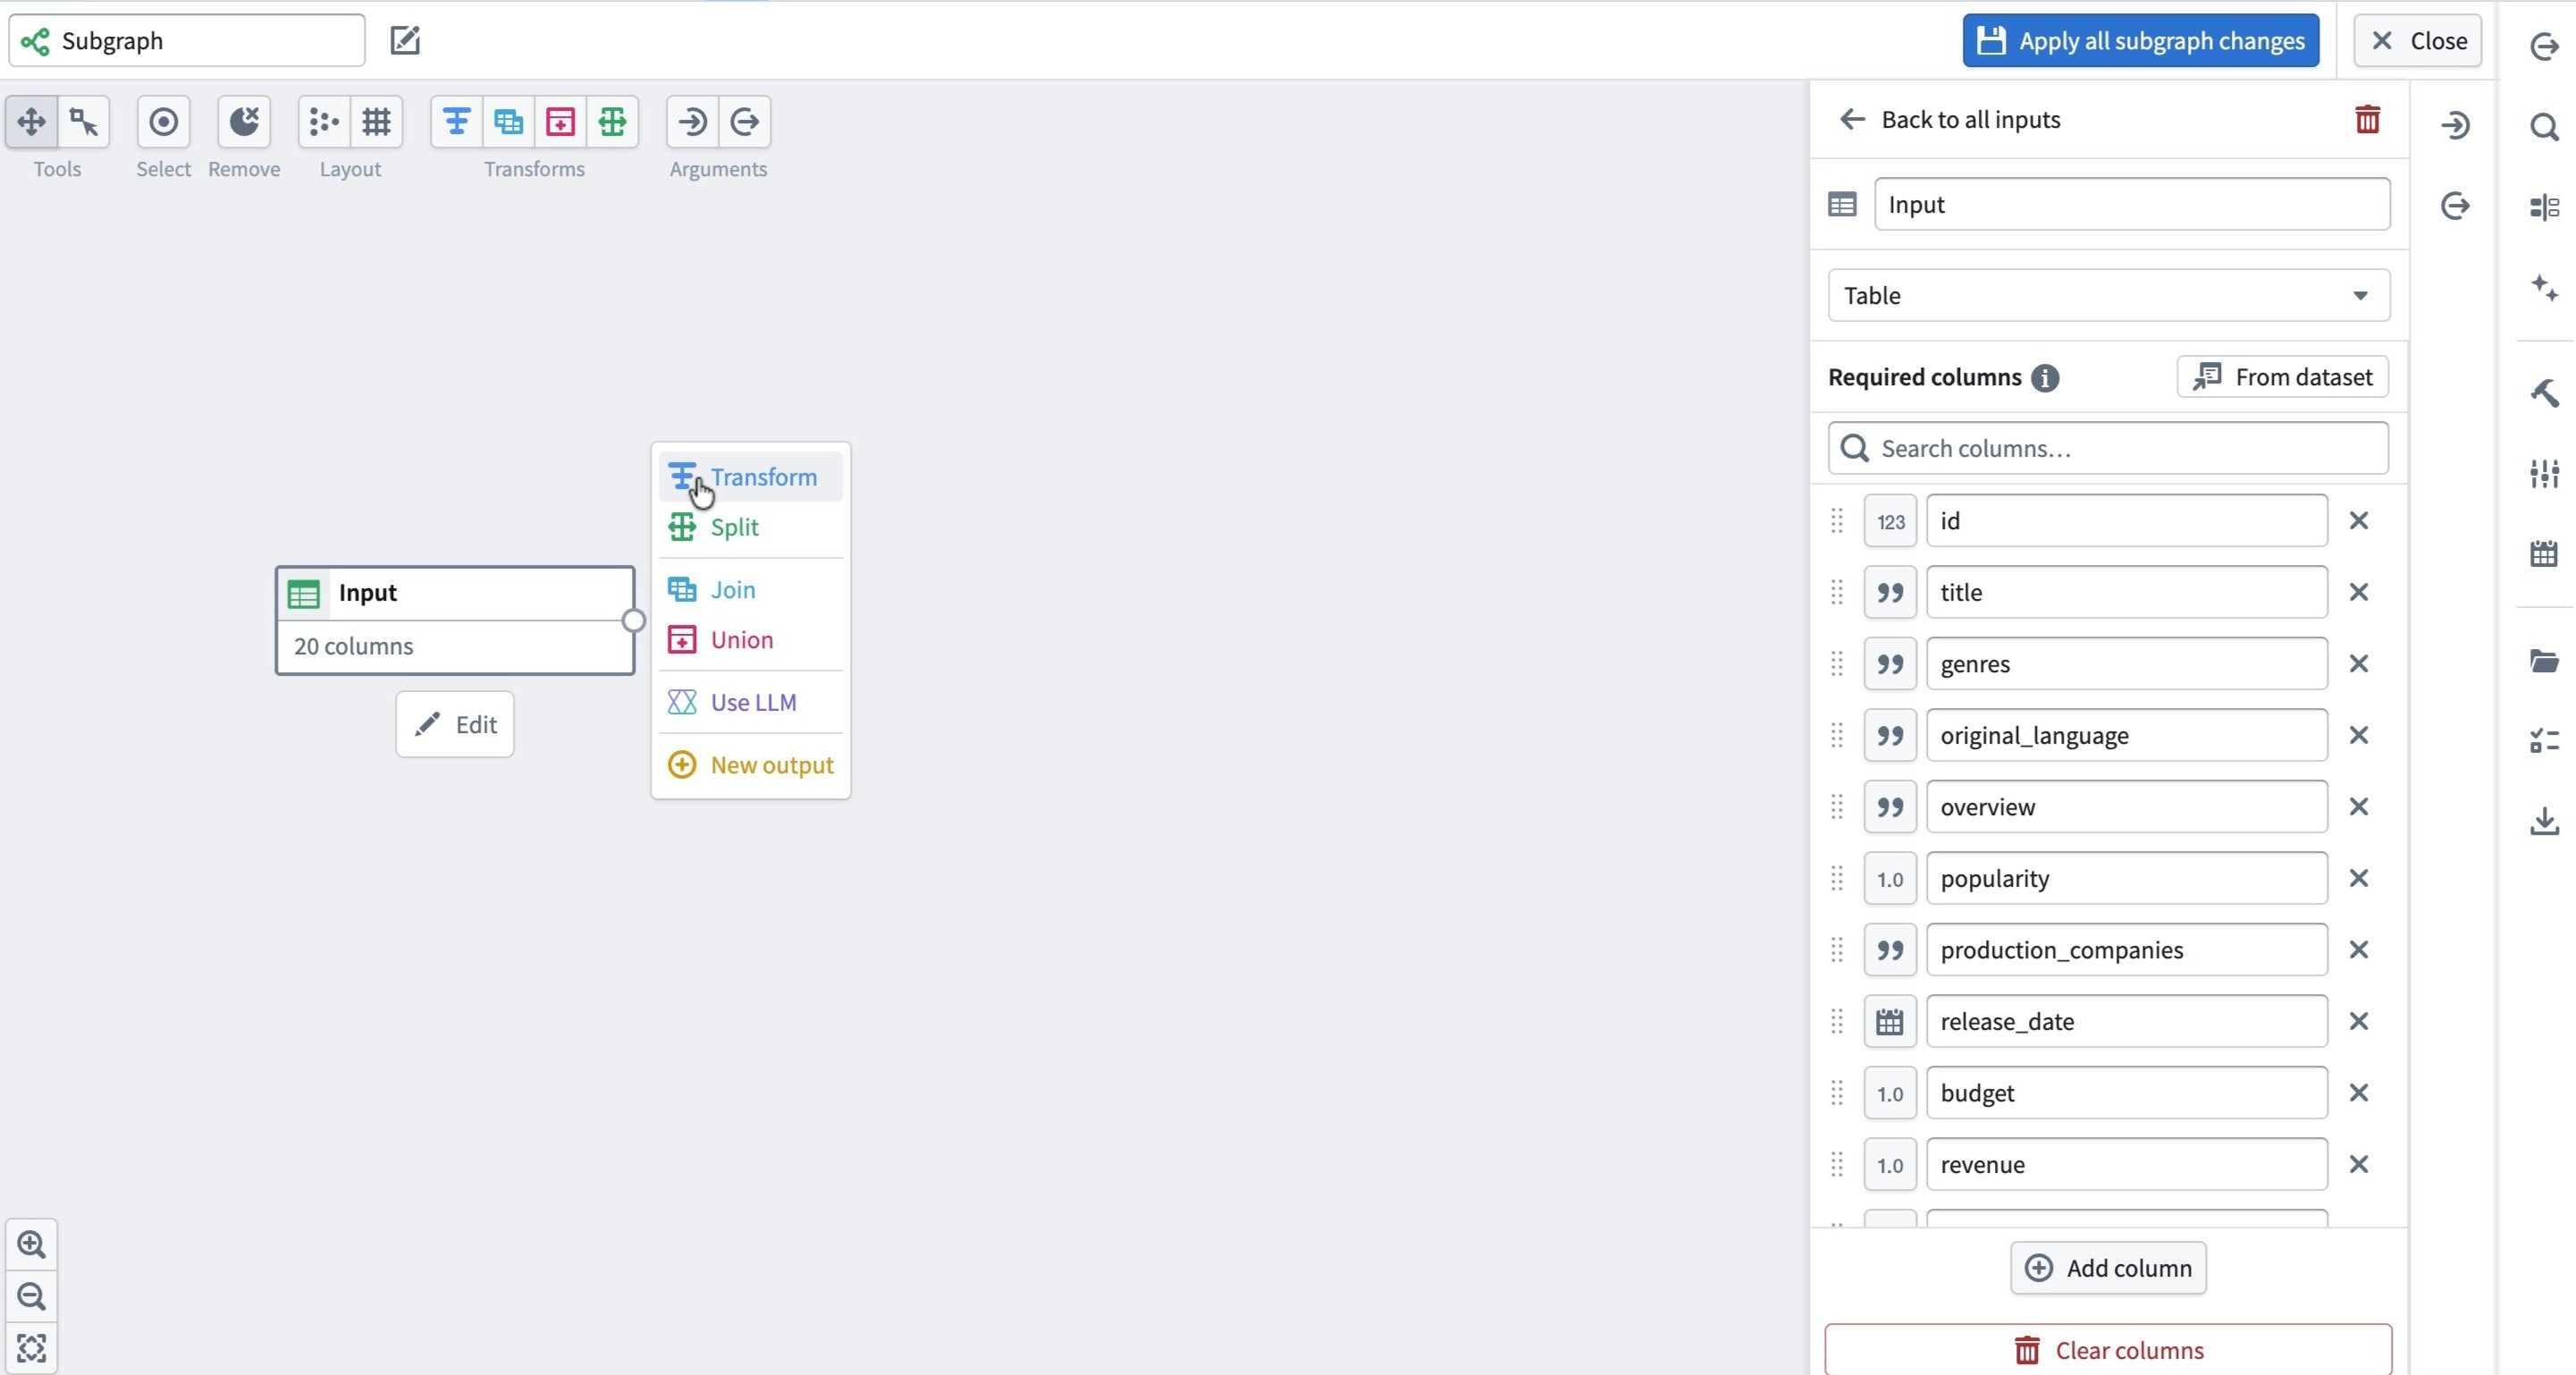
Select Add input in the center of the canvas.

-
An Input node appears. Select Edit beneath it.
-
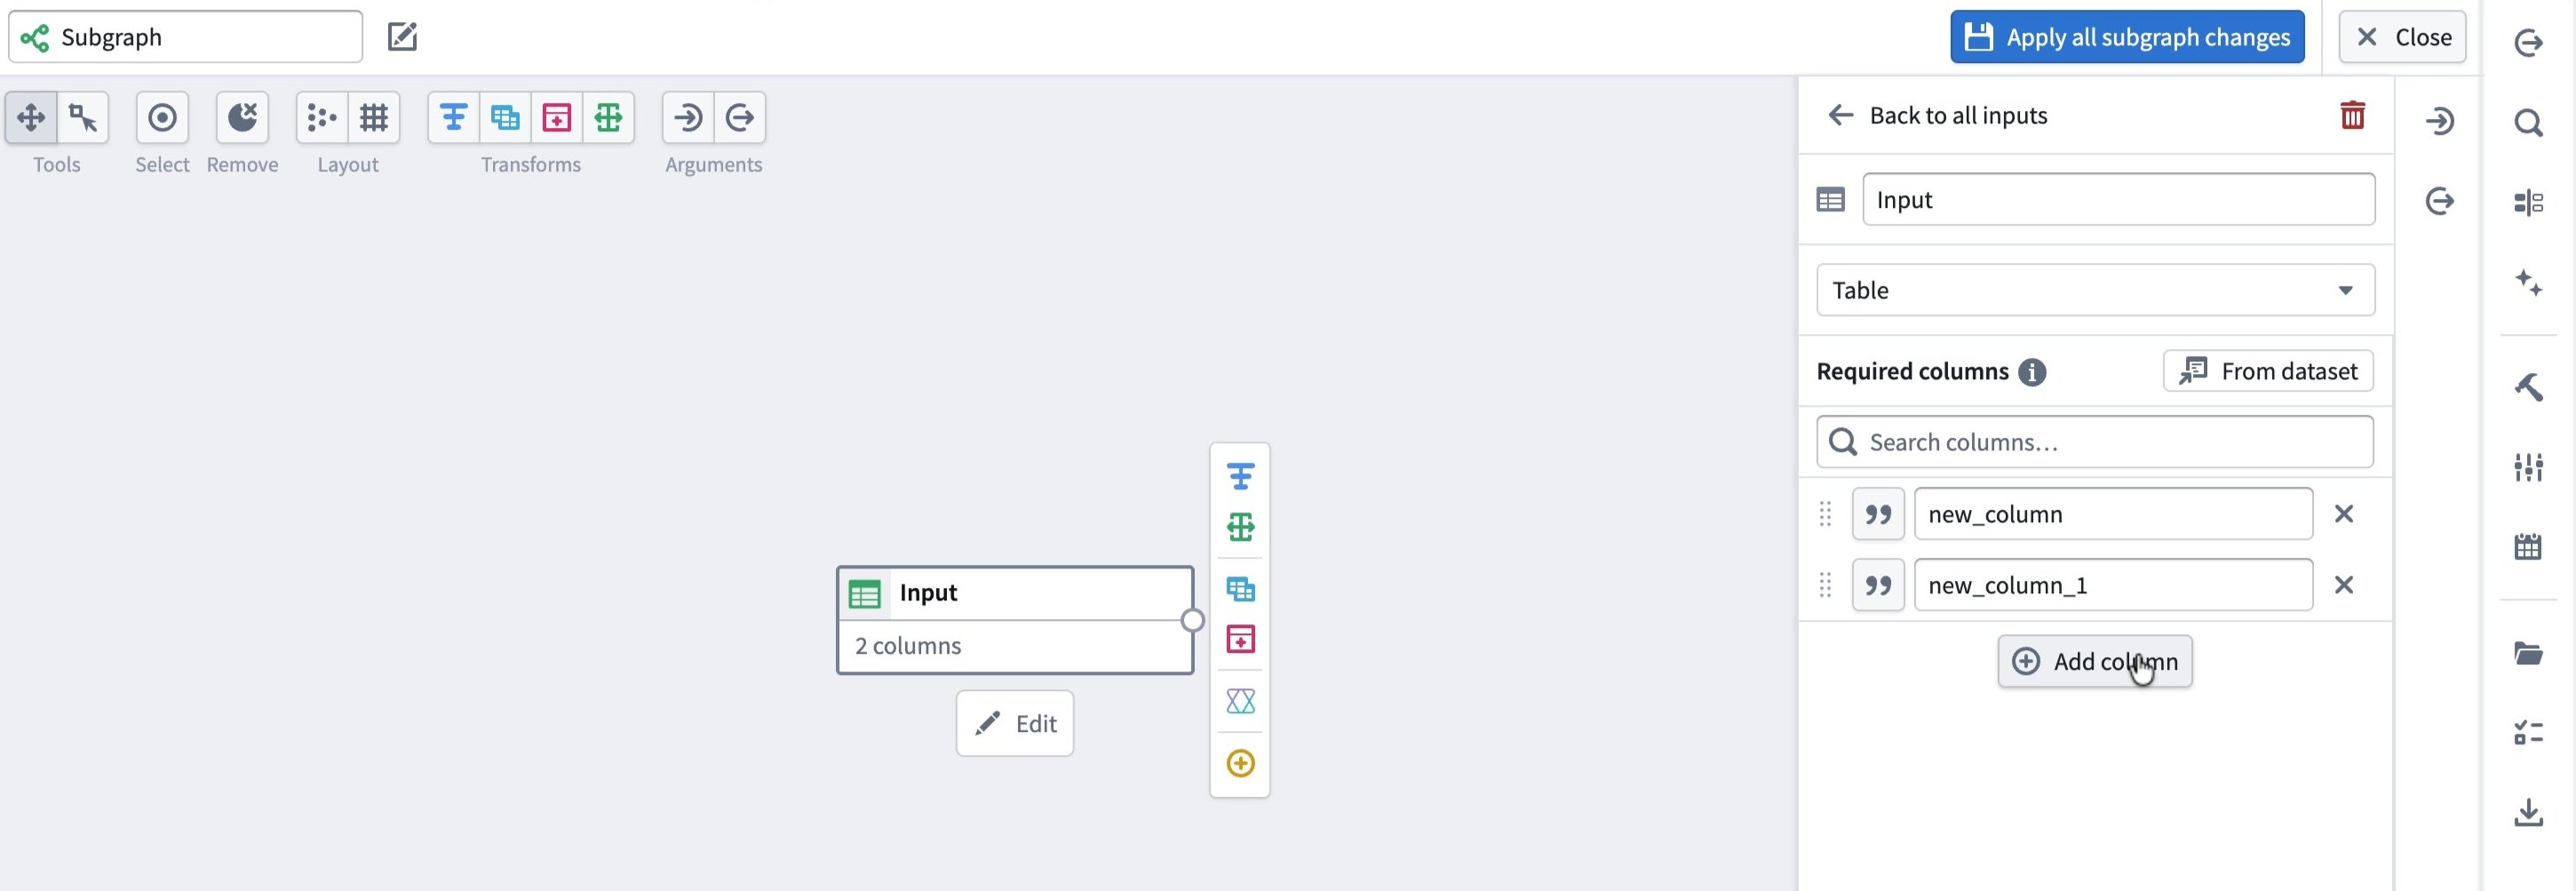
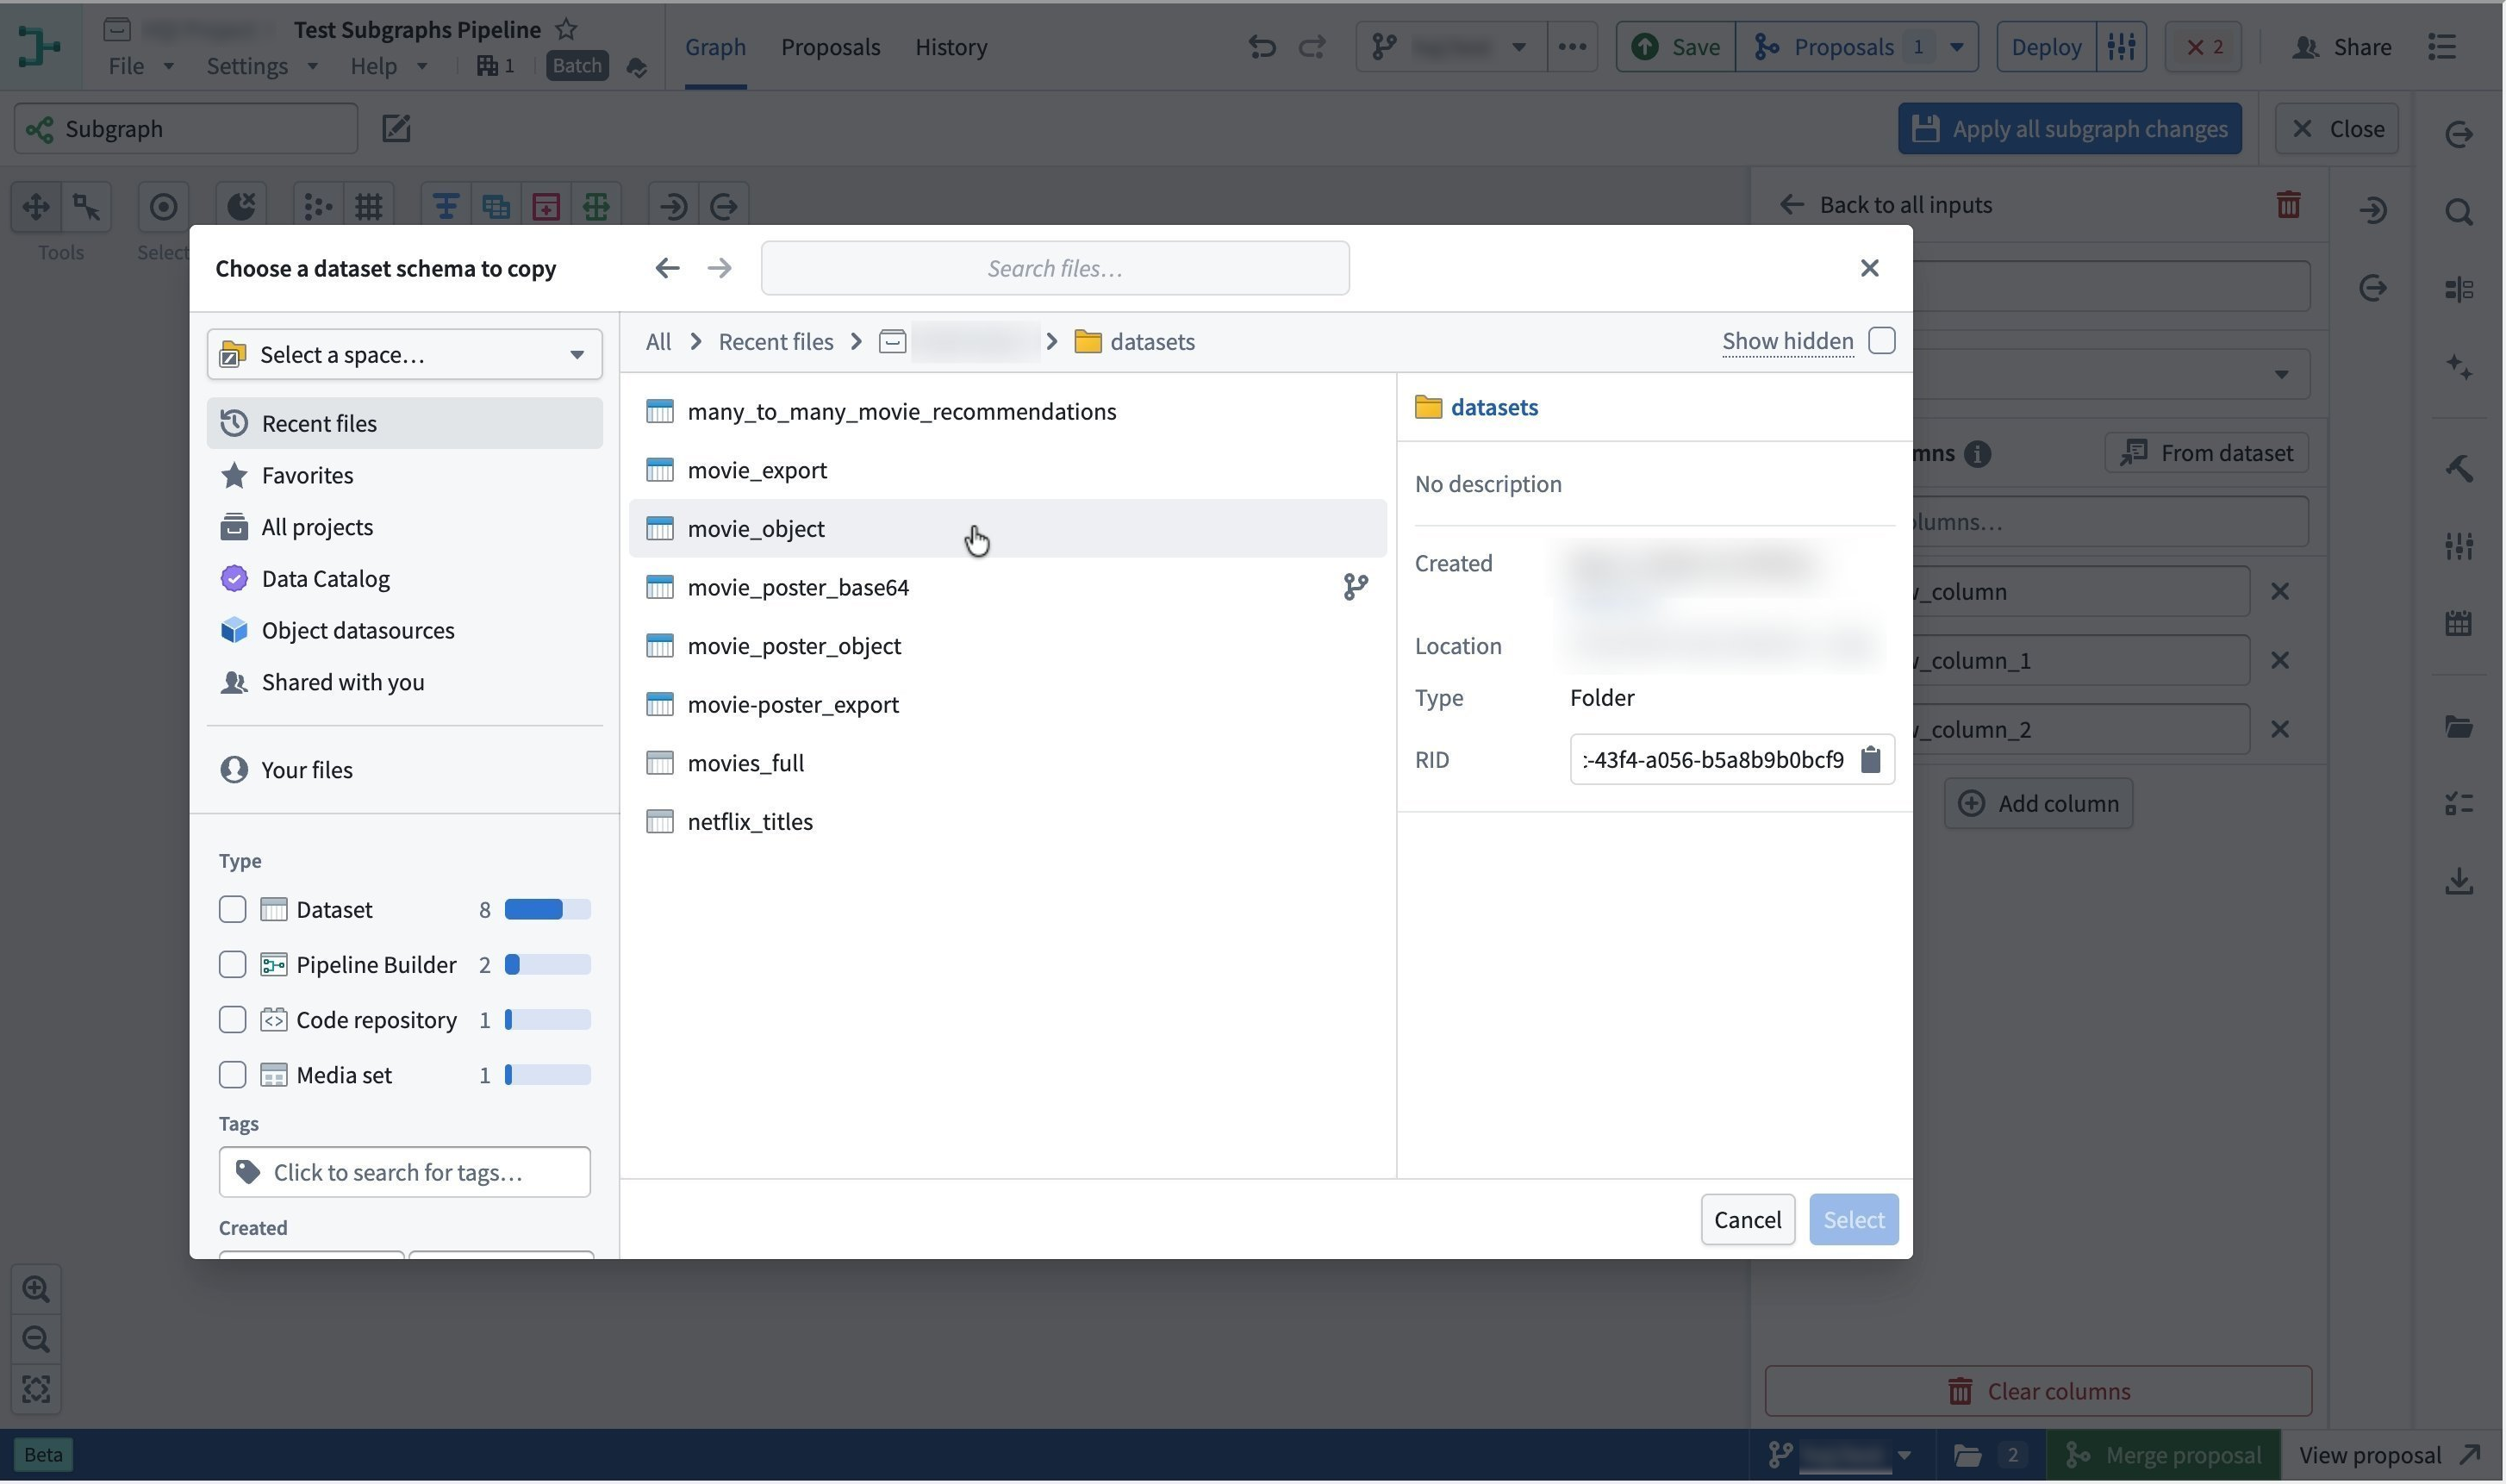
In the right-side pane, configure the Required columns for this input. You can either add columns manually or copy a schema from an existing dataset:
- To add columns manually, select Add column and enter the column names.
- To copy the schema from an existing dataset, select From dataset.
If you select From dataset, choose the dataset whose schema you want to use, then confirm with Select. The input node now expects the columns from the chosen dataset.
Build the subgraph logic
With inputs defined, you can build out the subgraph just like any other pipeline:
- From the input node, use the node menu to add transforms, splits, joins, and other logic.
- Create an Output node at the end of your transform path.
- Ensure all expected output columns are correctly defined in the Output node schema.
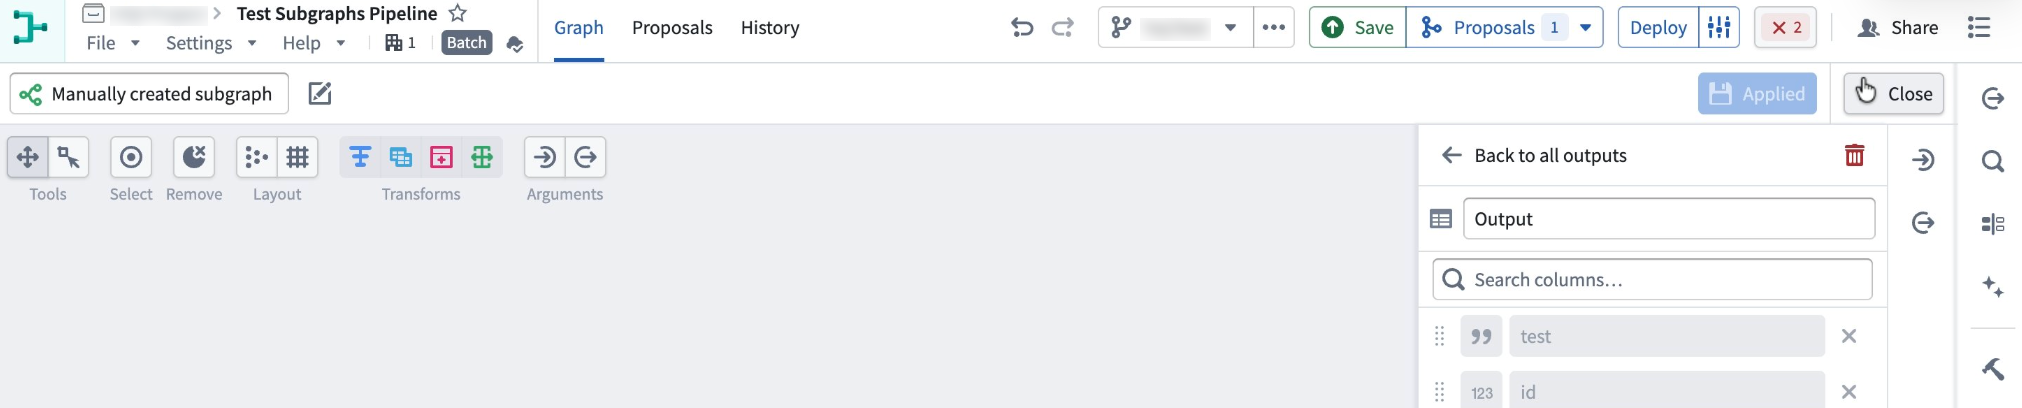
When you are done, select Apply all subgraph changes in the top right. Give the subgraph a clear name. In this example, the subgraph is named Manually created subgraph. Select Close to exit the subgraph editor. Your subgraph is now available as a reusable block.
Add a subgraph to your pipeline
You can add a subgraph after any node whose output matches the subgraph's input schema. There are two entry points:
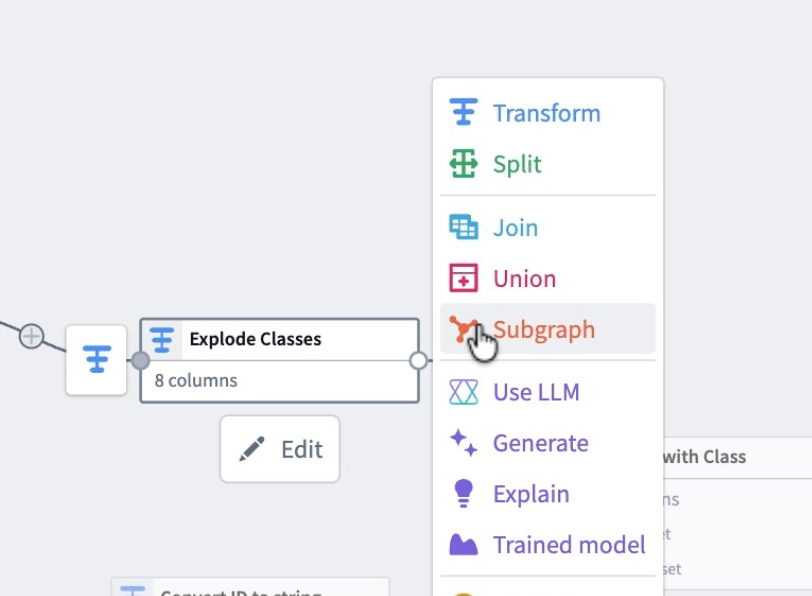
- From the toolbar, select Apply subgraph to table.
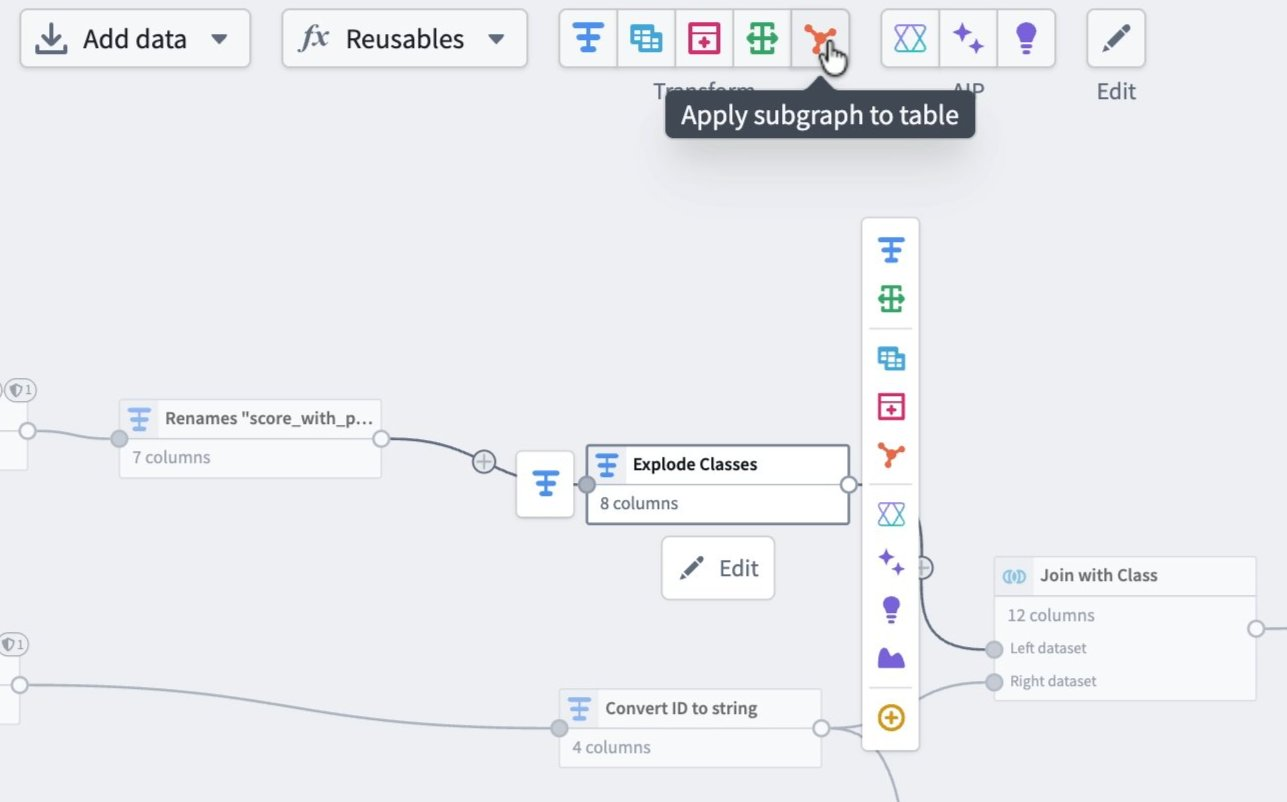
- From the node menu, select Subgraph.
Select and map the subgraph
-
Select the pipeline node where the subgraph should start.
-
Select Apply subgraph to table, or select Subgraph from the node menu.
-
In the banner that appears, open the Select a subgraph dropdown and choose your subgraph.
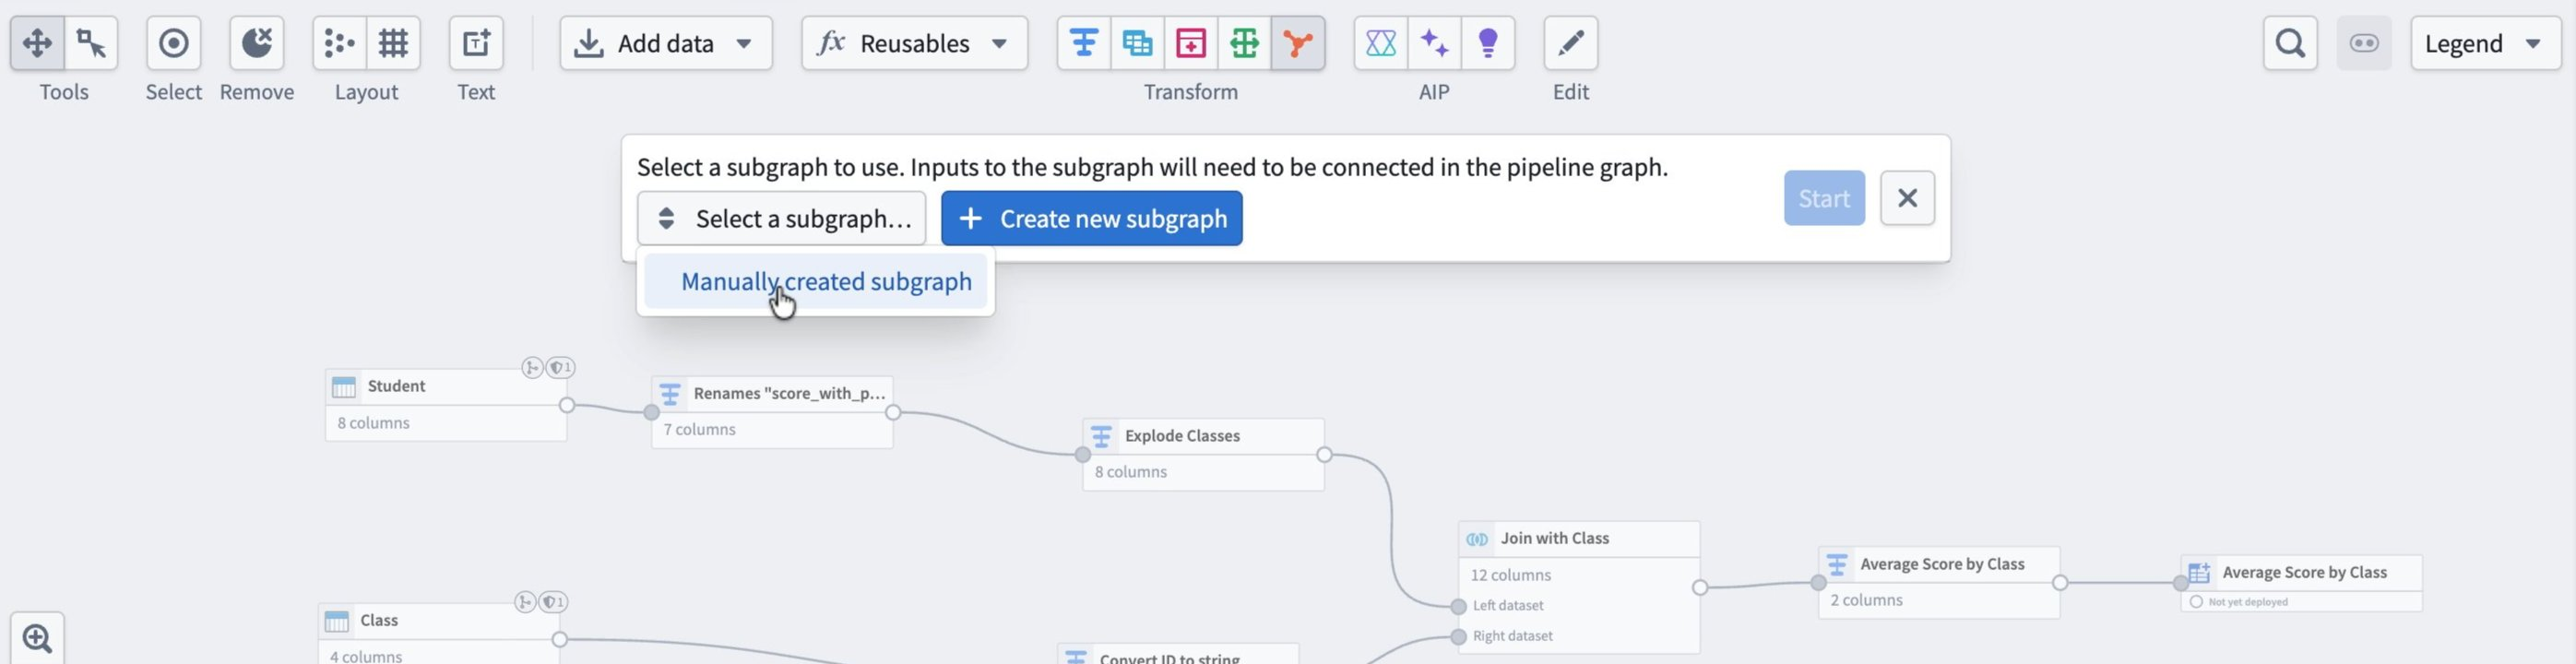
-
Map the subgraph's Input to the selected node in the graph. Pipeline Builder maps this automatically if you start from that node. Select Start.
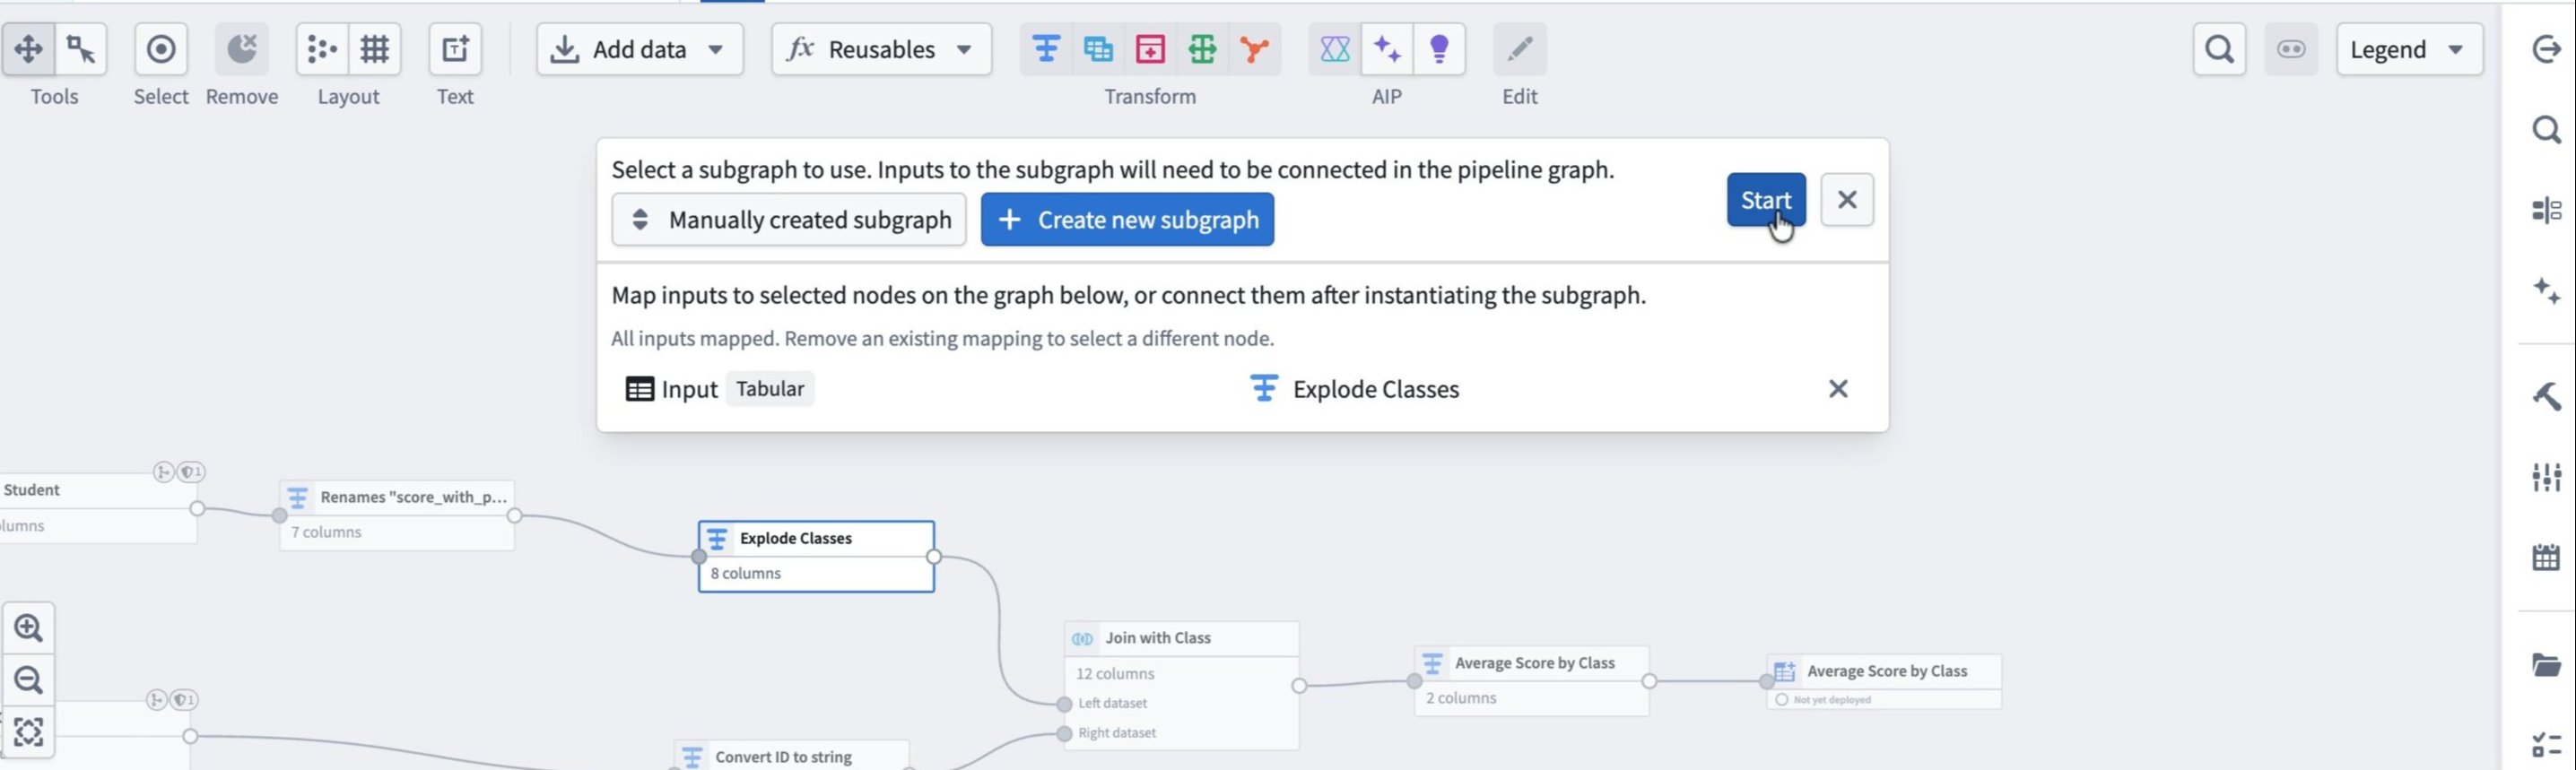
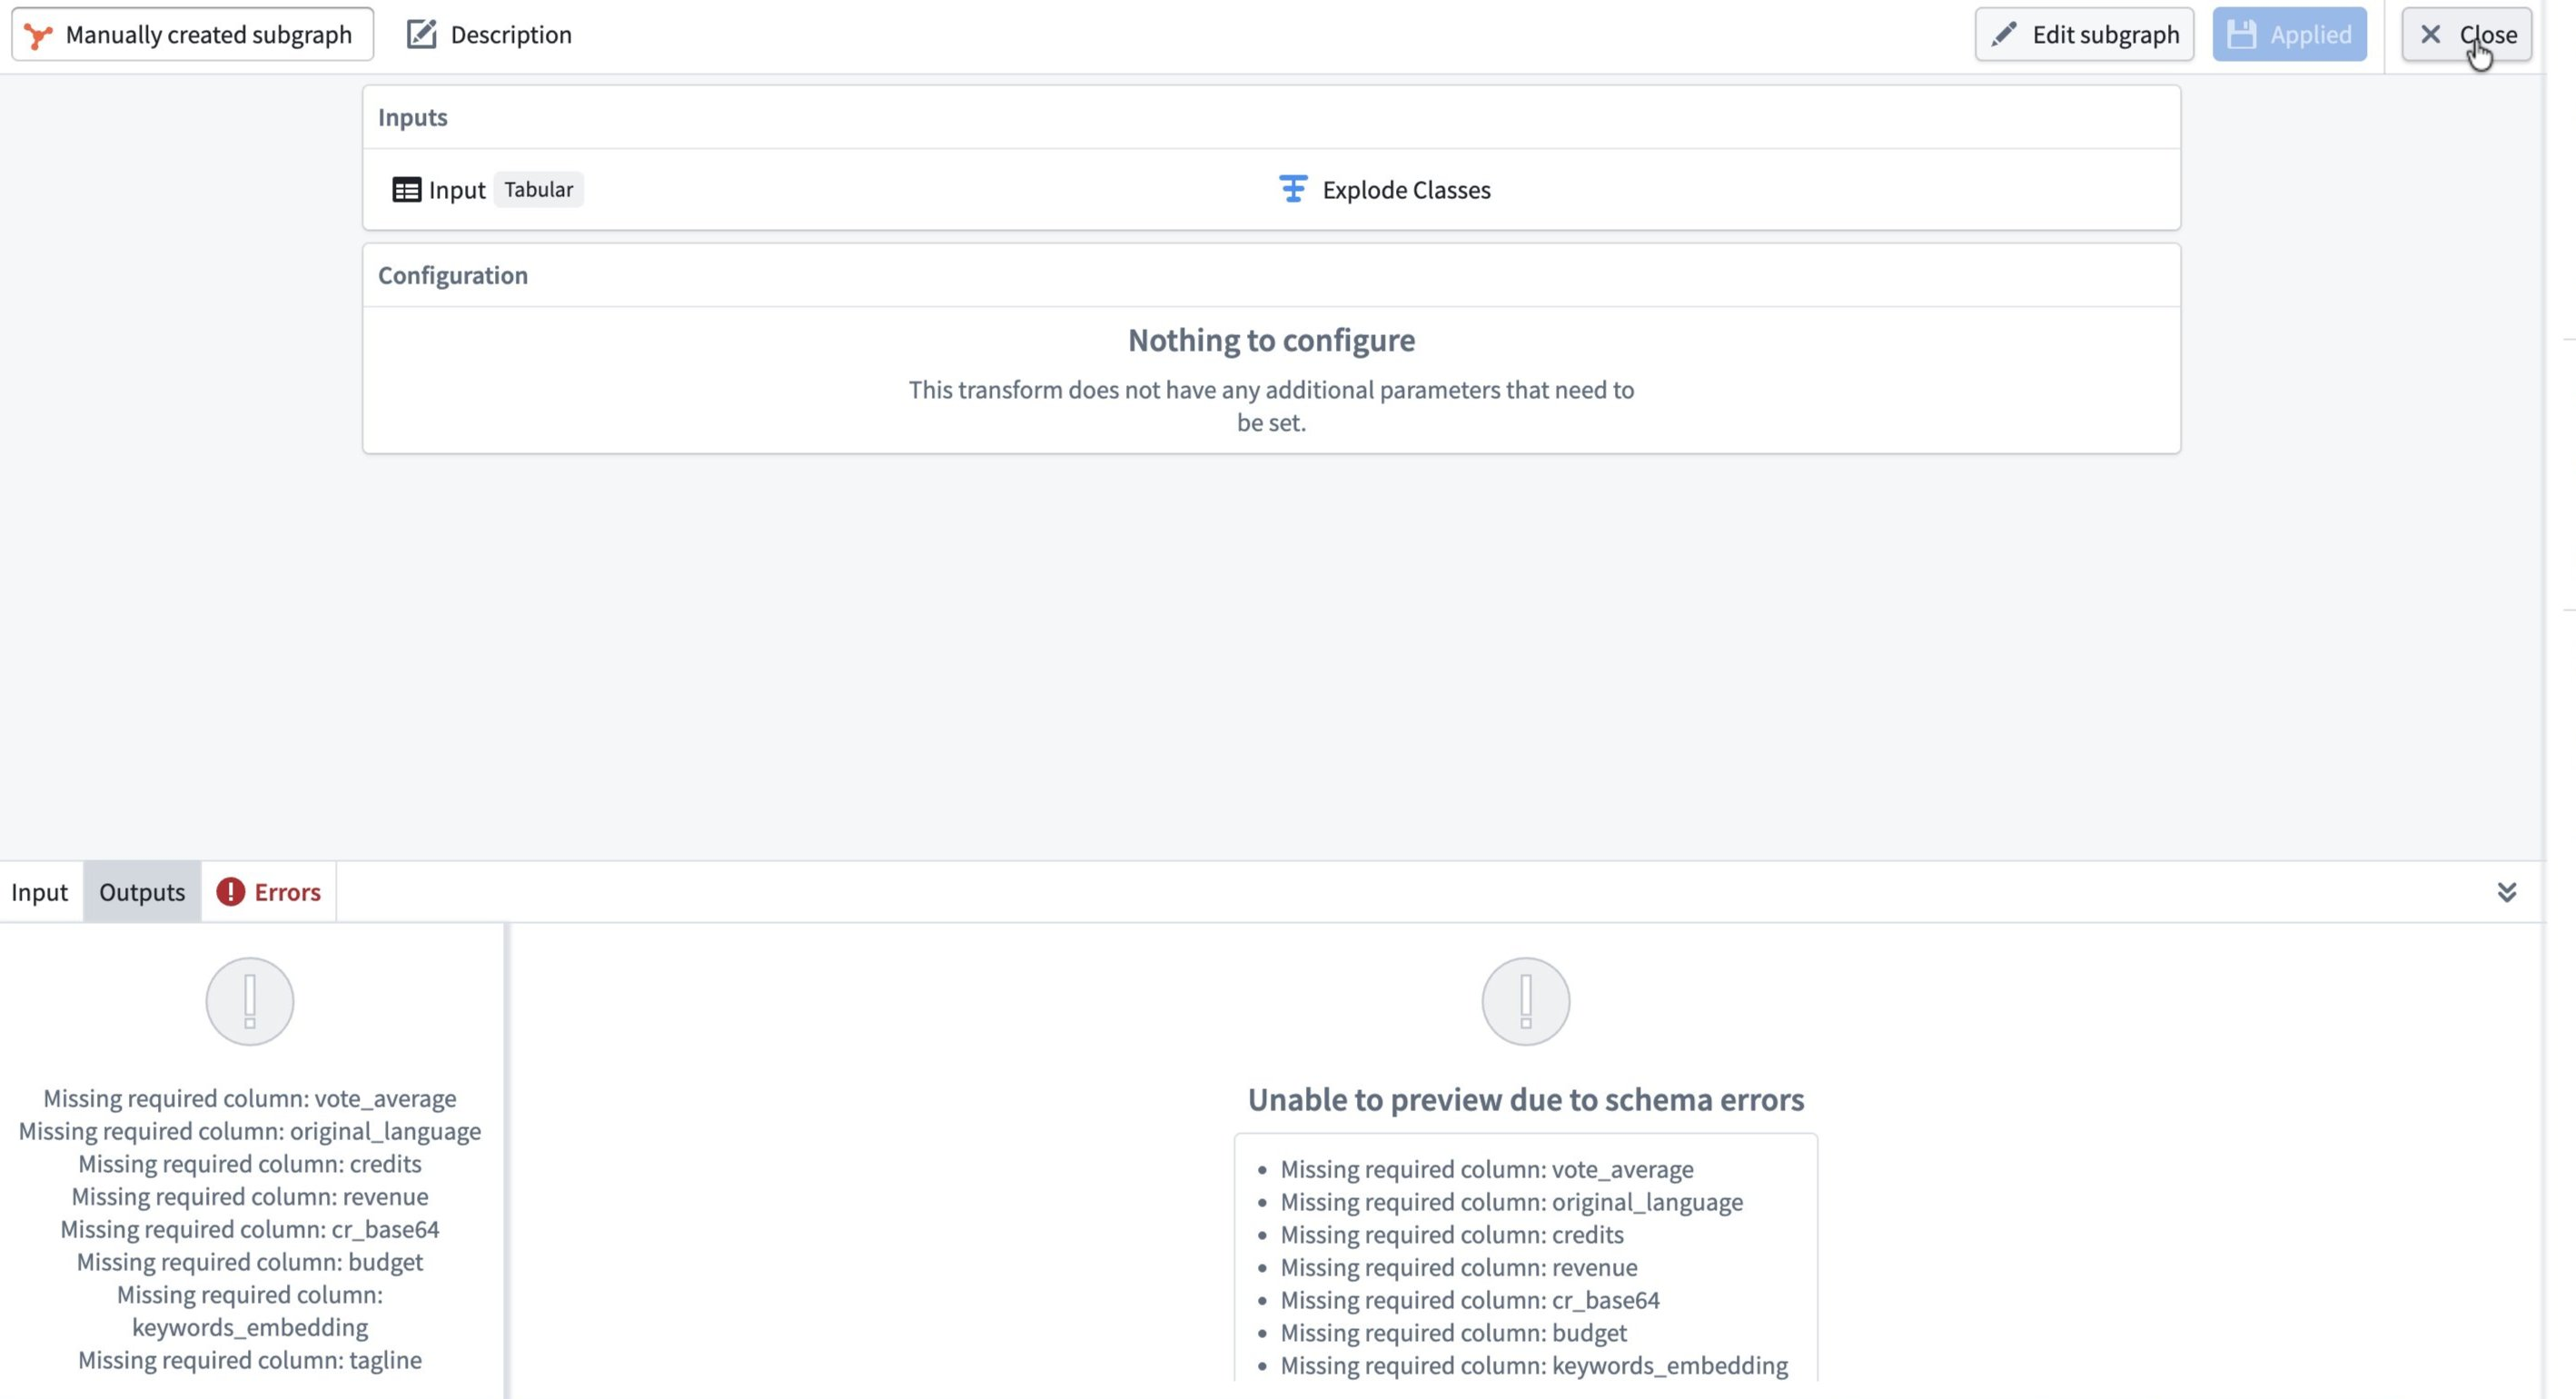
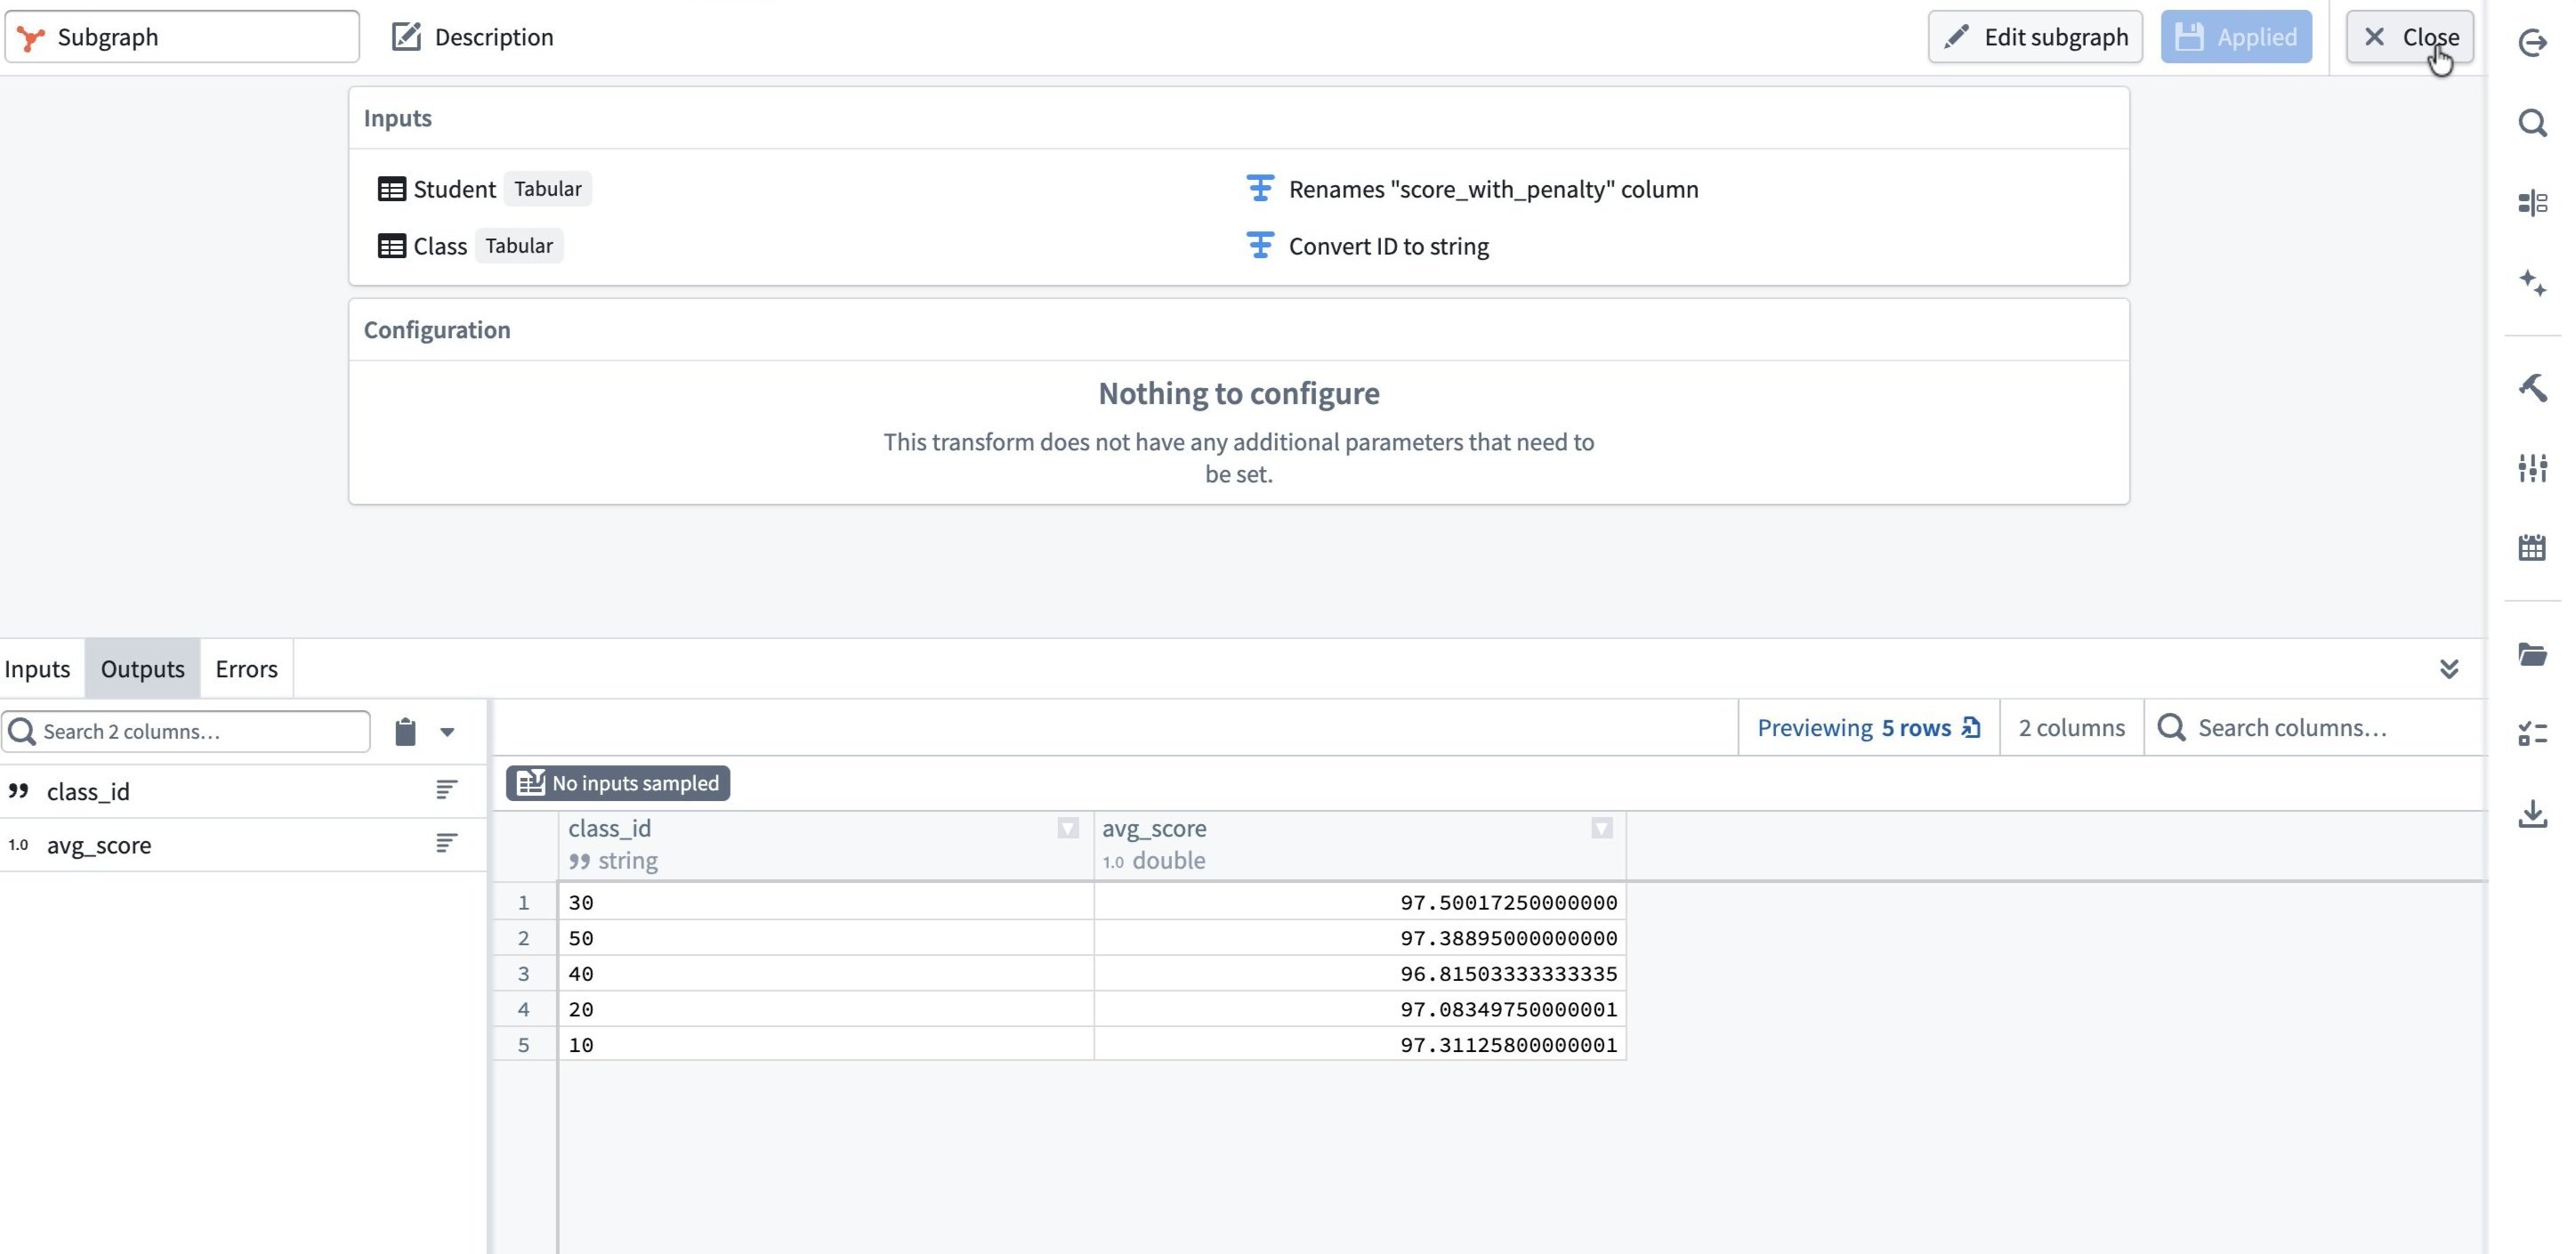
Review and apply
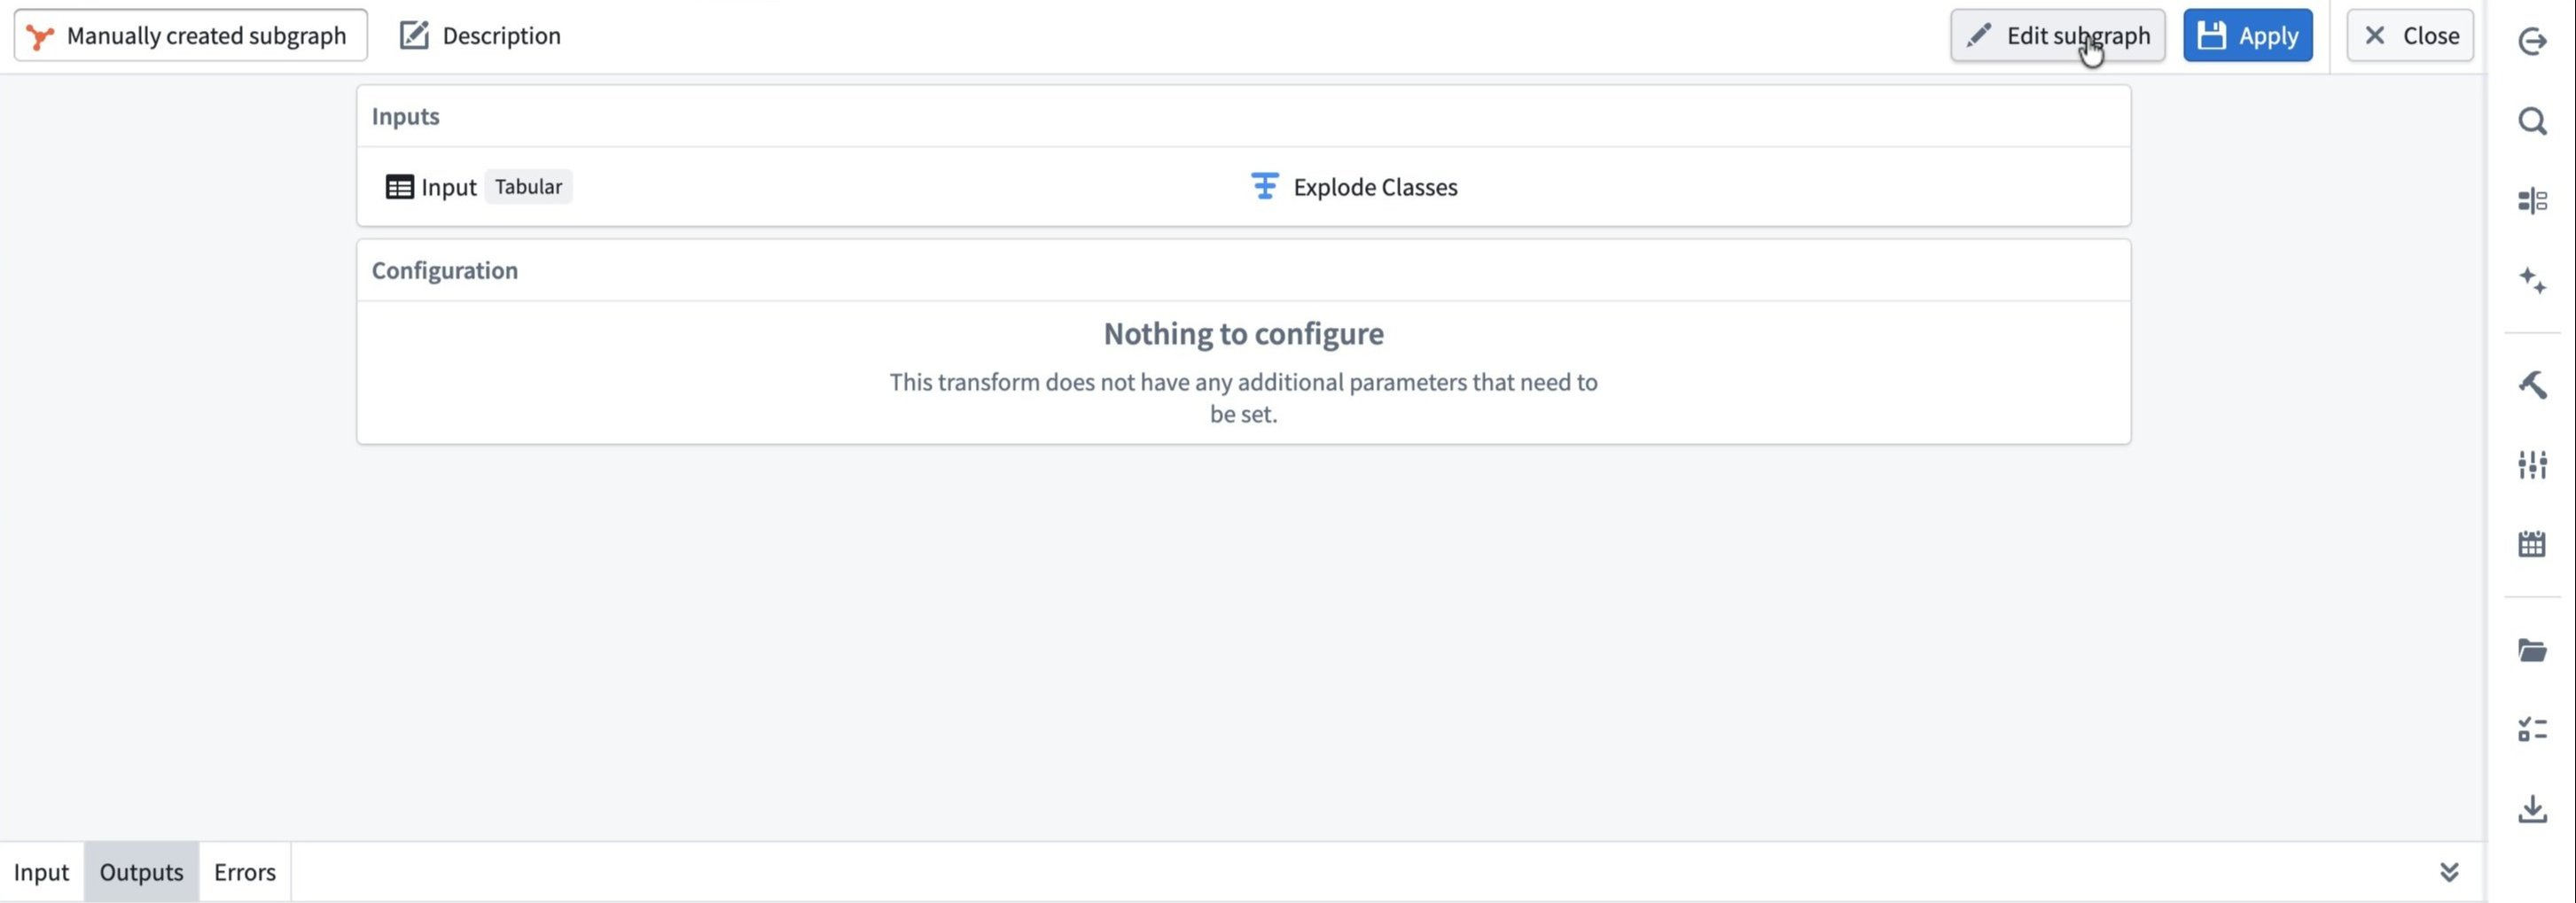
The subgraph configuration panel opens:
- Inputs shows how the selected node feeds into the subgraph.
- Configuration is empty if the subgraph has no parameters that need configuration.
Review the Outputs tab to confirm the resulting schema, then select Apply and Close.
If the subgraph's input does not contain all the required input columns, schema errors appear in the Errors tab and on the pipeline graph.
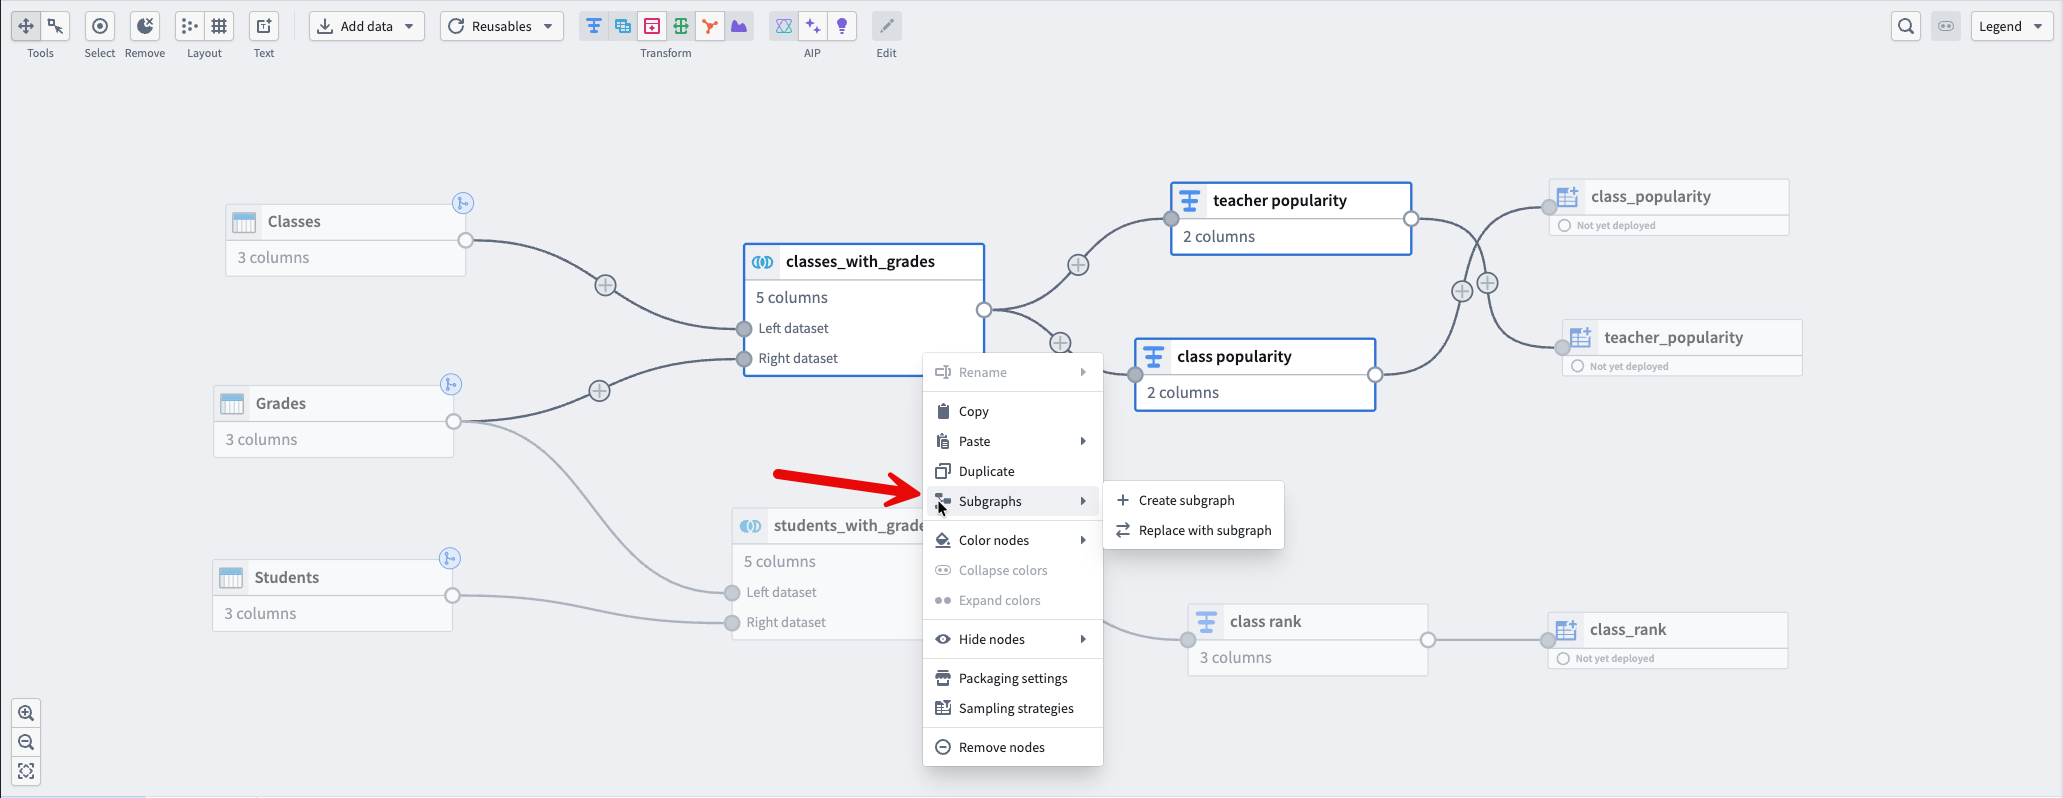
Create a subgraph from existing nodes
You might already have a sequence of nodes that you want to reuse. You can convert those nodes directly into a subgraph, or replace them with a subgraph you have already created.
Select the nodes to package
- In your main pipeline, select the nodes you want to package. For example, you might select a join, sort, and aggregation sequence.
- Right-click the selection and select Subgraphs.
- To package the nodes into a new subgraph, select Create subgraph. To replace the selected nodes with an existing subgraph, select Replace with subgraph.
A new subgraph editor opens containing the selected nodes, along with automatically created Input and Output nodes with populated schemas.
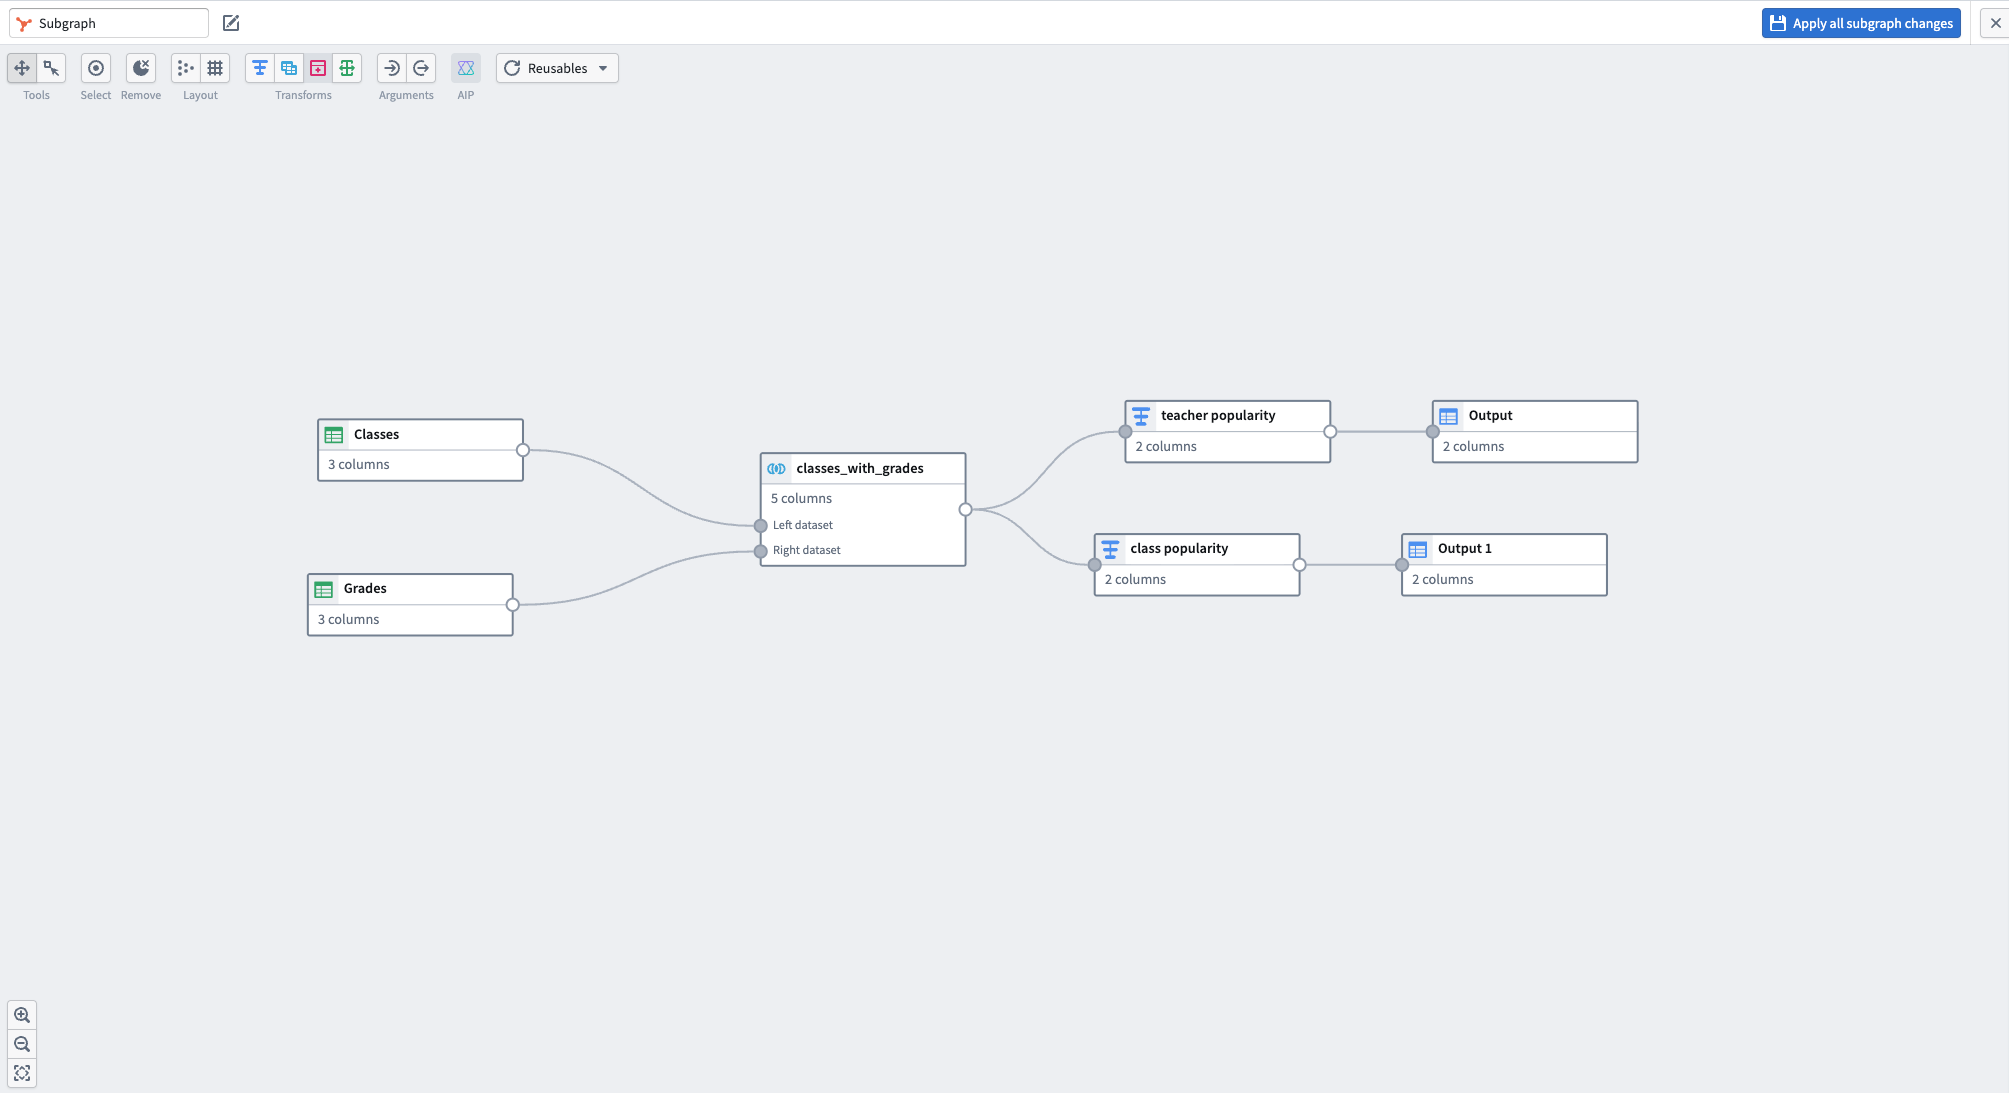
When the subgraph is valid and no schema errors appear, select Apply all subgraph changes.
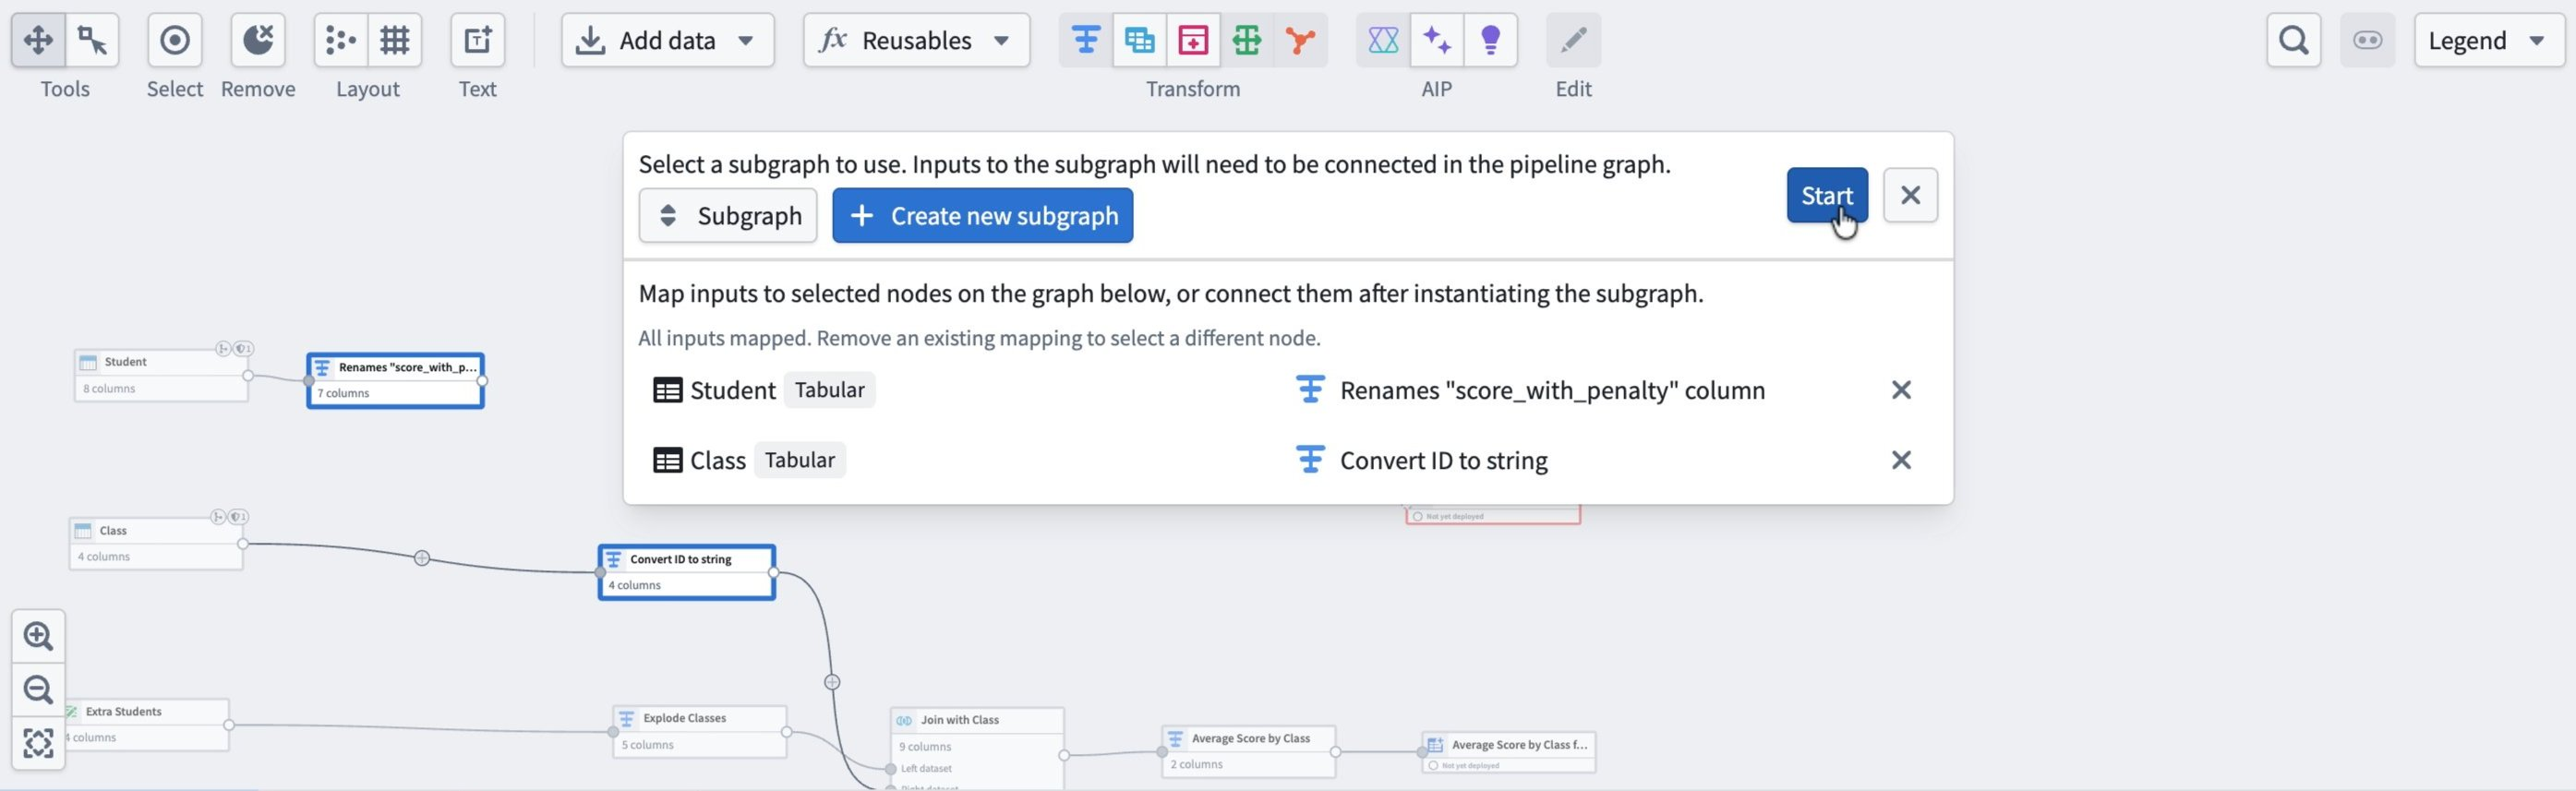
Add a multi-input subgraph
When your subgraph has multiple inputs, you map each input separately when you apply it.
- On the main graph, select the starting nodes that correspond to each subgraph input.
- Select Apply subgraph to table from the toolbar, or select Subgraph from the node menu.
- Choose your subgraph from the dropdown menu.
- In the Map inputs section, map each subgraph input to a node on the graph. For example, map
Studentto a rename transform andClassto a type-conversion transform. Select Start.
The subgraph configuration window opens, showing the mapped inputs and a preview of the outputs. Confirm the output looks correct, then select Apply and Close.
Back on the main canvas, the subgraph appears as a single node with its output schema, such as class_id and avg_score, visible in the preview panel.
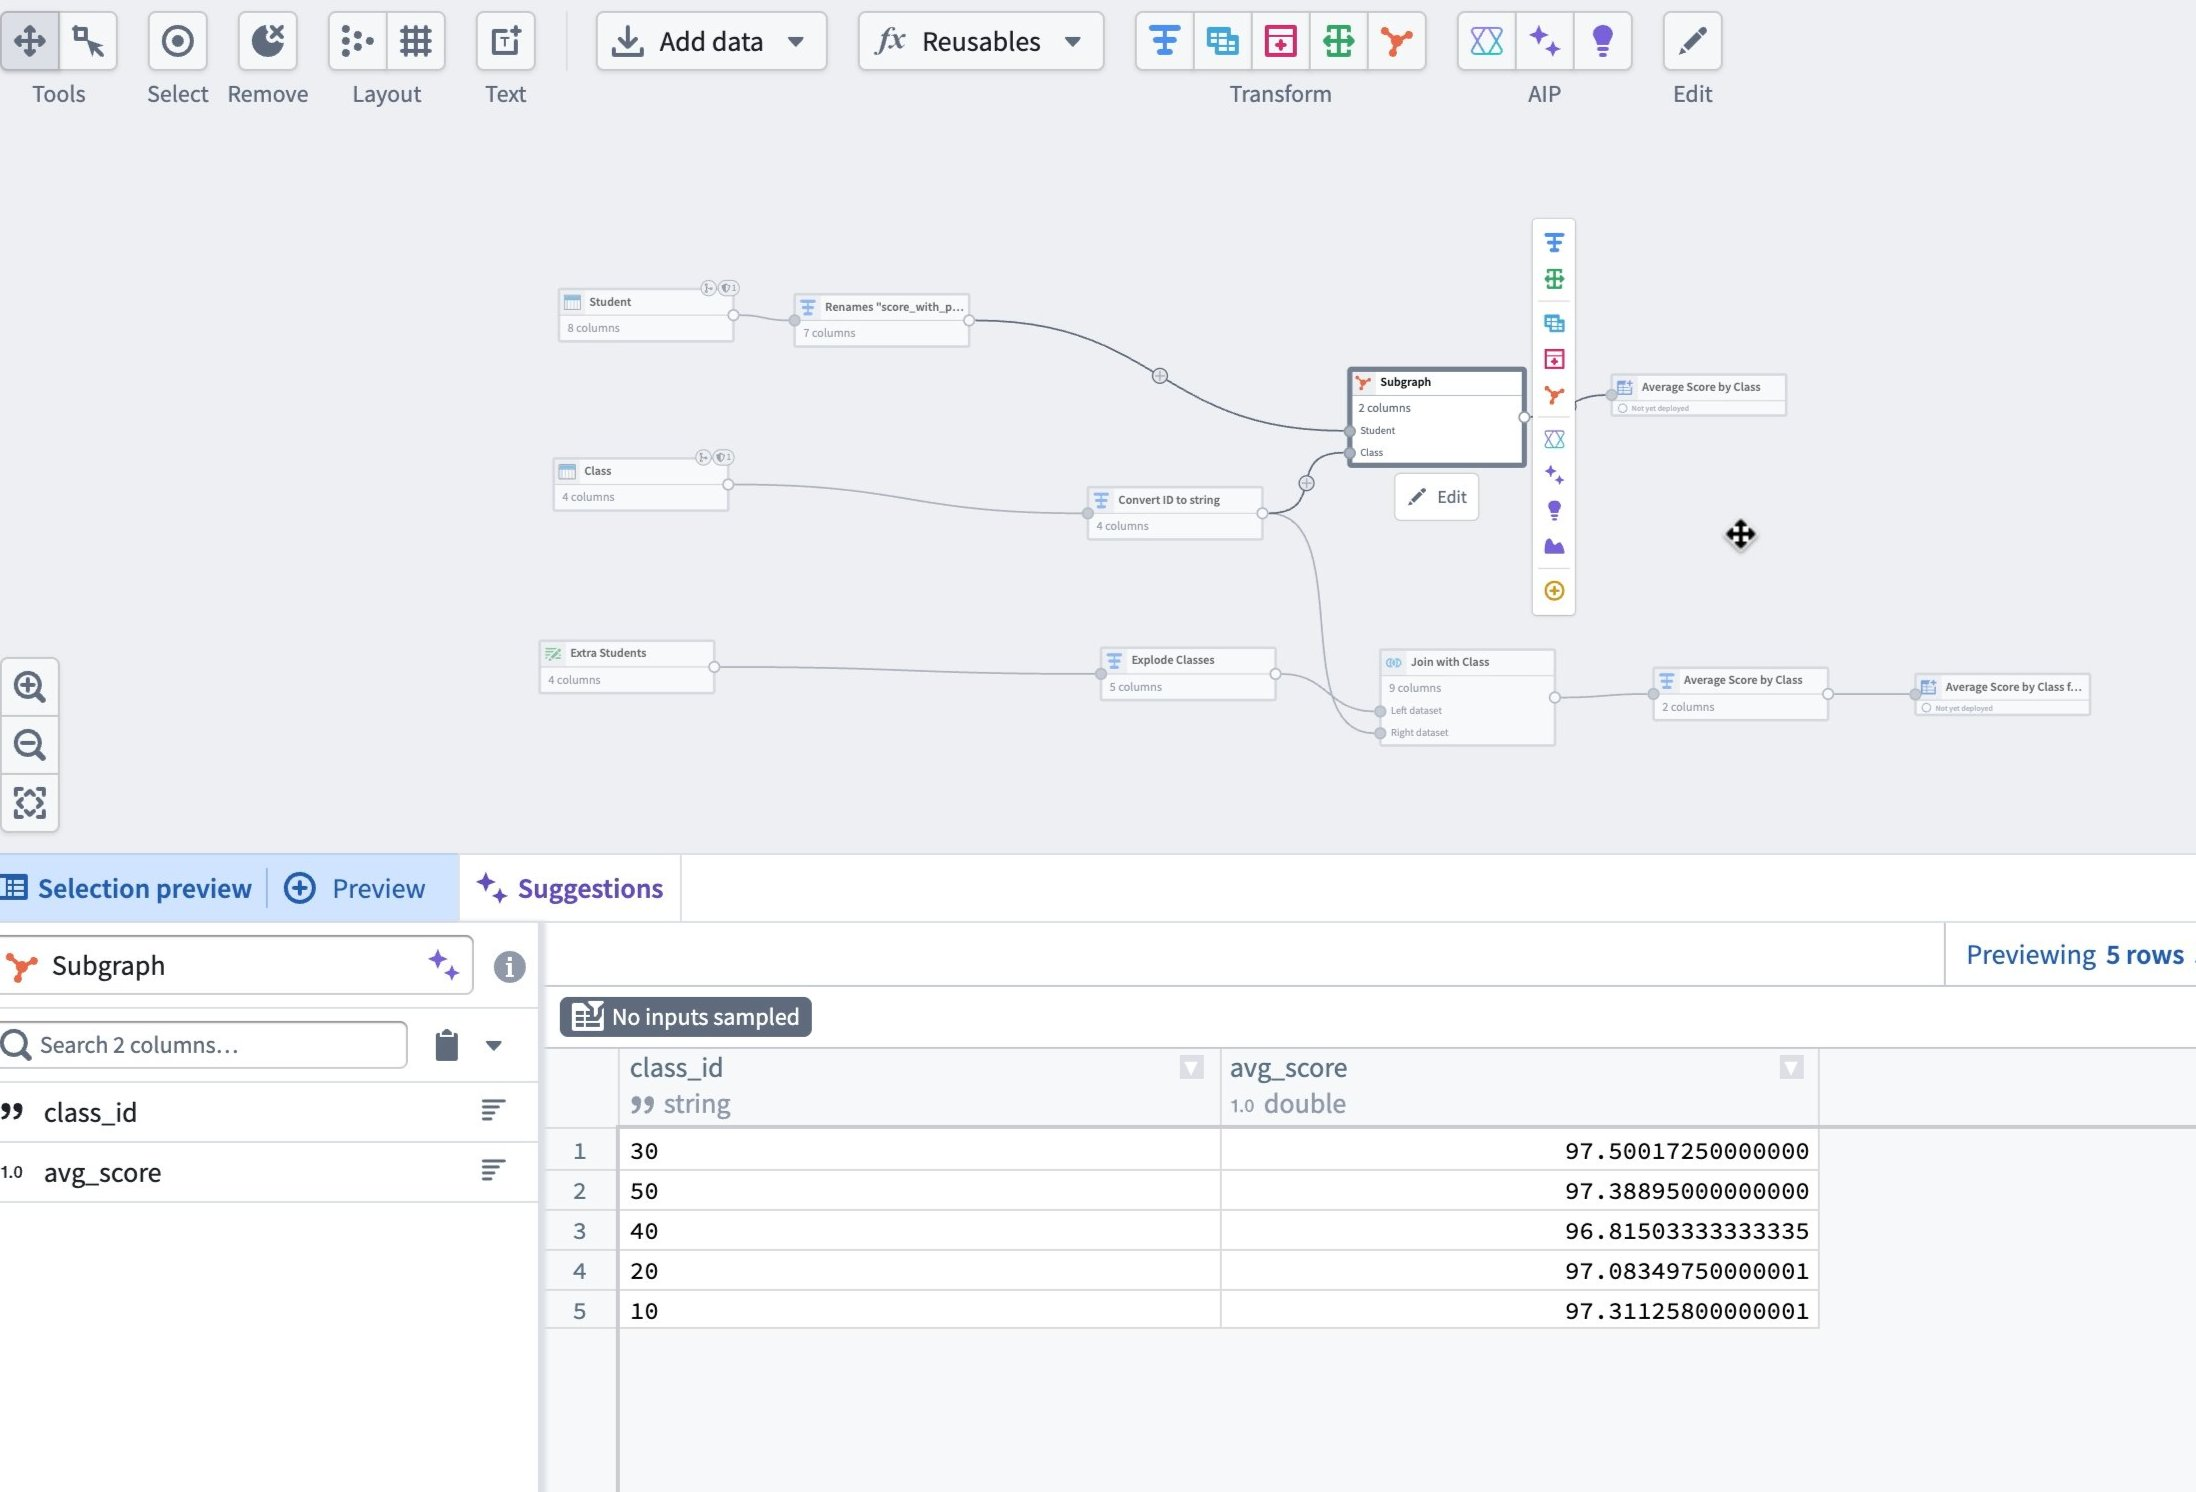
You can then rewire connected nodes to use the subgraph output, and replace duplicated logic elsewhere with additional instances of the same subgraph.