- Capabilities
- Getting started
- Architecture center
- Platform updates
Select a model
The functionality described below is deprecated and its use is no longer recommended. To use a model as part of a Scenario, wrap the model in a Function and use it in a Function-backed Action instead.
This page explains how to select an objective-backed model to power your Scenario.
Before you begin, you must ensure that your model is correctly being managed by a modeling objective. See below for specific requirements for powering your Scenario with a model from an objective:
- Ensure you have created an objective and successfully submitted your model to the objective. There are many ways a model can be authored or imported into the platform. Learn more about what a Model is in the platform and how to author one by visiting the Model concept page.
- Ensure your objective has an objective API configured and properly mapped to the Ontology.
- Ensure you have successfully deployed your model to a Live deployment configured to deploy the
PRODUCTIONrelease tag. For more information on tags and deployment environments, see the Deployment Environment concept page.
Only objectives that are bound to the Ontology and that have a healthy Live production deployment will appear in the model selector for a Scenario.
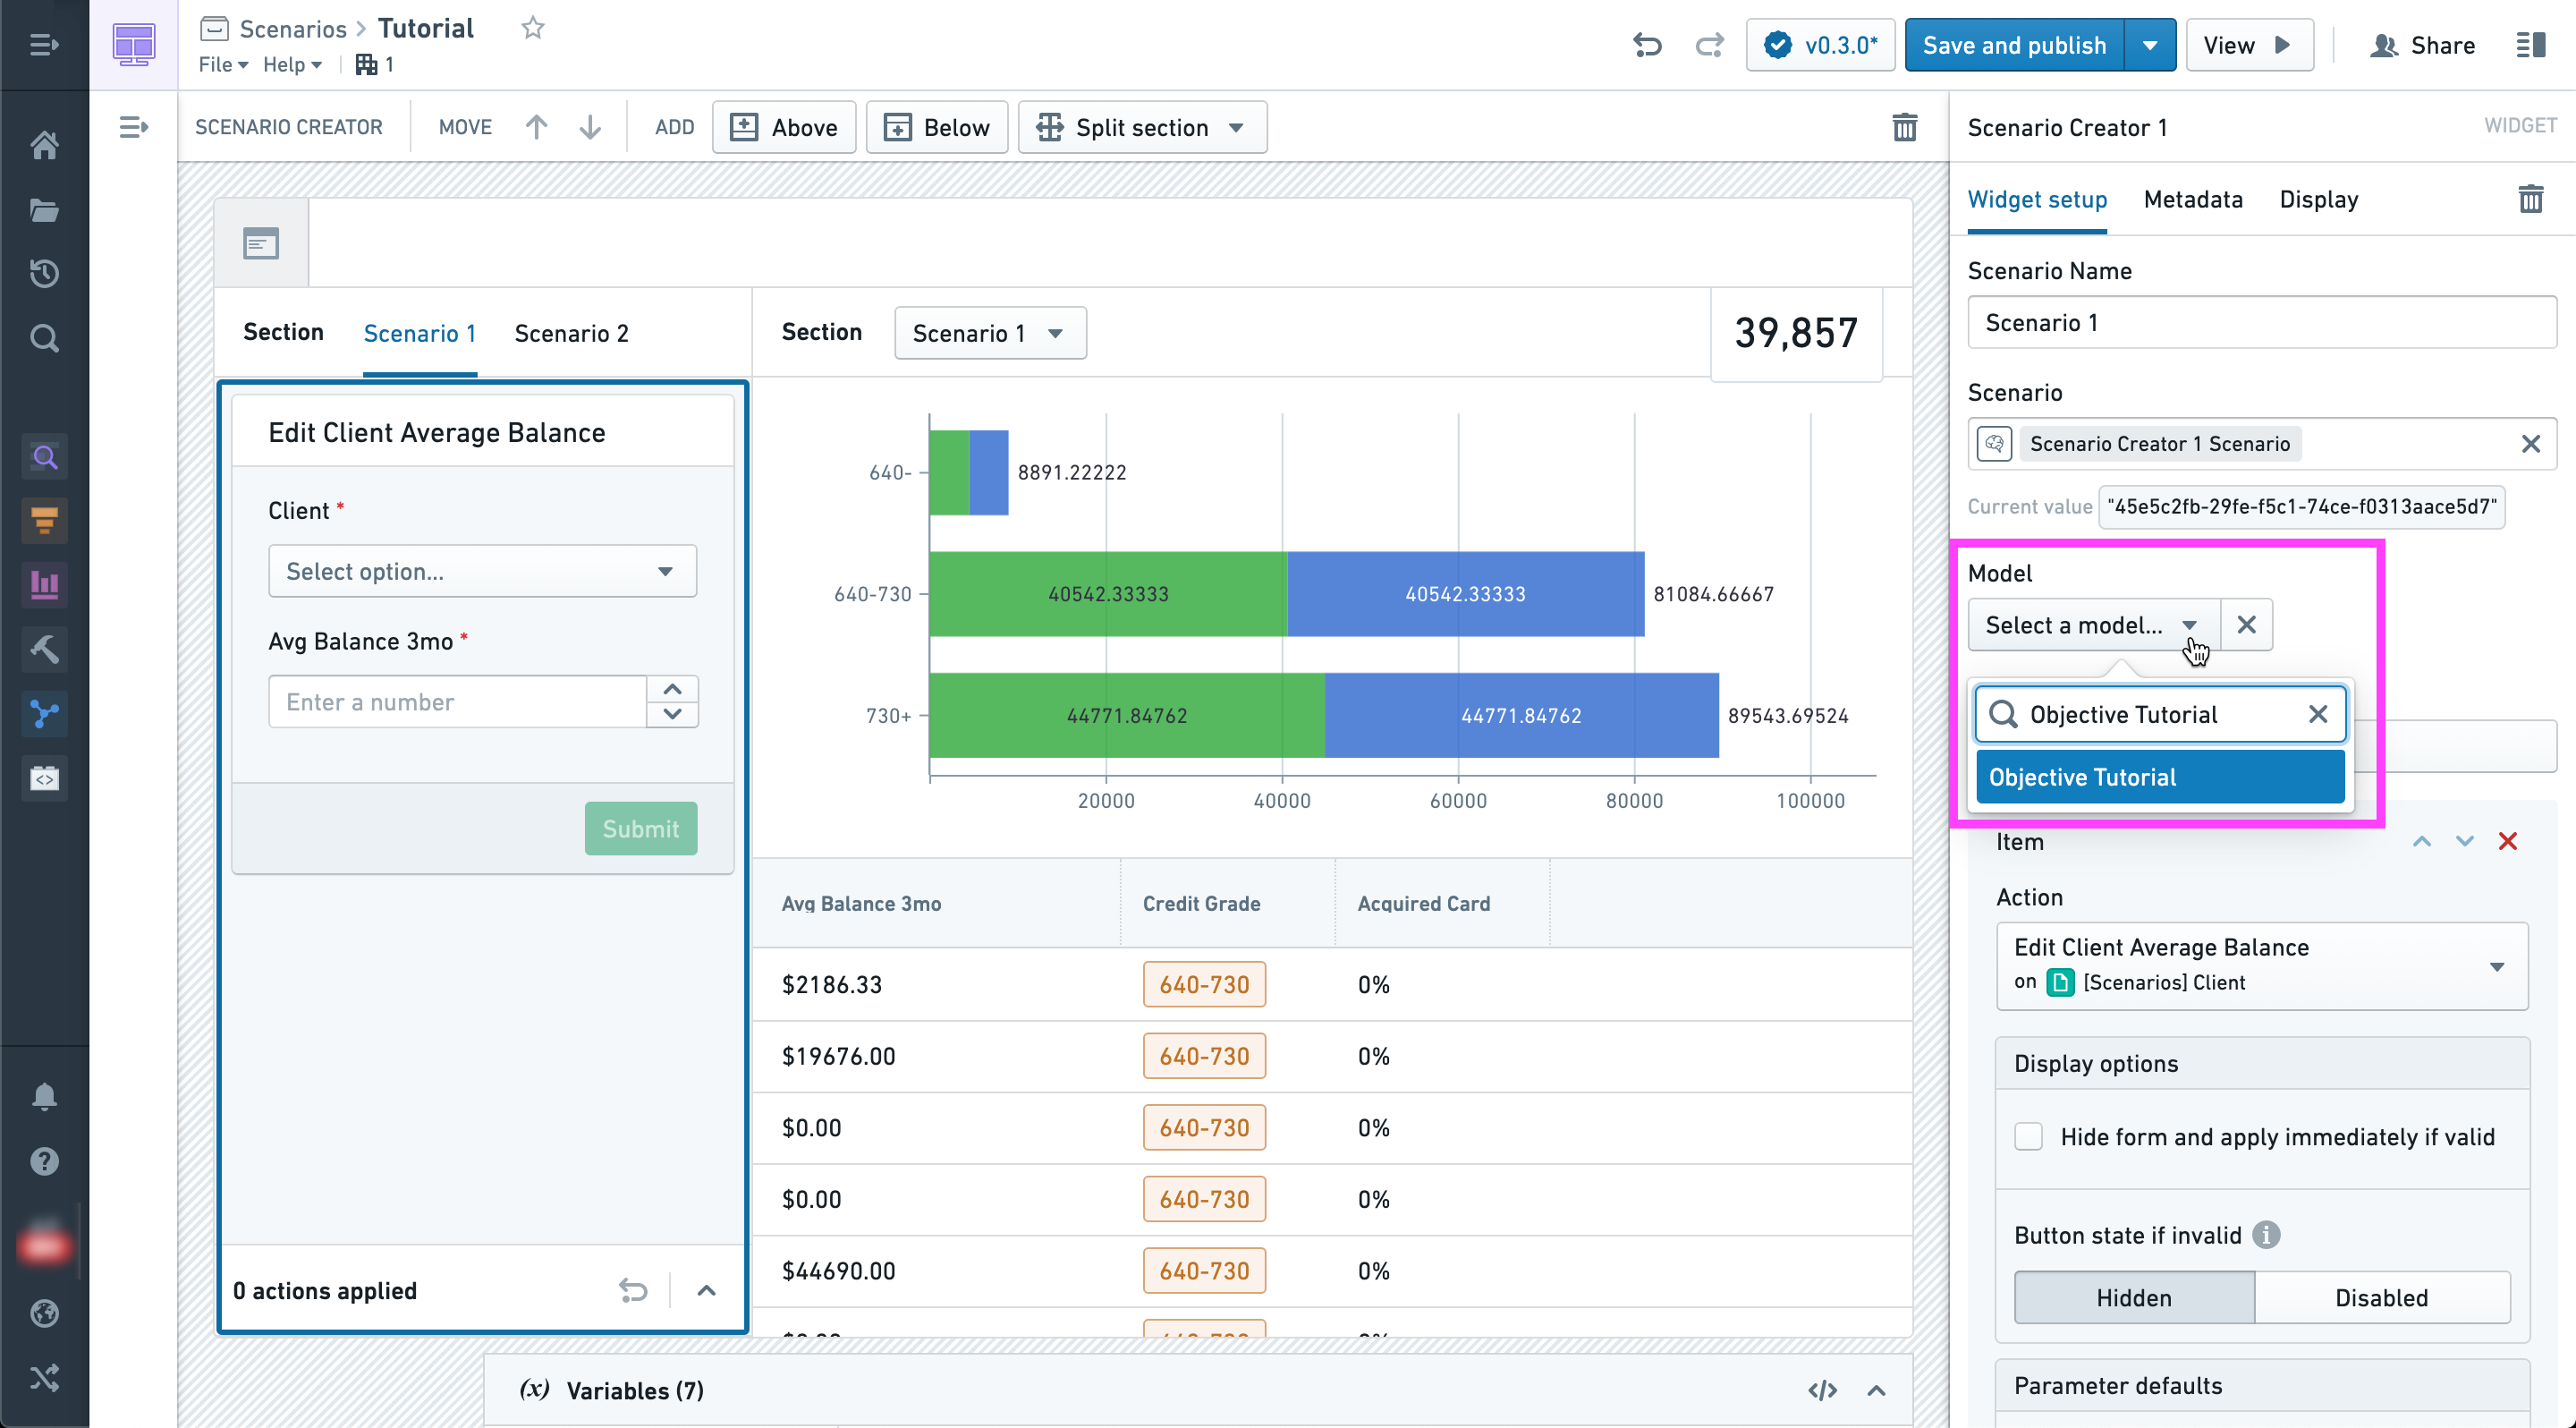
In the configuration for the Scenario Creator widget, click Select a model and choose the modeling objective you just configured.
Notice that you are not selecting a specific version but rather the objective. This means that as new models and versions are released to production deployments, they will automatically be picked up by applications like this module.
At this point, model configuration has been completed.
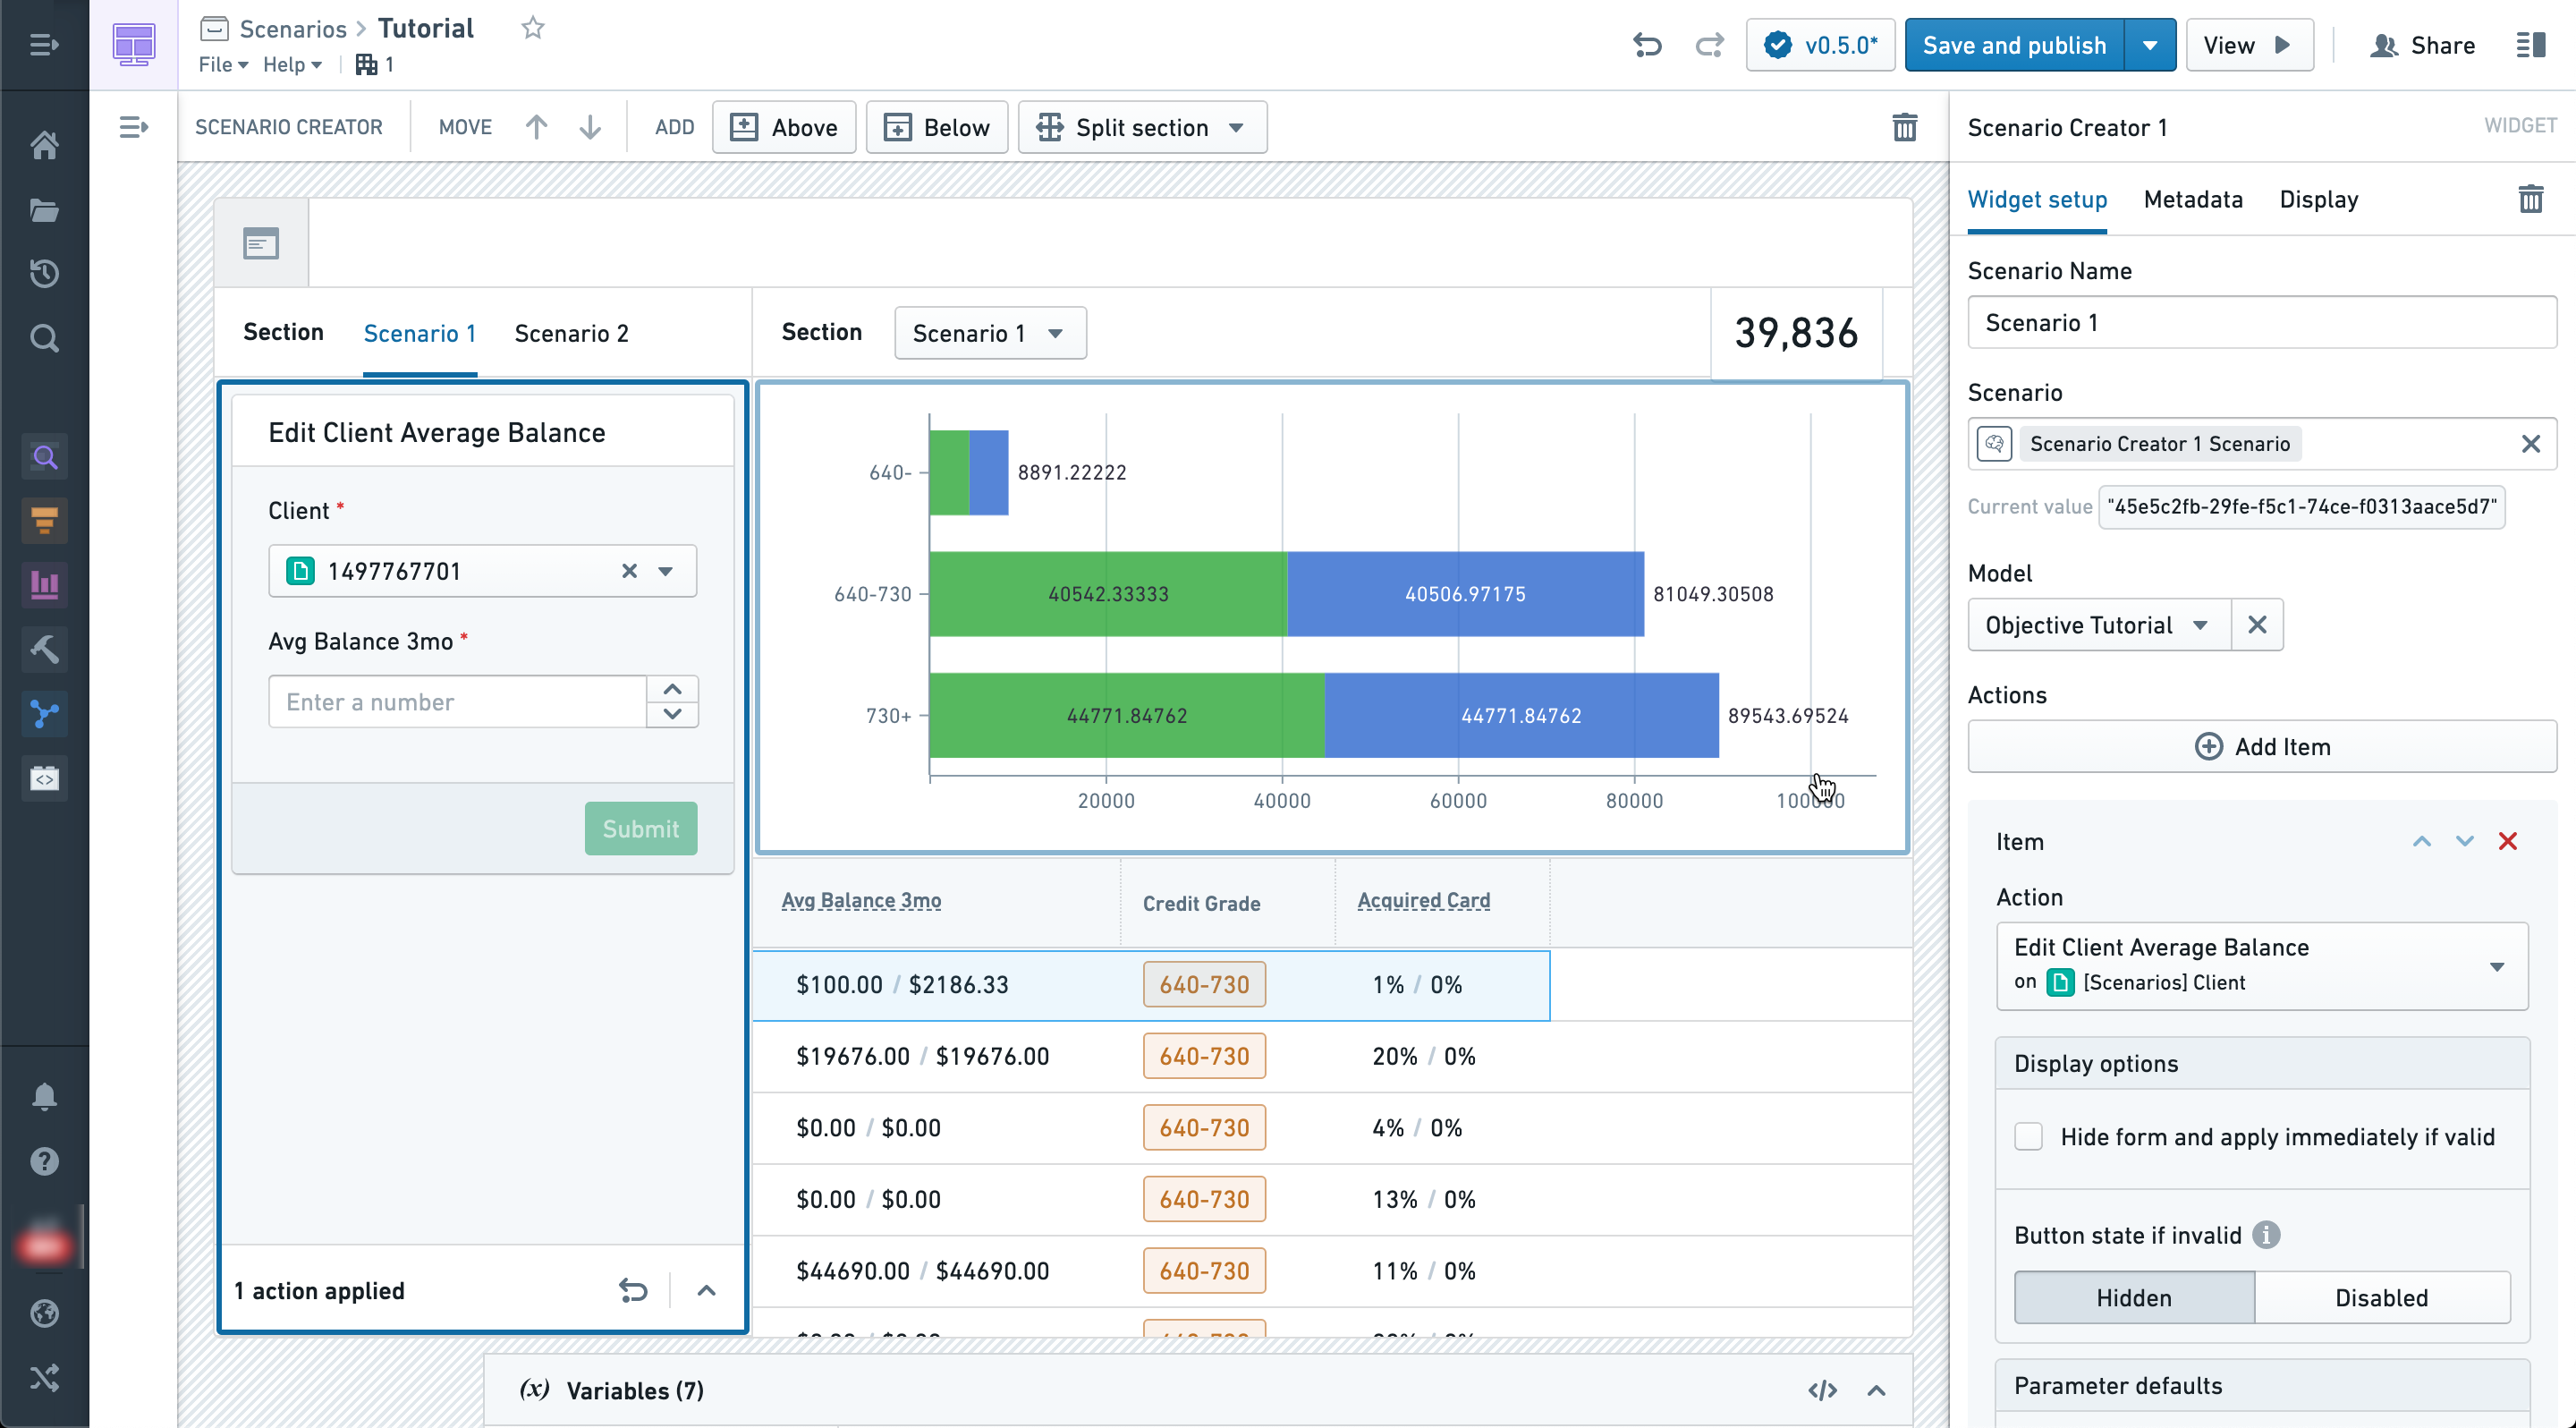
The model will now be run in the context of the Scenario after all Actions have been applied. Any widget configured to display values from the Scenario will reflect model results via the bound output properties.
Below you can see the newly calculated probability of acquiring the offer calculated for every client in the table.