- Capabilities
- Getting started
- Architecture center
- Platform updates
Create sensor object types with Ontology Manager
This guidance explains how to use Ontology Manager to create a sensor object type and link it to a root object type. Once you complete the steps below, you will be able to interact with a sensor object type in the platform. In this example, you will create a Flight Sensor object type and link it to a Flight root object type.
Part I: Create the sensor object type
- Navigate to Ontology Manager, and select Object types from the left side panel.
- From the upper right corner of the screen, select New object type.
- In the configuration dialog that appears, configure your object type metadata.
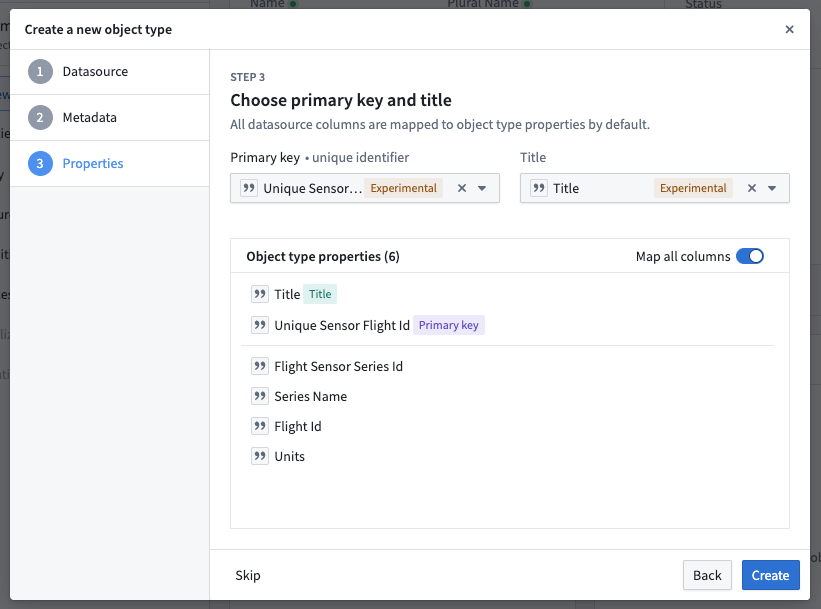
- In the Properties step, choose to back the object type with the
[Example] Sensorsdataset that you created with the sensor data pipeline. - Then, in the Property field, select the string type
unique_sensor_flight_idproperty to use as the primary key. You can also select Sync all columns from datasource or Map all columns if either of those options is available. - Choose the
Titlecolumn as the title property, which allows theFlight Sensorobject types to appear across the application with human-readable names.
-
Depending on your version of the platform you may see options to configure permissions and actions for the
Flight Sensorobject type. Our example does not require additional permissions or action configuration. -
Once you have progressed through all the steps in the dialog, select Create.
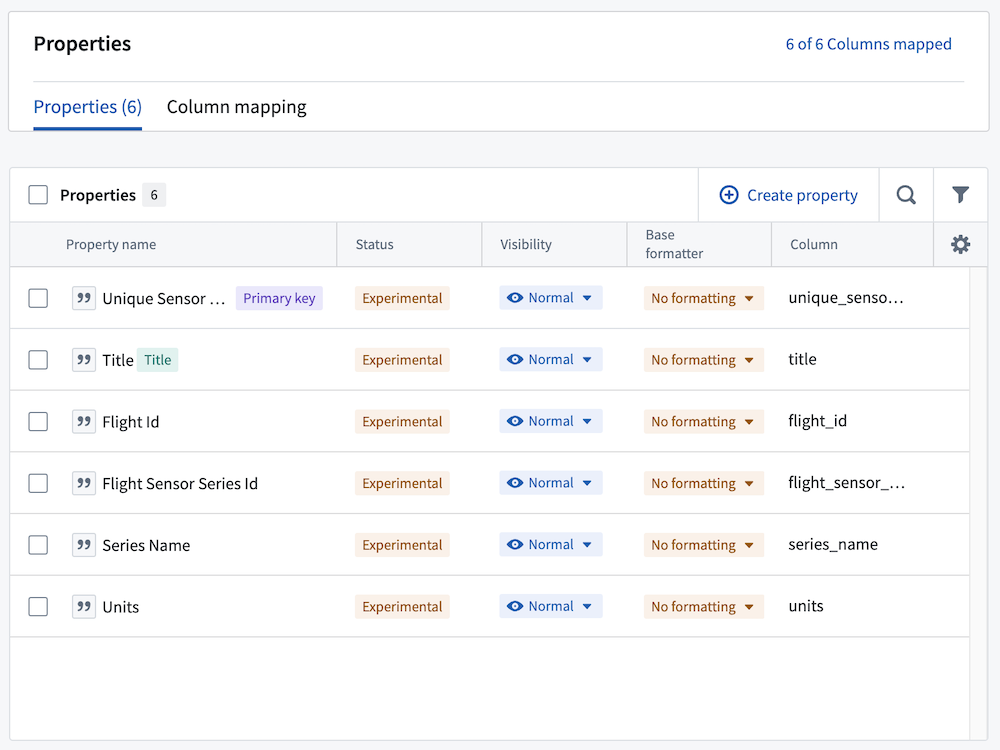
From the Properties tab of the new [Example] Sensors object type, the properties should appear as in the screenshot below:
Part II: Configure the time series property for the sensor object type
- Navigate to the
[Example] Flight Sensorobject type in Ontology Manager and select the Capabilities tab from the left side panel. - From the Time series property section select + Add.
- Select the existing
Flight Sensor Series Idproperty as the time series property, then select Set as default time series property so that it automatically appears in Quiver.

- Select the time series sync that you created in Pipeline Builder. In our example, it is called
[Example] Time Series Sync | Sensor Readings.
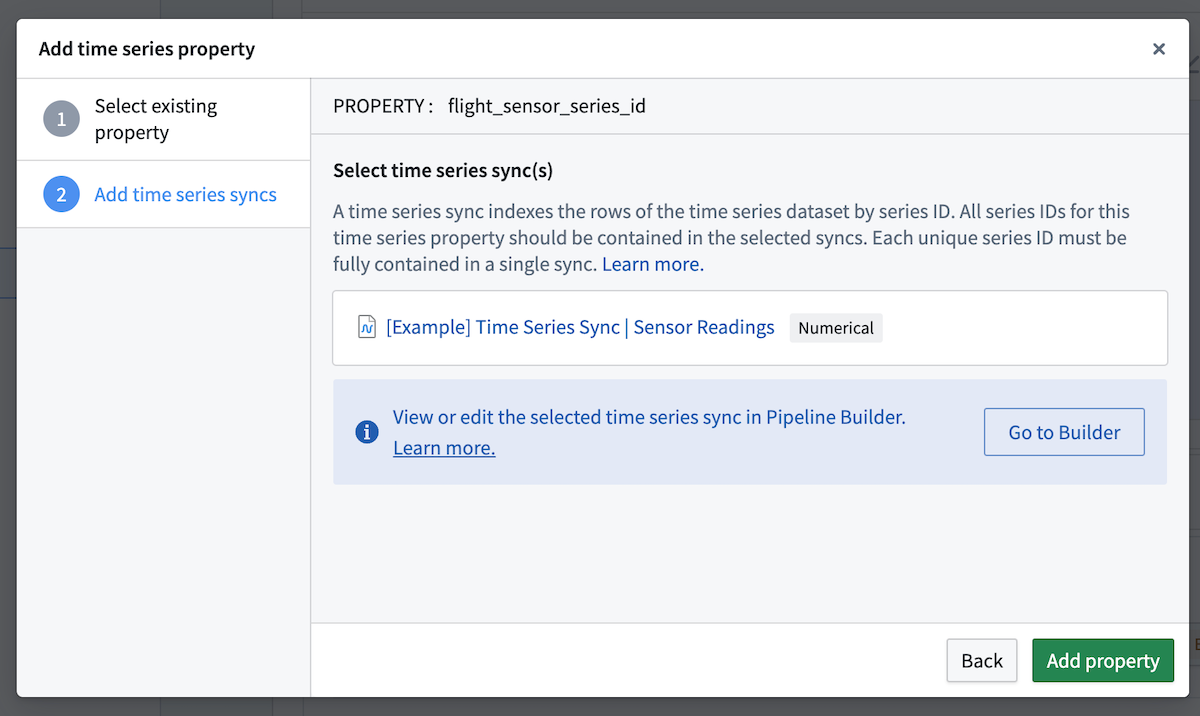
- Select Add property to save the time series property configuration.
Part III: Link the sensor object type to a root object type
Add a link between the [Example] Flight Sensor and [Example] Flight object types using the steps below.
- From the
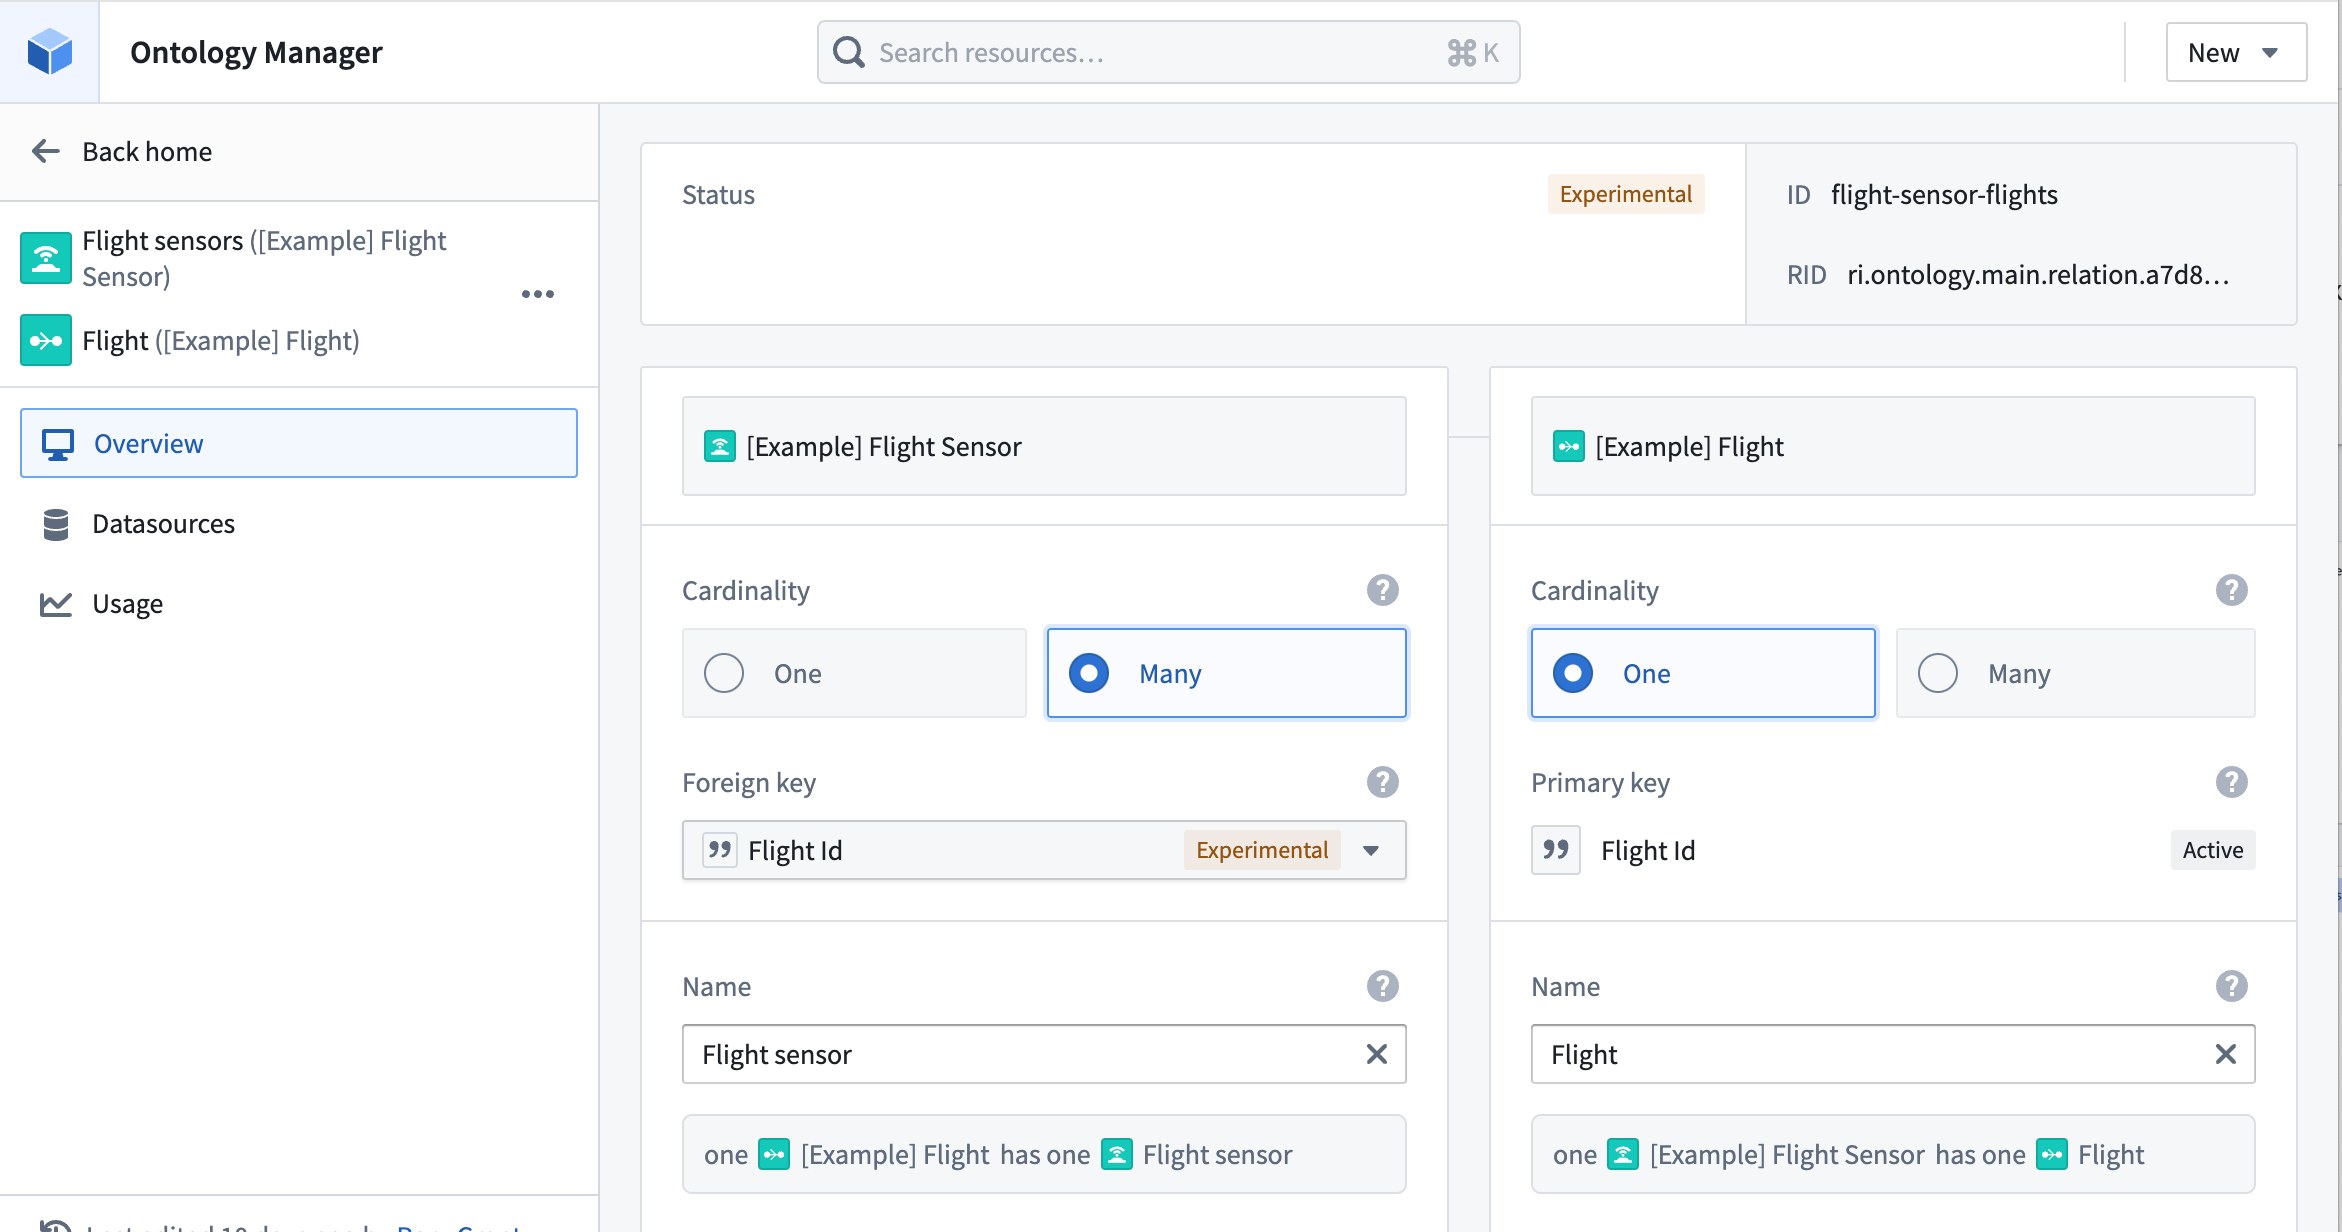
[Example] Flight Sensorview in Ontology Manager, select the New dropdown menu and choose Link type - On the left side of the link, choose the
[Example] Flight Sensorobject type. On the right, choose the[Example] Flightobject type. - Set the cardinality for the left
Flight Sensorobject type as Many, and the rightFlightobject type as One, meaning theFlightobject type has a one to many relationship to theFlight Sensorobject type. - Set the
flight_idcolumn as a foreign key to theFlight Sensorobject type, which will setflight_idas the primary key for theFlightobject type.
Learn more about link types.
Part IV: Configure the sensor object type
In the time series section, ensure that the sensor object type toggle is on. Set up the Sensor link to use the recently created Flight to Flight Sensor link.
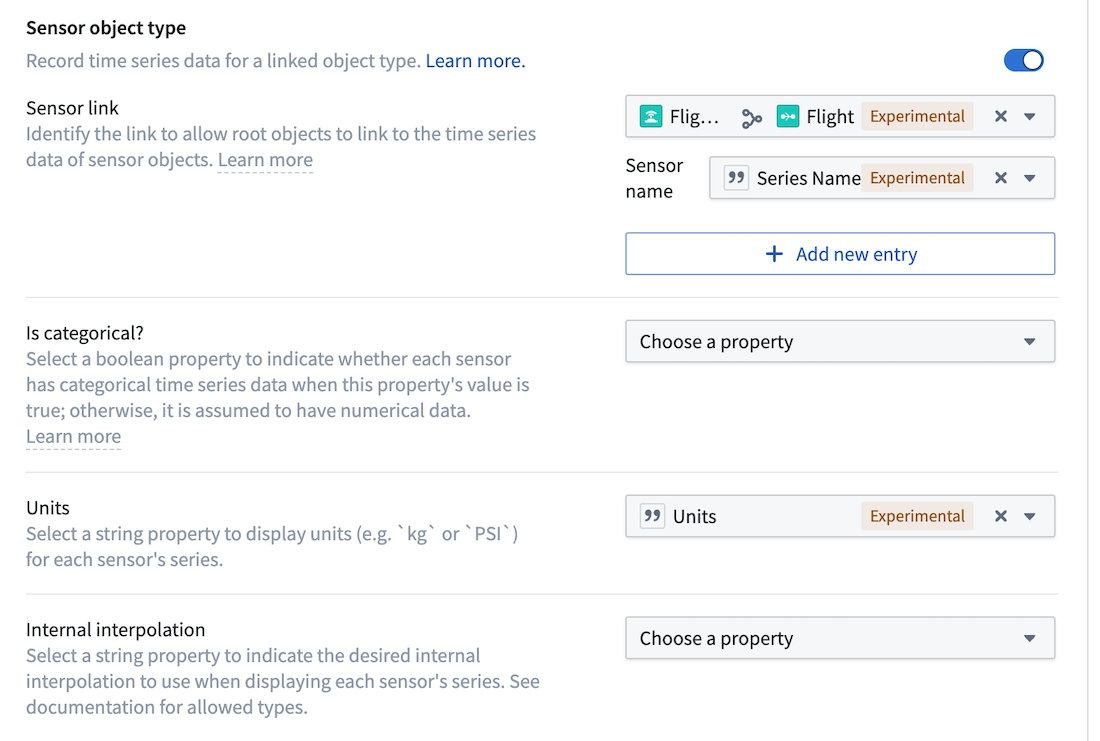
-
Set the link name as the
Series Namecolumn. Applications will surface the sensor object data under this series name. -
Configure units by selecting the Units dropdown menu in the sensor object type setup.
Is categorical and Internal interpolation can be inferred from properties on the sensor object type, but they are not required for this use case. Is categorical is only needed when it is important to delineate categorical time series values from numeric time series values.
Internal interpolation is used to enable applications like Quiver to infer series values between adjacent data points. Review our Quiver documentation on interpolation for more information.
- Choose to Save the edits to the object type from upper right corner of the screen to view the changes in the Ontology and throughout the platform.
Now, you are ready to use the Flight Sensor and Flight object types in an operational context. Proceed in the documentation to learn how to use sensor object type time series data in Workshop and Quiver.
Configuration for Is enum? is not required for our example use case. Is deprecated and Sparkline preview properties should be ignored.