- Capabilities
- Getting started
- Architecture center
- Platform updates
Getting started with function-backed time series
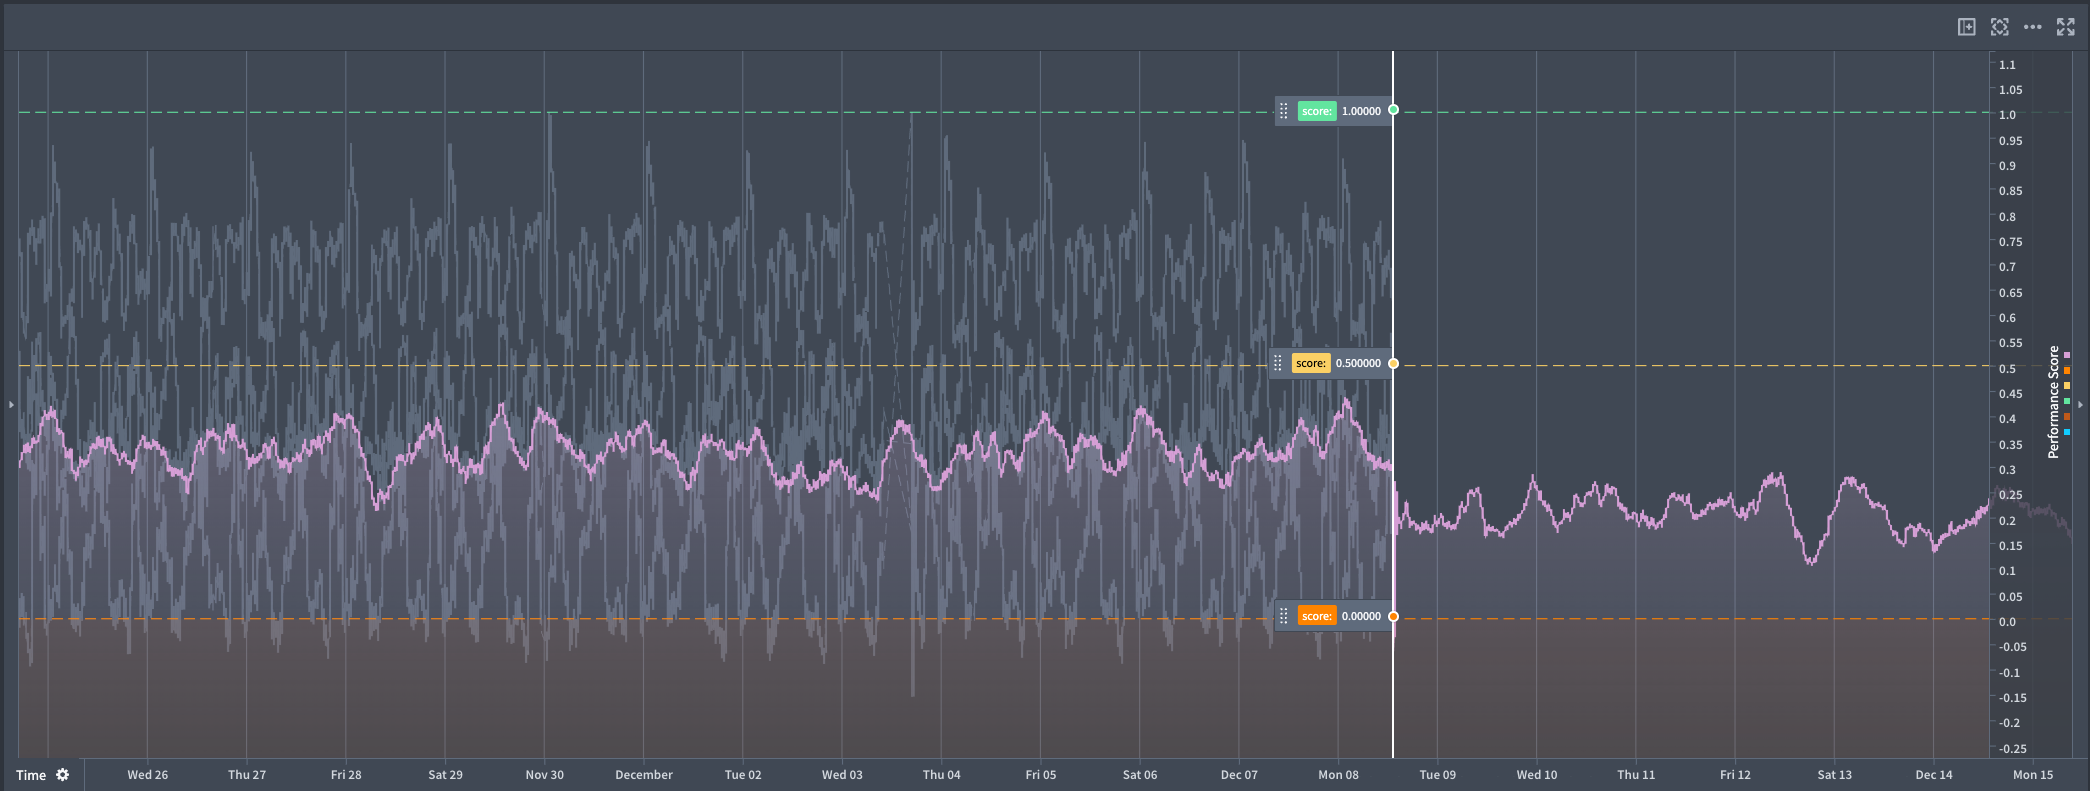
This guide will help you get started with creating a function-backed time series that can be used in Quiver analyses to enable real-time forecasting workflows.
Prerequisites
To set up function-backed time series, you need the following resources:
- A Foundry function that returns a numeric time series using the time series SDK.
- A tagged version of that function to reference in Quiver.
Set up a function-backed time series in Quiver
-
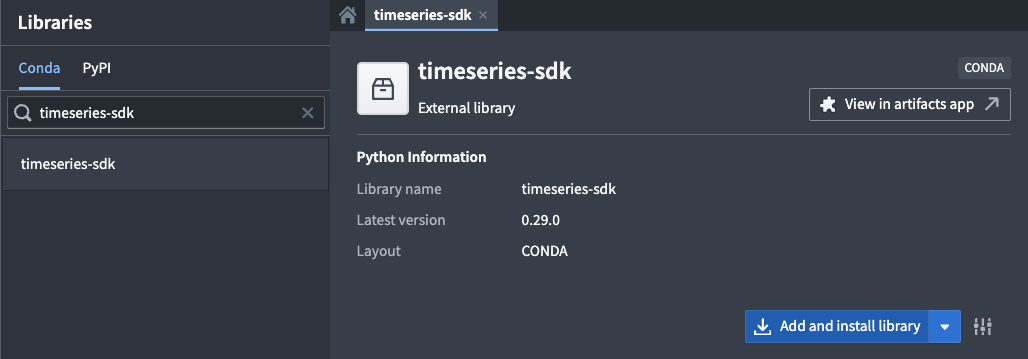
Install the time series SDK: In Code Repositories, add the
timeseries-sdklibrary to your code repository using the Libraries tab.
-
Write a Python function: Create a function that returns a serialized pandas DataFrame with the following columns:
timestamp: A pandas timestamp.value: A numeric value, for example int32 or float.
The time series SDK provides a library for serializing a pandas DataFrame as shown in the example below.
Copied!1 2 3 4 5 6 7 8 9 10 11 12 13 14 15 16 17 18 19 20 21 22 23 24 25 26 27 28 29 30 31 32 33from functions.api import function from timeseries_sdk.types import TimeSeries from ontology_sdk.ontology.objects import Machine import pandas as pd @function def performance_prophet_forecast( machine: Machine, periods: int = 96, # number of future steps freq: str = "15min", # sampling frequency ) -> list[bytes]: """ Forecast a machine's performance_score using Prophet. """ from prophet import Prophet # Retrieve performance score data (columns: timestamp, value) df = machine.performance_score.to_pandas(all_time=True) if df.empty: return TimeSeries.serialize(pd.DataFrame(columns=["timestamp", "value"])) # Prepare the data for Prophet df = df.rename(columns={"timestamp": "ds", "value": "y"}).sort_values("ds") model = Prophet().fit(df) # Create future data frame for forecast future = model.make_future_dataframe(periods=periods, freq=freq, include_history=True) forecast = model.predict(future) # Format the forecast output out = forecast[["ds", "yhat"]].rename(columns={"ds": "timestamp", "yhat": "value"}) return TimeSeries.serialize(out)
-
Publish the function: Publish your function and tag a version.
-
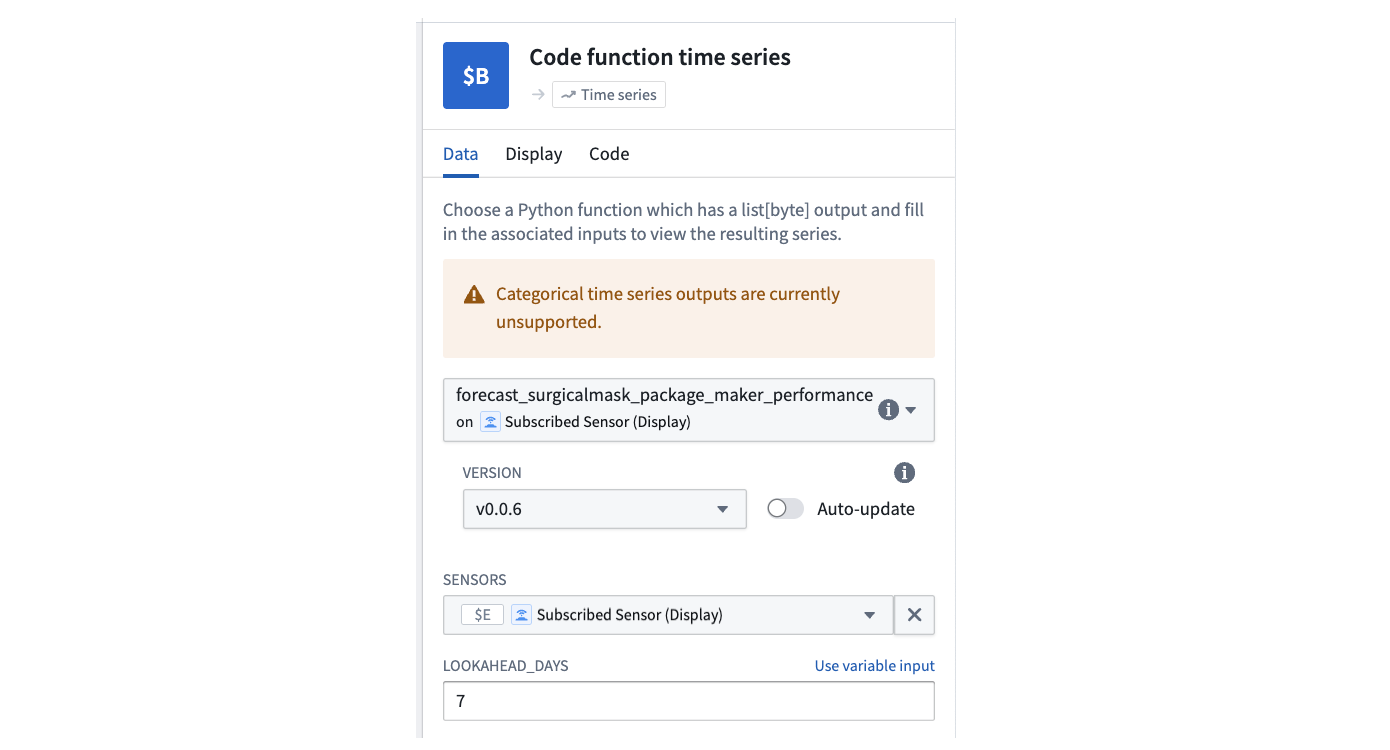
Use the function in Quiver:
- Add a Code function time series card.

- Select your function, choose the correct version, and configure its inputs.
- Optionally, add another instance of the card to compare multiple scenarios side-by-side.
- Add a Code function time series card.