Remove Markings from outputs
Access requirements for platform resources are controlled by Markings. Markings restrict access in an all-or-nothing fashion: to access a resource, a user must be a member of all Markings applied to the resource. In addition, Markings are inherited through file hierarchies and direct dependencies.
If you have the Remove marking permission for a specific Marking, you can now remove that inherited Marking from outputs in Pipeline Builder. This is equivalent to the stop_propagation argument in Code Repositories.
Removing a Marking on an output is equivalent to stopping the propagation of a Marking from an input.
Prerequisites
You must complete the following steps before you can remove Markings using Pipeline Builder.
Enable branch protection
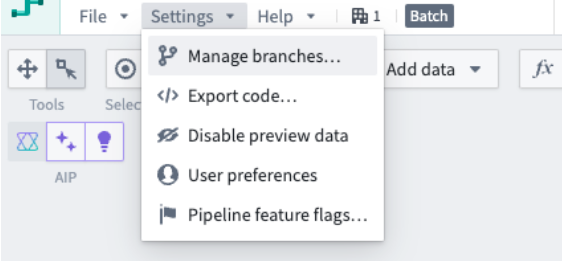
- In Pipeline Builder, select Settings, then Manage branches.
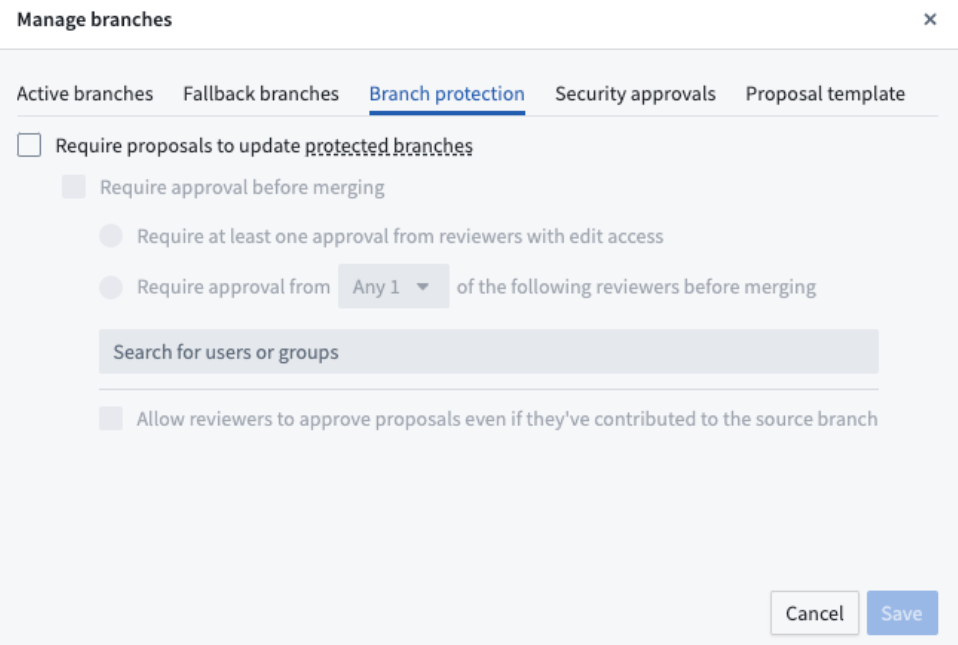
- Select the Branch protection tab.
Require code approvals
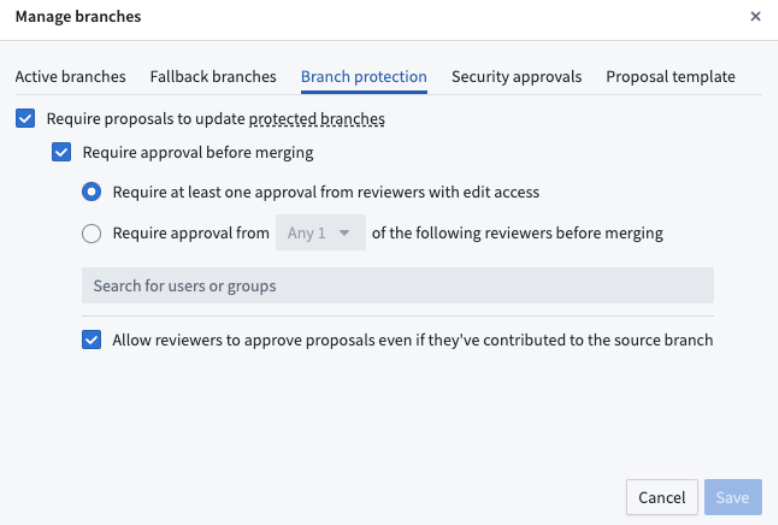
- From the Branch protection tab, check the boxes to Require proposals to update protected branches and Require approval before merging.
- Specify the desired approval policy. An example approval policy is shown below.
Enable changes to security Markings in pipeline settings
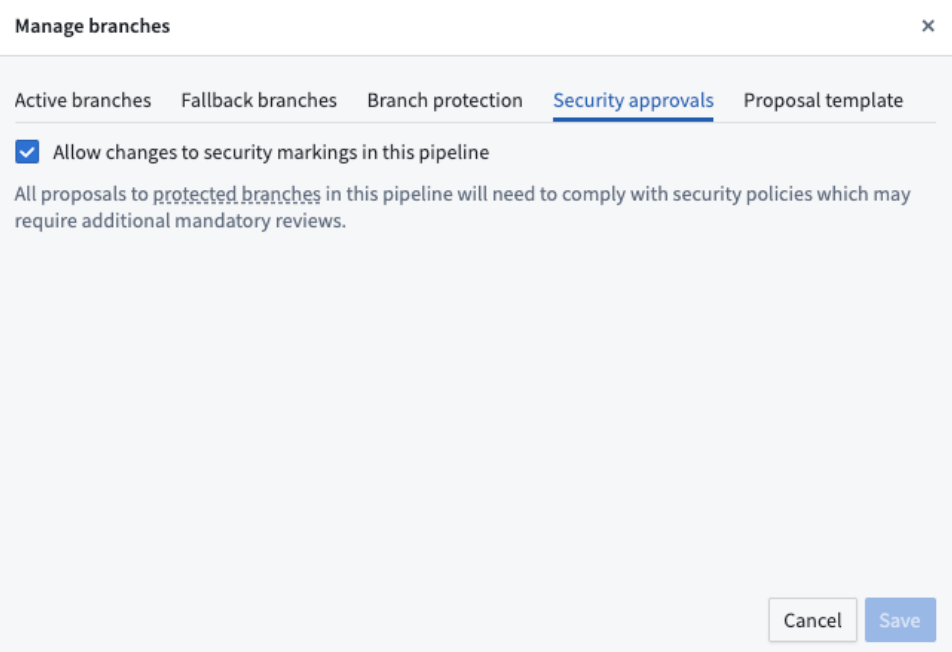
- Navigate to the Security approvals tab and check the box next to Allow changes to security Markings in this pipeline. You must have the
Ownerrole on the pipeline to complete this step.
Once you Allow changes to security Markings in this pipeline, you cannot disable branch protection or remove code approval requirements. You must disable Allow changes to security Markings in this pipeline to disable those features.
Once you remove a Marking in a protected branch, you cannot disable the Allow changes to security Markings in this pipeline from the Security approvals tab. You must undo the removal of the Marking first to disable this setting.
Remove Markings
-
Create a branch off of the protected branch.
-
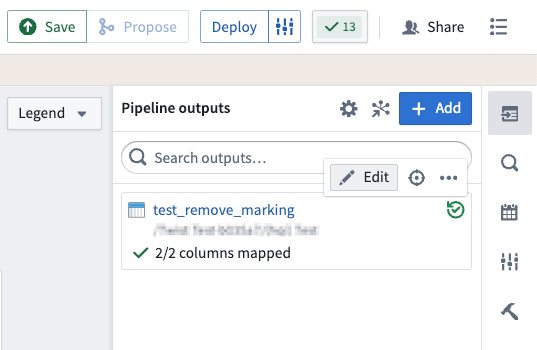
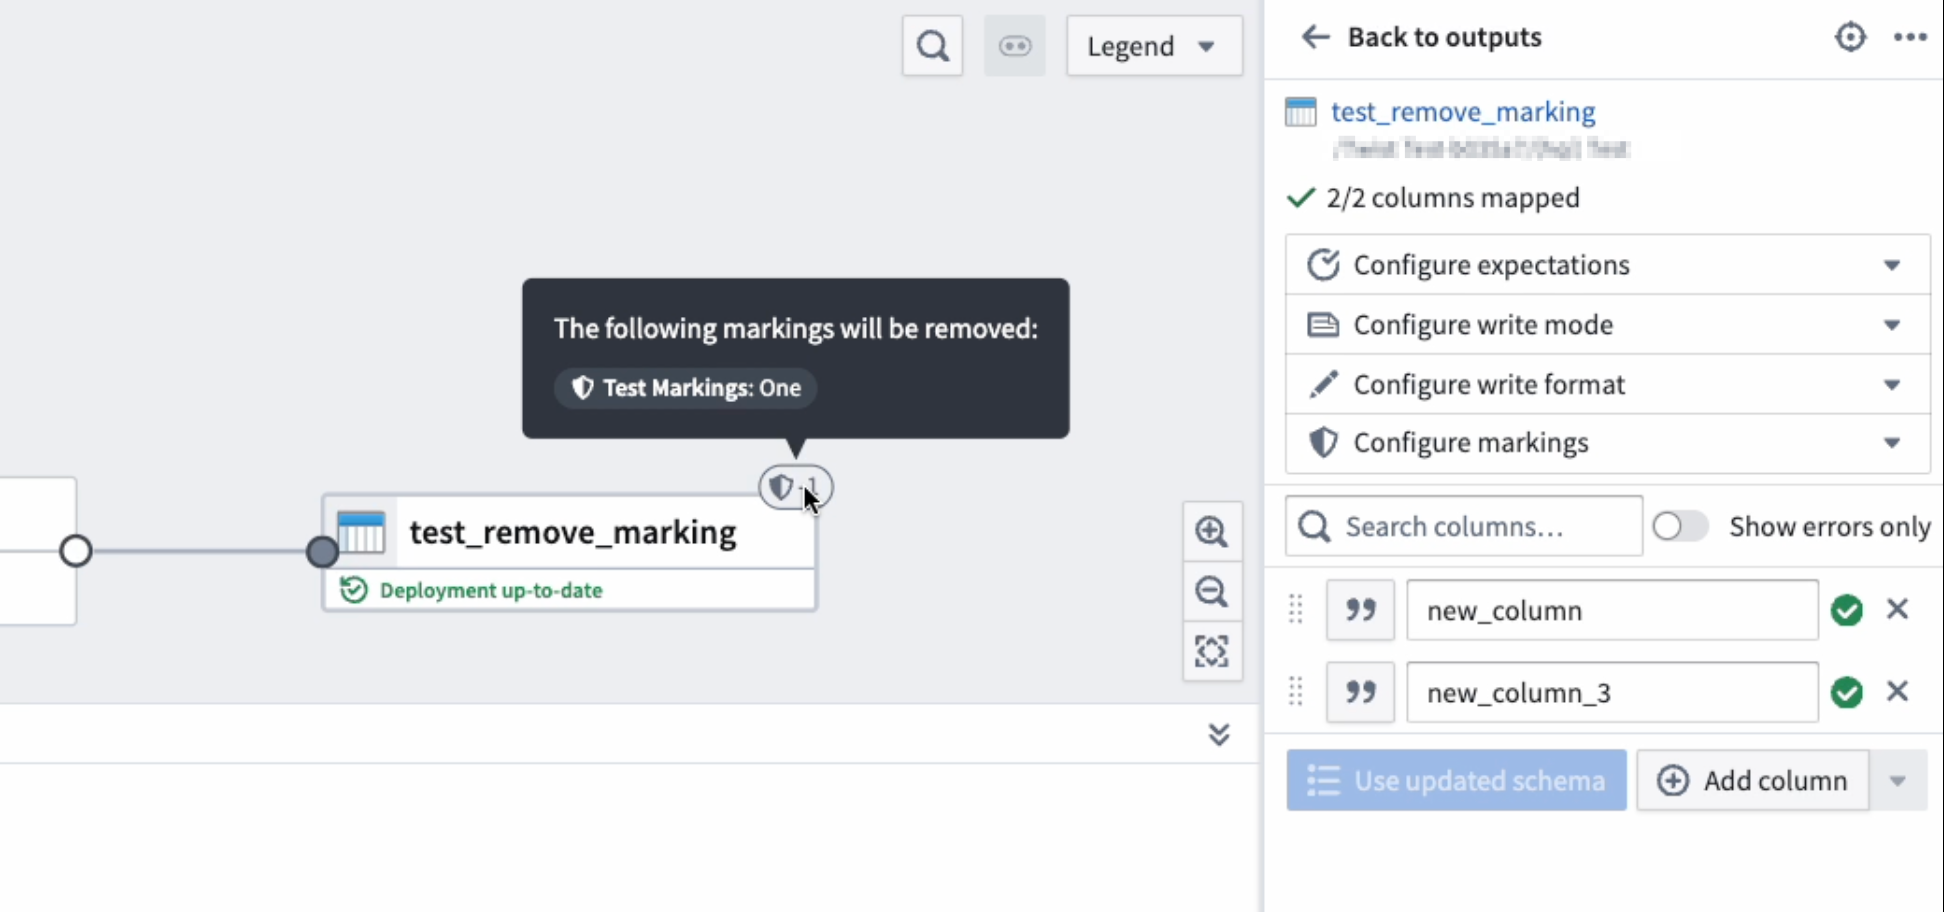
Navigate to Pipeline outputs on the right side of your screen, and hover over the output with the Marking(s) you want to remove. Then, select Edit.
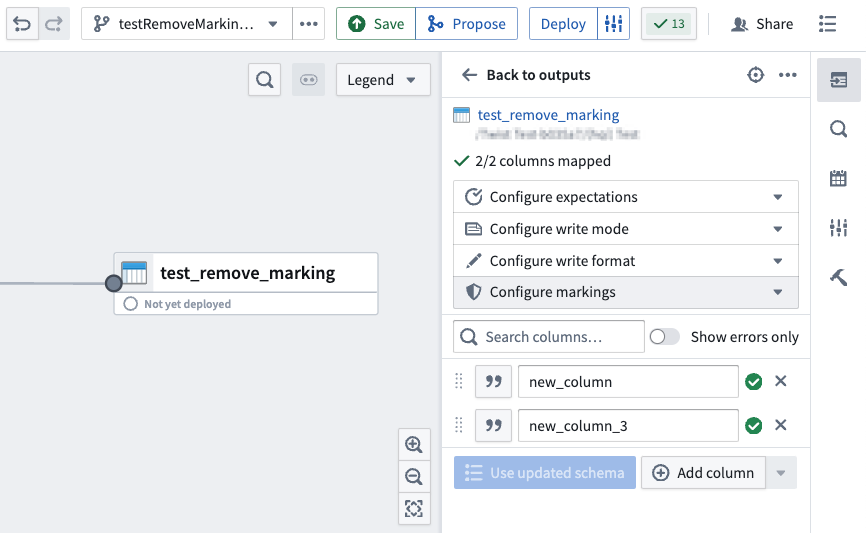
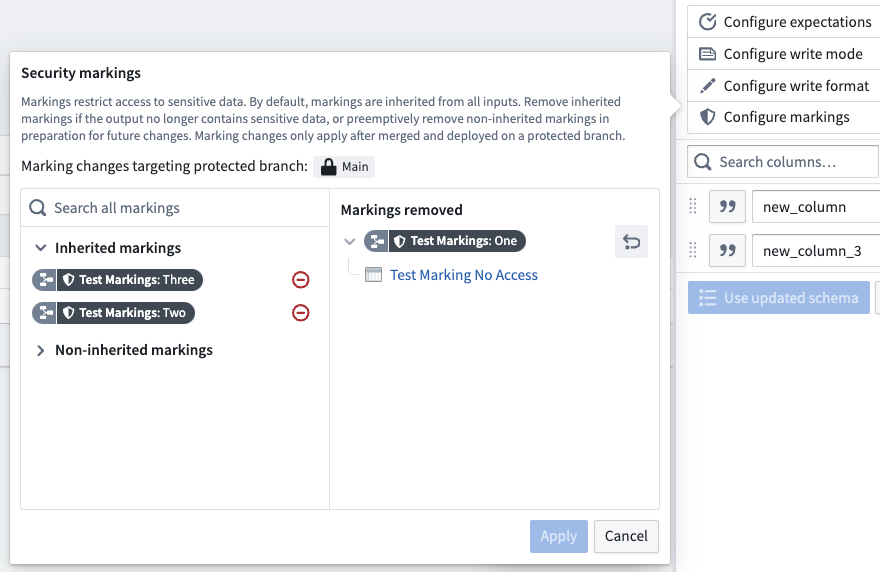
- Select the Configure Markings dropdown menu under the output dataset.
- Under the Inherited Markings section in the pop-up menu, select the red remove icon next to the Marking(s) you want to remove.
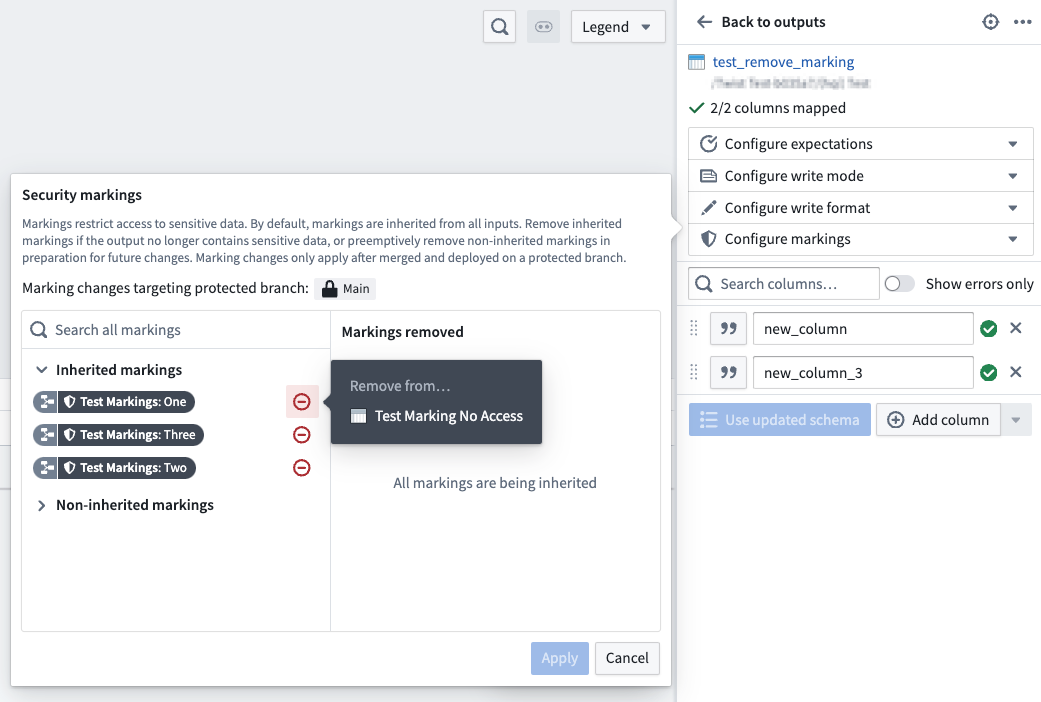
The removed Markings will now show up under the Markings removed section in the dialog.
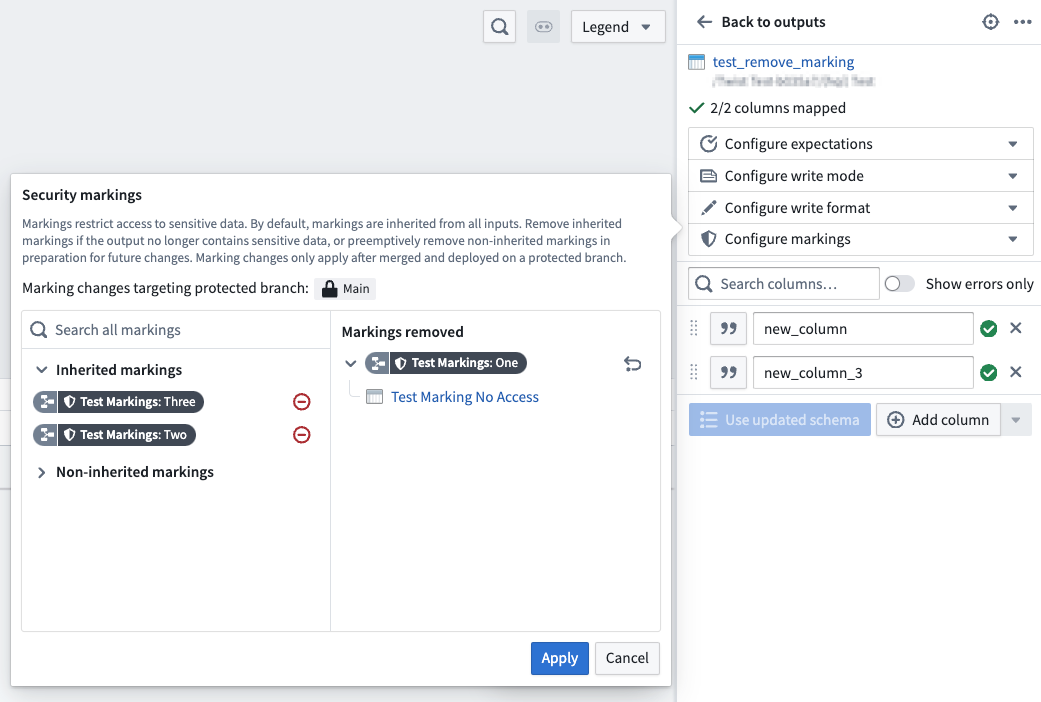
- Select Apply. You should now see a shield icon in the upper left of your output board with a negative number signifying how many Markings you are removing.
The changes you applied to Markings on outputs will not go into effect until the branch is merged successfully and deployed on the protected branch. If you try building the dataset on your branch, it will still show the original Markings.
Propose your changes
- For your changes to Markings on pipeline output to take effect, create a proposal to merge your changes into the protected branch. The proposal will include a section for approving Marking removals, a function similar to pipeline code approvals.
You must have the Remove marking permission to approve the change. Approvers for proposals to remove Markings do not need to be pipeline owners and only require View access to the proposal.

Every removed Marking will require a separate check, meaning that you could have multiple checks in one proposal. When you approve a Marking removal, your approval will apply for every Marking that you have permission to review.
Once all required approvals have been granted, the proposal is allowed to merge. Deploying that version will allowing the Marking removals to take effect.
Undo a Marking removal from a pipeline output
-
To undo the removal of a Marking, navigate to Pipeline outputs on the right side of your screen and hover over the output with the Marking(s) you removed.
-
Select Edit.
- Select the Configure Markings dropdown menu under the output dataset.
- Select the undo icon under the Markings not propagated section in the pop-up dialog.
- Select Apply, then save your pipeline from the top right of your screen.

-
Propose your changes to begin approval checks.
-
Once approved, deploy your pipeline.
Elevated permissions are not required to undo the removal of a Marking, unlike the permissions required to remove a Marking.
Markings and job groups
In a job group, Markings from all inputs will be inherited by all outputs within the same job group. To view an example and learn more about job groups, review our documentation.
Markings and multiple protected branches
If there are marking removals on any branch, you must stop removing markings from all branches in the pipeline before protecting or unprotecting branches. When multiple branches are protected, marking removals will target all protected branches.
When security approval settings are enabled, you will not be able to change branch protection settings, including protecting or unprotecting branches.