- Capabilities
- Getting started
- Architecture center
- Platform updates
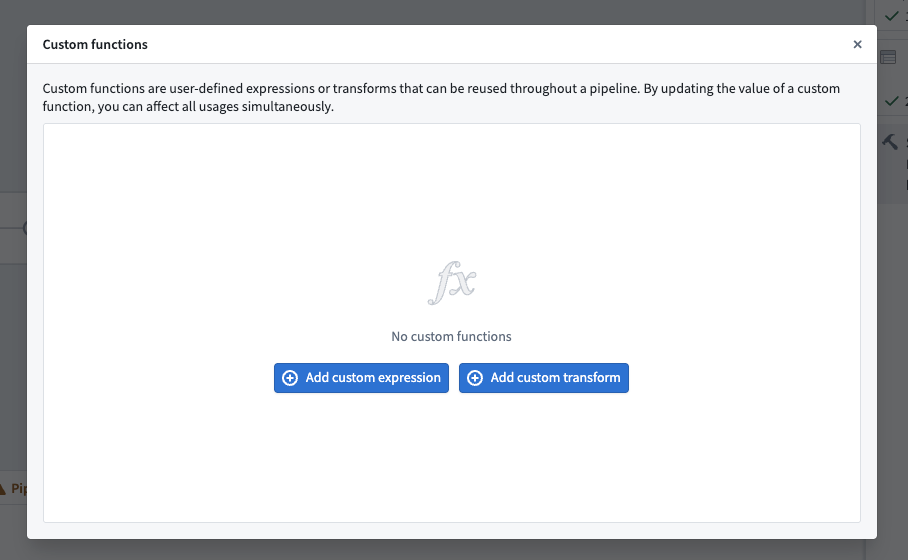
Custom functions
Custom functions include both custom expressions and custom transforms. Both capabilities are useful for repeating logic across your pipeline while managing it in a single location.
Custom transforms enable you to save a series of transform boards as a single transform for reuse across your pipeline.
Custom expressions enable you to save a single expression with optional parameters for reuse across your pipeline. Custom expressions can be used inside of other transforms such as filters or case statements.
A custom function generally consists of a name (required), description (optional), function arguments (optional), and the function definition (required).
Create a custom expression
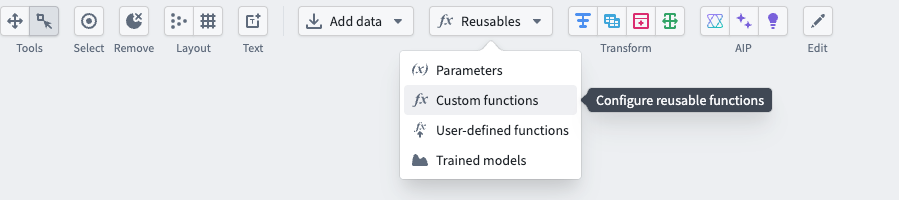
To create a custom expression, select the Reusables dropdown at the top of the graph, then choose Custom functions.
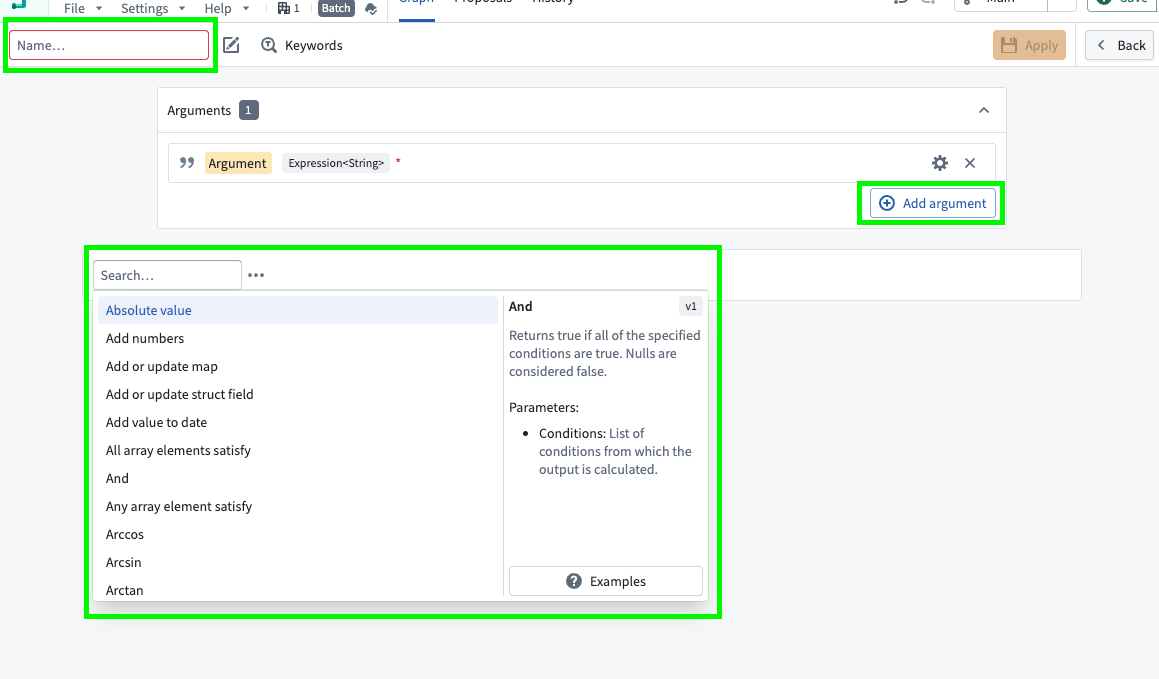
Select Add custom expression.
In the new window, configure your custom expression. Enter a name in the top left, add any arguments in the Arguments window using the Add argument option, and define your expression. Select Apply when finished.
After creating a custom expression, you can search for it the same as any other expression in a transform node or in a transform.
Create a custom transform
Two steps are required to create a custom transform:
- Define your logic as a series of transform boards.
- Convert the transform boards into a new custom function.
Below, we will review an example for each step.
Define a series of transform boards
Suppose you have a table of users, and you want to create a primary key to uniquely identify each user. You know that each user’s first_name, last_name, and first_login_date is a unique combination. You would like to add a column primary_key of type String to the dataset, which is a hash of those three columns, then drop first_name, last_name, and first_login_date. Finally, you want to keep only one row per user if there are duplicates, retaining the row with the lowest age value.
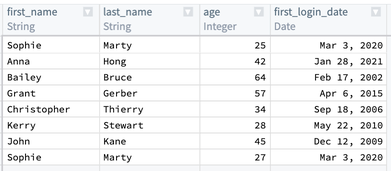
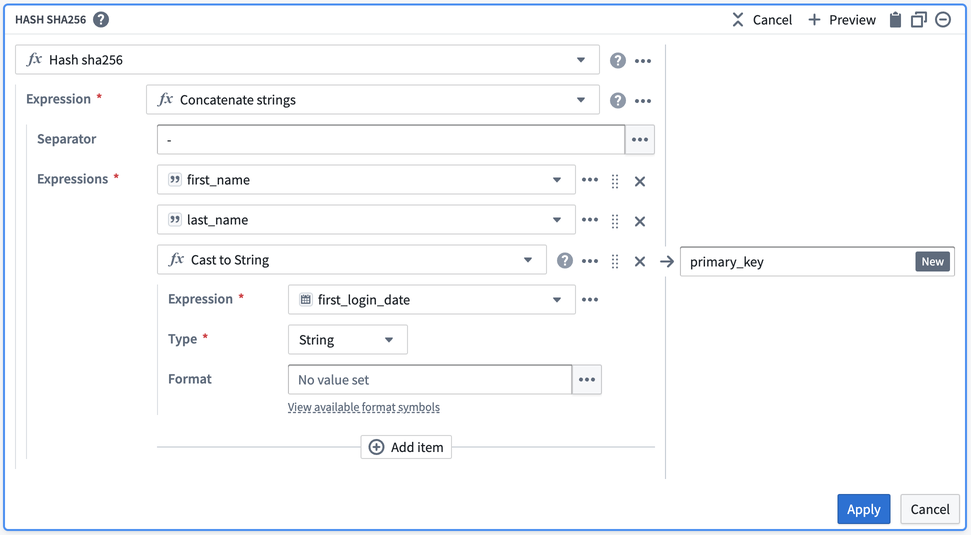
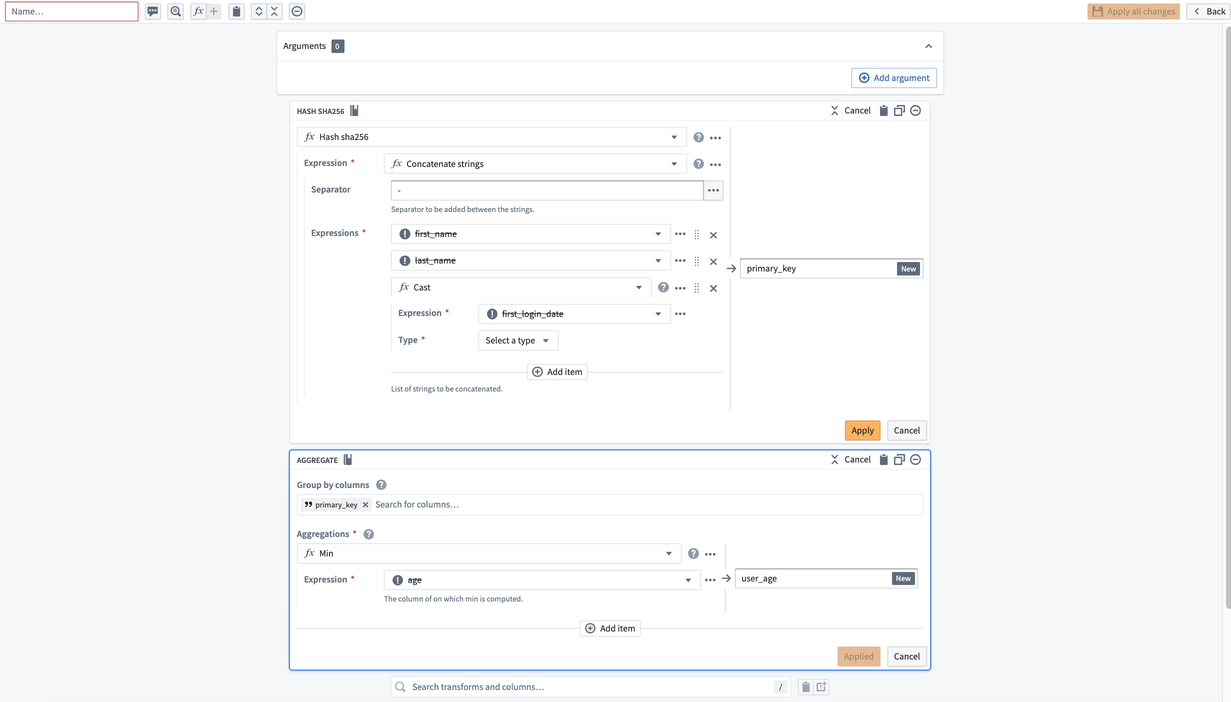
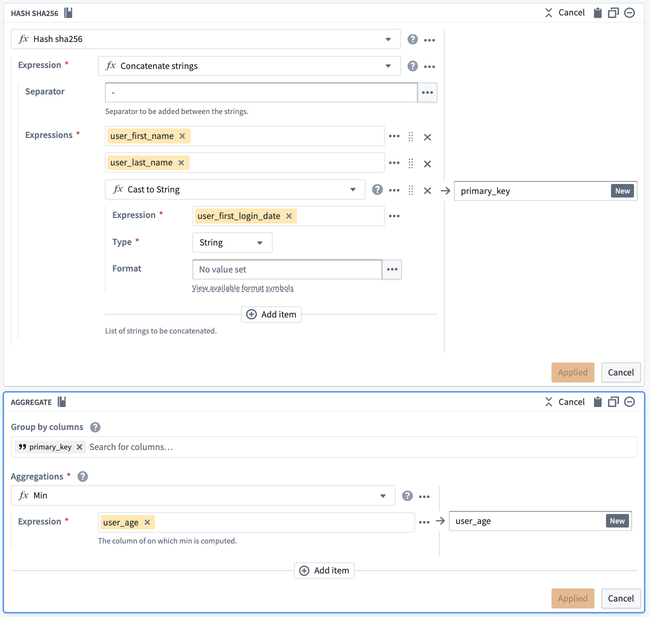
First, combine first_name, last_name, and first_login_date into one column. You can use the Concatenate strings transform to add those three columns together.

For the Separator field, enter a -. Then, choose each column in the Expressions dropdown. For the first two columns, choose first_name and last_name. However, first_login_date column is not an option for us to choose from for our third field. This is because it is a Date type, and the Concatenate strings function only accepts String types.

To resolve this, insert a Cast expression from the Expressions tab. The parameters will be first_login_date for the Expression and String for the Type to cast it to. This prevents you from needing to change first_login_date globally, which would affect all downstream transform boards.

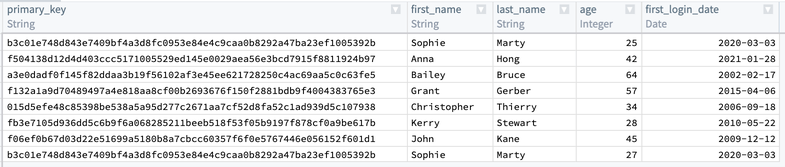
Once you select Apply, the output table should look like this:

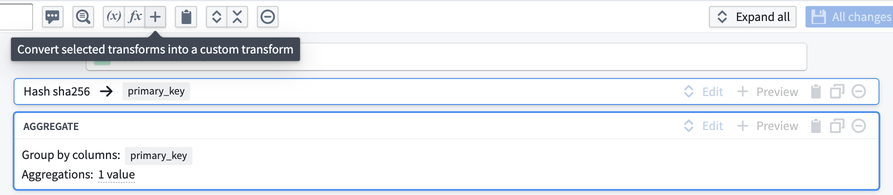
Now, you must de-identify the data within primary_key. One way to do this is to create a hash for each value in primary_key by applying the Hash sha256 transform. You can do this in the same board by selecting the Reuse value option to replace Concatenate strings with Hash sha256.
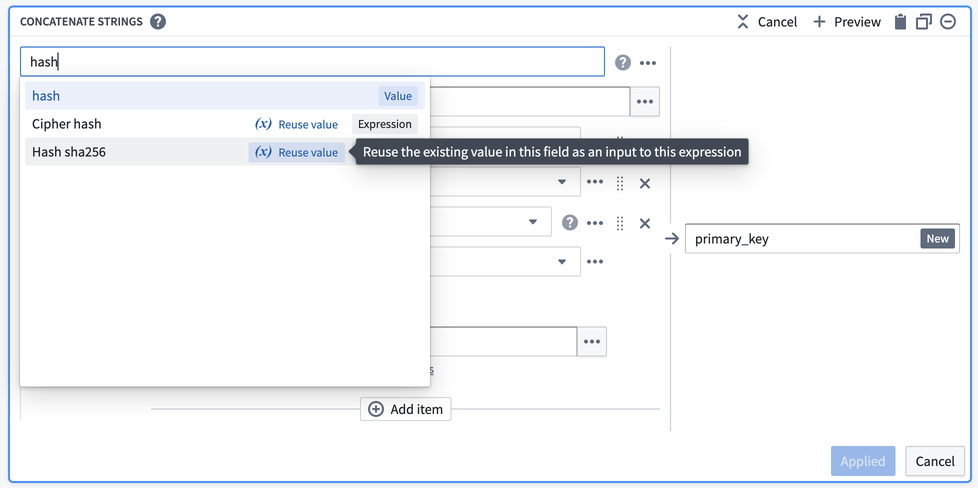
This option keeps the existing values and makes them the first input to the new transform.
After selecting Apply, validate that your output matches what you would expect: a primary_key: String column that contains unique data about each row.
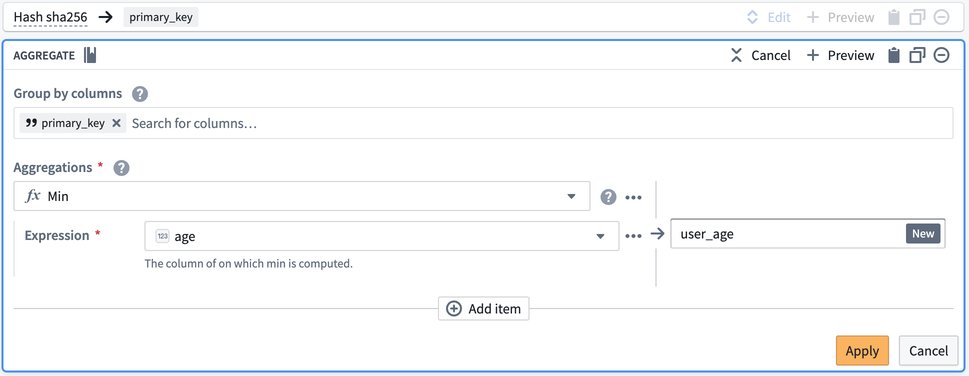
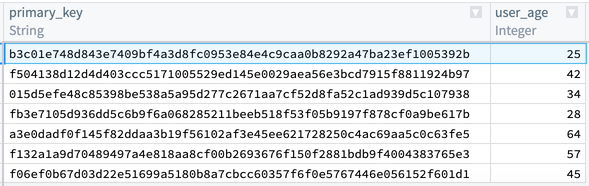
Now, you will notice that the first and last row in primary_key are the same. You want to keep the row with the lower age of 25, and drop first_name, last_name, and first_login_date. To do this, add an Aggregate transform. Input primary_key in the first field Group by columns, and age in the second field Aggregations with a Min expression:
Finally, the output table should look like the image below. You can verify that there is only one row for primary_key = b3c01... and age is 25.
Convert a series of transform boards into a custom function
Now, suppose that you want to reuse this logic in three different places within your pipeline. We can convert our logic into a custom function by using Shift + Down Arrow to select both boards, then selecting the + button in the top bar.
This will take you to the custom function creation page. You will notice that the column inputs first_name, last_name, first_login_date, and age are crossed out; this is because the function you are creating will be generic for any four inputs of the correct types within your pipeline regardless of column name.
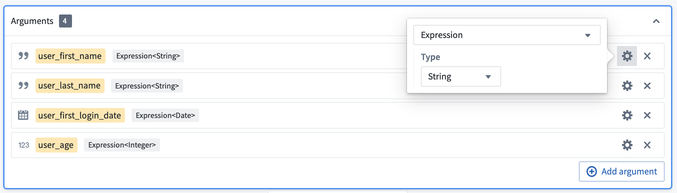
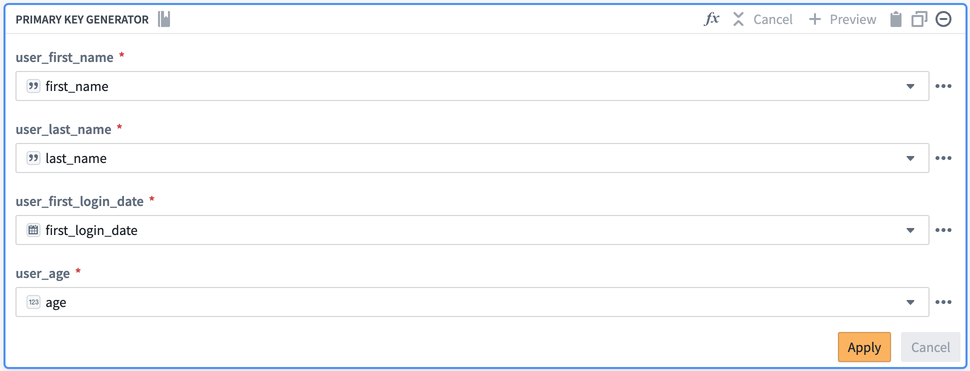
To define these inputs, select Add argument four times. Configure the argument names by clicking into the yellow box.
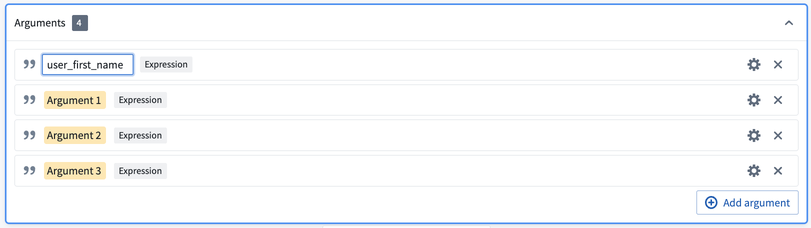
Then, configure the argument types by clicking into the gear icon to the right of each argument. Here, you want the first two arguments to be type Expression<String> to represent columns of String type, the third argument to be type Expression<Date>, and the last column to be type Expression<Integer>.
Now, you can add your new arguments to the two boards as before. However, they will now be available in the Parameters section instead of the Columns section.
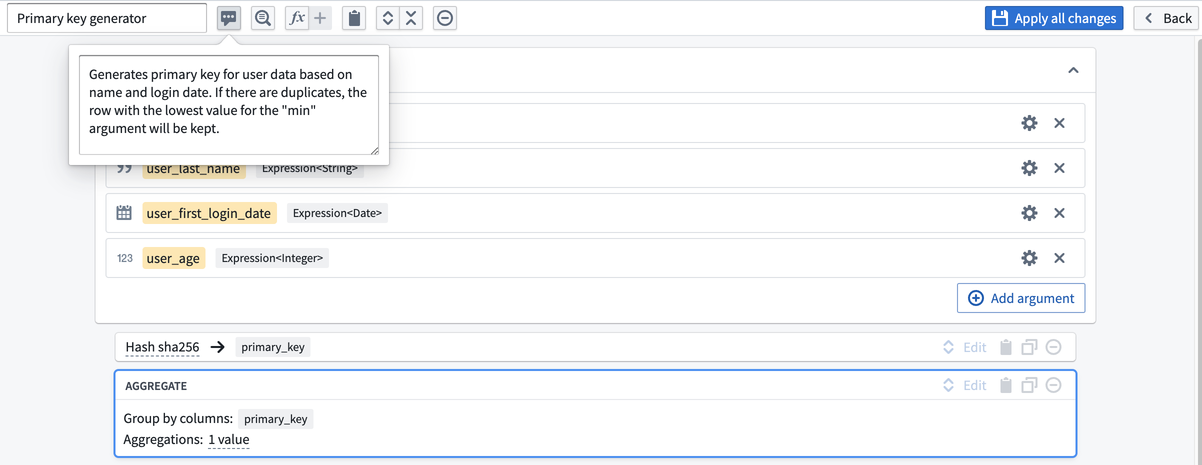
Once you have finished your configuration, name the function Primary key generator, give it an optional description, and select Apply all changes.
The new function is now available for use in any transform path. The next time you need to create a primary key with this pattern, you can search Primary key generator in the transform dropdown.
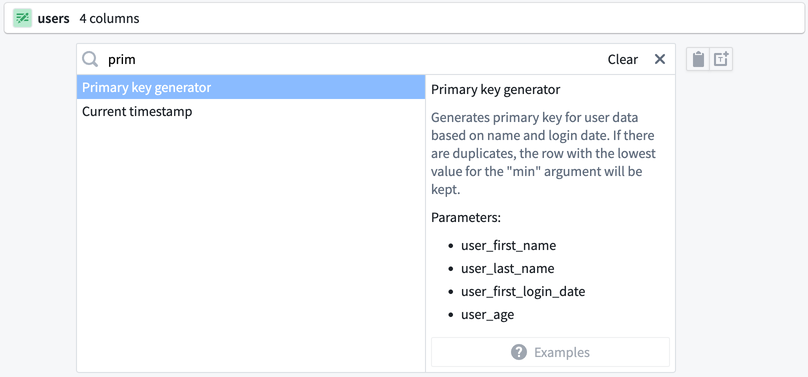
You can populate your custom function with the original columns: first_name, last_name, first_login_date, and age.
By populating the relevant column names into your custom function, you are producing the same result as if you had created the function with the same transforms in the path. However, by creating the custom function, you can save the function logic to reuse across your pipeline rather than recreating logic with separate transform boards.