- Capabilities
- Getting started
- Architecture center
- Platform updates
Set up a webhook
This tutorial guides you through how to set up webhooks to send HTTP requests to external systems.
Prerequisites
This tutorial will walk through creating a REST API source and a webhook associated with that source. If you have already created a source, you can skip ahead to the Create a webhook step.
If you are trying to connect to a system that is not accessible from Foundry's network, we recommend using a Foundry worker source with agent proxy egress policies. If the system can only be referenced by IP address and not hostname, use an agent proxy runtime.
Using an agent worker source for webhooks comes with additional complexity to configure and manage. In particular, we recommend provisioning a dedicated agent for webhooks running on an agent worker. Agents execute tasks in the order received; if bulk syncs and webhooks are executed on the same agent, short-running webhook tasks may end up queued behind long-running bulk syncs.
Ensure that you have a Project to manage permissions for the source you will create in this tutorial. If you have not yet created a Project, learn how in the Project documentation.
Tutorial
This tutorial assumes you will be using a REST API for a system available over the open Internet.
Some sources, including SAP, legacy Salesforce, and legacy magritte-rest-v2 use a more complex task configuration. For more information on configuring webhook tasks, see the webhooks reference.
Create a source
Start by navigating to Data Connection and selecting the Sources tab. Then, select New source and REST API.
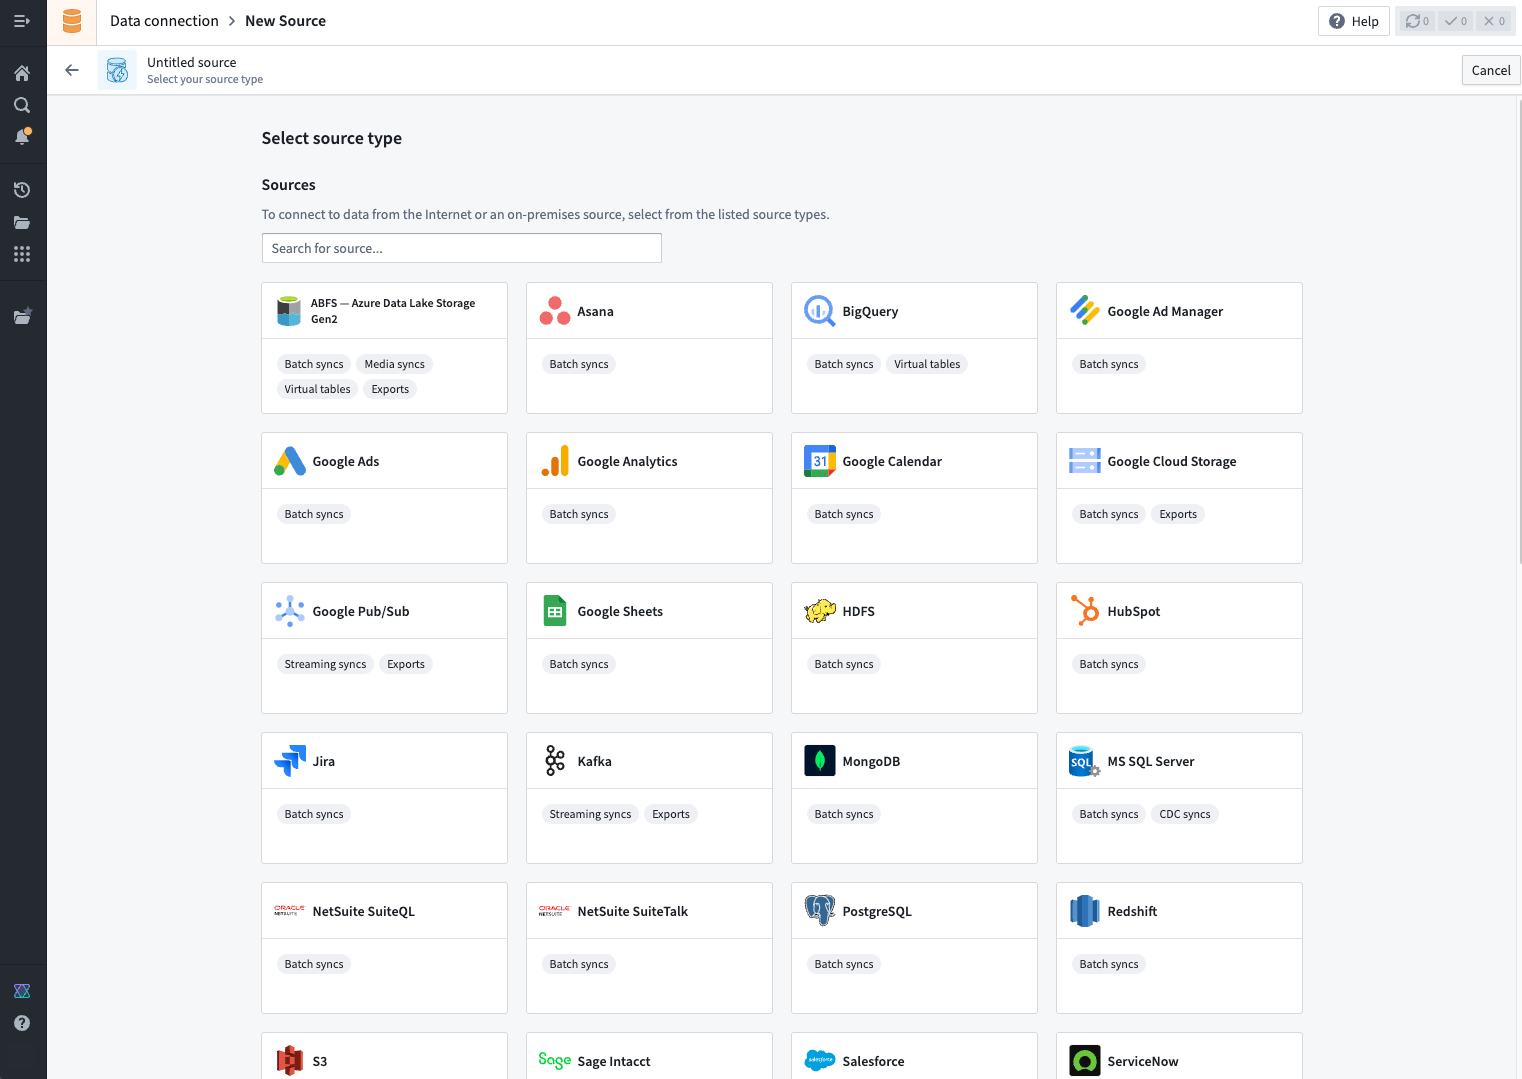
Use the source editor to fill in configuration details for the REST API to which you are connecting. More details on the REST API source type can be found in the source type reference.
The source is meant to contain the minimal set of secrets and connection details required to establish a connection. When configuring individual webhooks using this source, you will have an opportunity to add additional request details, including the relative path, query parameters, headers, and body content.
Other source types
Some other source types also support webhooks. For more details, review the reference page for the specific source type.
Create a webhook
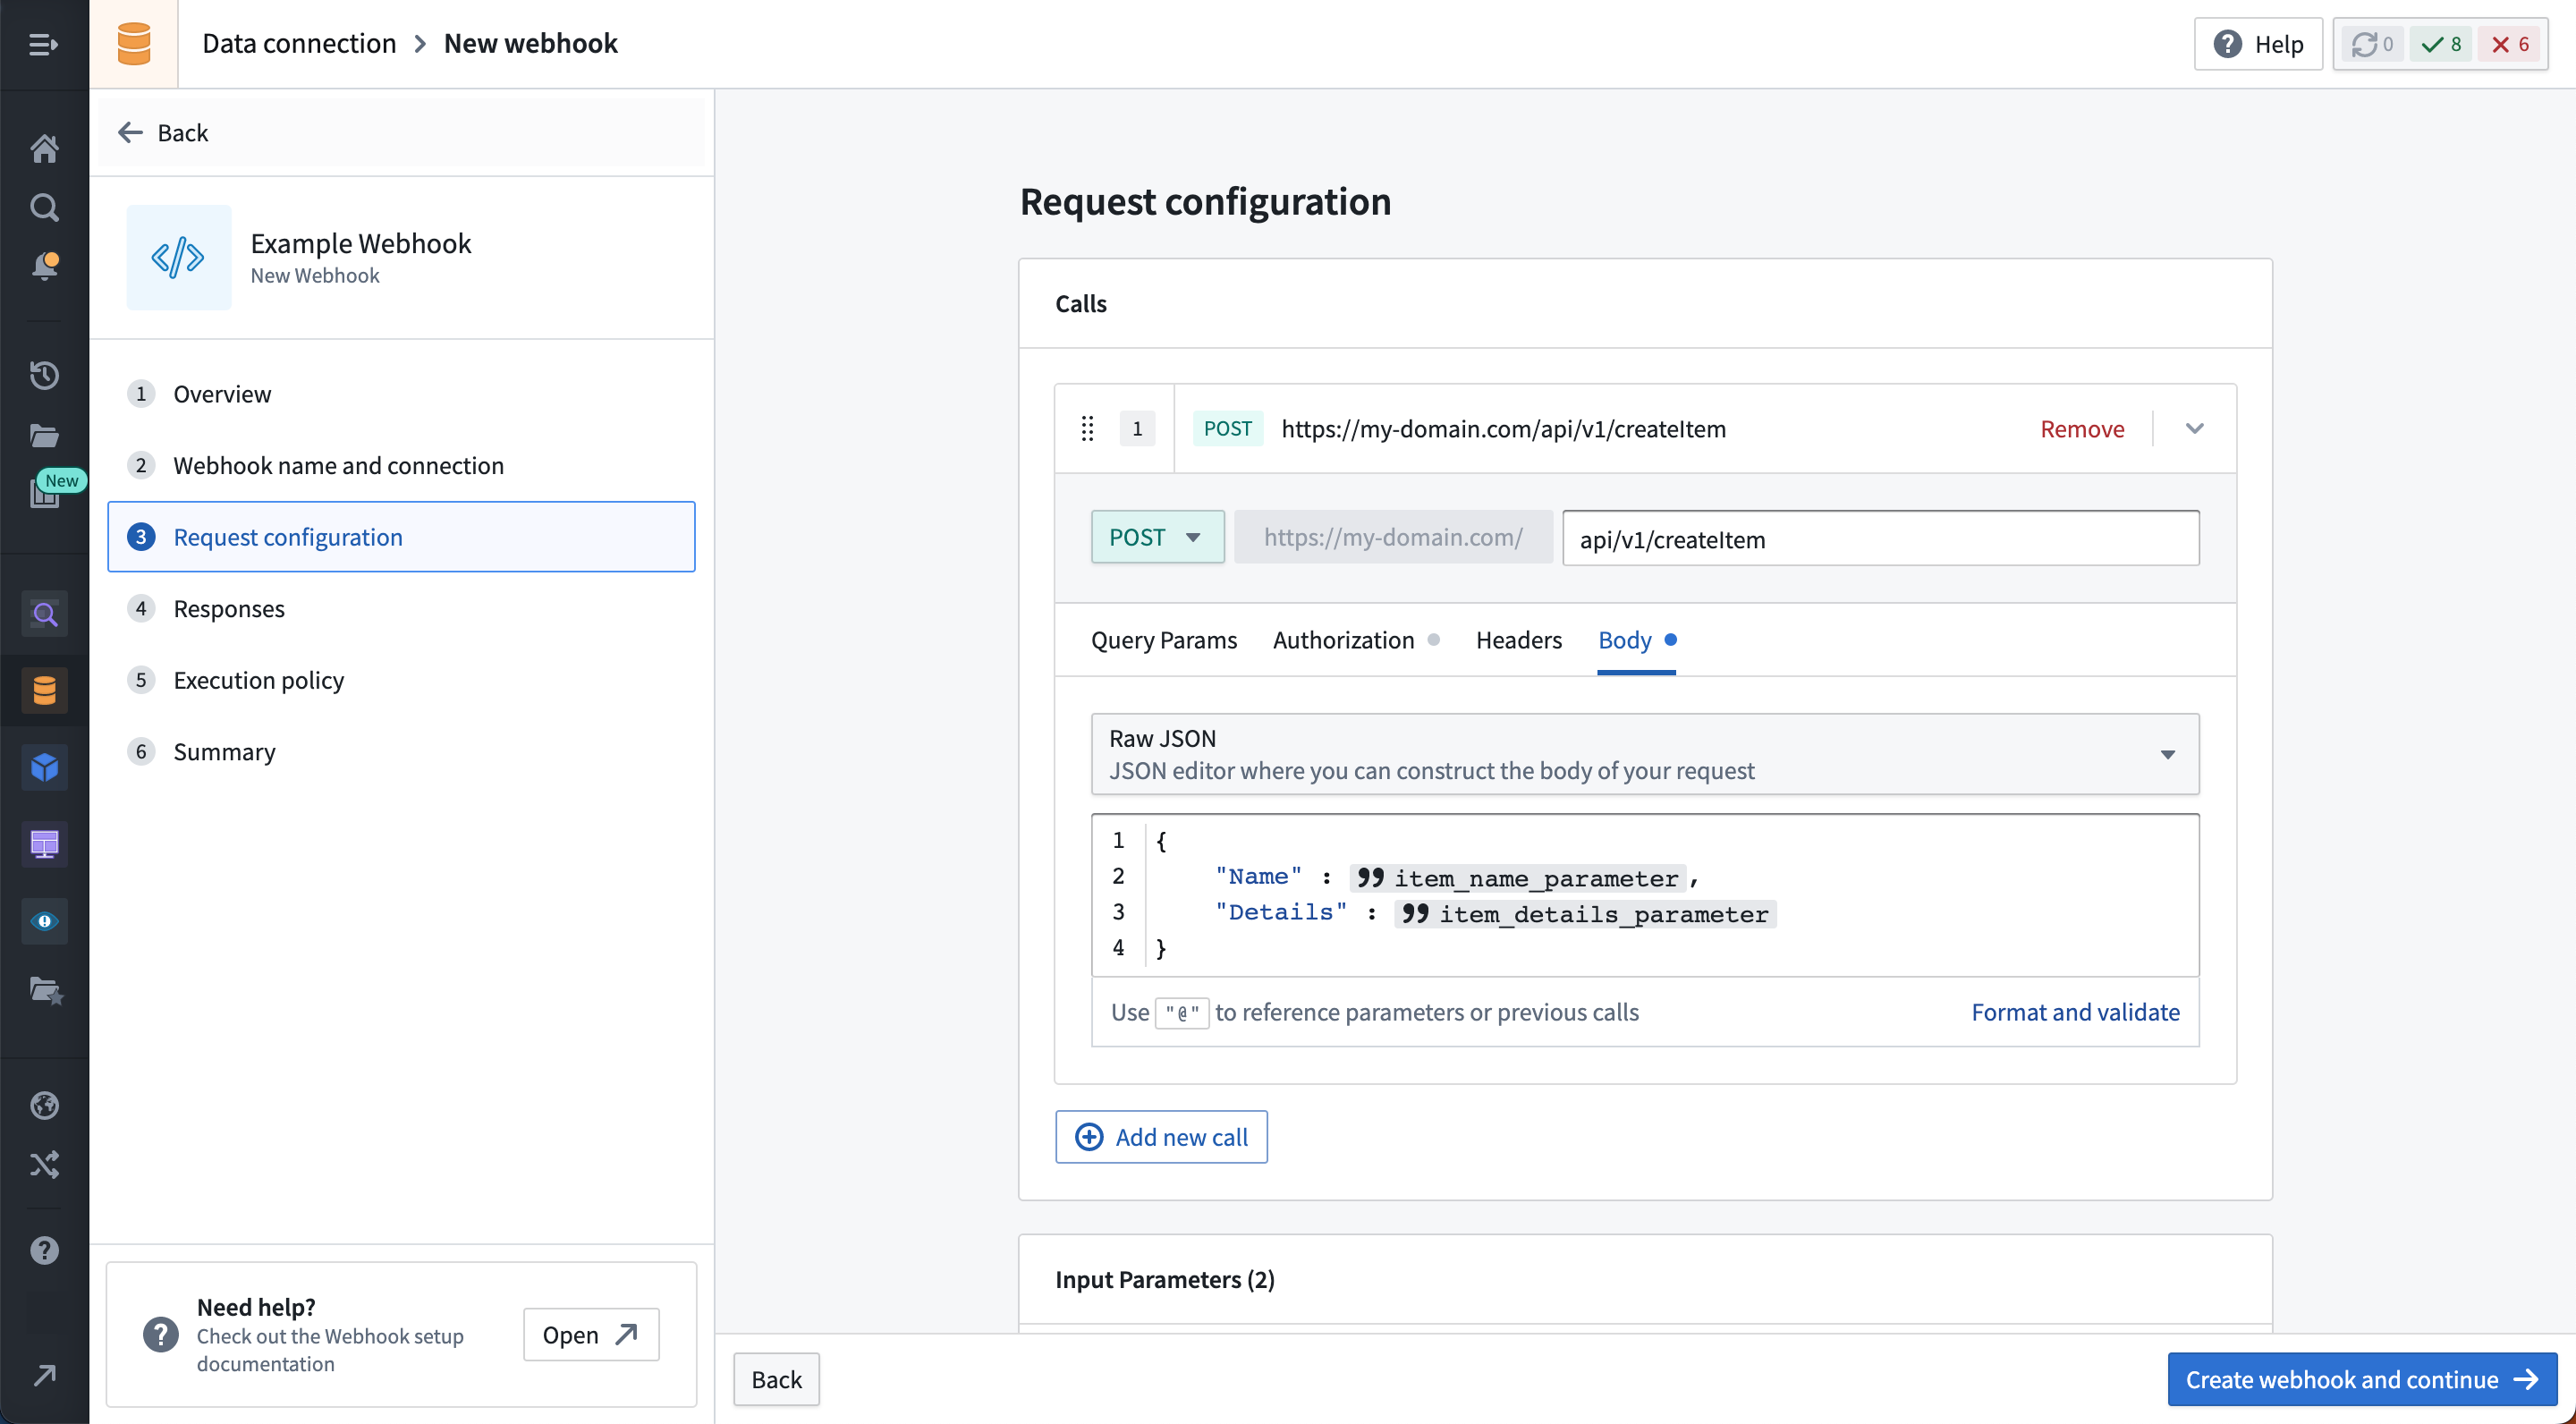
Once the source has been created, select the Webhooks tab and select New webhook.

Follow the steps in the New webhook wizard to create a webhook that makes an external request. The example below illustrates a POST request to the /api/v1/createItem endpoint on our example domain. The body is constructed as Raw JSON and, in this case, is configured to accept two string input parameters.
Duplicate a webhook
If you are looking to create a new webhook that has a similar configuration to an existing webhook (for example, two similar endpoints on the same API), you may choose to duplicate the existing webhook. To duplicate a webhook, open the Actions menu from the Webhooks tab of the source overview or use the Actions button on the webhook page, then select Duplicate.
Configuration options
- Enter a name for the webhook, and add a description if desired.
- Select the source you created in the previous step of the tutorial. If you landed in the wizard directly from a source page, the source will be pre-selected.
- Add any input parameters that you want to use in the external request.
- Populate any required parts of the request configuration. You can reference input parameters in the path, query params, headers, and body configuration sections.
- Optionally, set any Limits you want to apply to the webhook. Refer to the Limits reference for details.
- Click Create to complete creating the webhook.
Direct import from cURL commands
Alternatively, you can also create a request Call by directly importing a cURL command. To do this, choose the Import from cURL option and put your cURL command in the TextArea. If your cURL uses the supported options and relates to a domain already in Source, selecting Import cURL will create a new Call.
Test the webhook
After saving, you will be able to run a test request to see if your configuration is correct. This may be done at any time by using the Test Connection side panel.
After a test request is made, you may use the response to parse output parameters. For more information on output parameters, see the webhooks reference page.
Next steps
In this tutorial, you learned how to create a Source and create a Webhook associated with that Source. Here are some resources we recommend to learn more:
- View the Action types tutorial to learn how to configure a Webhook for use in end-user applications.
- Read the Webhooks reference to see the full details about options available for configuring Webhooks.