- Capabilities
- Getting started
- Architecture center
- Platform updates
Set up a source
A Foundry source represents a connection between Foundry and an external system. Some example Foundry source types include a Postgres database, an S3 bucket, a filesystem on a Linux server, an SAP instance, or a REST API over the Internet.
At a high level, below are the steps required to connect a source to Foundry. Note that Step 1 through Step 3 may require you to change or validate configurations within your existing architecture:
- Ensure there is a valid network connection between the source and Foundry.
- Provision valid credentials for Foundry to authenticate against the source.
- If the source will be executing compute on an agent worker, then ensure the agent has the appropriate drivers to access the external system.
- Finally, create the source in Data Connection.
Once you have this source connection established, you can configure syncs to bring specific sets of data into Foundry. Syncs can be entirely configured through the Data Connection UI, so the source setup is the final task that may require configurations to be updated in your organization's environment before you can access your data within Foundry.
Configure network access
To connect Foundry to an external system, first validate network paths:
- External systems hosted in the same network as and accepting inbound connections from Foundry requires a single valid network connection from Foundry to the external system. For cloud-hosted instances of Foundry, this is typically the case for cloud-based systems or SaaS services.
- External systems hosted in a separate network from Foundry must use an agent with two valid network paths: (1) from the agent host to the external system and (2) from the agent host to Foundry. For cloud-hosted instances of Foundry, a separate network usually means an on-premise network.
(Optional) Set up an agent and configure agent connectivity
You will need to set up an agent if the external system you are connecting to is hosted on a separate network from Foundry's network.
If you decide to use a Foundry worker source with agent proxy policies, the agent will be used as a networking proxy only and the compute will happen in Foundry. If you decide to use an agent worker source, the agent will serve both as networking proxy and a compute engine.
Ensure there is a connection between an agent set up within your network and the external system. The agent acts as a single point of validated entry to Foundry from your network and will handle the process of reading and sending data on to the Foundry instance. For each new system, you will only need to confirm there is a valid connection between the agent and the new system.
You will not need to establish direct network egress from the external system to Foundry, as traffic only flows from the agent to Foundry and from the agent to the external system. Learn more about the architecture of data connection.
The steps required to establish this connection will vary depending on your organizational network settings. Regardless of your specific setup, the goal is for the agent to have the ability to connect to the external system. This could involve the configuration of egress settings on the agent host, ingress settings on the external system, firewall rules across the network, proxy settings on the agent, adding source system certificates to the agent truststore, and so on.
If you need to configure proxy settings for the agent to reach the external system, you can do this through Data Connection.
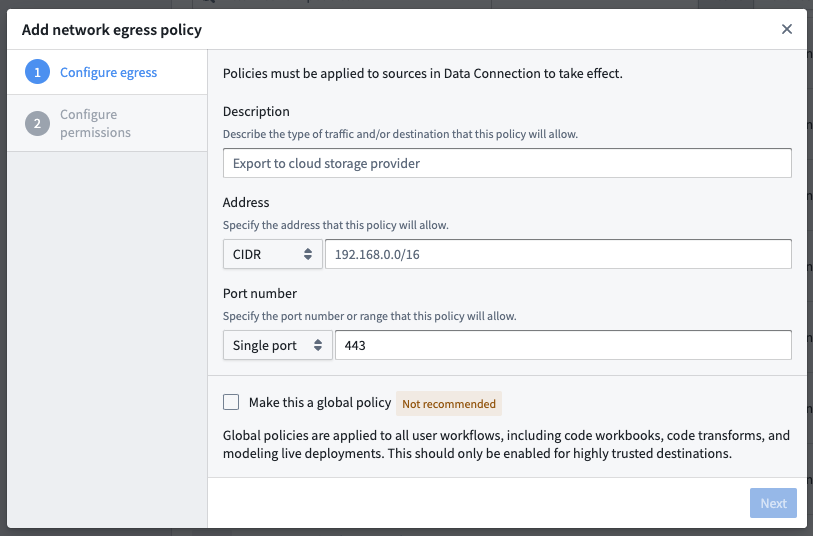
Configure a network policy
You must have the Information security officer role on your enrollment to configure network egress. If you do not have permissions to configure egress, contact your Palantir administrator to request access.
You can find the Information security officer role in the Enrollment permissions section of Control Panel. A user must have the Enrollment administrator role to view this section.
Foundry worker sources additionally require network egress policies to route the traffic.
To configure a network policy, navigate to the Network egress section in Control Panel. Pick a direct connection policy if the external system you are connecting to is hosted in the same network than Foundry. Pick an agent proxy egress policy if the source you are connecting to is in a separate network from Foundry.
If you are unable to view the Network egress section, contact your Palantir administrator to set up the network policy.
Provision credentials
For most cases, Foundry will require authorized credentials (such as a username and password) to access external systems. We recommend using a dedicated service account with credentials scoped specifically for the required access in Foundry.
Provision a service account for the source following any internal guidelines and processes that your organization has for establishing service accounts. Note the credentials before proceeding to the next step.
Create the source in Data Connection
Once the above steps are done, you can proceed with creating the source in Data Connection:
- After logging in, navigate to Data Connection using the sidebar.
- Select the Sources tab.
- Select New source in the top-right.
- Select the source type corresponding to your data source.
- Select Foundry worker or agent worker, then select Continue in the bottom right.
Save the source in a Project
Next, name your source and choose a Project to place it in. We generally recommend creating a new Project for each source, as this provides the most natural way to permission datasets derived from this source.
You can read more about source permission best practices or consult the full guidance for how to structure data pipelines end-to-end in Foundry.
Select Create source and continue in the bottom-right.
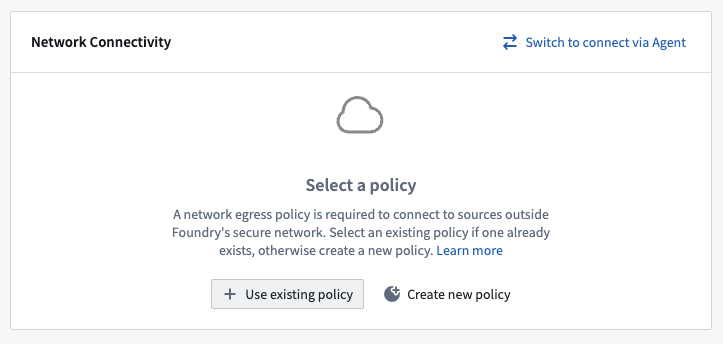
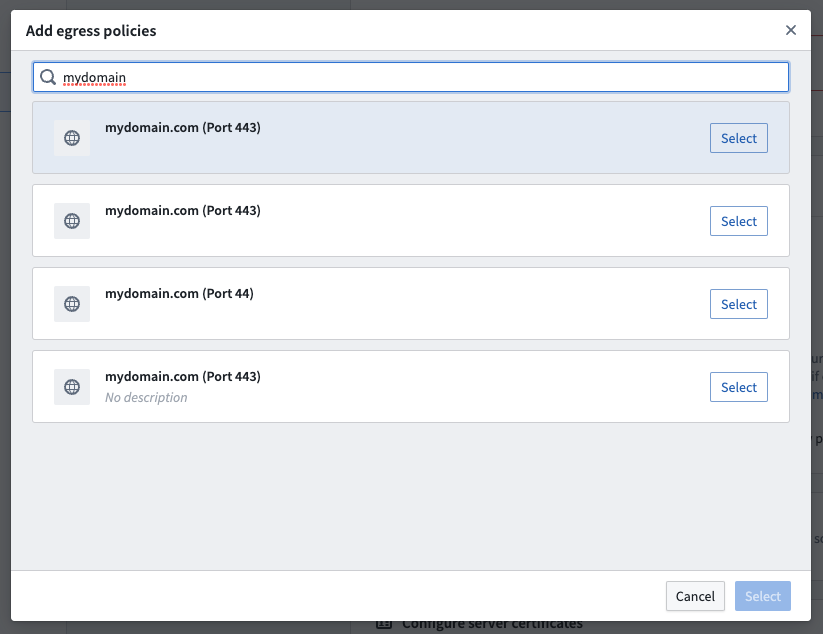
Choose your network policy [Foundry worker]
On the next setup page, select the network policy you configured earlier by choosing Use existing policy and searching for the policy name.
Configure source
Add details about how to connect to your source. These will depend on the source type you are using and typically consist of basic credentials such as connection URLs, cloud provider regions, and so on.
(Optional) Add JDBC drivers
JDBC sources may require you to uplod JDBC drivers, then specifying which Java class from the driver should be used.
(Optional) Add certificates
External systems might require certificates to ensure the connection can be trusted. This would occur for the following:
- Systems using TLS with self-signed certificates, for which you will need to add server certificates.
- Systems using mTLS which require the Foundry client to prove its identity with a client certificate.
To understand if you should add server or client certificates, review our FAQ.
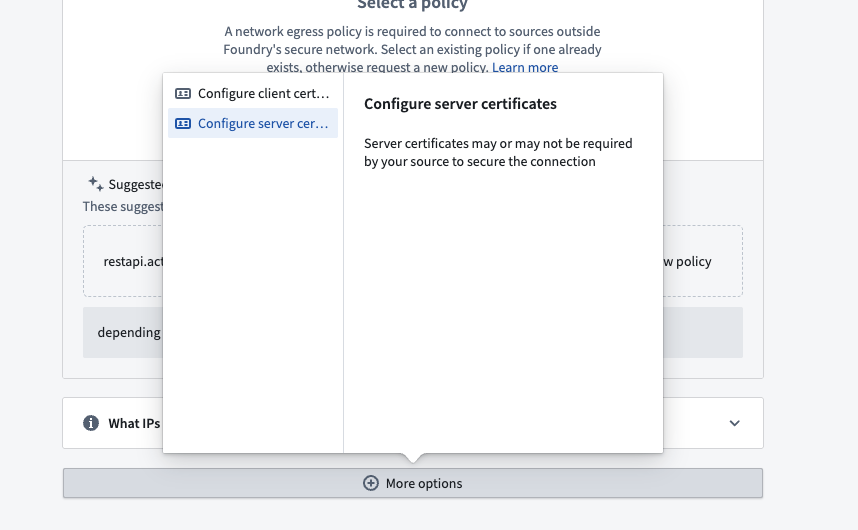
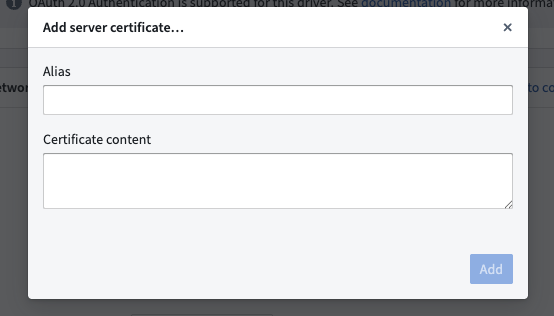
For Foundry worker connections, add certificates on to the source itself using the following steps:
- At the bottom of the Connection details page, select More options.
- Choose Configure server certificates or Configure client certificates and private key.
- Provide an alias, and paste the certificate.
The certificate should be added as a string similar to the below example, including newlines but without a trailing newline character. The certificate shown below is the public certificate for https://palantir.com. Note that you cannot enter a certificate chain; you must enter each certificate separately.
-----BEGIN CERTIFICATE-----
MIIGXjCCBUagAwIBAgIQASByQ6gv8Z6X7wEqsyBb1DANBgkqhkiG9w0BAQsFADBY
MQswCQYDVQQGEwJCRTEZMBcGA1UEChMQR2xvYmFsU2lnbiBudi1zYTEuMCwGA1UE
AxMlR2xvYmFsU2lnbiBBdGxhcyBSMyBEViBUTFMgQ0EgMjAyNCBRMjAeFw0yNDA2
MTcxNjUwMTVaFw0yNTA3MTkxNjUwMTRaMBkxFzAVBgNVBAMMDioucGFsYW50aXIu
Y29tMIIBIjANBgkqhkiG9w0BAQEFAAOCAQ8AMIIBCgKCAQEAvBalUG3JFYaSiRO2
enRnEwdeGUgtal9isJfB1++LxcPwo/DP2dncK+ur7URID0TVWOqu+4vXE2mmC9jz
Kx0o/URrMoz70i6qF6/Oyq6CuOHjZINiAN0ovNBBEPNGbSVD3Xq/eWgI7PNQ8hfI
9BJ/3WVA17oSG3zEXiWP3+CiL3Wm1Gn38oOt4URBMA0hgLqyOoU3ooqYIK8Fz2K/
OxAJvq45z2lonMZFFzj5thO5dBBch26mNAacO4MvI9mhUrMZtYvGBRZoXrph4EmF
TJDo2UTYiST0Tq6ibNW+NTuv66DrqFvzOpZybNuZsS6VrisYQ4huPN9jVz7RNFhJ
aeJvbQIDAQABo4IDYTCCA10wGQYDVR0RBBIwEIIOKi5wYWxhbnRpci5jb20wDgYD
VR0PAQH/BAQDAgWgMB0GA1UdJQQWMBQGCCsGAQUFBwMBBggrBgEFBQcDAjAdBgNV
HQ4EFgQUuAbgKrz0fIAXR1I/89IpUMN57AgwVwYDVR0gBFAwTjAIBgZngQwBAgEw
QgYKKwYBBAGgMgoBAzA0MDIGCCsGAQUFBwIBFiZodHRwczovL3d3dy5nbG9iYWxz
aWduLmNvbS9yZXBvc2l0b3J5LzAMBgNVHRMBAf8EAjAAMIGeBggrBgEFBQcBAQSB
kTCBjjBABggrBgEFBQcwAYY0aHR0cDovL29jc3AuZ2xvYmFsc2lnbi5jb20vY2Ev
Z3NhdGxhc3IzZHZ0bHNjYTIwMjRxMjBKBggrBgEFBQcwAoY+aHR0cDovL3NlY3Vy
ZS5nbG9iYWxzaWduLmNvbS9jYWNlcnQvZ3NhdGxhc3IzZHZ0bHNjYTIwMjRxMi5j
cnQwHwYDVR0jBBgwFoAUrw0C0MMbnlj47zdiLecDXZ5BSoowSAYDVR0fBEEwPzA9
oDugOYY3aHR0cDovL2NybC5nbG9iYWxzaWduLmNvbS9jYS9nc2F0bGFzcjNkdnRs
c2NhMjAyNHEyLmNybDCCAX0GCisGAQQB1nkCBAIEggFtBIIBaQFnAHUA5tIxY0B3
jMEQQQbXcbnOwdJA9paEhvu6hzId/R43jlAAAAGQJxs/FAAABAMARjBEAiATvomb
hMrUty8Vj703fTBSzY5qDxEMI473IigiGIiXugIgbj4/j24jloGdVoedM3jb6DFw
yAXkuZD3SMHBLsEvP9gAdgDd3Mo0ldfhFgXnlTL6x5/4PRxQ39sAOhQSdgosrLvI
KgAAAZAnGz7qAAAEAwBHMEUCIAHXbm9F2rwyxD36aHoGZRrnDtgg9UDRy5UtHK6D
OrmKAiEAjfomH4CGUrkBbwD8pzt9BbC6u6gPPveYiURxFIq//RUAdgB9WR4S4Xgq
exxhZ3xe/fjQh1wUoE6VnrkDL9kOjC55uAAAAZAnG0C6AAAEAwBHMEUCIQDDOg9s
KZqzbCu0mNBQMRAv6/2HkuLjZSGMxjq/F0R1/wIgKMHBSsNgeVED+LpTcIBYgp1q
SXgbwSizE6OD+1Ewol0wDQYJKoZIhvcNAQELBQADggEBAAr/tnc9dtTfwrczP7Ok
1+tLKmFRss4/1KQgLY8Tyy45Pag53ikn2n3tSPG1OpRTSmfPhPs9/UQRtMf7f2Gk
ObSXDVpPArtFBFDfZug+j22gVSYQr6zgFJu4Y9QD1GGtICqkmTScubfnjwdffTv6
5oNY4LbVGp5yctAd80OFUXspy+oVGsvv61a1pFO+s/NXleSrqDGL1oWcFW5Uj8GH
jnTM+Lt/HupqZ/ThVSkjMOug+hB875Yf8mWvadKYBX0Ga2s51cp8CI49FRswziY6
3oXPKfHHQybpIKhGosuSyzY8pL8UofHNp8gicAV80Vj6Mw+L8gWaAkCR6YnzQIyJ
9lc=
-----END CERTIFICATE-----
For client certificates, you can also add an optional private key in a PKCS#8 or RSA format. These are similar to the certificate format, but with a -----BEGIN PRIVATE KEY----- (PKCS#8) or -----BEGIN RSA PRIVATE KEY----- (RSA) header.
Add credentials
Add the credentials you provisioned previously to allow the source to connect to your data.
Save and continue
Select Save in the bottom-right to complete setting up your source. Once your source is fully set up, you can proceed to set up a sync to bring data into Foundry.
Troubleshooting
Preview the source by selecting Preview in the right panel to confirm the connection has been successfully established. If the source does not work properly, refer to our sync troubleshooting documentation. If you are using an agent worker, review our agent troubleshooting documentation as well.
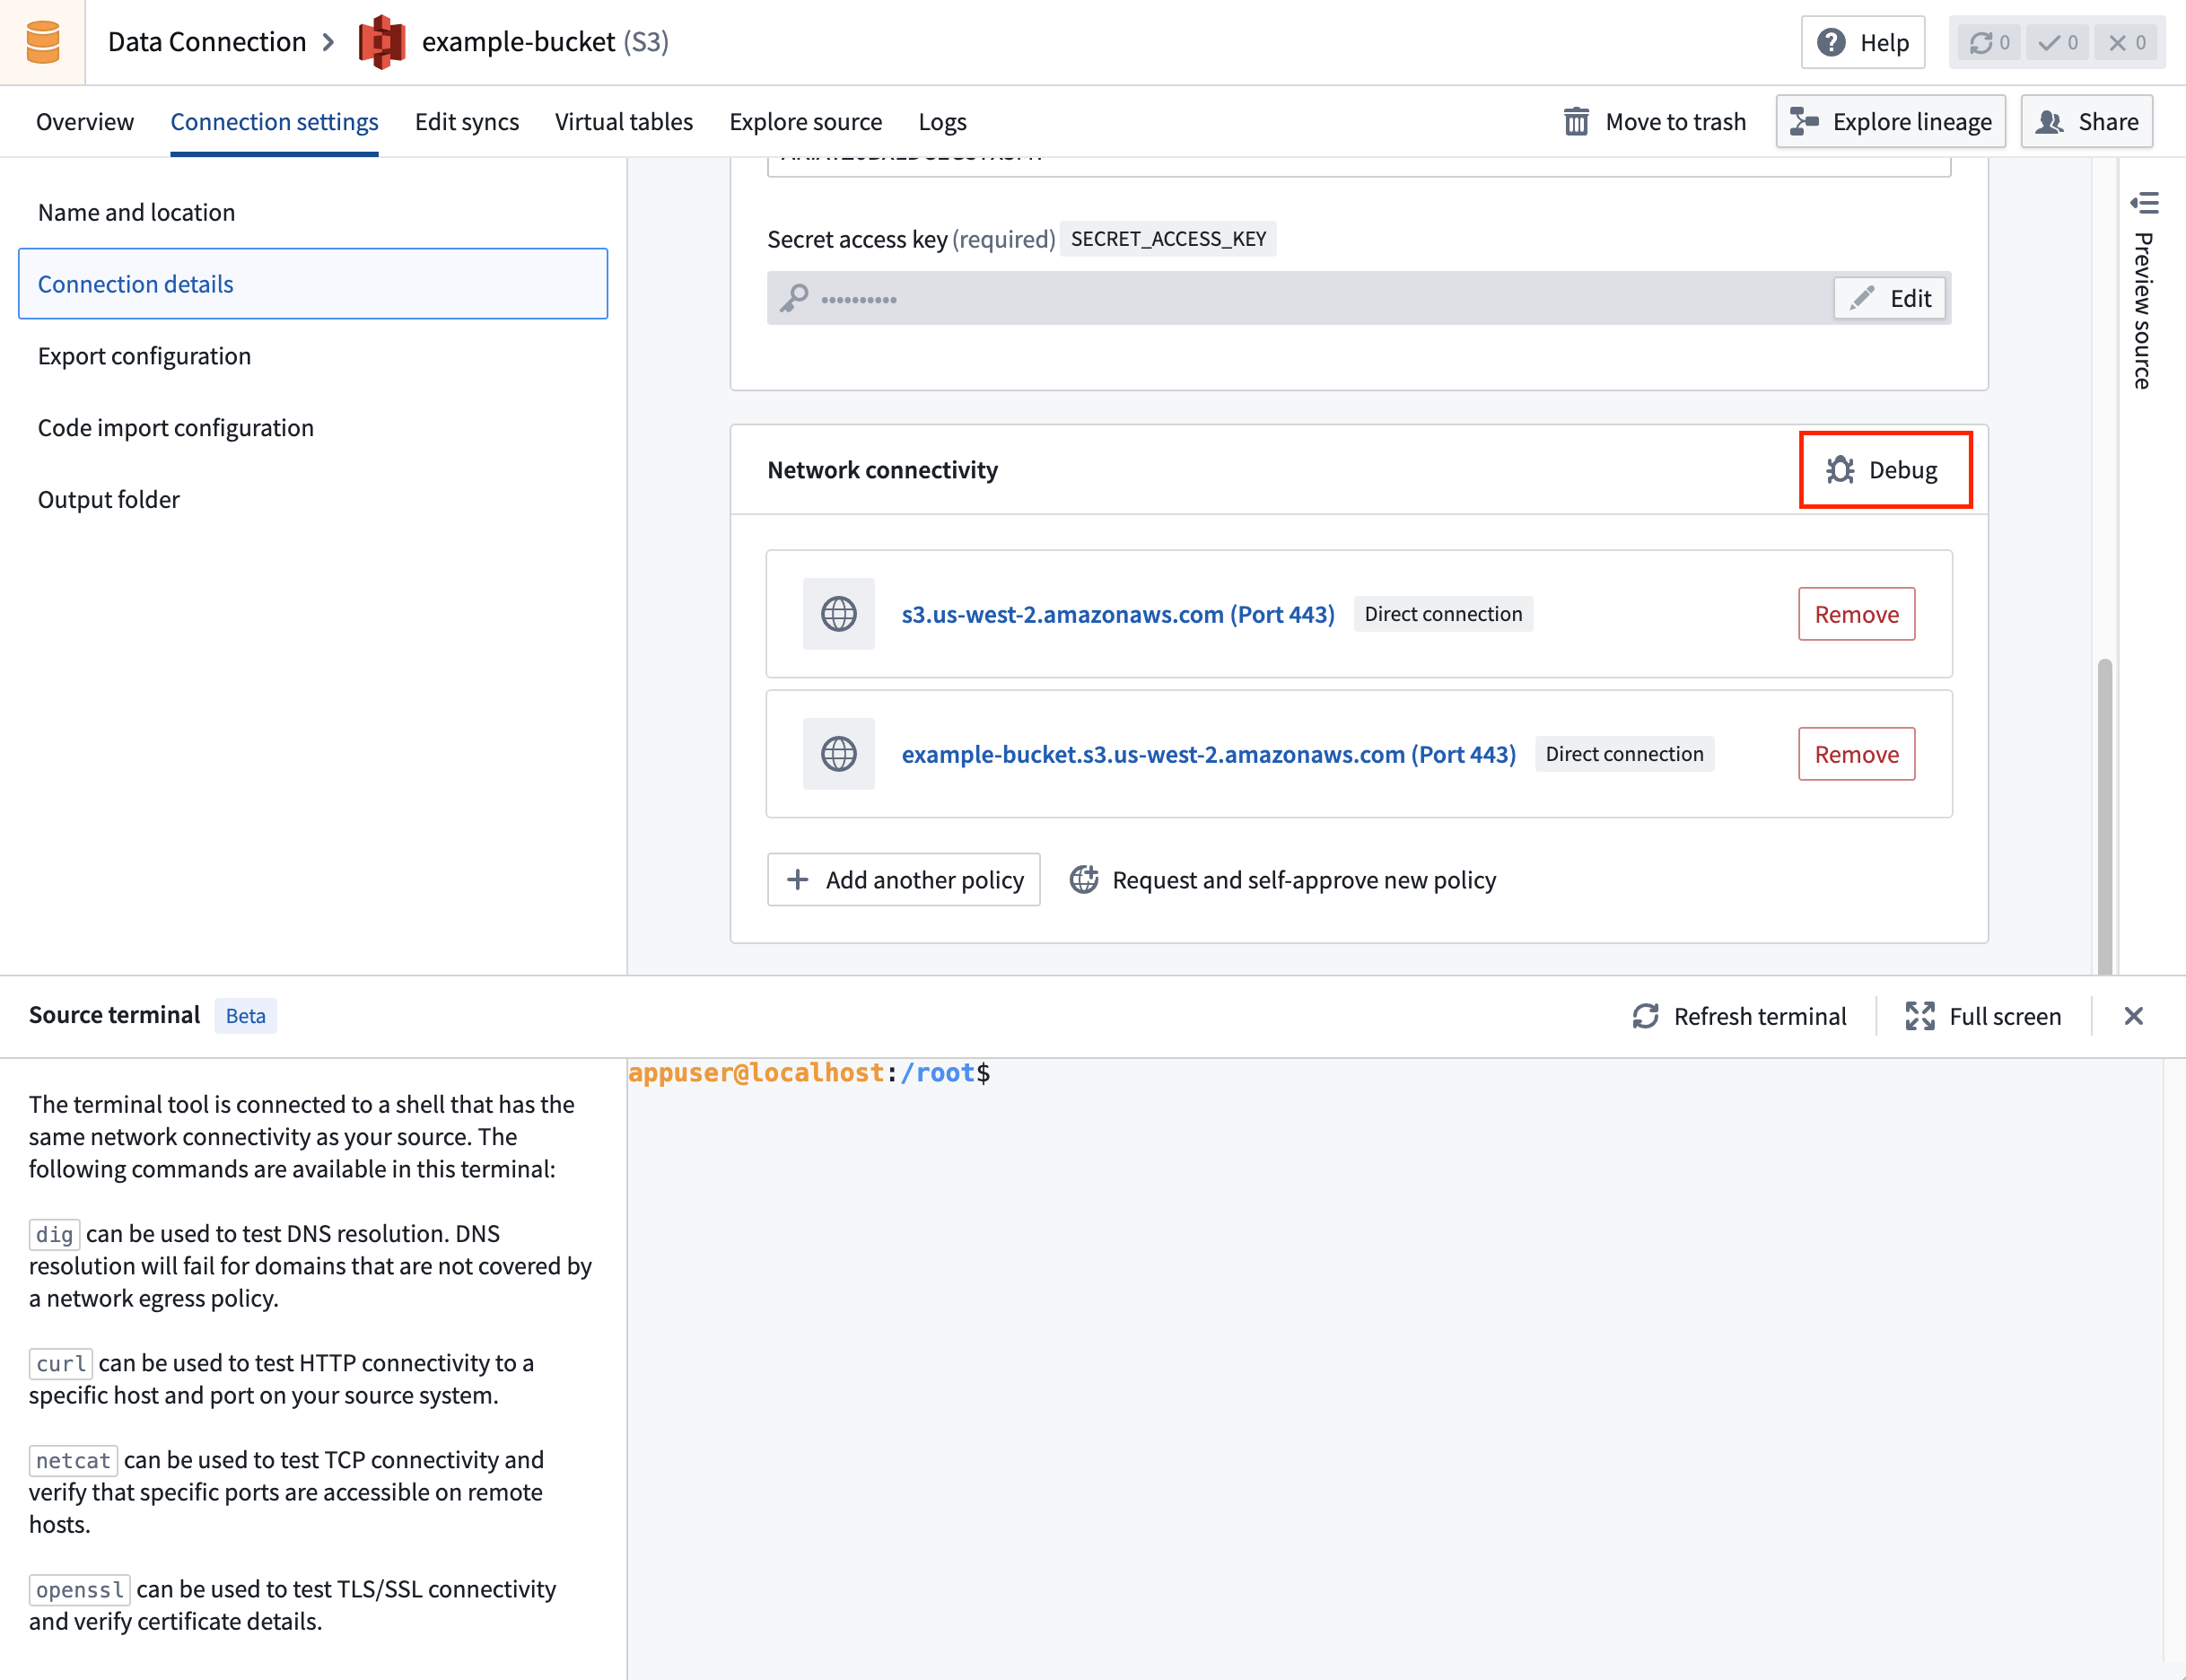
Source terminal
A terminal, using the same connectivity settings as your source, is available to help you test network connectivity with your external systems using commands like dig, curl, netcat and openssl.
To open the terminal select Debug in the Network Connectivity panel under Connection details.
dig
The dig command tests DNS resolution, and can be used to check whether the hostname of your source is being correctly resolved.
For example, to test if DNS can be resolved to palantir.com, you can use the command dig palantir.com. If you see an ANSWER SECTION in the response, the DNS resolution succeeded.
The following is an example of a successful dig command:
appuser@localhost:/root$ dig palantir.com

; <<>> DiG 9.18.30-0ubuntu0.20.04.2-Ubuntu <<>> palantir.com
;; global options: +cmd
;; Got answer:
;; ->>HEADER<<- opcode: QUERY, status: NOERROR, id: 13561
;; flags: qr rd ra; QUERY: 1, ANSWER: 4, AUTHORITY: 0, ADDITIONAL: 0

;; QUESTION SECTION:
;palantir.com.                  IN      A

;; ANSWER SECTION:
palantir.com.           300     IN      A       151.101.129.170
palantir.com.           300     IN      A       151.101.1.170
palantir.com.           300     IN      A       151.101.193.170
palantir.com.           300     IN      A       151.101.65.170

;; Query time: 99 msec
;; SERVER: 10.100.0.53#53(10.100.0.53) (UDP)
;; WHEN: Fri Oct 31 14:56:58 UTC 2025
;; MSG SIZE  rcvd: 142
curl
The curl command tests HTTP connectivity to a specific host and port on the external system. If the port is not specified, the port will be inferred from the protocol (for example, 80 for HTTP or 443 for HTTPS).
For example, to test if connectivity can be established to https://palantir.com, you can use the command curl https://palantir.com.
The following is an example of a successful curl command:
appuser@localhost:/root$ curl https://palantir.com
<HTML><HEAD><meta http-equiv="content-type" content="text/html;charset=utf-8">
<TITLE>301 Moved</TITLE></HEAD><BODY>
<H1>301 Moved</H1>
The document has moved
<A HREF="https://www.palantir.com/">here</A>.
</BODY></HTML>
If the curl command is hanging, try setting a timeout (in seconds) using the --connect-timeout flag:
Copied!1curl --connect-timeout 10 https://palantir.com
openssl
The openssl command can help test SSL/TLS connectivity and verify certificates for HTTPS connections.
For example, to test if an SSL/TLS connection can be established to palantir.com on port 443, you can use the command openssl s_client -connect palantir.com:443 -servername palantir.com.
The following is an example of a successful openssl command:
appuser@localhost:/root$ openssl s_client -connect palantir.com:443 -servername palantir.com
CONNECTED(00000003)
depth=2 C = BE, O = GlobalSign nv-sa, OU = Root CA, CN = GlobalSign Root CA
verify return:1
depth=1 C = BE, O = GlobalSign nv-sa, CN = GlobalSign Atlas R3 DV TLS CA 2024 Q2
verify return:1
depth=0 CN = *.palantir.com
verify return:1
---
Certificate chain
 0 s:CN = *.palantir.com
   i:C = BE, O = GlobalSign nv-sa, CN = GlobalSign Atlas R3 DV TLS CA 2024 Q2
   a:PKEY: rsaEncryption, 2048 (bit); sigalg: RSA-SHA256
   v:NotBefore: Jun 17 16:50:15 2024 GMT; NotAfter: Jul 19 16:50:14 2025 GMT
---
SSL handshake has read 3654 bytes and written 442 bytes
---
If the connection is successful, you will see certificate details and a message indicating the SSL handshake completed. If the command hangs or shows certificate verification errors, there may be network or certificate configuration issues.
Certificates configured in the UI are not directly included in the terminal environment. To use them in the terminal, you will first need to add them manually. This can be done inline or with nano/vim.
Copied!1 2 3 4 5echo "-----BEGIN CERTIFICATE----- MIIGXjCCBUagAwIBAgIQASByQ6gv8Z6X7wEqsyBb1DANBgkqhkiG9w0BAQsFADBY ... 9lc= -----END CERTIFICATE-----" > server-cert.pem
To test with the custom certificates, such as self-signed certificates or mTLS, you can specify the certificate files as following:
Copied!1 2 3 4 5openssl s_client -connect my-server.example.com:443 \ -servername my-server.example.com \ -CAfile server-cert.pem \ -cert client-cert.pem \ -key client-key.pem
If these commands are successful and your connection is still not working, it is likely that some certificates or source credentials are configured incorrectly.