Push data into a stream
Most data ingestion in Foundry focuses on pulling data from a source system and syncing it into a dataset or stream.
With streams, Foundry supports push-based ingestion to support event-based workflows.
Push-based record ingestion in Foundry follows the same principles as typical REST services. Through a series of REST endpoints, we expose a push-based API that can consume records and write them into streams and datasets. The following high-level information is required to push into a stream:
- The dataset resource identifier of the stream.
- The name of the branch.
- A token to authenticate the request.
If you already have a Foundry source configured for your data, you may want to connect with that source instead. Learn how to set up a streaming sync with an existing source, or learn how to set up a Kafka source.
If you need to receive inbound webhooks from systems that cannot properly authenticate with Foundry or conform to standard stream schemas, consider using listeners.
Below, we will discuss the steps required to push data into a stream:
- Set up a new stream.
- Push records into the stream.
- Share the stream.
- Test the stream.
Part 1. Initial setup
First, begin the stream creation workflow.
- Log into Foundry.
- Navigate to a Project.
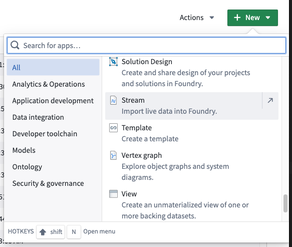
- Select + New in the top right corner.
- Scroll down and select Stream.
Next, we must define the schema, throughput, and keys for the stream.
- Schema defines the structure and types of your stream data.
- Throughput represents the data processing rate and will impact the number of partitions used in your stream. Learn more in our throughput and partitions documentation.
- Keys are used to guarantee ordering for unique IDs when using multiple partitions. Learn more in our steaming keys documentation.
For this tutorial, we will create a simple single partition stream.
- Set the schema to
sensor_id: String,temperature: Double, andcreated_at: Timestamp. - Set the throughput to
Normal.
Then, configure your stream.
- Automatically generate schema from an existing JSON blob by selecting the
Generate from JSON sample...button and pasting in your existing JSON blob. - Set up change data capture if you are streaming real-time updates from a relational database.
- Consider the parallelism requirements of your stream to determine if you need higher throughput settings. Review our partitions documentation for more information.
- Consider setting a key for ordering guarantees when using multiple partitions.
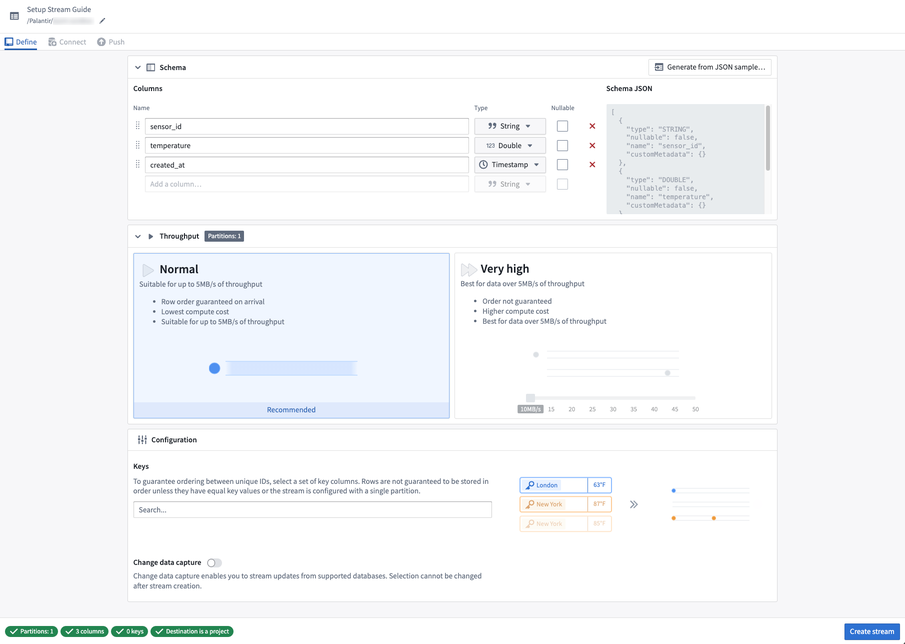
All validation errors must be addressed before selecting Create stream. Hover over the tooltips on the bottom of the page for more details about the error.
Select the Create stream button in the bottom right corner to navigate to the Connect page. Here, you can specify how to connect to the streaming data.
Part 2. Push records into the stream
We are now ready to connect our stream.
-
For push-based ingestion, select one of the options under the Connect via API section.
Any language or technology that can make HTTP requests can be used to push records. We provide examples for cURL, Python, JavaScript via Node, and Java. If you want to ingest data via a Foundry sync instead of pushing the data into Foundry, review how to set up a streaming sync.
For this example, we will select cURL.
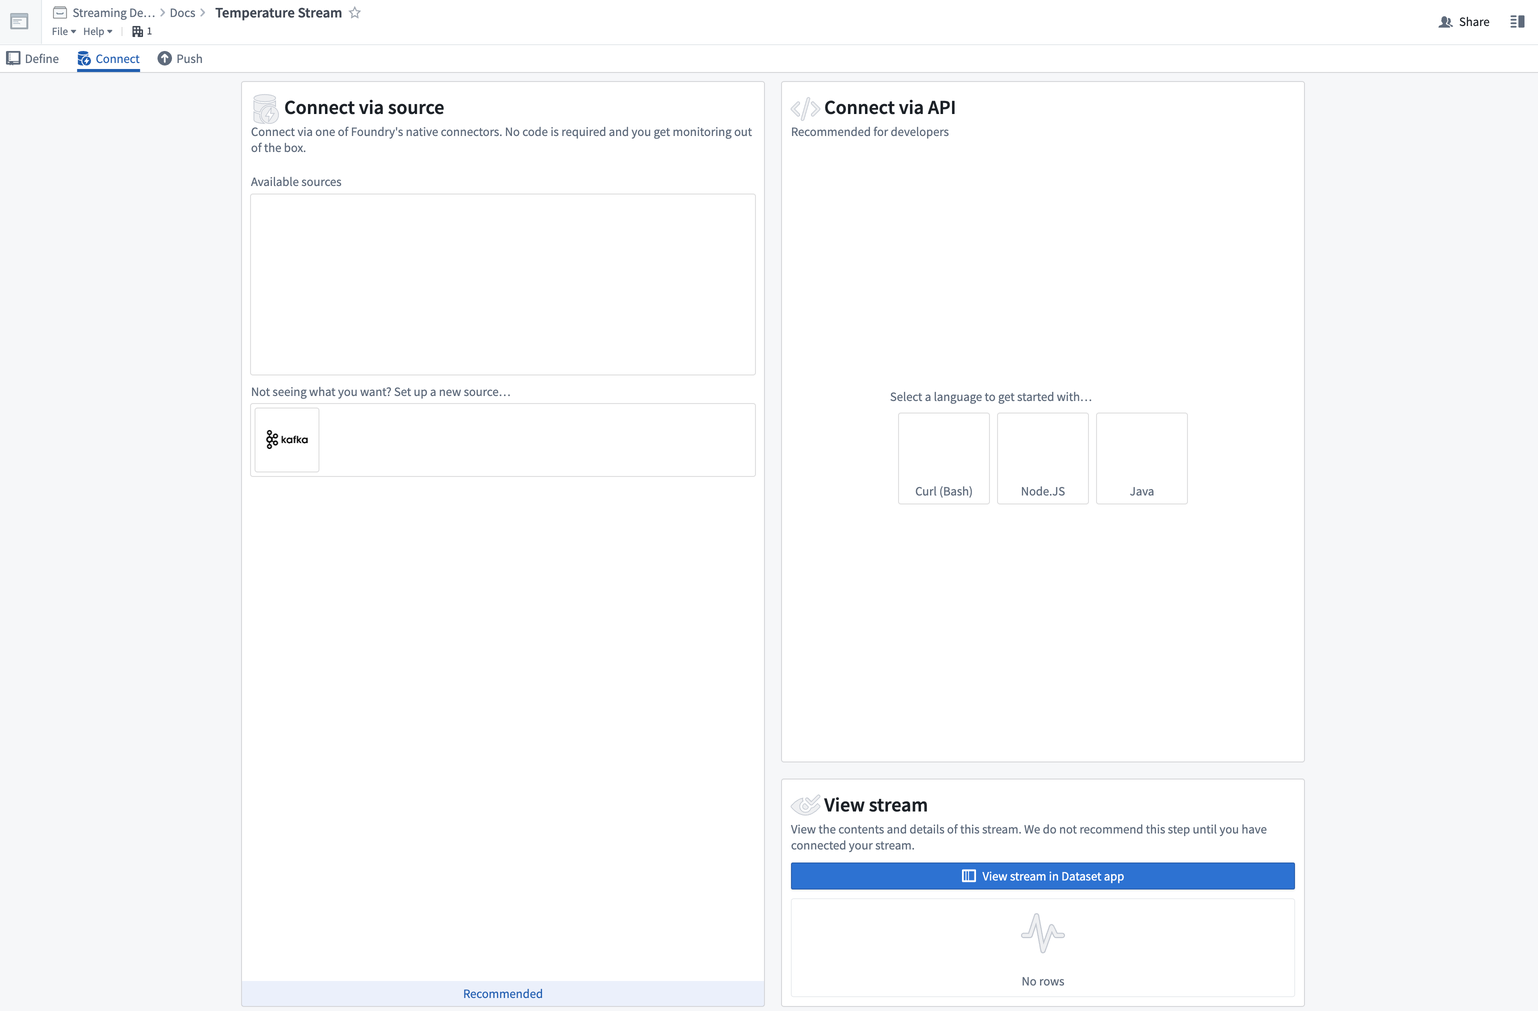
You will then land on the Push data workflow page.
-
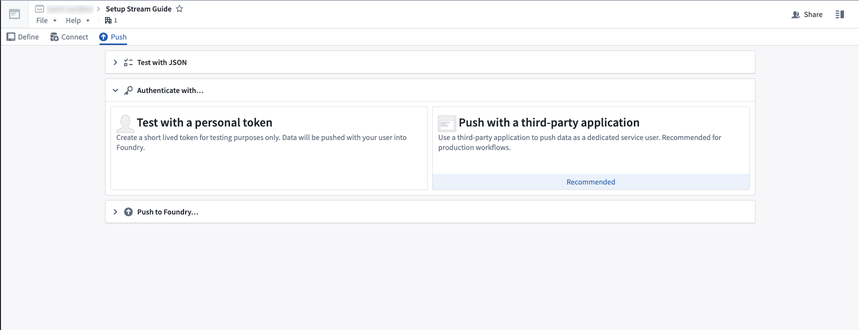
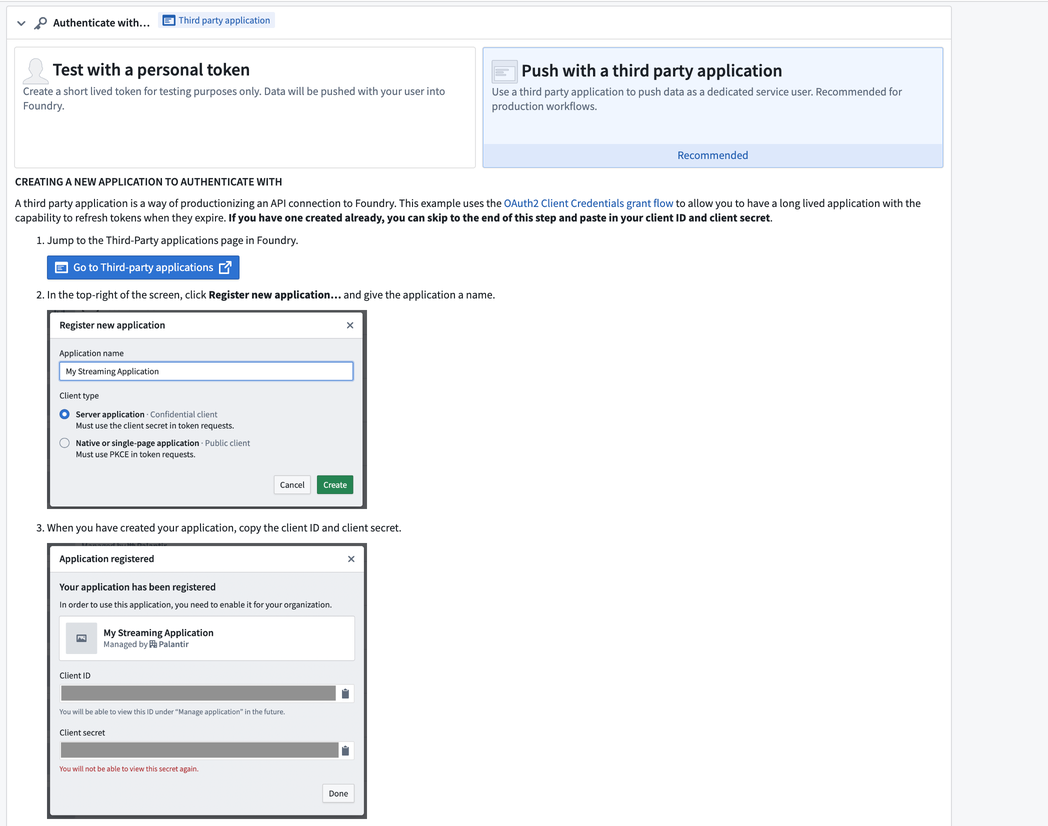
Next, select an authentication mechanism. We support two ways to authenticate to the request:
- Push with a third-party application (recommended): This method uses an OAuth2 workflow to create a secure token that can be used to push records into your stream.
- Push with a personal token: This method uses a user-generated token for testing purposes only.
-
For this tutorial, choose the Push with a third-party application method. Follow the steps on the screen to set up a third-party application and create your client secret.
-
Now, select Go to third-party applications to open the third-party application management page in your Foundry platform settings.
-
Select Register new application at the top right of your screen.

-
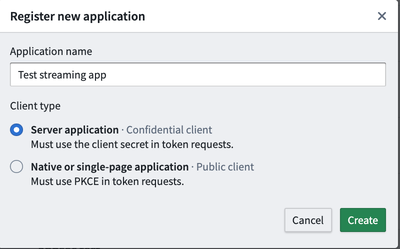
Choose a name, and set the client type to Server application.
-
Select Create, and you will be presented with your client ID and secret.
The client secret will not be accessible once you leave this page. Be sure to store it in a secure location.
-
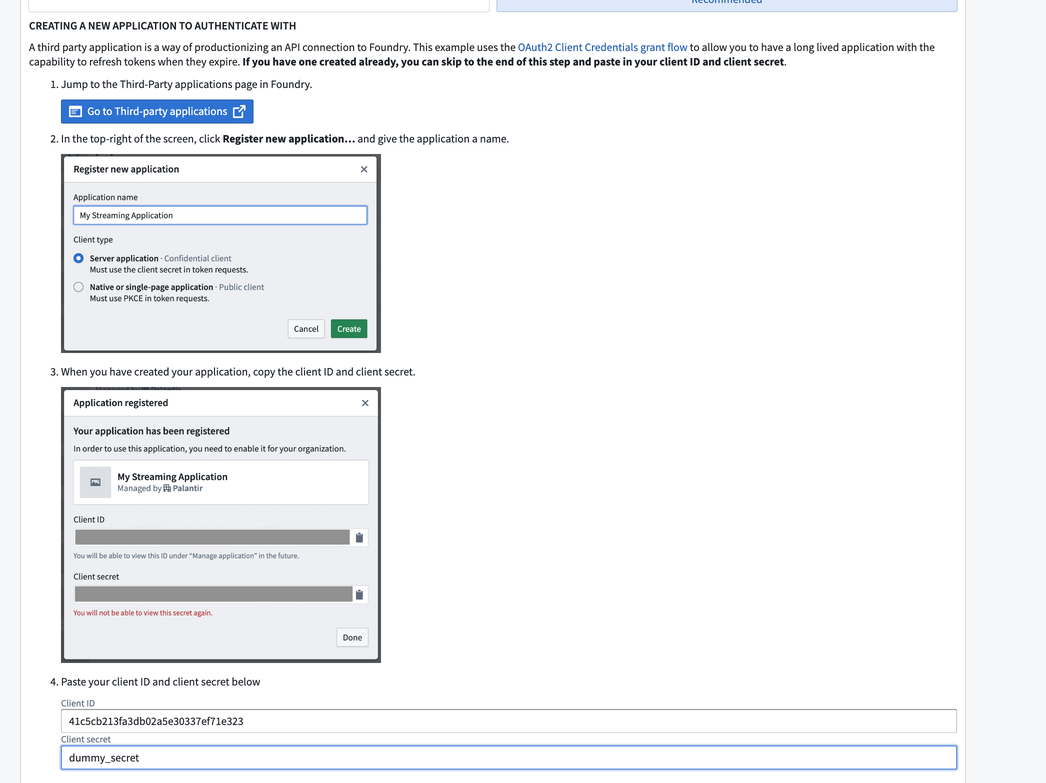
Now, you can add the client ID and secret into the Push workflow page.
-
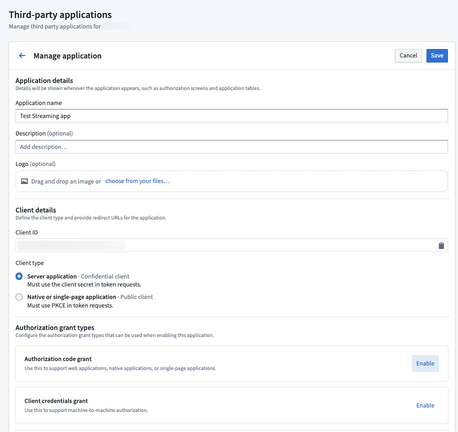
Scroll down to the Configuring the Application section of the workflow, then select Manage application to open the Third-party applications management page in your Foundry platform settings.

-
Next, enable the Client credentials grant setting.
-
Finally, click Save in the upper right corner.
Part 3: Share the stream
Now, we need to share the stream with the application we created.
-
First, return to the Push workflow page. Under the Using Your New Application section in the workflow, find the client ID that you generated.

-
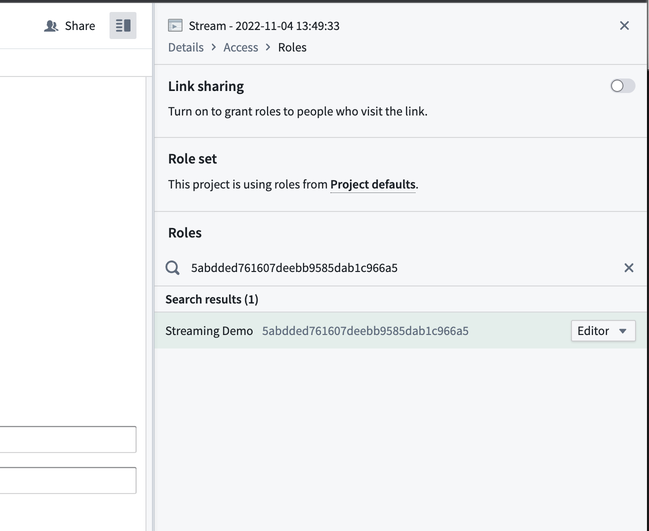
Next, select Share on the top right to open the Roles tab of the stream Details sidebar to the right side of your screen.
-
Copy and paste the client ID into the Roles search field to find the application you created. Select the + to search for and choose the
Editorrole. -
Choose Save at the bottom of the side panel to share the stream.
-
Return to the push workflow and select Next step.
Part 4: Test the stream
You will now be presented with code examples that can be used to push test records into the stream. The code examples differ depending on what language you selected in the previous steps. For this example, we are using cURL.
Before running cURL commands, be sure to install jq ↗ for command line JSON parsing.
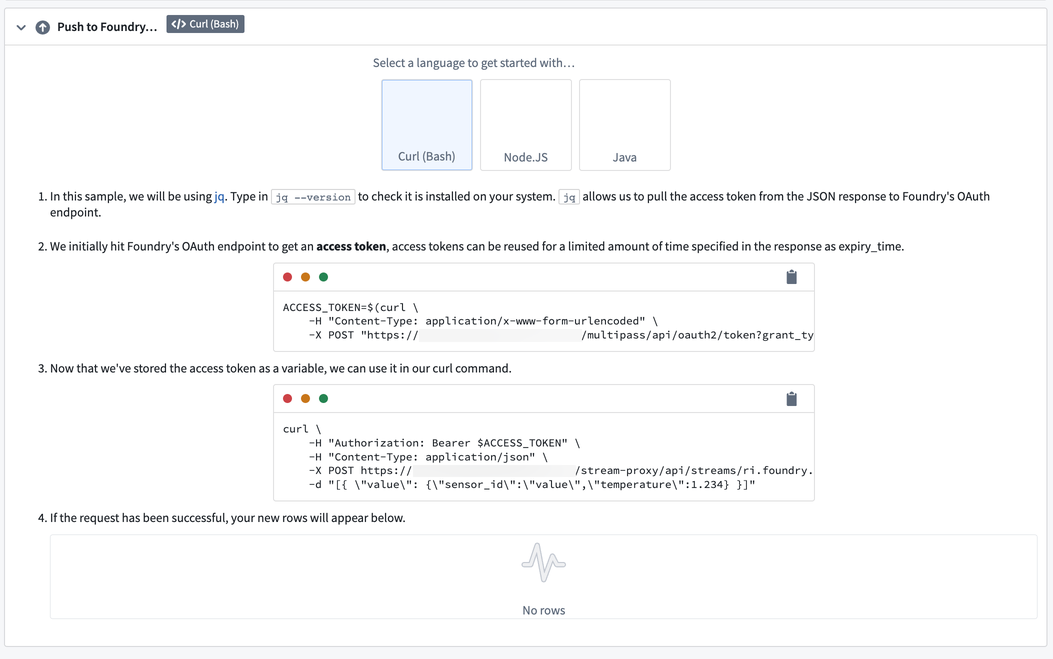
- First, copy the command from the first box. This will hit Foundry’s OAuth2 endpoint, providing you with an access token you can use to push records.
-
Execute the command in a bash terminal on your Mac, Windows, or Linux machine.
Once the command is executed, you will have an available variable called
$ACCESS_TOKEN. You will use this variable in the next command to push records.The second command will use cURL to hit a Foundry endpoint with a post request that contains the records we want to insert into the stream. The command is prepopulated with a dummy record to push into the stream, but you could provide any data in the HTTP request that adheres to the schema of the stream.
-
Copy and paste the second command into your terminal and execute it.
If the command is successful, you will see records appear in the stream.
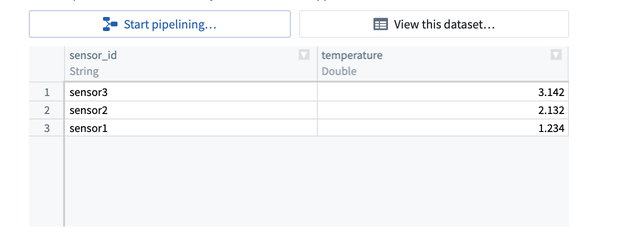
To change the data pushed into the stream, modify the data parameter of the post request.
[{ \"value\": {\"sensor_id\":\"sensor4\",\"temperature\":4.132} }]
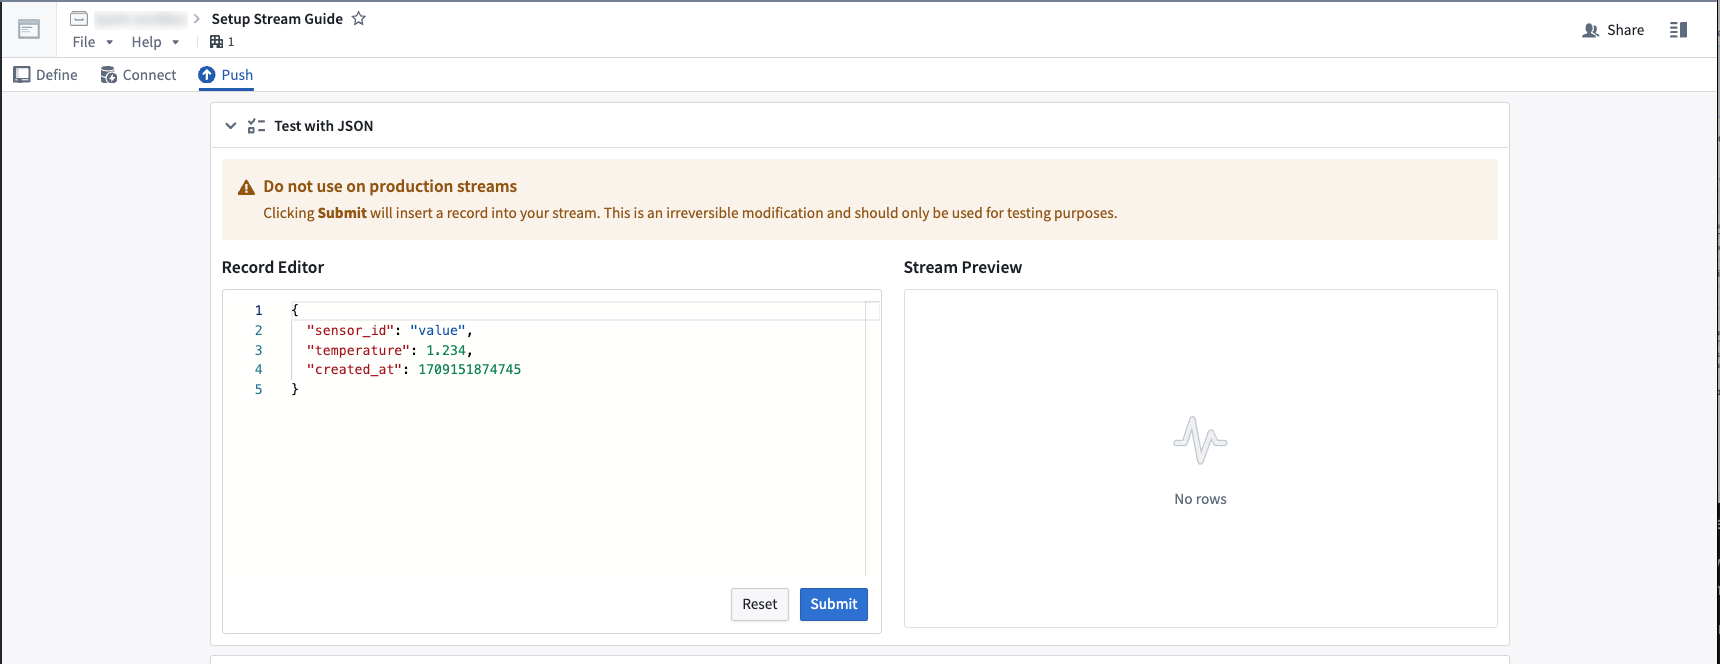
You can also send test records into the stream from the user interface by expanding the Test with JSON card.
Next steps
Now that you have successfully pushed data into a stream, you are ready to start transforming your data. Select Start pipelining to navigate to the Pipeline Builder application where you will build your streaming pipeline. Learn how to transform your data, and learn more about the different transforms available in Pipeline Builder.