- Capabilities
- Getting started
- Architecture center
- Platform updates
Create a streaming pipeline with Pipeline Builder
In this tutorial, we will use Foundry Streaming and Pipeline Builder to create a simple pipeline with an output of a single dataset with information on sensor temperatures. You will learn how to create a stream in Foundry, push records into that stream, and transform them in Pipeline Builder.
Part 1. Initial setup
First, we need to create a new stream.
- When logged into Foundry, navigate to a Project in Foundry, select + New in the top right corner, then select Stream.

- Next, you will need to define your stream. For this guide, we will create a simple one partition stream and manually push records to it.
On the Define page, select Normal for the throughput and define a basic schema as: sensor_id: String, temperature: Double.
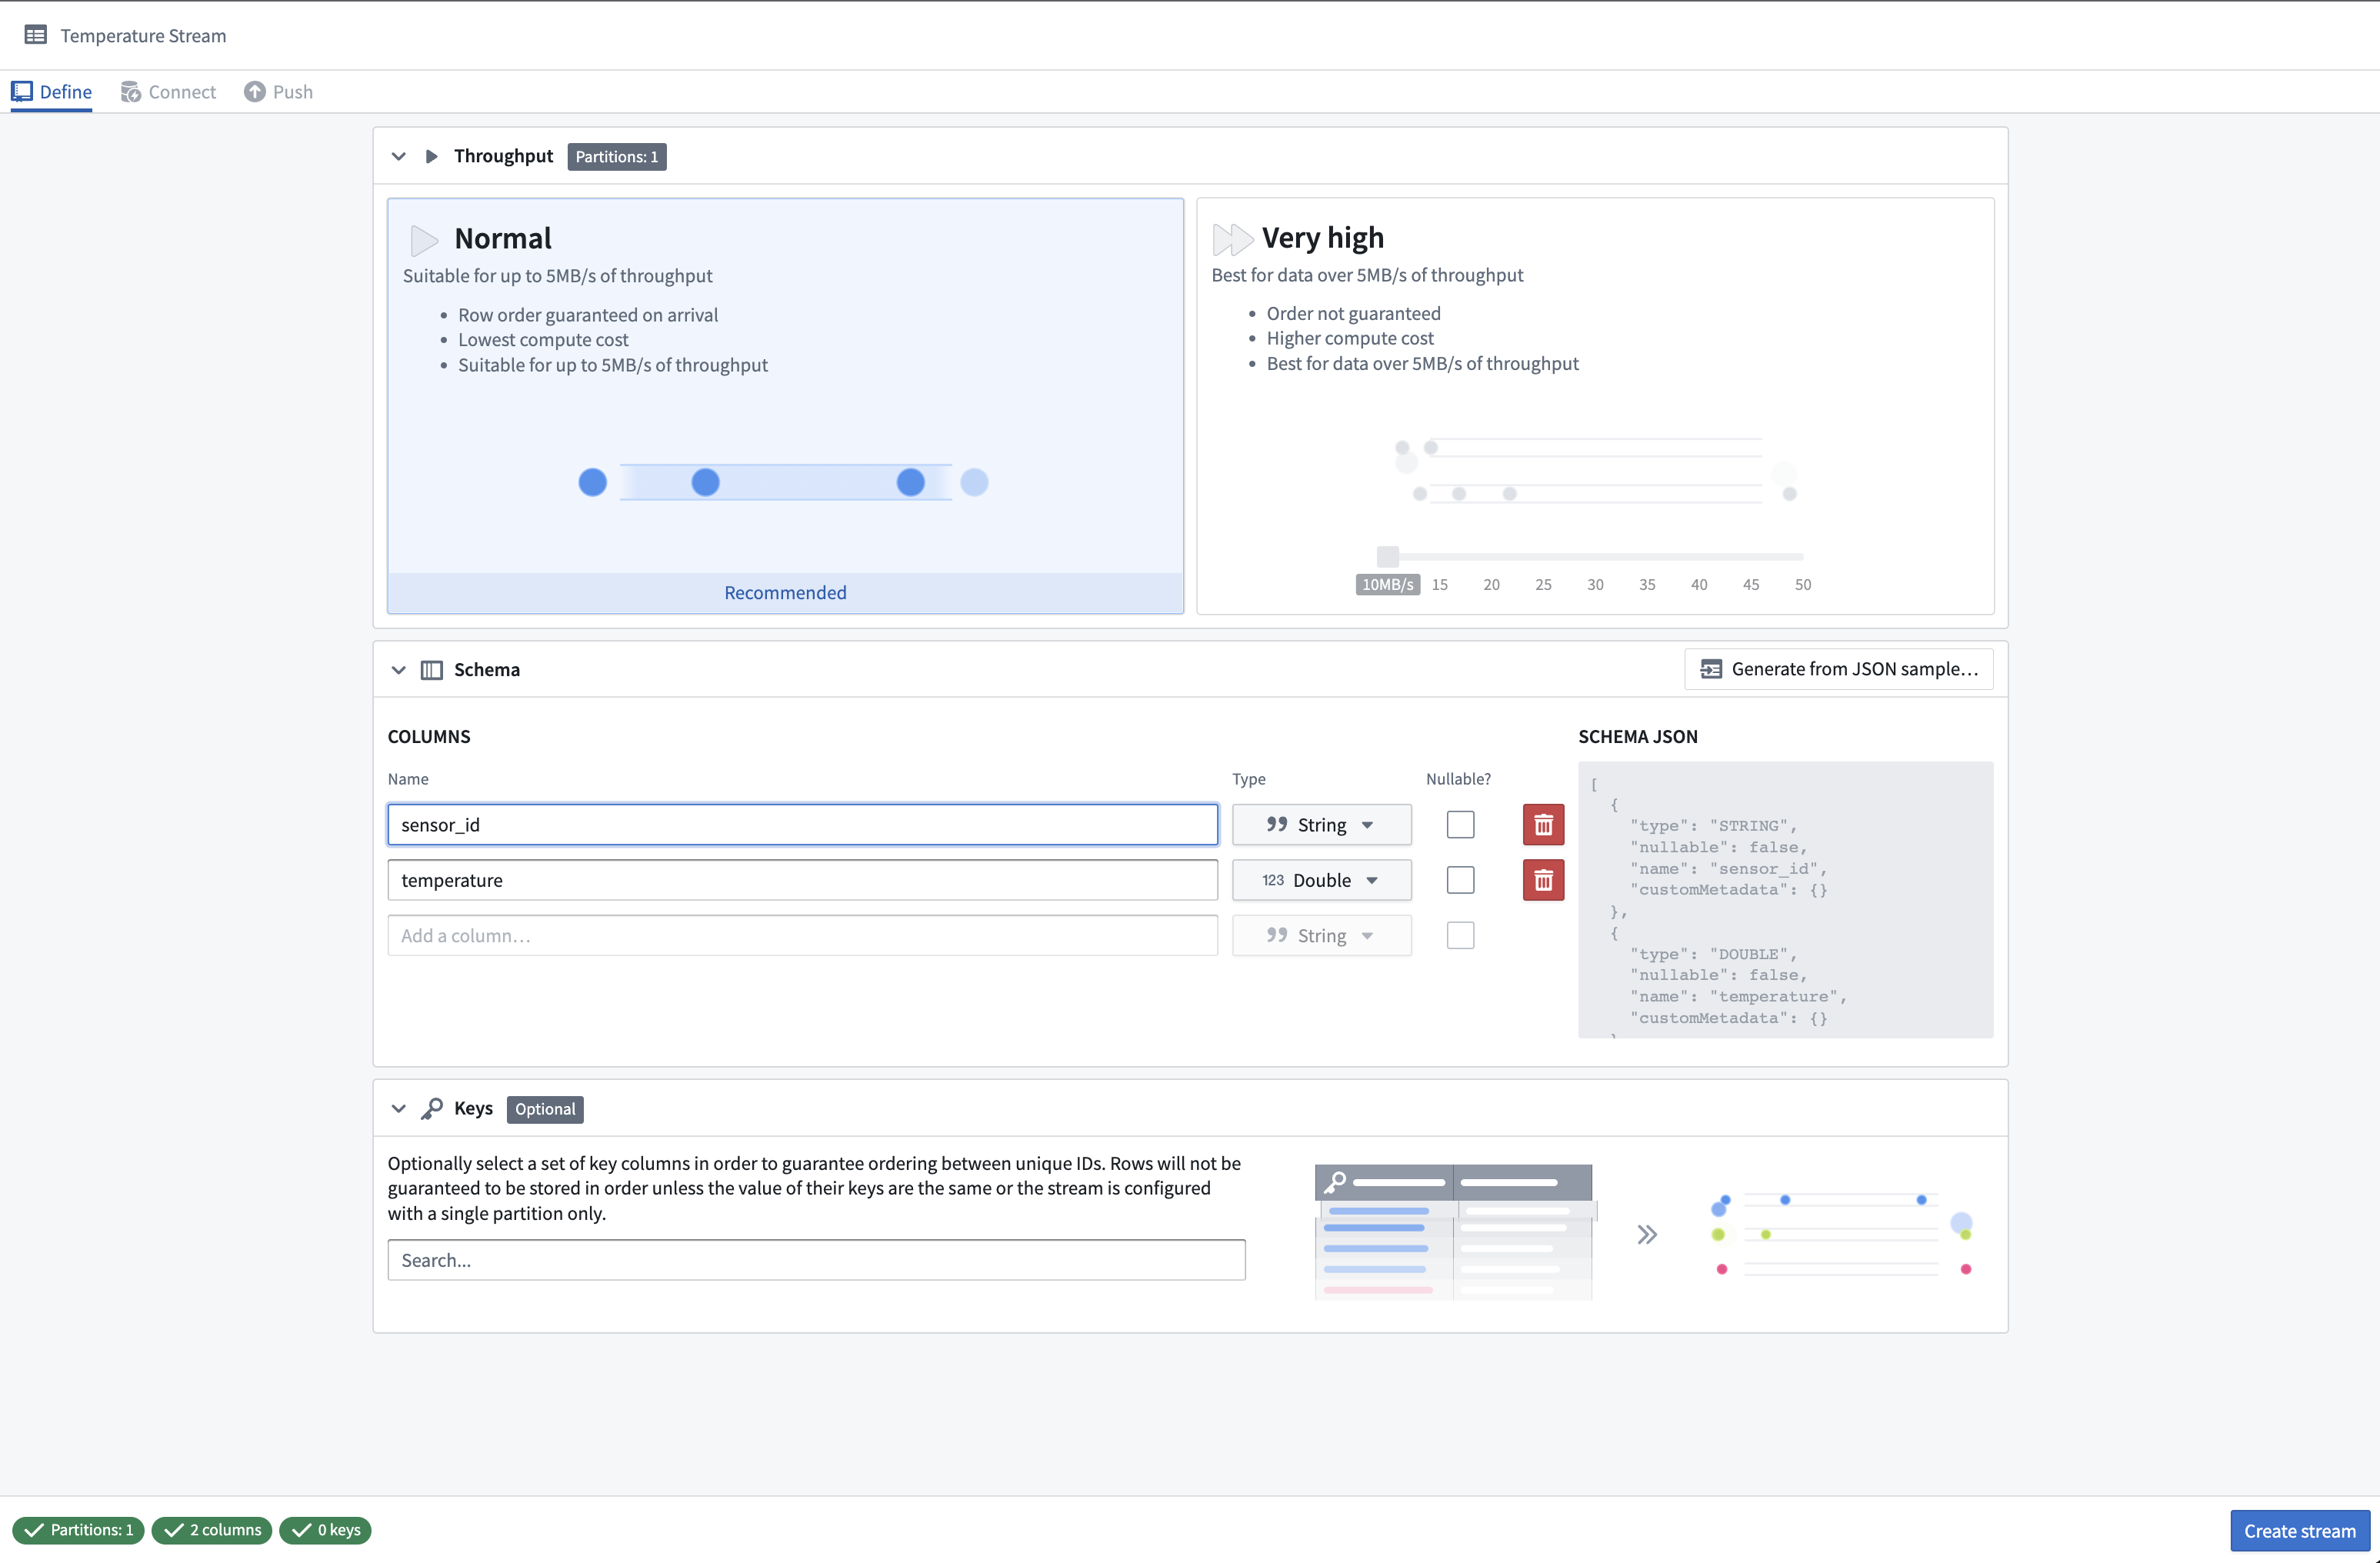
- Select Create stream. This will take you to the Connect page where you can specify how to connect to the streaming data.
Part 2. Push records into the stream
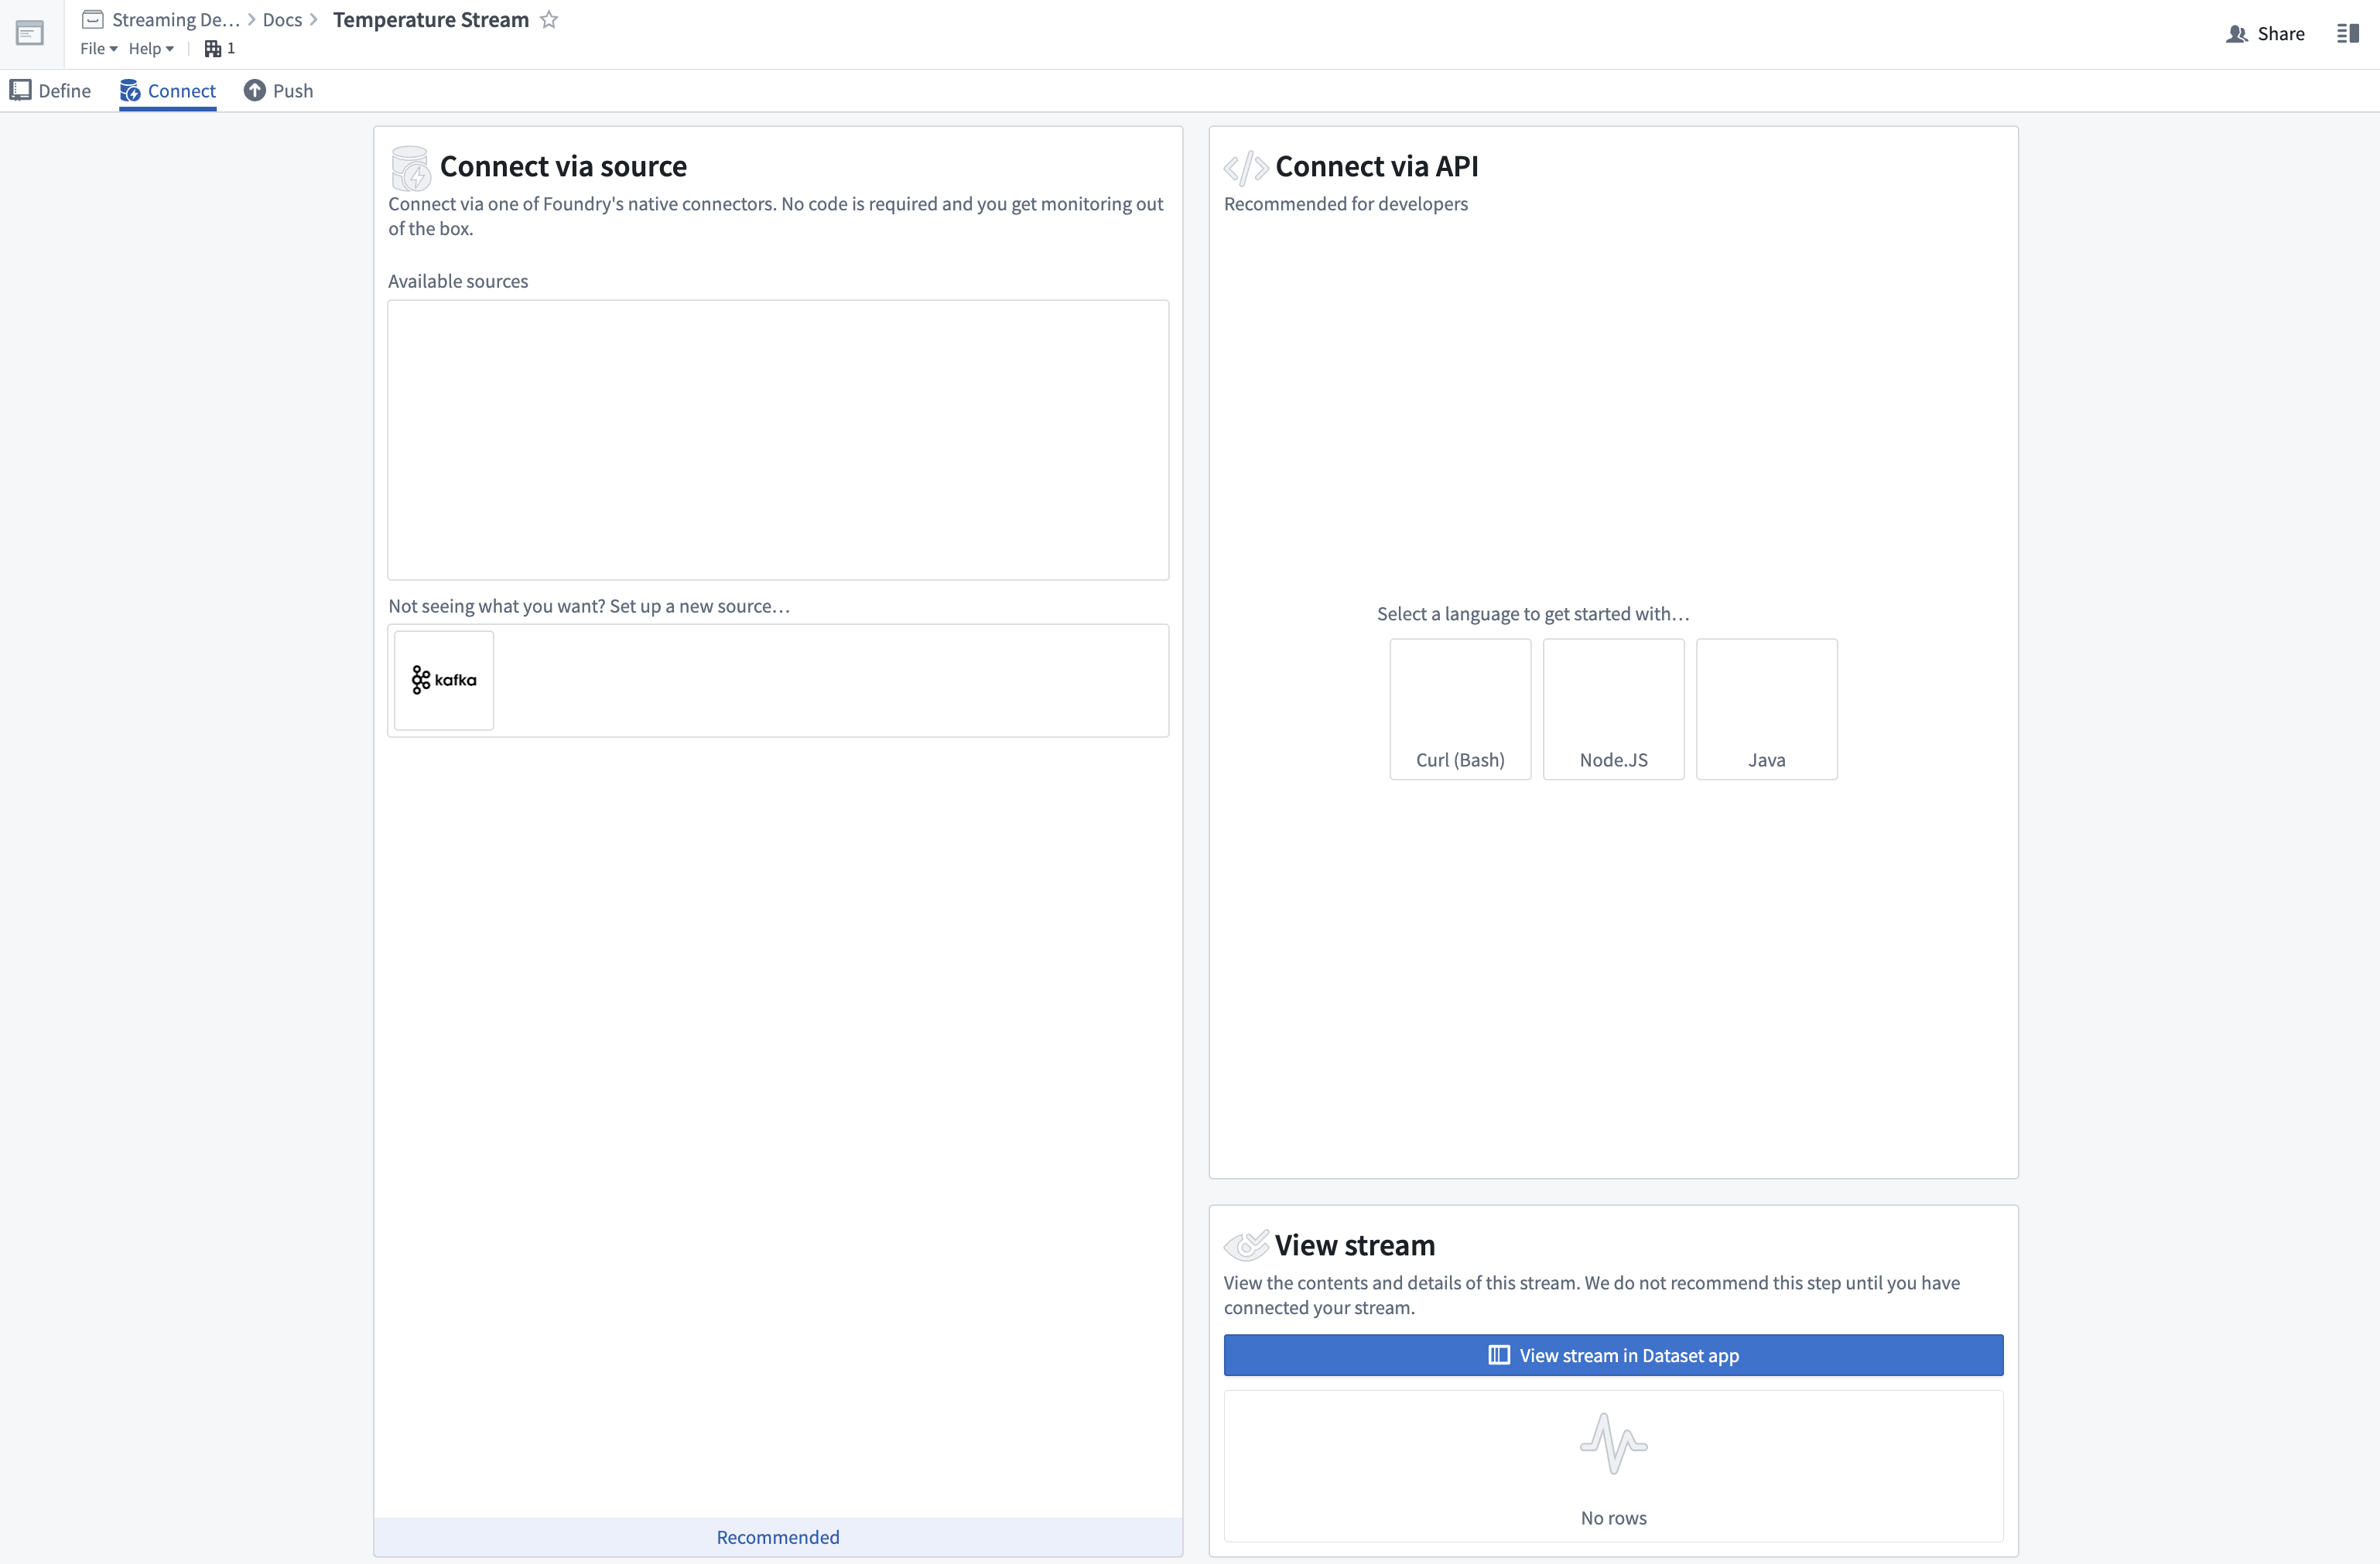
We are now ready to connect our stream. At this point, we could set up a streaming data ingestion task with a source. For this tutorial, we will instead manually push records to the stream with Curl.
- First, select Curl (Bash) under the Connect via API section to set up authentication for your stream. We will use a personal token to submit records.
-
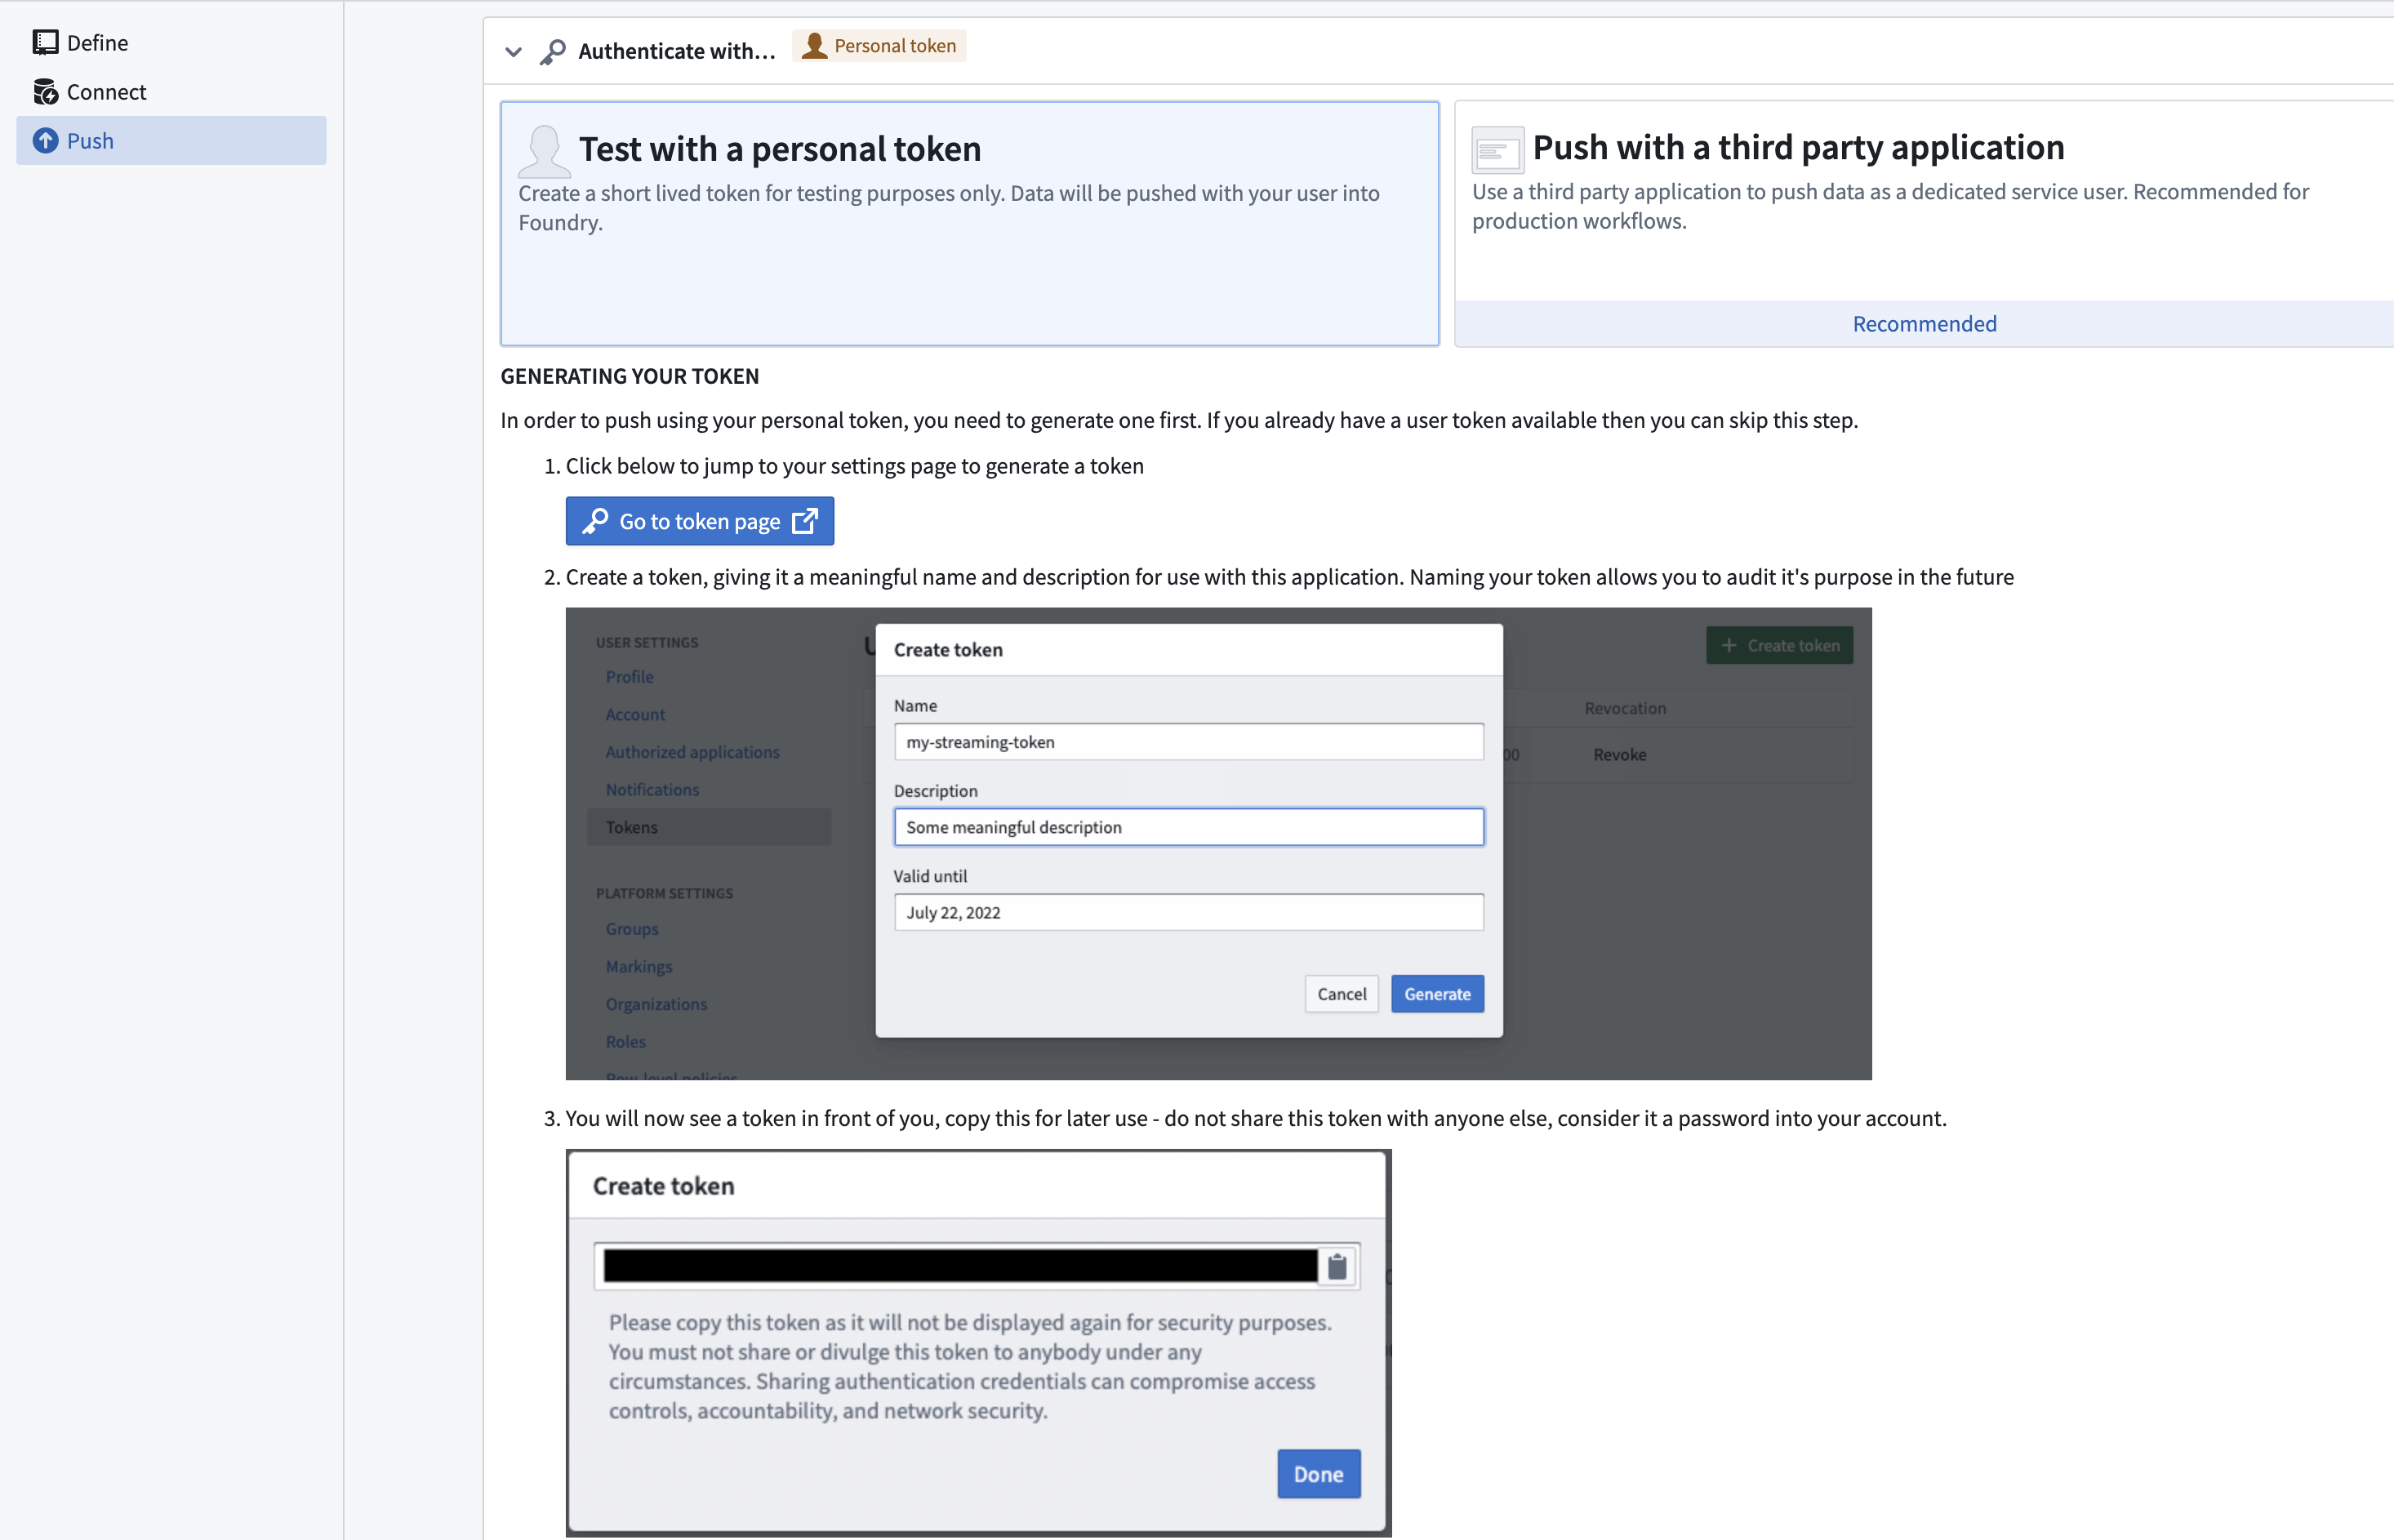
Select Test with a personal token and follow the on-screen prompts for generating a short-lived personal token.
Personal tokens should not be used for production pipelines. Production pipelines should use an OAuth token workflow.
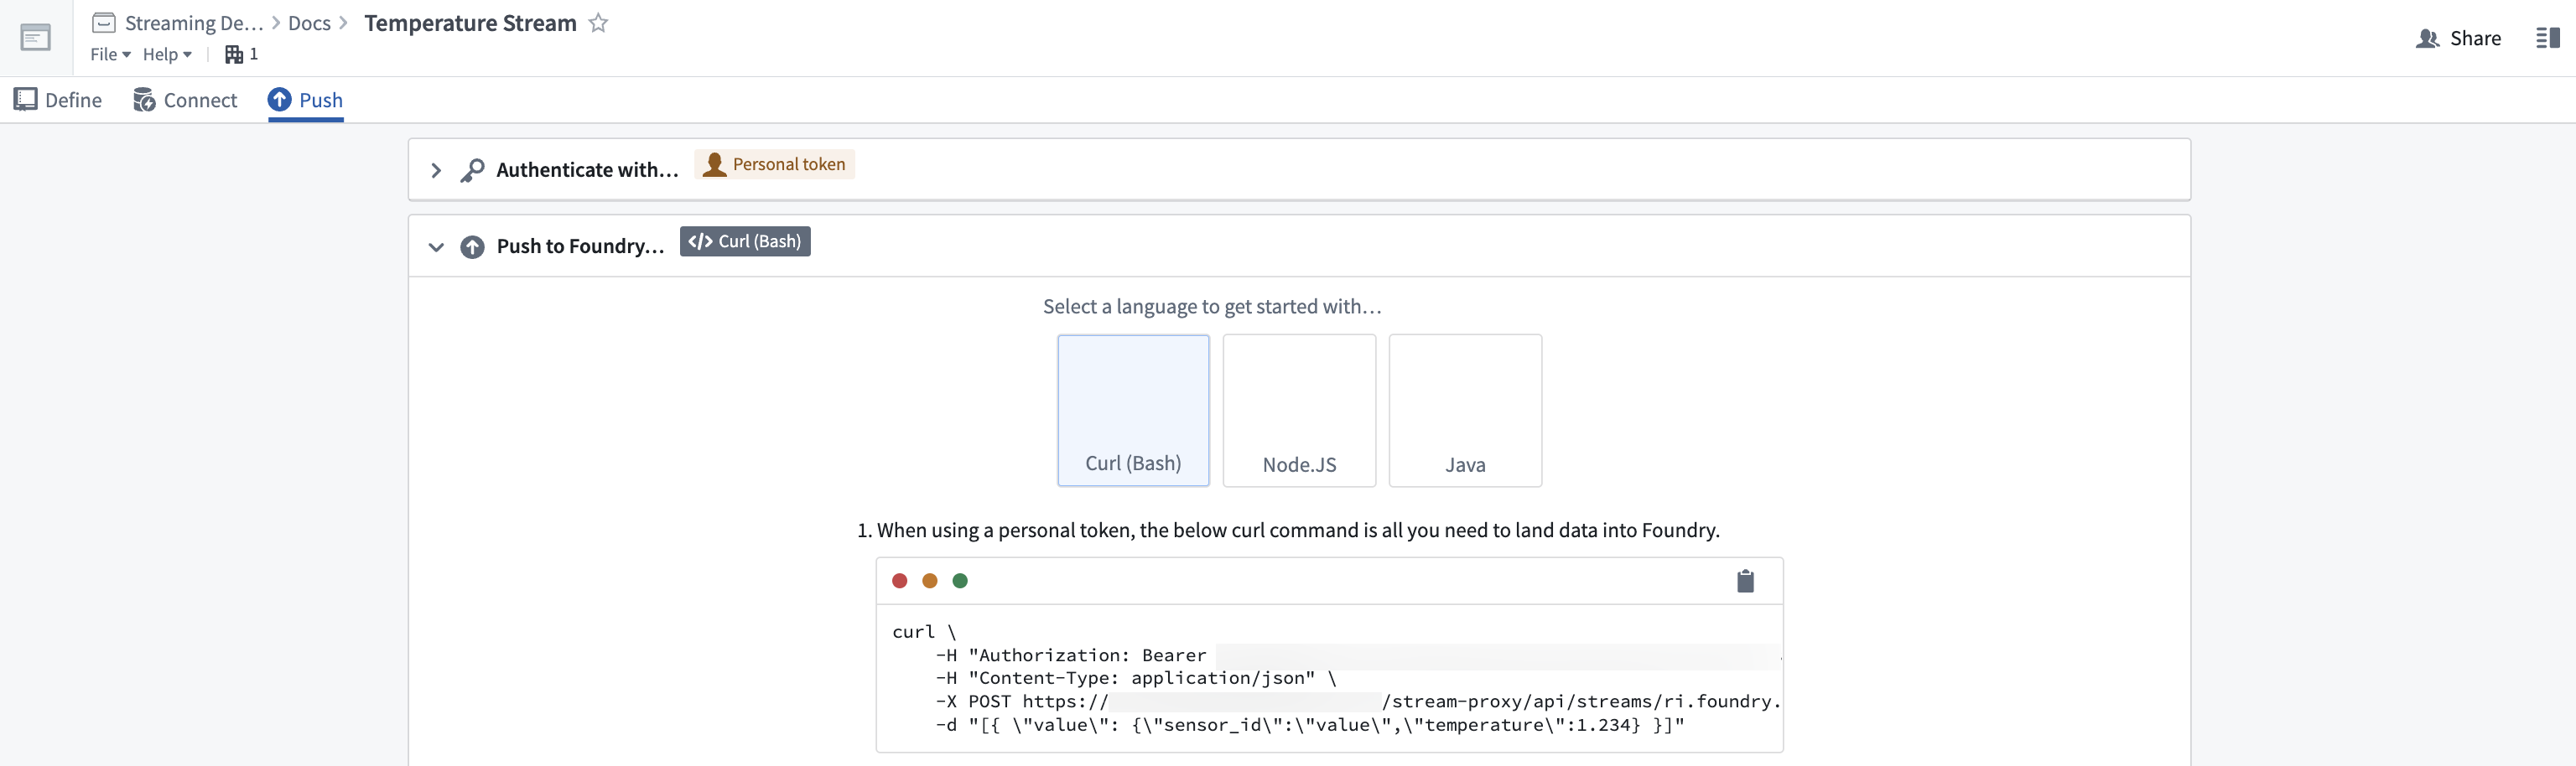
- Paste your generated token into the text box, then click Next Step.
- Copy the Curl command. Open a terminal on your computer that can execute Bash and paste the command. Run the command in your terminal.
Within seconds, you will see a record appear in the stream viewer on the page:
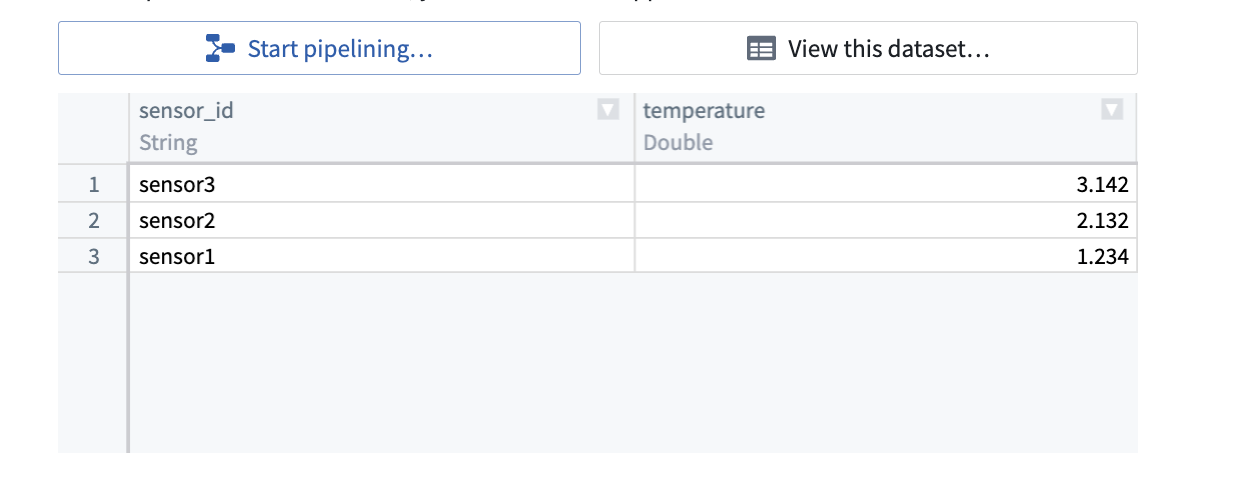
We have now ingested streaming data in real time. Let’s transform that data now.
Part 3. Transform a stream
- Select the Start pipelining button to begin writing a basic streaming transform in Pipeline Builder.

- In the Create new pipeline modal, select the Streaming pipeline type, and click Create Pipeline.

This will create a pipeline for the input stream, displayed on a graph.
Selecting the input stream node will display a preview of the data. Note that the preview runs on a cold storage view of the stream; records from the stream will be delayed before they appear.
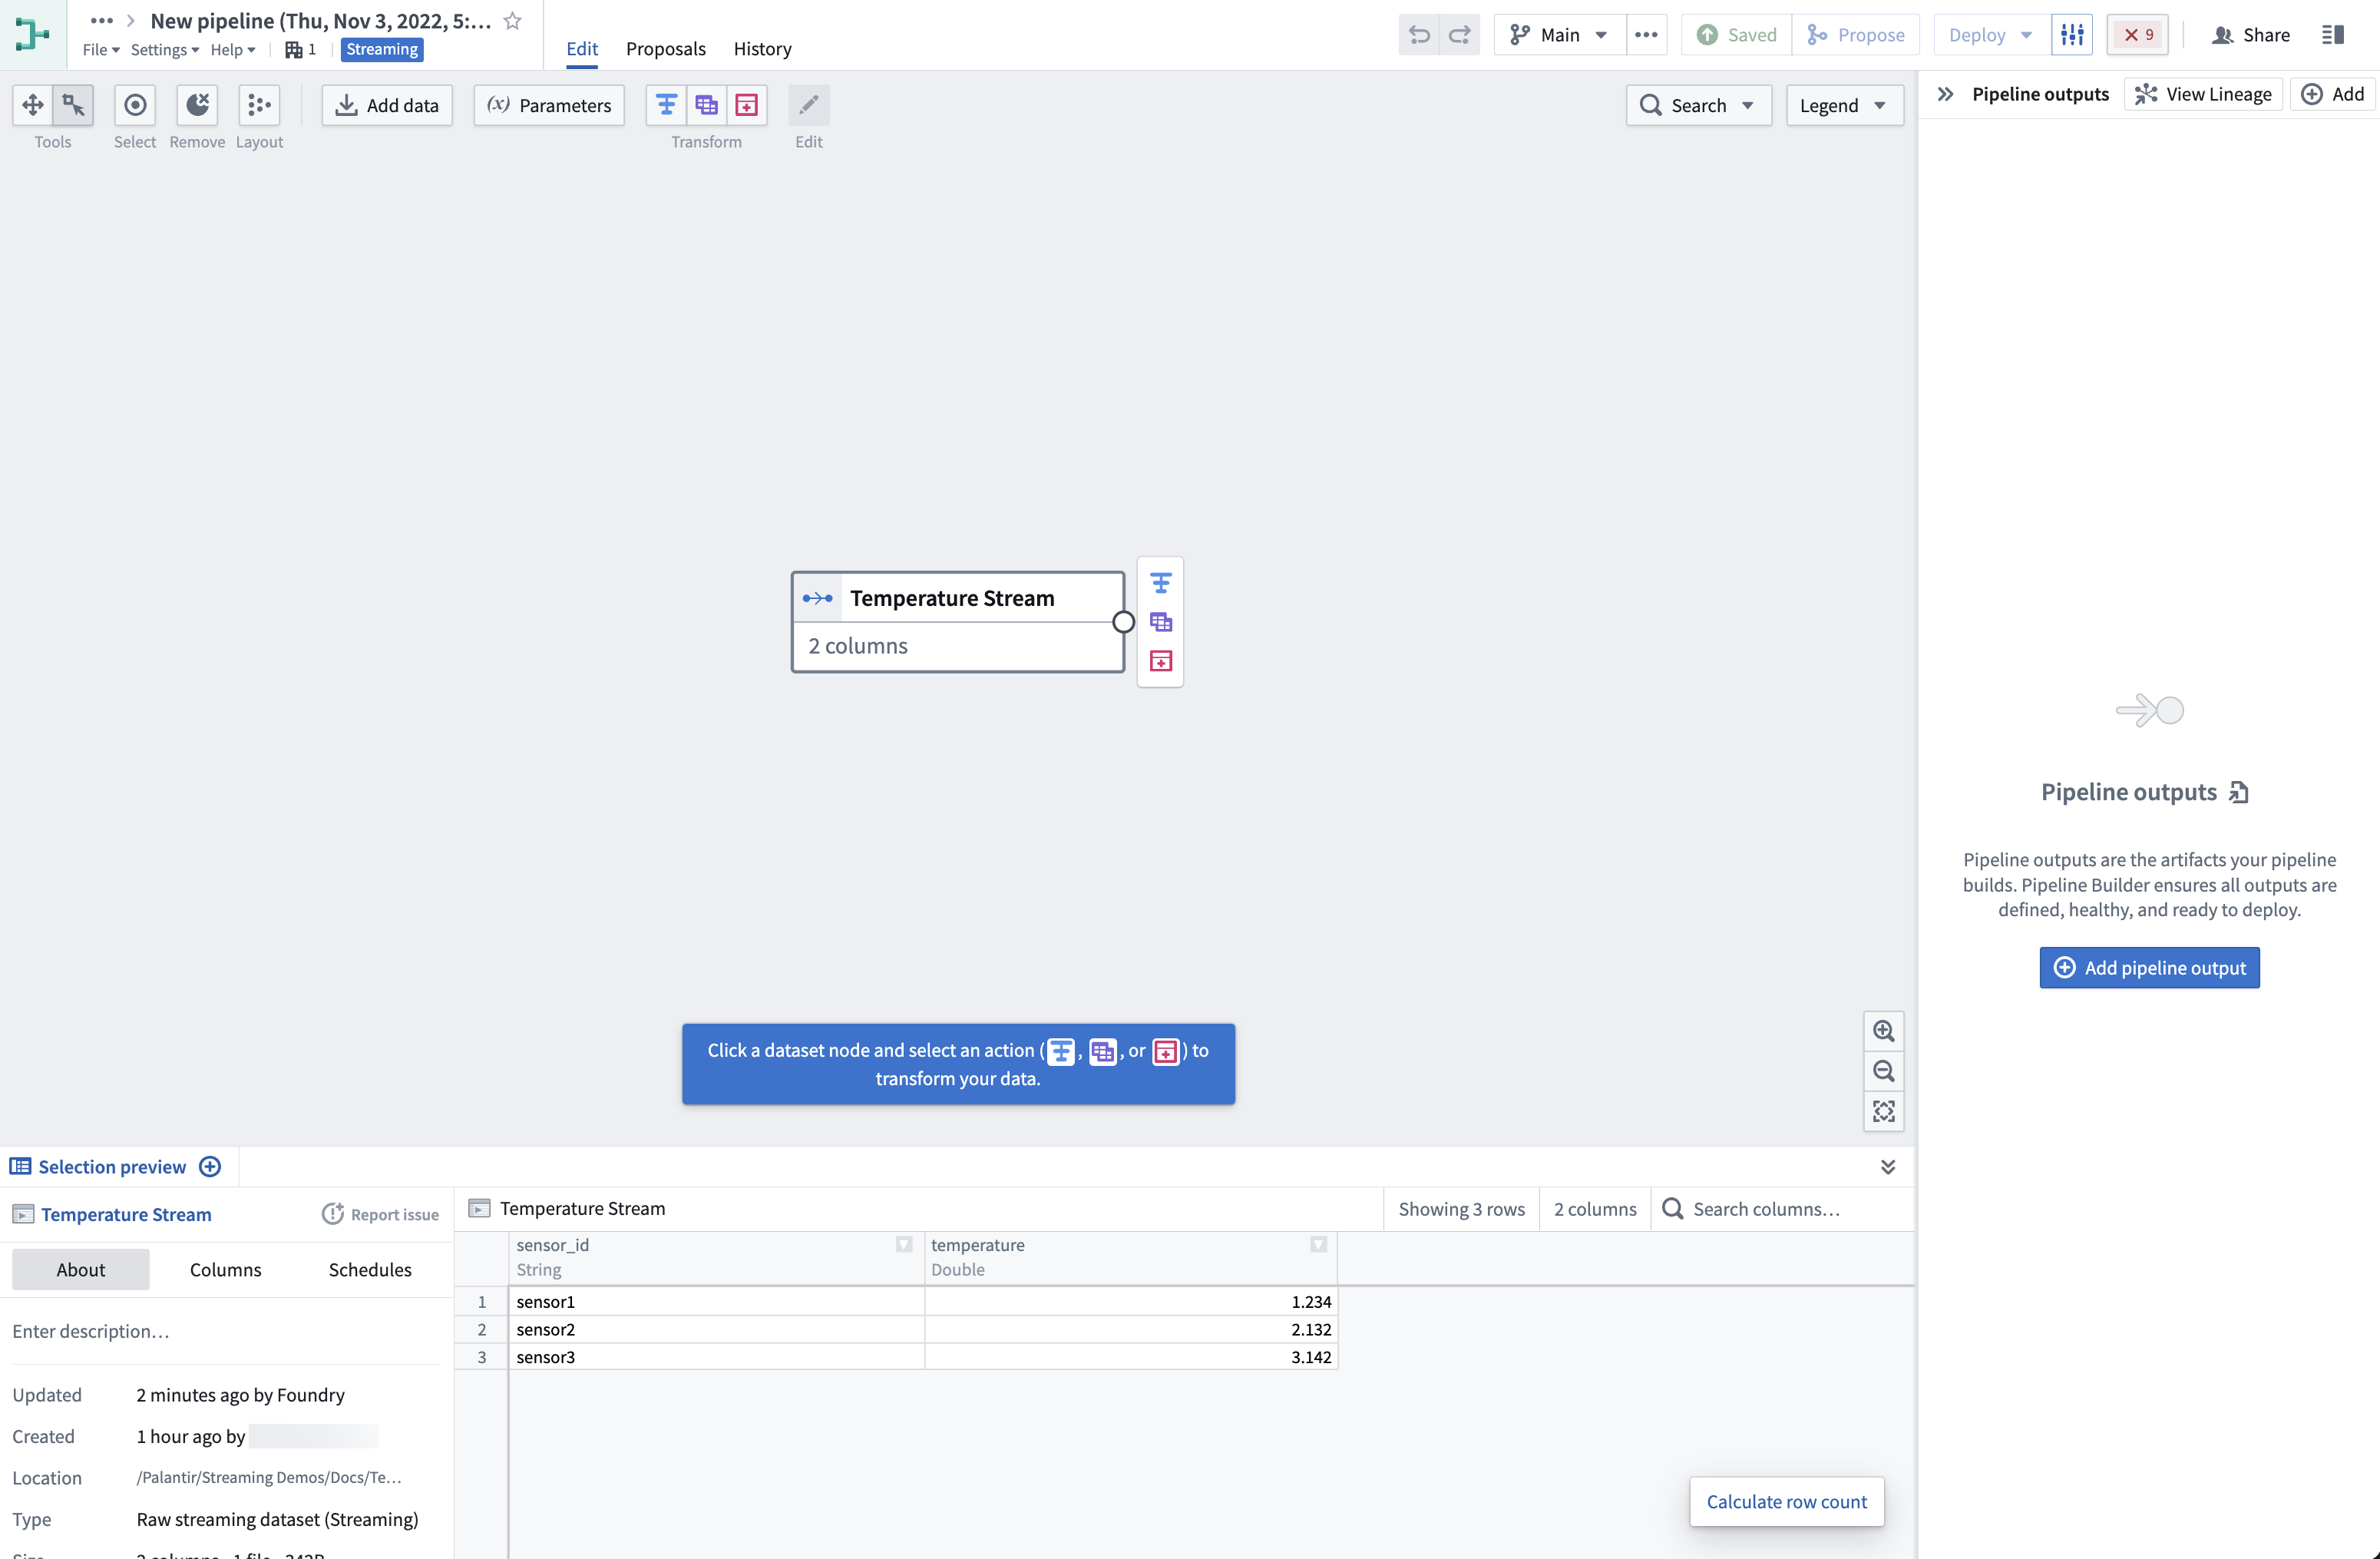
-
Click on the input stream node on the graph and select the Transform action (the blue T icon next to the input node).
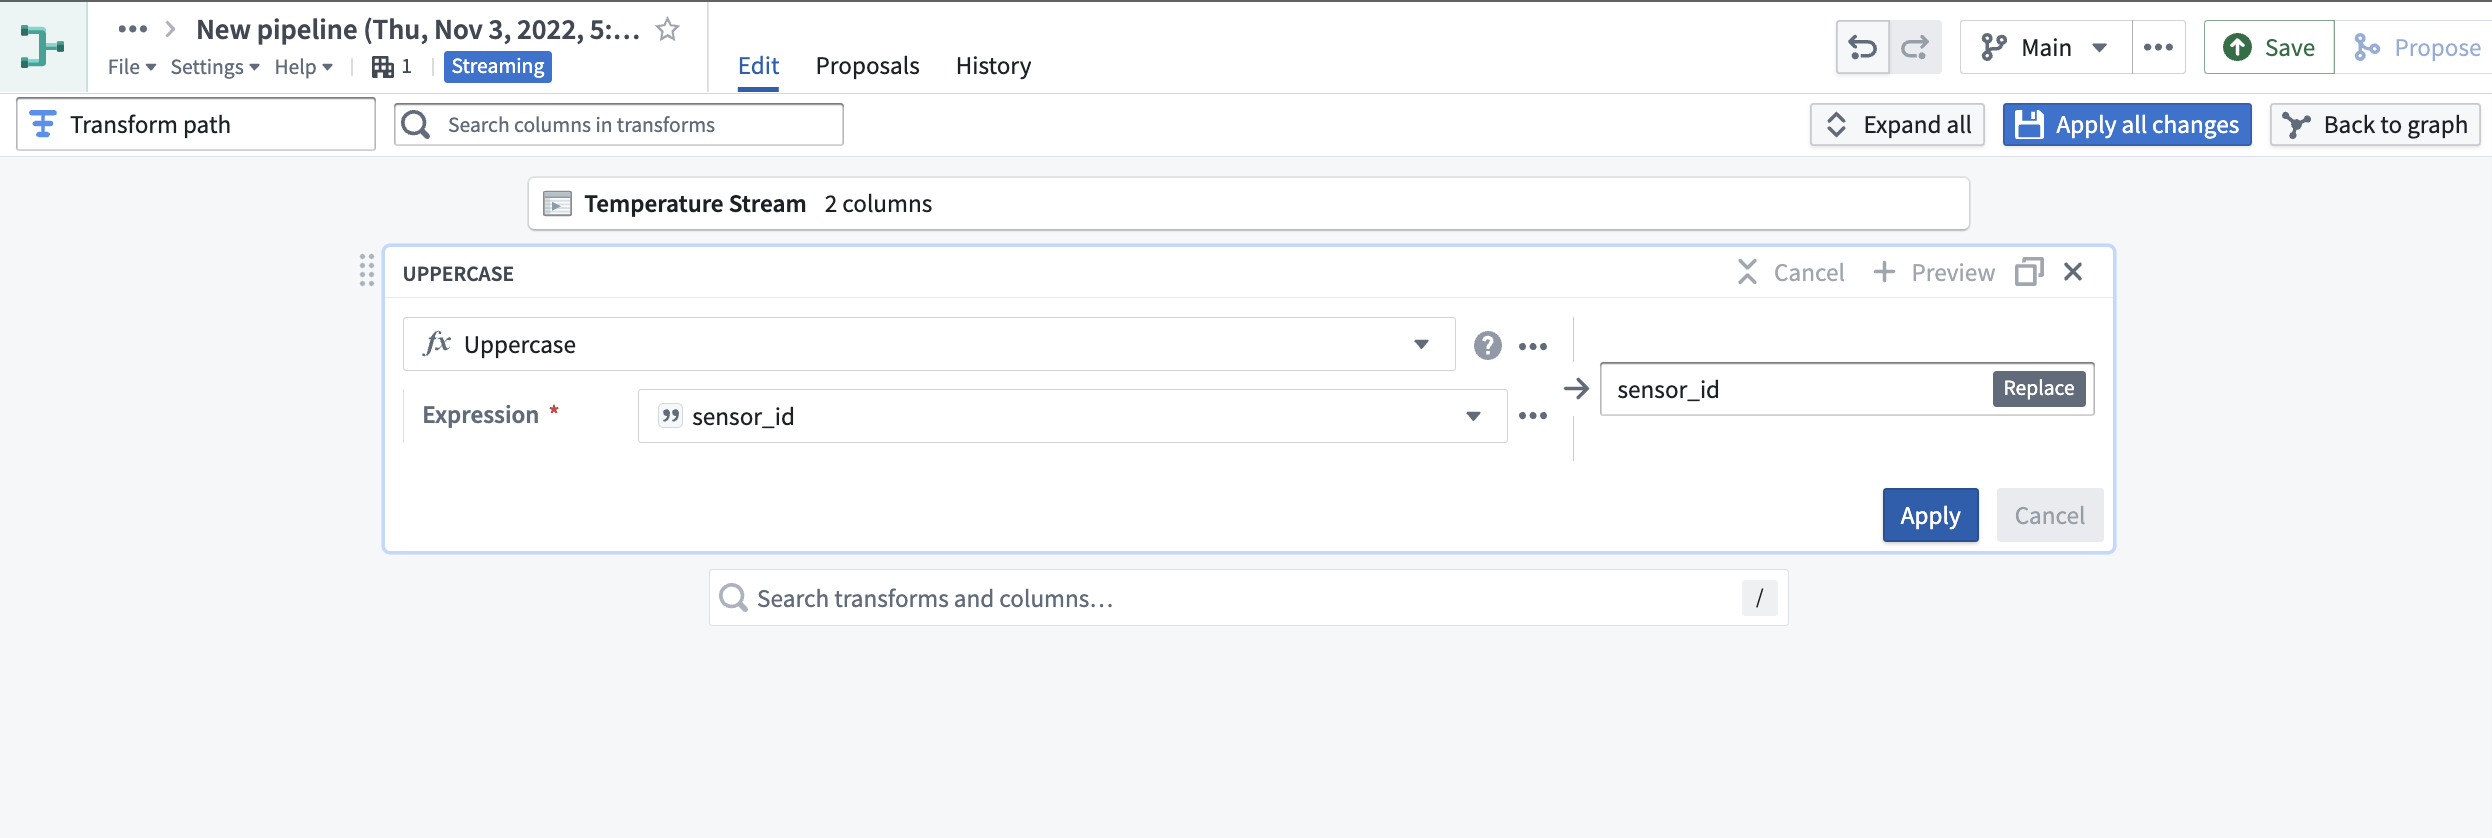
This will open a list of all transforms currently supported for streams based on the input types of the columns in the stream. For this tutorial, we will convert all
sensor_idsto uppercase, remove any whitespace on them, and filter by temperatures exceeding three degrees.

- Select the Uppercase transform, choose the
sensor_idcolumn, and click Apply.
- Then, search for the Trim whitespace transform and select it. Choose the
sensor_idcolumn again, and click Apply.

- For the final transform, first search for the Filter transform and choose Keep rows. Then, select the
temperaturecolumn, set the filter to greater than3, and select Apply.
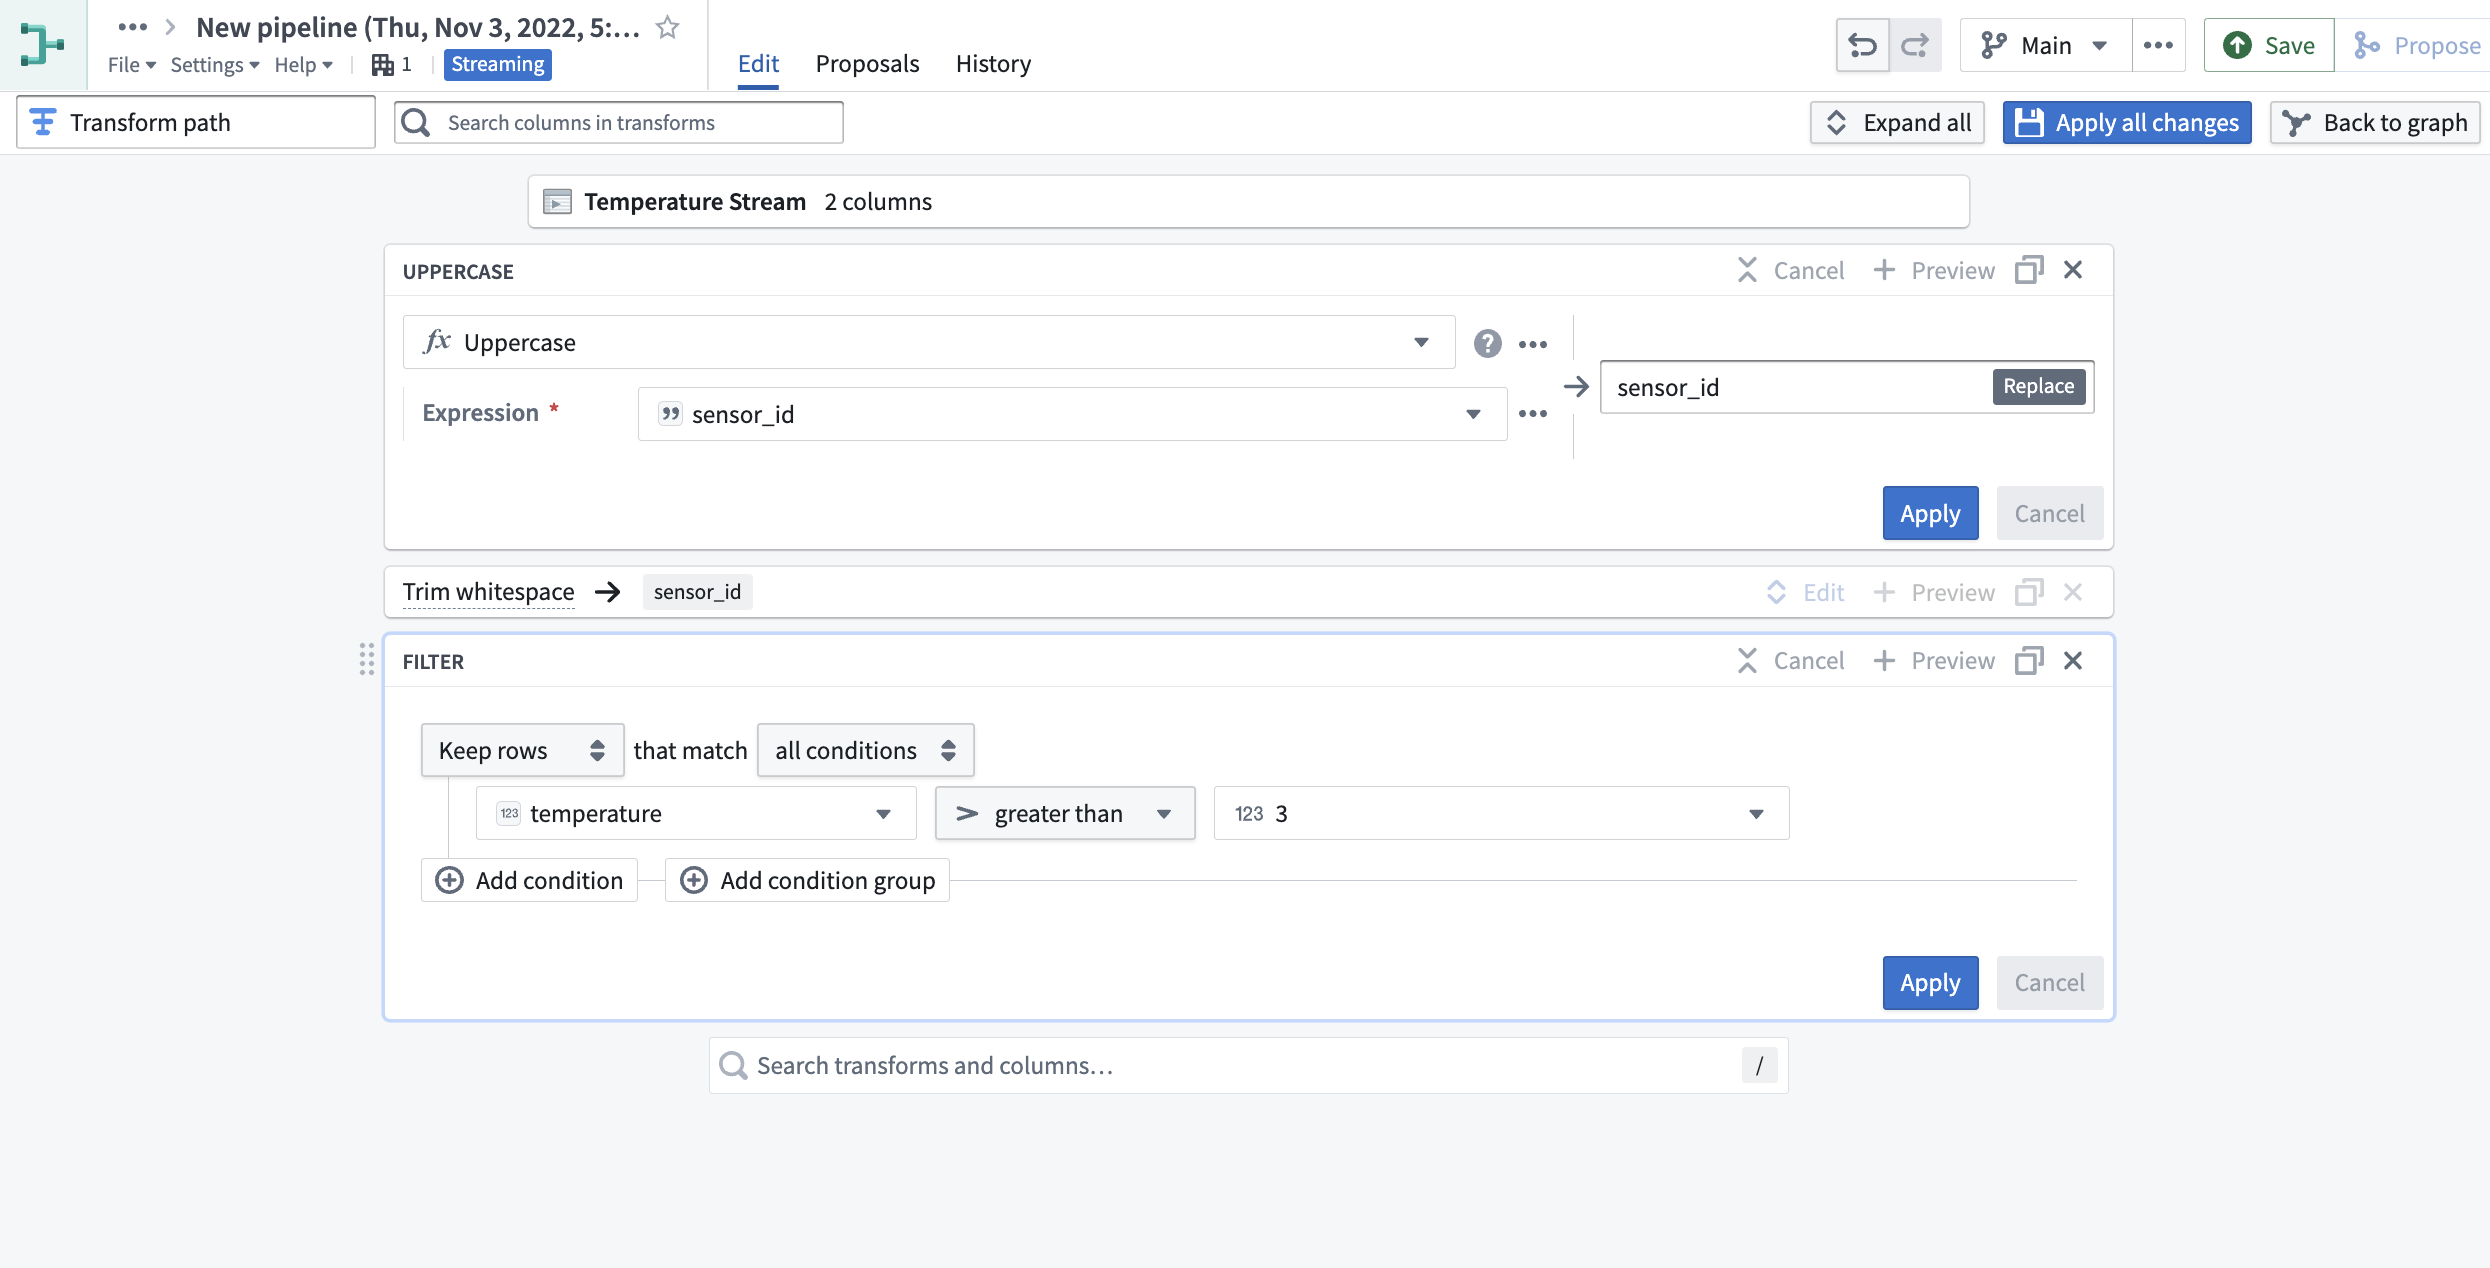
- Click Apply all changes to the top right of your screen. Then, select Back to graph to return to your pipeline.
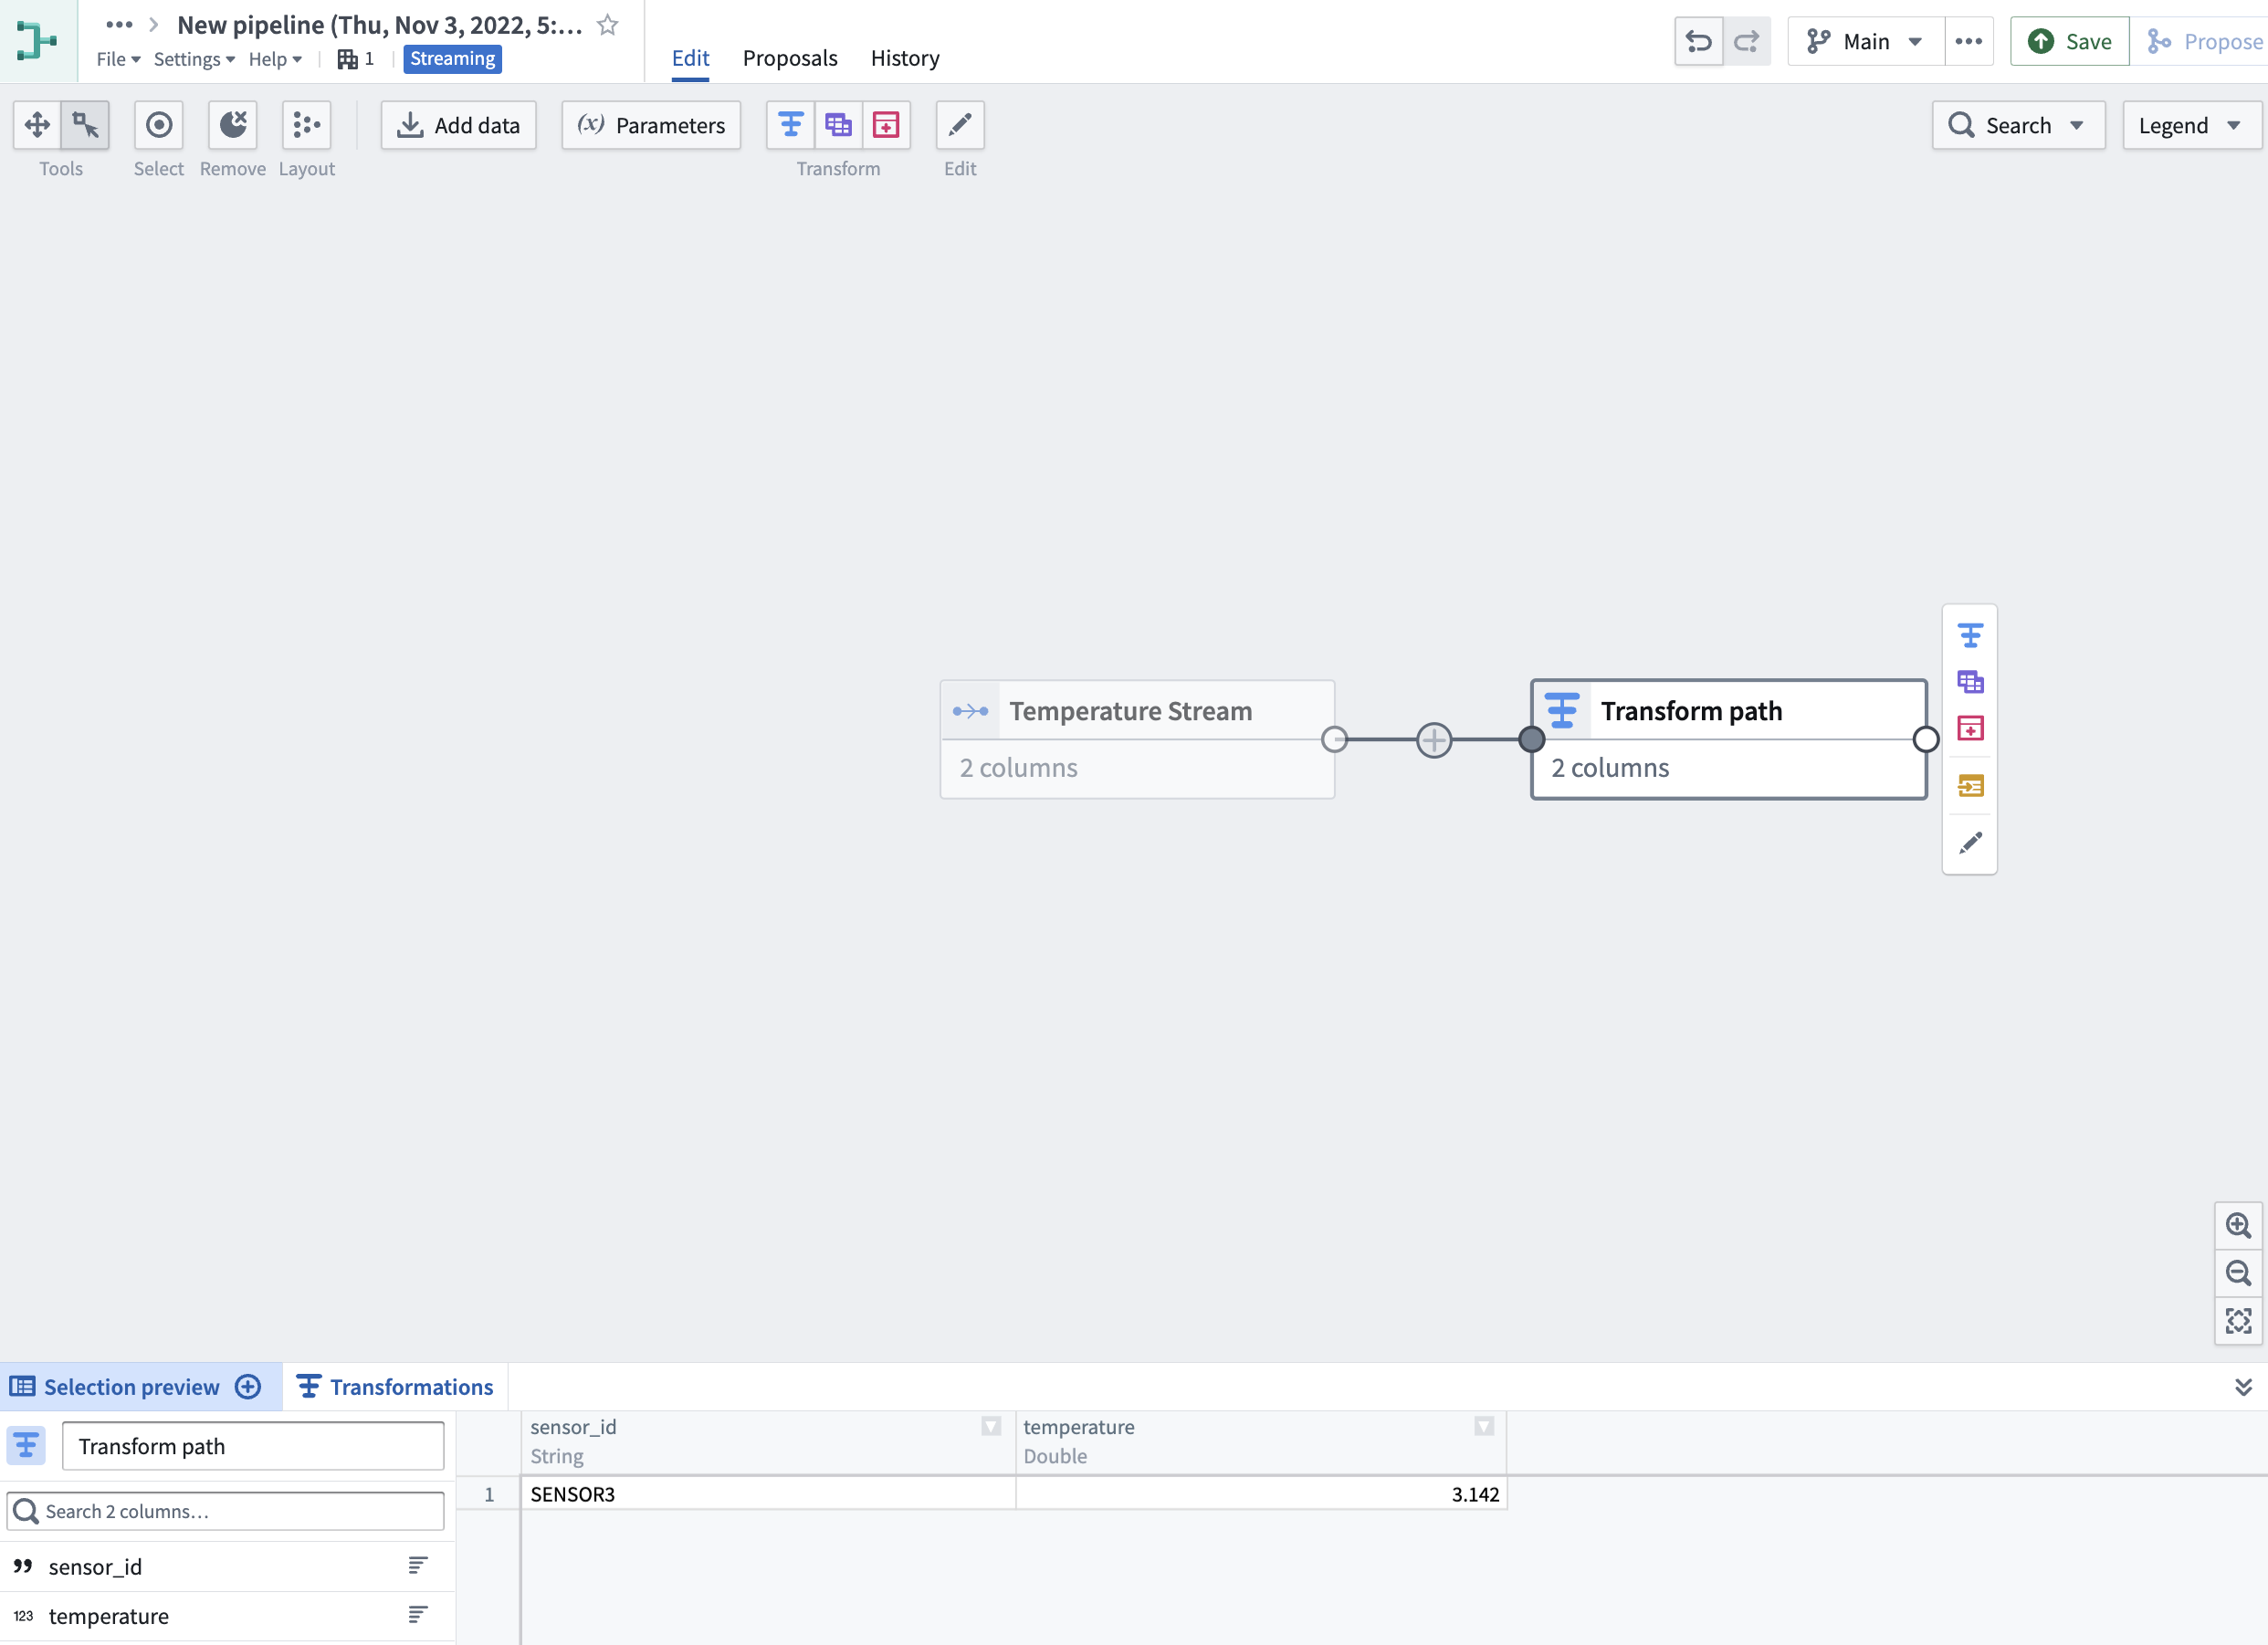
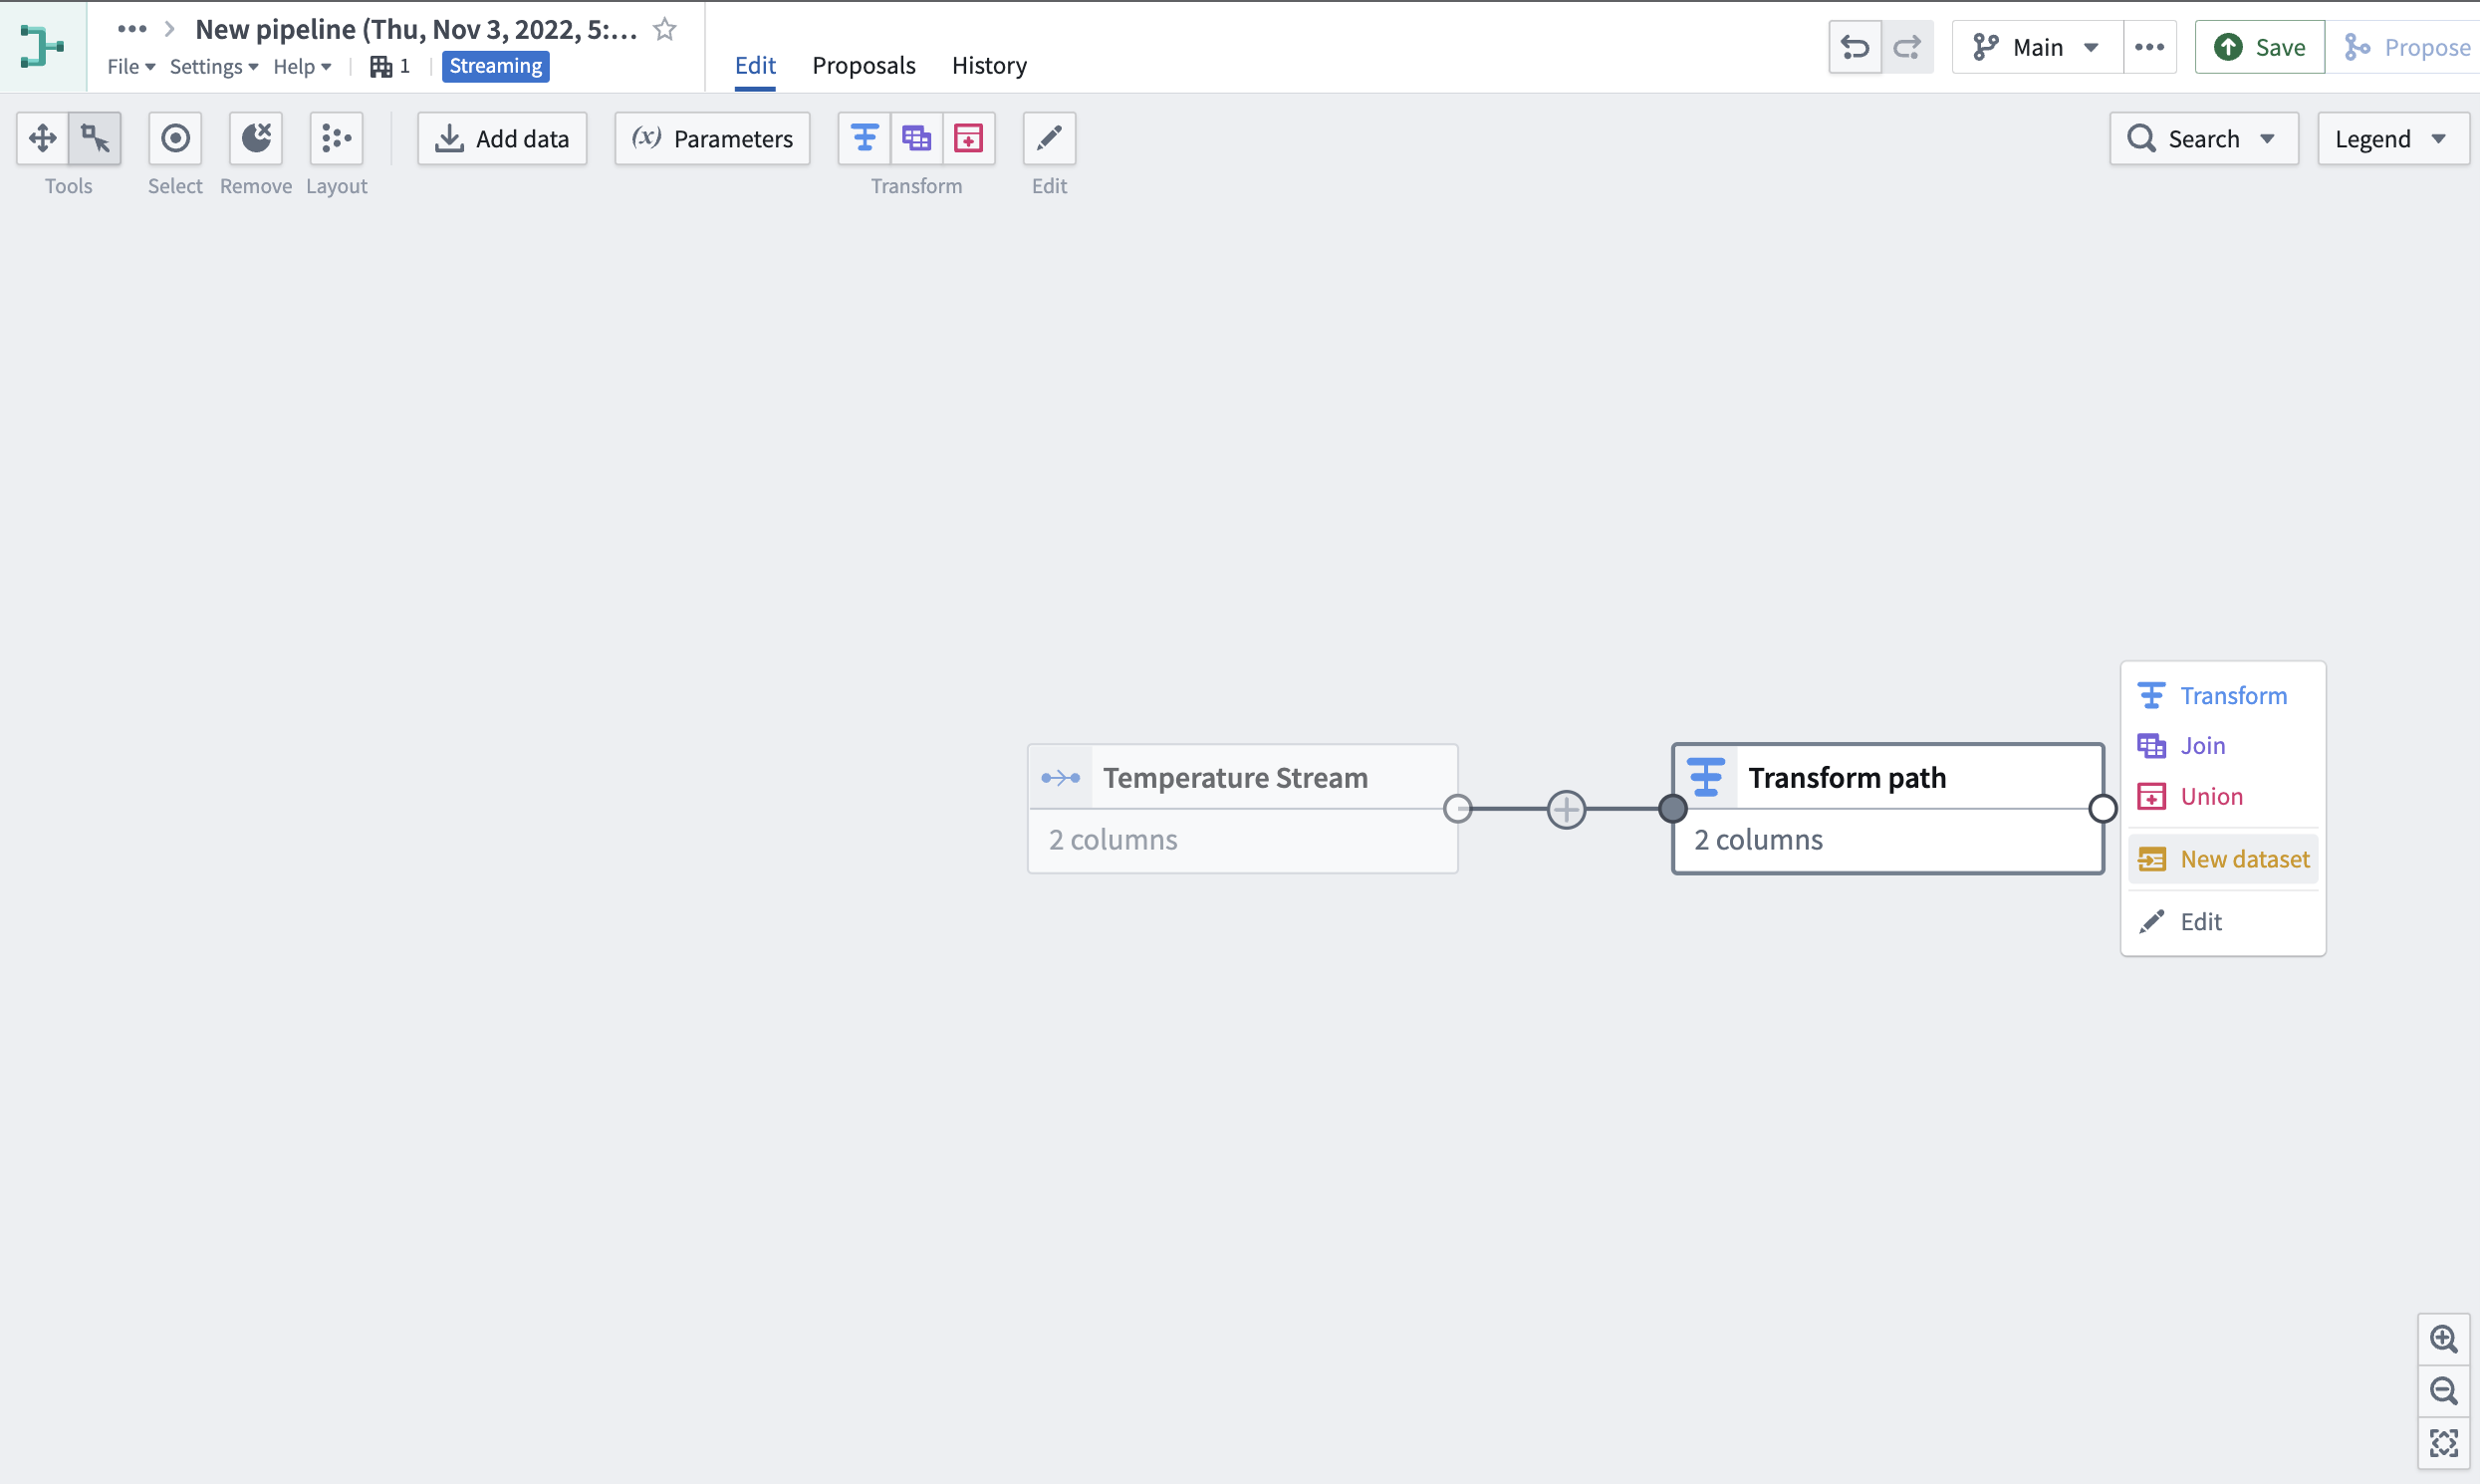
- Select the Transform path node we just created, then click New dataset.
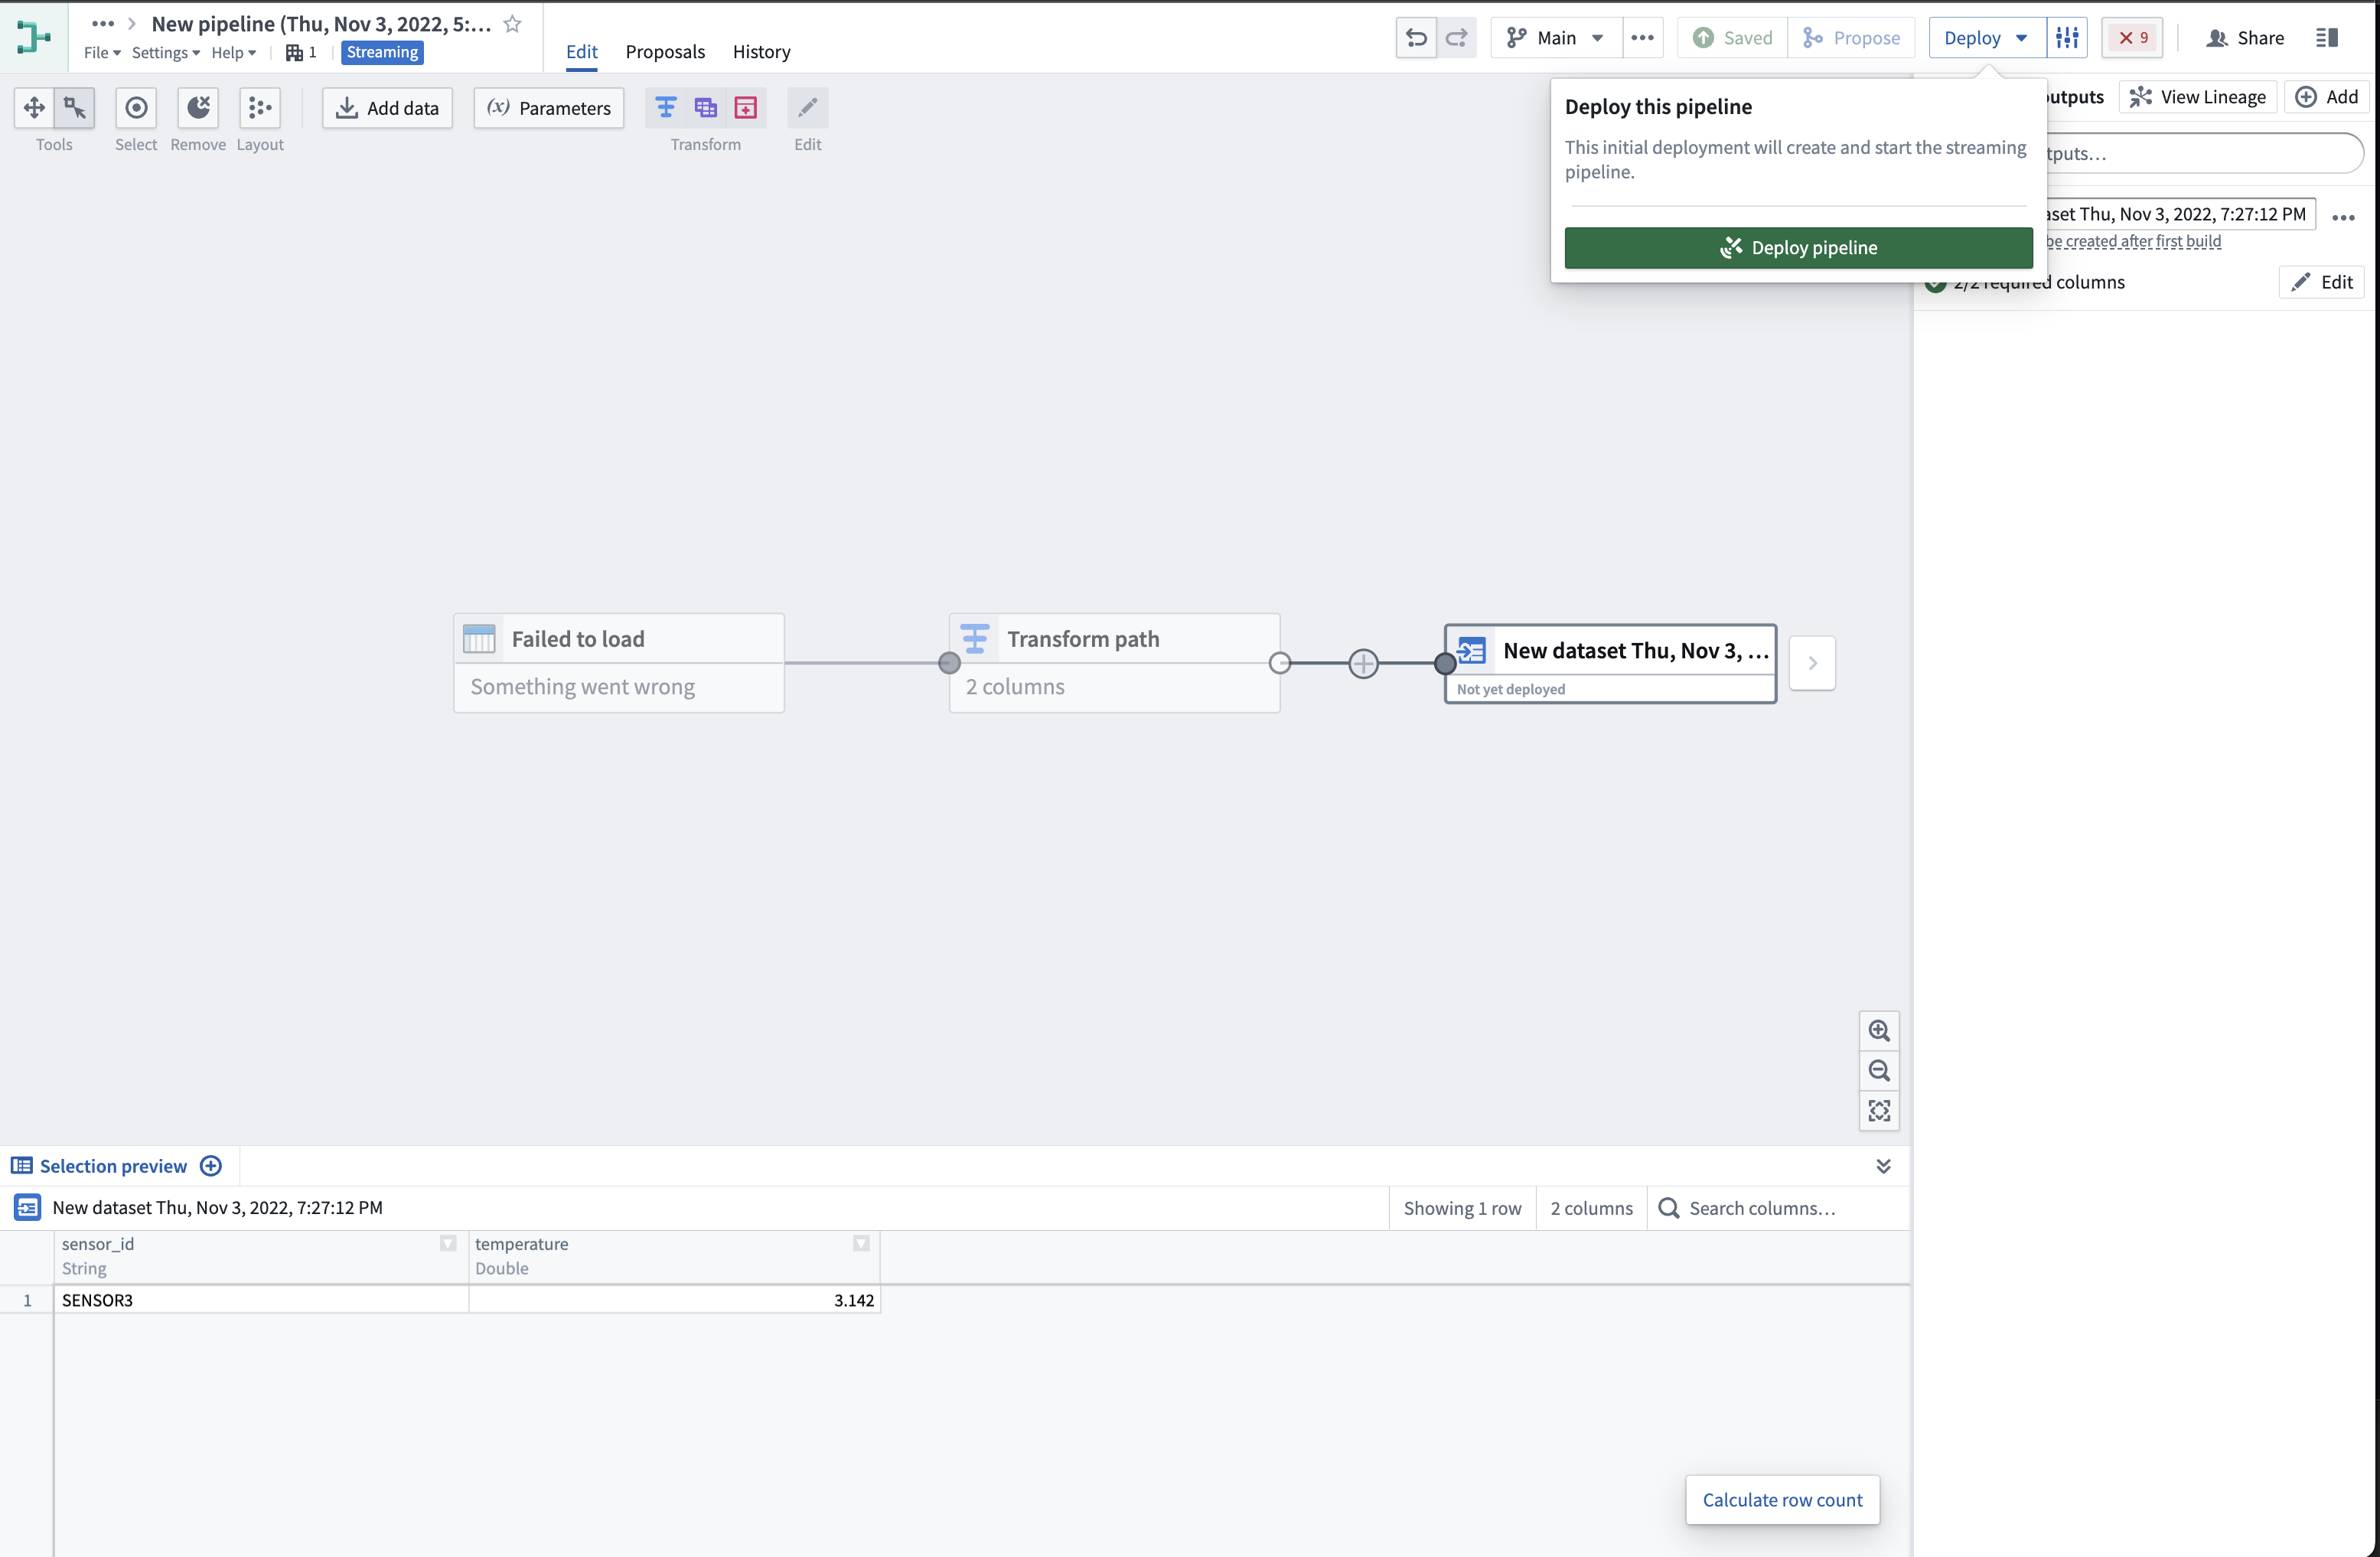
- In the top right corner of the application, first click Save to apply all new changes to your pipeline. Then, click Deploy and Deploy pipeline.
If you save your changes without deploying them, your pipeline logic will not update to the latest changes. You must deploy the pipeline to capture changes to transform logic.
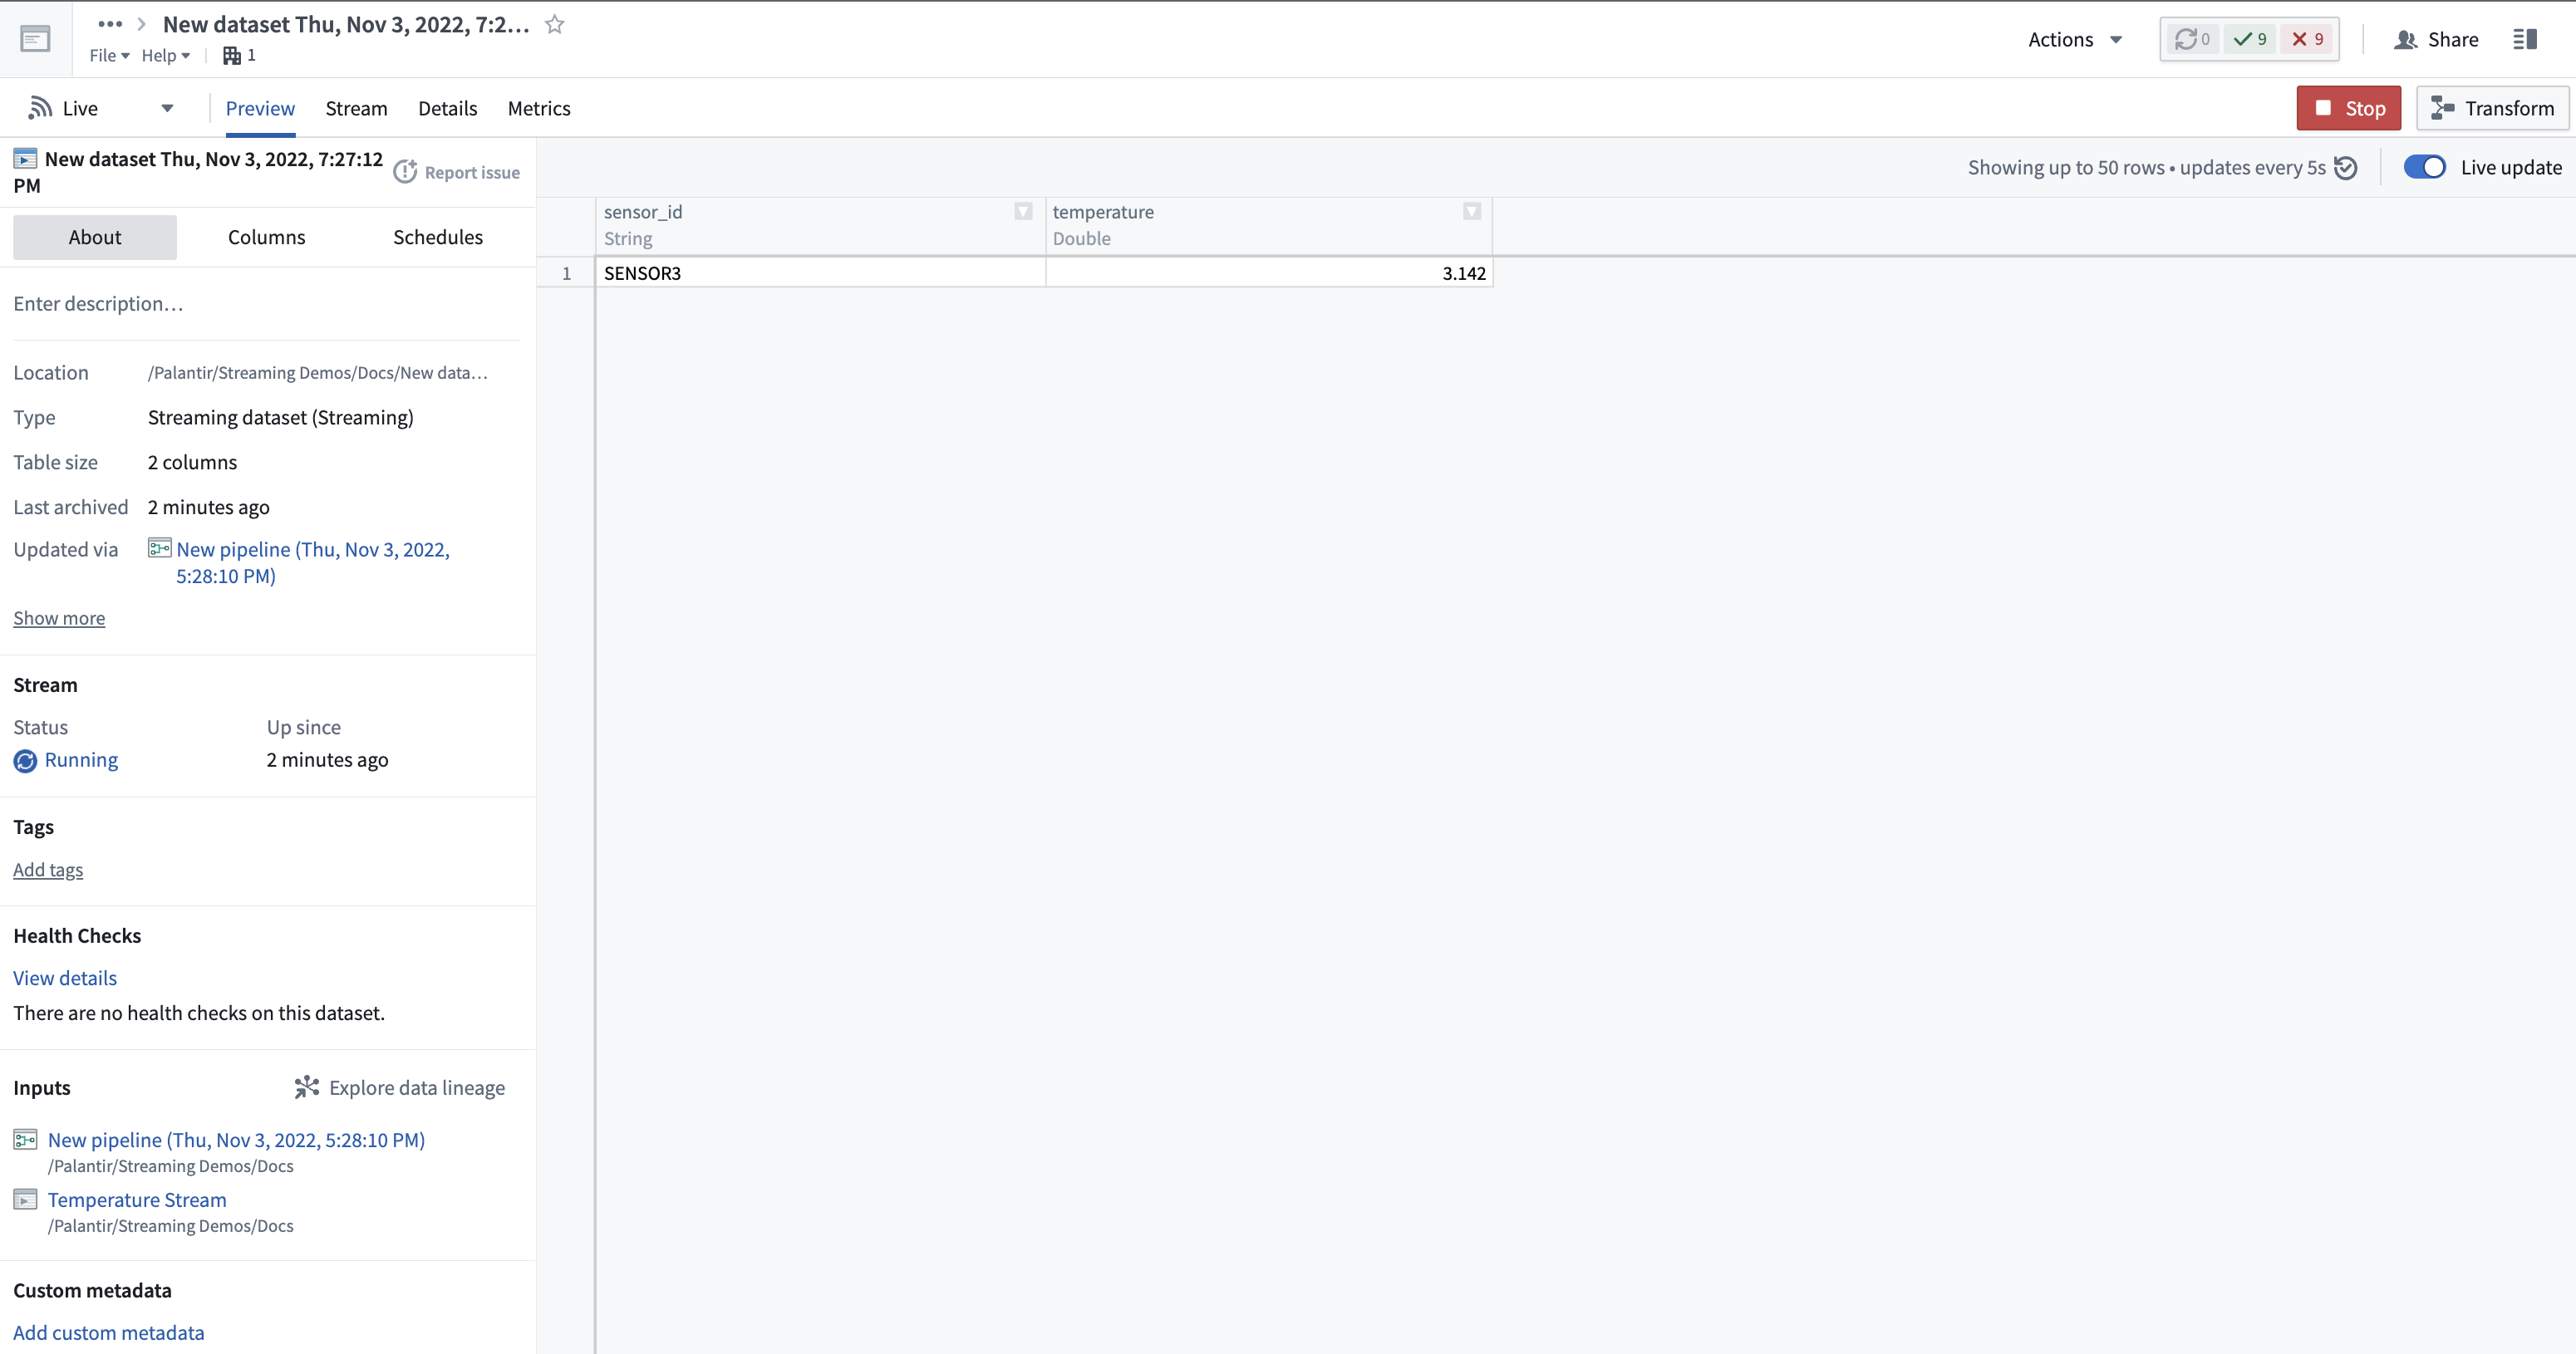
- Select the output stream node you just created, then click on the stream name above the Data preview section at the bottom of your graph.
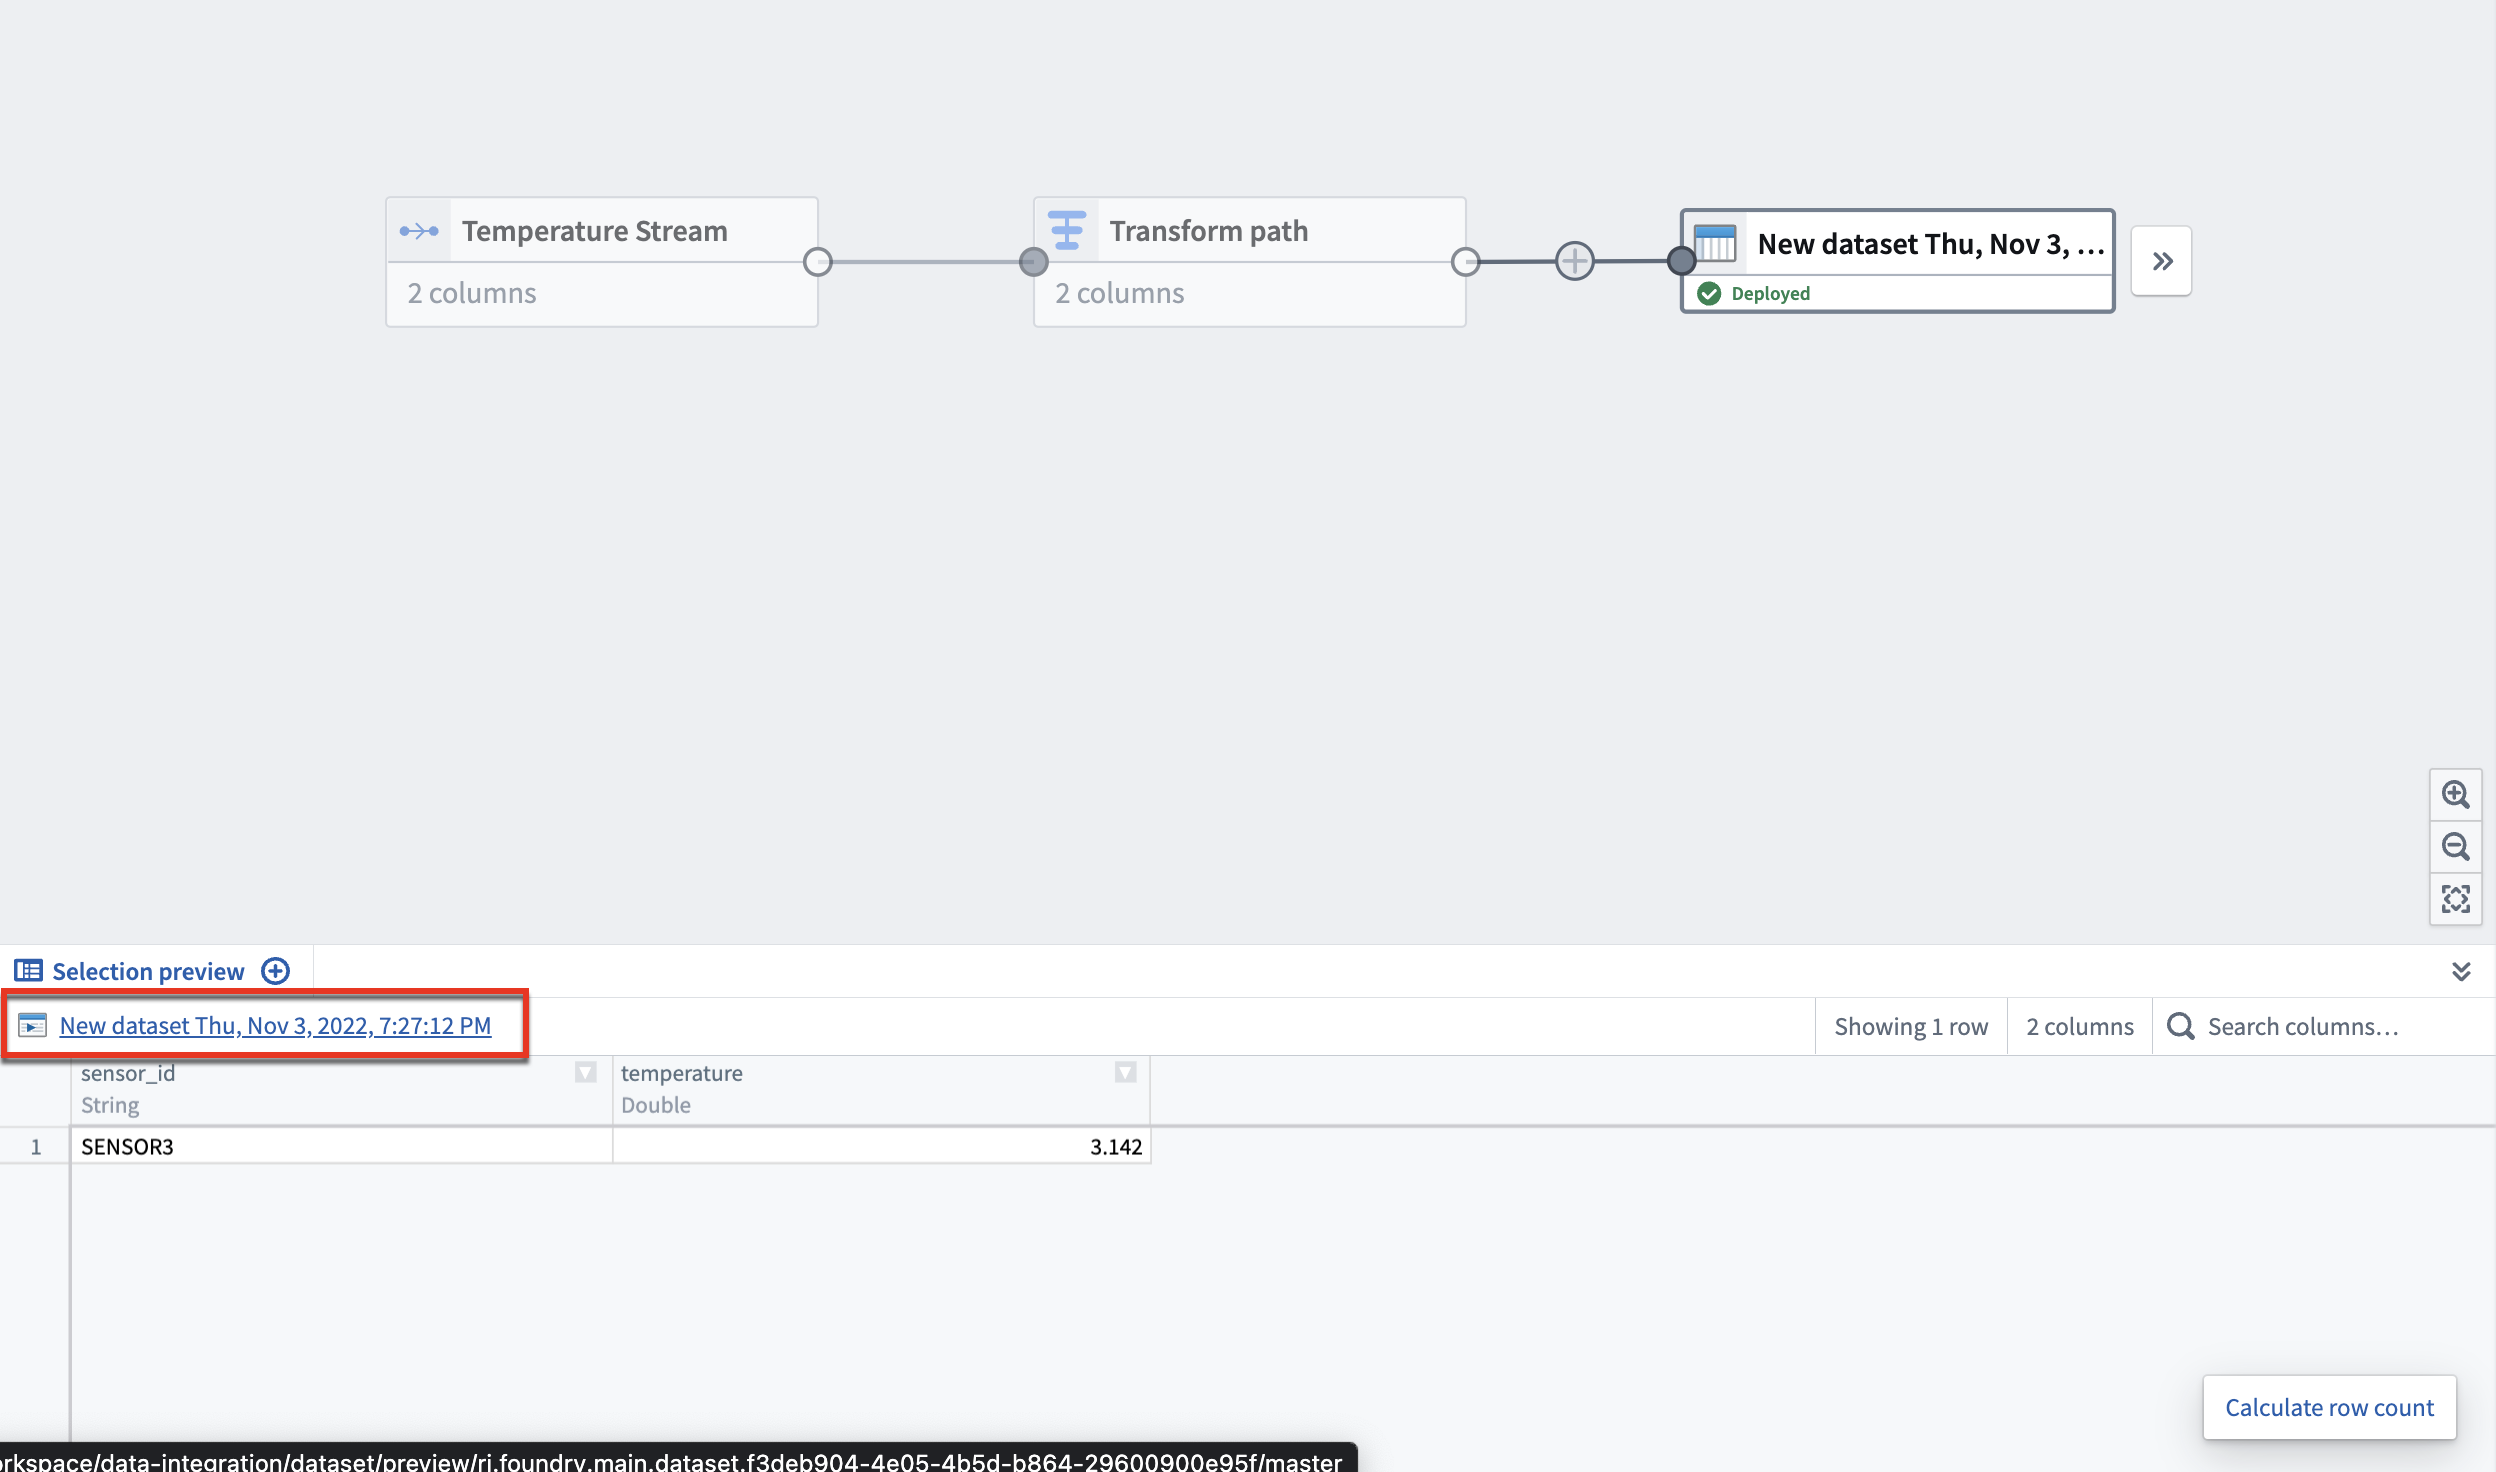
This will take you to the stream preview page with the output stream from your transform.
The streaming cluster takes about one minute to start, so you may not see records immediately. Once running, however, the cluster will process all new records in real time.
Next steps
Now that you know how to create a simple streaming pipeline, learn more about managing streams by exploring how to debug a failing stream. For more advanced transform functionality, learn more about Pipeline Builder.