- Capabilities
- Getting started
- Architecture center
- Platform updates
Oracle NetSuite SuiteQL
Connect Foundry to Oracle NetSuite using the SuiteQL framework and start syncing data from your NetSuite ERP to Foundry.
Supported capabilities
| Capability | Status |
|---|---|
| Exploration | 🟢 Generally available |
| Batch syncs | 🟢 Generally available |
| Incremental | 🟢 Generally available |
Setup
- Open the Data Connection application and select + New Source in the upper right corner of the screen.
- Select NetSuite SuiteQL from the available connector types.
- Choose to run the source capabilities on a Foundry worker or on an agent worker.
- Follow the additional configuration prompts to continue the setup of your connector using the information in the sections below.
Learn more about setting up a connector in Foundry.
Authentication
The NetSuite SuiteQL source uses token-based authentication (TBA) ↗.
The token-based authentication feature must be enabled on your account. To enable TBA, see NetSuite documentation ↗.
Configure user roles and permissions in NetSuite
Access control in NetSuite is configured via the assignment of roles to a user; each role is a collection of permissions that define what tasks the user can perform and what data they can access. We recommend the following configuration for the user that will connect to Foundry:
-
Create a dedicated role with appropriate permissions.
- From NetSuite’s tool bar, select Setup > Users/Roles > Manage Roles > New and provide an explicit name to the role. We recommend using
foundry-role.- You can optionally tick the Web Services only configuration box.
- Add system-wide permissions to the role by navigating to the bottom of the role page and selecting Permissions > Setup. The minimal required permissions you need to add are:
- Log In using access tokens
- REST Web Services
- Custom Record Types
- Custom Fields
- Remember to Save after adding the required permissions.
- Add report permissions to the role by navigating to the bottom of the role page and selecting Permissions > Reports. Select:
- SuiteAnalytics Workbook,
- Remember to Add the permissions and then Save.
- Add table permissions to the role for tables you want to be able to query from Foundry by navigating to the bottom of the role page and selecting Permissions > Lists. Select the tables you want, select Add then Save.
- From NetSuite’s tool bar, select Setup > Users/Roles > Manage Roles > New and provide an explicit name to the role. We recommend using
-
Assign the new role to a user.
- From NetSuite’s tool bar, select Setup > Users/Roles > Manage Users. Select the user you want to use to connect to Foundry, and select Edit.
- Navigate to the Access tab and make sure the Give Access checkbox is ticked.
- In the Roles tab, select the newly created role (
foundry-role) from the dropdown list, select Add then Save.
To verify that you added the correct permissions, log in as the user you have assigned the new role to, and check that you can view all the data that you expect.
Configure integration and access tokens in NetSuite
Integration records are used in NetSuite to manage connections to external systems. We recommend the following configuration to connect to Foundry:
- Create a new Integration record using TBA (see more details ↗).
- From NetSuite’s tool bar, select Setup > Integration > Manage Integrations > New and provide an explicit name to the integration. We recommend
foundry-integration. - Make sure the State is Enabled and that only Token-based Authentication is ticked. All other boxes should be unticked.
- After you Save, make a note of the
CLIENT IDandCLIENT SECRET. You will need them to configure Foundry.
- From NetSuite’s tool bar, select Setup > Integration > Manage Integrations > New and provide an explicit name to the integration. We recommend
CLIENT ID and CLIENT SECRET will be displayed only the first time you save the integration record. You must reset them to get new ones, which invalidates the previous values.
- Create and assign a TBA token.
- From NetSuite’s tool bar, select Setup > User/Roles > Access Tokens > New.
- If you can't manage tokens for other users, navigate to the bottom-left Settings panel on NetSuite's homepage and select Manage Access Tokens.
- Select the newly created application (
foundry-integrationin our example), the user to which you've assigned the newly created role (foundry-role), and the newly created role.- If you can't manage tokens for other users, your user will be selected by default. Make sure your user has the newly created role (
foundry-role) assigned to it.
- If you can't manage tokens for other users, your user will be selected by default. Make sure your user has the newly created role (
- After you Save, make a note of the
TOKEN IDandTOKEN SECRET. You will need them to configure Foundry.
- From NetSuite’s tool bar, select Setup > User/Roles > Access Tokens > New.
TOKEN ID and TOKEN SECRET will only be displayed the first time you save the token. You will need to create a new token to get a new TOKEN ID and TOKEN SECRET.
Learn more about token management in NetSuite. ↗
Networking
The NetSuite SuiteQL connector requires network access to the NetSuite instance to which you want to connect.
Option 1: Foundry worker connection
If your connection runs on a Foundry worker, you will need to add the following egress policy to the source:
- <ACCOUNT_ID>.suitetalk.api.netsuite.com on port 443. You can find your account id in the url when connected to NetSuite.
If this egress policy does not exist, you can request the egress policy; otherwise, you can add the egress policy.
Option 2: Agent worker connection
If your connection runs on an agent worker, you must ensure that the agent host has firewalls open to the host names, IP addresses, and ports required to connect to your NetSuite Connect instance.
Connection details
| Option | Required? | Description |
|---|---|---|
Account ID | Yes | NetSuite Account ID, found as a prefix in your NetSuite's instance URL |
Client ID | Yes | CLIENT ID copied when creating the foundry-integration |
Client secret | Yes | CLIENT SECRET copied when creating the foundry-integration |
Access token | Yes | TOKEN ID copied when creating the TBA token |
Access token secret | Yes | TOKEN SECRET copied when creating the TBA token |
Creating a sync
The NetSuite SuiteQL source can be explored to discover tables and create new syncs. You can also manually create new syncs from the overview page of the source.
Notes
Schema definition of SuiteQL tables
The schema of native SuiteQL tables is hardcoded within the driver, but your account or role may not have permissions to see all columns; by default, the first 1000 extracted rows of a table are used to determine the exact columns that are available for viewing with your role.
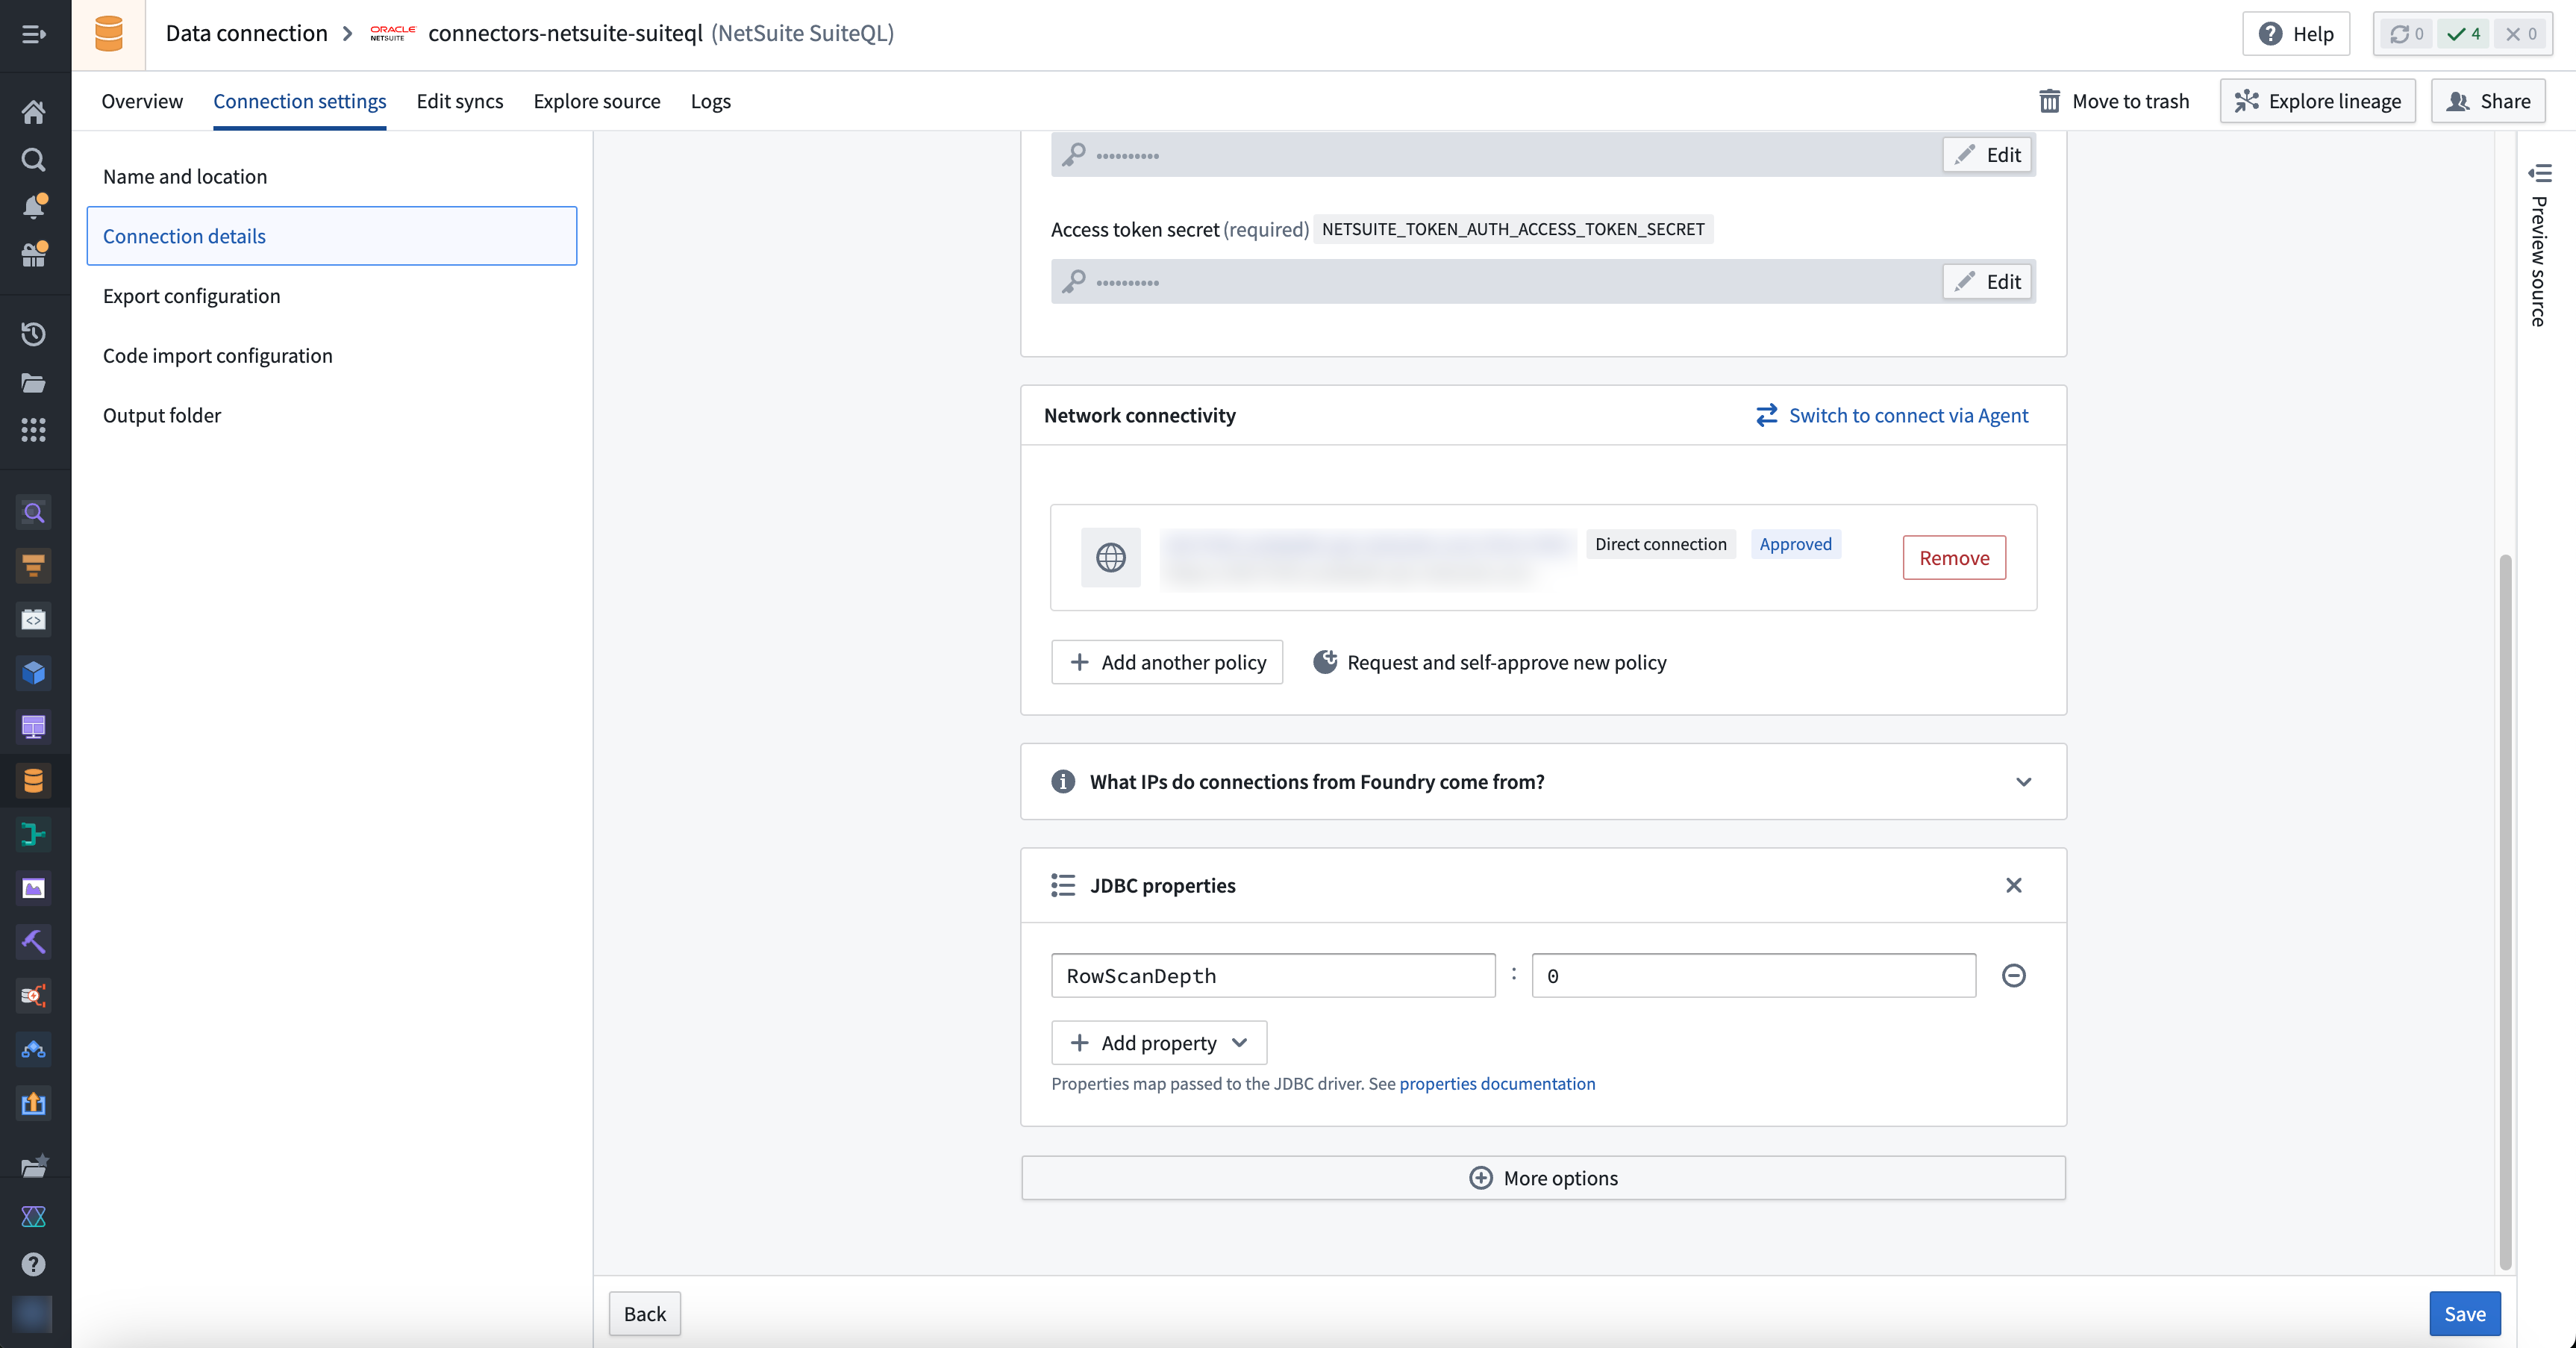
You can change this behavior by modifying the RowScanDepth connection property. In particular, setting RowScanDepth to 0 will allow you to see all columns, but may result in permission exceptions.
Read more about schema definition for native SuiteQL tables in the JDBC Driver for NetSuite documentation on SuiteQL ↗.
To change the value of RowScanDepth, navigate to the source Connection details page, then go to More options followed by JDBC properties.
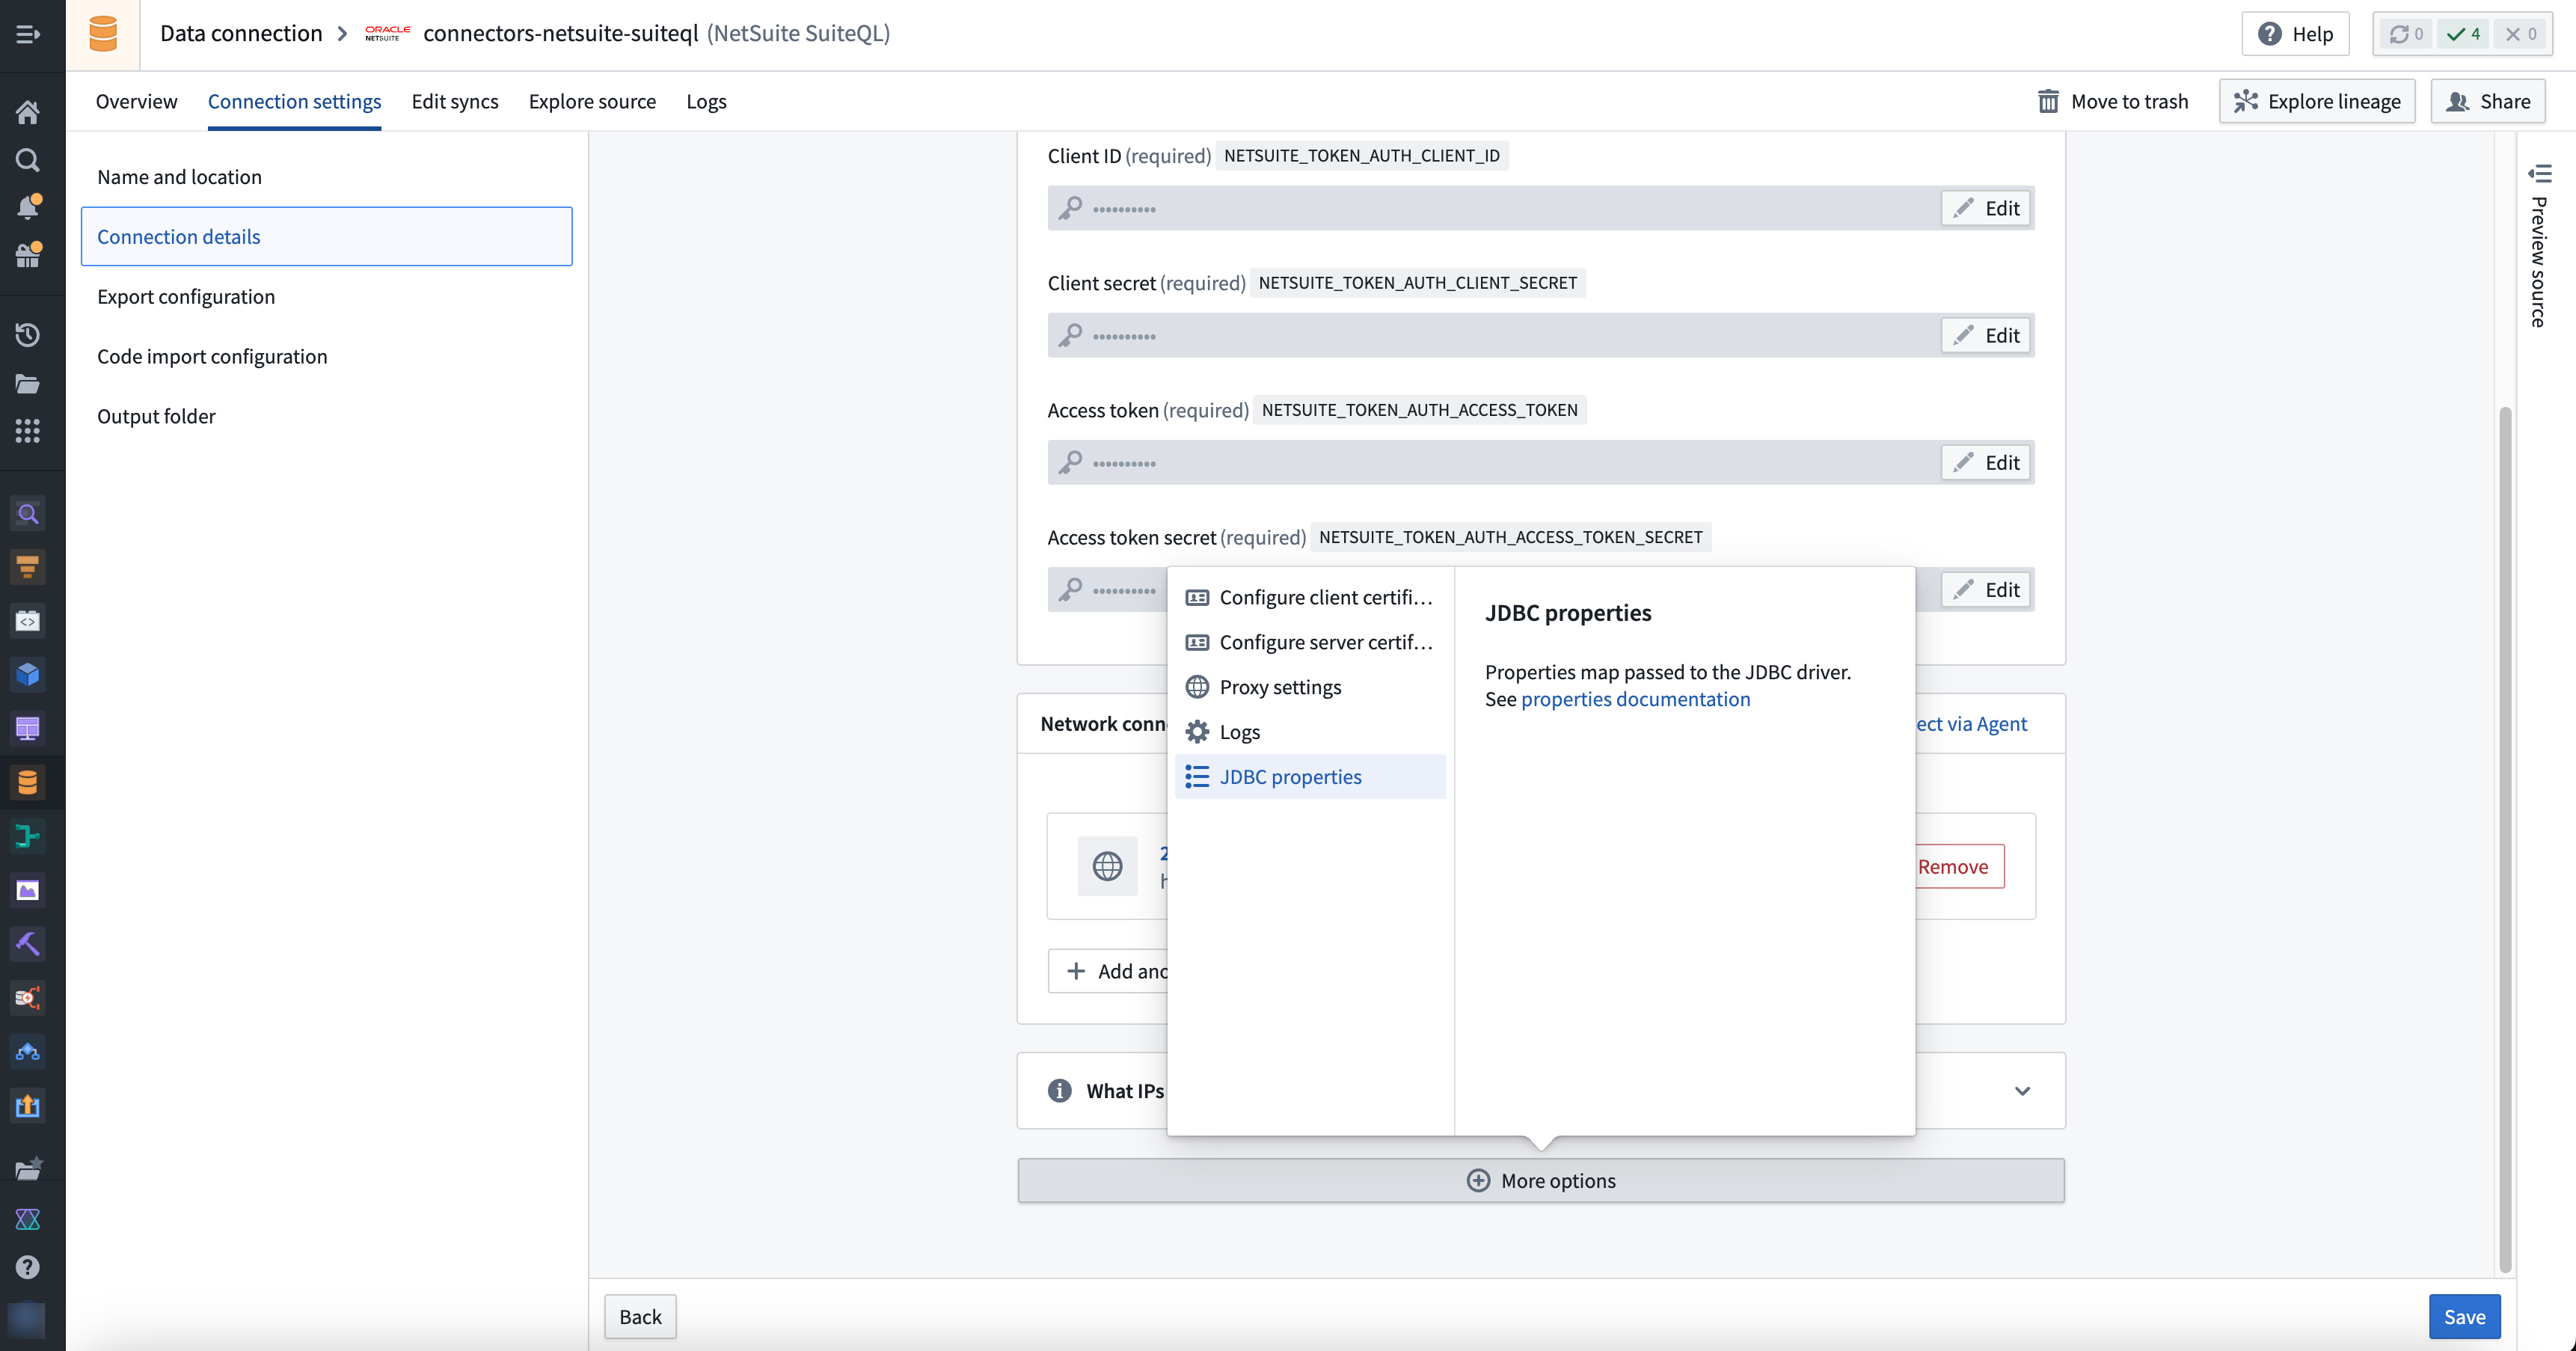
From the JDBC properties, you can add RowScanDepth and set the desired value.