- Capabilities
- Getting started
- Architecture center
- Platform updates
AIP features in Pipeline Builder
Pipeline Builder has a collection of AIP assistance features designed to help you better understand, build, and manage your pipeline. The features allow you to generate new data transformation logic with a single prompt, explain steps in your pipeline development, suggest names and descriptions, create and edit regular expressions, and cast timestamps.
Pipeline Builder assistant features
Generate
Use the Generate feature to create new data transformation logic given a user prompt. AIP can access the full suite of data transformations available to you across Pipeline Builder, recommending the most suitable ones for your specific needs. This provides transparency into the reasoning and rationale used to suggest transformations, using metadata to generate logic, without exposing the underlying data. Finally, AIP transformations are saved into your pipeline logic like regular data transformations, enabling seamless integration into existing workflows.
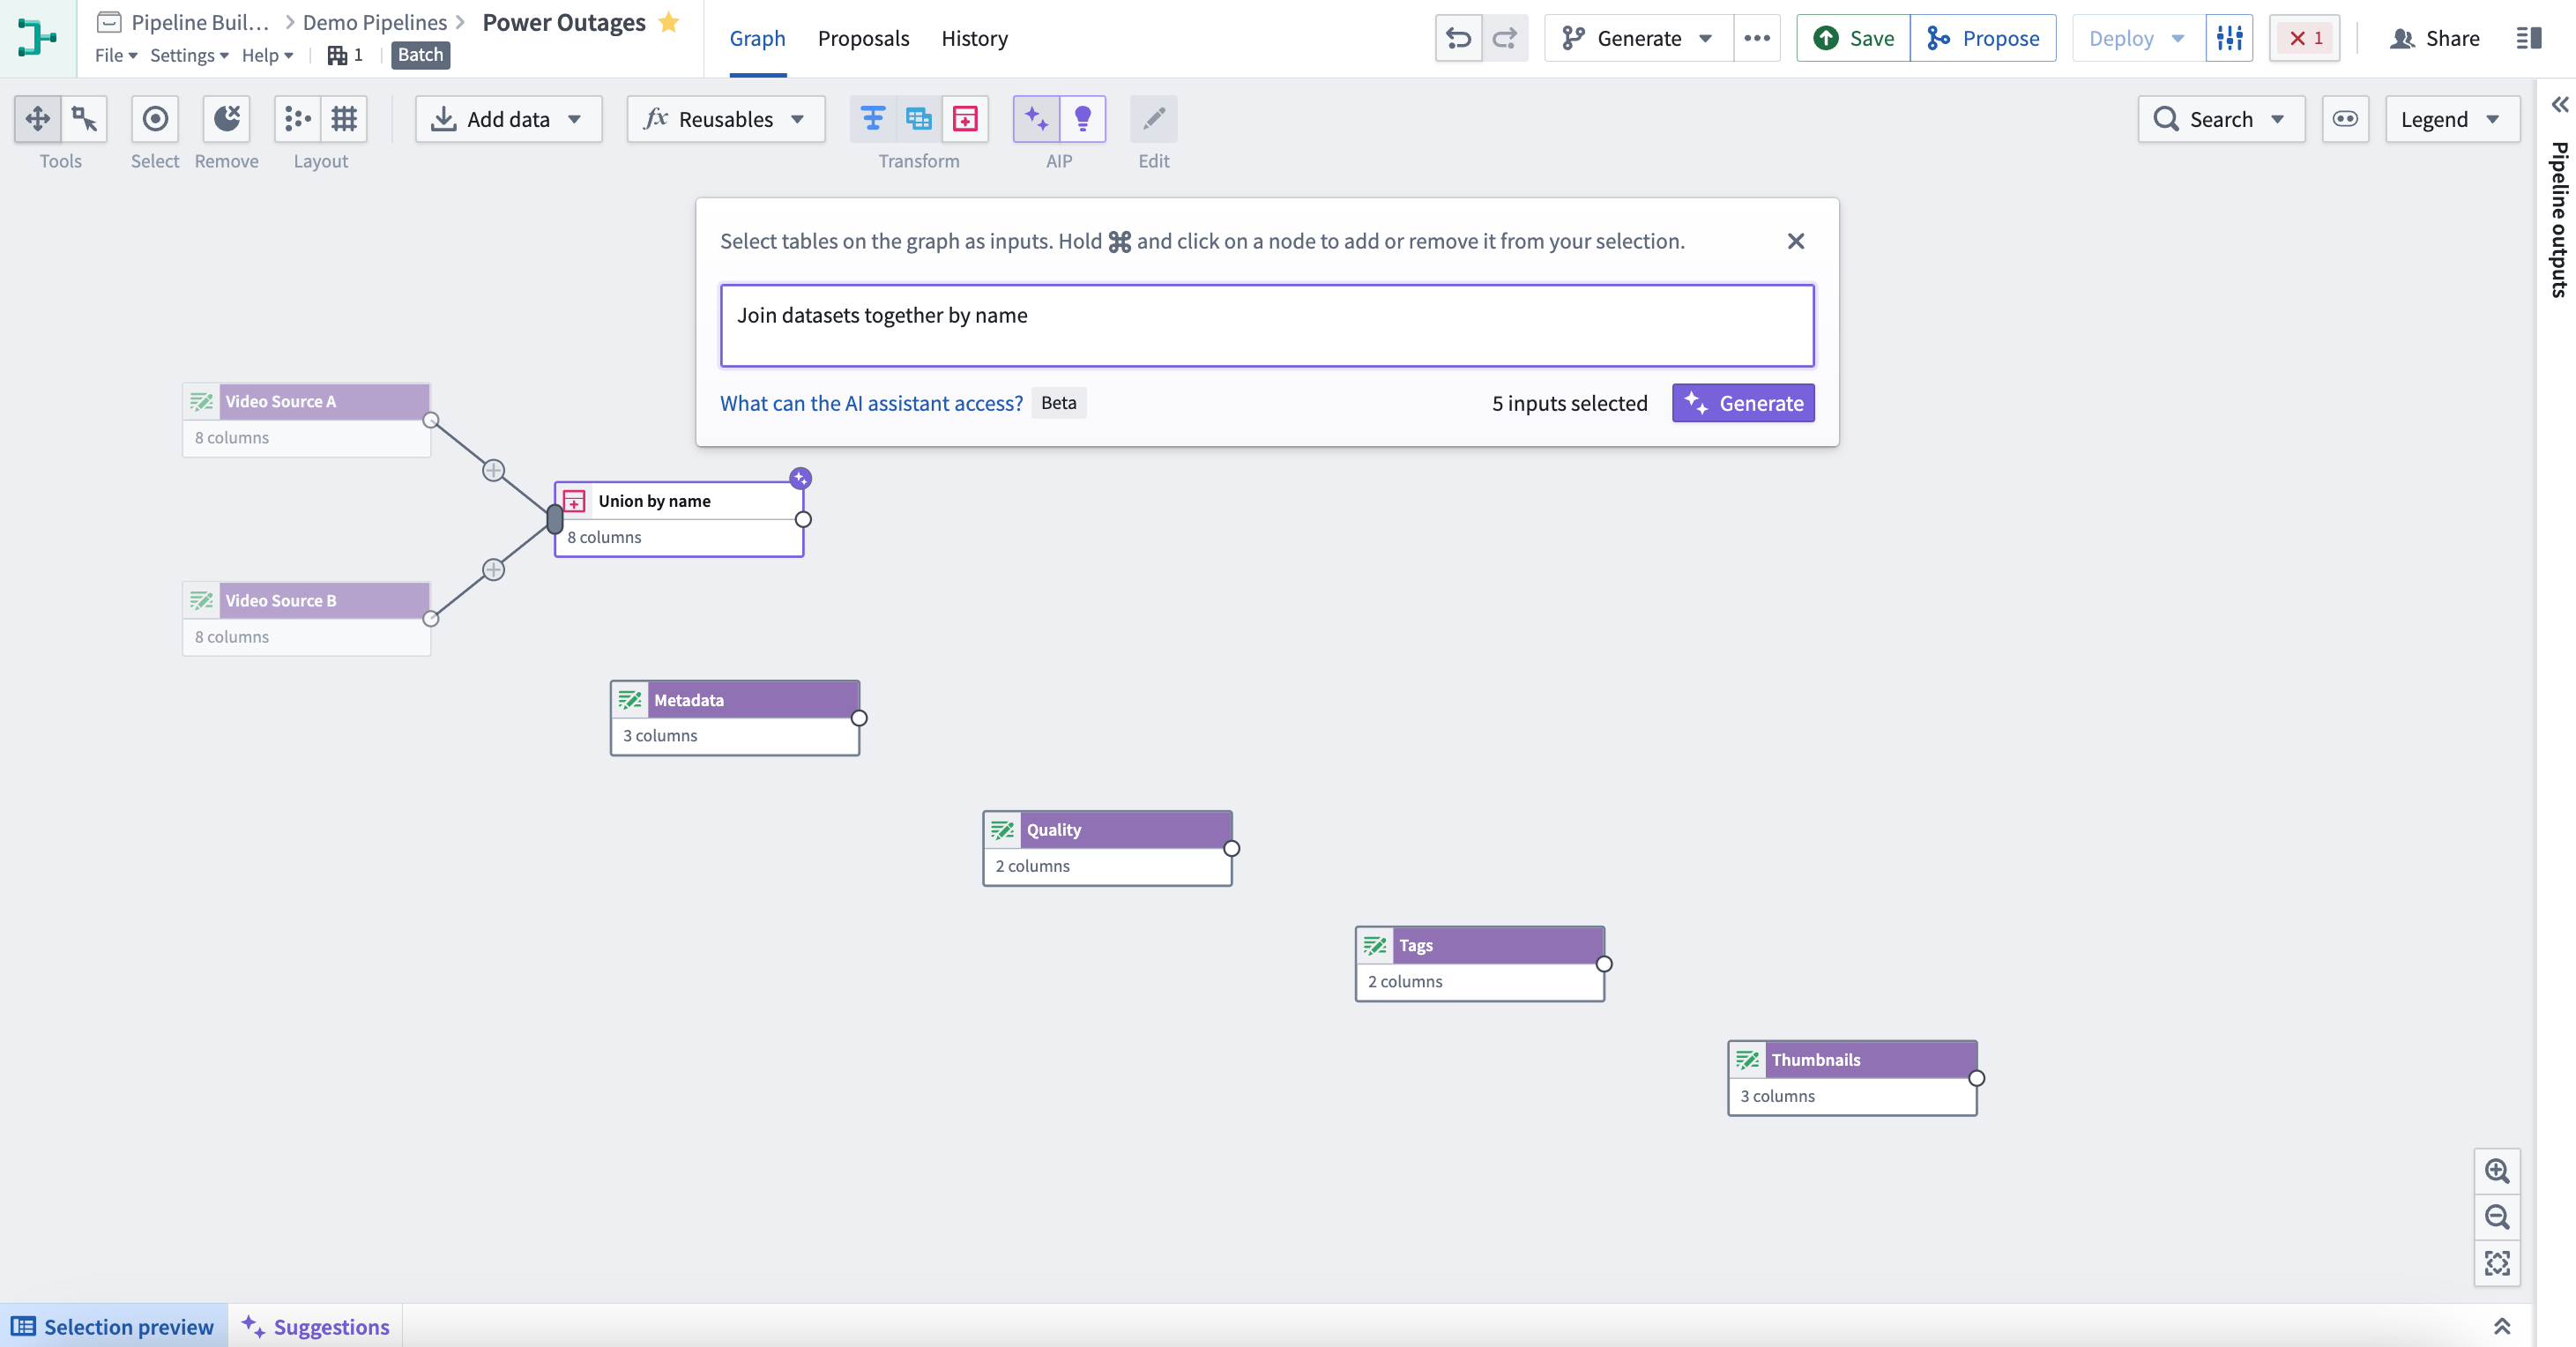
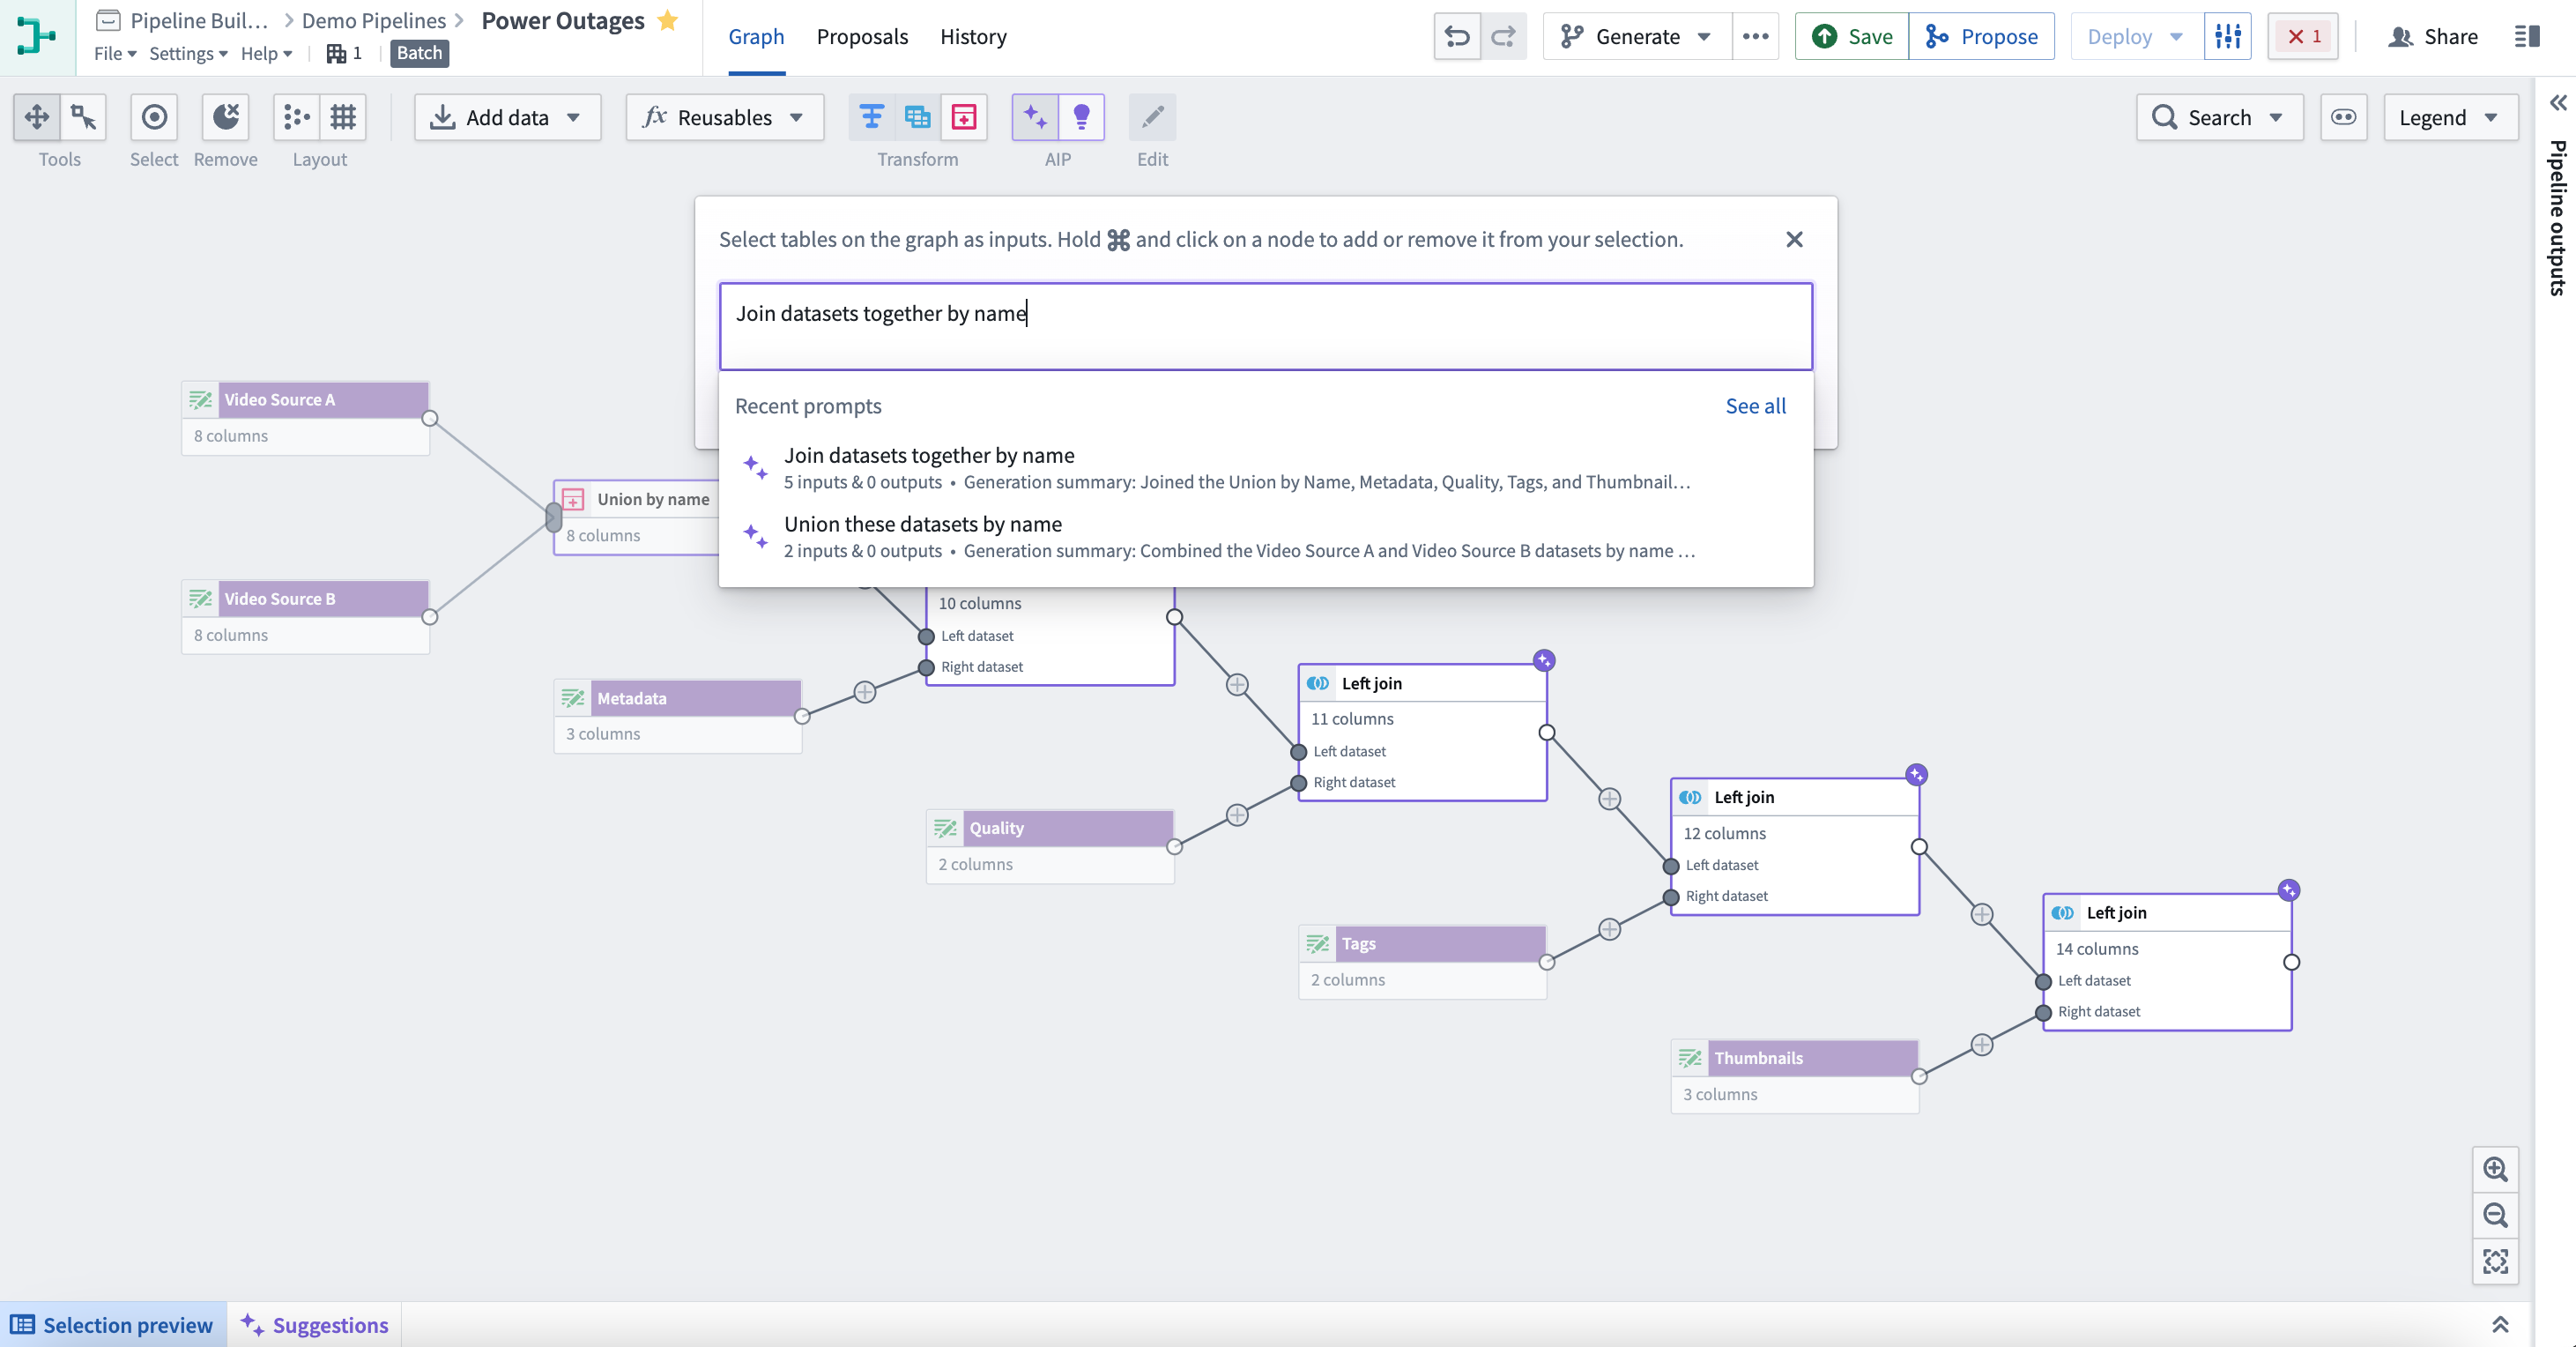
To use the generate feature, select the purple icon with two stars AIP at the top center of your Pipeline Builder graph. Following the instructions in the pop-up window, select nodes on the graph as inputs. Hold cmd (MacOS) or ctrl (Windows) and select on a node to add or remove it from your selection.
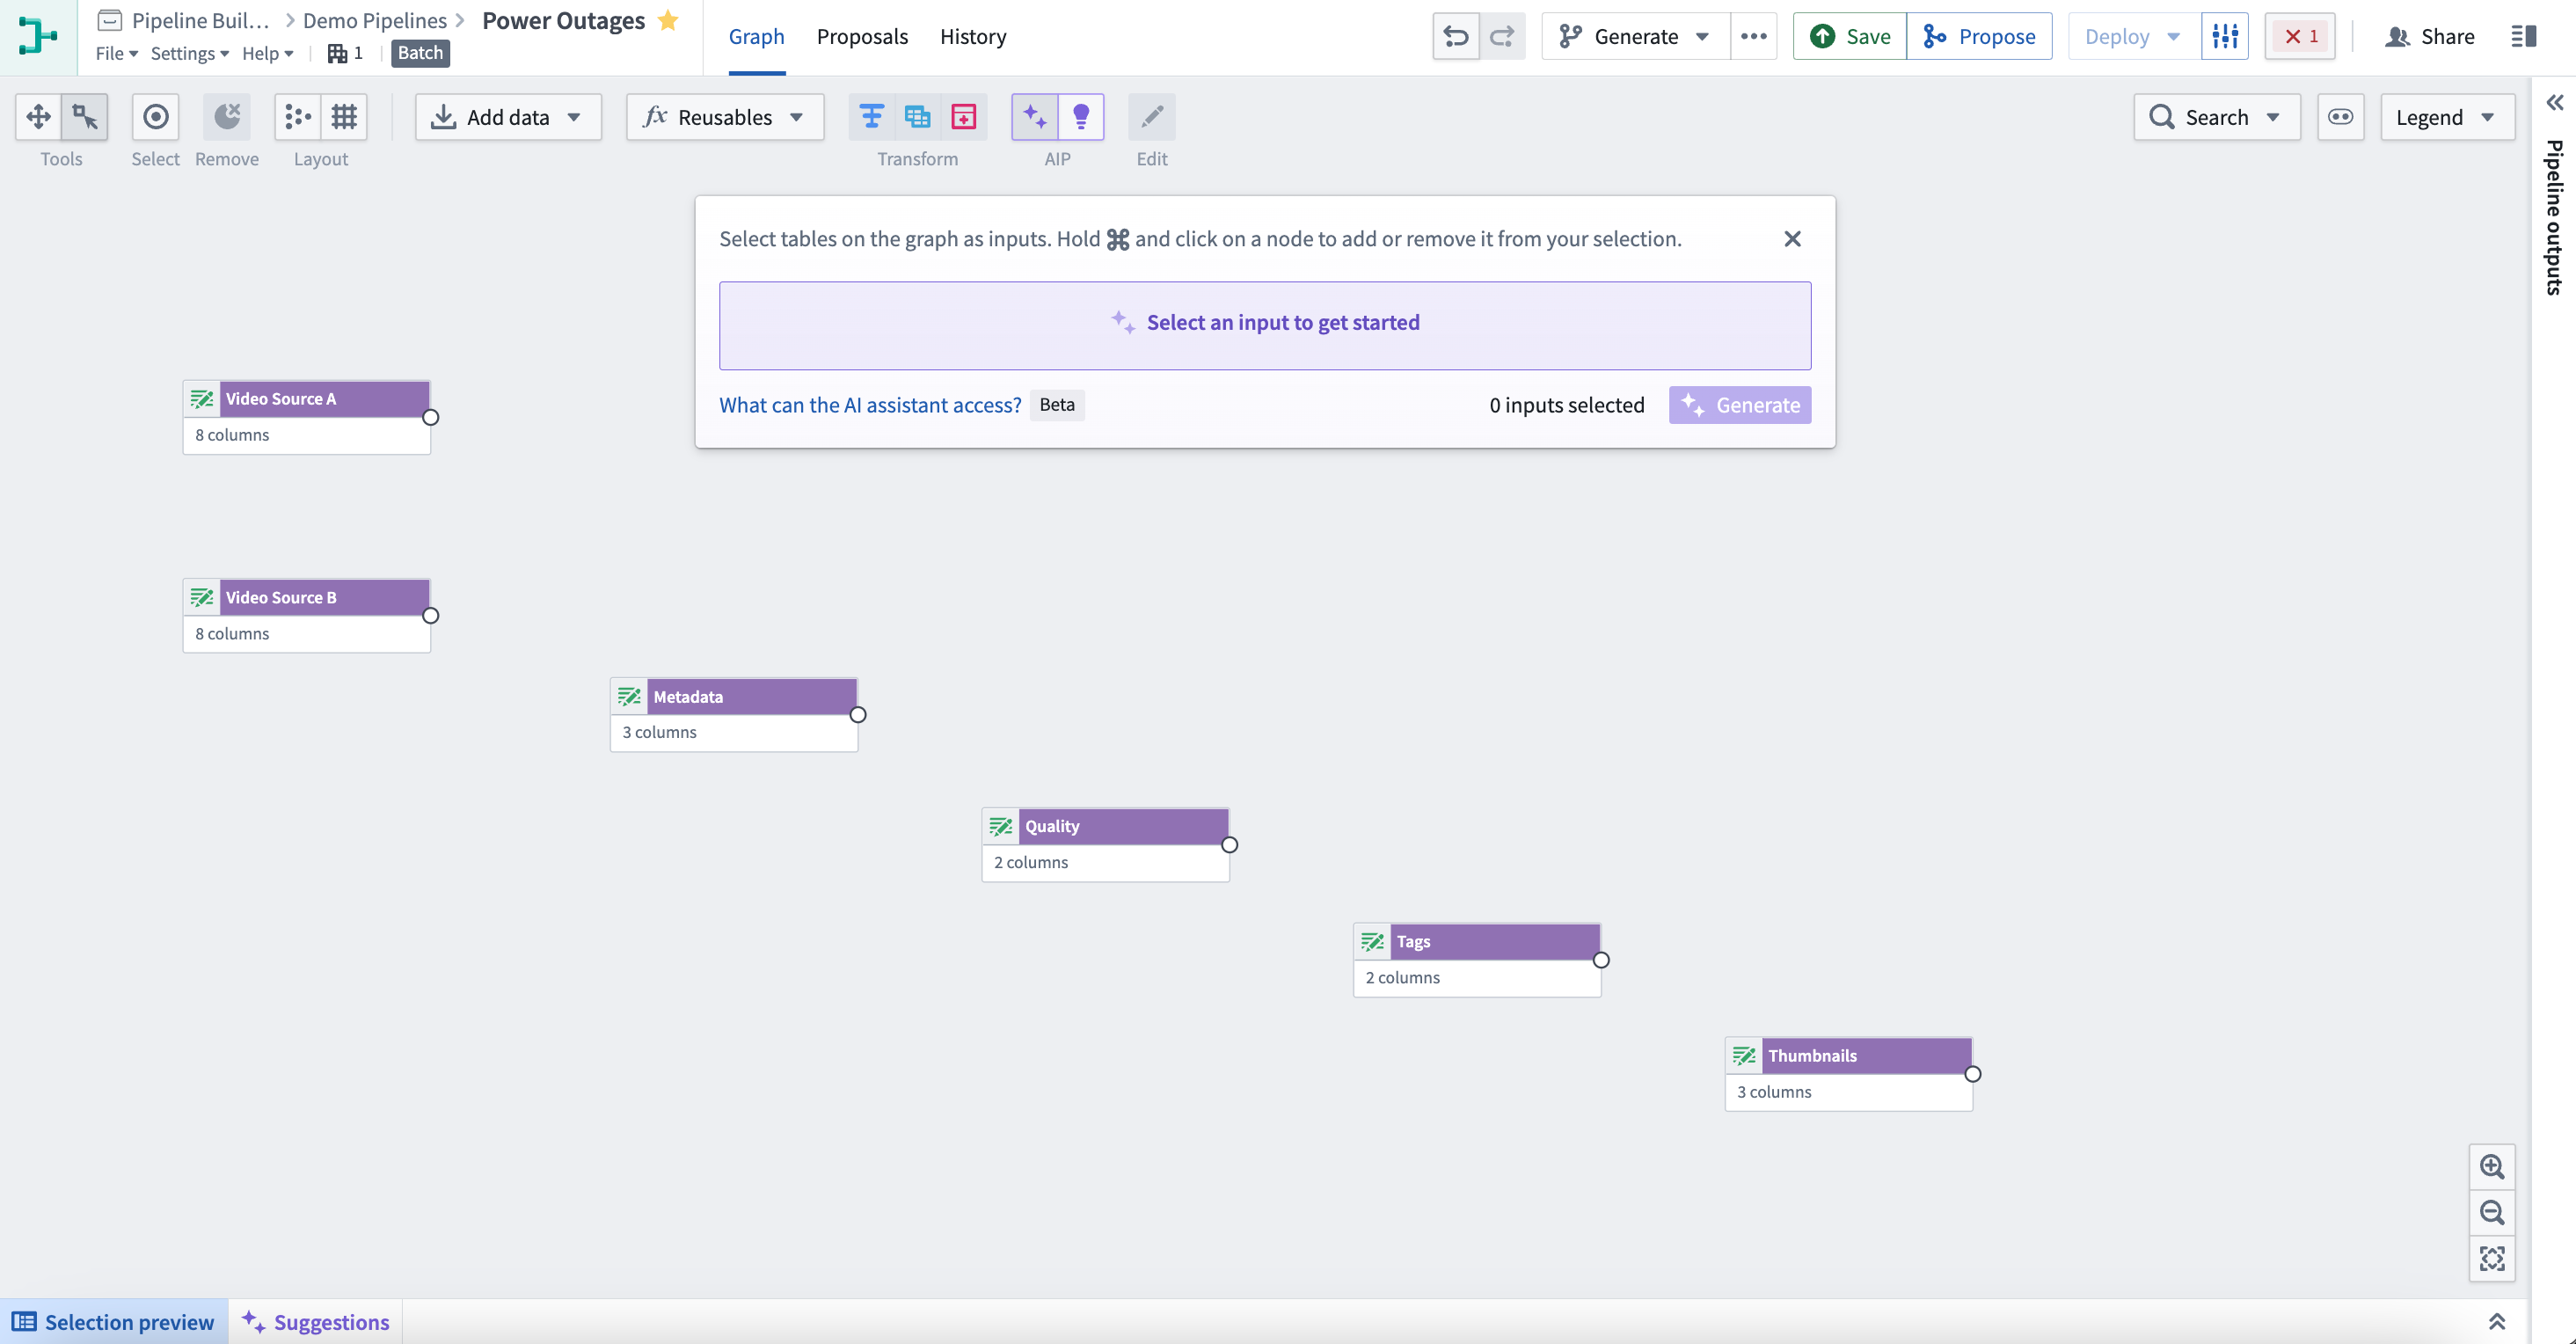
Next, enter the prompt for AIP to evaluate, then select Generate to start the run.

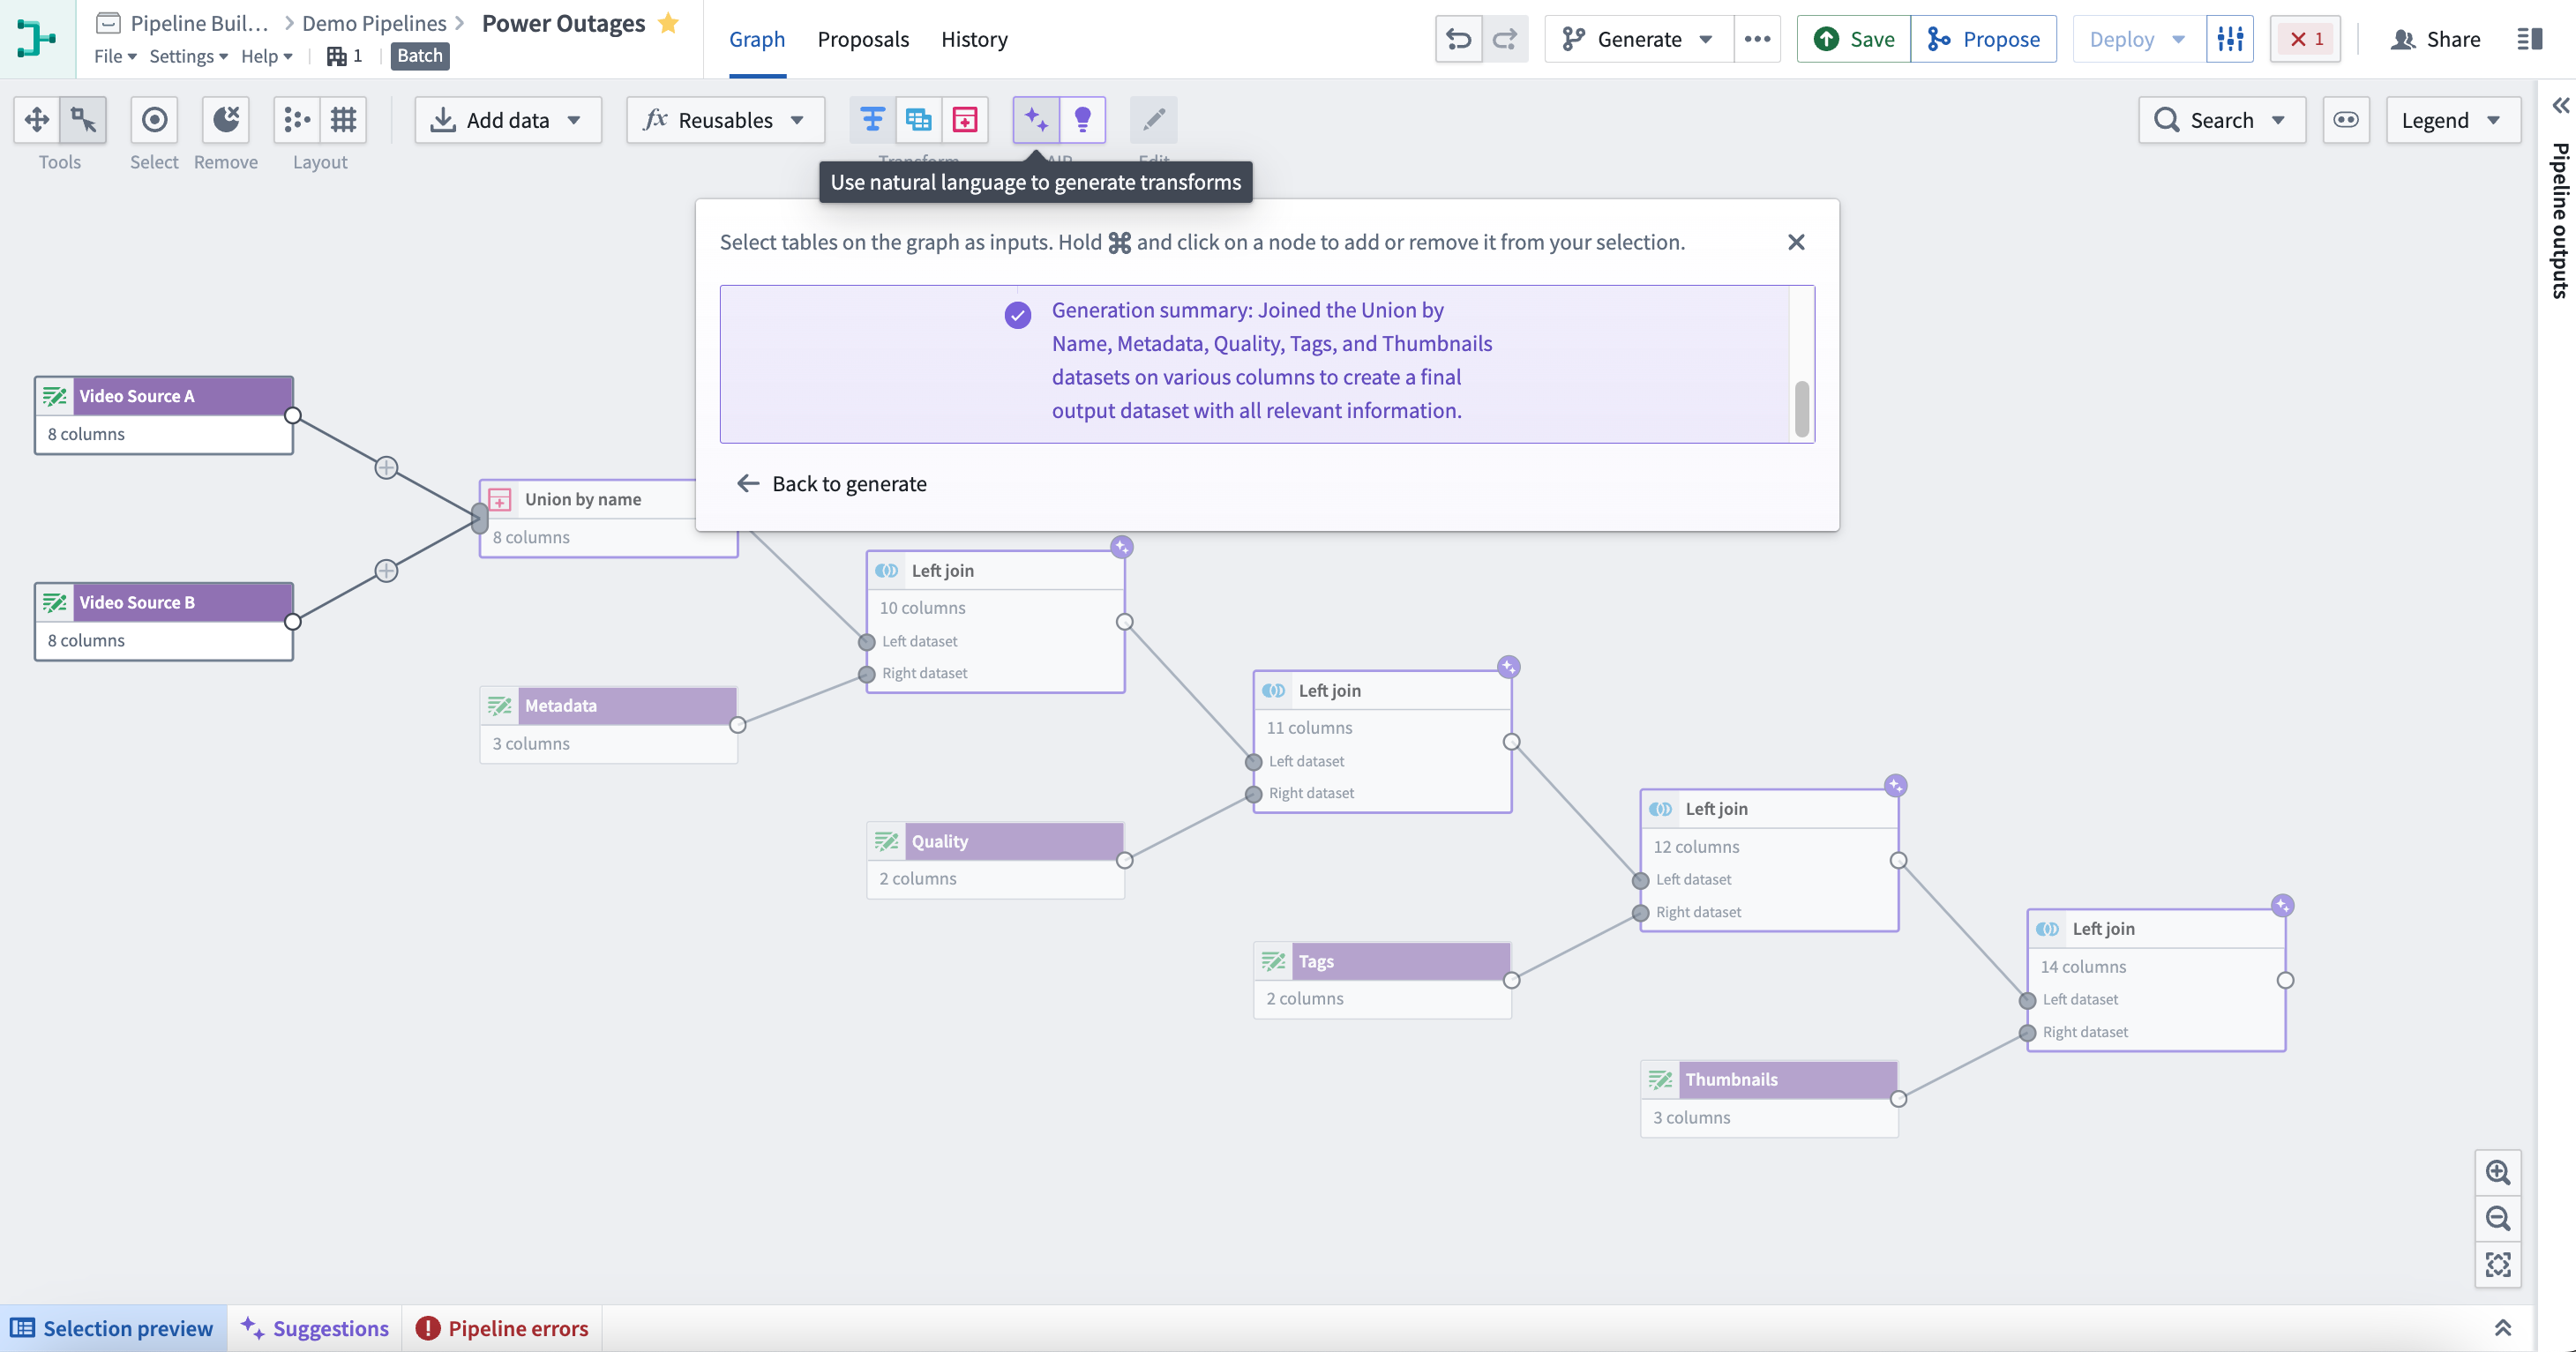
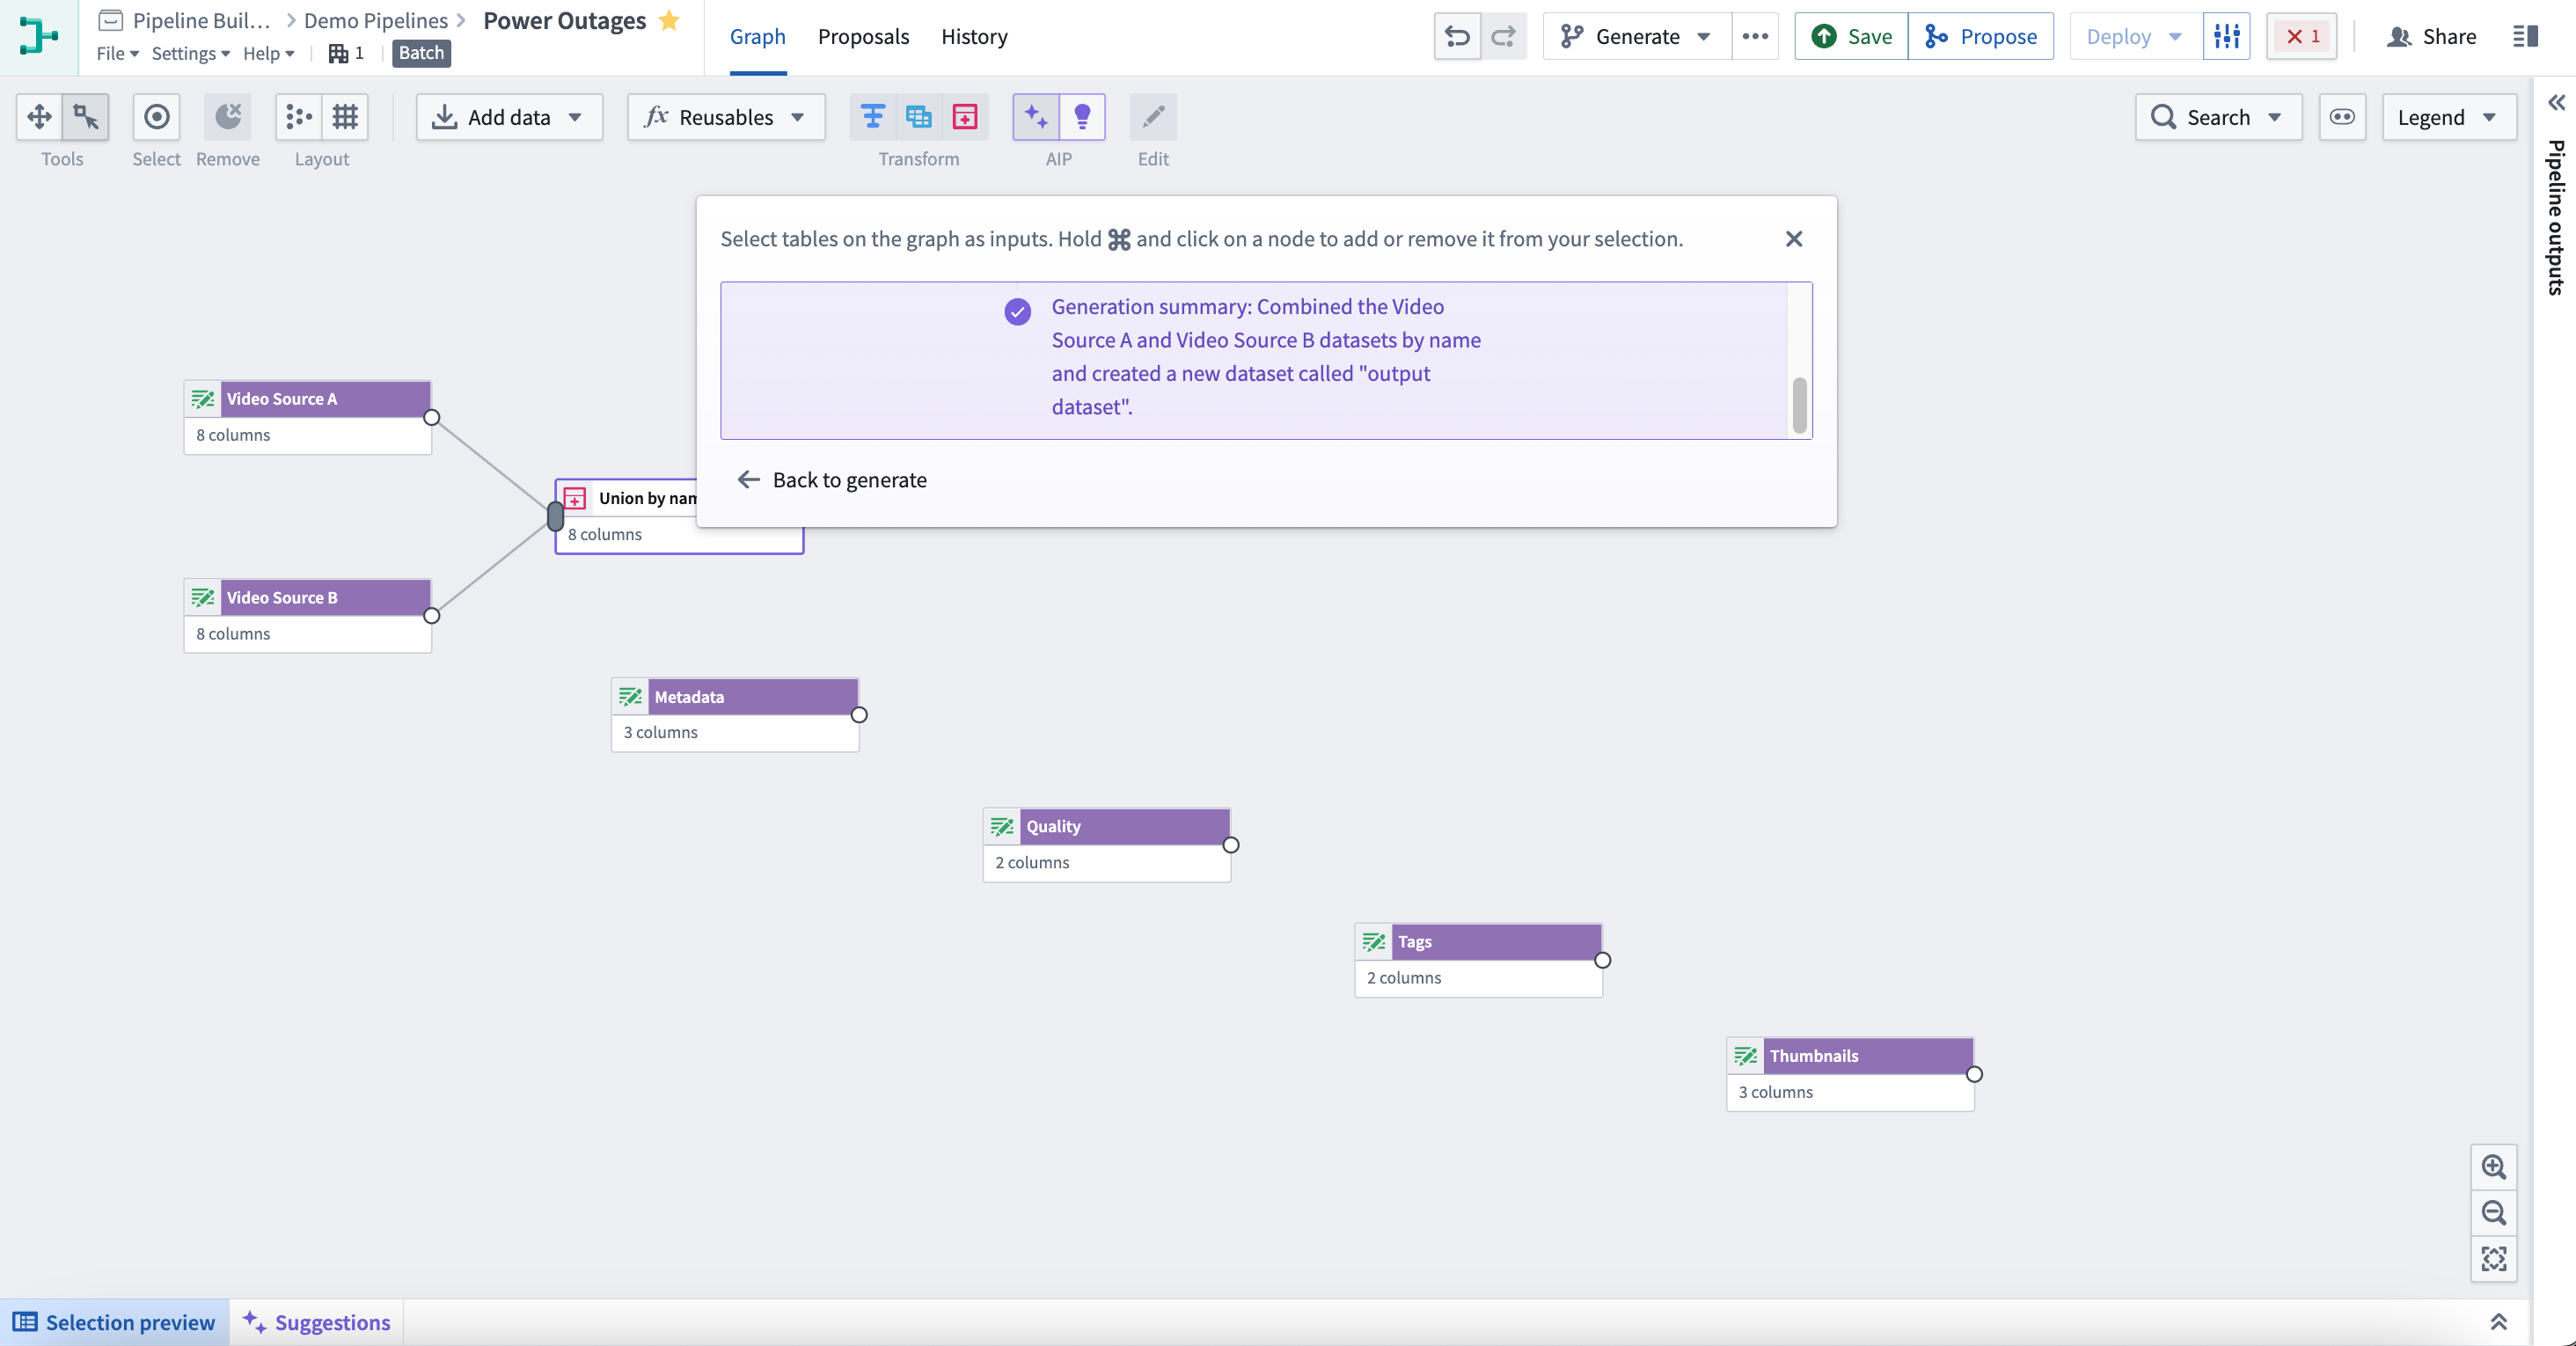
This will return one or more transform nodes highlighted in purple alongside a description of the generated transforms.
To continue transforming, select Back to generate. Choose the next set of nodes and enter the next prompt to continue building your pipeline.
To look back at your recent prompts, select the input box. You can retry any prompt by choosing a historical entry which will automatically select the original inputs.
Explain
Use the Explain feature to dynamically obtain descriptions for your pipelines through every step of the development process. Keep your collaborators in sync on the current state, provide valuable context for new approvers, or facilitate knowledge transfer between new team members with minimal maintenance effort.
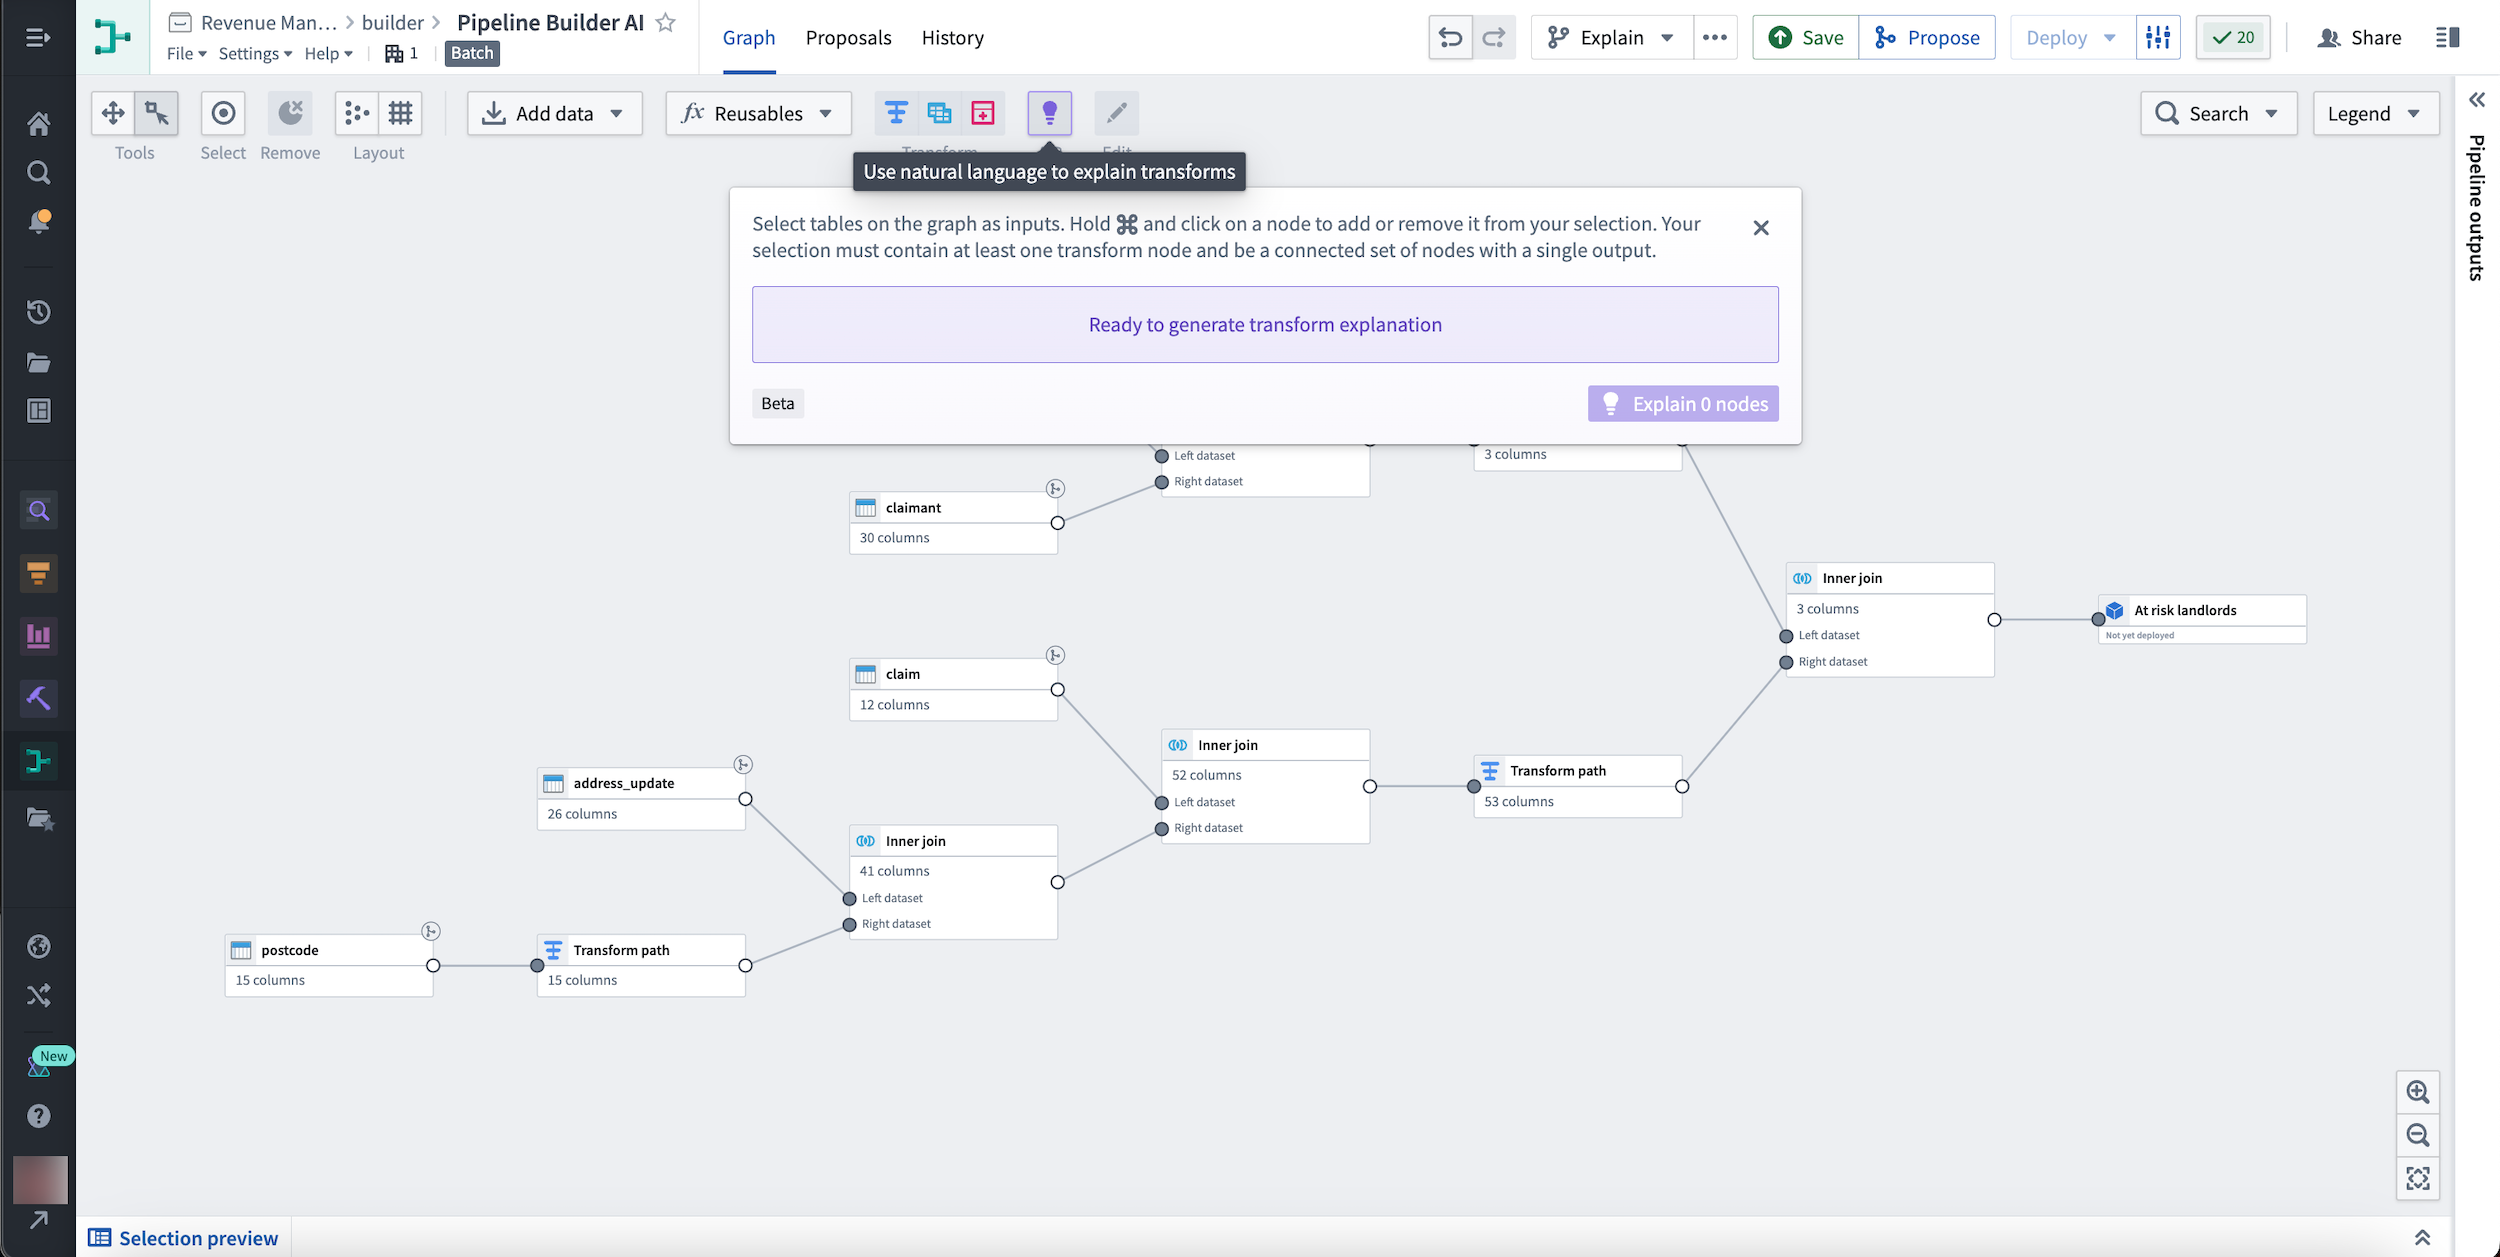
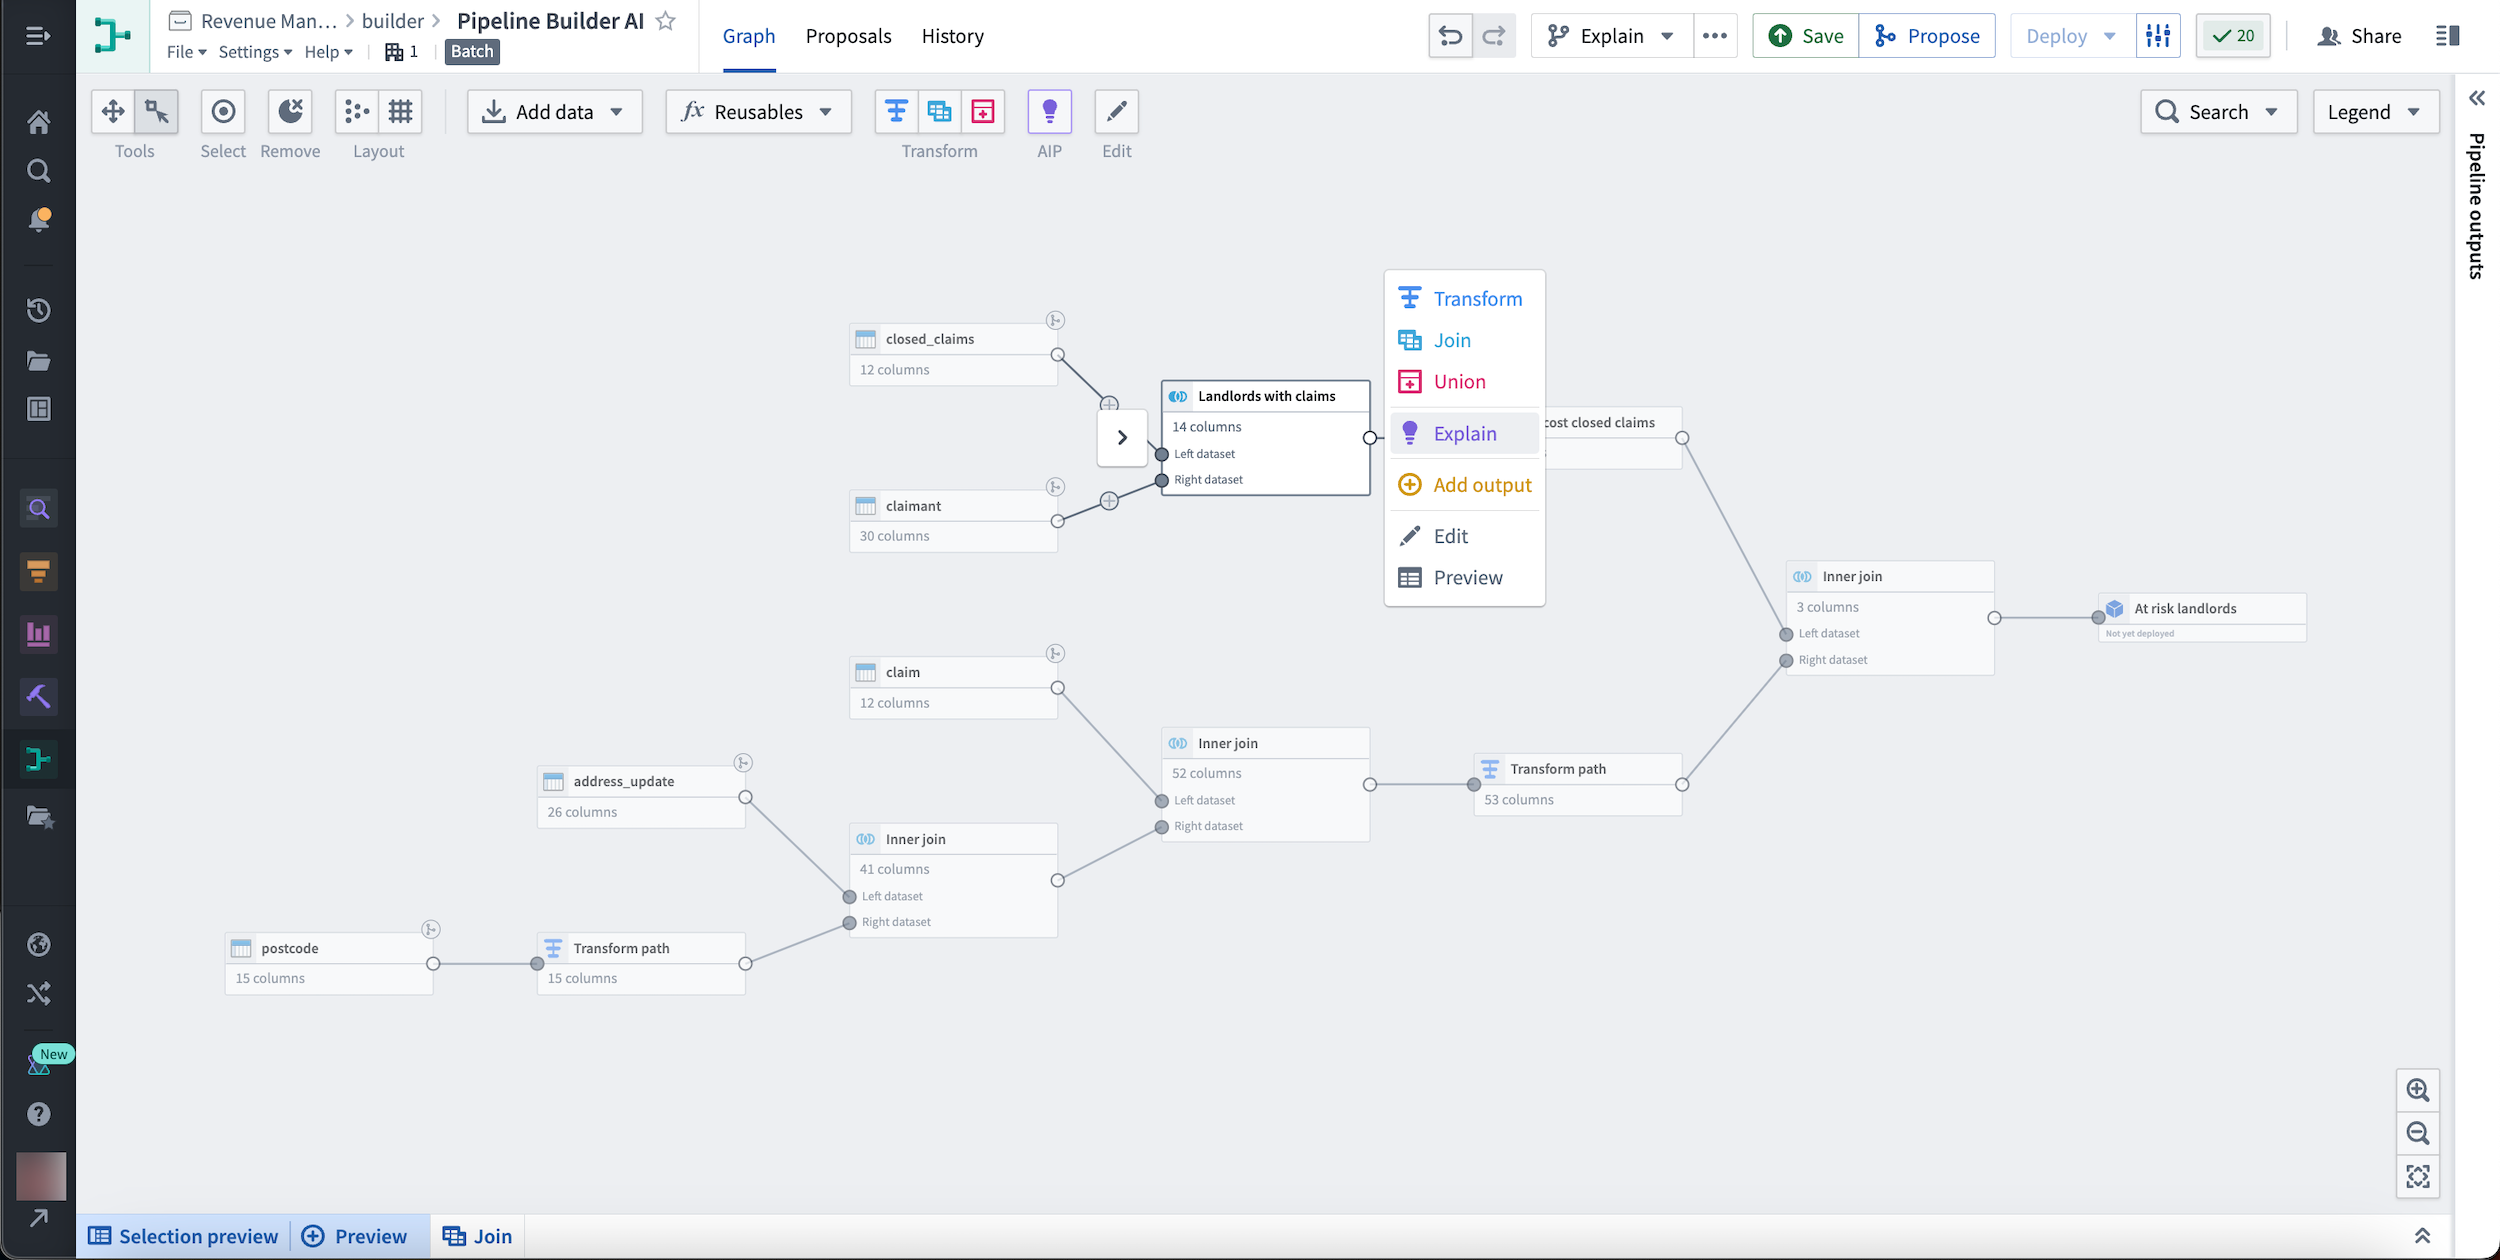
To use Explain, select the purple lightbulb labeled AIP in the top center of your Pipeline Builder graph. Following the instructions in the pop-up window, select tables on the graph as inputs. Hold and select on a node to add or remove it from your selection. Your selection must contain at least one transform node and be a connected set of nodes with a single output.
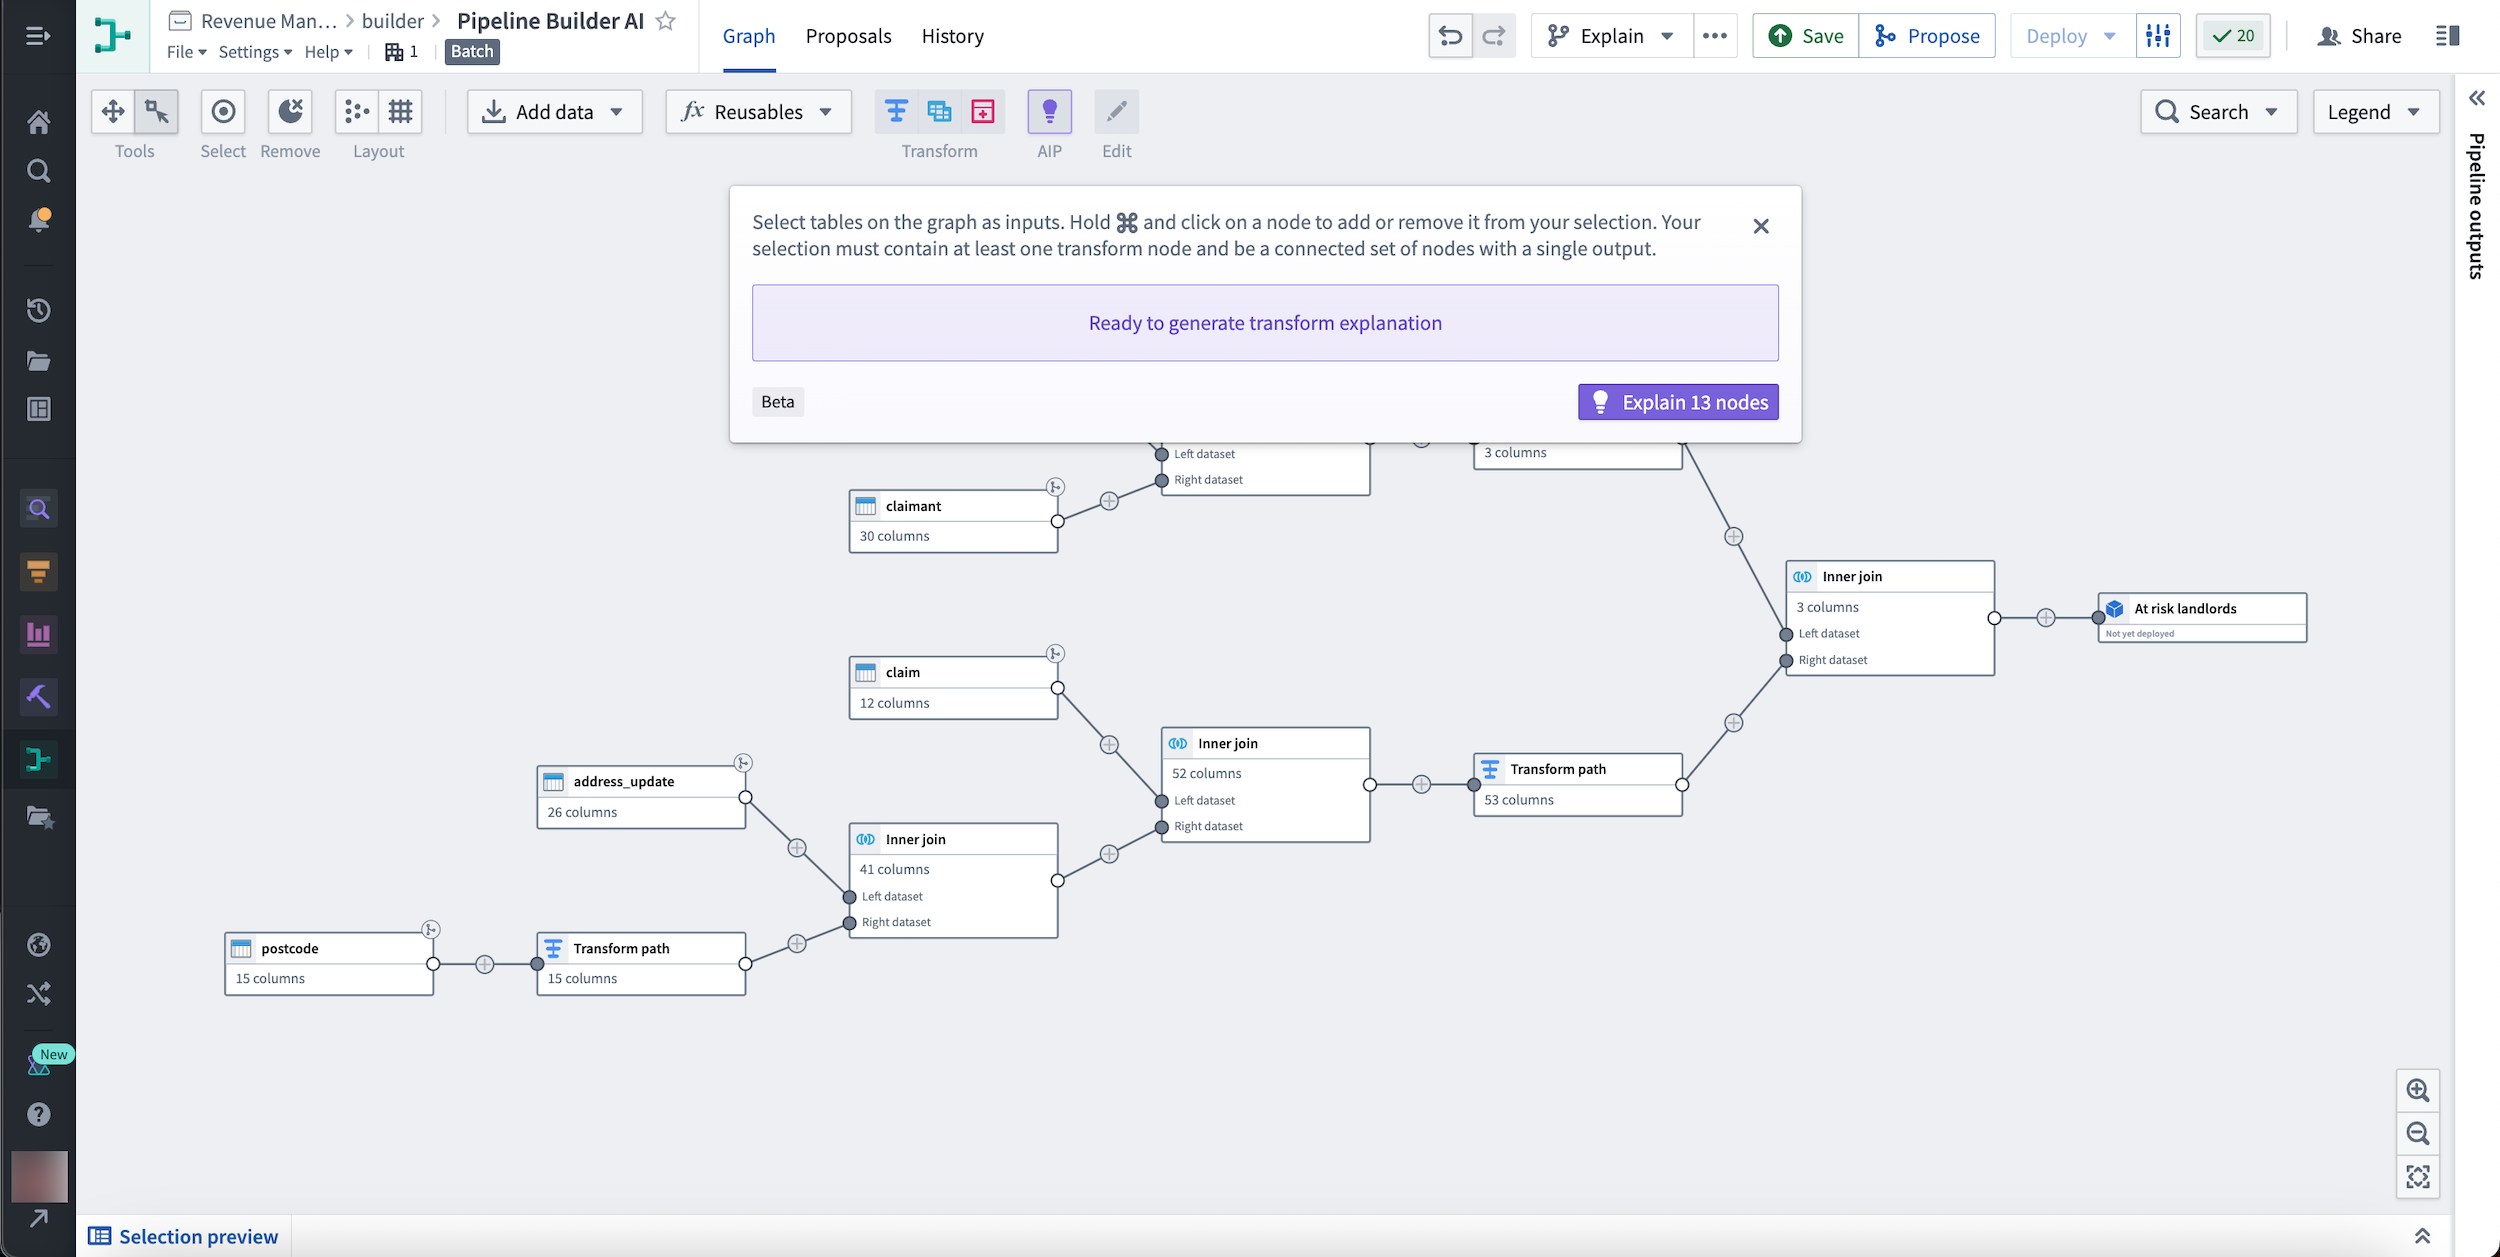
Hold and select a node to add or remove it from your selection. Your selection must contain at least one transform node and be a connected set of nodes with a single output.
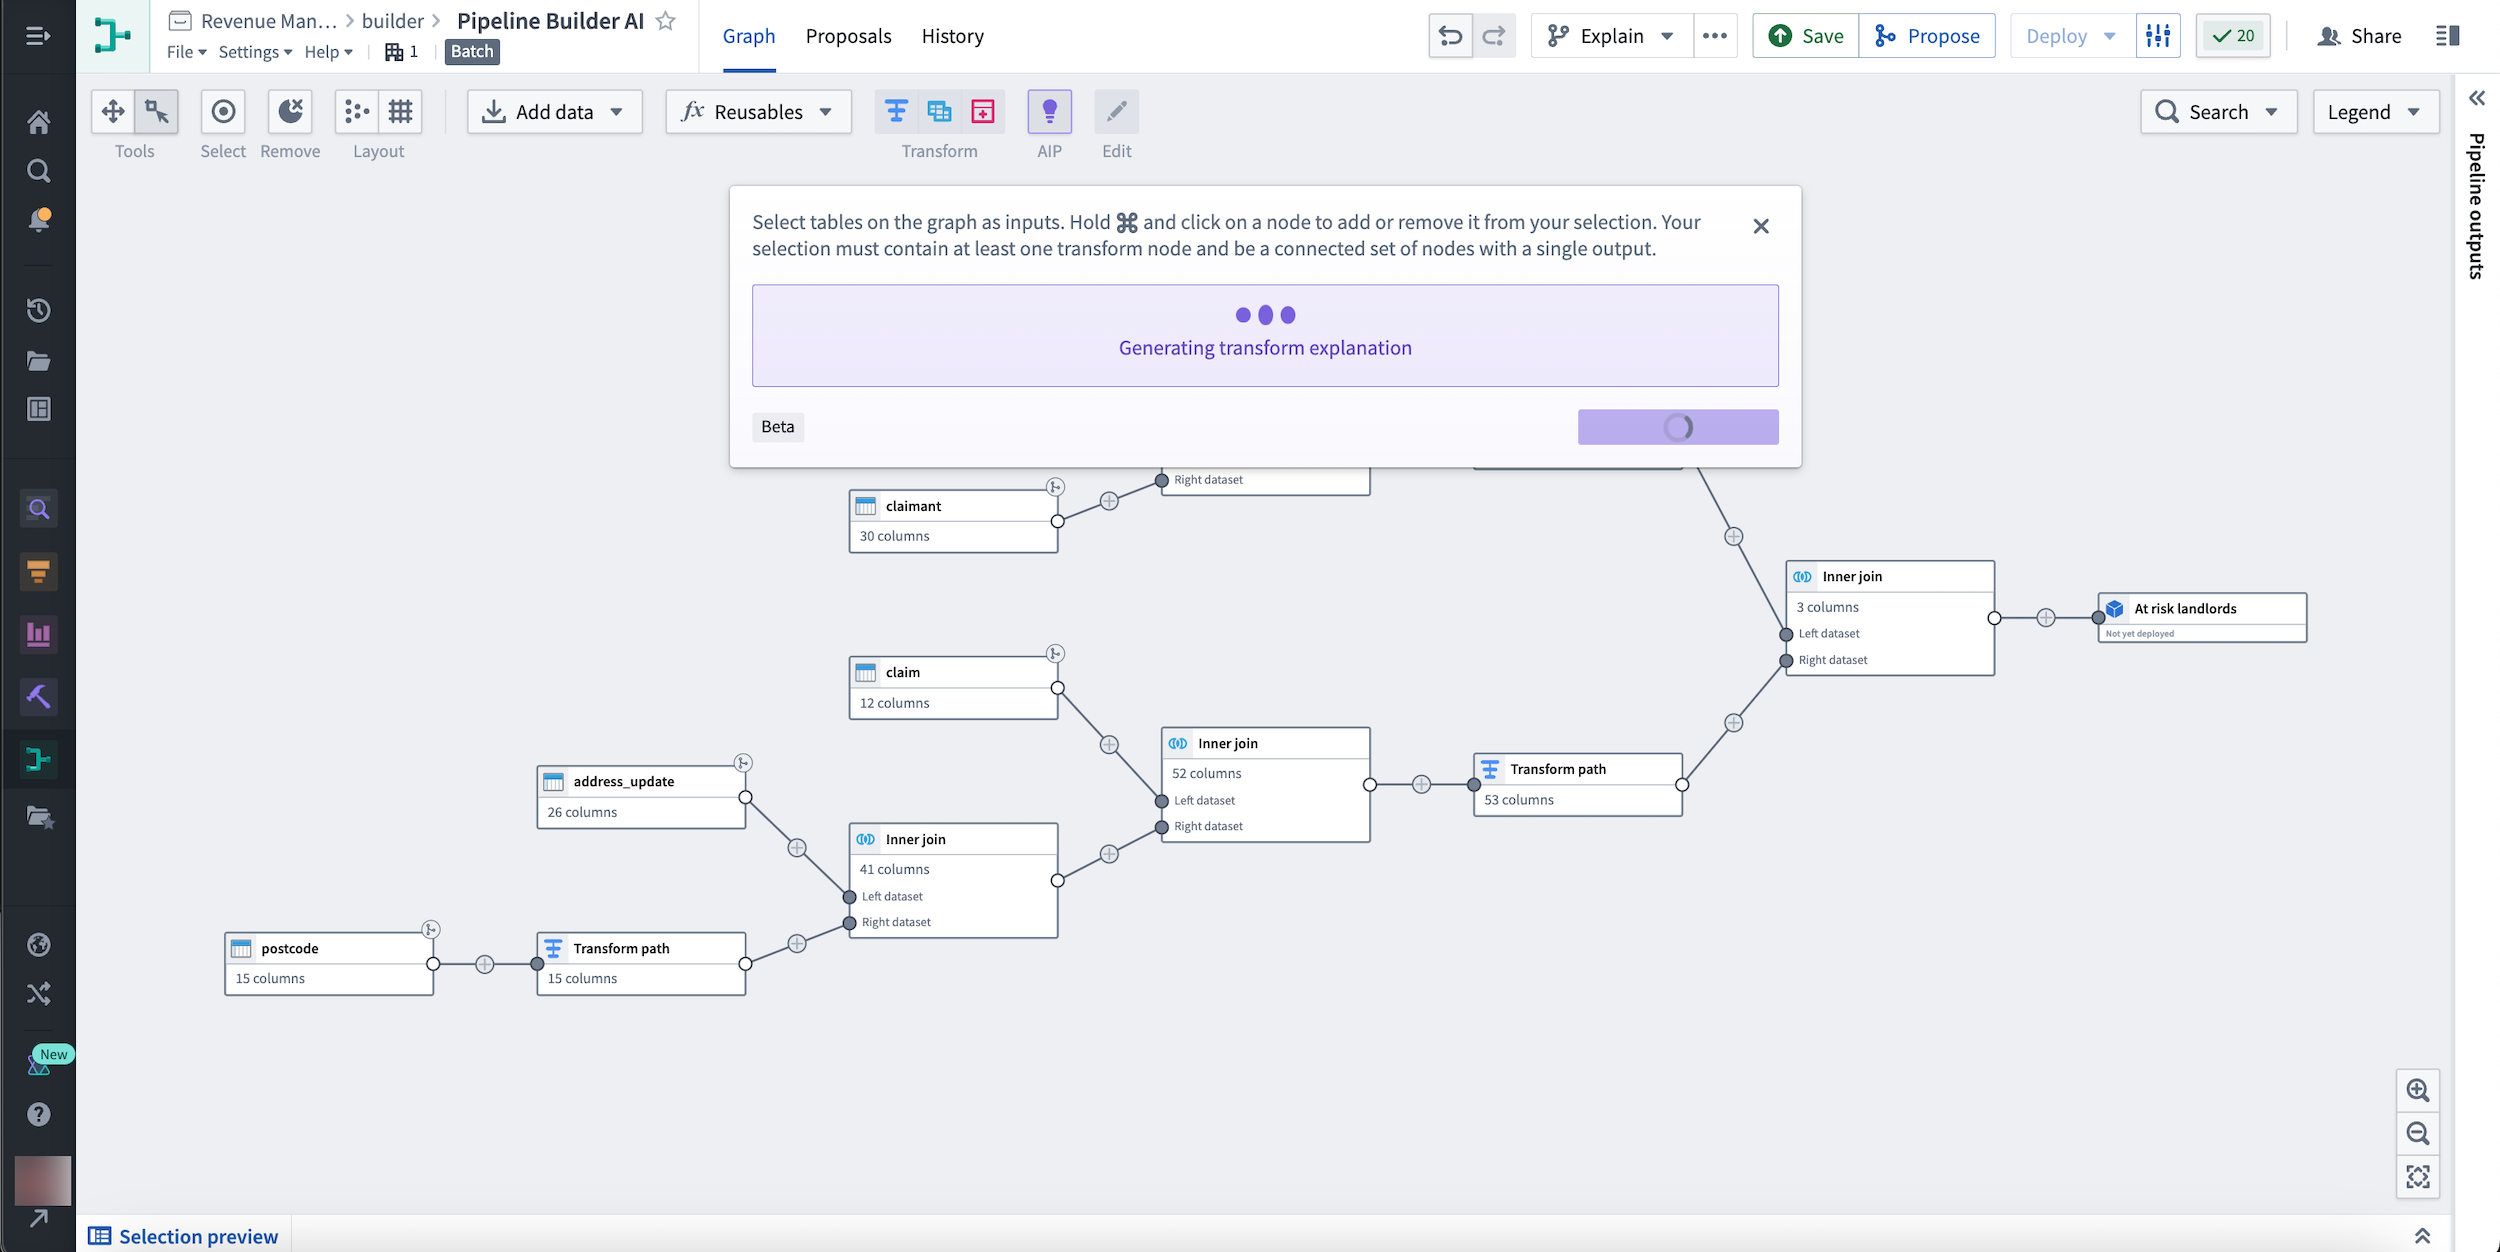
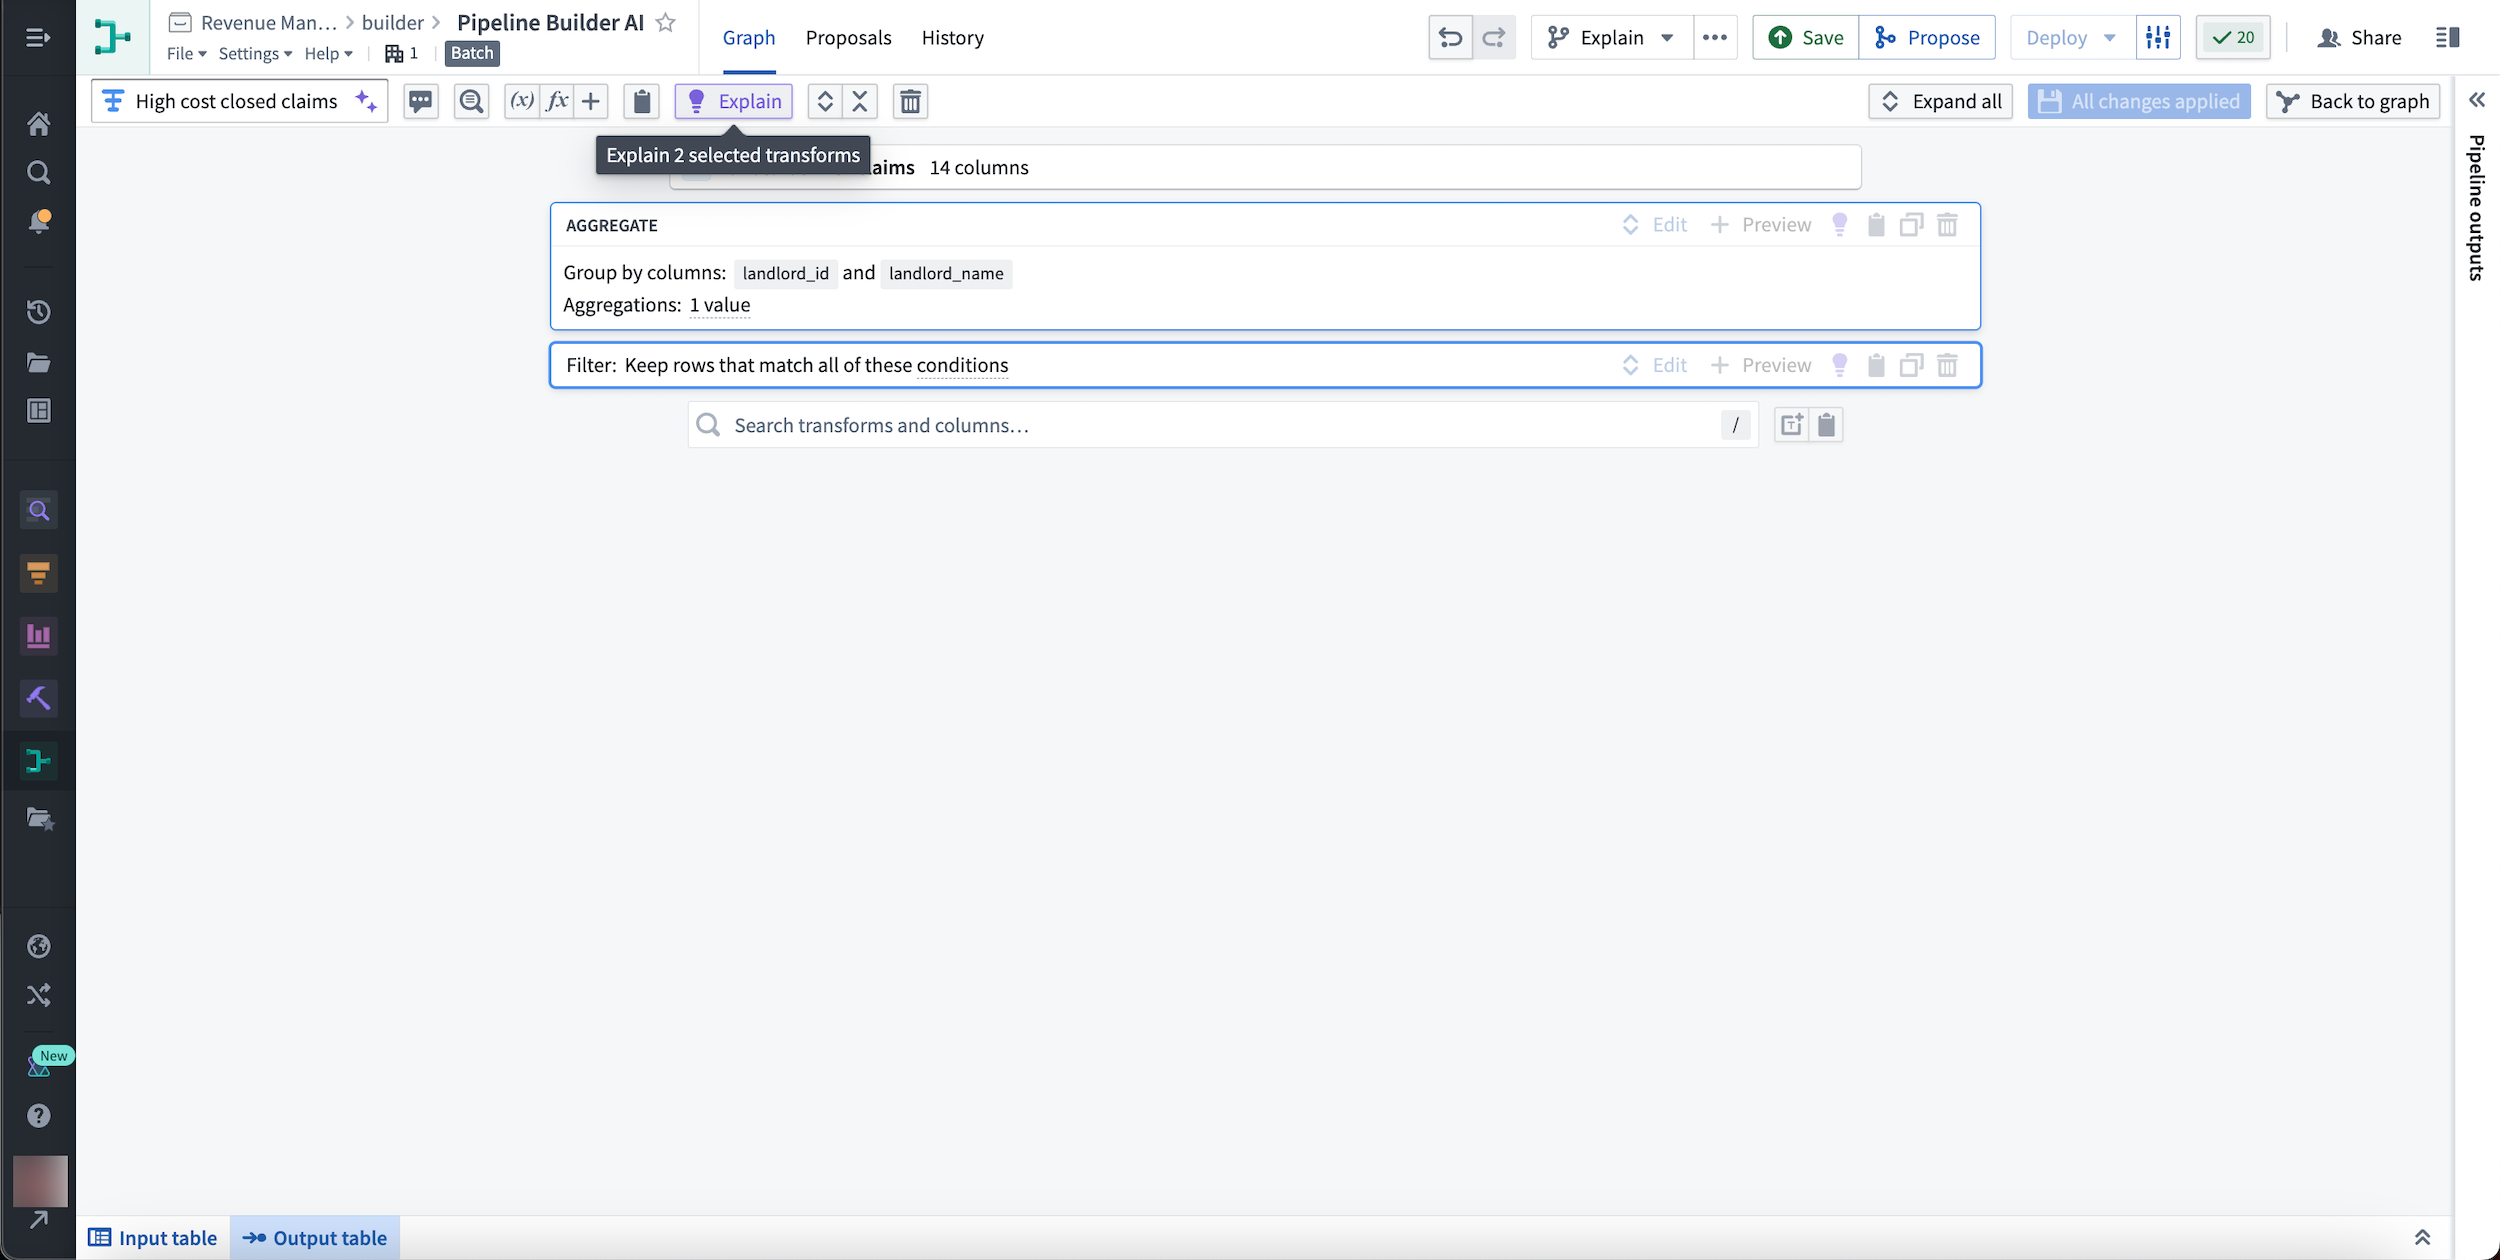
Finally, select Explain xx nodes to generate a transform explanation.

You can also explain a single node by selecting it and choosing the purple Explain button from the menu that appears to the right.
Additionally, you can choose to explain any set of transforms within a node.
Learn more about transforms in Pipeline Builder.
Suggest names and descriptions
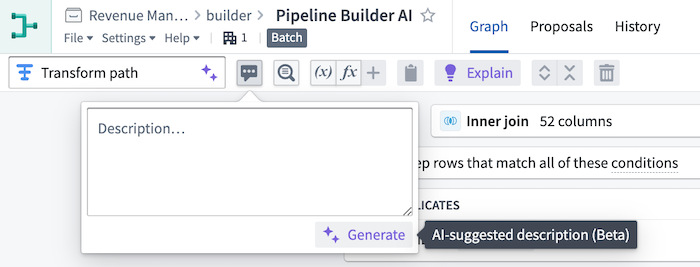
You can also use AIP in Pipeline Builder to quickly document your work by generating a suggested name and description for any transform node.
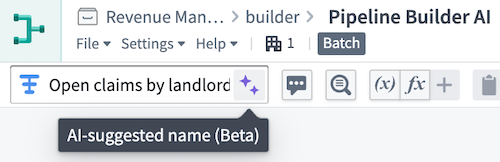
Select the purple AIP star icon next to the default transform name to generate a suggested name.
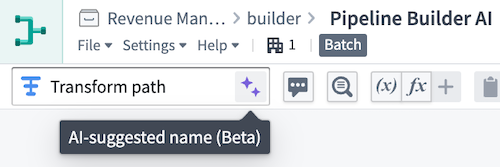
In this example, the suggested name of Open claims by landlord... adds more information than Transform path:
Select the purple Generate button to generate a suggested description.
In this example, the description provides more details about a transform that groups claims data by landlord ID:
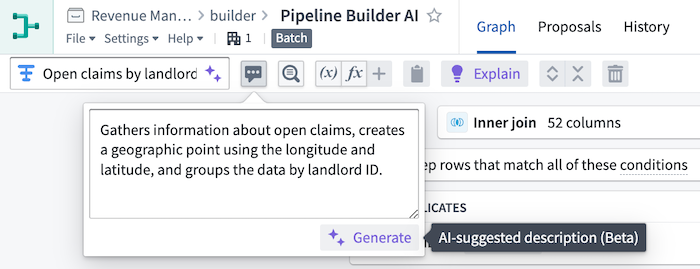
The generated suggestions are short summaries of the transform path. Once you save a generated name or description, the information is automatically persisted in the pipeline and visible to collaborators.
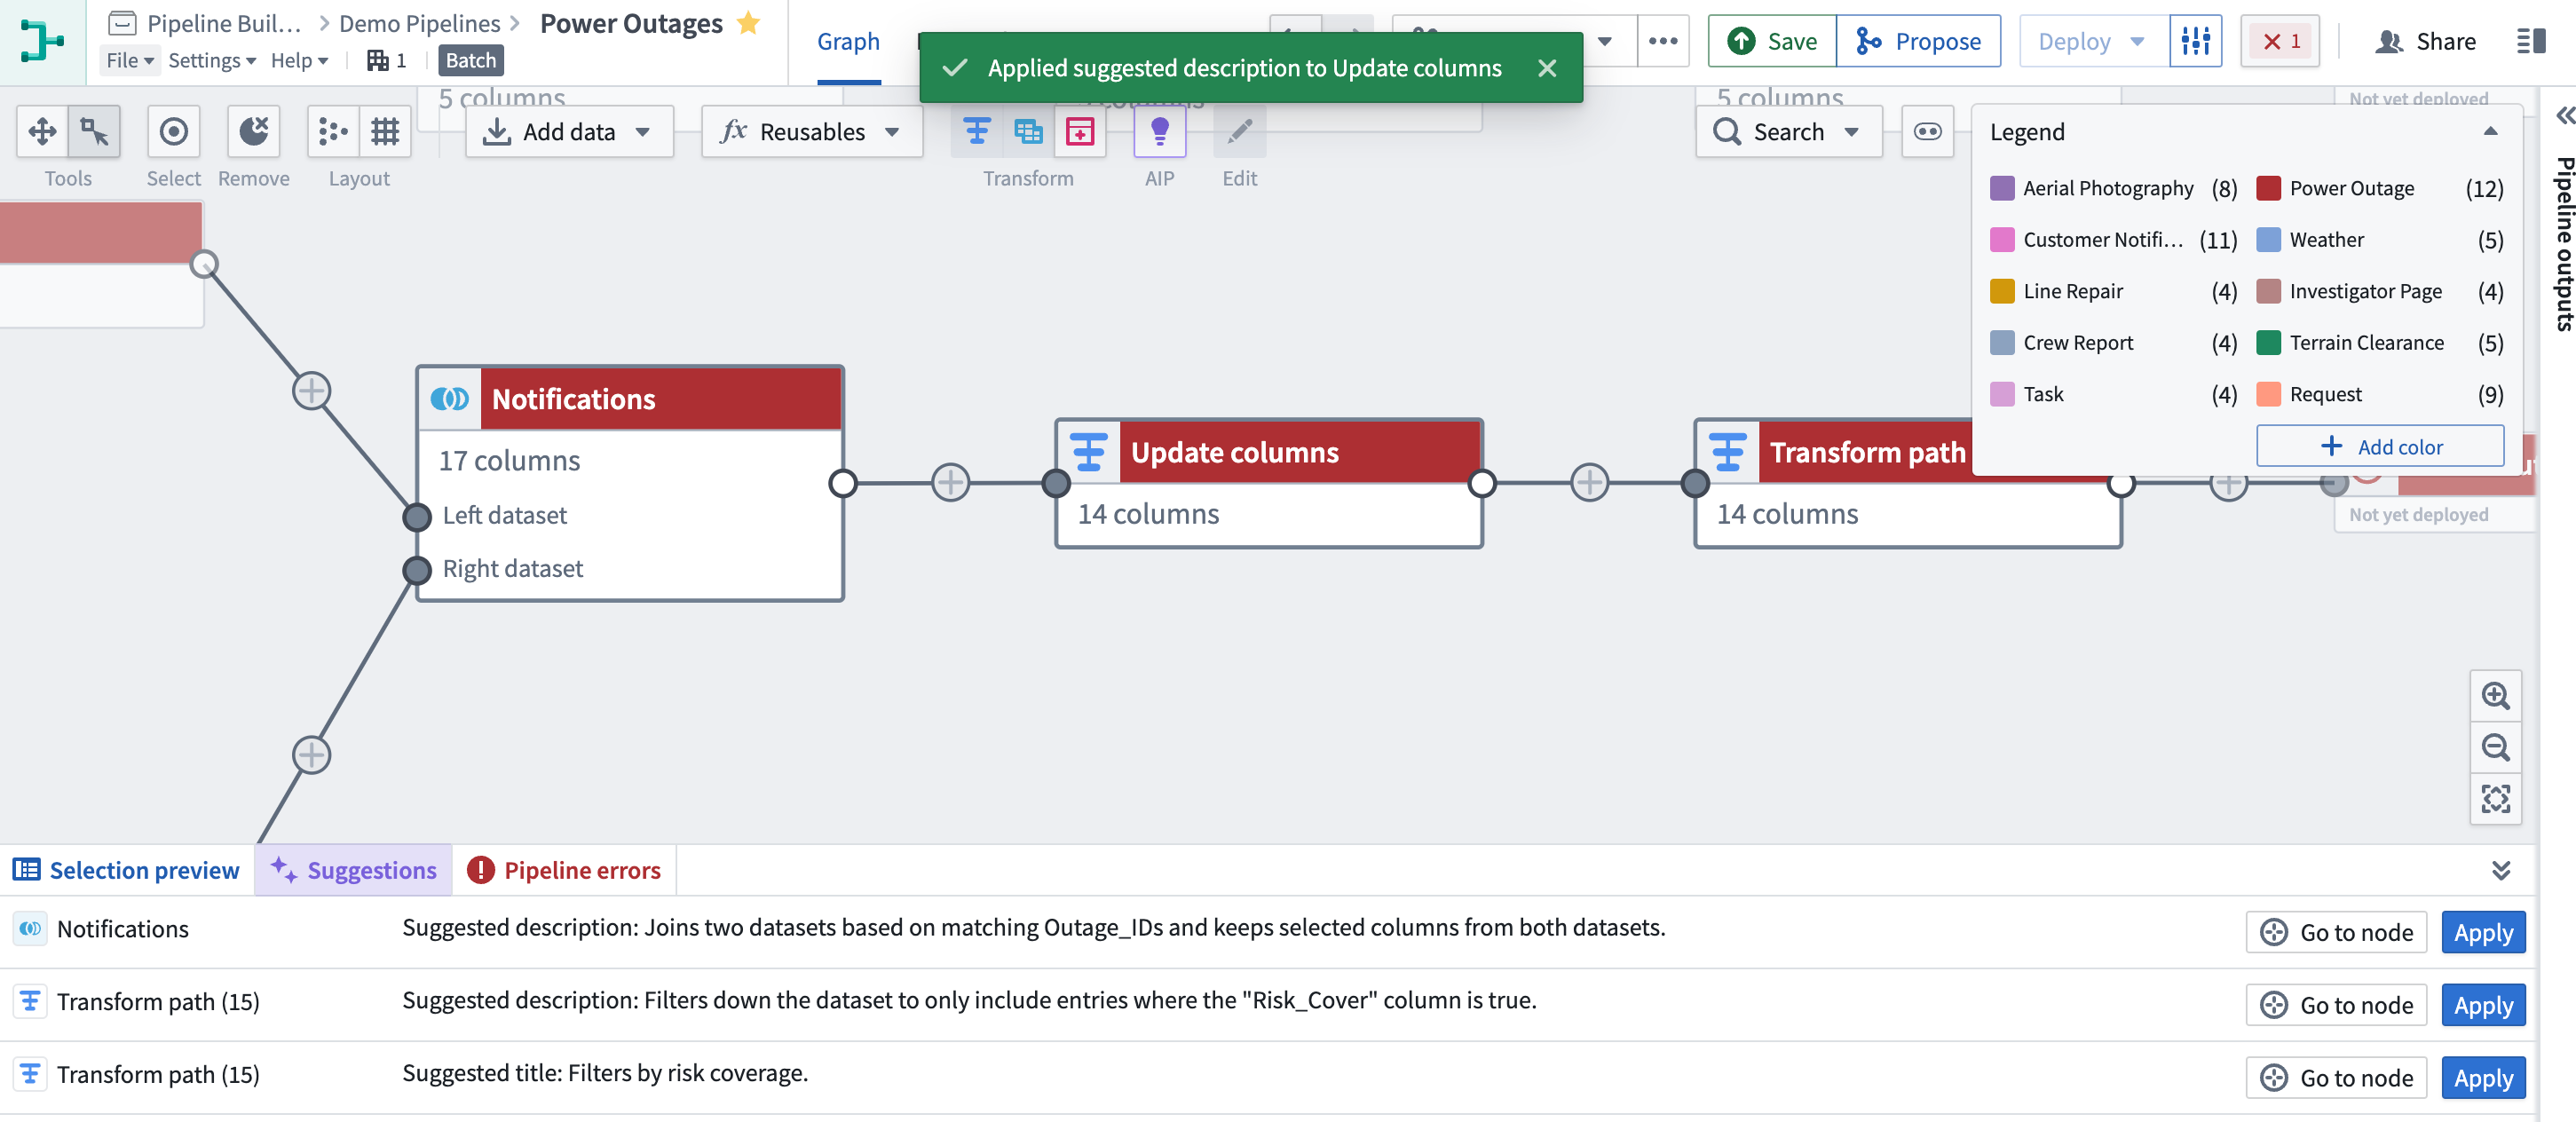
To suggest up to 10 nodes at a time, open the Suggestions tab at the bottom of the screen.
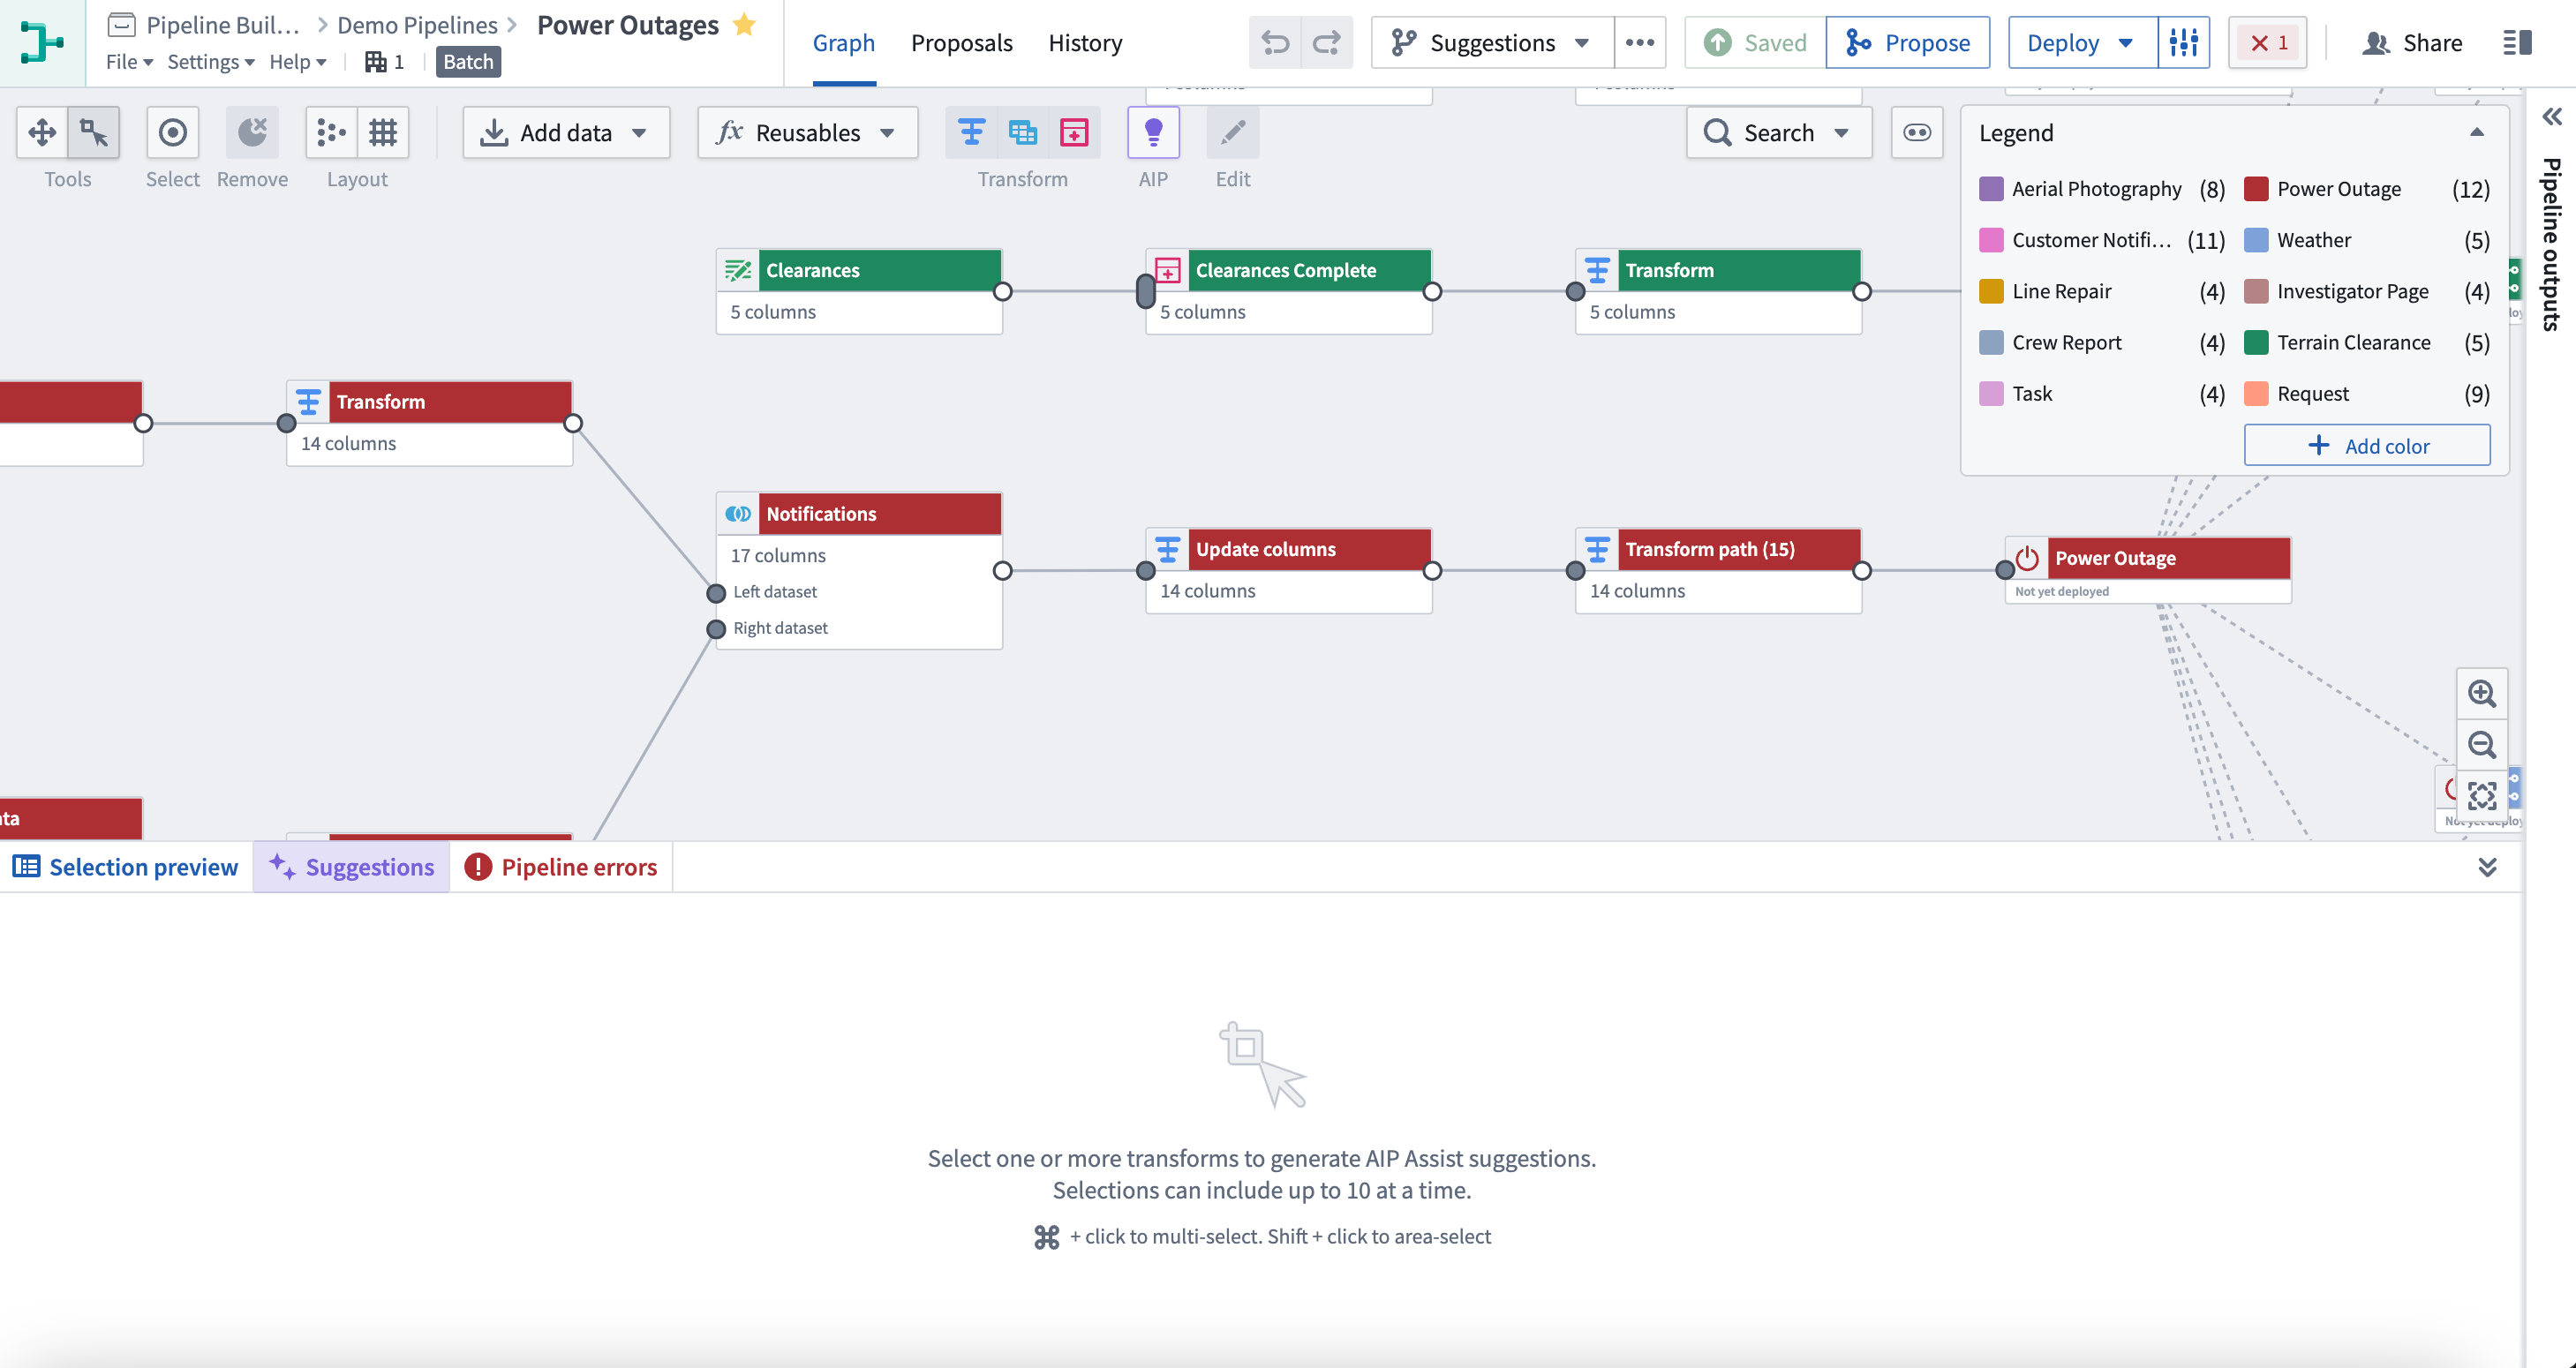
Select one or more nodes on your pipeline to generate a name and description if they do not already exist.
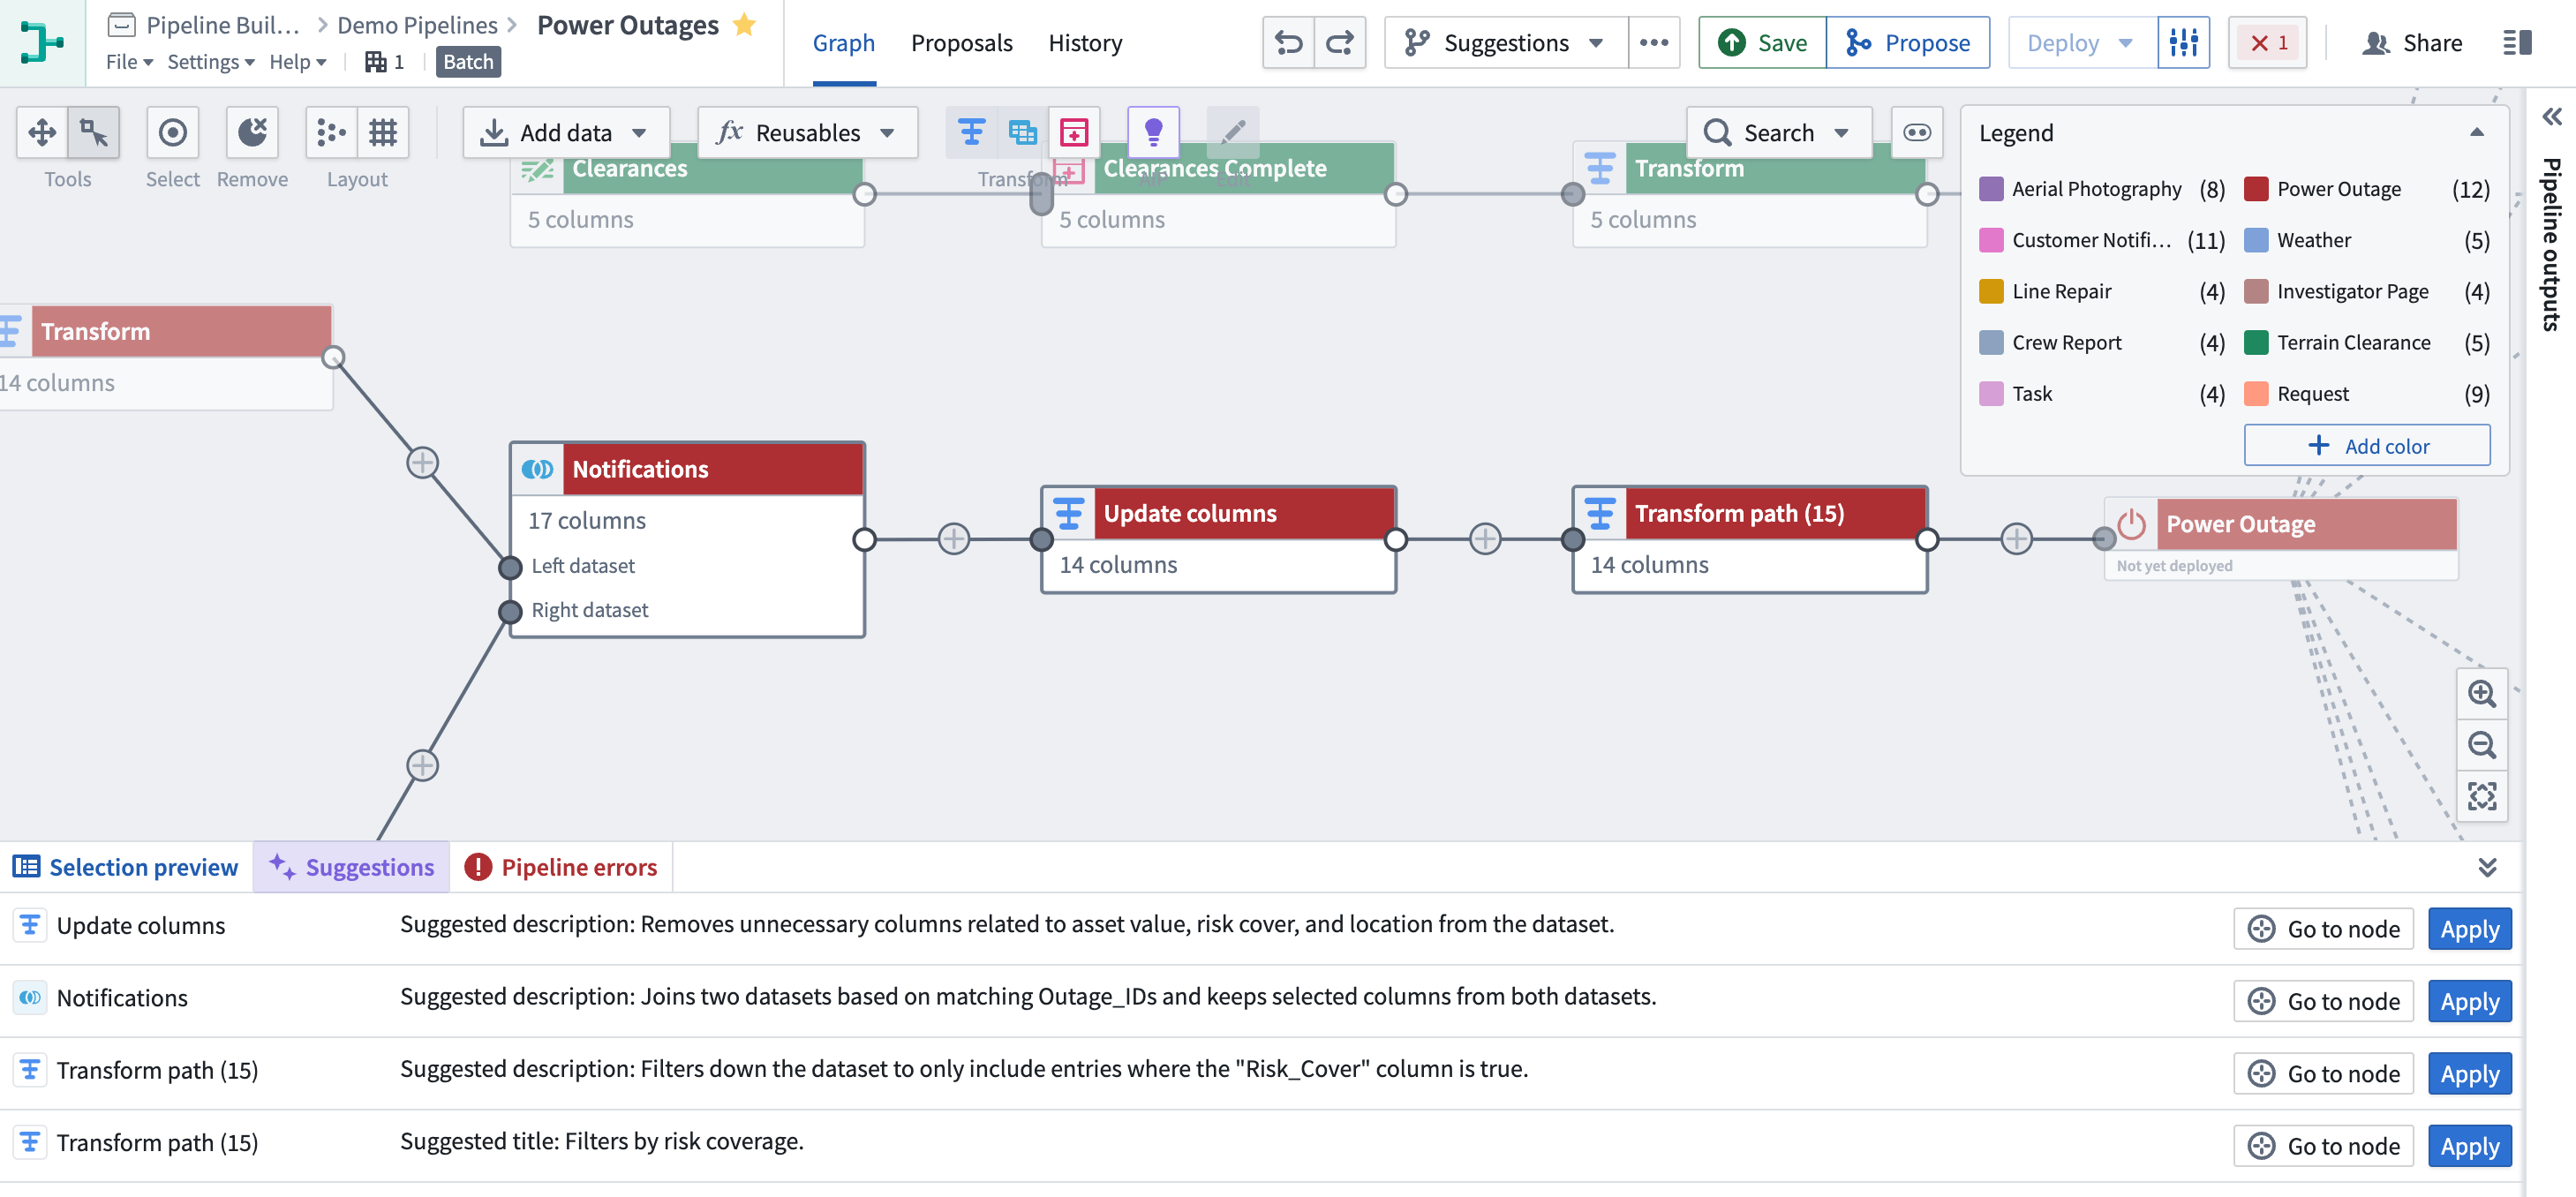
Select Apply on each suggestion to save the change to the node.
Transform Assist
The Transform Assist feature can help you make the best use of the many transformation options available to you in Pipeline Builder. Using the power of AIP, the regex helper can generate regular expressions based on your input and update existing expressions. Additionally, with the timestamp formatter, you can quickly transform cast board values from string into timestamp.
Regex helper
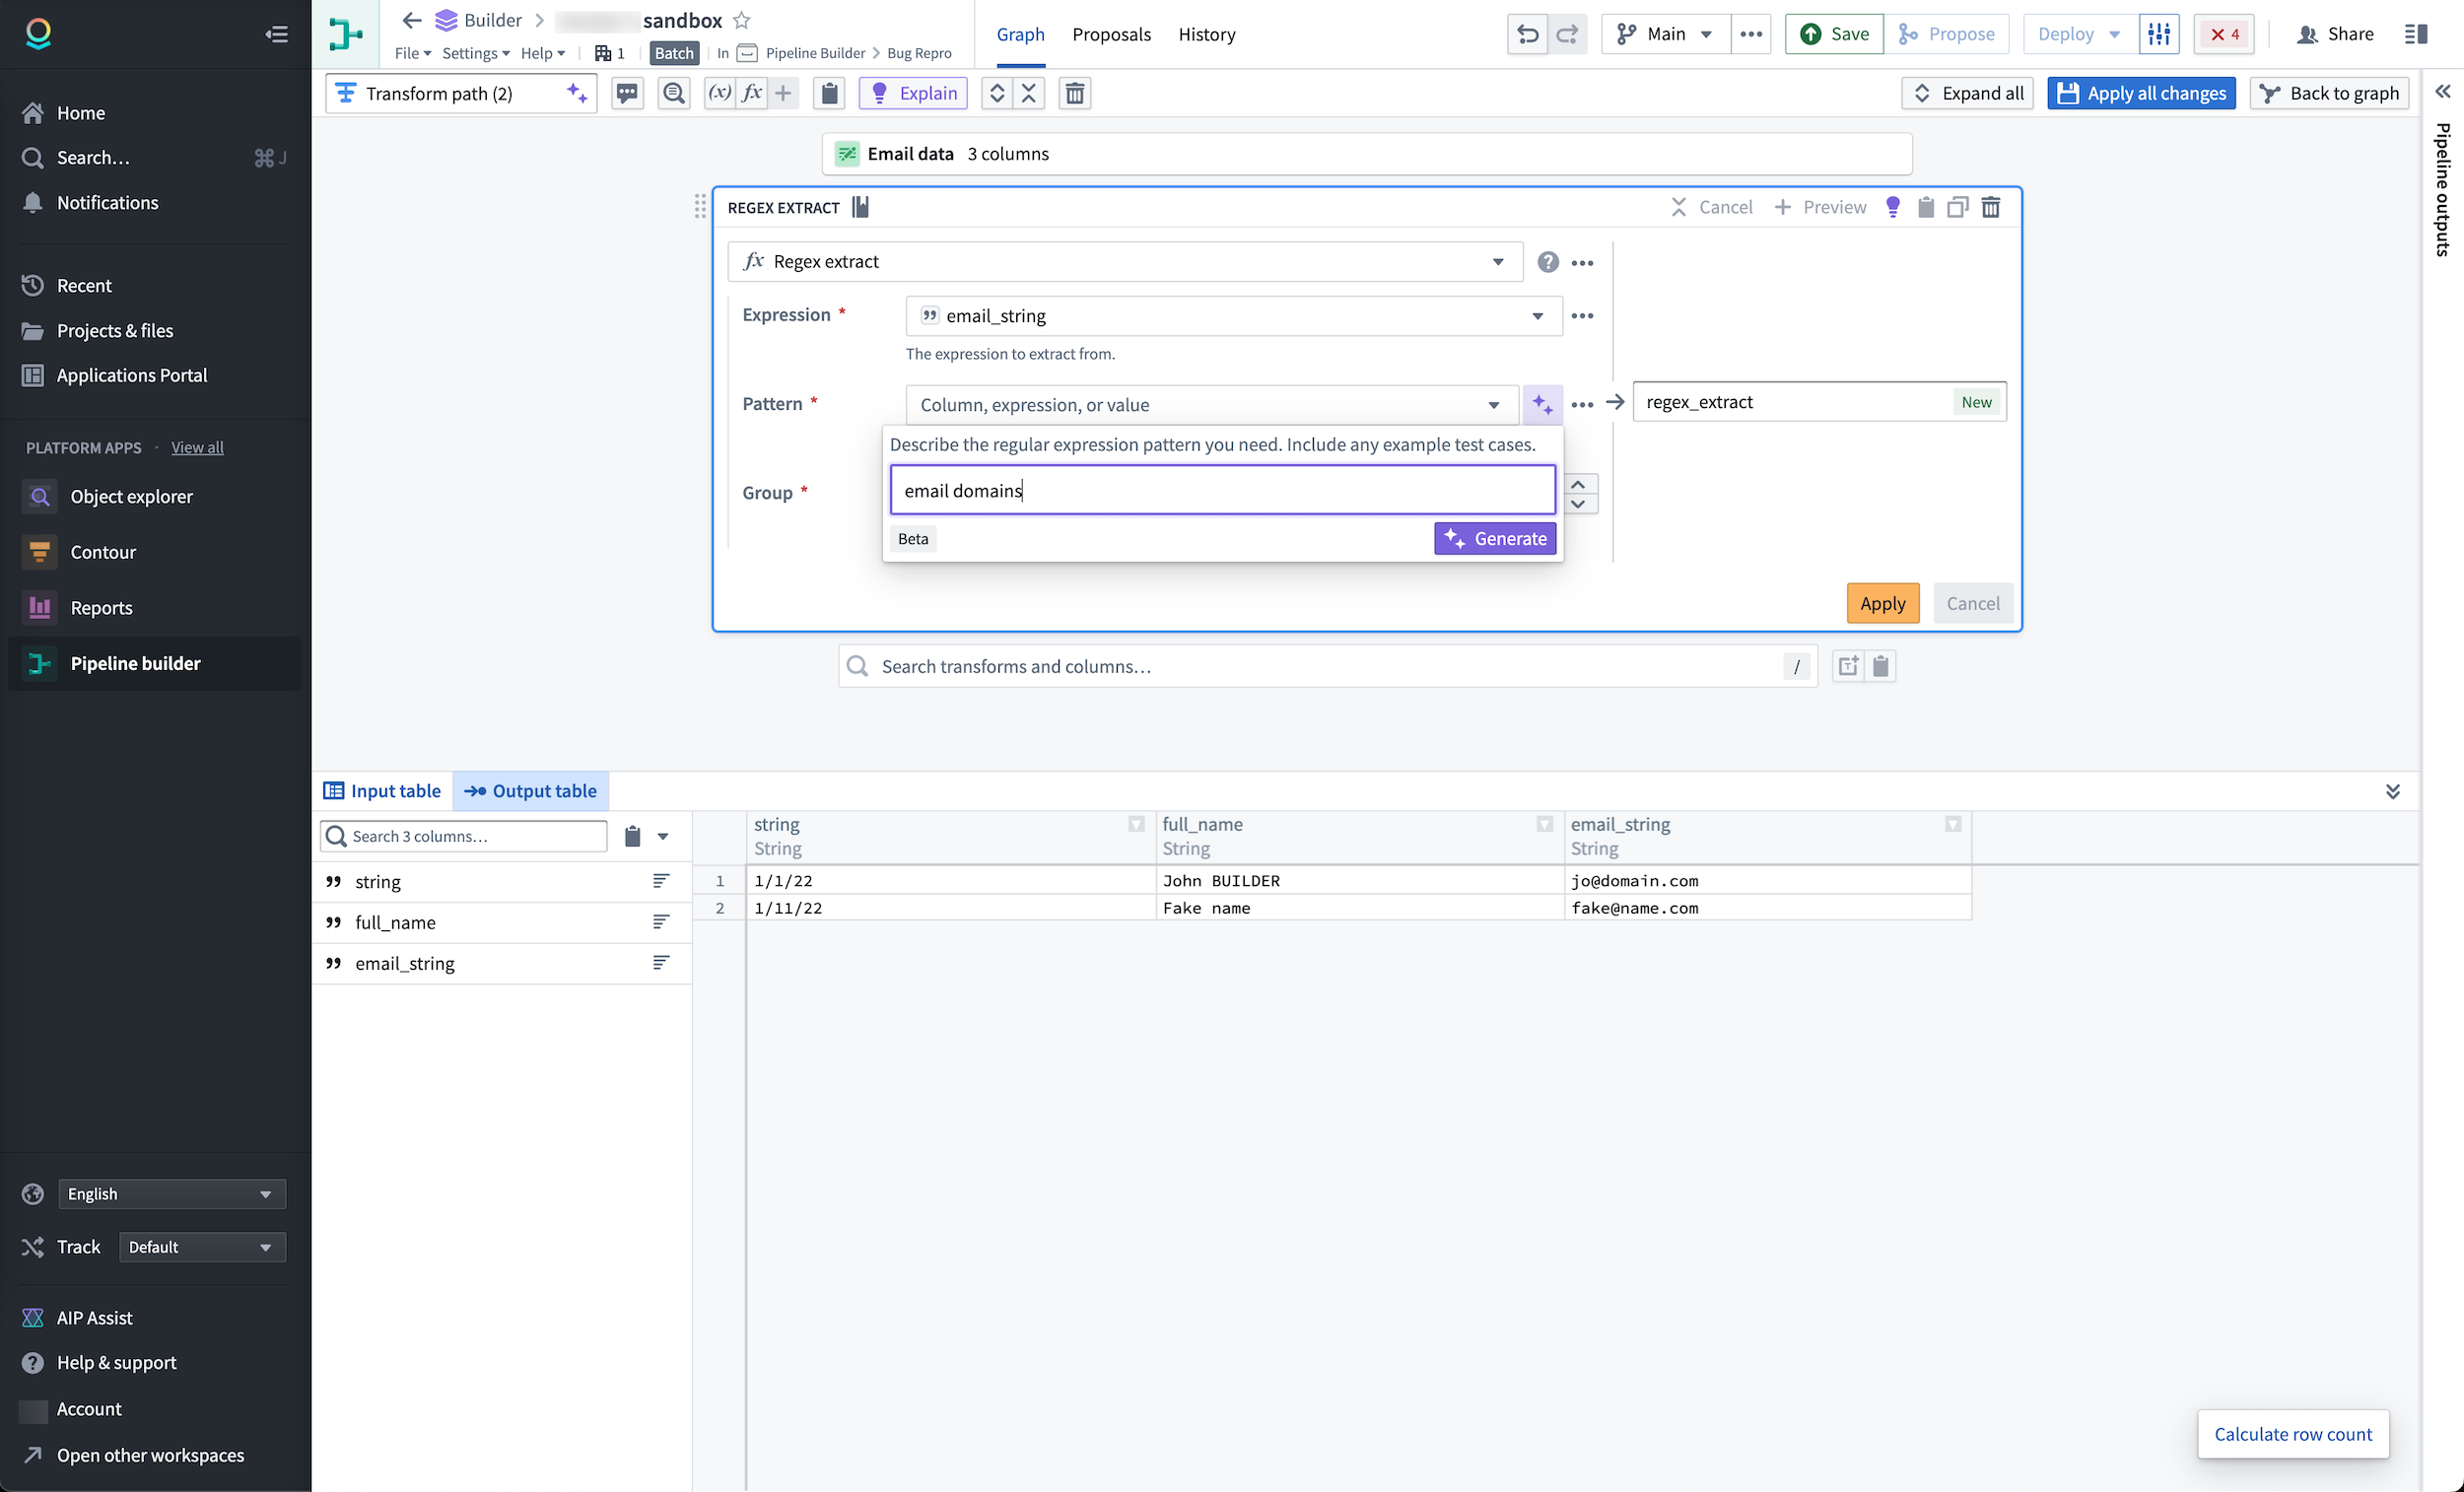
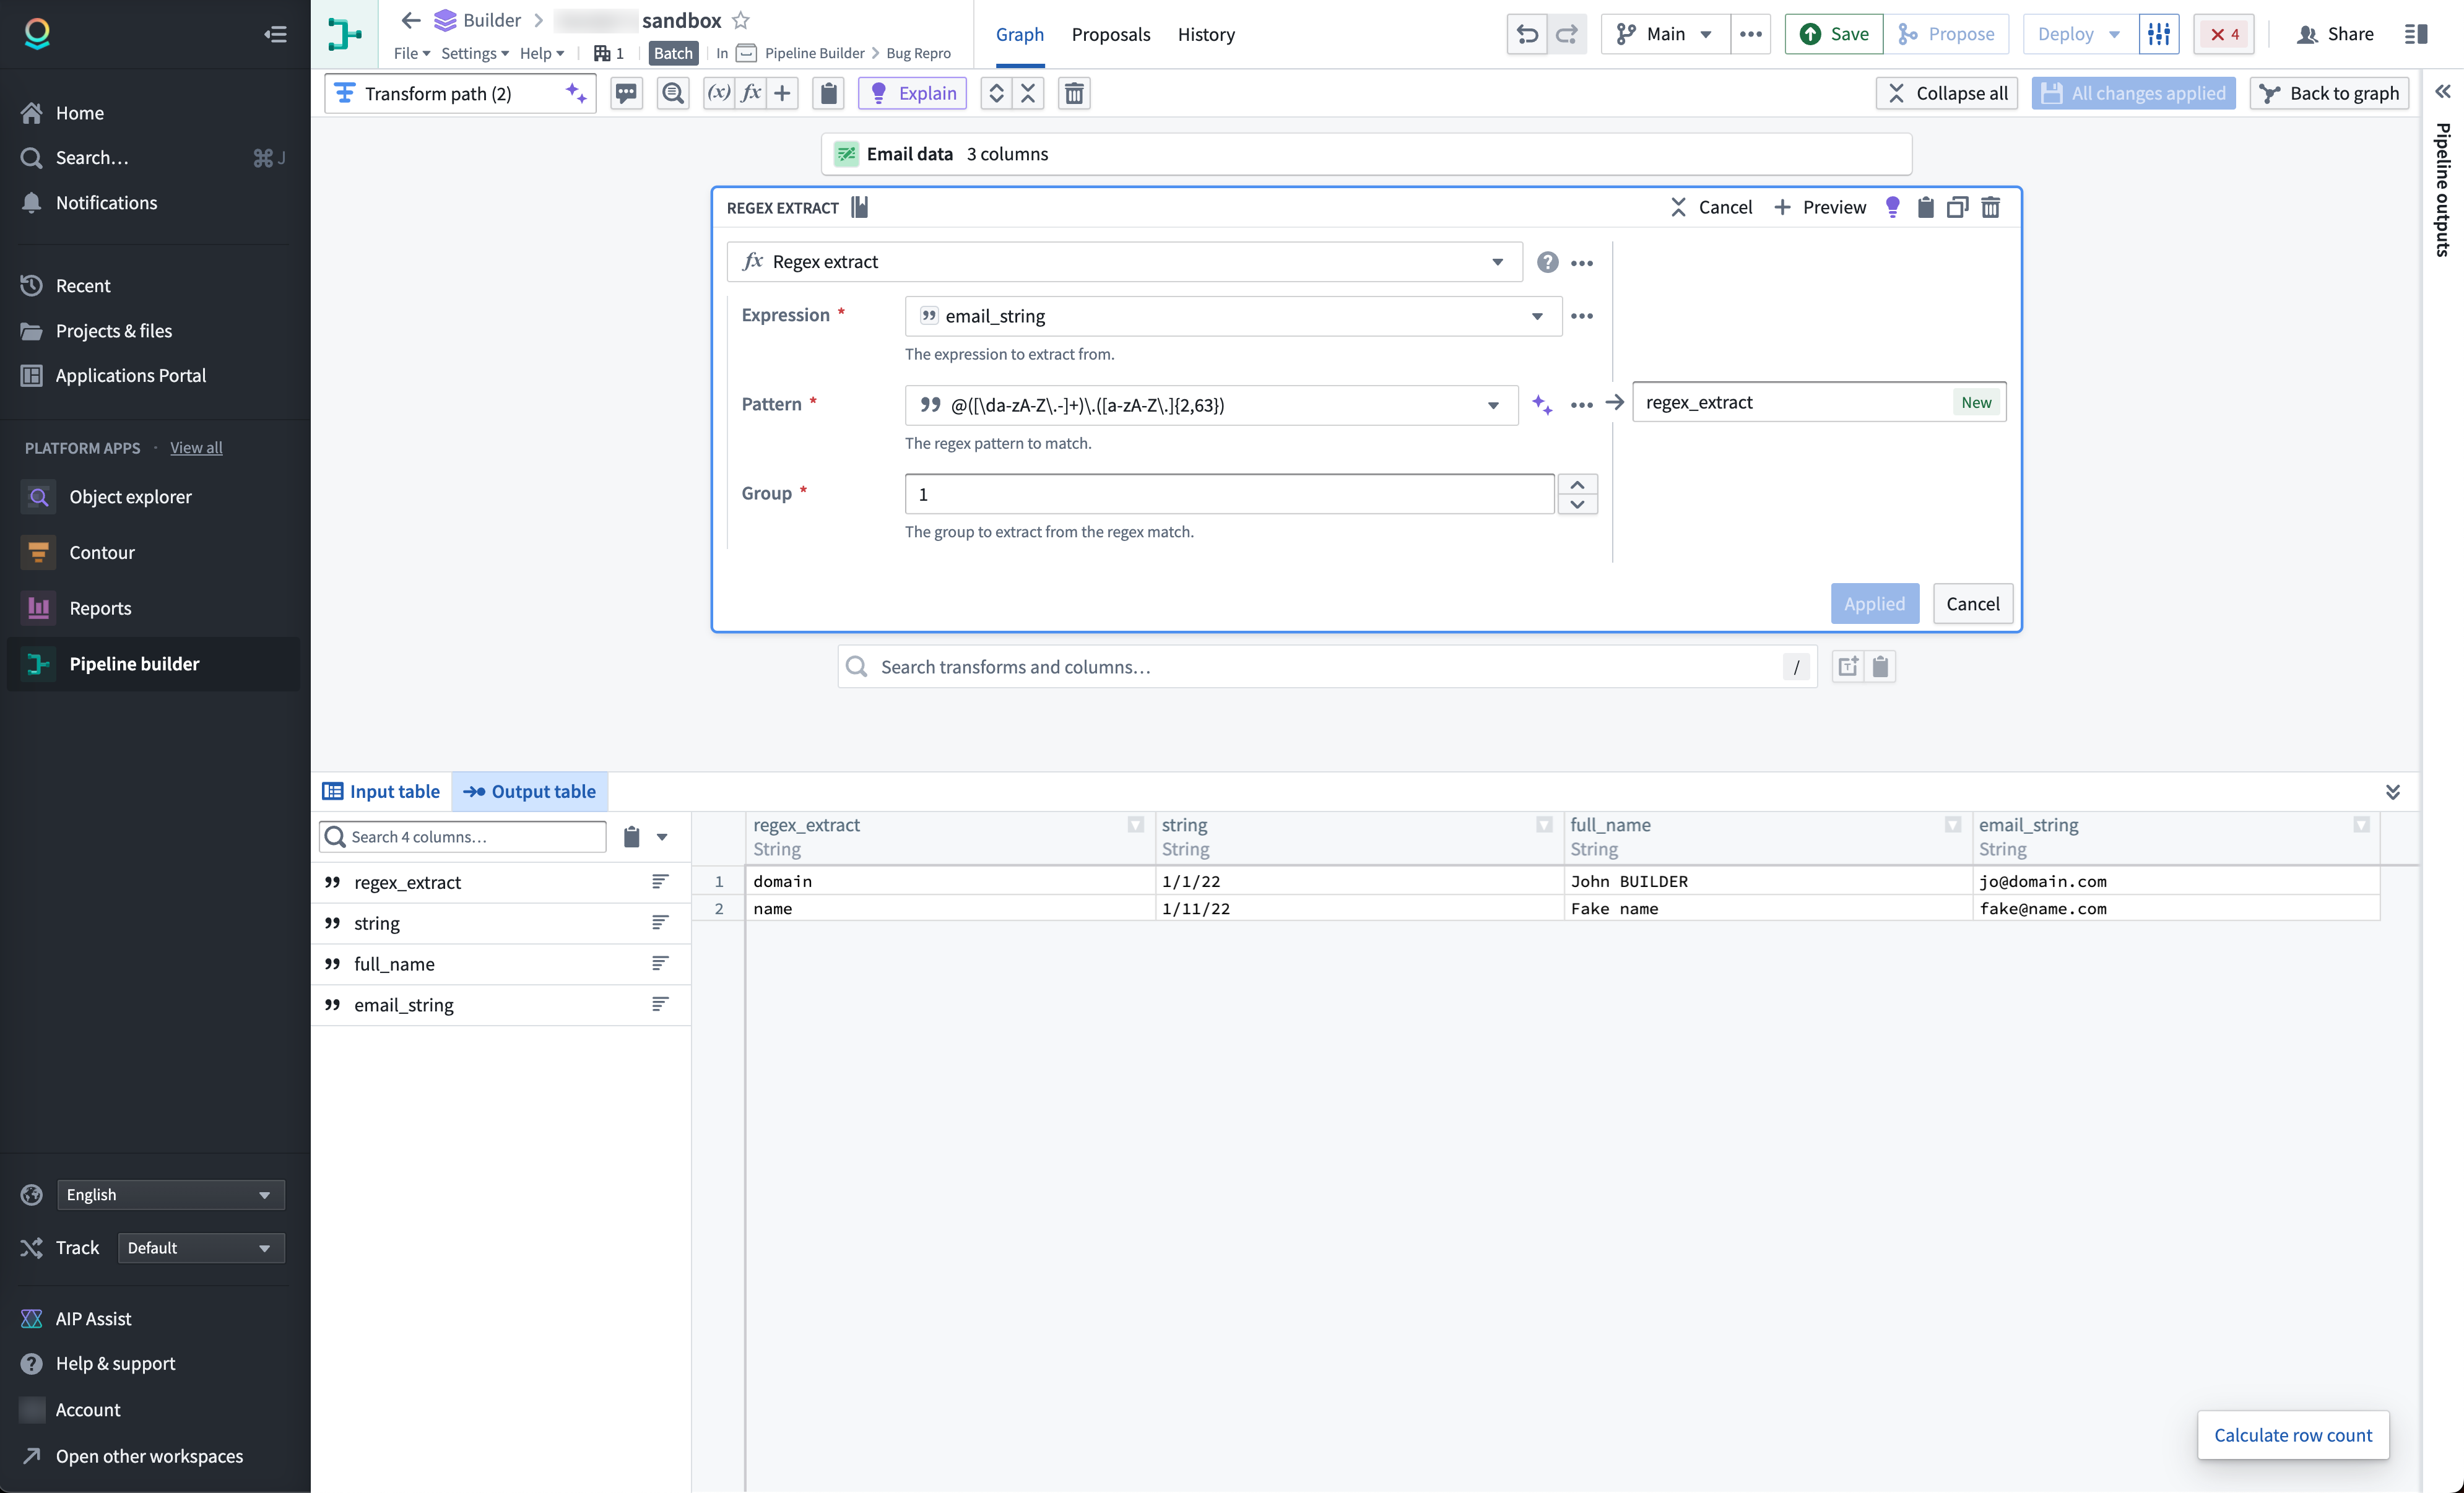
The regex helper simplifies the process of creating data pipelines by providing you with accurate and efficient regex patterns to extract, replace, and find strings within your data. To use the regex helper, first create a new transform board that uses regex parameters: regex extract, regex extract all, regex replace, regex find, or regex match. In the example below, we use the regex extract transform on the expression column email_string.
Select the purple AIP star icon next to the Pattern field, then describe the regular expression you want to create. In this example, we want to search for email domains.
Select the purple Generate button to view the results.
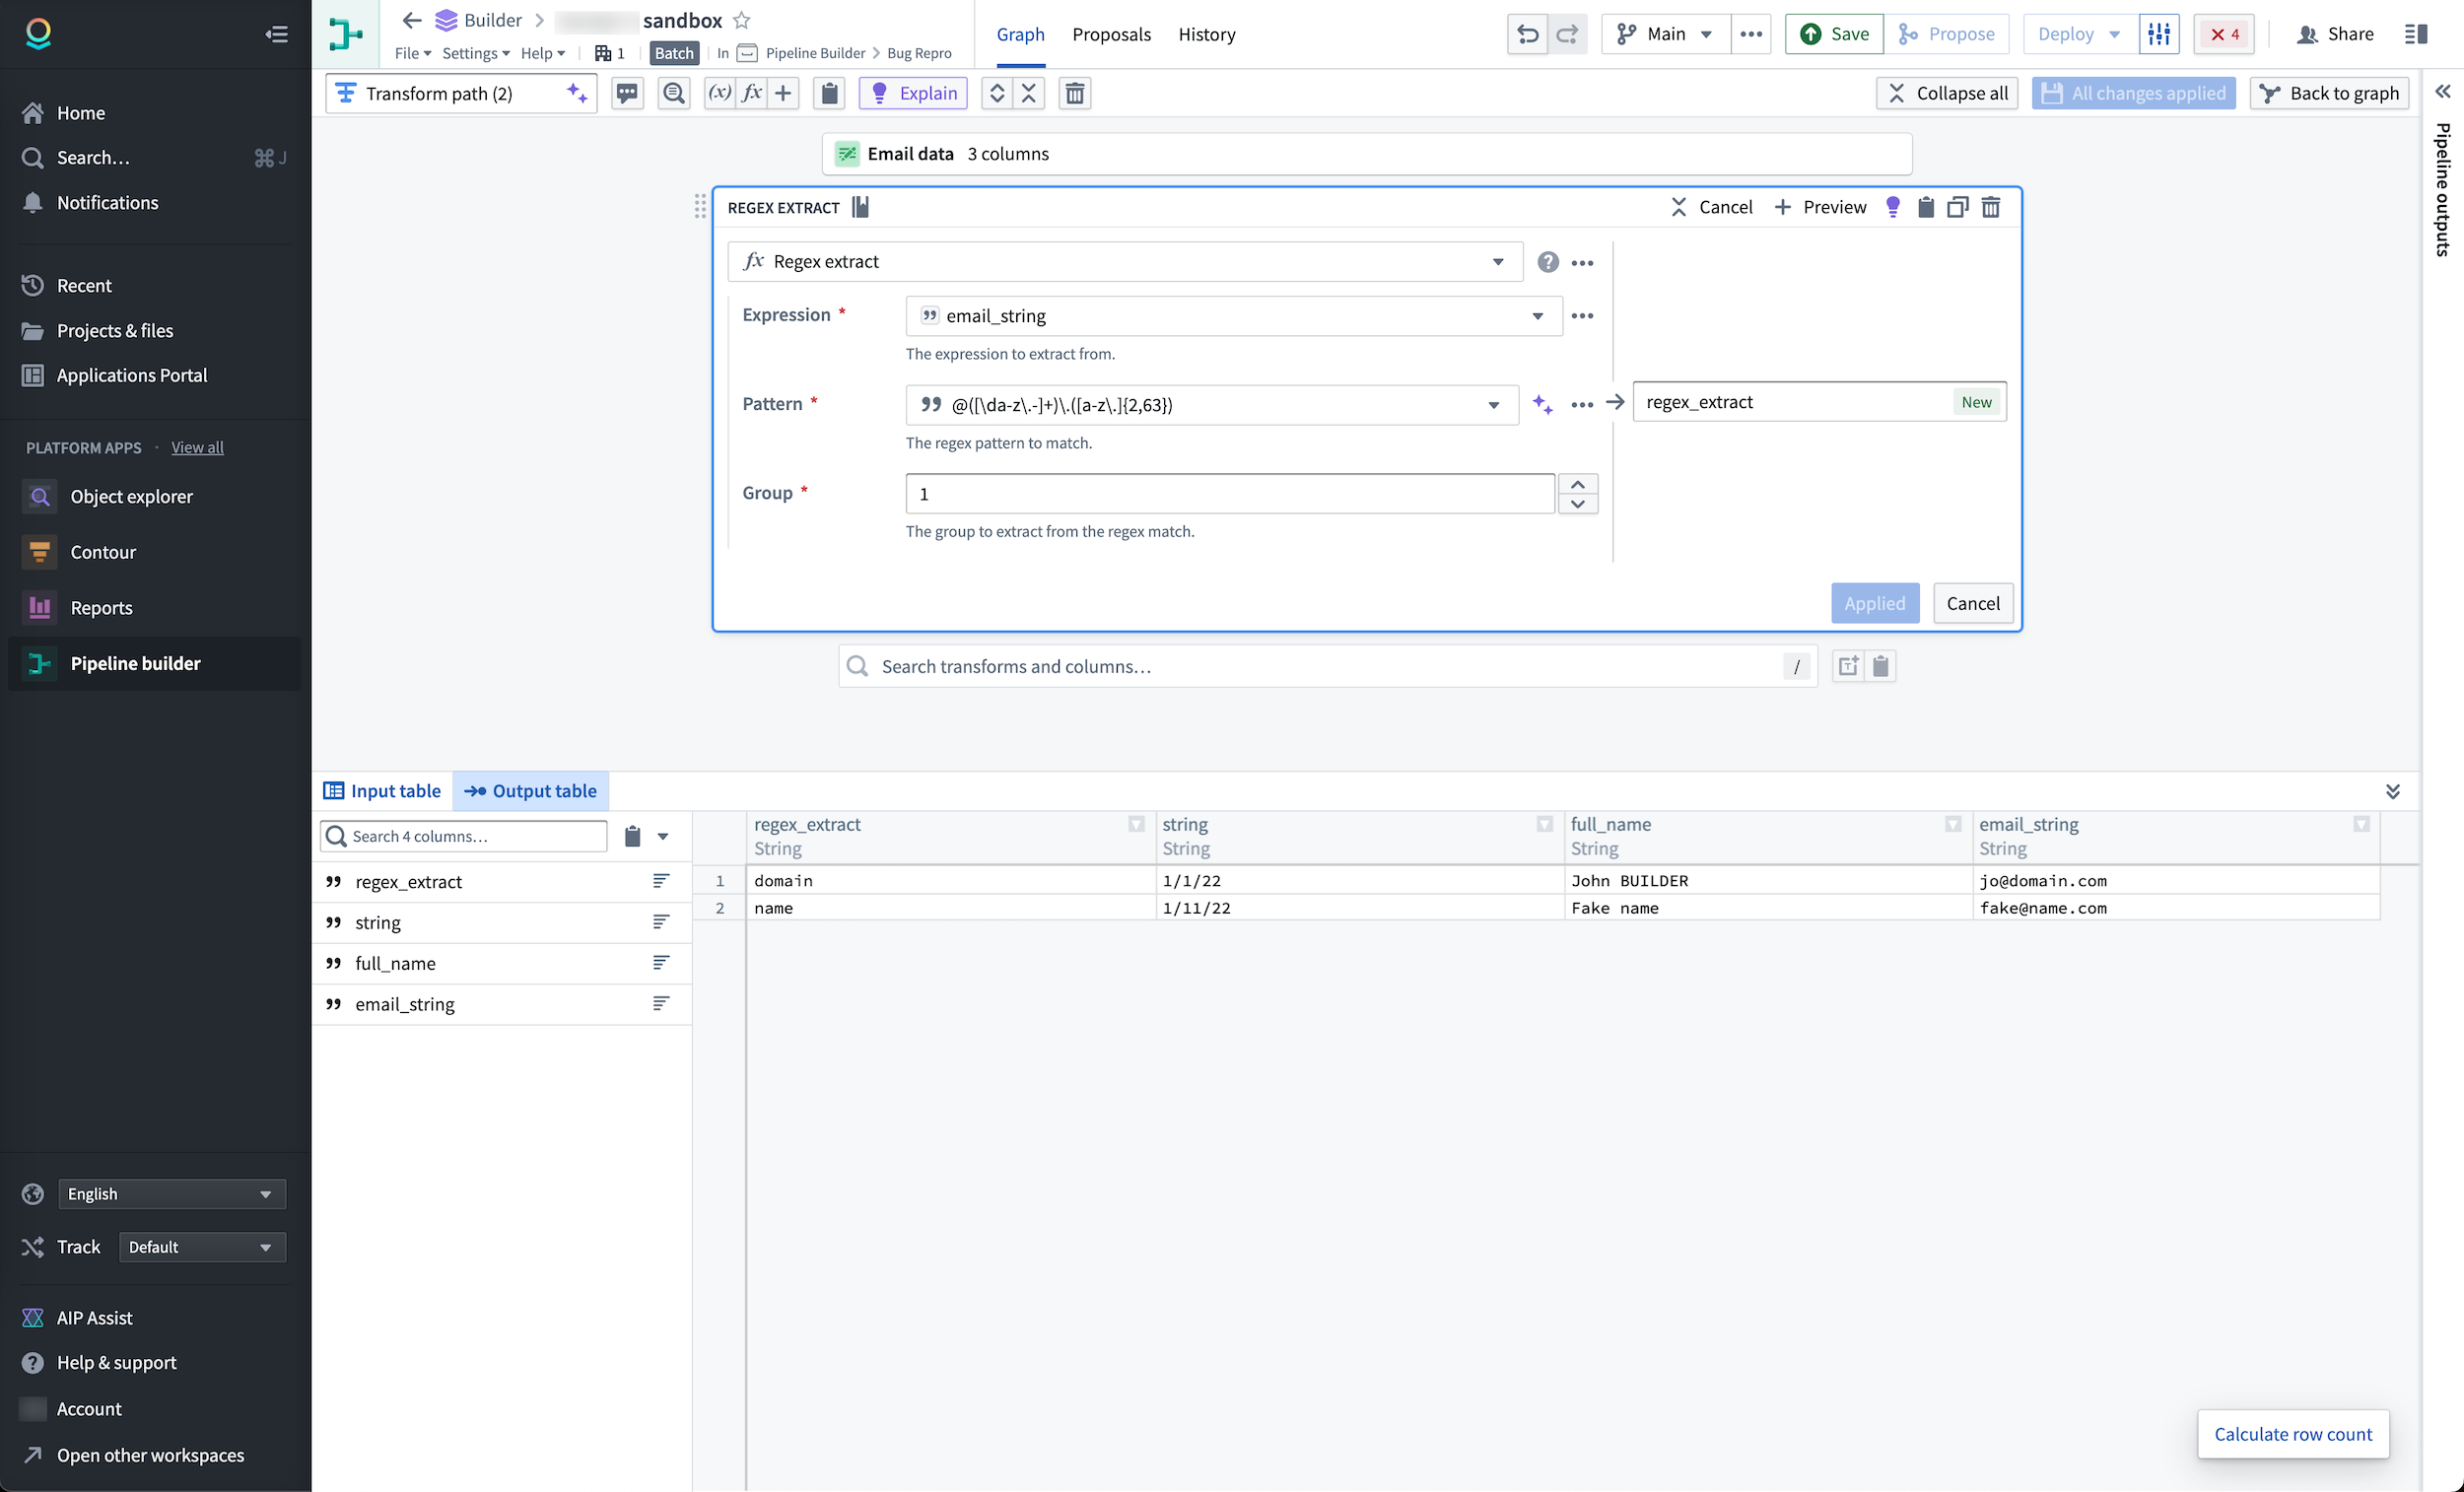
Update existing expressions
You can also use the regex helper to update an existing regular expression.
Select the purple AIP start icon next to the Pattern field. Then, enter the regular expression you want to modify, followed by the modification. In the example below, the regular expression @([\da-z\.-]+\.([a-z\.]{2,63}) should be modified to include uppercase.
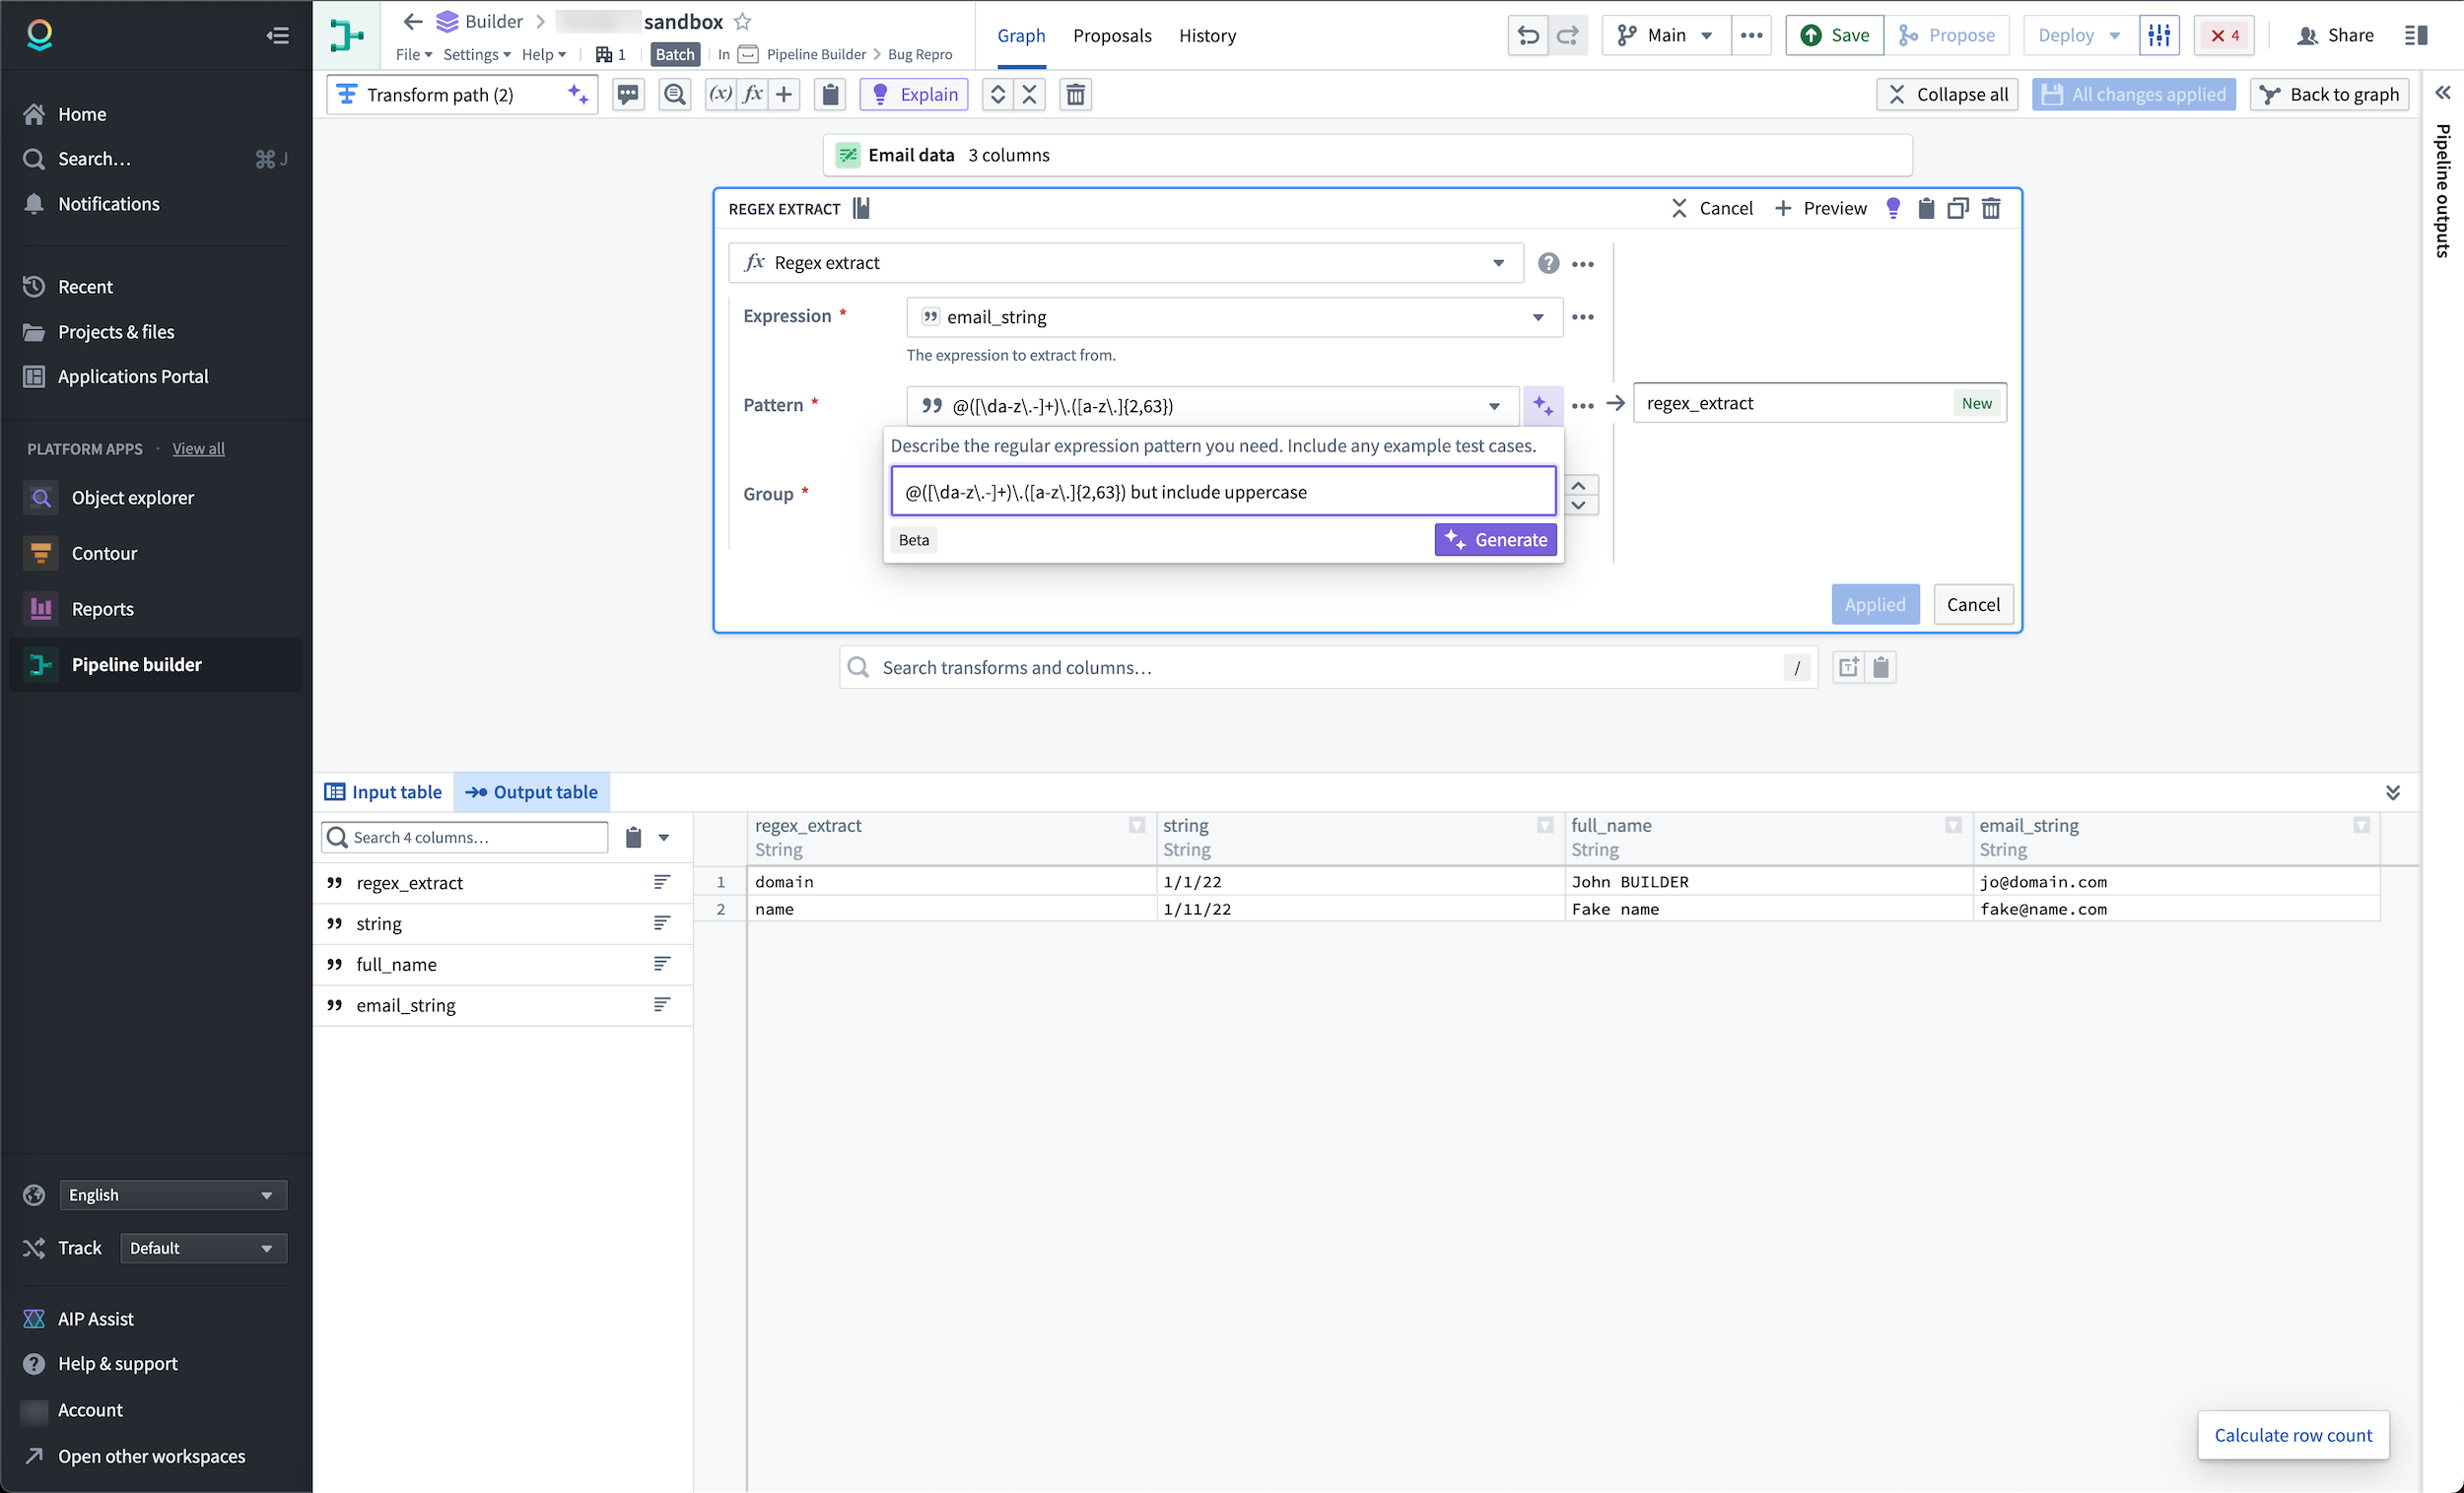
Select the purple Generate button to view the result.
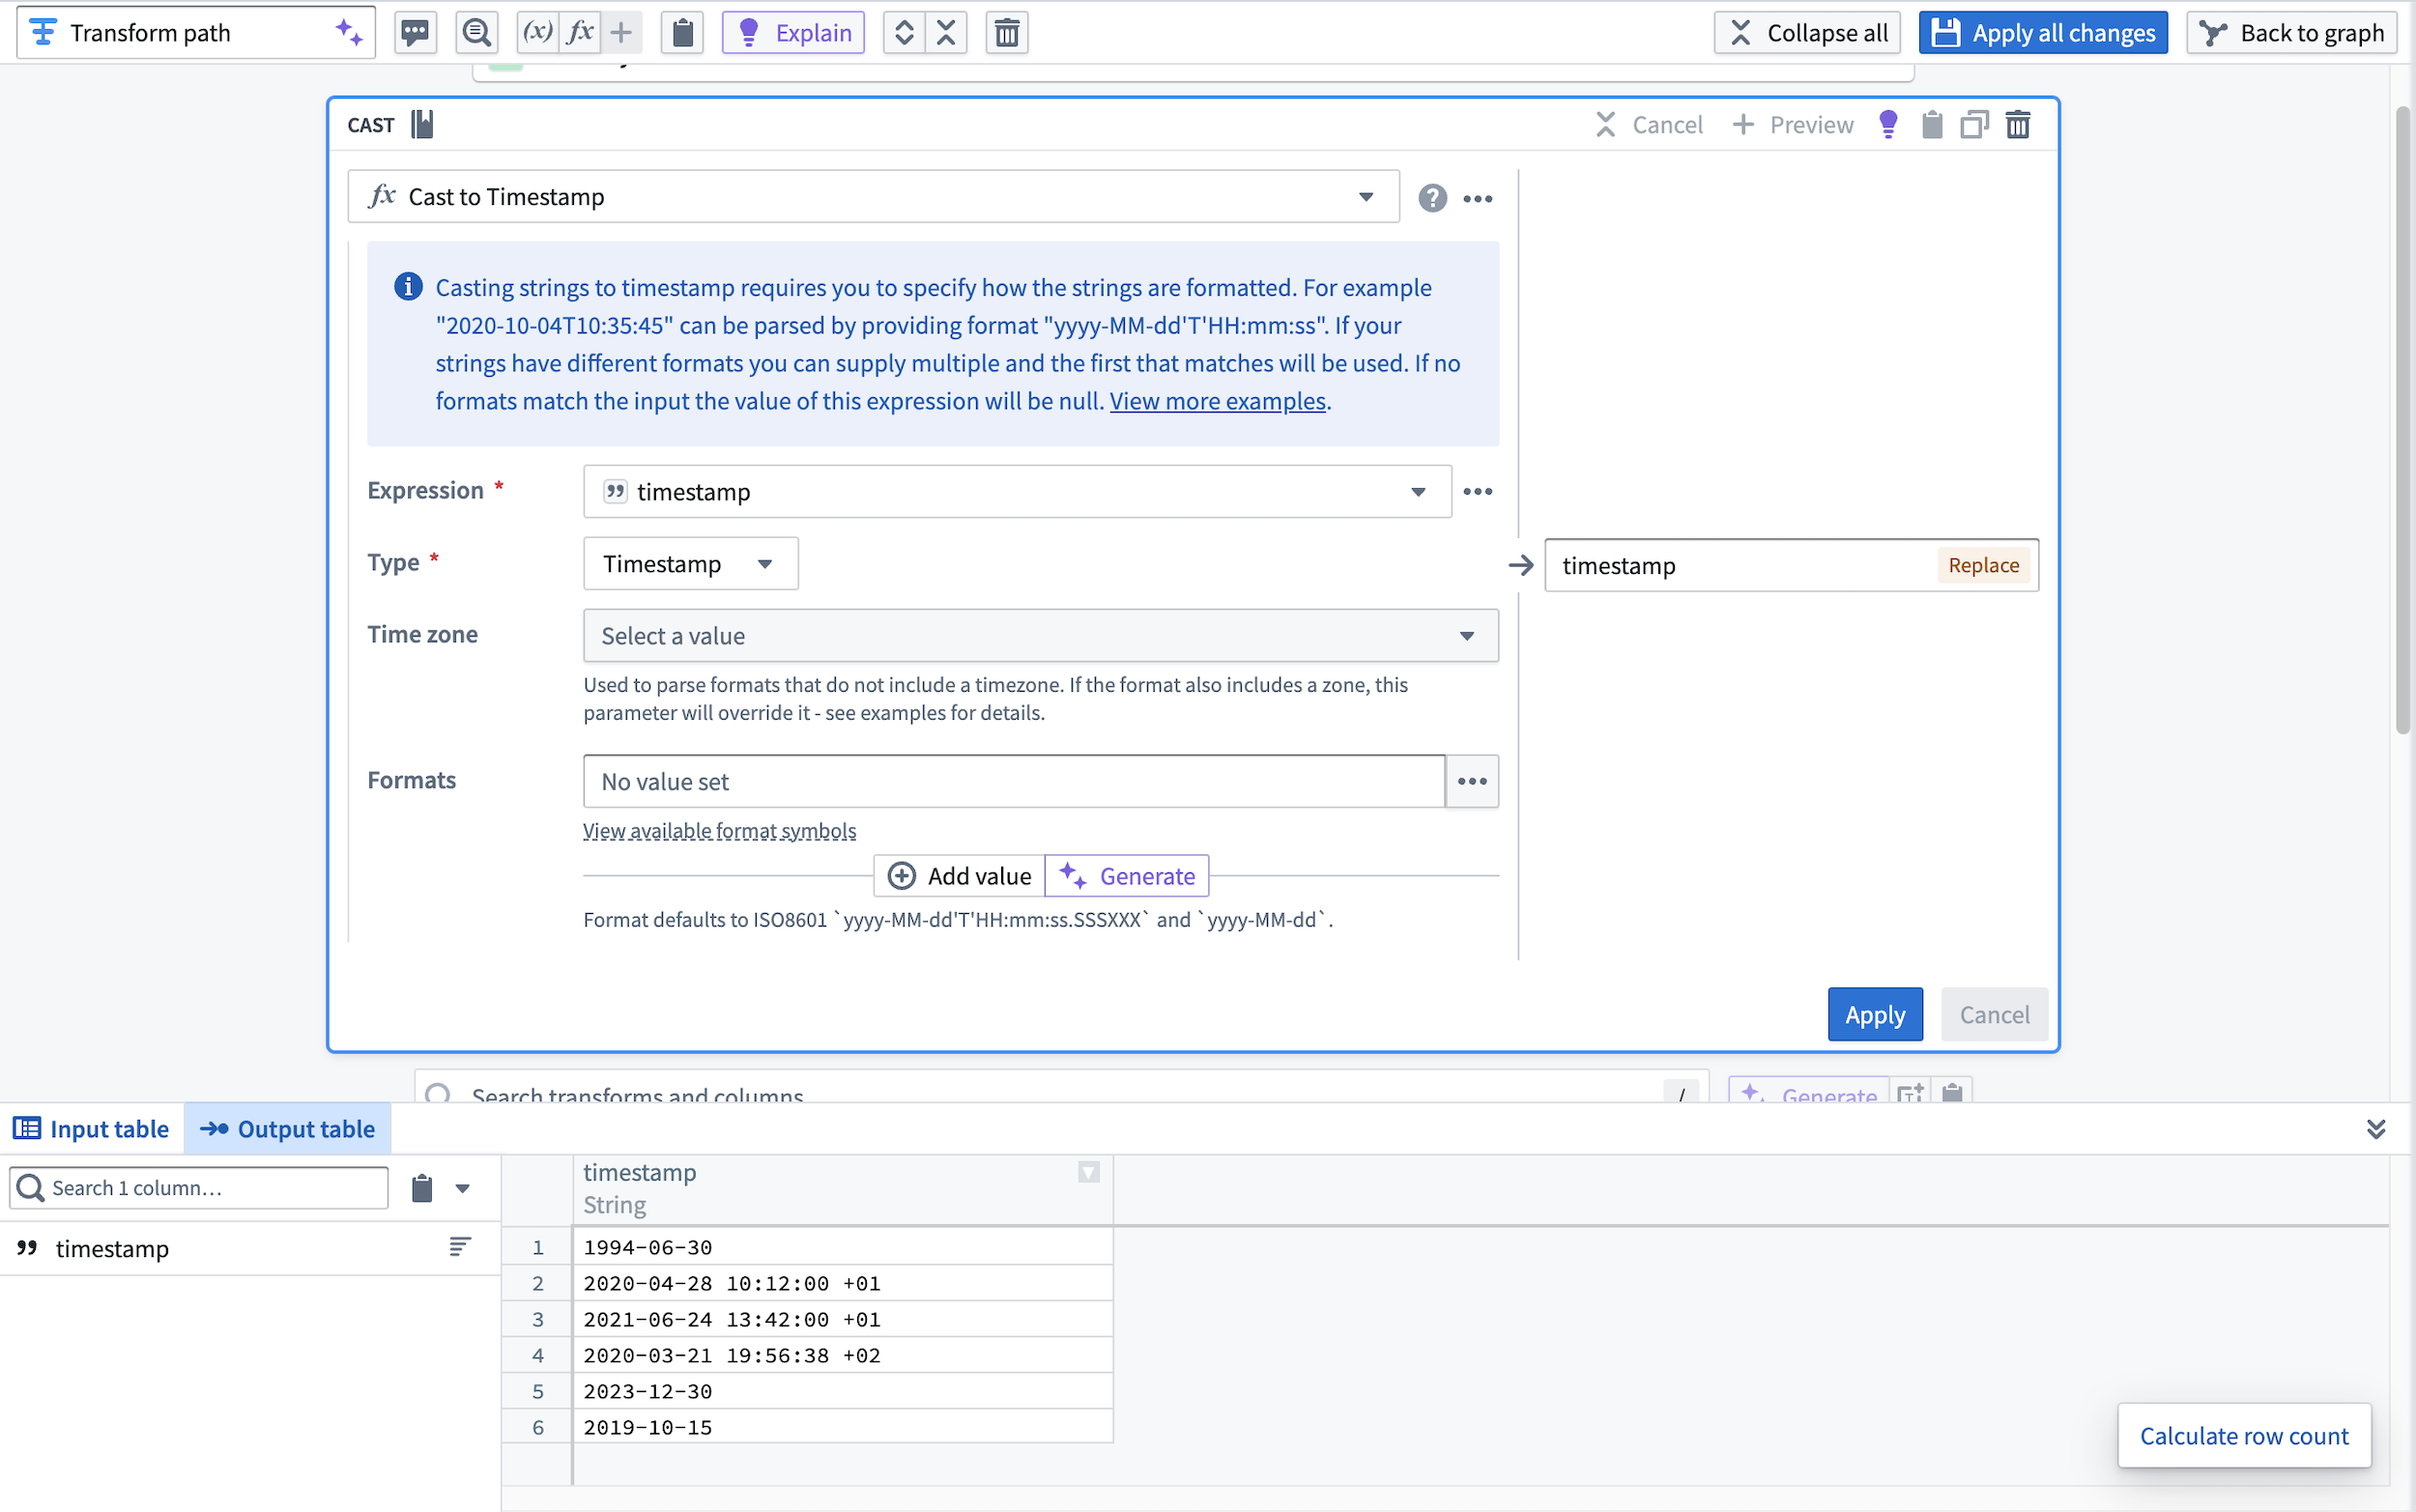
Timestamp formatter
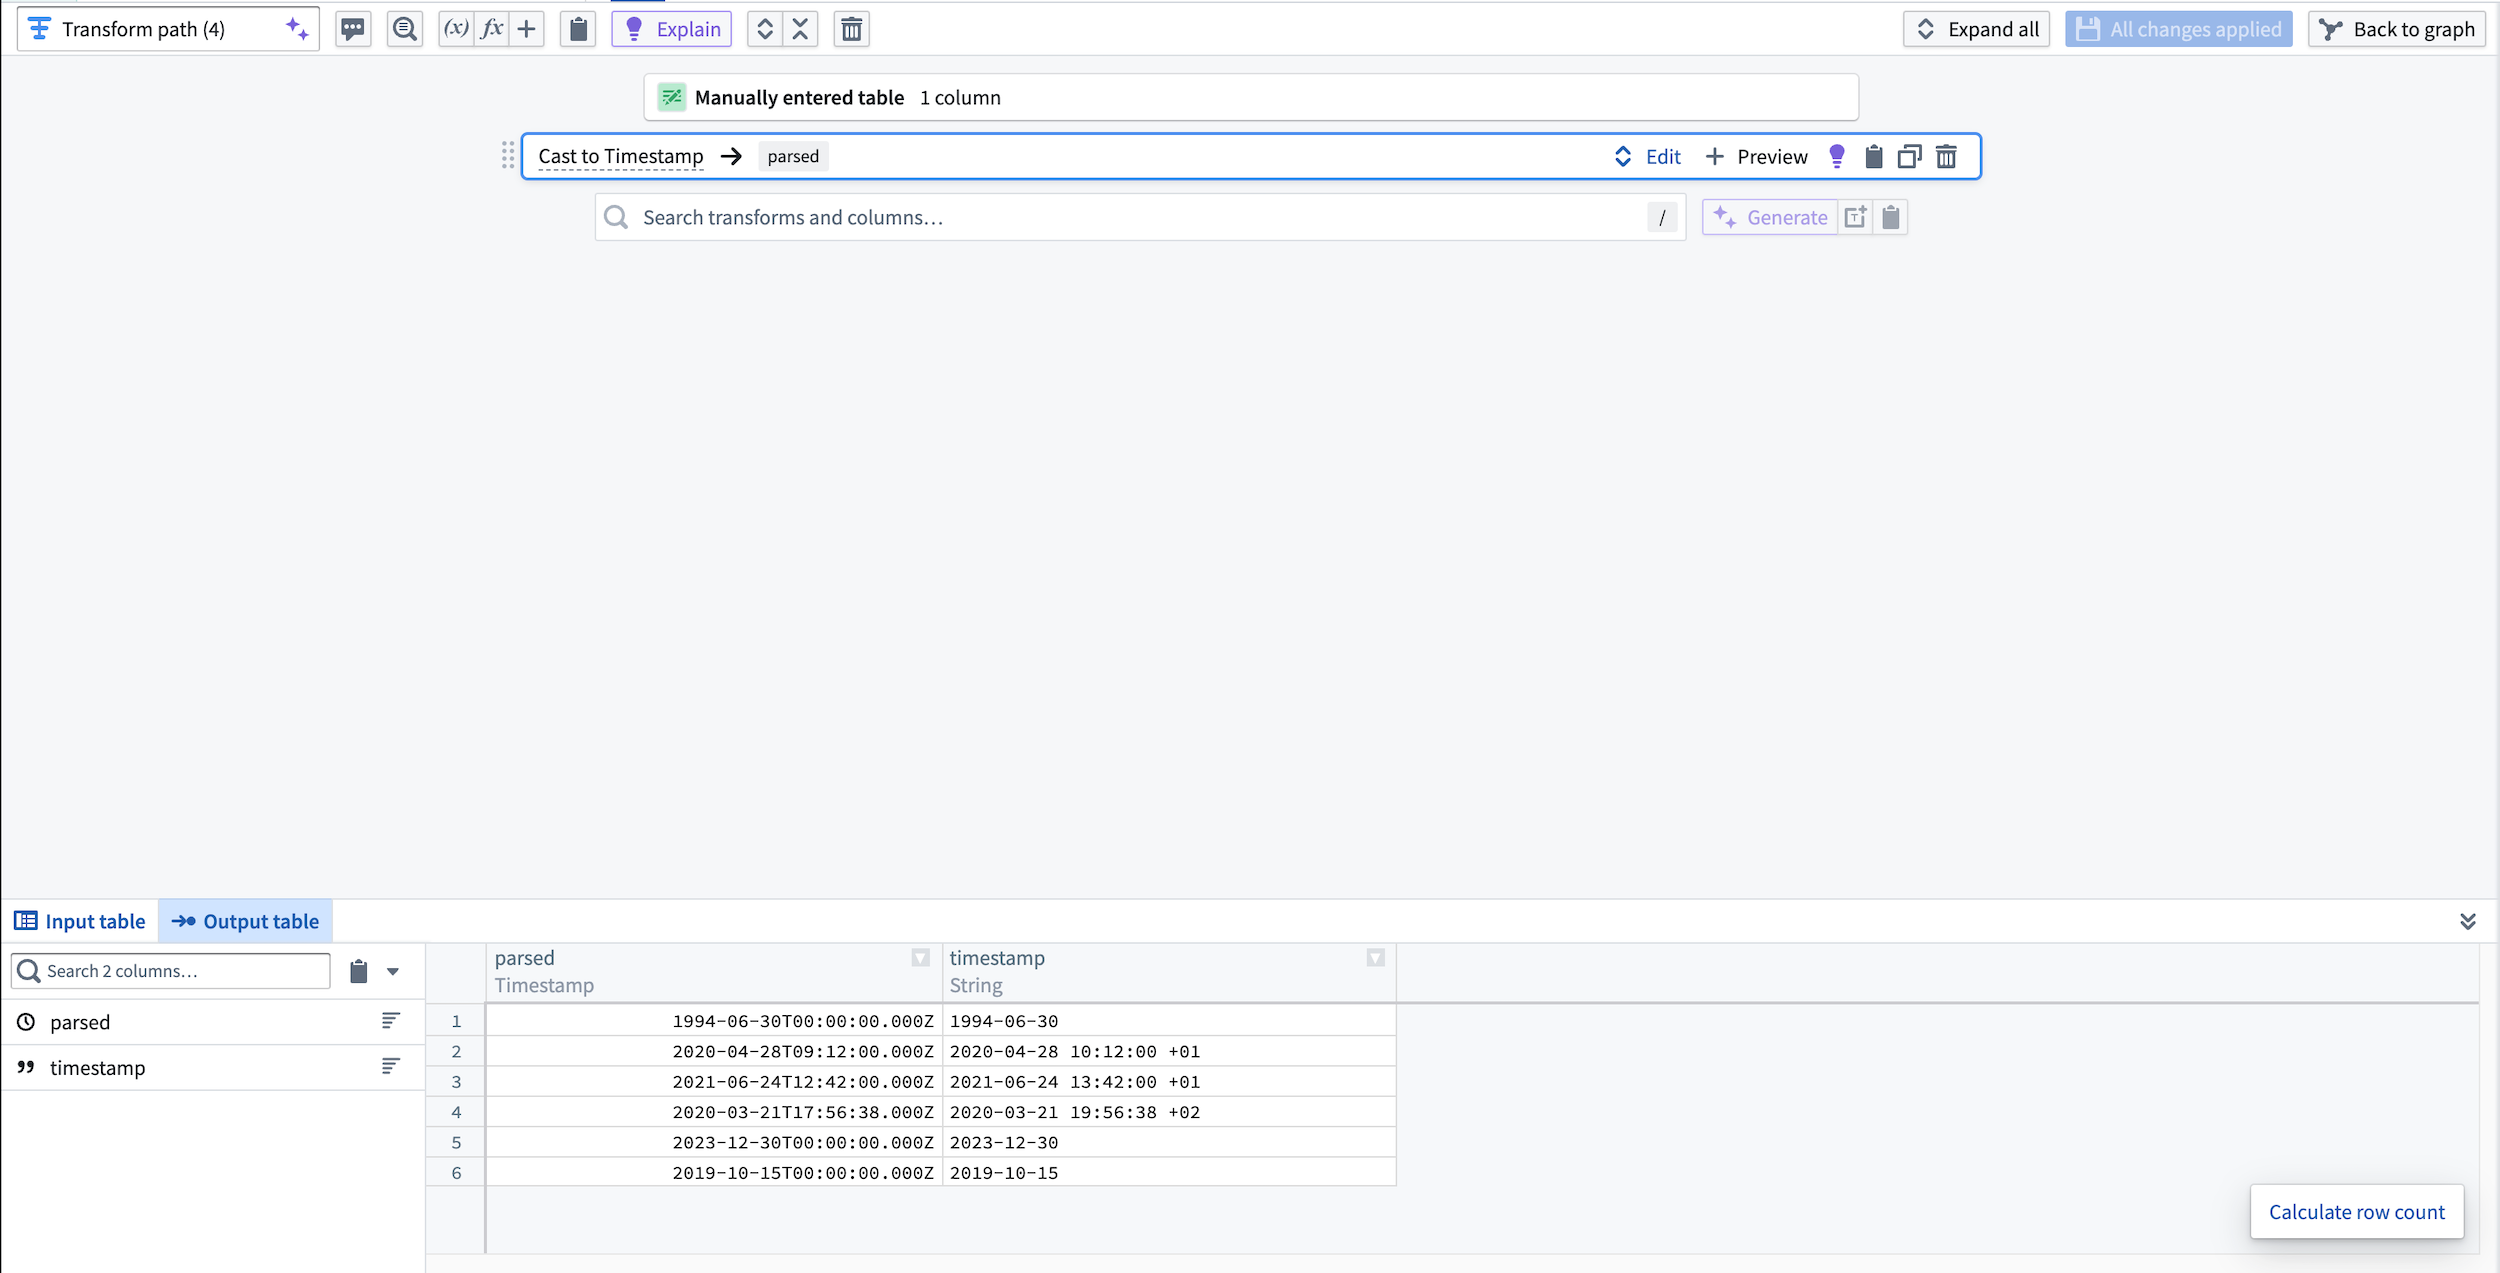
The timestamp formatter offers a time-saving solution for quickly casting strings to timestamps in cast boards. To use the timestamp formatter, first create a new cast board configured to cast from string to timestamp. In the example below, we have timestamps with different formats:
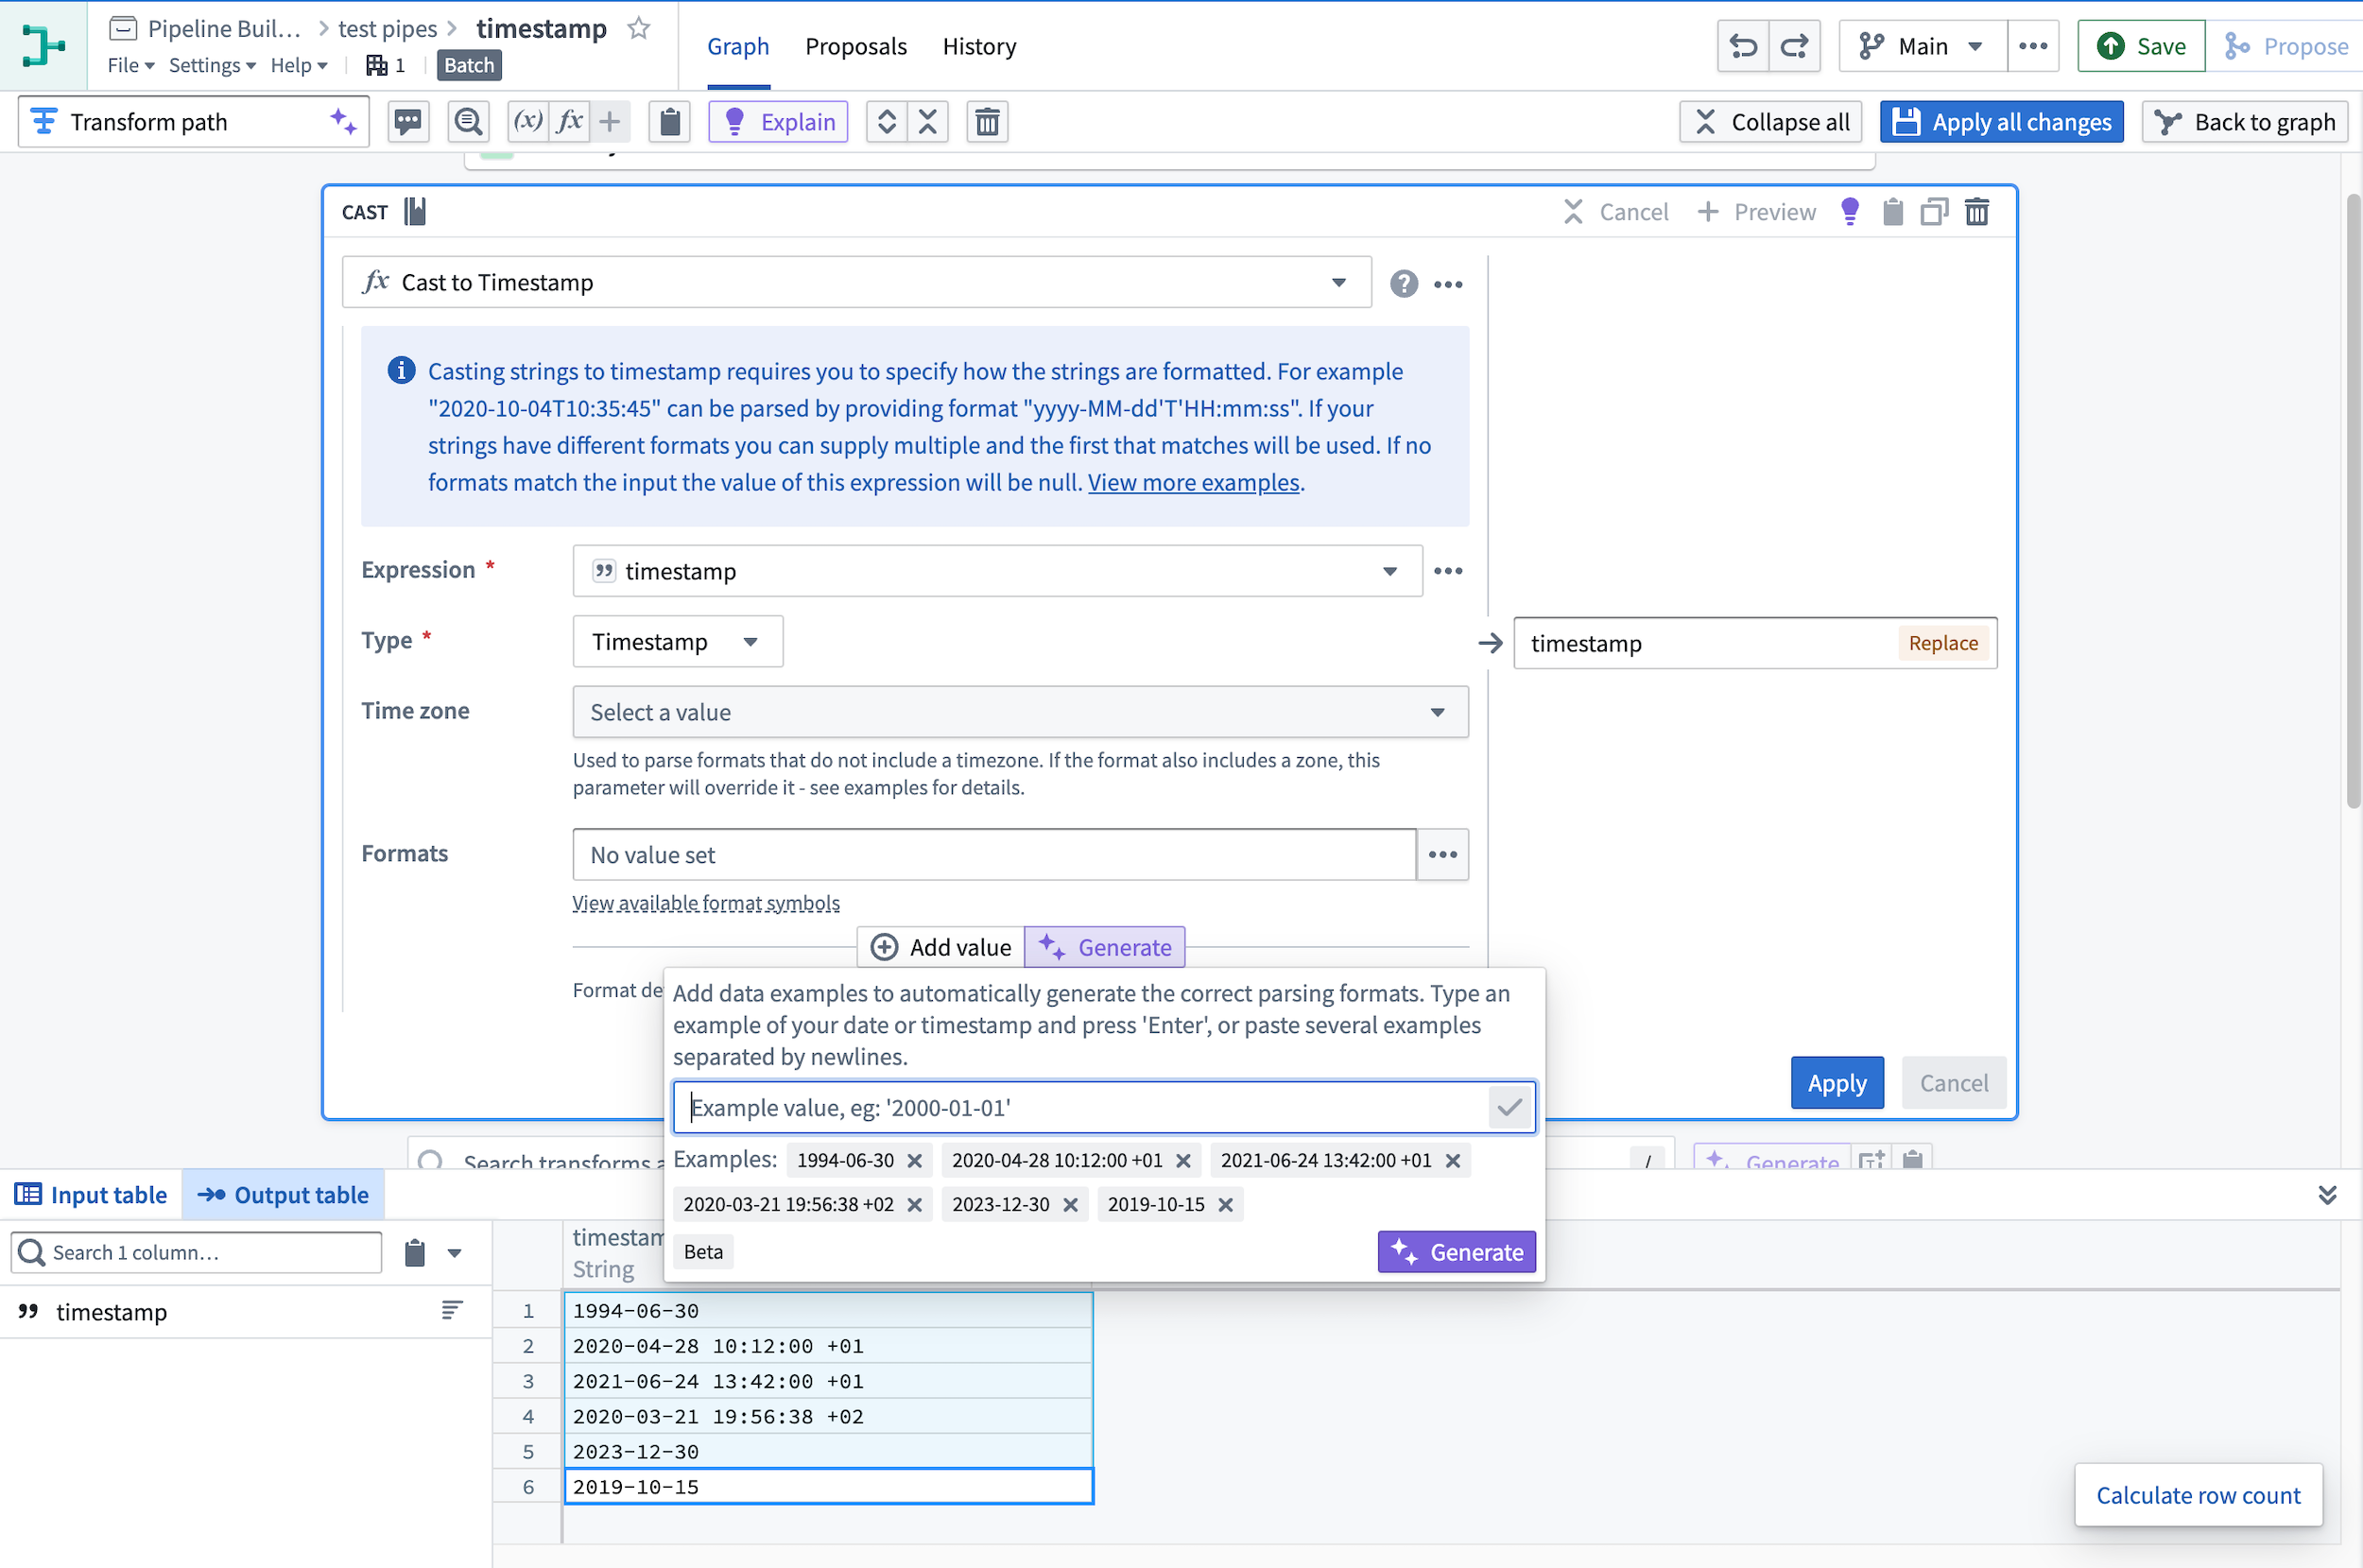
Then, select the purple Generate button to enter an example of the parsing format you want to use in the cast. In our example, we will paste all five timestamps:
AIP will then generate a set of formats matching these timestamps and enter them into the cast board. Select Apply.
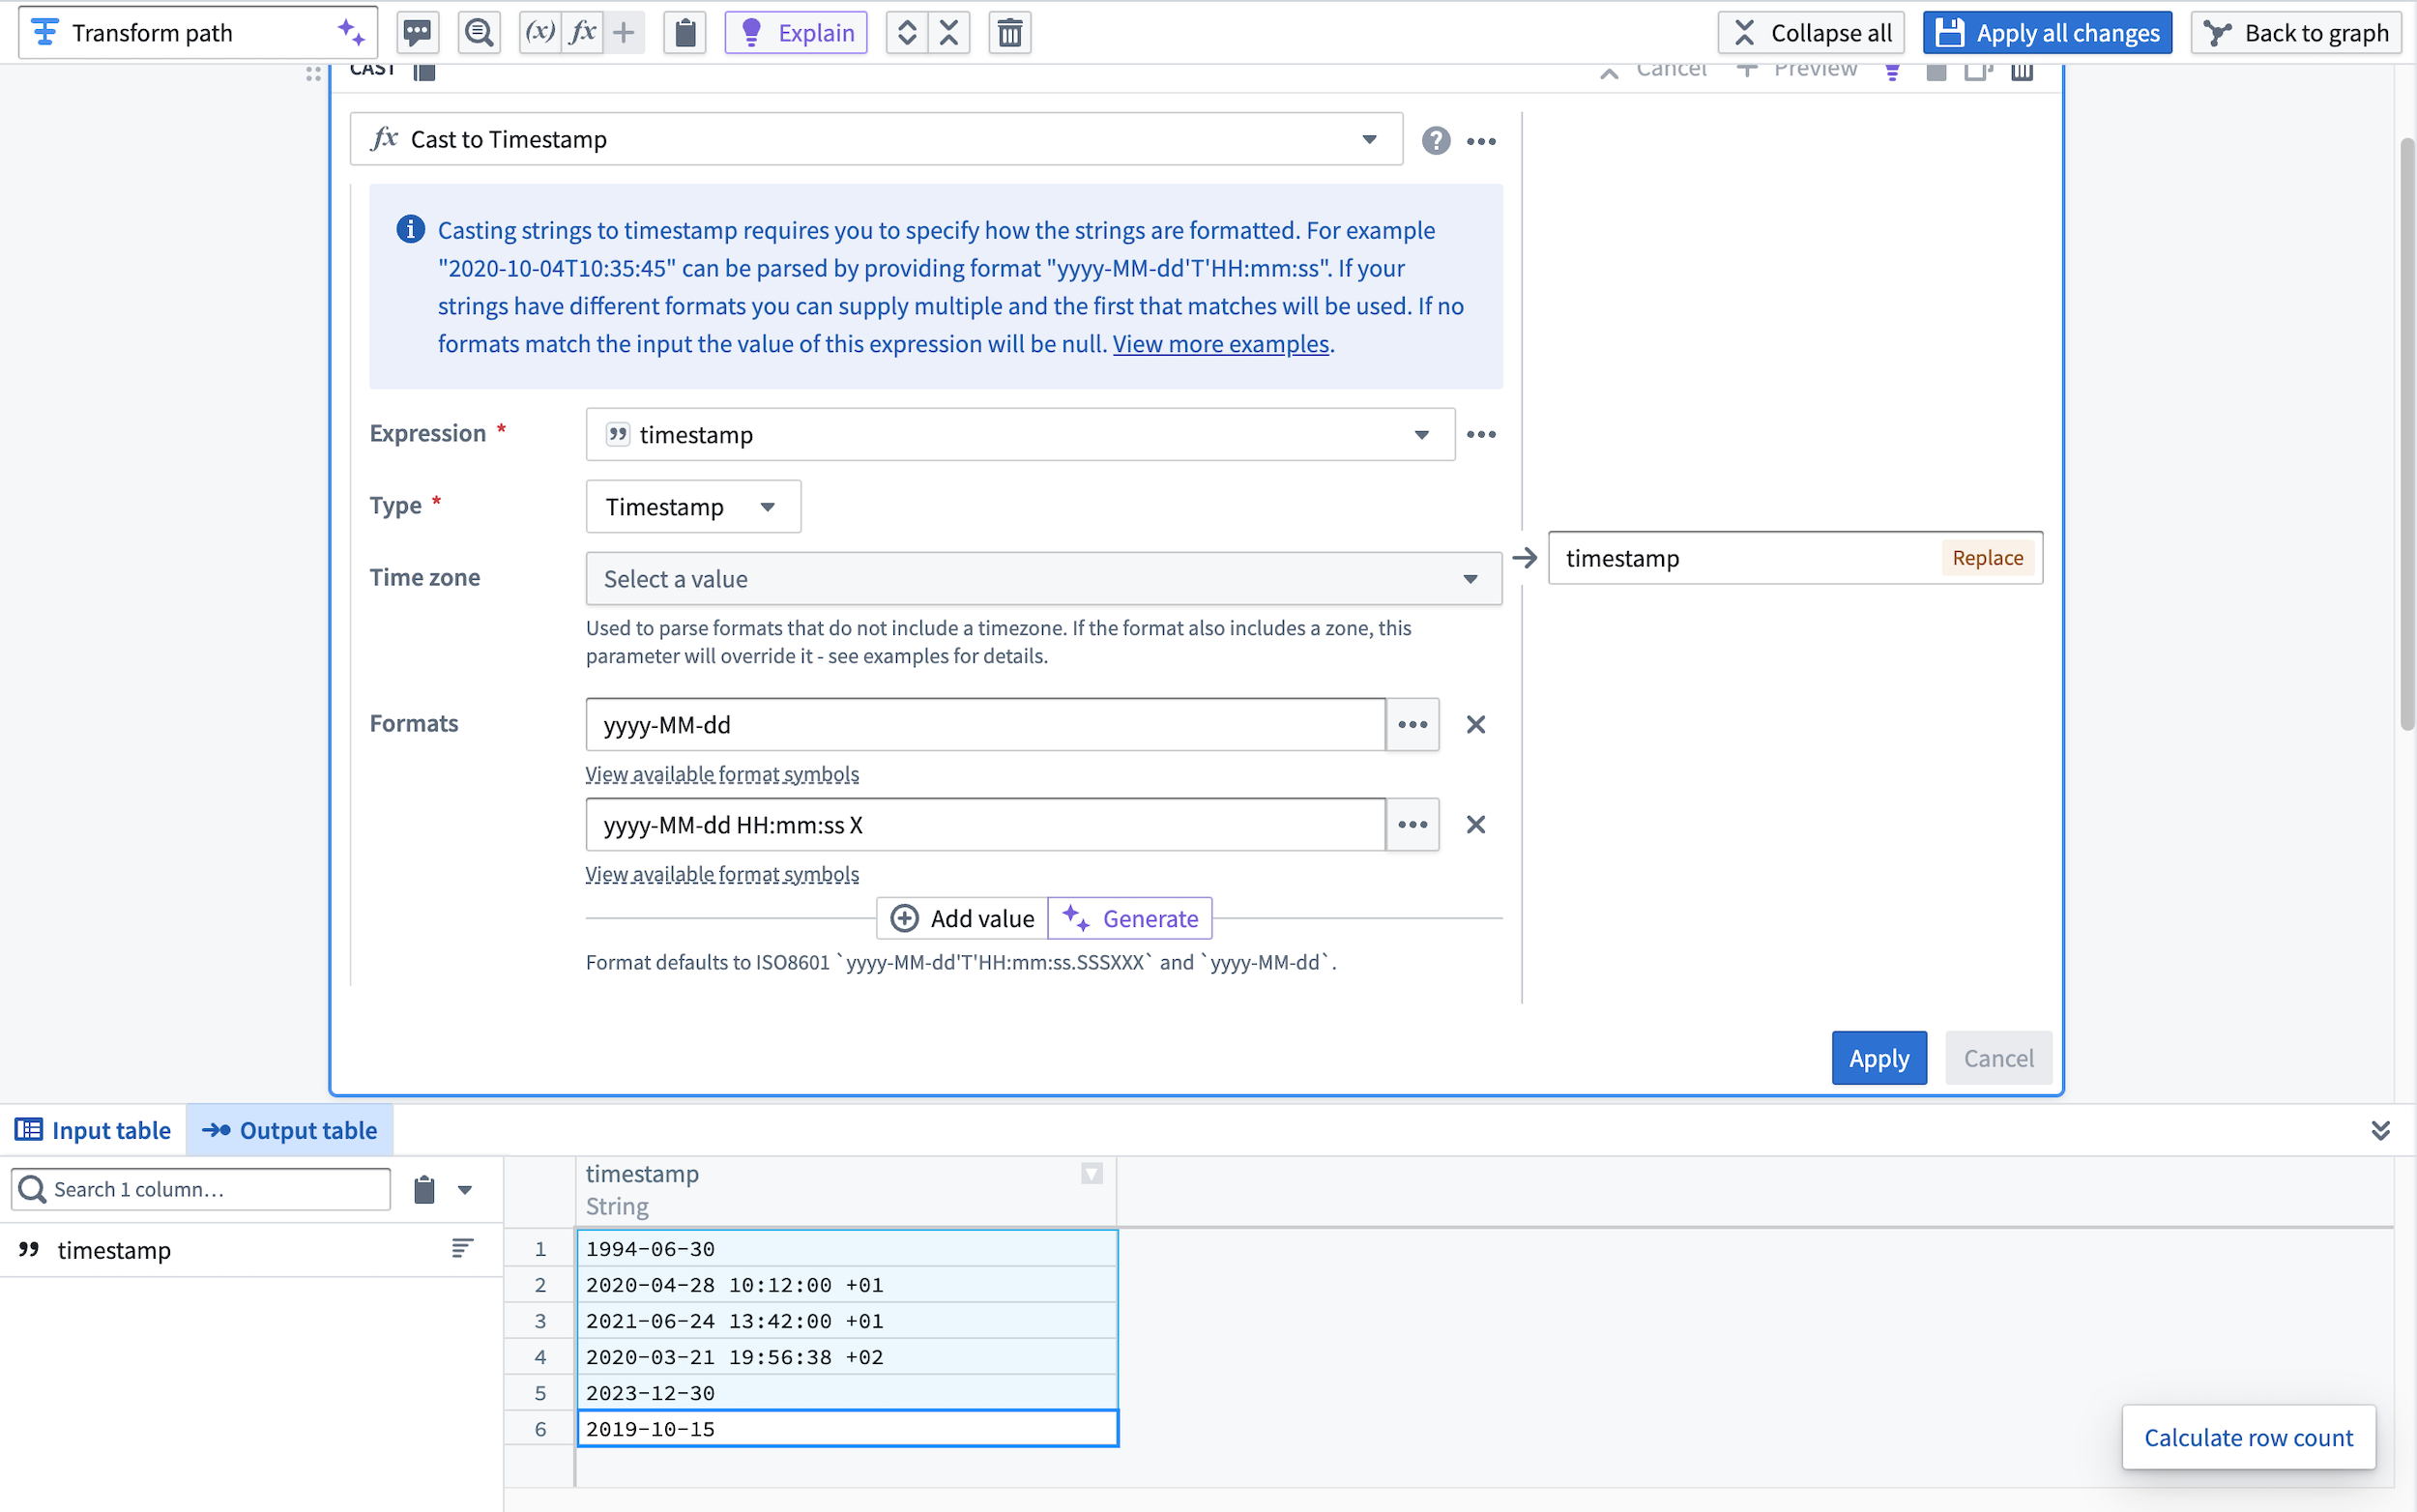
The string column is then parsed into a timestamp column.
Learn more about transforms in Pipeline Builder.
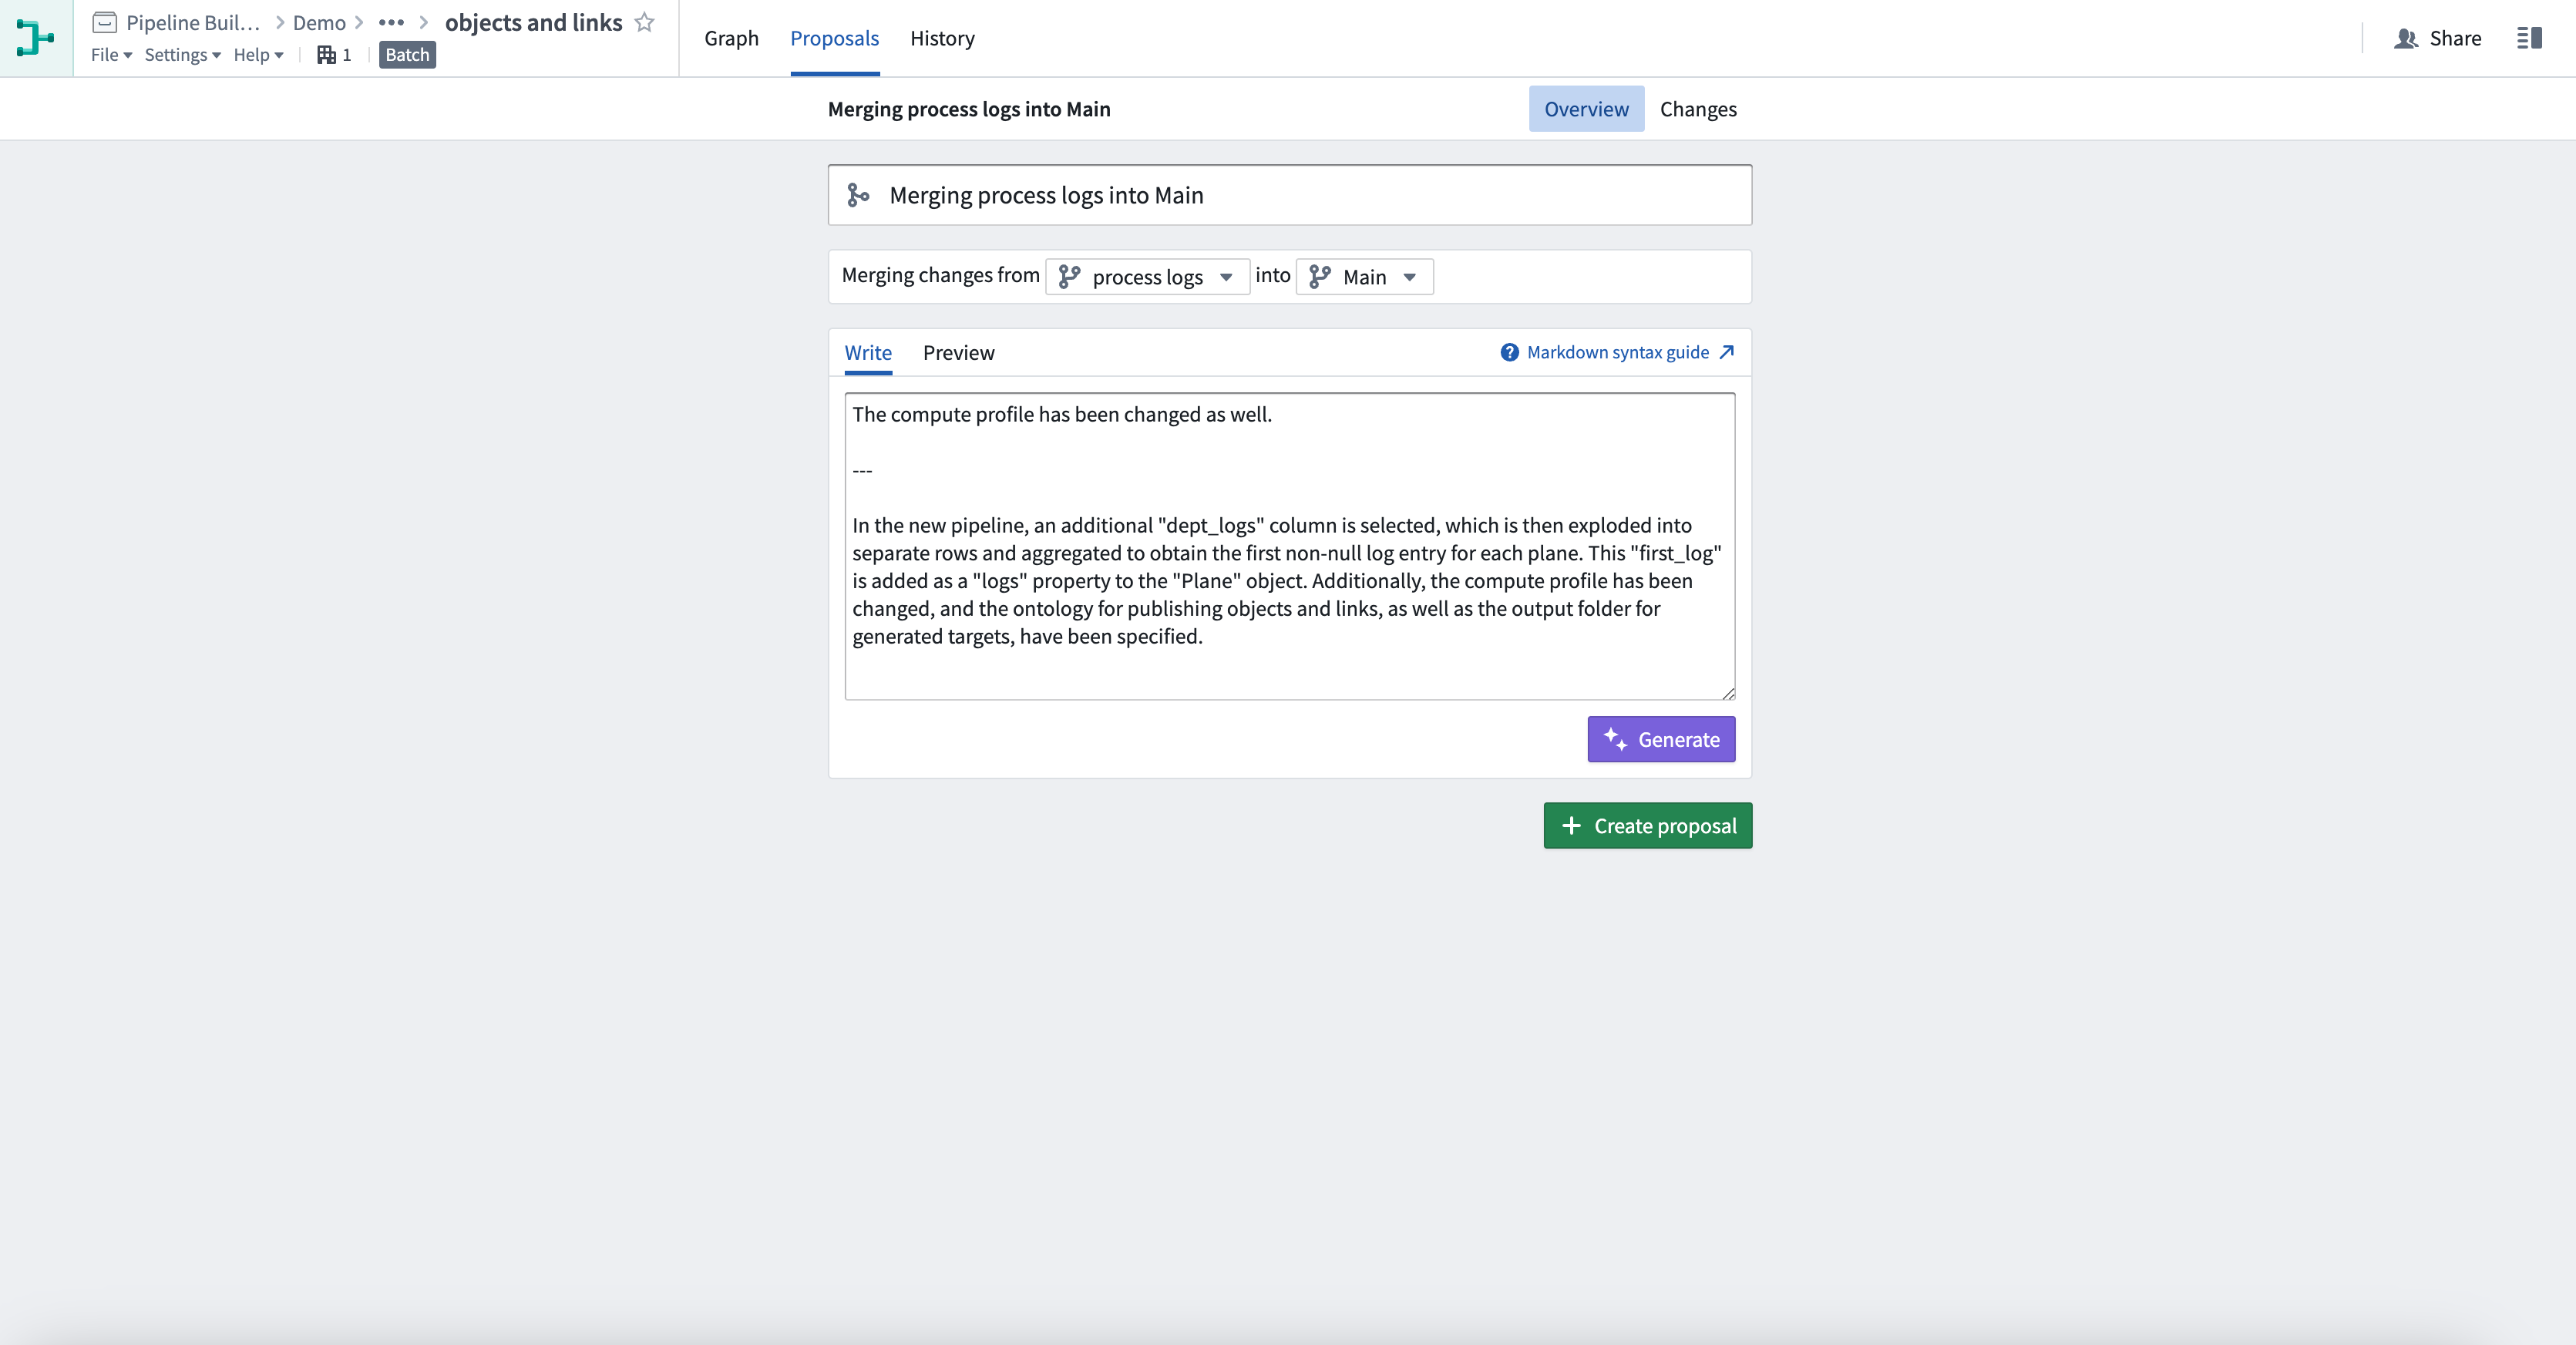
Generate proposal descriptions
You can also use AIP in Pipeline Builder to quickly describe your changes by generating the proposal description when making your proposal.
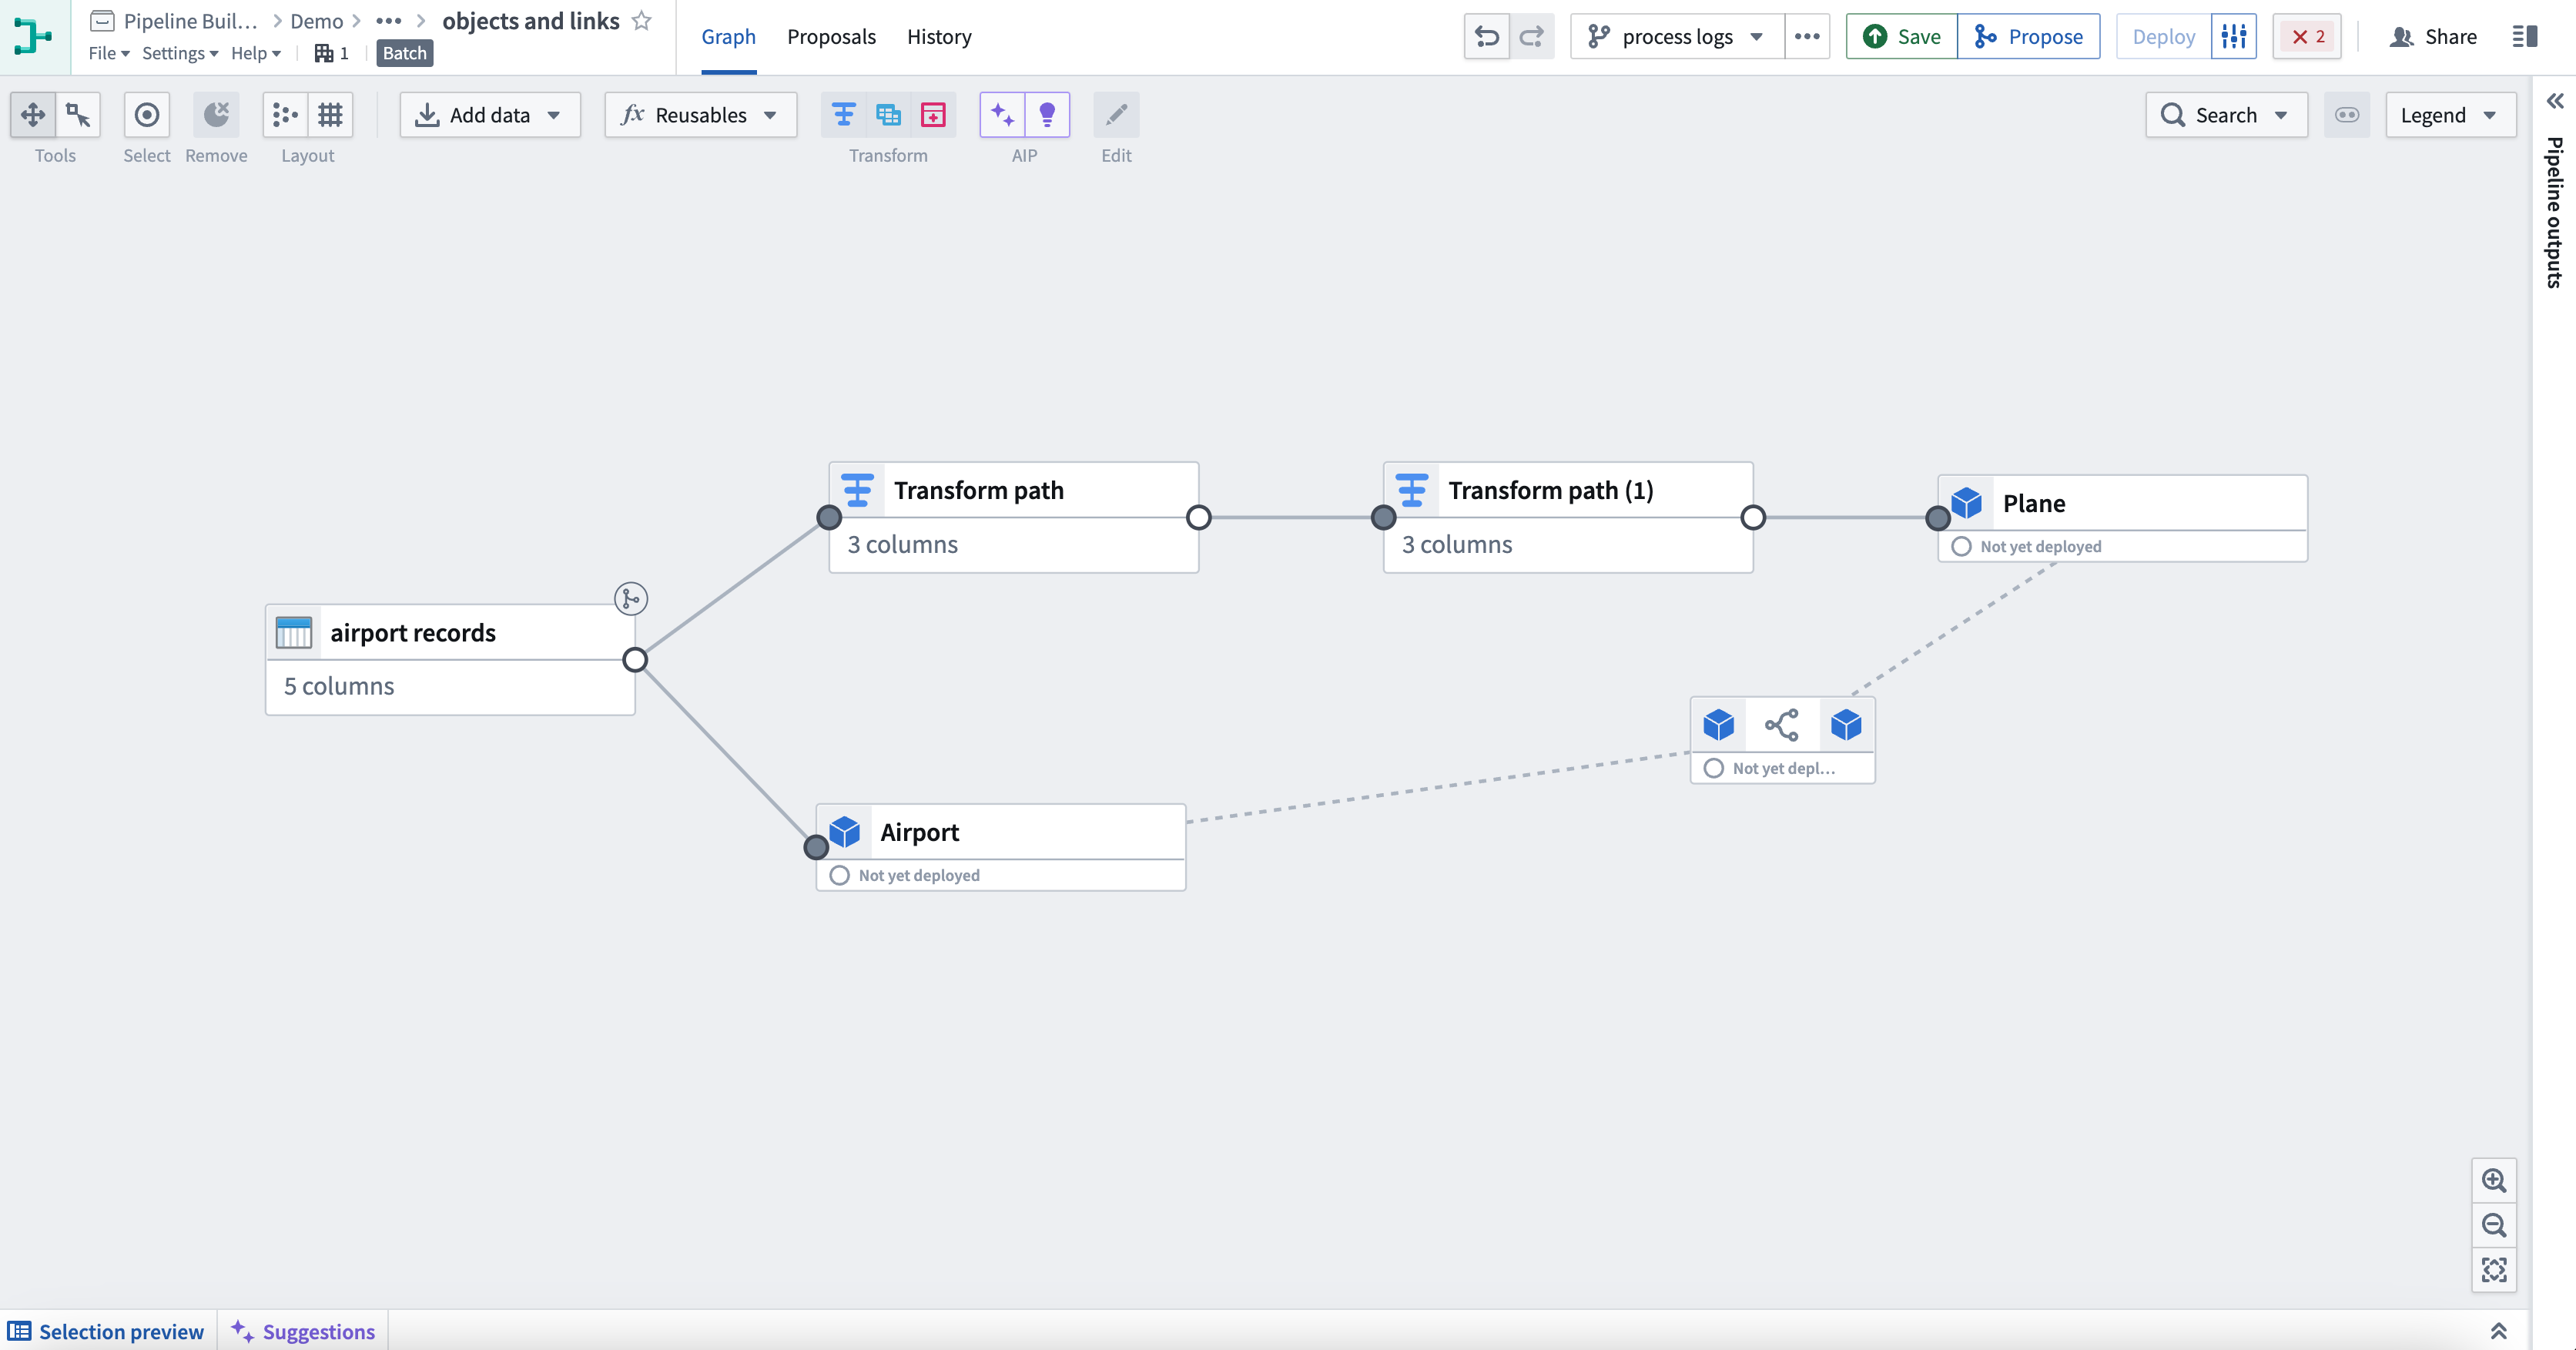
To do this, first select Propose in the top right corner. This will bring you to the proposal creation view.
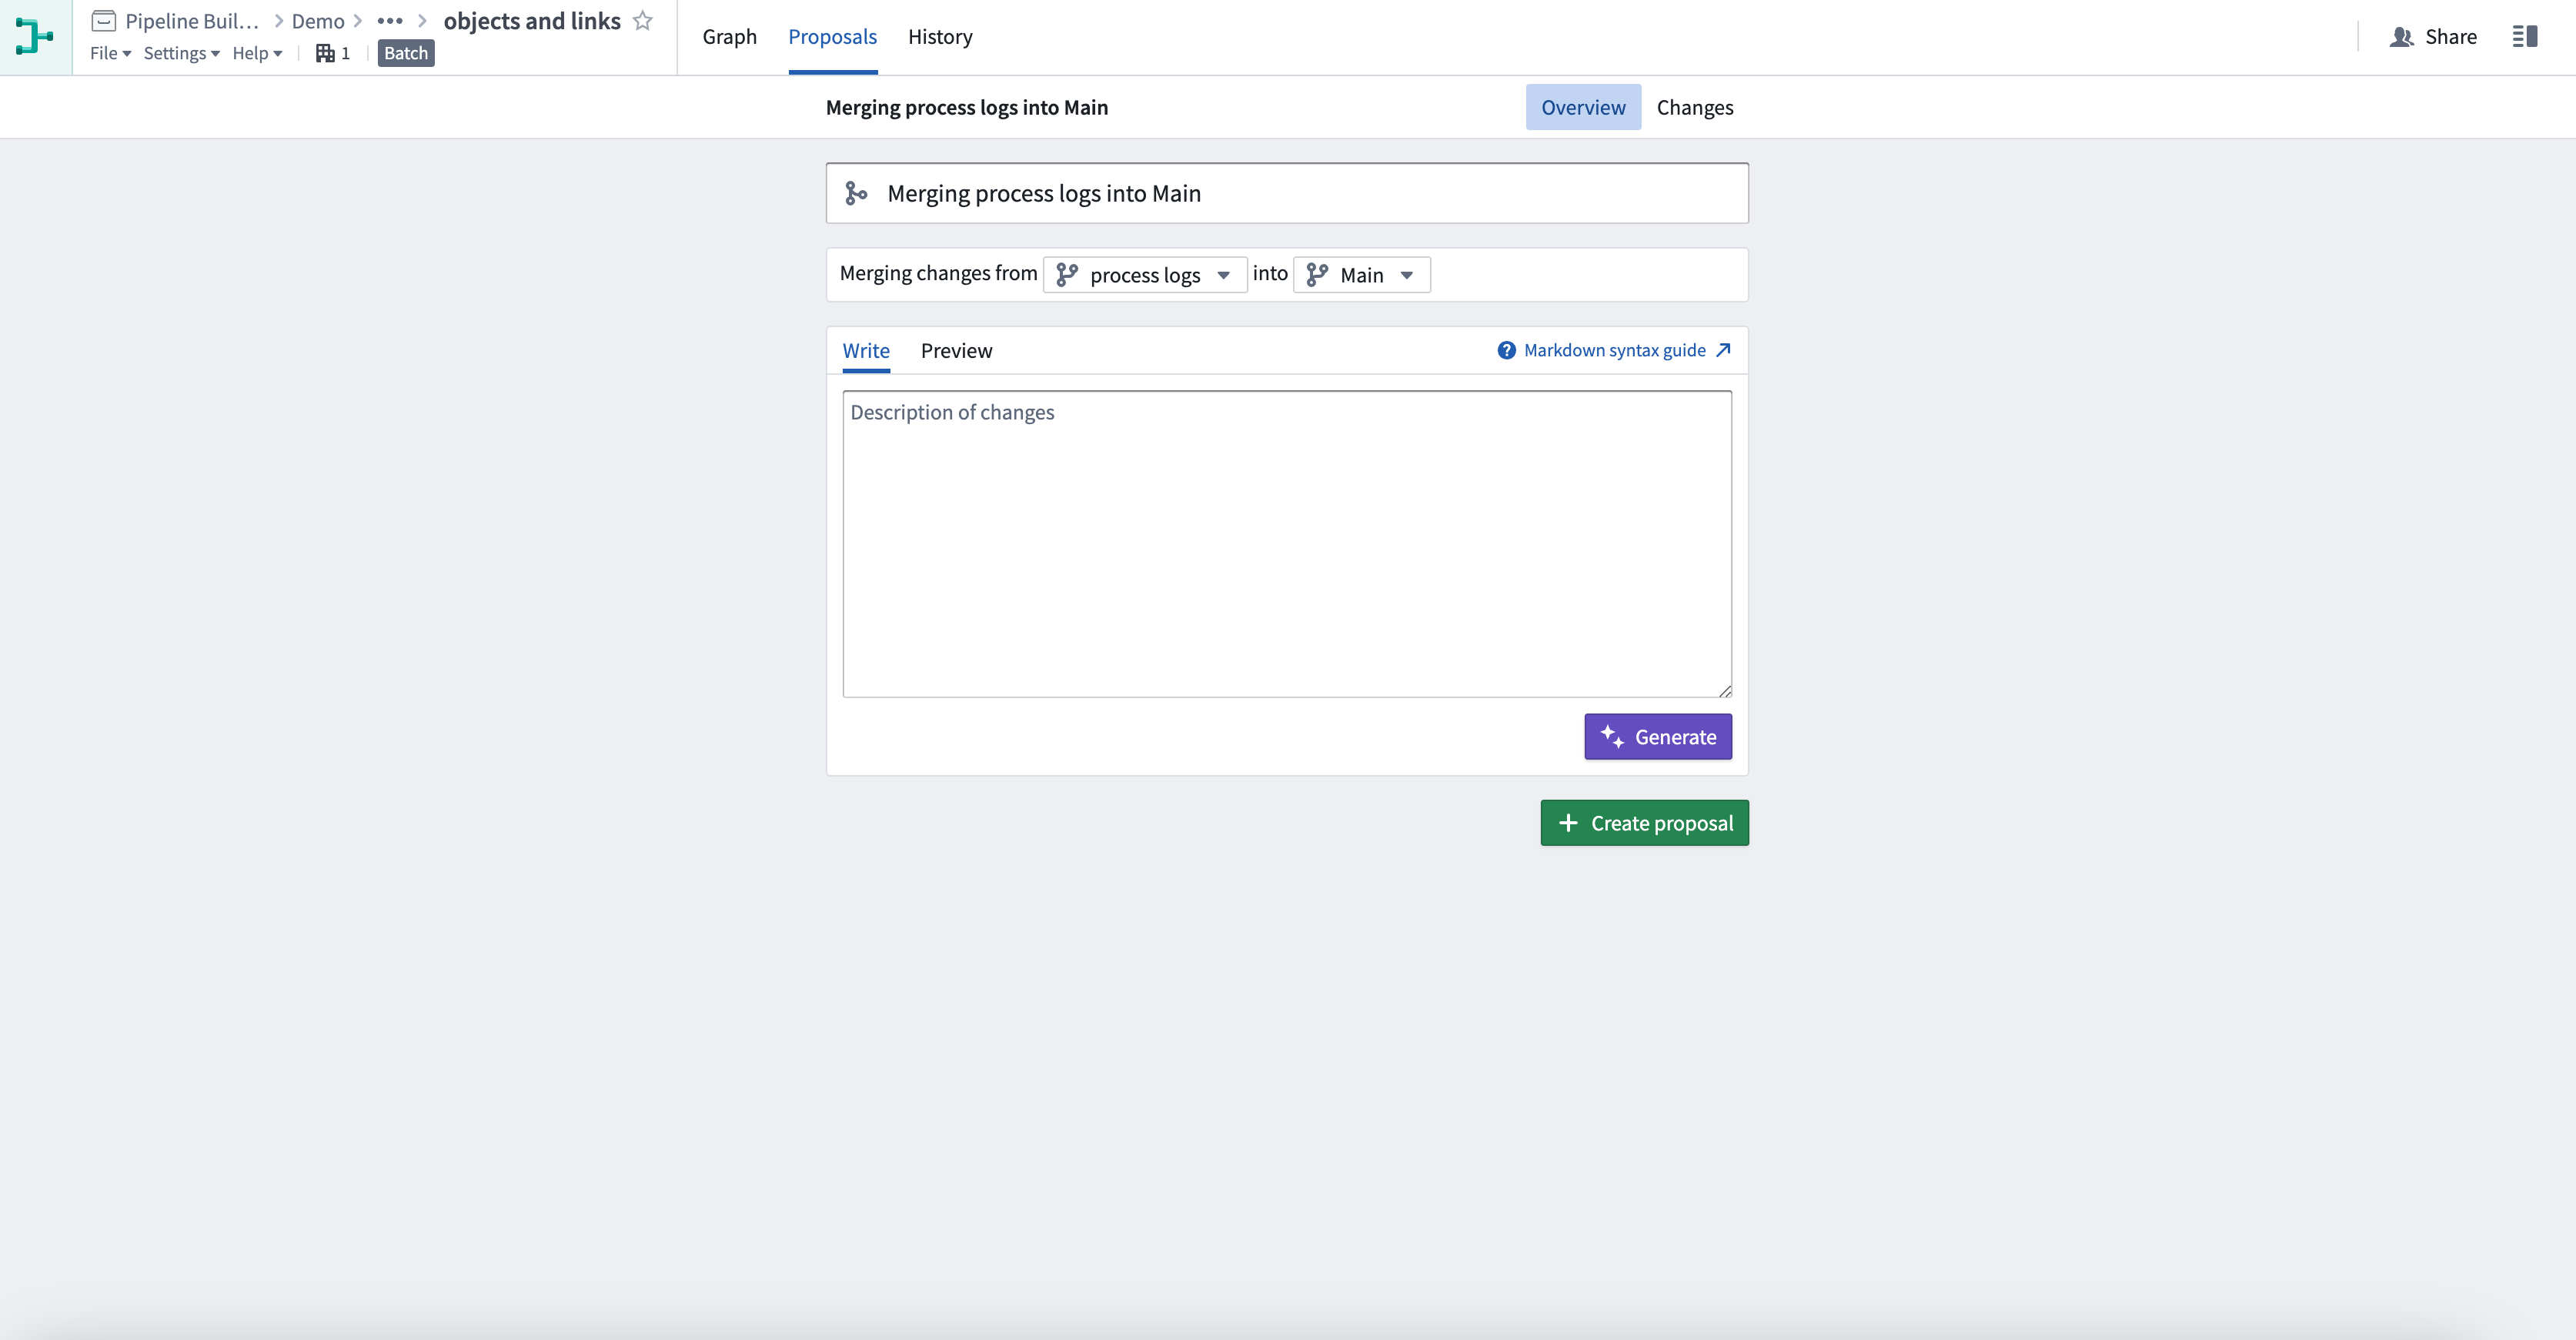
Now select the purple Generate button. AIP will write a proposal description of the changes to the pipeline on your branch.
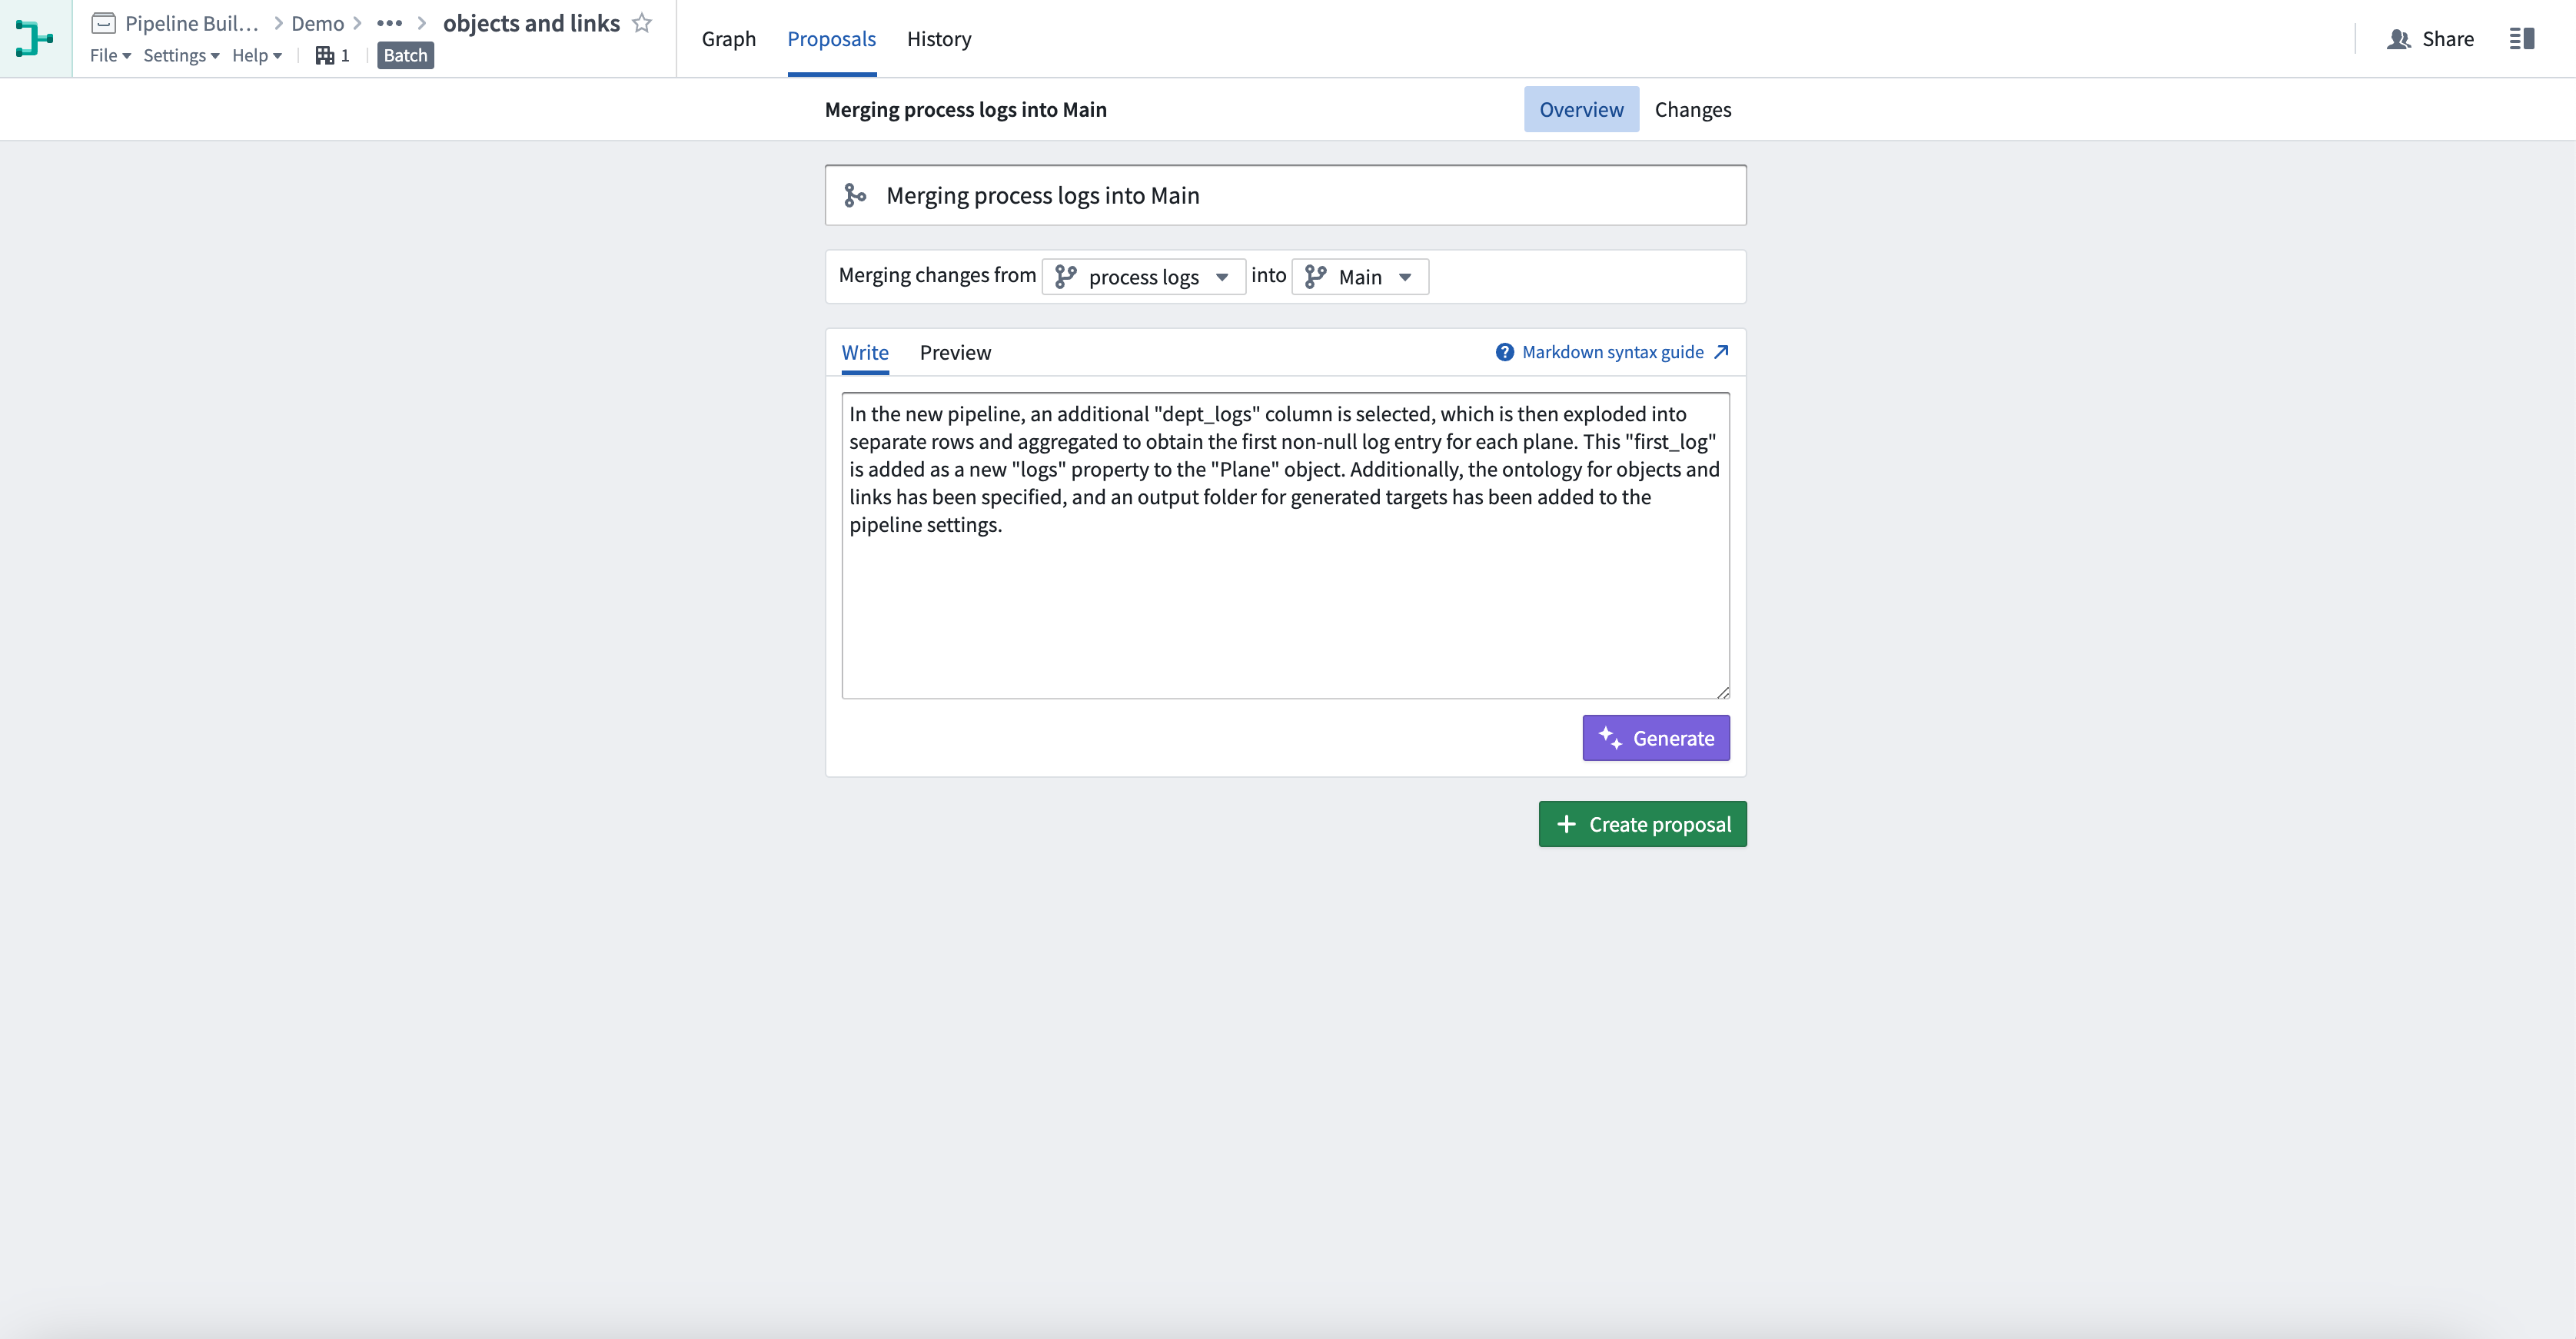
In this example, there were multiple changes, including changes to some pipeline settings. AIP describes all of them for you.
You can also type in additional context, bring attention to particular changes, or even start writing a rough proposal description into the text box before you select Generate. AIP will use this to enhance its proposal description. The generated description will be added below your text, with a clear separation.
To generate again or change the description you have provided, ensure only the relevant text is in the text box before you select Generate. For best results, all other text, including any previously generated description should be deleted.
AIP capabilities for custom workflows
To use the following features, users must be granted permission for AIP capabilities for custom workflows by a platform administrator.
Text to embeddings
You can embed text as vectors with the Text to embeddings expression by providing it with strings to convert to an embedded vector using the Text embedding ada-002 embedding model. These vectors are designed to capture the semantic meaning of words or phrases, enabling advanced text analysis and operations.
Embedding text is computationally expensive and may result in slower previews and builds.

Use LLM node
The Use LLM node feature offers a convenient method for executing Large Language Models (LLMs) on your data at scale so you can seamlessly incorporate LLM processing logic between various data transformations, simplifying the integration of LLMs into your pipeline with no coding required.
Note: AIP feature availability is subject to change and may differ between customers.