- Capabilities
- Getting started
- Architecture center
- Platform updates
Approve a change
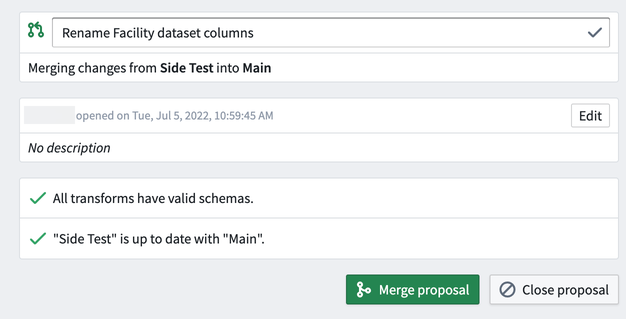
Pipeline Builder users with Edit access in a workflow project can approve change proposals to the Main pipeline branch. To approve a proposal, first open the Builder Proposal view and select it from the list of open proposals. Here, you can view details including the merge behavior (for example, from test/branch into Main), a description of the change, and any errors found in the proposal.
View changes
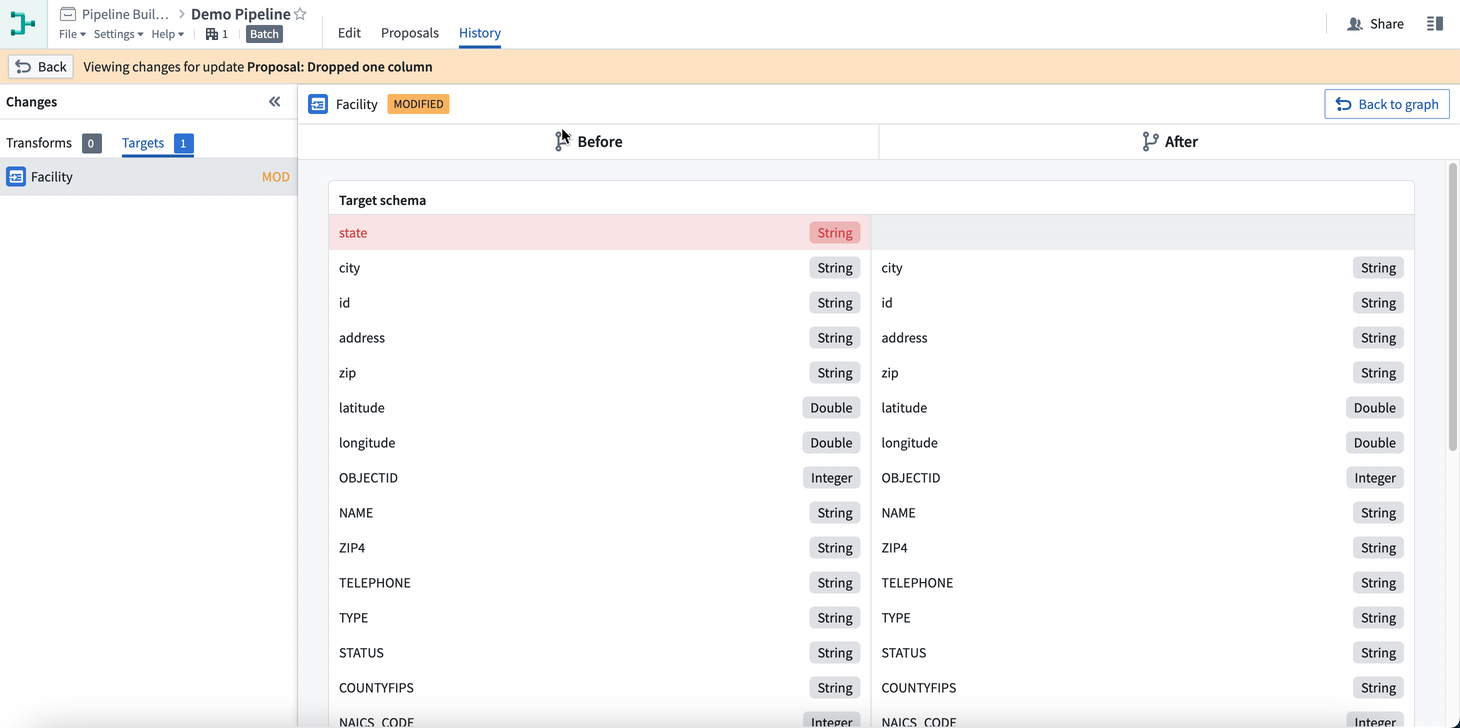
Switch to the Changes tab to compare proposed changes to the Main branch workflow. In the left panel, you can filter between types of changes. In the example below, the proposed changes include four edits to Transforms and three edits to Outputs.
Each proposed edit is tagged by proposal type: ADD, MOD, or DEL.
ADD: The edit is a new addition to the workflow.MOD: The edit is a modification of an existing workflow node.DEL: The edit removes a node from the workflow.
Click on an individual edit for a side-by-side view of differences between the Main branch and proposal branch. In the example below, the proposed Join person data modification adds the CITY column to the existing join.
View and compare statistics
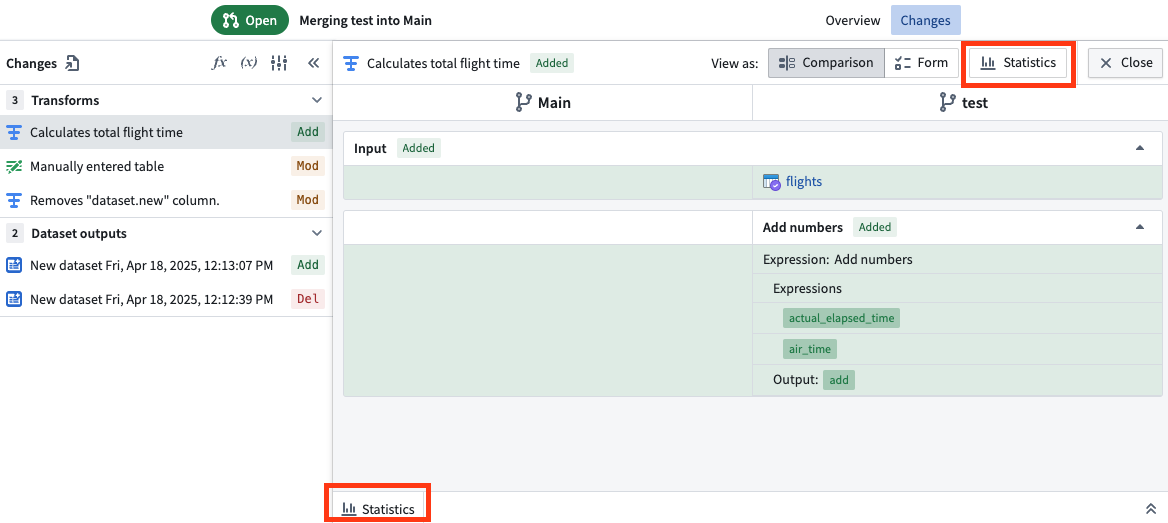
You can view and compare column statistics on any transforms on your branch. Double click into the transform and select Statistics at the top right or the tab on the bottom panel.
Select the View column stats icon to view and compare the statistics of the select column.
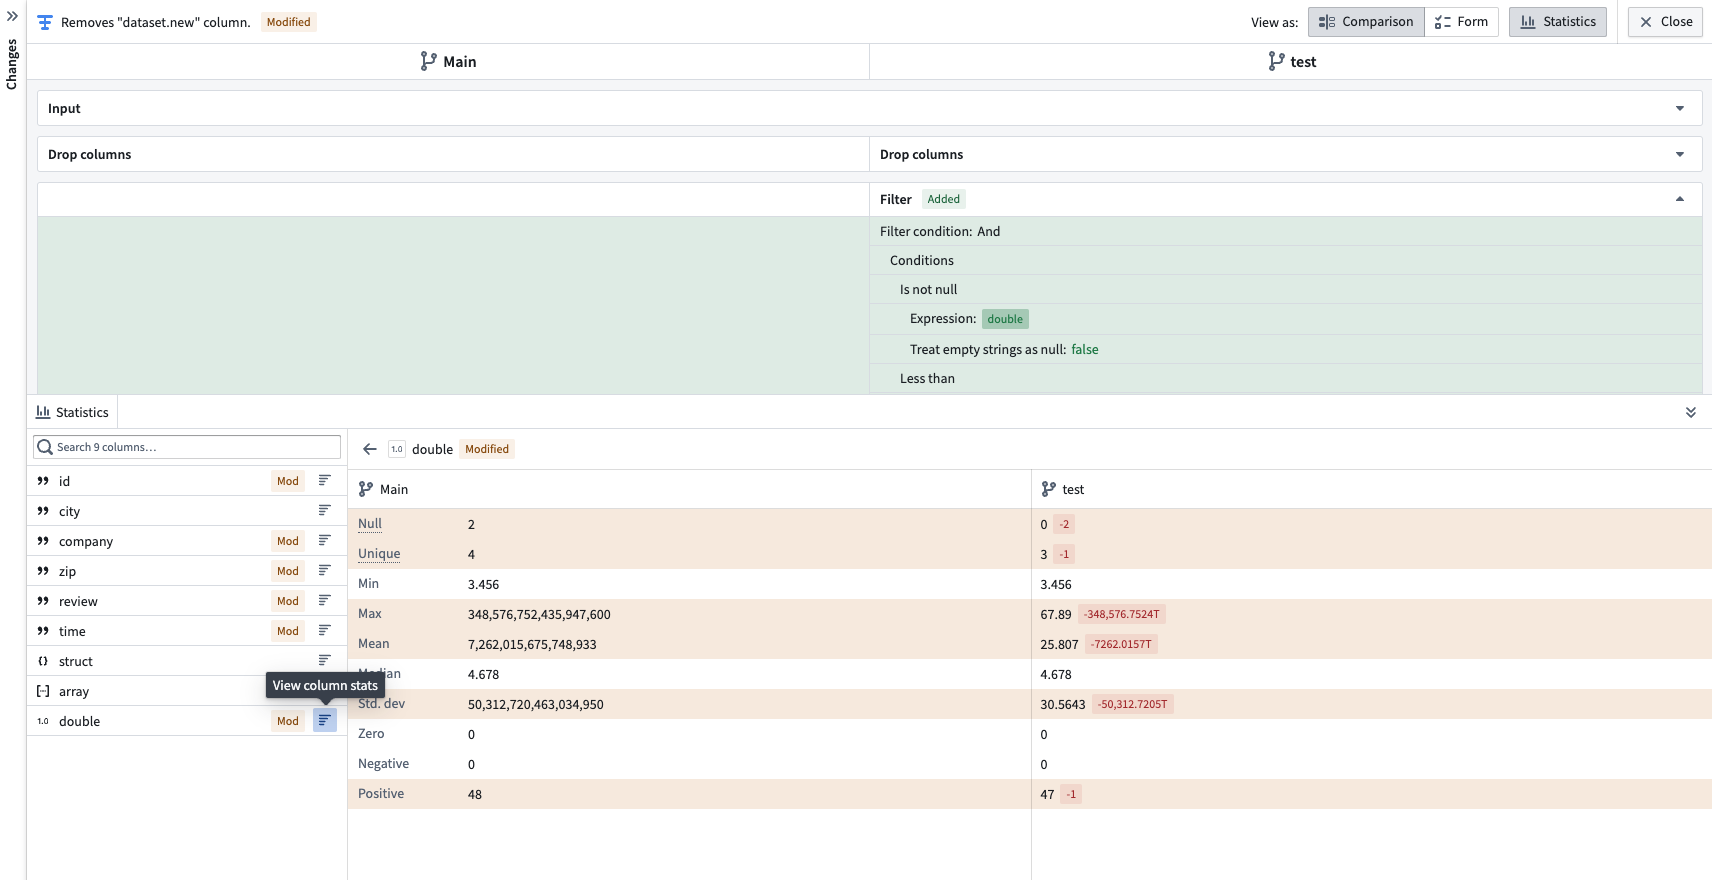
Here you can view a variety of metrics such as:
- The number of null values.
- The number of unique values.
- For strings: The minimum and maximum lengths, and how many strings need trimming.
- For numeric values: The minimum, maximum, media, standard deviation, negative, and positive values.
Differences between the statistics between your branch and the main branch will be color coded to the right of the metric.
Switch back to the Overview tab to continue reviewing the proposal.
Track and mark changes as reviewed
In the Changes tab, you can mark each node or setting change as "reviewed". Pipeline Builder tracks and displays how many changes you have reviewed as well as the total number of changes, making it easy to see your review progress at a glance.
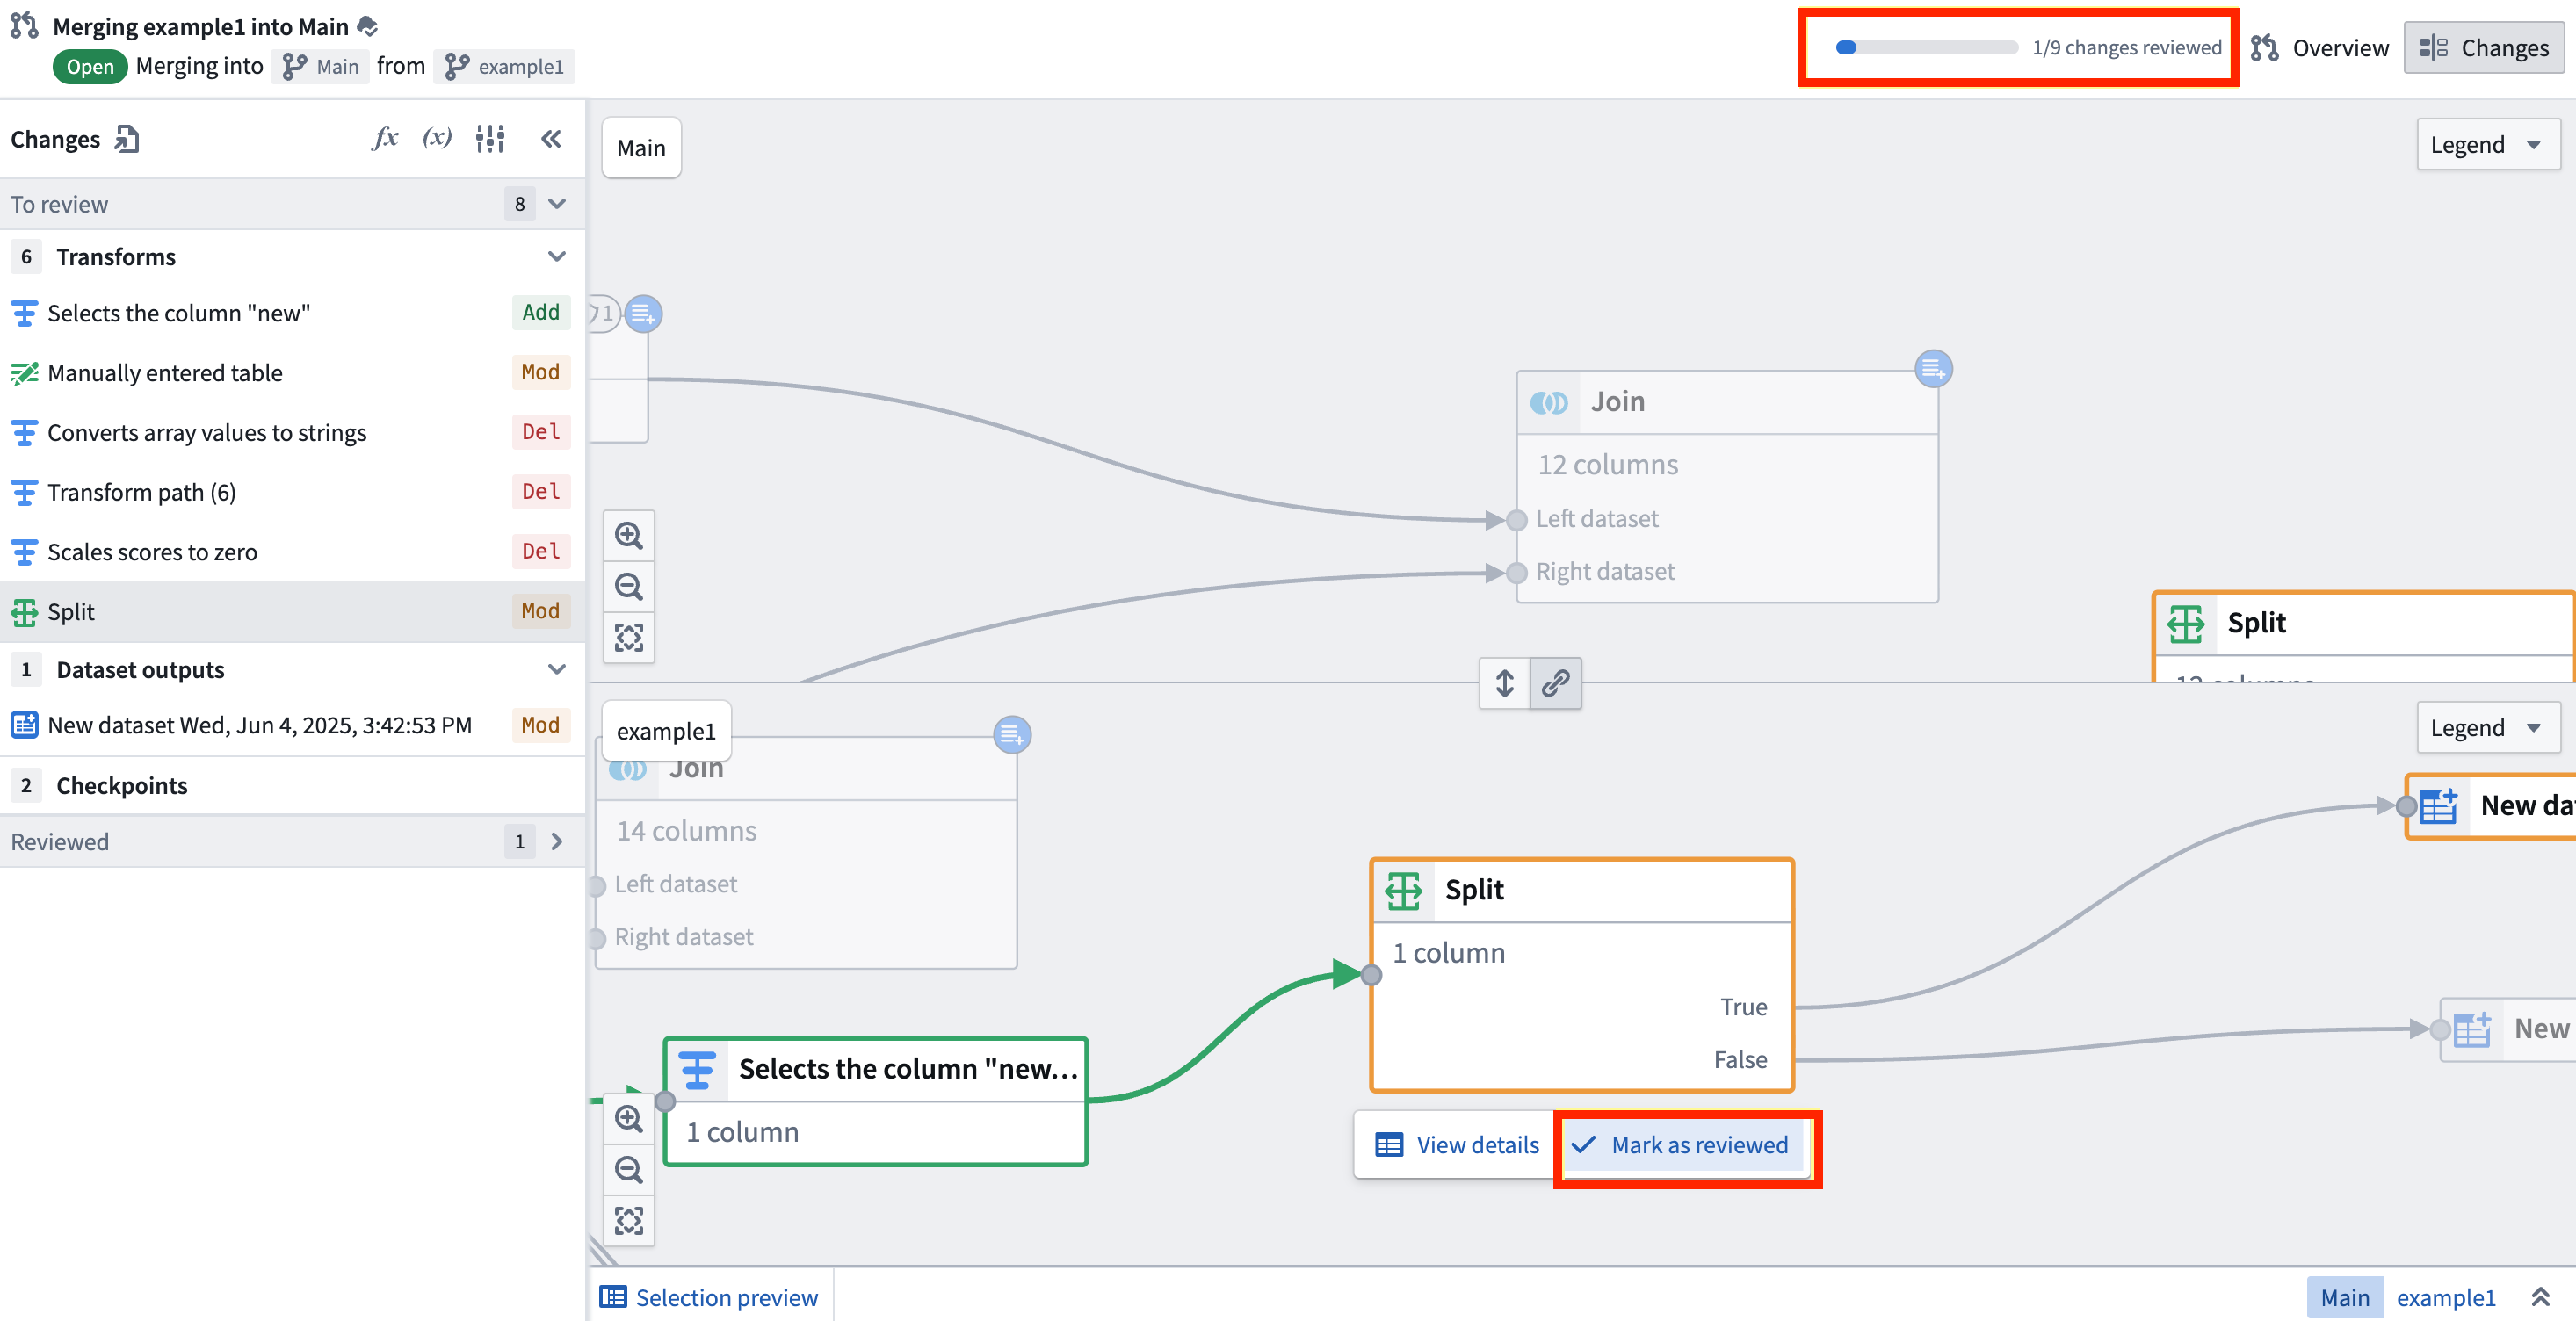
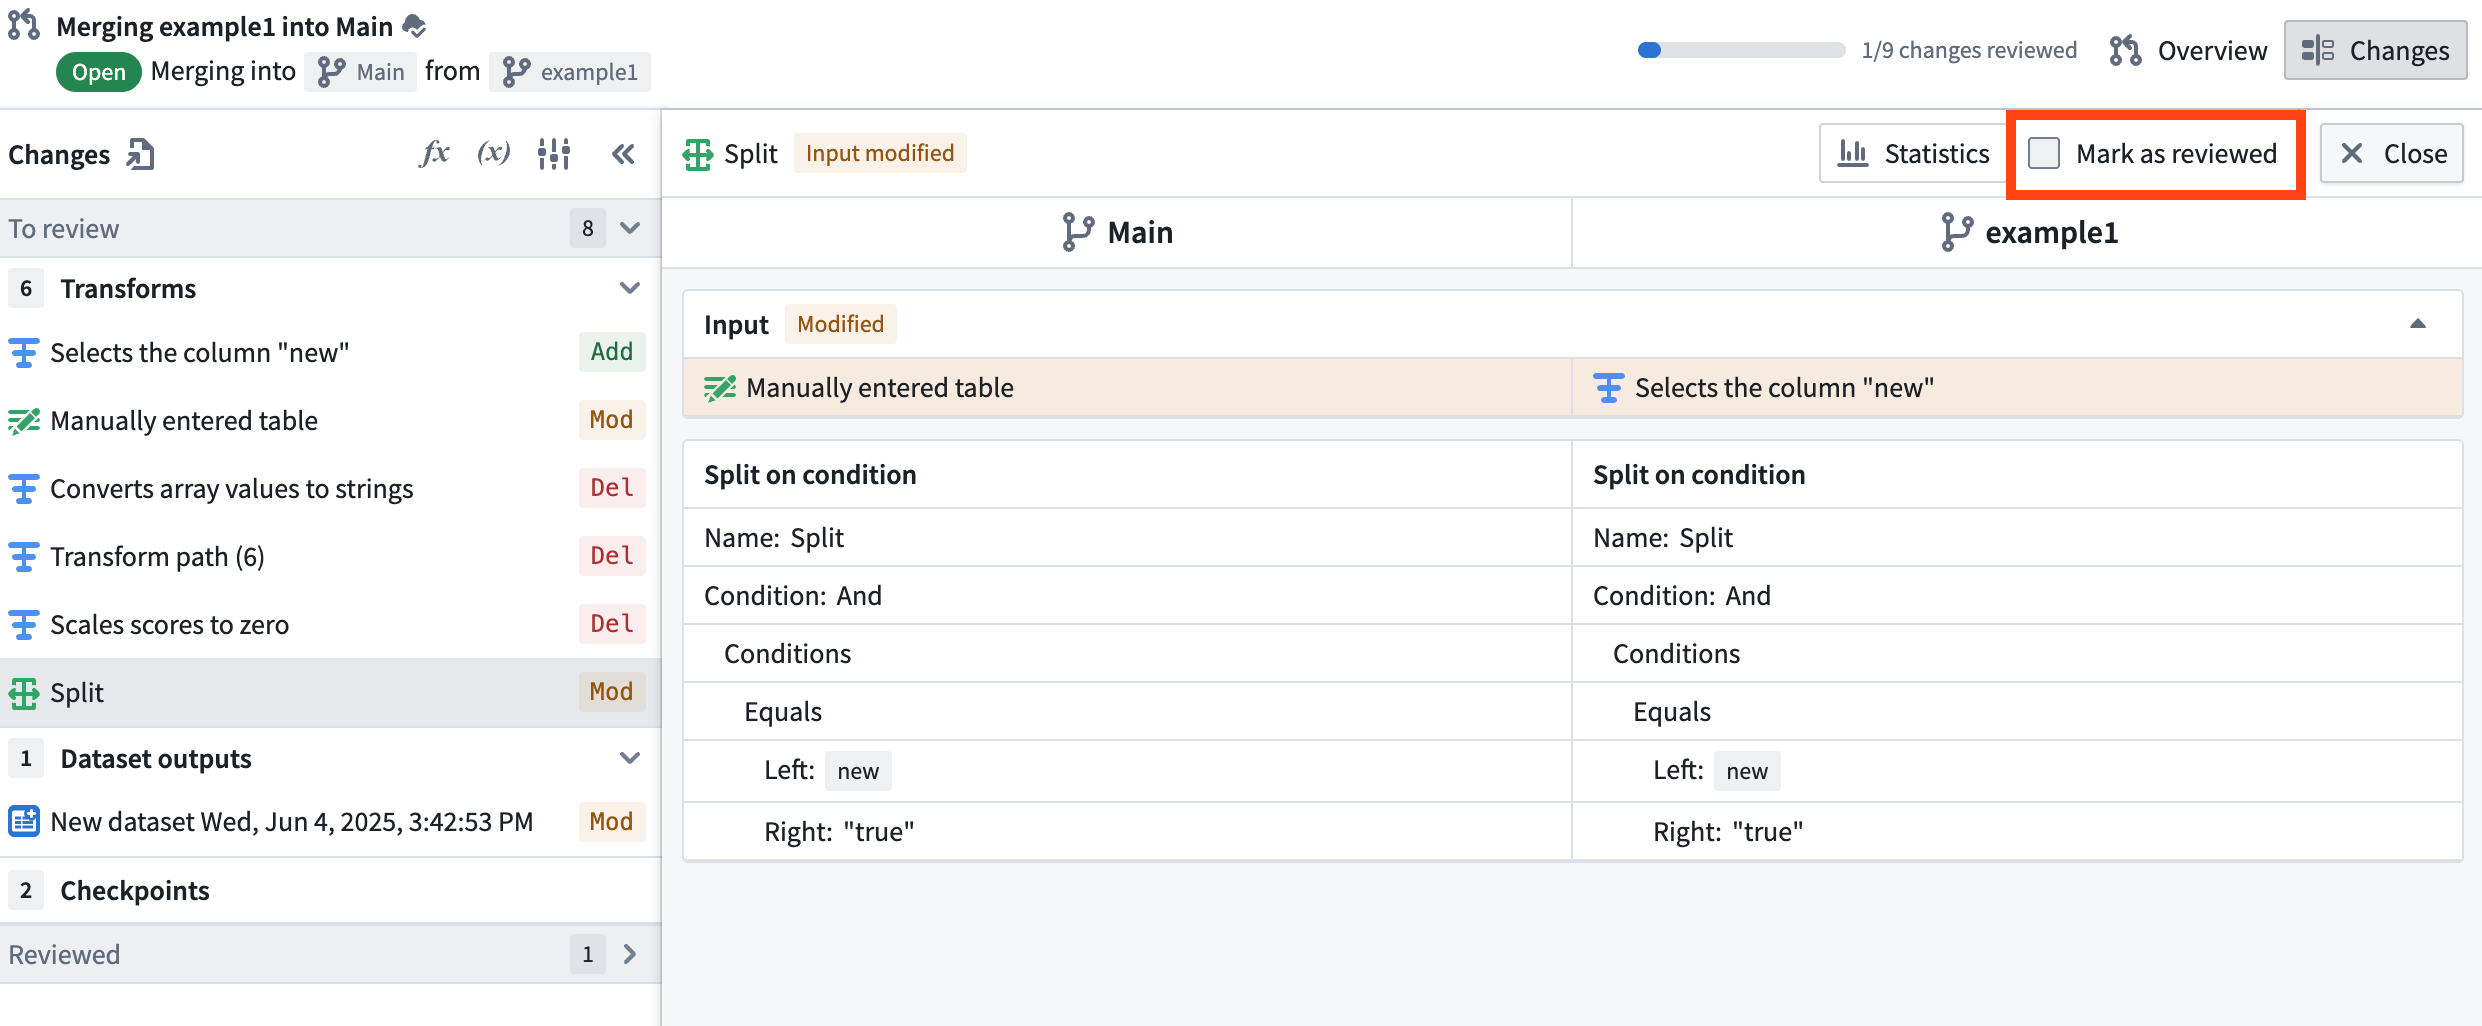
Select a node from the side panel or directly on the graph. Then, you can either select Mark as reviewed directly underneath the node on the graph, or select the node or setting and check Mark as reviewed.
At the top right of the interface, a progress bar shows how many changes you have reviewed out of the total changes in the proposal.
Note that if a change is made to something that was previously marked as reviewed, it will automatically be unmarked as reviewed.
Marking changes as reviewed is user-specific. When you mark changes as reviewed, it only applies to your user. Other users can independently mark the same changes as reviewed without affecting your review status.
Comments
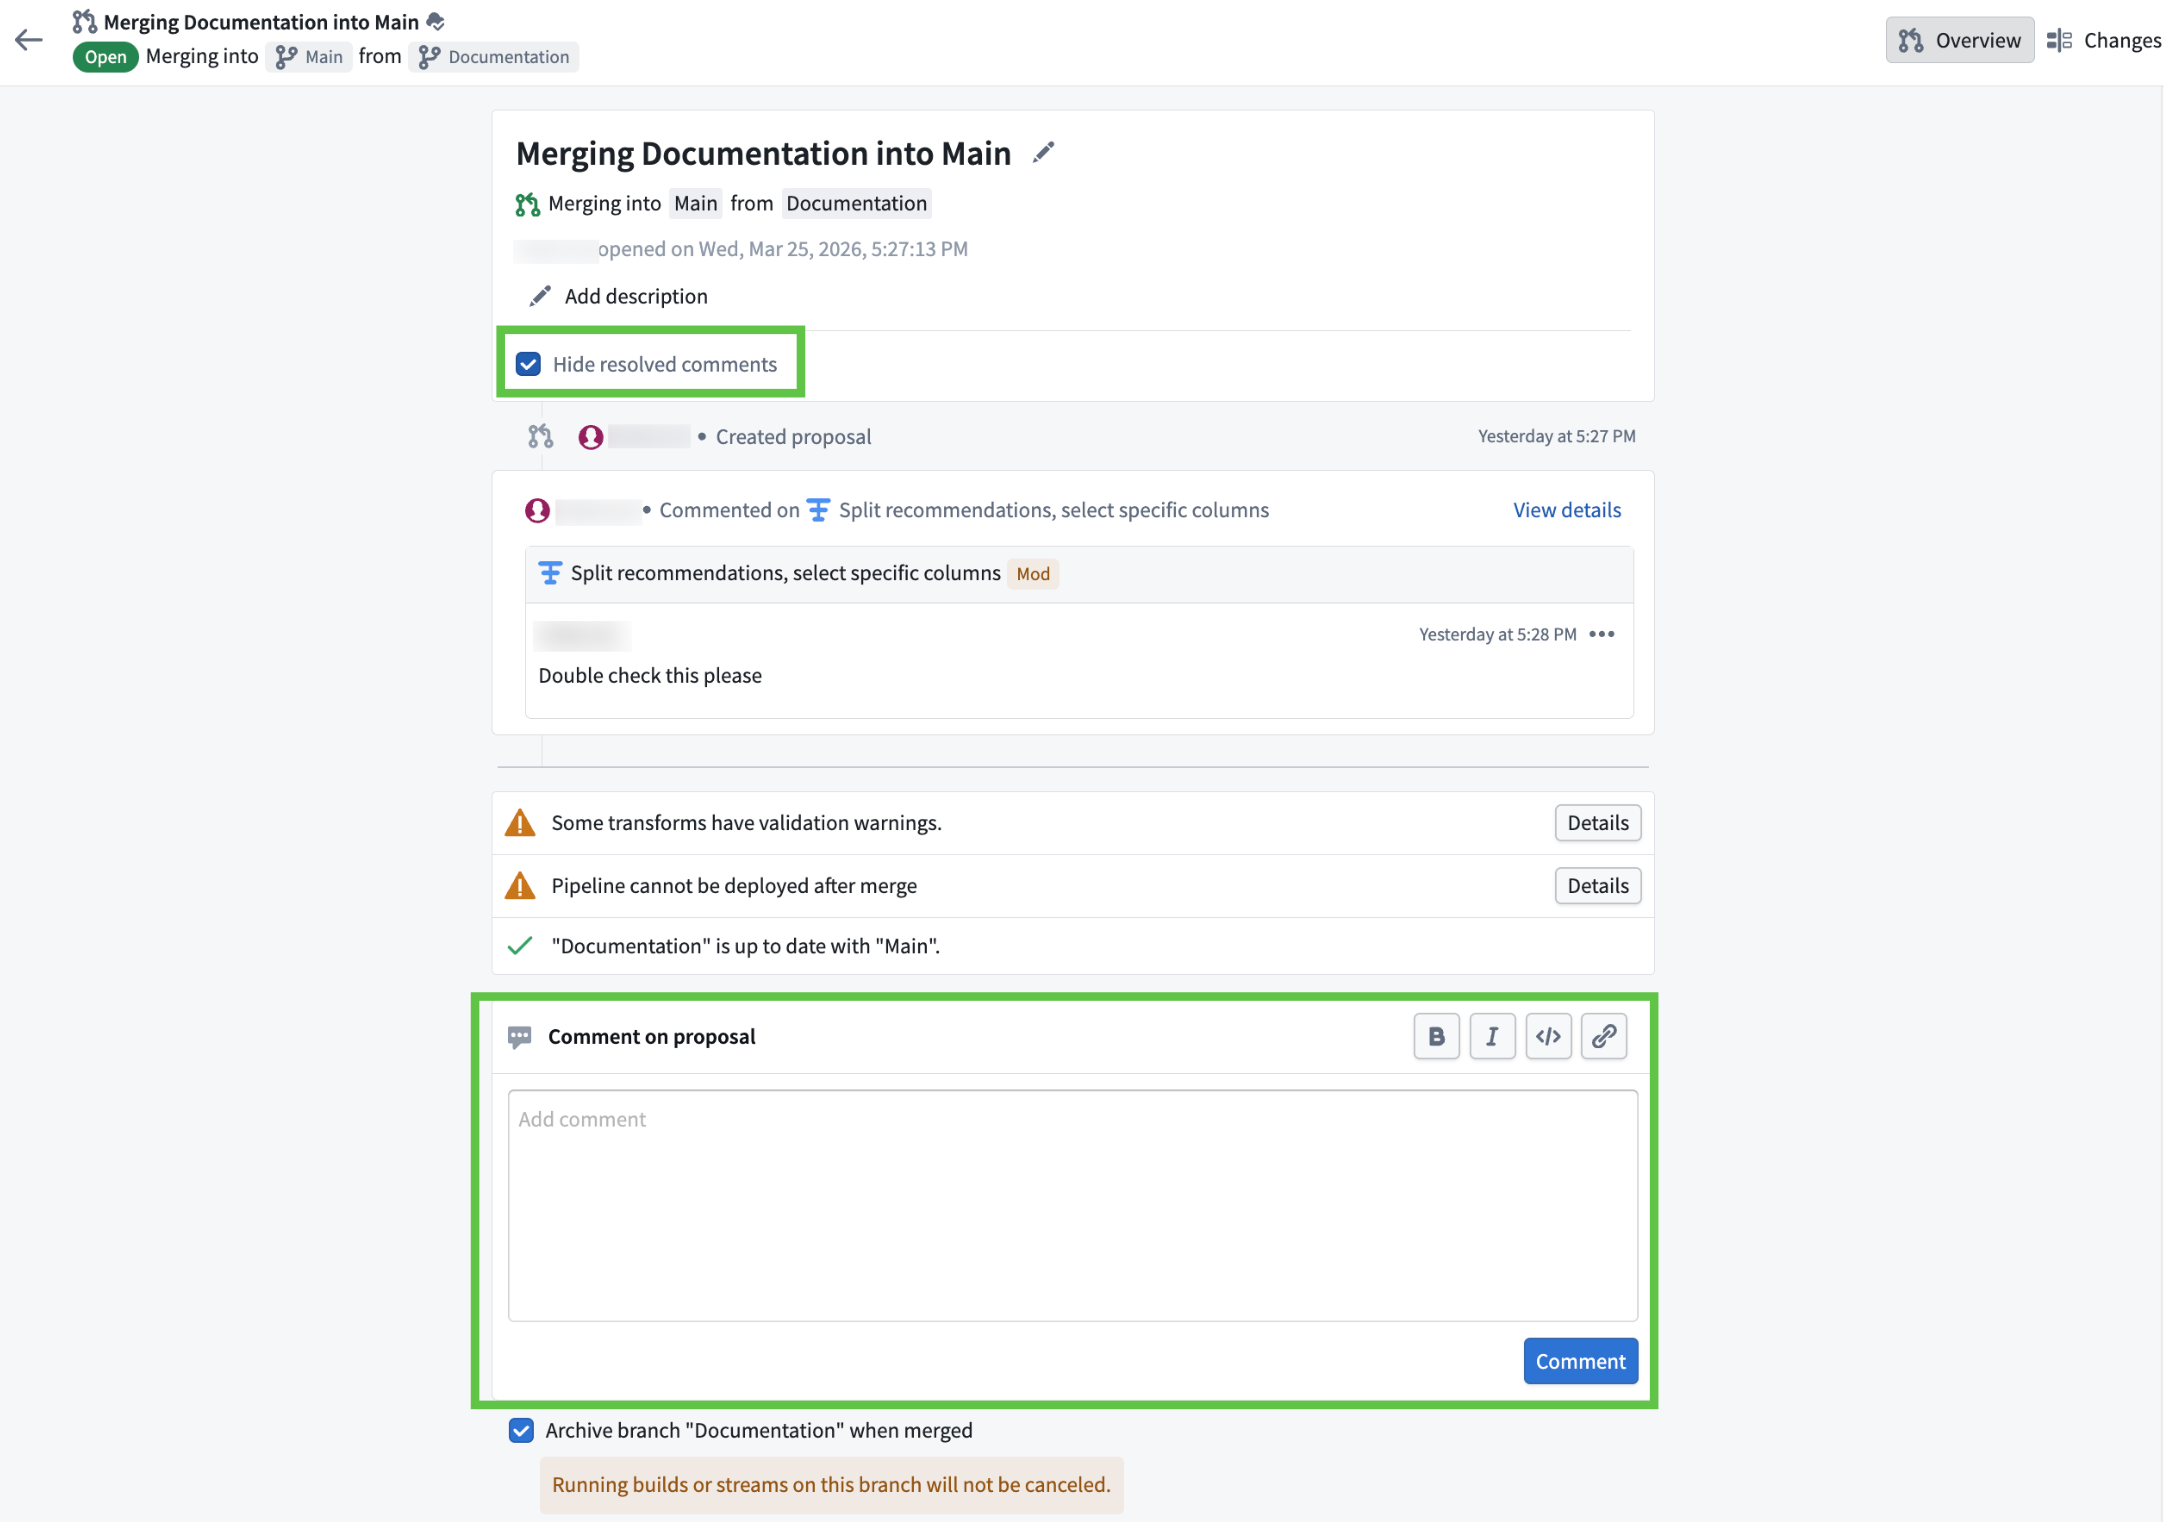
You can add and view comments on the main Overview tab of your proposal. To comment, scroll to the bottom of the Overview page and enter your comment directly, or comment on a specific node in the Changes tab. By default, resolved comments are hidden on the main Overview page, but you can toggle to view them if needed.
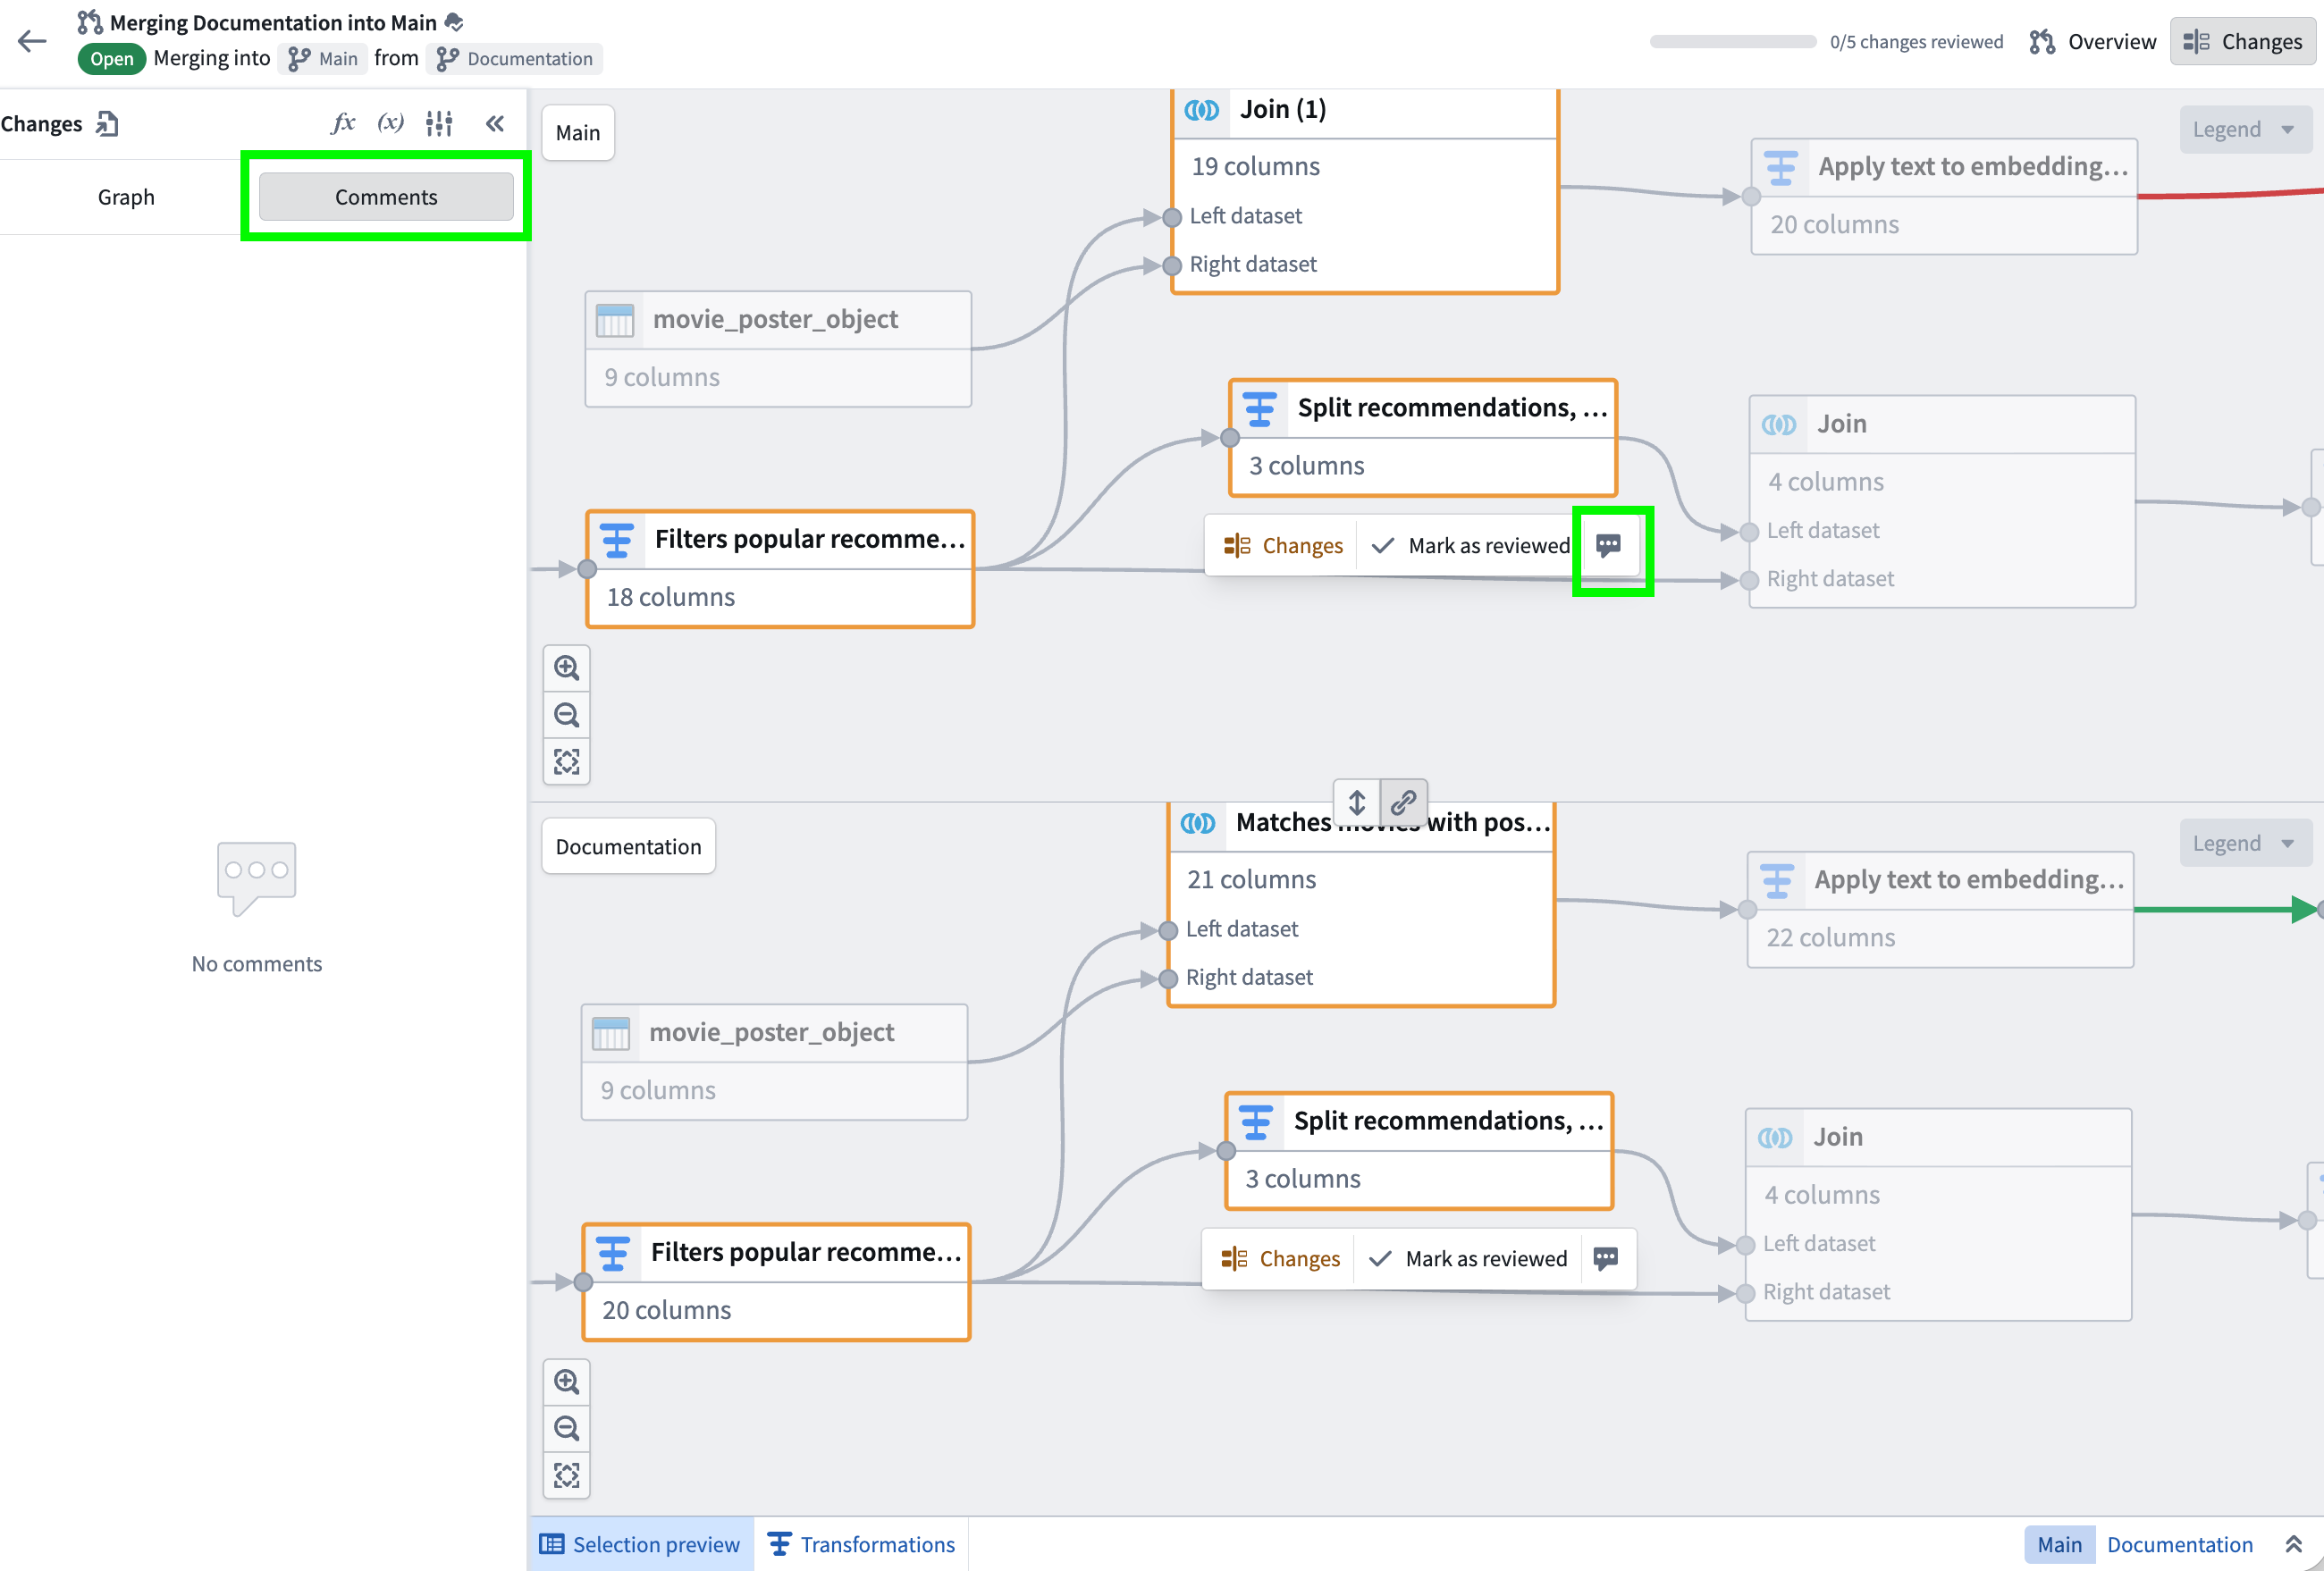
To comment on a specific node, navigate to the Changes tab in the top right. On the left side panel, open the Comments section to view all comments. To add a comment to a node, either select the node and then select the comment icon or click directly into the node itself.
When viewing a specific node, select the comment icon in the top right corner to add a comment. You can view the total number of comments on the node, as well as how many have been resolved. The left-hand panel will continue to show the list of all comments for your pipeline.
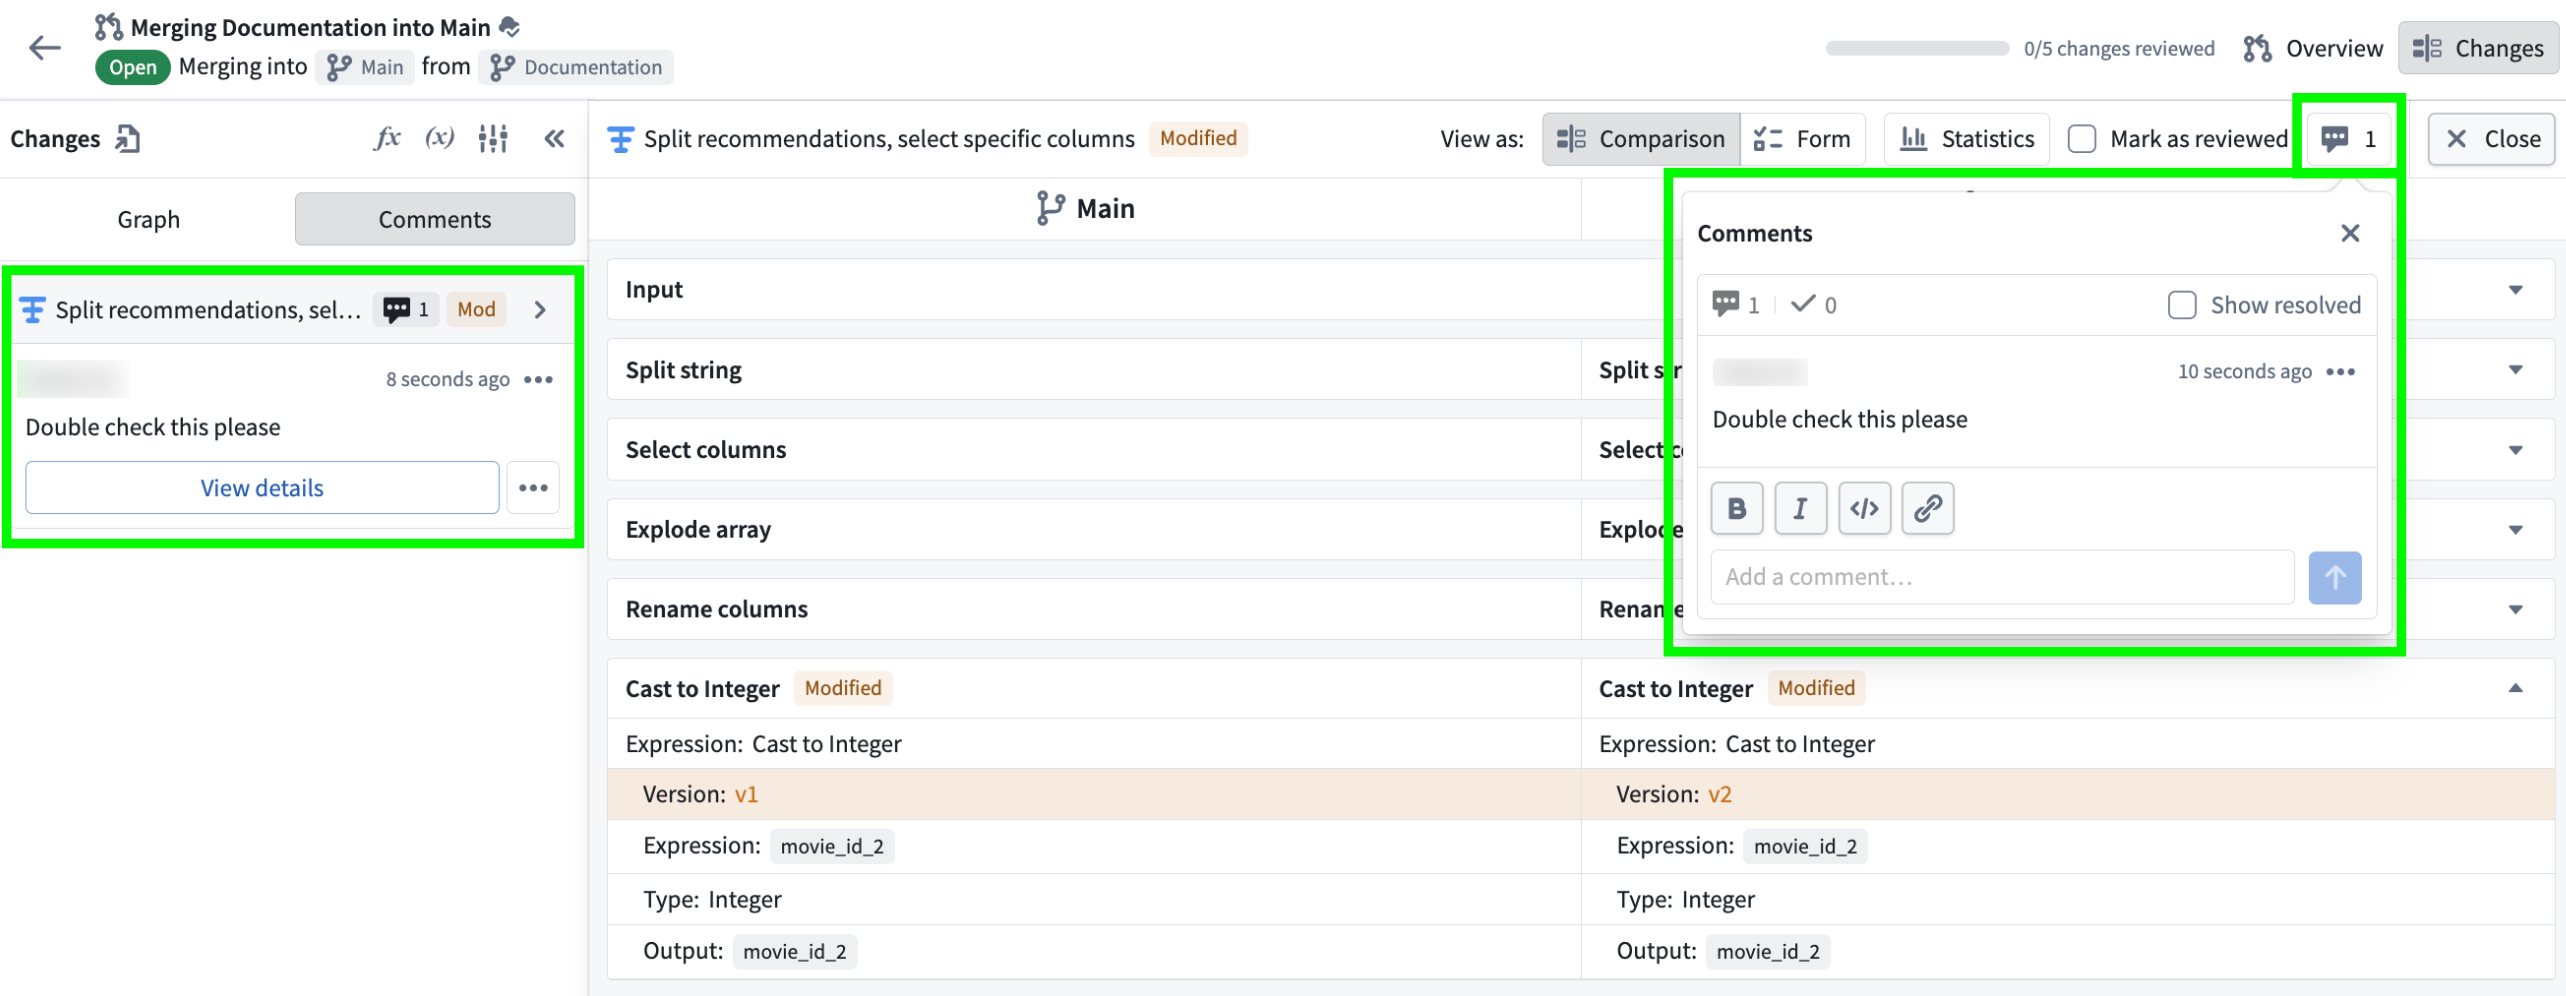
All comments support Markdown formatting, including bold, italics, links, and code blocks. After submitting a comment, you can Edit, Copy, Resolve, or Delete it. You can also tag specific users in your comments by using the @ key.

Resolve comments
You can resolve comments either from the Comments side panel or from the pop-up within a node. When a comment is resolved, it is hidden by default. You can expand the unresolved section in the Comments panel or enable Show resolved in the Comments pop-up to view them.
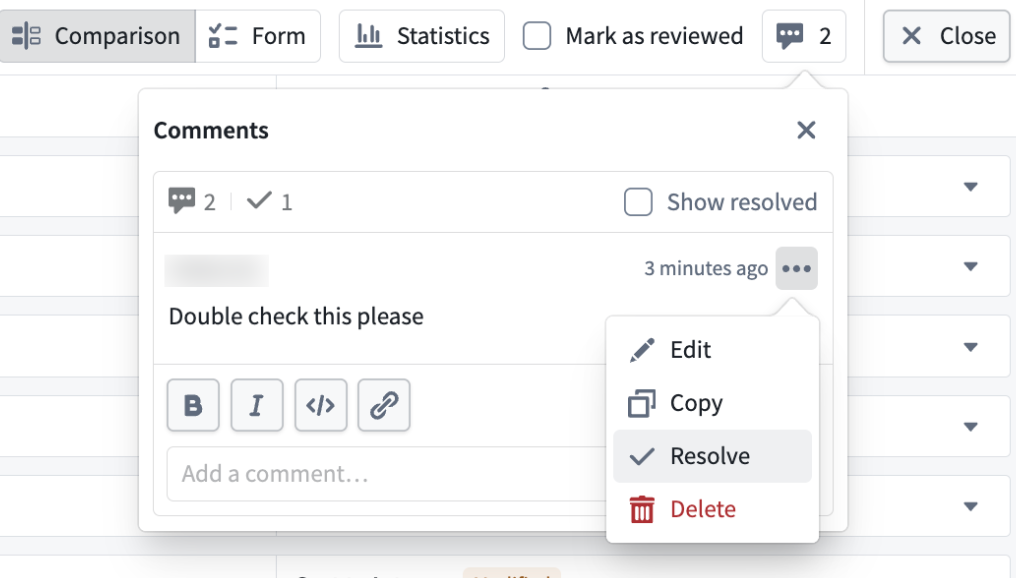
To resolve a comment from within a node, navigate to the comment, select the three dots, and select Resolve.
You can also resolve comments in the Comments side panel. Select the three dots next to the comment and select Resolve.
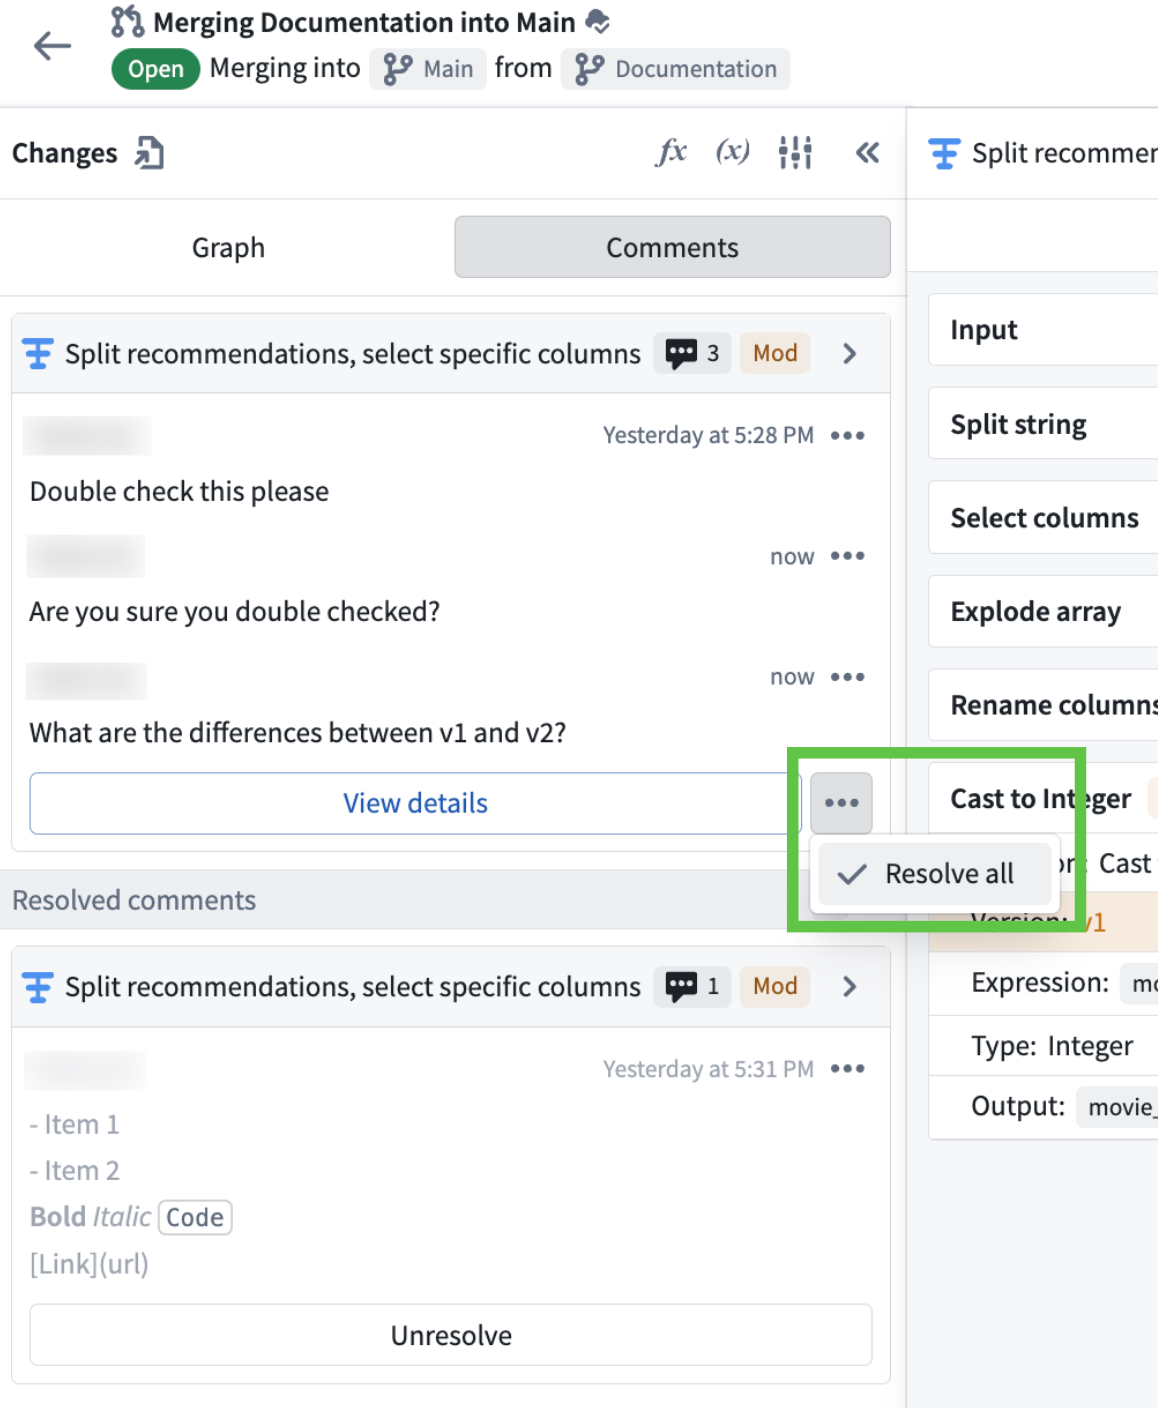
To resolve all comments associated with a node, use the side panel to view all unresolved comments for that node. Select the three dots and select Resolve all.
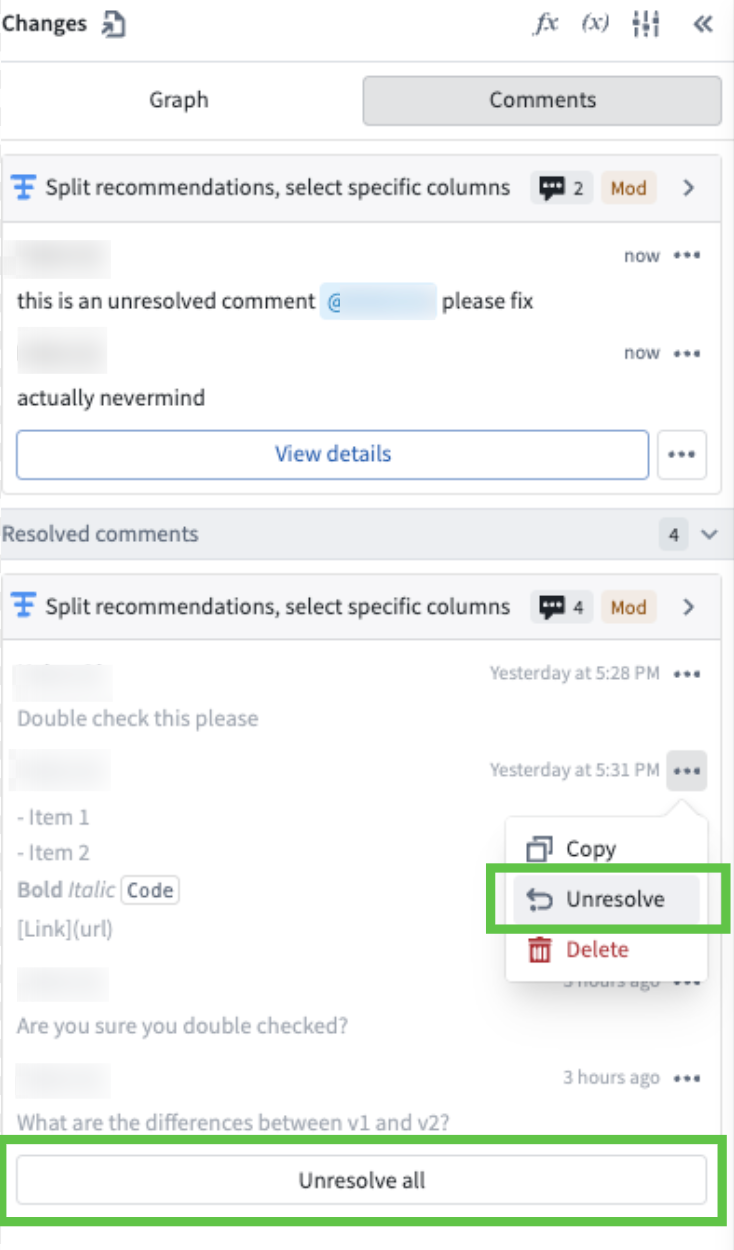
You can also unresolve resolved comments by selecting Unresolve or Unresolve all under the Resolved comments section.
Resolve errors
In some cases, a proposal will show schema or edit errors that must be resolved before merging.
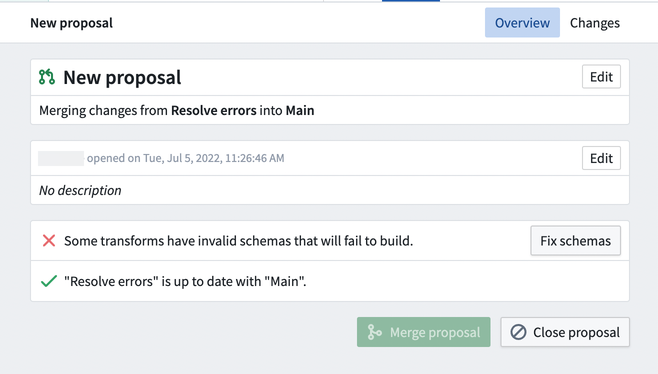
To resolve a schema error preventing a successful build and merge, select Fix schemas.
This will bring you back to the graph where the schema error is.
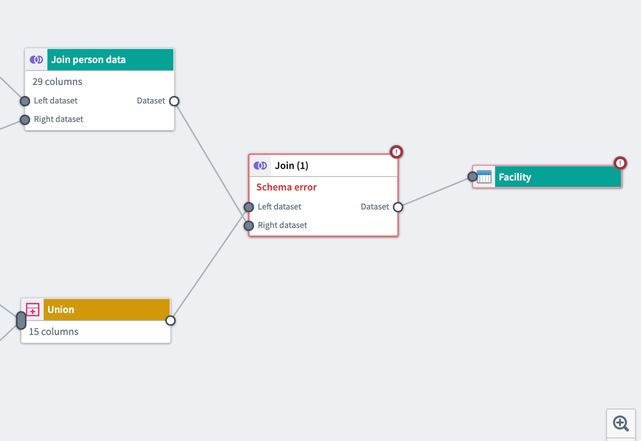
Double-click on the step in the graph that has the error and resolve the conditions that are problematic.
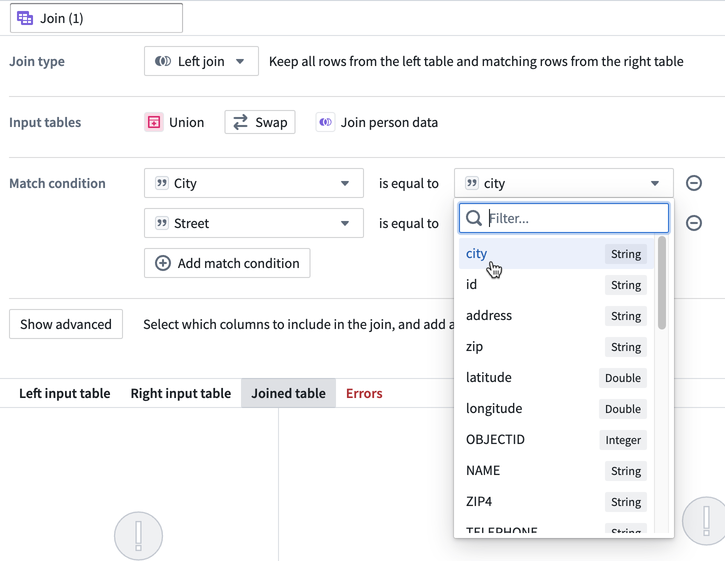
Click Propose to automatically save and propose the resolved branch.
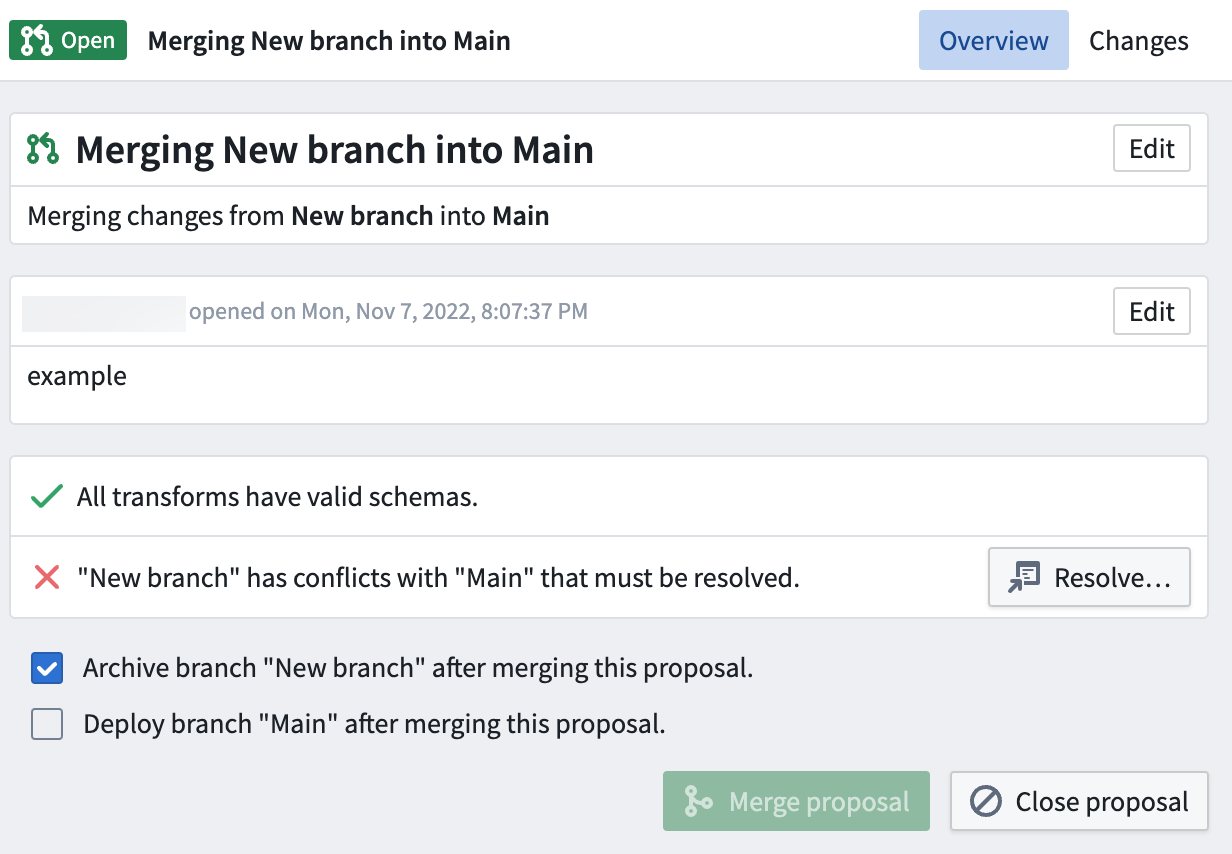
Resolve merge conflicts
In some cases, a proposal will show merge conflicts that must be resolved before merging. Merge conflicts are changes that were made to the base branch in the time since you created a branch from it. Merge conflicts must be resolved to ensure the correct changes are merged into the base branch of your pipeline. To resolve these conflicts, you need to rebase your branch. Rebasing in Pipeline Builder allows you to combine your unpublished changes in your local branch with the latest published changes on your remote branch.
To start resolving conflicts through rebasing, select Resolve in the proposal.
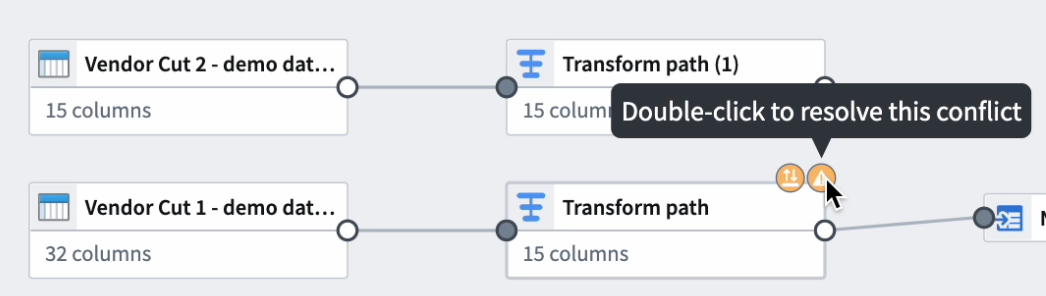
This will bring you to the graph in the Rebasing branches view. Here, you can view and resolve the list of conflicts from the top bar or the left side bar and investigate individual conflicts and changes.
In the rebase branch, you can view the conflicts and changes on the graph. Find more details, including explanations and possible solutions, by hovering over the symbols in the upper right corners of the affected nodes. In the example below, you can resolve the merge conflict by double-clicking on the symbol.
Once you are done resolving all conflicts, you can submit the changes to your branch and proposal by clicking Submit in the upper right of your graph.