External transforms
Data Connection sources can now be directly imported into code repositories. Source-based external transforms are the preferred method to connect to external systems, superseding legacy external transforms
External transforms allow connections to external systems from Python transforms repositories.
External transforms are primarily used to perform batch sync, export, and media sync workflows when one of the following is true:
- An existing Data Connection source type is not available.
- The desired capability is not available for the target source type.
- The capability offered through the Data Connection user interface does not have the desired features.
Solutions to these situations may include the following:
- Connecting to REST APIs, both over the Internet and within a private network.
- Connecting to databases to arrange customized query logic not currently possible in the Data Connection user interface.
- Transforming data as needed during sync or export. This could include batching files together before writing to Foundry, handling custom encryption/decryption of data during transfer, and more.
Any transforms that use virtual tables are also considered to be external transforms, since the transforms job must be able to reach out to the external system that contains the virtualized data. To use virtual tables in Python transforms, follow the instructions below for details on how to set up the source.
Setup guide
In this setup guide, we will walk through creating a Python transforms repository that connects to a free public API of Pokemon data ↗. The examples then use this API to explain various features of external transforms and how they can be used with the API.
The Pokemon API used in this setup guide is unaffiliated with Palantir and may change at any time. This tutorial is not an endorsement, recommendation, or suggestion to use this API for production use cases.
Prerequisite: Create a Python transforms repository
Before following this guide, be sure to first create a Python transforms repository and review how to author Python transforms as described in our tutorial. All features of Python transforms are compatible with external transforms.
Prerequisite: Create a Data Connection source
Before you can connect to an external system from your Python repository, you must create a Data Connection source that you can import into code. For this tutorial, we will create a REST API source that connects to the PokeAPI mentioned above.
Option 1: Create source in the external systems sidebar
The quickest way to create a source for use in external transforms is from a Python transforms code repository. Once you have initialized a repository, complete the following steps to set up a generic source:
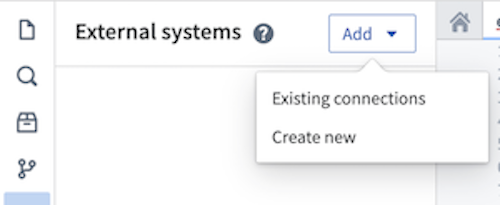
- From the left side panel, open the External systems tab.
- Select Add > Create new.
- Choose a name for your source and a Project in which to store it. Upon creation, the newly created source will show up in the left side panel. Any egress policies, secrets and exportable markings can be directly configured from this panel.
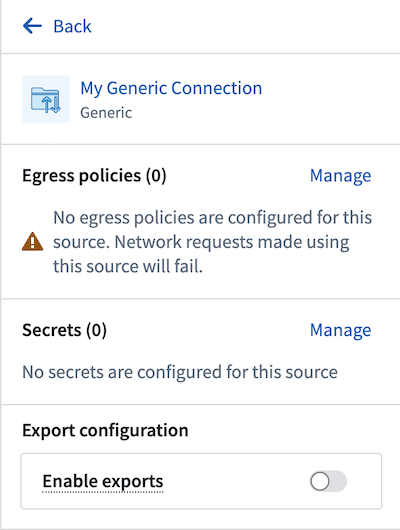
-
For this tutorial, you should add an egress policy for the PokeAPI:
pokeapi.co. You will not need any secrets since this API does not require authentication, and export controls may be skipped for now. However, they will be required to use Foundry data inputs with this source. -
Since this connection is to a REST API, you will be automatically prompted to convert your generic connector to a REST API source so that you can use the built-in Python requests client.
Option 2: Create a source in Data Connection
You may also create a source from the Data Connection application or use an existing source you have already configured. To use this option, follow the steps below:
- Navigate to the Data Connection application within Foundry and choose New Source. From the list of options, select REST API.
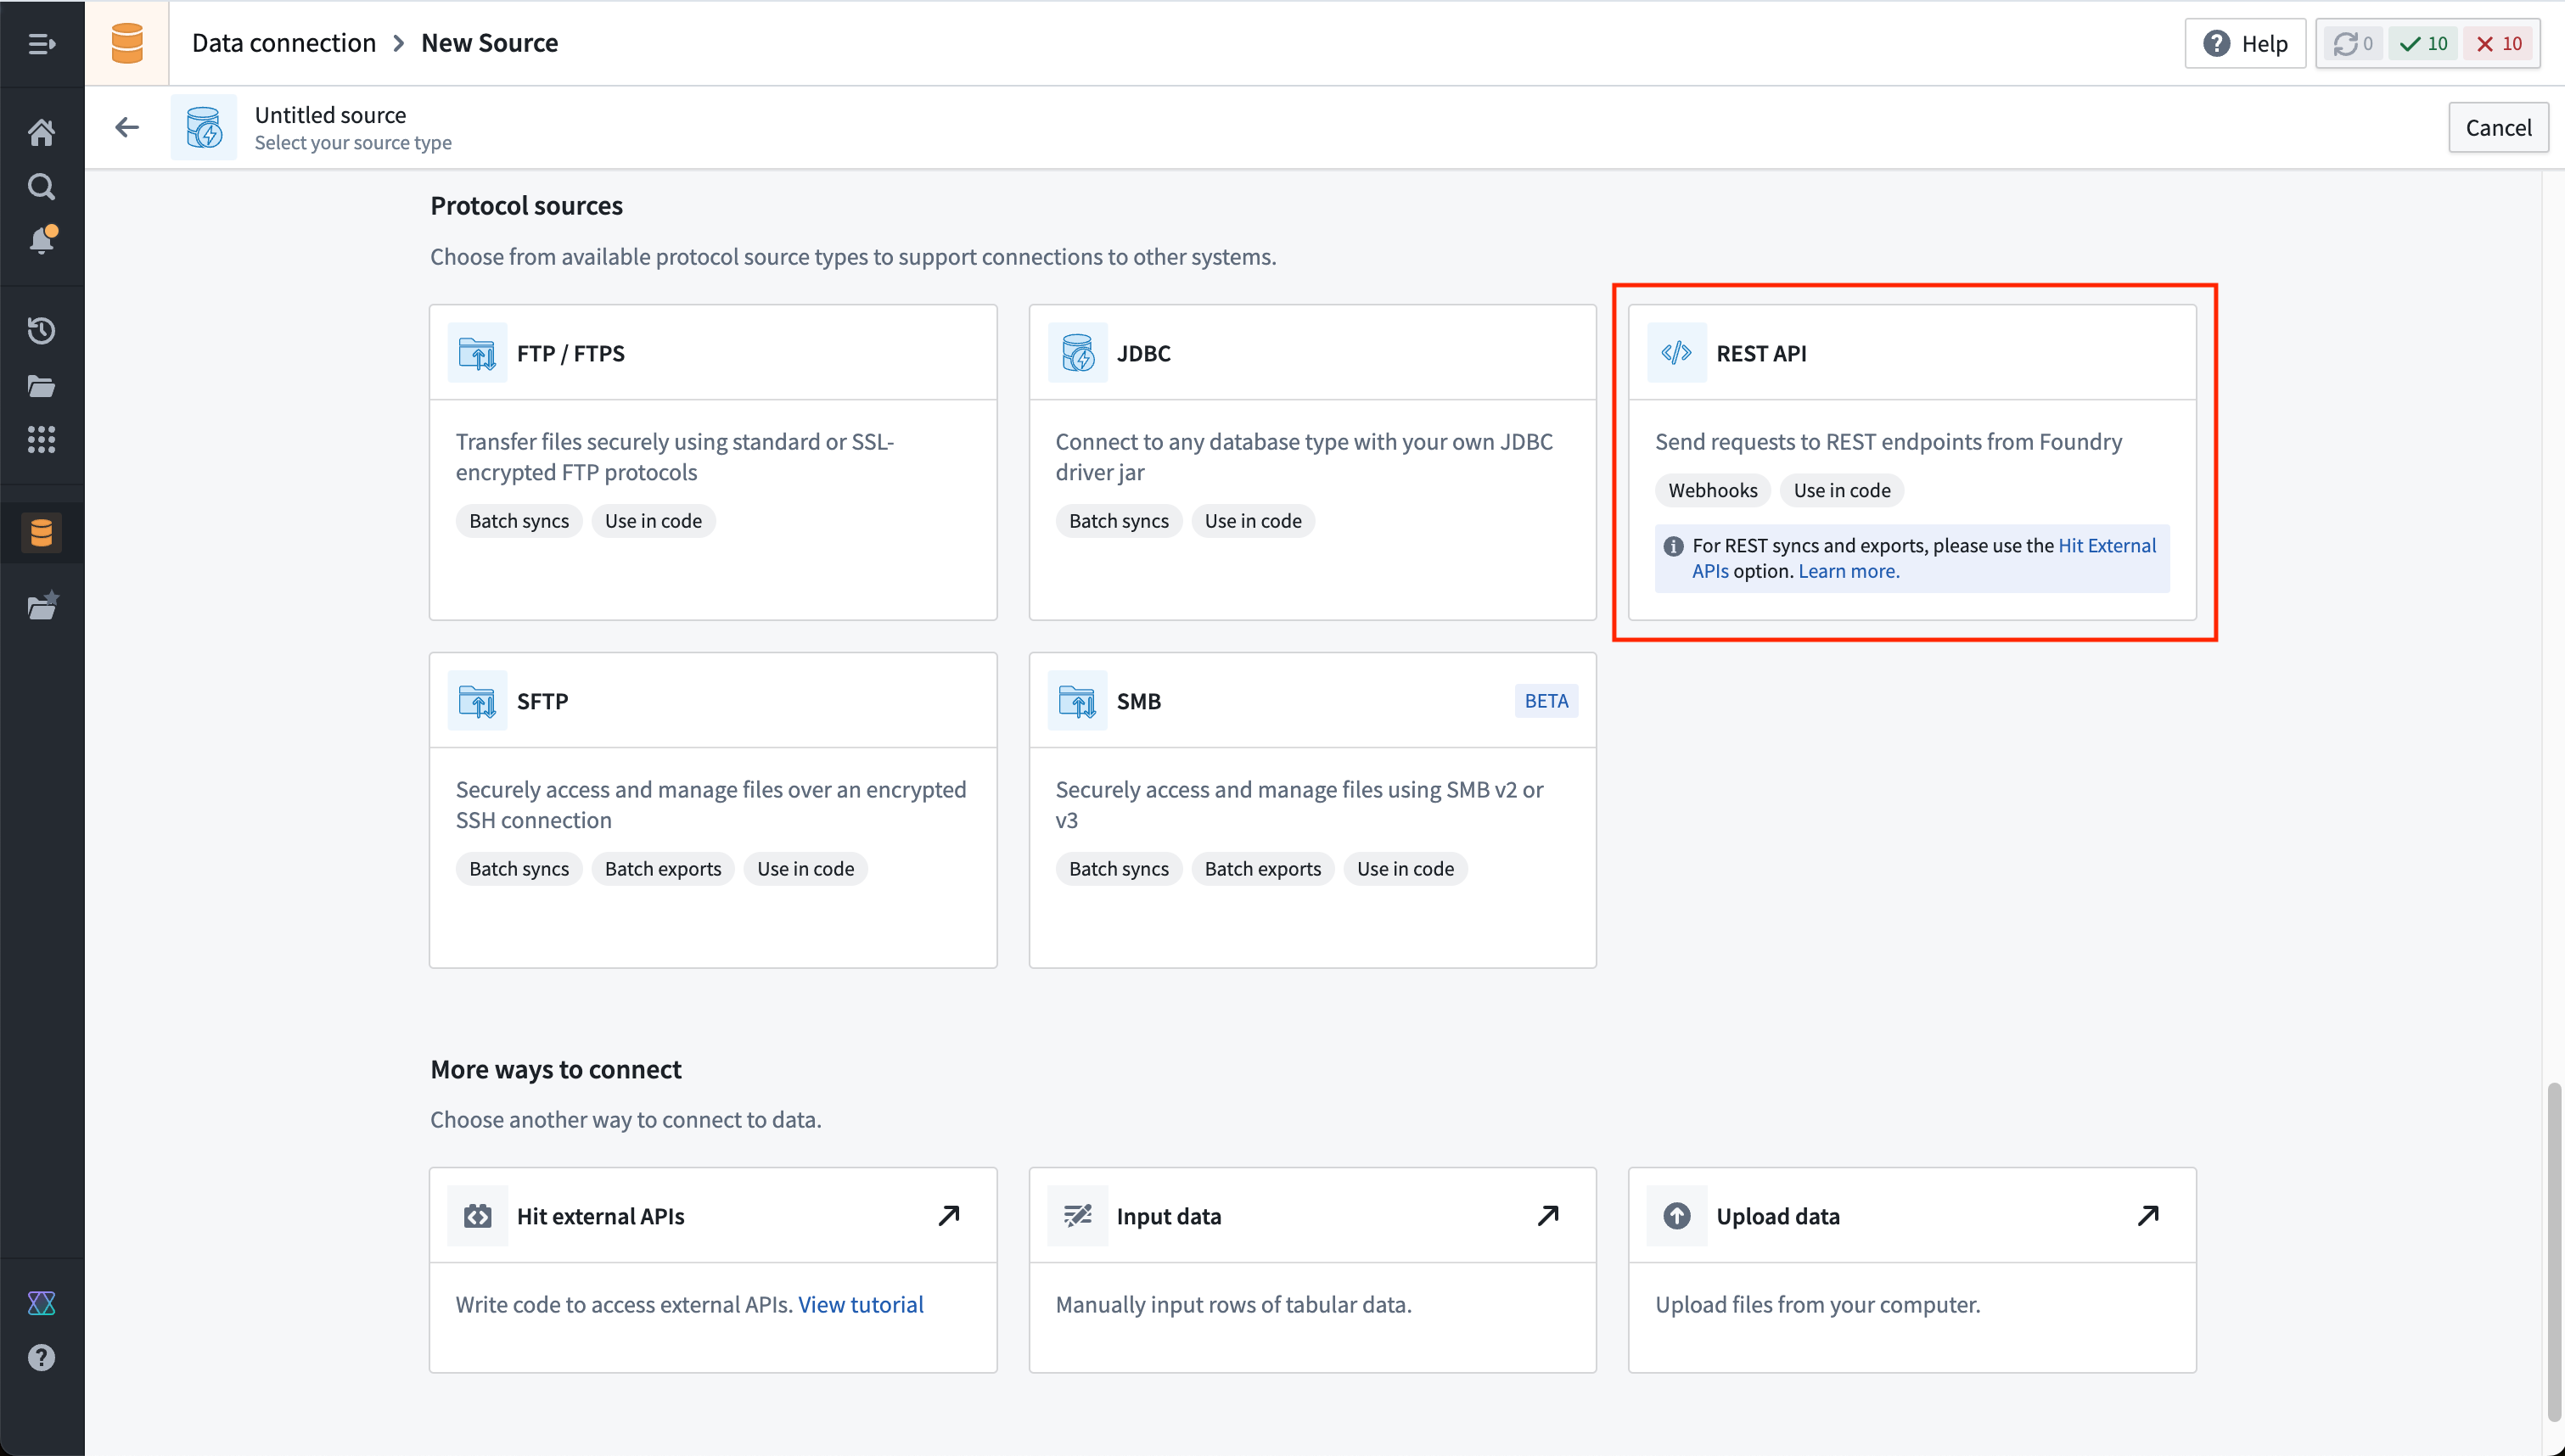
-
Review the Overview page, then select Continue in the bottom right. You will be prompted to choose the connection runtime: a direct connection, through an agent worker, or through an agent proxy. Since agent worker connections are not supported for external transforms, choose to use a direct connection to the Internet or an agent proxy to connect to the PokeAPI.
-
Choose a name for your source, and select a Project to which it should be saved.
-
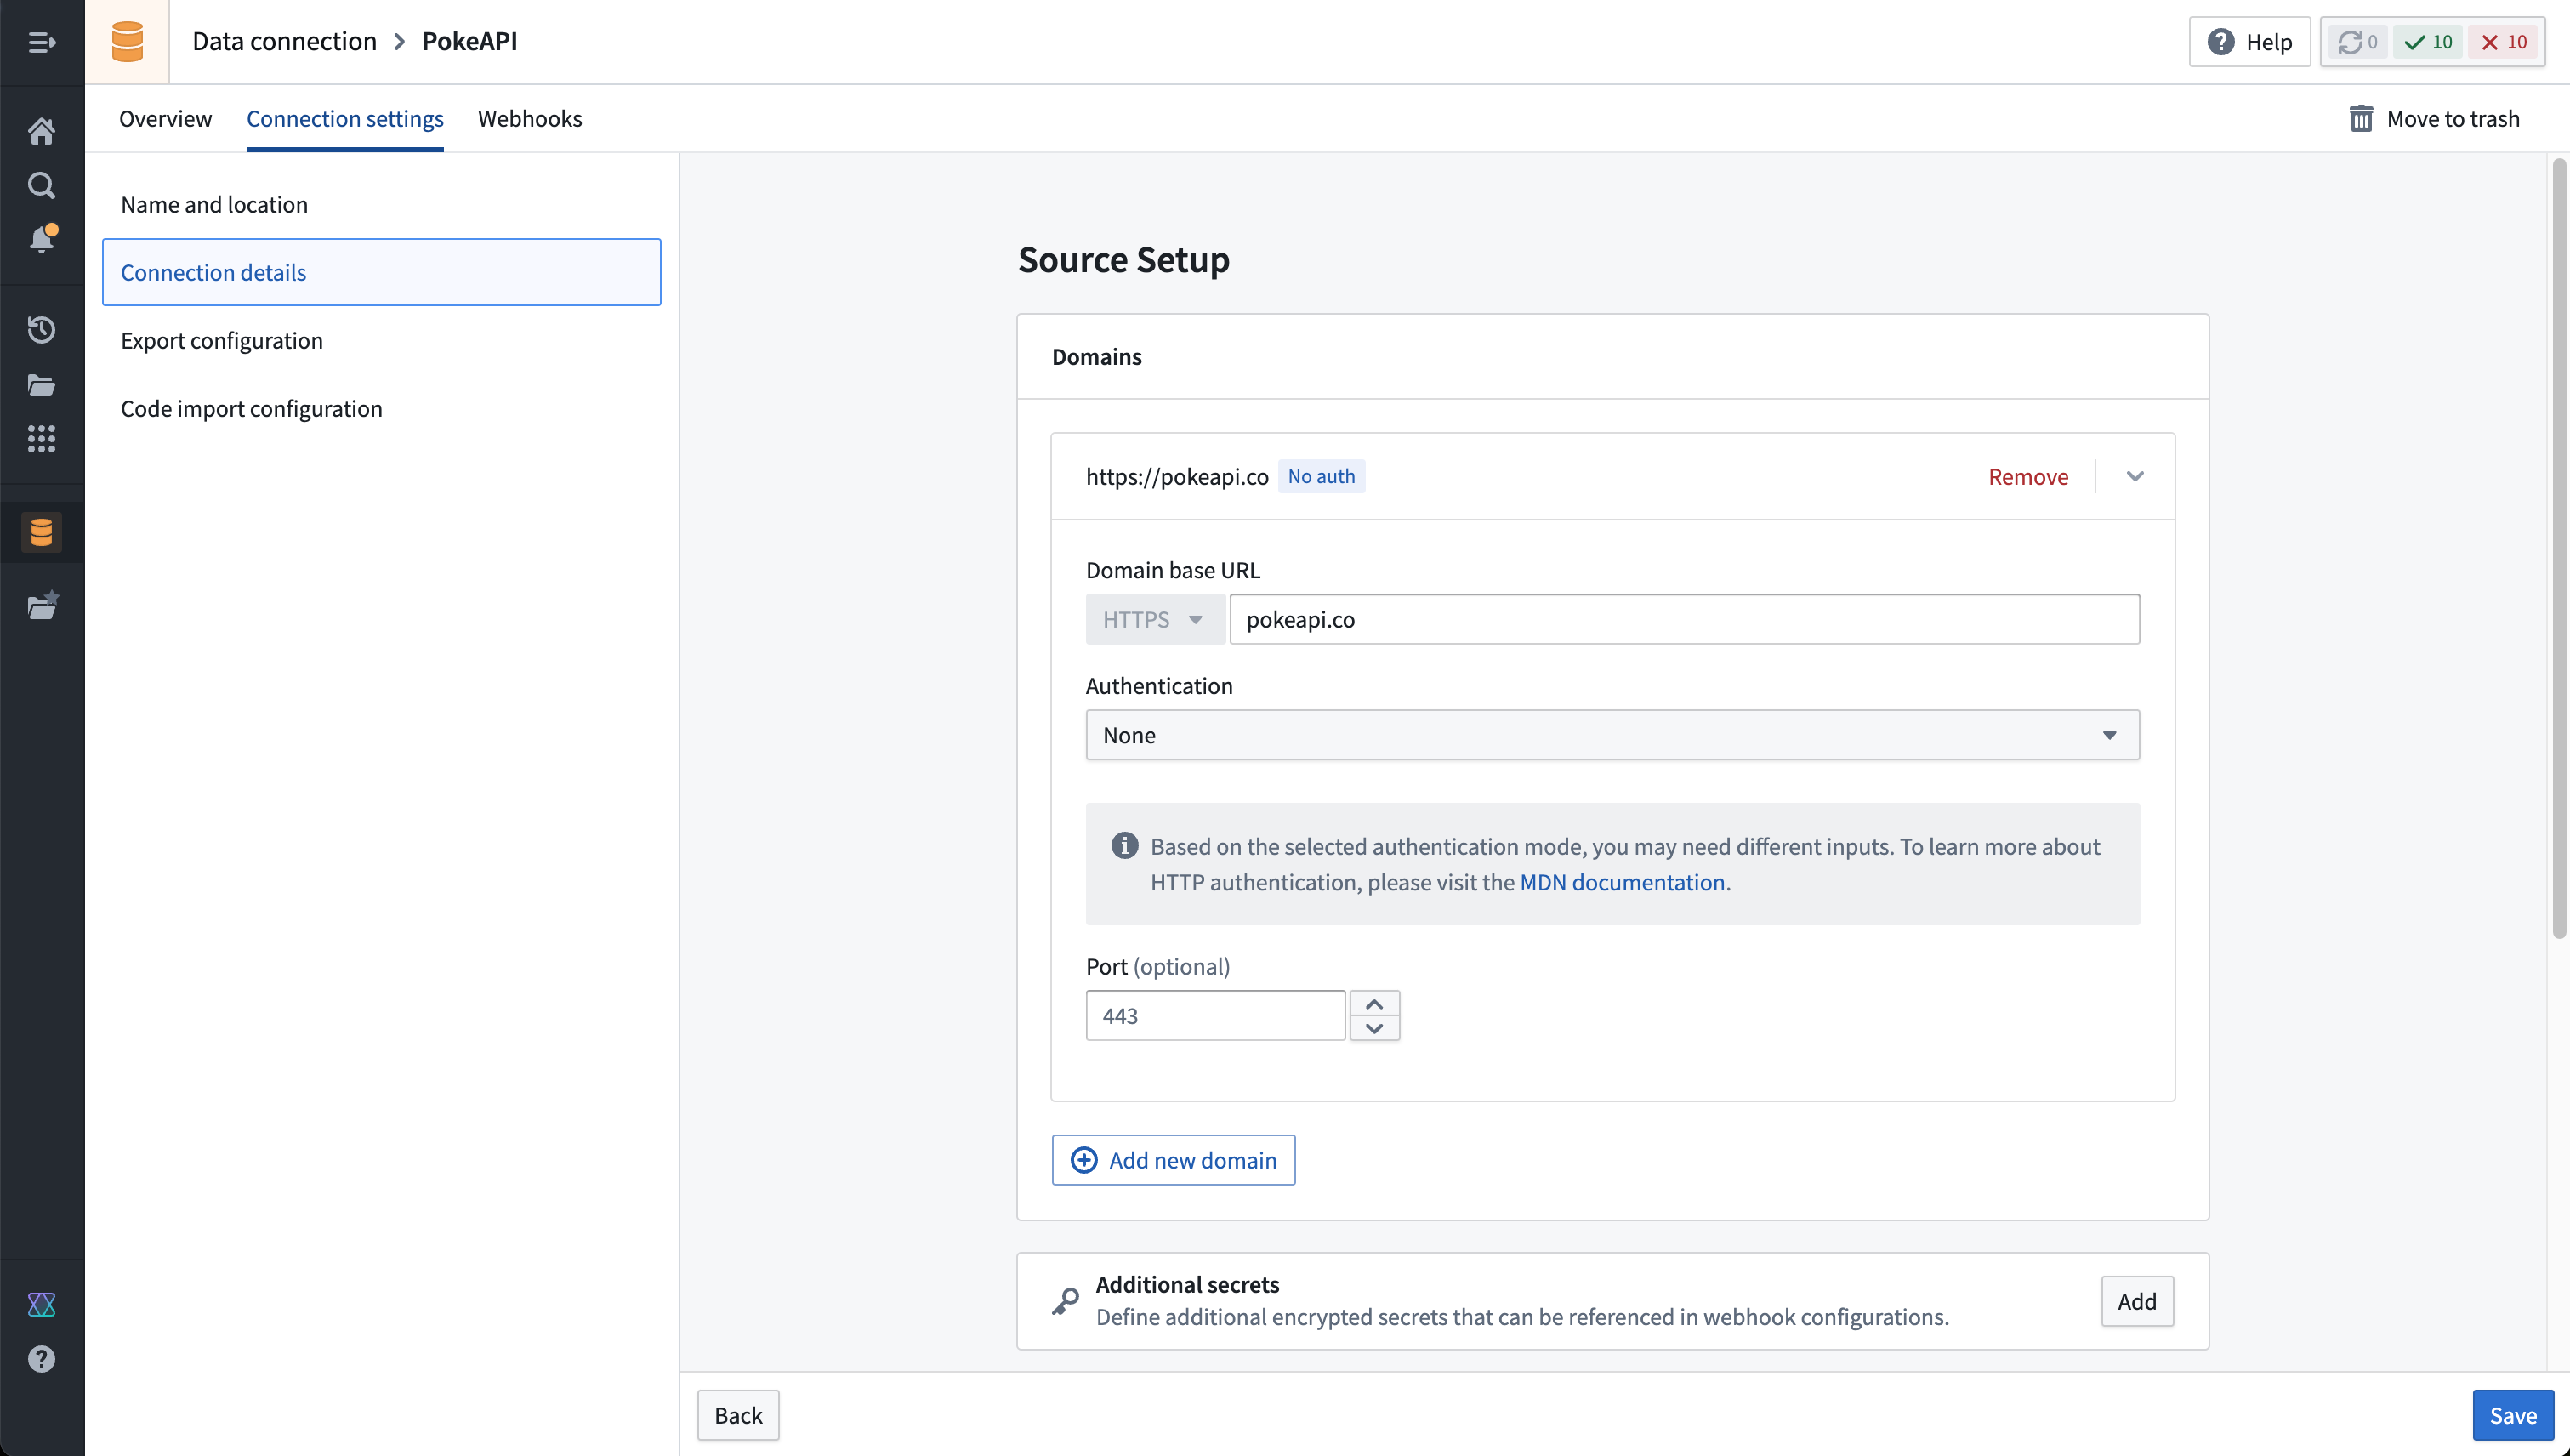
Fill out the Domains section with the connection information of the API source. The configuration for the PokeAPI example is shown below:
- For this example, we also need to create the necessary egress policy. The policy will be automatically suggested in the Network Connectivity section if you completed the previous step:
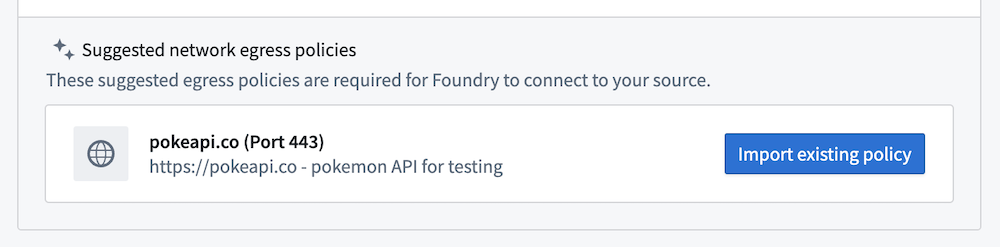
- Select Save, then Save and continue to complete the source setup.
Prerequisite: Import a source into code
REST API sources with multiple domains may not be imported. Instead, you should create a separate REST API source per domain if multiple domains are required in the same external transform.
-
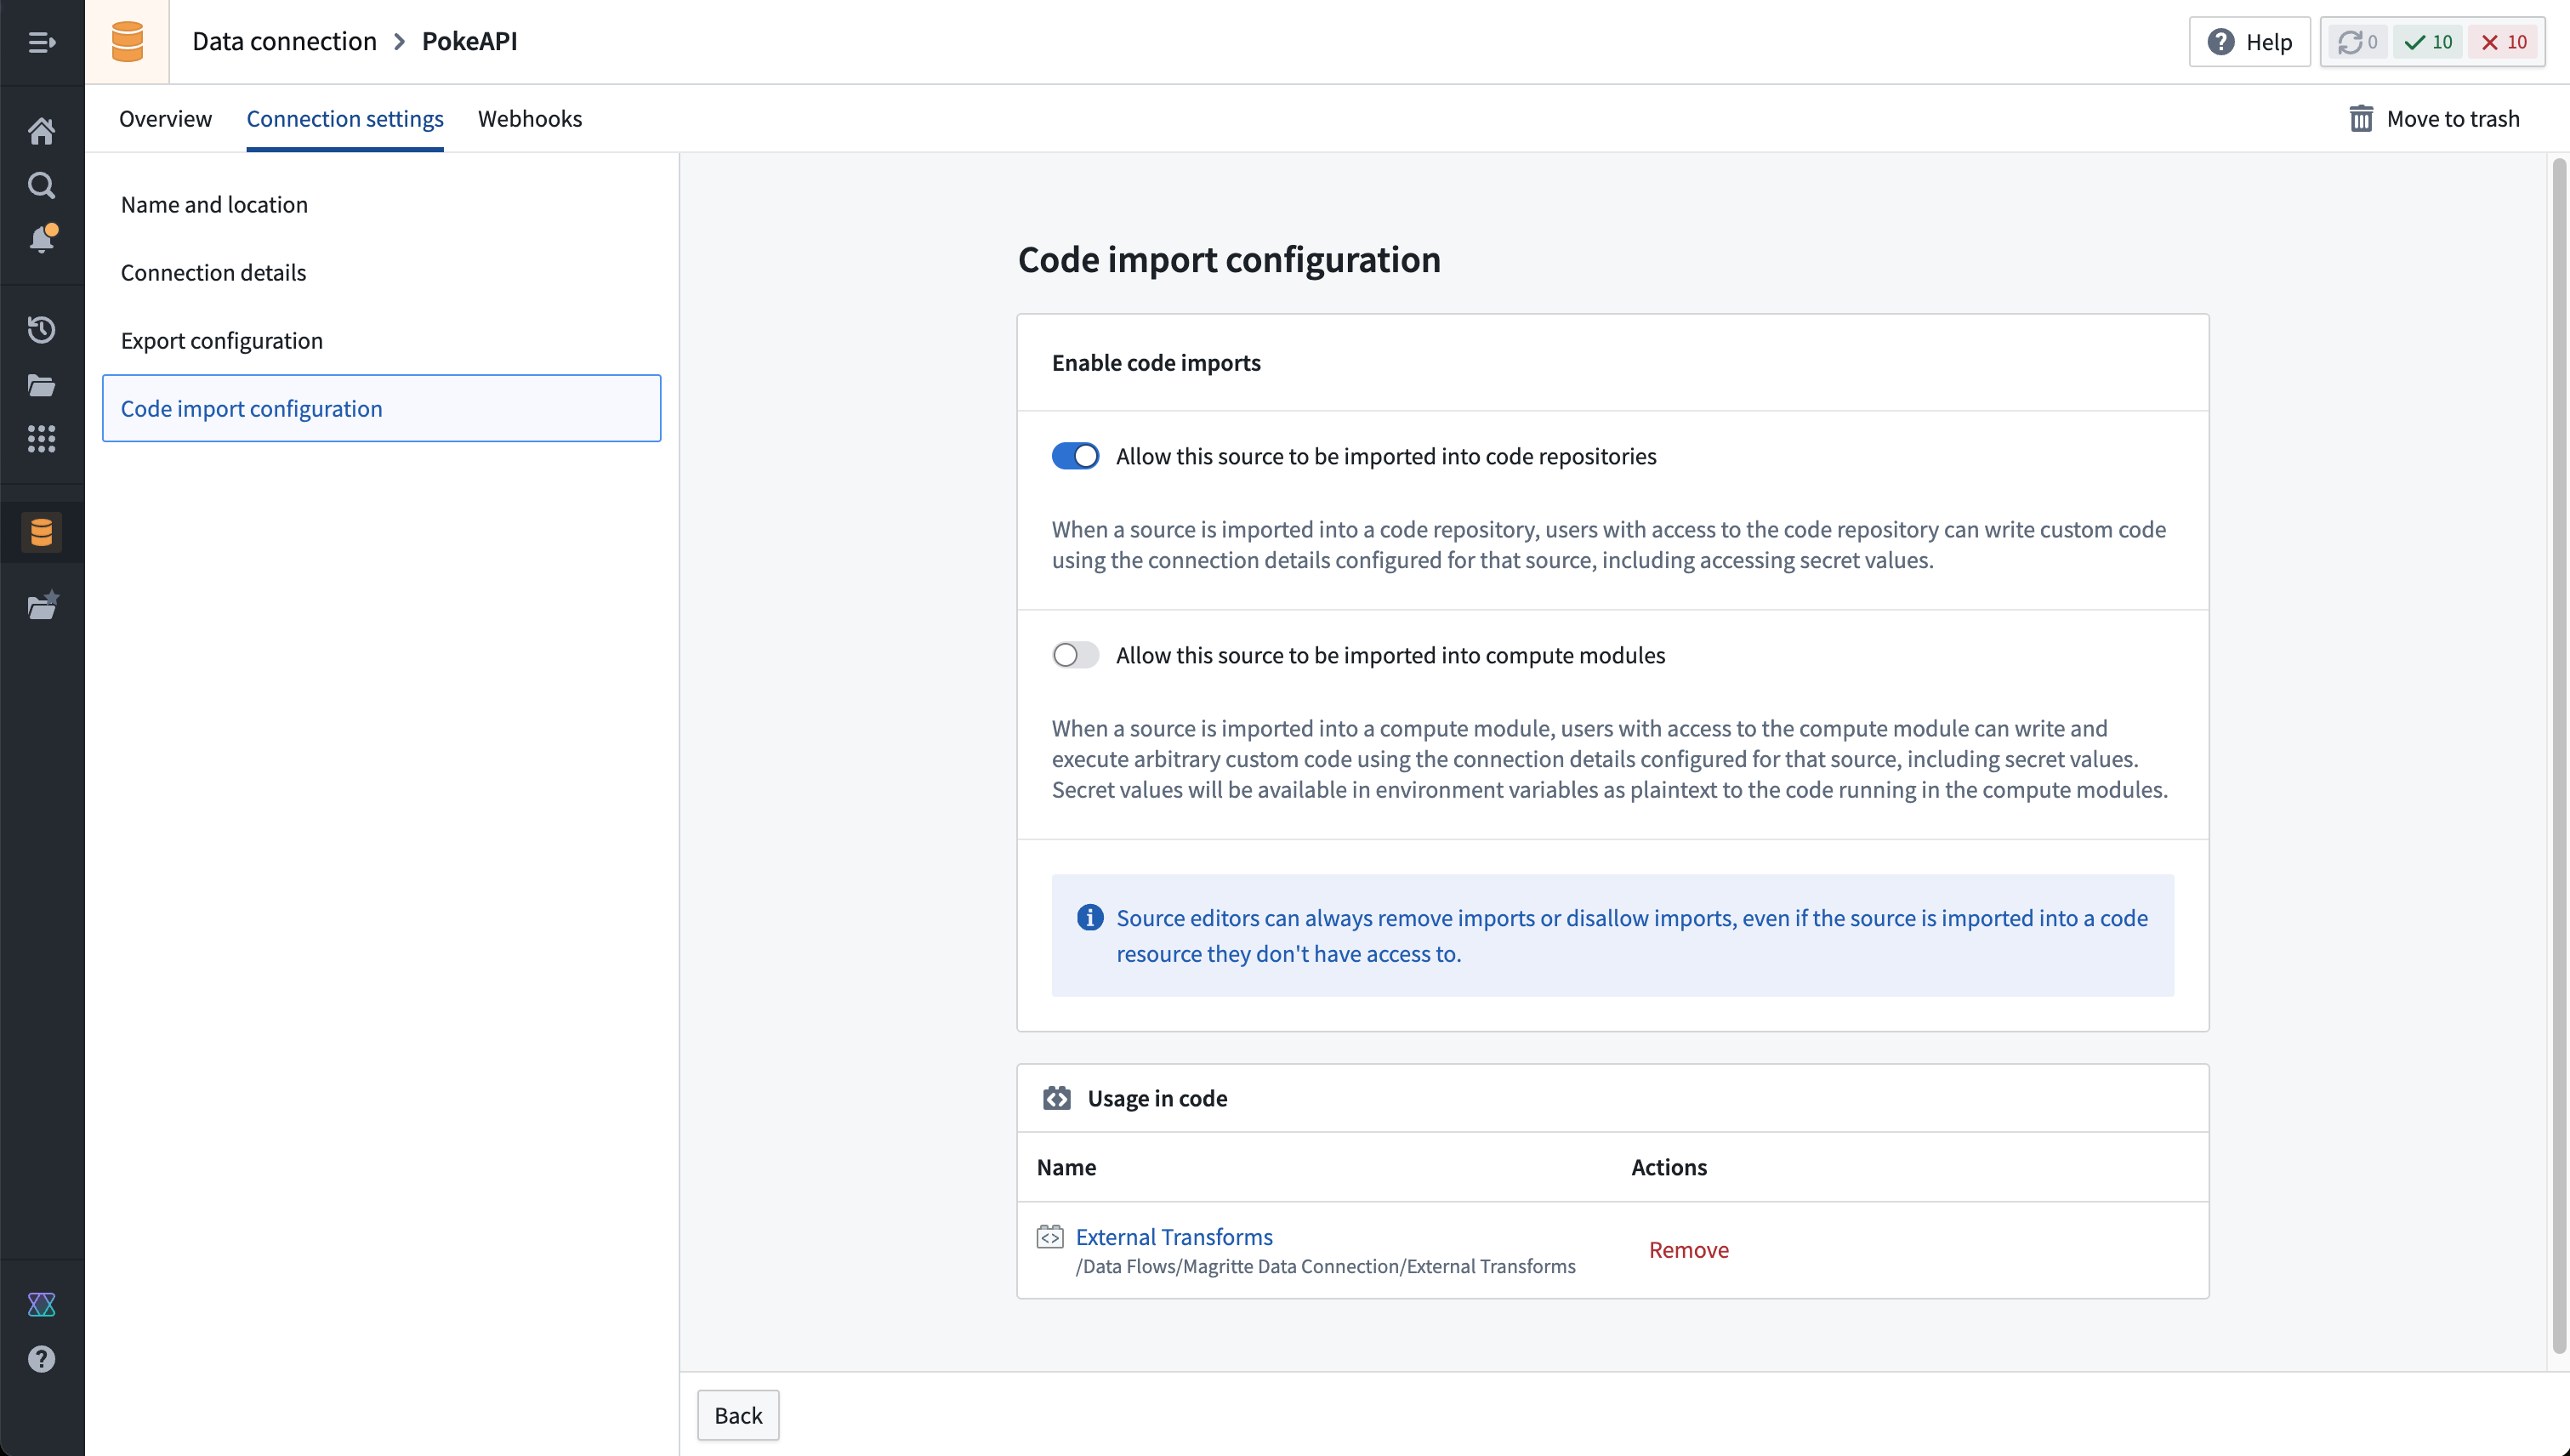
First, you must allow the REST API source to import into code. To configure this setting, navigate to the source in Data Connection, then to the Connection settings > Code import configuration tab.
-
Toggle on the option to Allow this source to be imported into code repositories. Any code repositories that import this source will be displayed on this page.
- You are now ready to return to your code repository. To use external transforms, you must first import the
transforms-external-systemslibrary. Libraries are installed using the Libraries tab in the left side panel, searching for the desired library, then selecting Install.
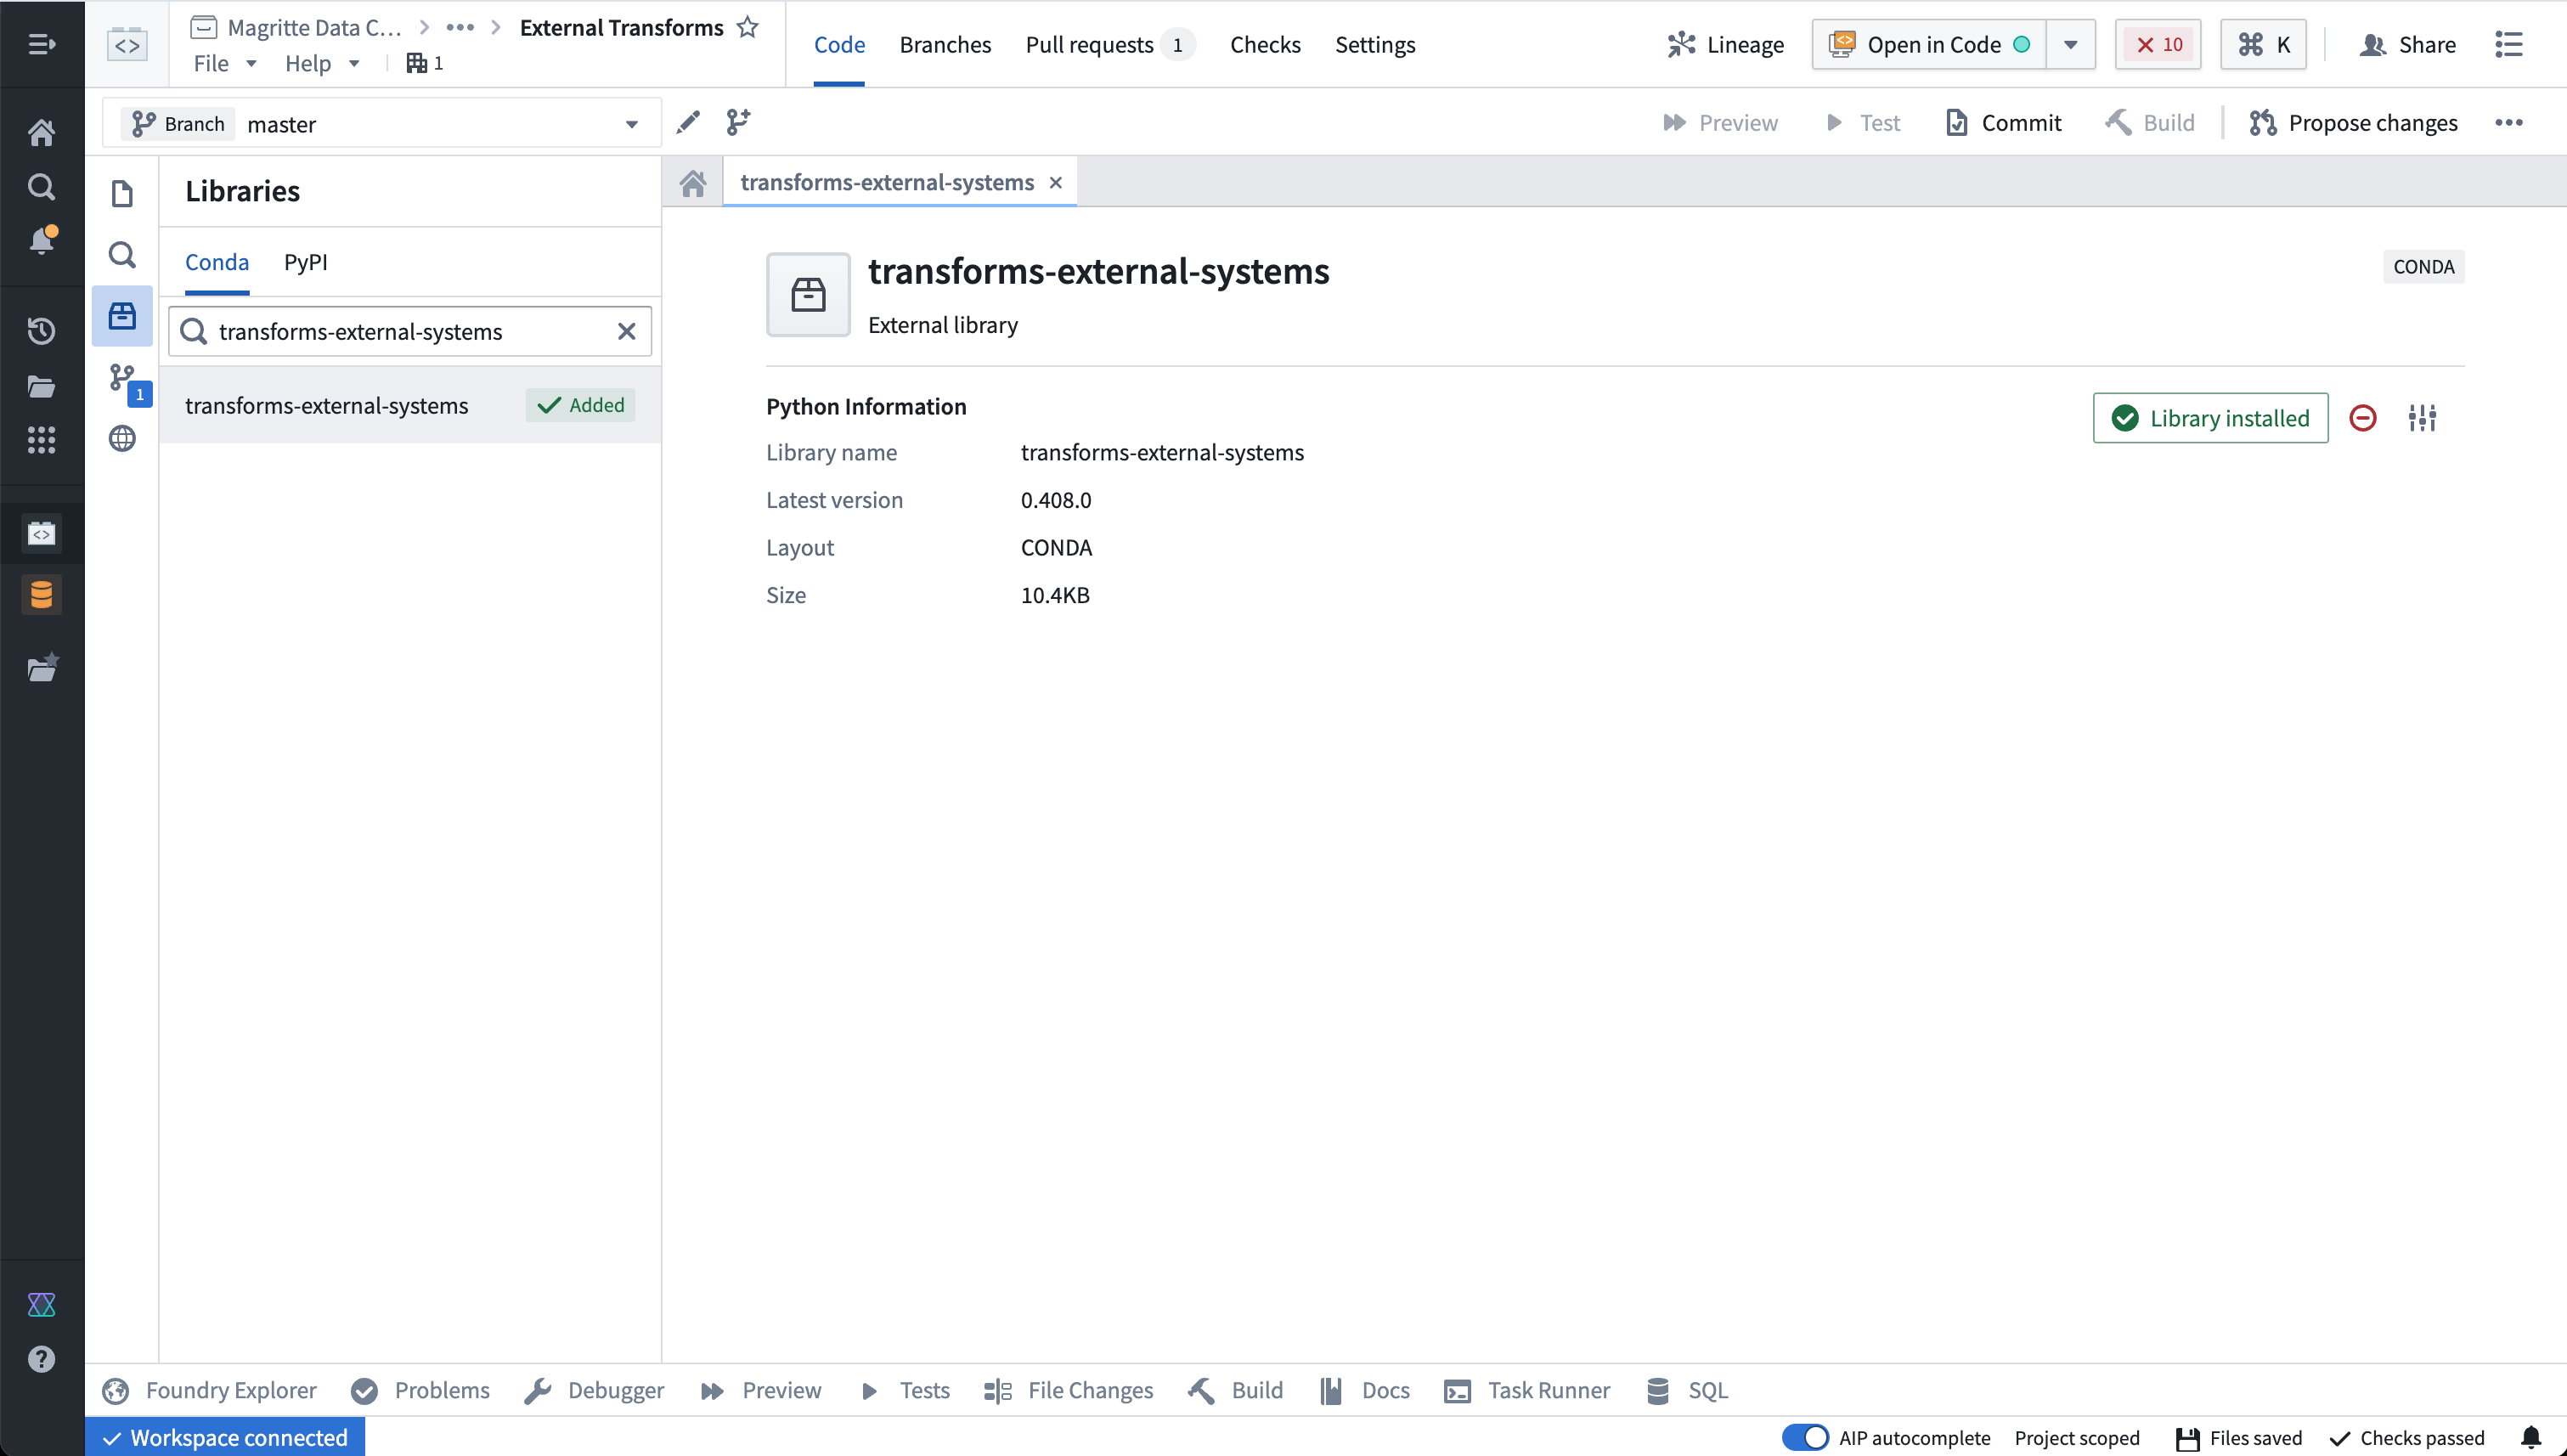
Learn more about installing and managing libraries..
- Now, you must import the source. In the repository, navigate to the left side panel and select the External Systems tab represented by the globe icon. Within the side panel, select Add, then search for the PokeAPI source that you previously created. Select this source, then Confirm selection to import.
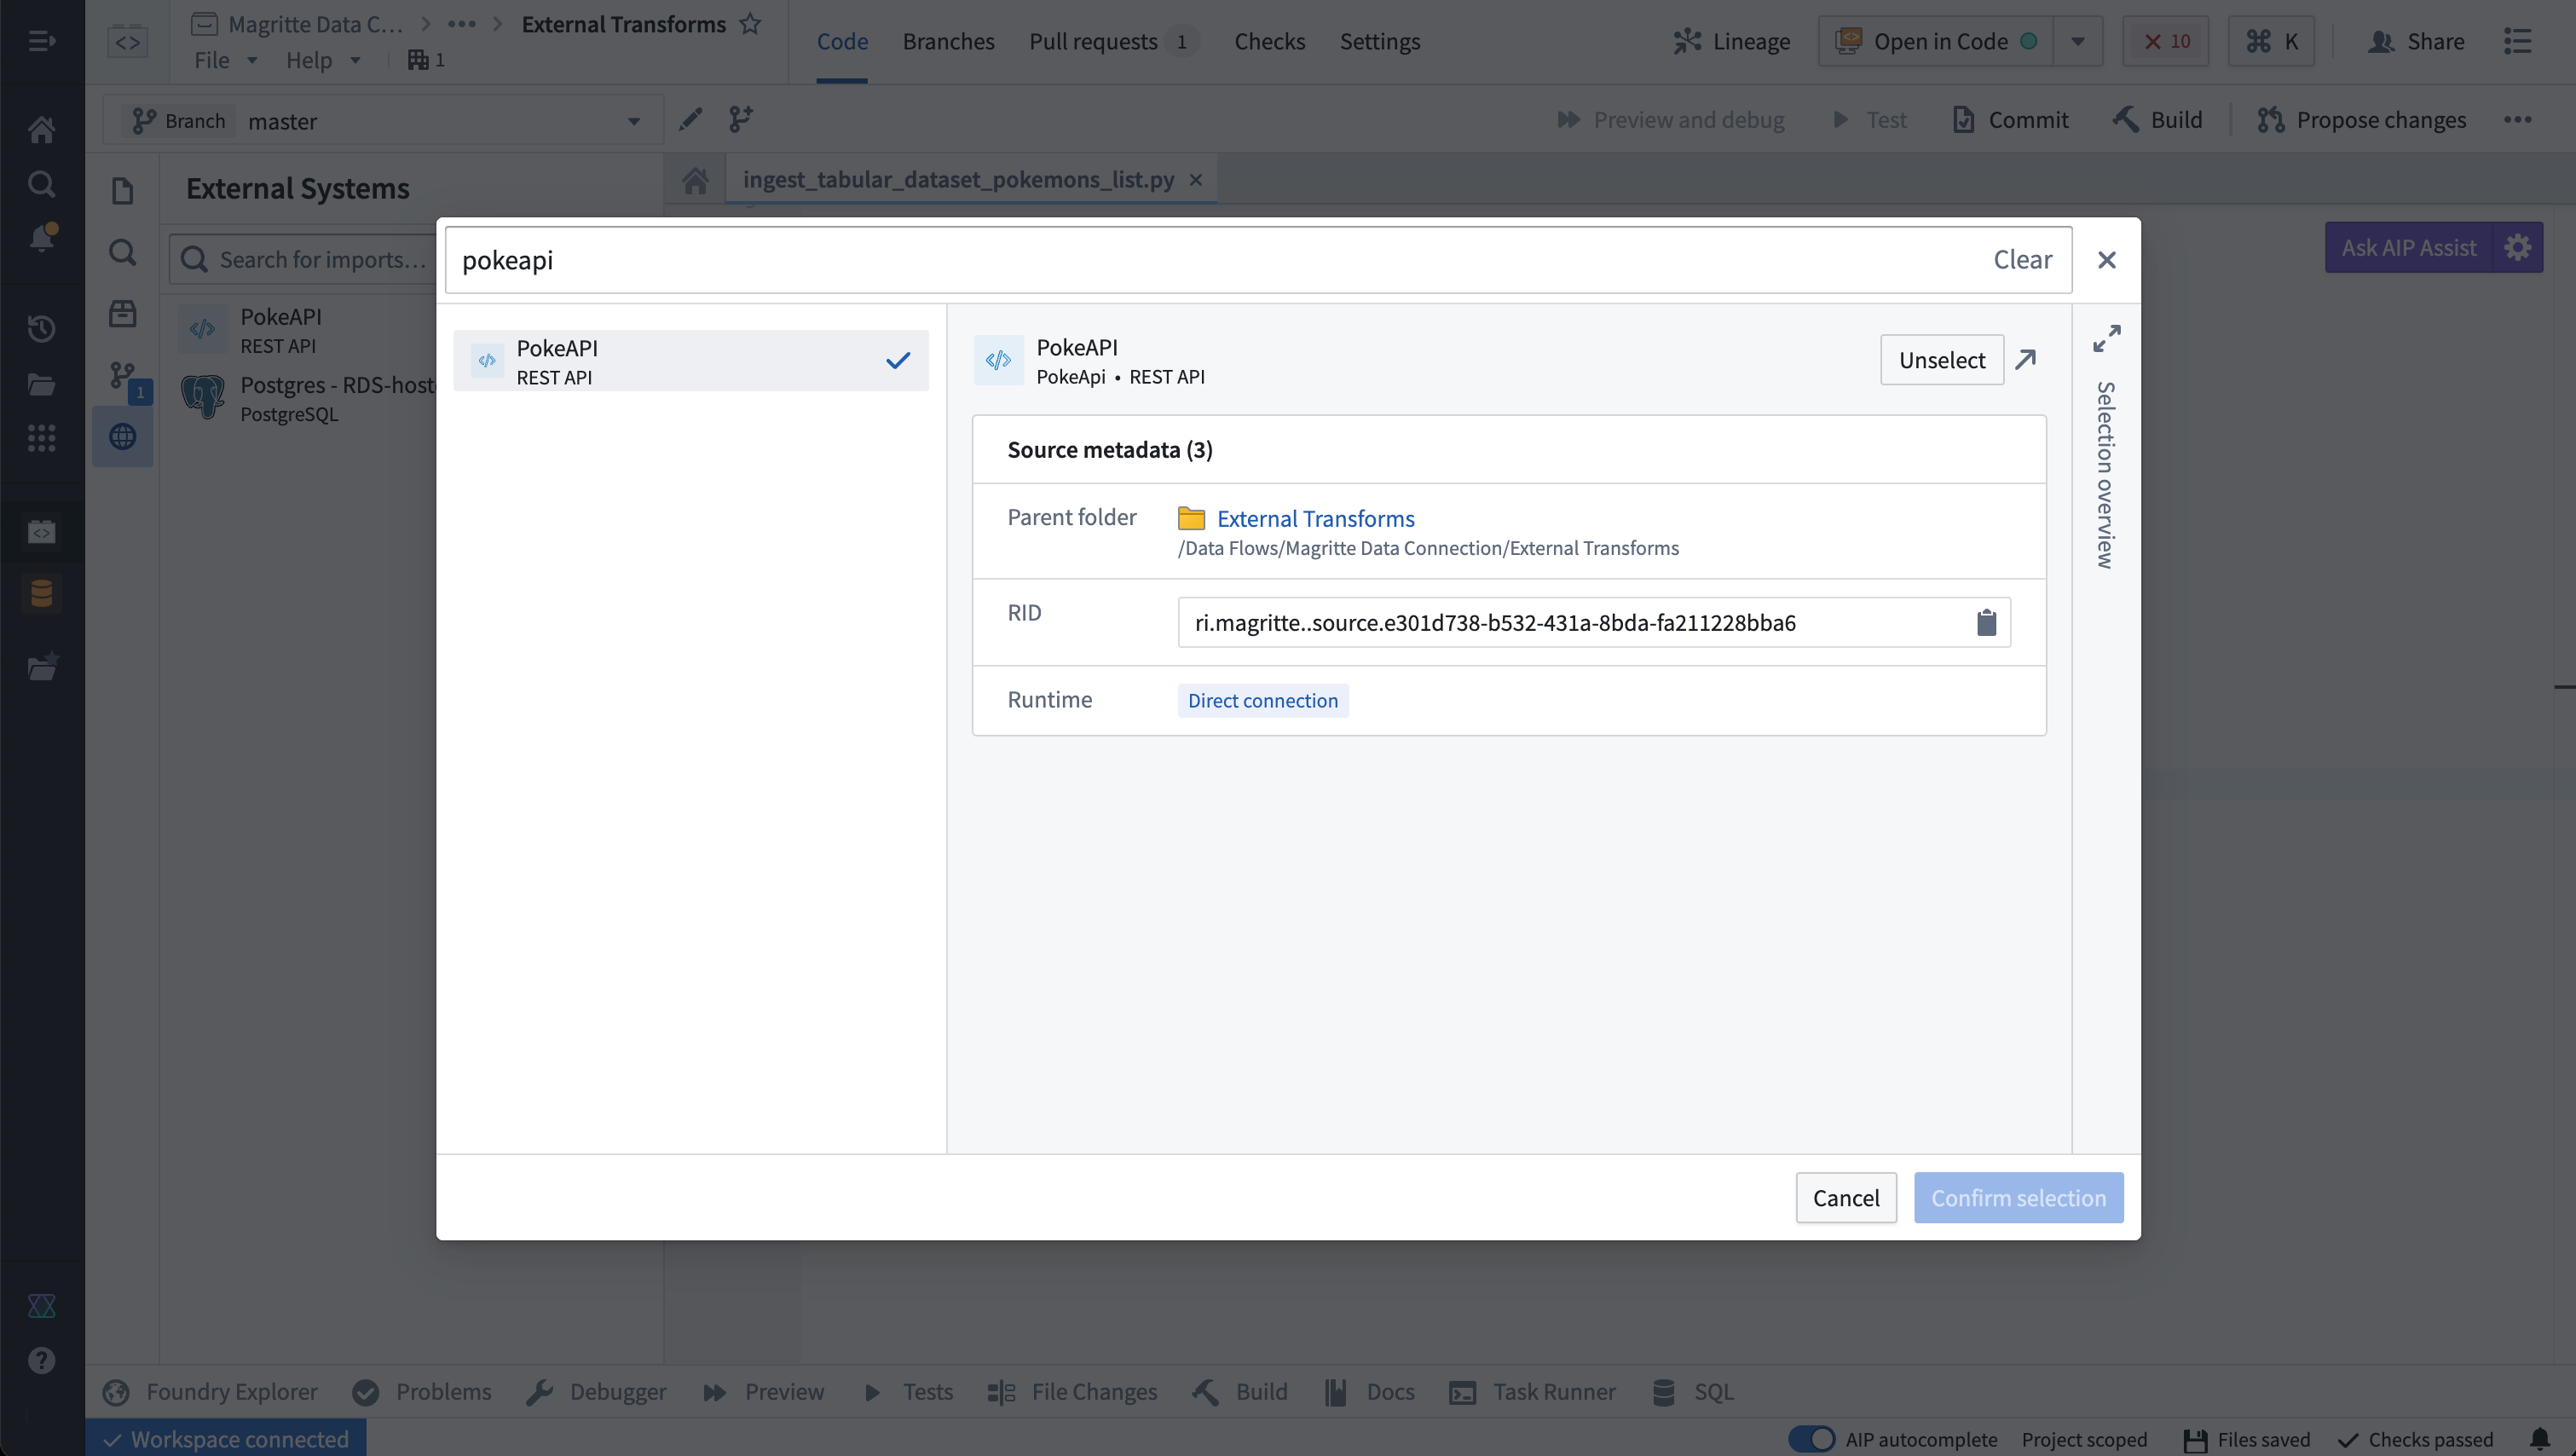
You must have at least Editor access to the source to be able to import it in the repository. Read more about permissions
Write external transforms
Once you set up a Python transforms repository that imports your PokeAPI source, you are ready to start writing Python transforms code that uses the source to connect externally.
Import and configure the @external_systems decorator
To use external transforms, you must import external_systems decorator and Source object from the transforms.external.systems library:
Copied!1from transforms.external.systems import external_systems, Source
You should then specify the sources that should be included in a transform by using the external_systems decorator:
Copied!1 2 3@external_systems( poke_source=Source("ri.magritte..source.e301d738-b532-431a-8bda-fa211228bba6") )
Sources will automatically be rendered as links to open in Data Connection and will display the source name instead of the resource identifier.
Access source attributes and credentials
Once a source is imported into your transform, you can access attributes of the source using the built-in connection object using the get_https_connection() method. The example below shows how we can grab the base URL of the PokeAPI source we configured in the previous step.
Copied!1poke_url = poke_source.get_https_connection().url
Additional secrets or credentials stored on the source can also be accessed from the source. To identify the secret names that can be accessed, navigate to the left panel in your transform.
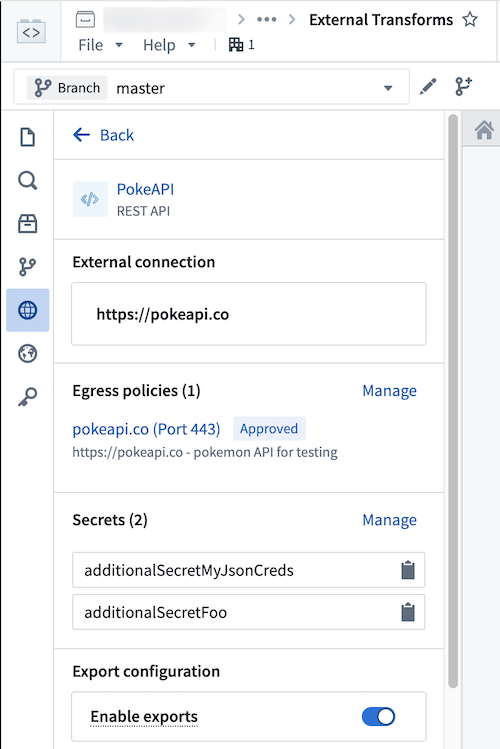
Use the following syntax to access secrets in code:
Copied!1poke_source.get_secret("additionalSecretFoo")
Currently, it is not possible to access source attributes that are not credentials unless the source provides an HTTPS client. For example, on a PostgreSQL source you will not be able to access the hostname or other non-secret attributes.
Use the built-in HTTP client
For sources that provide a RESTful API, the source object allows you to interact with a built-in HTTPS client. This client will be pre-configured with all of the details specified on the source, including any server or client certificates, and you can simply start making requests to the external system.
Copied!1 2 3 4 5 6poke_url = poke_source.get_https_connection().url poke_client = poke_source.get_https_connection().get_client() # pokeClient is a pre-configured Session object from Python `requests` library. # Example of GET request: response = poke_client.get(poke_url + "/api/v2/pokemon/" + name, timeout=10)
When connecting to an on-premise system using an agent proxy, you must use the built-in client, since that will be automatically configured with the necessary agent proxy configuration.
Example: Import data from the PokeAPI
The below example illustrates a complete transform that pages through all pokemon returned by the API in batches of 100 at a time, and outputs all pokemon names to a dataset.
Copied!1 2 3 4 5 6 7 8 9 10 11 12 13 14 15 16 17 18 19 20 21 22 23 24 25 26 27 28 29 30 31 32 33 34 35 36 37 38from transforms.api import transform_df, Output from transforms.external.systems import external_systems, Source from pyspark.sql import Row import json import logging logger = logging.getLogger(__name__) @external_systems( # specify the source that was imported to the repository poke_source=Source("ri.magritte..source.e301d738-b532-431a-8bda-fa211228bba6") ) @transform_df( # this transform doesn't use any inputs, and only specifies an output dataset Output("/path/to/output/dataset") ) def compute(poke_source, ctx): poke = poke_source.get_https_connection().get_client() poke_url = poke_source.get_https_connection().url data = [] start_url = poke_url + "/api/v2/pokemon?limit=100&offset=0" while start_url is not None: # loop through until no more pages are available logger.info("Fetched data from PokeAPI:" + start_url) # fetches up to 100 pokemon per page using the built-in HTTPS client for the PokeAPI source response = poke.get(start_url) response_json = json.loads(response.text) for pokemon in response_json["results"]: data.append(Row(name=pokemon["name"])) start_url = response_json["next"] # the data fetched and parsed from the external system are written to the output dataset return ctx.spark_session.createDataFrame(data)
Use Foundry inputs in external transforms
External transforms often need to use Foundry input data. For example, you might want to query an API to gather additional metadata for each row in a tabular dataset. Alternatively, you might have a workflow where you need to export Foundry data into an external software system.
Such cases are considered export-controlled workflows, as they open the possibility of exporting secure Foundry data into another system with unknown security guarantees and severed data provenance. When configuring a source connection, the source owner must specify whether or not data from Foundry may be exported, and provide the set of security markings and organizations may be exported. Foundry provides governance controls to ensure developers can clearly encode security intent, and Information Security Officers can audit the scope and intent of workflows interacting with external systems.
Configure export controls on the source
Exports are controlled using security markings. When configuring a source, the export configuration is used to specify which security markings and organizations are safe to export to the external system. This is done by navigating to the source in the data connection application, and then navigating to the Connection settings > Export configuration tab. You should then toggle on the option to Enable exports to this source and select the set of markings and organizations that may potentially be exported.
Doing this requires permission to remove Markings on the relevant data and Organizations, since exporting is considered equivalent to removing Markings on data within Foundry.
The setting to Enable exports to this source must be toggled on to allow the following:
- Use datasets, media sets, and streams as an input to Python transforms code importing this source.
- Use virtual tables registered on this source in Python transforms.
Below you can see an example export configuration for the PokeAPI source, allowing data from the Palantir organization with no additional security markings to be exported to the PokeAPI:
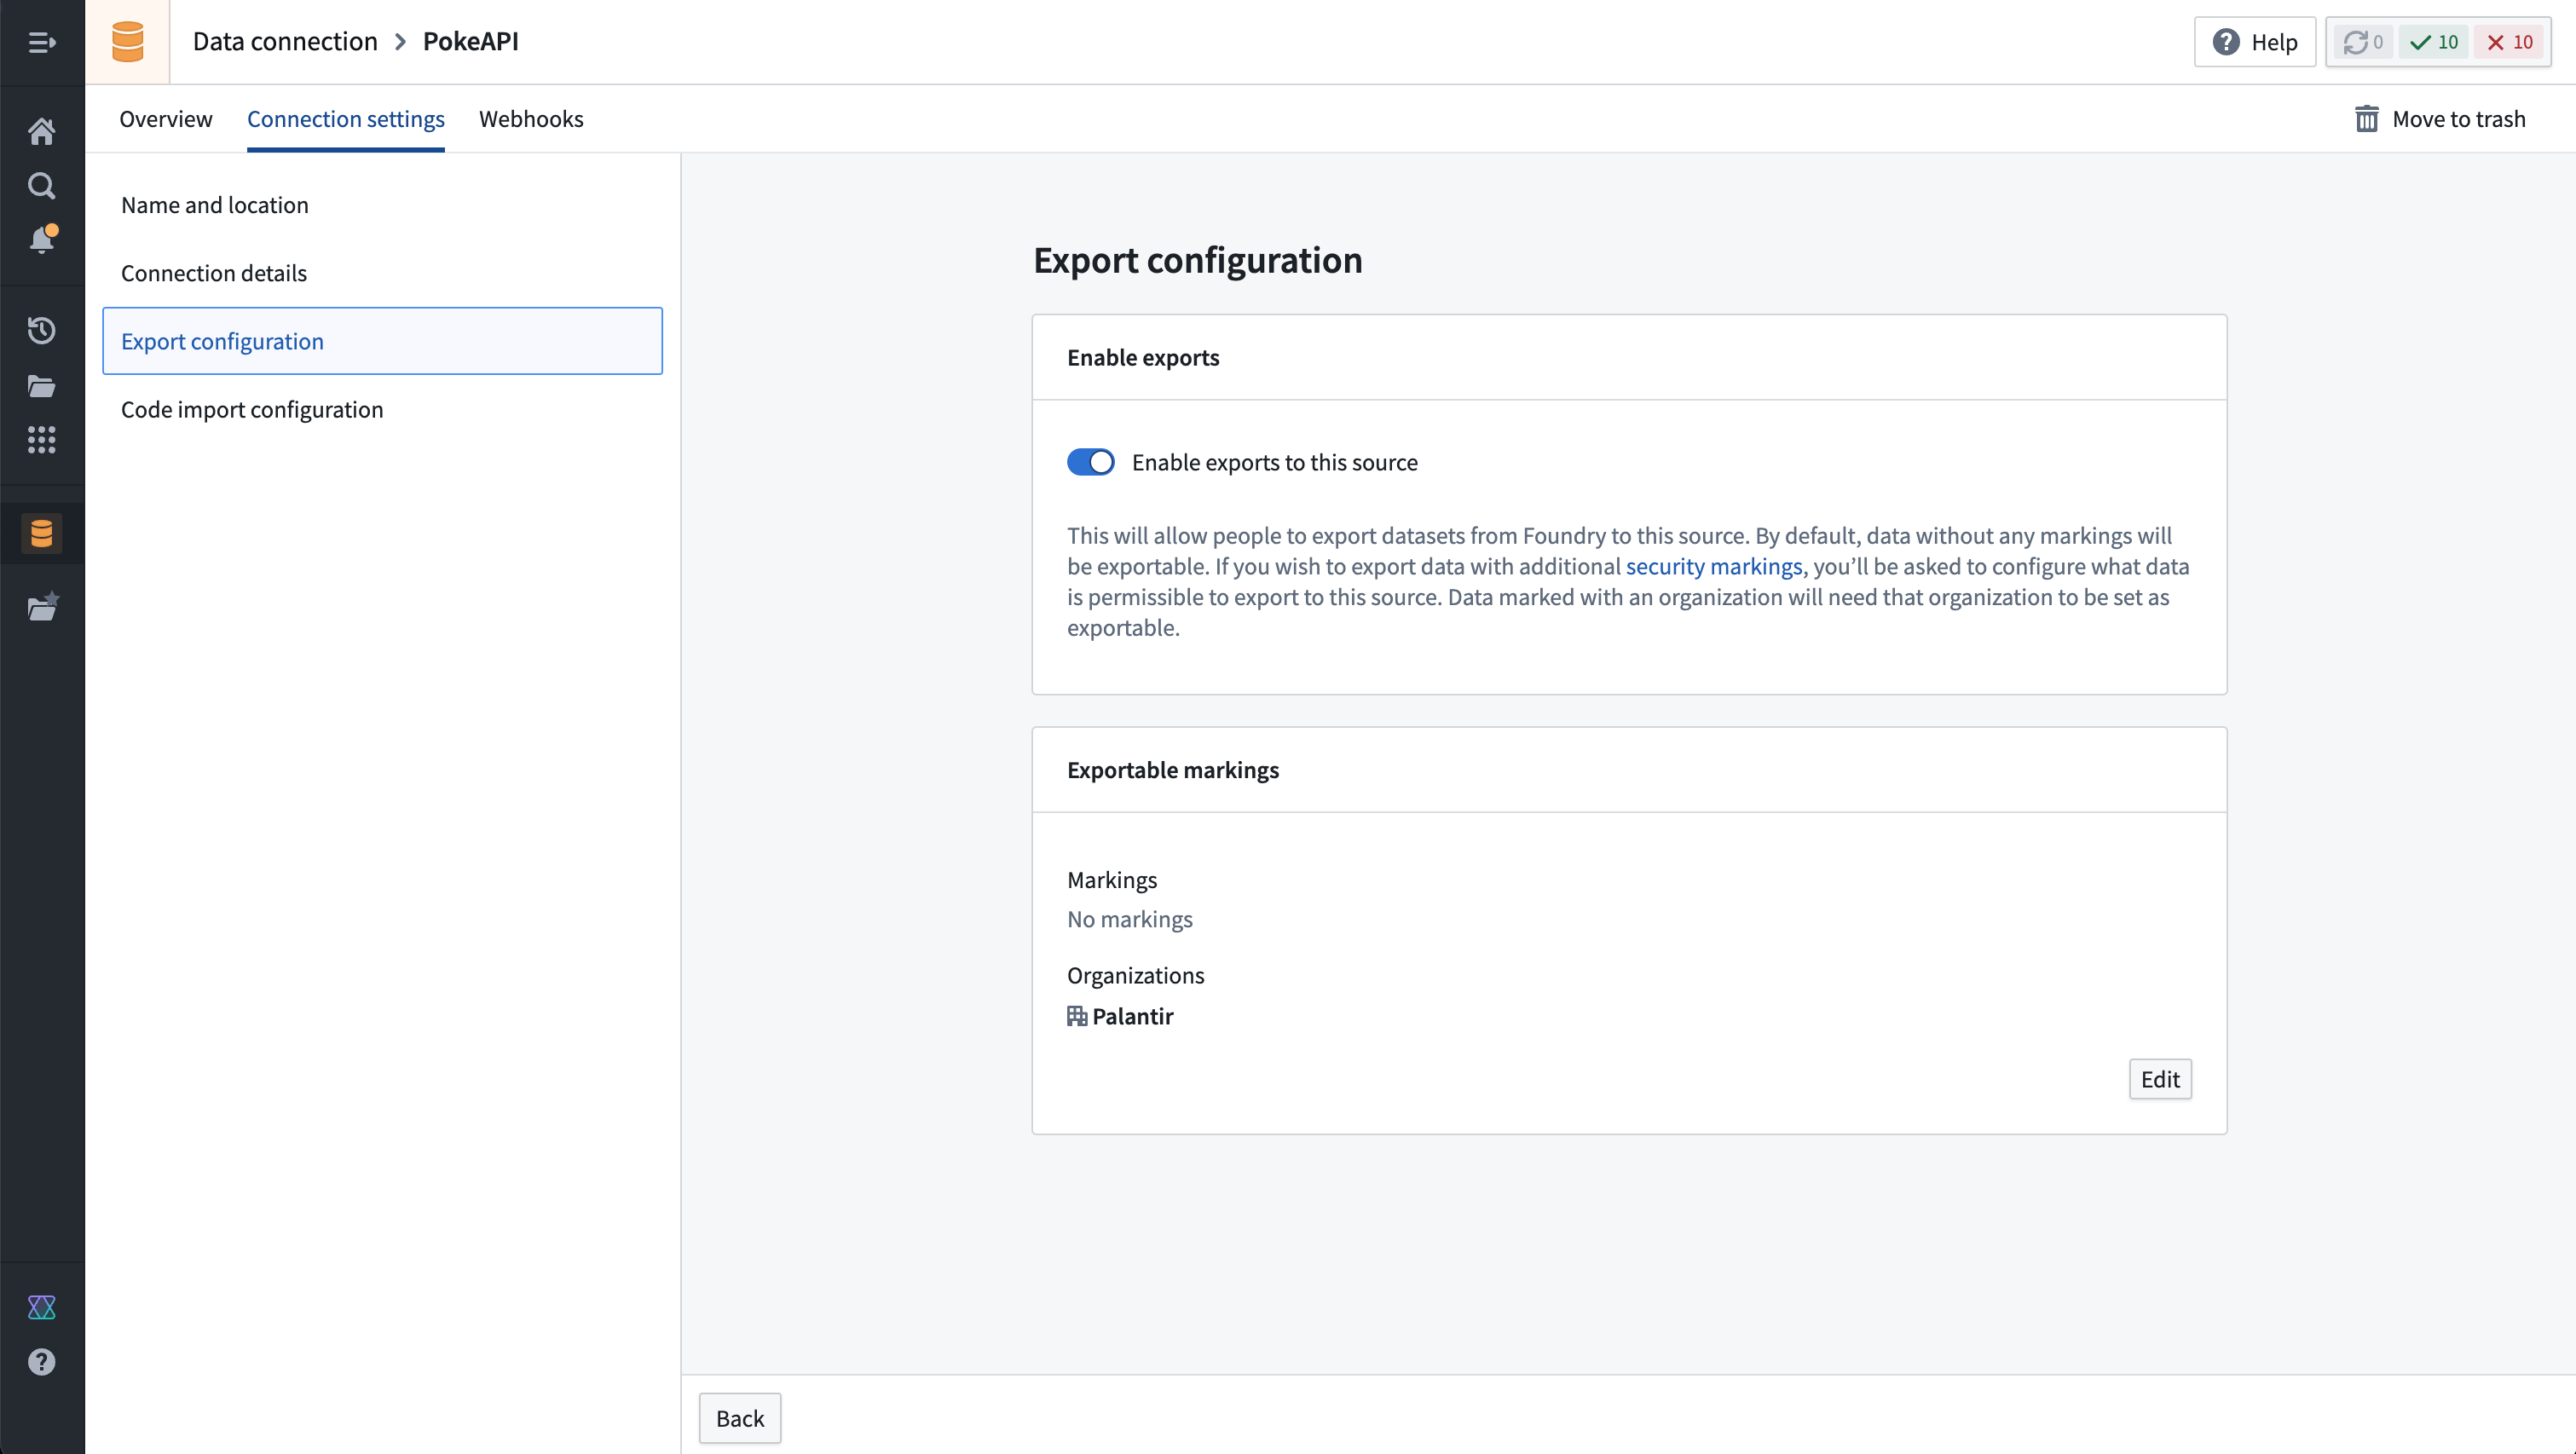
Note that Enable exports to this source must be toggled on even if you are not actually exporting data to this system, since allowing Foundry data inputs into the same compute job with an open connection to this system means that data could be exported.
Example: Use Foundry imports alongside data from the PokeAPI
In this example, we start with an input dataset of pokemon names, and use the PokeAPI to output an enriched dataset that includes the height and weight of each pokemon. It also illustrates basic error handling based on the status code of the response.
Copied!1 2 3 4 5 6 7 8 9 10 11 12 13 14 15 16 17 18 19 20 21 22 23 24 25 26 27 28 29 30 31 32 33 34 35 36 37 38 39from transforms.api import transform_df, Output, Input from transforms.external.systems import external_systems, Source from pyspark.sql import Row import json import logging logger = logging.getLogger(__name__) @external_systems( poke_source=Source("ri.magritte..source.e301d738-b532-431a-8bda-fa211228bba6") ) @transform_df( # output dataset of enriched pokemon data retrieved from PokeAPI Output("/path/to/output/dataset"), # input dataset of pokemon names pokemon_list=Input("/path/to/input/dataset") ) def compute(poke_source, pokemon_list, ctx): poke = poke_source.get_https_connection().get_client() poke_url = poke_source.get_https_connection().url def make_request_and_enrich(row: Row): name = row["name"] response = poke.get(poke_url + "/api/v2/pokemon/" + name, timeout=10) if response.status_code == 200: data = json.loads(response.text) height = data["height"] weight = data["weight"] else: logger.warn(f"Request for {name} failed with status code {response.status_code}.") height = None weight = None return Row(name=name, height=height, weight=weight) return pokemon_list.rdd.map(make_request_and_enrich).toDF()
Permissions
Before using external transforms, make sure to familiarize yourself with the Data Connection - Permissions reference page.
Comparison of external transforms and legacy external transforms
The following are some key workflow differences between external transforms and legacy external transforms:
- The tab for importing sources will always automatically show for external transforms. Previously, tabs for adding egress policy and credentials would only show after an Information Security Officer had toggled on the ability to use external systems in repository settings.
- Settings to allow external connections and the use of inputs are no longer located in repository settings. Instead, these are controlled on each individual source.
- Credentials, egress policies, and exportable markings are no longer specified in code. Instead, these settings are taken from the sources that are imported into the transform and applied automatically to the job.
- If this configuration is changed at the source level, it will automatically be picked up by transforms that import the source without any code change or version bump required. This allows centralized governance of credentials, egress, and exportable Markings which will propagate immediately to downstream workflows.
- Changes will take effect as of the start of a build and will not affect running builds.
- The decorator has changed from
@use_external_systems()to@external_systems().
Key advantages of external transforms include the following:
- Support for connecting to systems not accessible from the Internet
- Support for rotating/updating credentials without requiring code changes
- Support for sharing connection configuration across multiple repositories
- Out-of-the-box Python clients for selected source types
- Improved and simplified governance workflows for enabling and managing external transform repositories
- Visualization of external transforms connected to external sources in Data Lineage
Migrate to external transforms
There is currently no automatic migration path to update external transforms to external transforms. However, the manual action required is expected to be minimal for most workflows.
The following are the main steps to manually migrate to external transforms:
- Identify the set of credentials, egress policies, and export control Markings used in your existing legacy external transforms code.
- Identify or configure Data Connection sources that connect to the systems you wish to connect to from your external transforms. Ensure these sources are configured to allow imports into code.
- Import the relevant sources from step 2 into your existing Python transforms repository.
- Change your code to import and use the new
@external_systems()decorator with source references, then remove any instances of the@use_external_systems()decorator. This will likely involve updating any references to credentials in your transforms logic to instead reference credentials retrieved from the sources you are now importing. - Test your changes on a branch to ensure that your transforms continue to build successfully.
- After merging your updated transforms code, you can now un-toggle the repository settings.
Transforms cannot contain both external transforms and their legacy version. To remedy this, you can migrate all legacy external transforms to use source-based external transforms instead (preferred), or split your transform into multiple transforms. Transforms can be split into one that uses the use_external_systems decorator and another that uses the external_systems decorator.
Capabilities
lightweight external transforms
External transforms are compatible with the @lightweight decorator. Using this decorator can dramatically increase the execution speed for transforms operating on small and medium-sized data.
The below example shows how the @lightweight decorator can be added to a transform along with the @external_systems decorator. For more information on the options for configuring lightweight transforms, see the lightweight transforms documentation.
Copied!1 2 3 4@lightweight @external_systems( poke_source=Source("ri.magritte..source.e301d738-b532-431a-8bda-fa211228bba6") )
Session credentials
External transforms support the generation and renewal of session credentials for the S3 source. This includes S3 sources configured with OIDC and Cloud Identity authentication. Below is an example of how to set up and begin using an S3 boto3 client.
Copied!1 2 3 4 5 6 7 8 9 10 11 12 13 14 15 16 17 18 19import boto3 @external_systems( s3_source=Source("ri.magritte..source.9a99cc8e-e76d-4490-847b-48b975b3d80b") ) @transforms_df( Output("ri.foundry.main.dataset.88359185-6ecd-4138-b4fd-aa8ae6d0df0c") ) def compute(s3_source, ctx): refreshable_credentials = s3_source.get_aws_credentials() credentials = refreshable_credentials.get() s3_client = boto3.client( "s3", aws_access_key_id=credentials.access_key_id, aws_secret_access_key=credentials.secret_access_key, aws_session_token=credentials.session_token, )