- Capabilities
- Getting started
- Architecture center
- Platform updates
Create a media set batch pipeline with Pipeline Builder
In this tutorial, we will use Pipeline Builder to create a simple pipeline with media sets to extract text from PDF.
For this example, we use PDFs of publicly available documents published by Palantir.
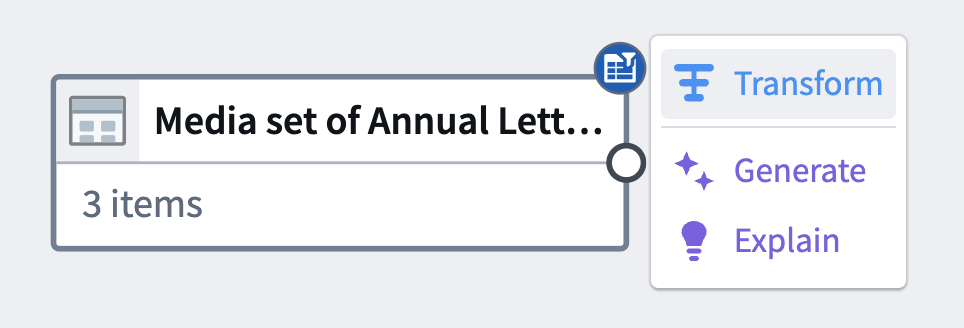
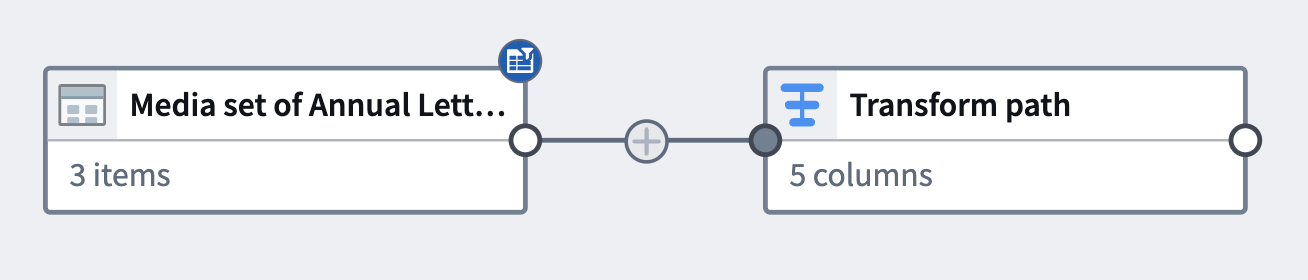
At the end of this tutorial, you will have a pipeline that looks like the following:
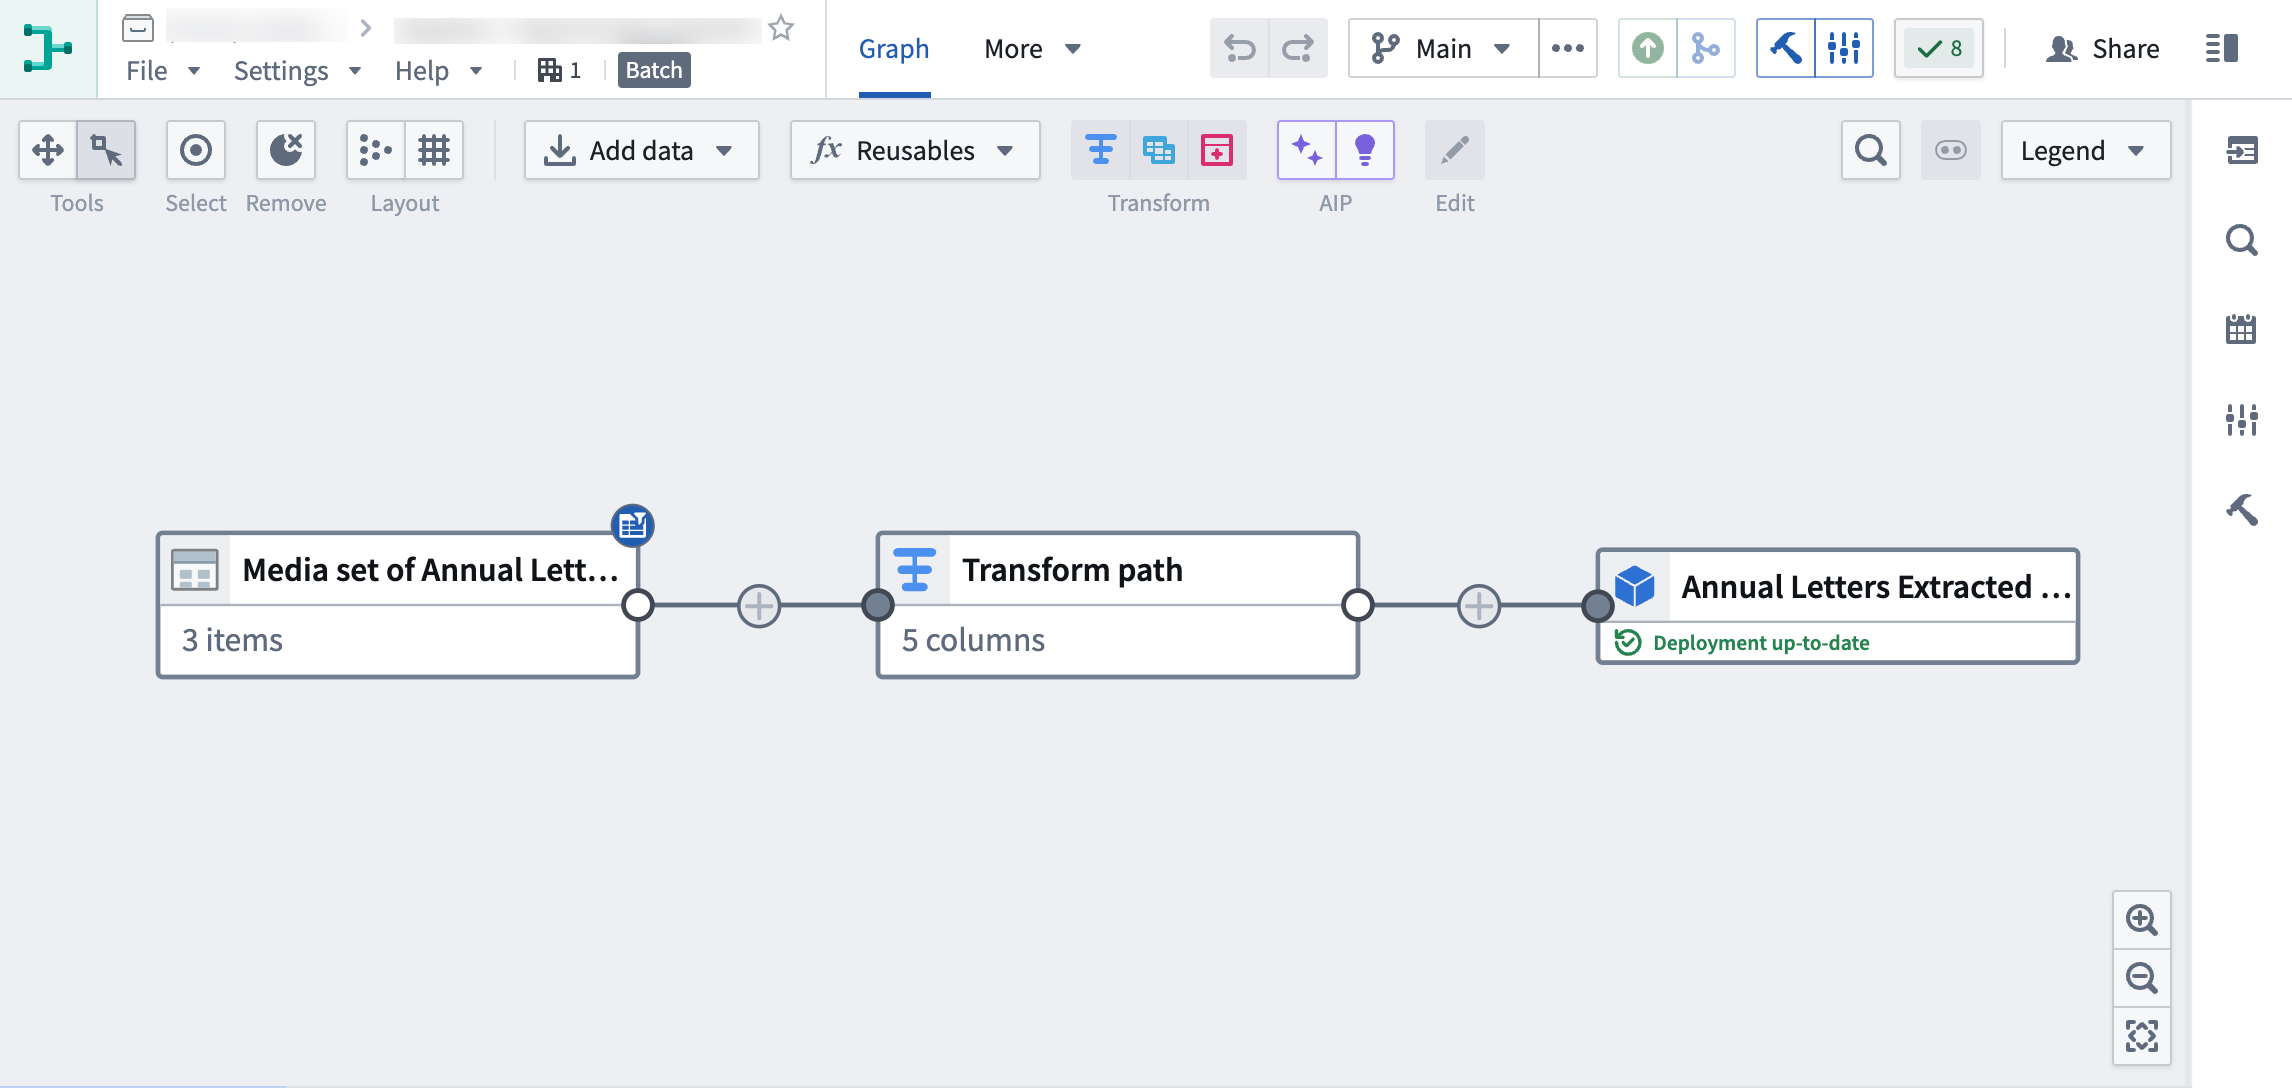
The pipeline will produce a new Object output of the extracted PDF text, which can be used for further exploration.
Part 1: Initial setup
First, we need to create a new pipeline.
-
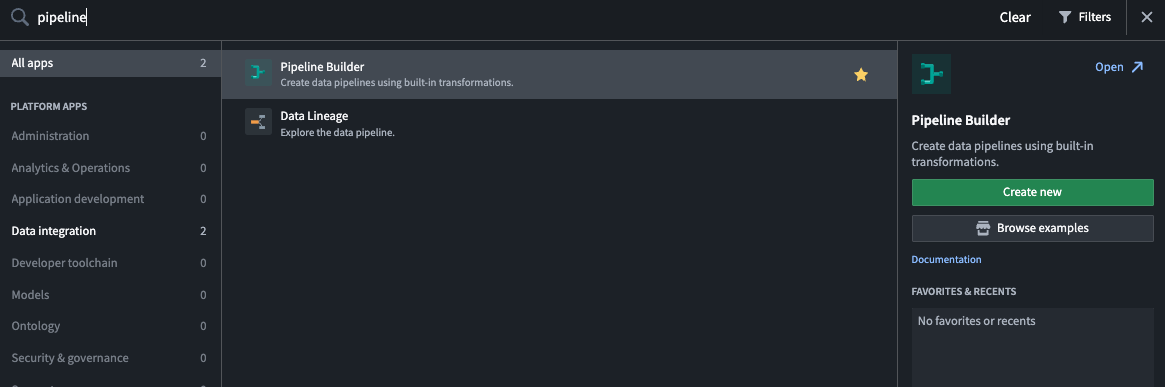
When logged into Foundry, access Pipeline Builder from the left navigation bar. If Pipeline Builder is not in the list of applications, select View all and find Pipeline Builder under the Build & Monitor Pipelines section.
-
Next, on the top right of the Pipeline Builder landing page, create a new pipeline by selecting New pipeline. Then, choose Batch pipeline.
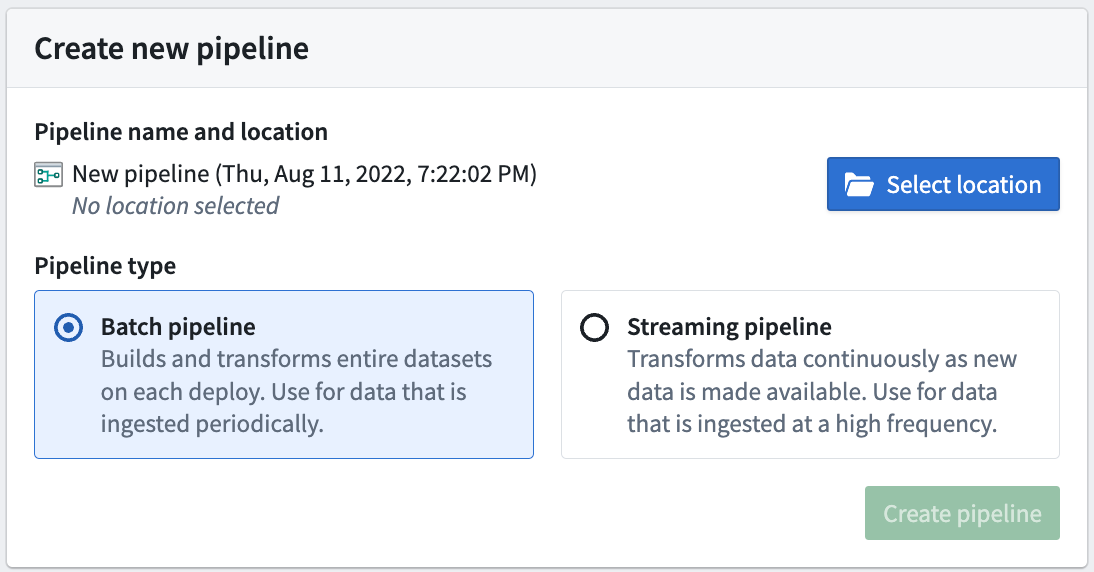
The ability to create a streaming pipeline is not available on all Foundry environments. Contact your Palantir representative for more information if your use case requires it.
-
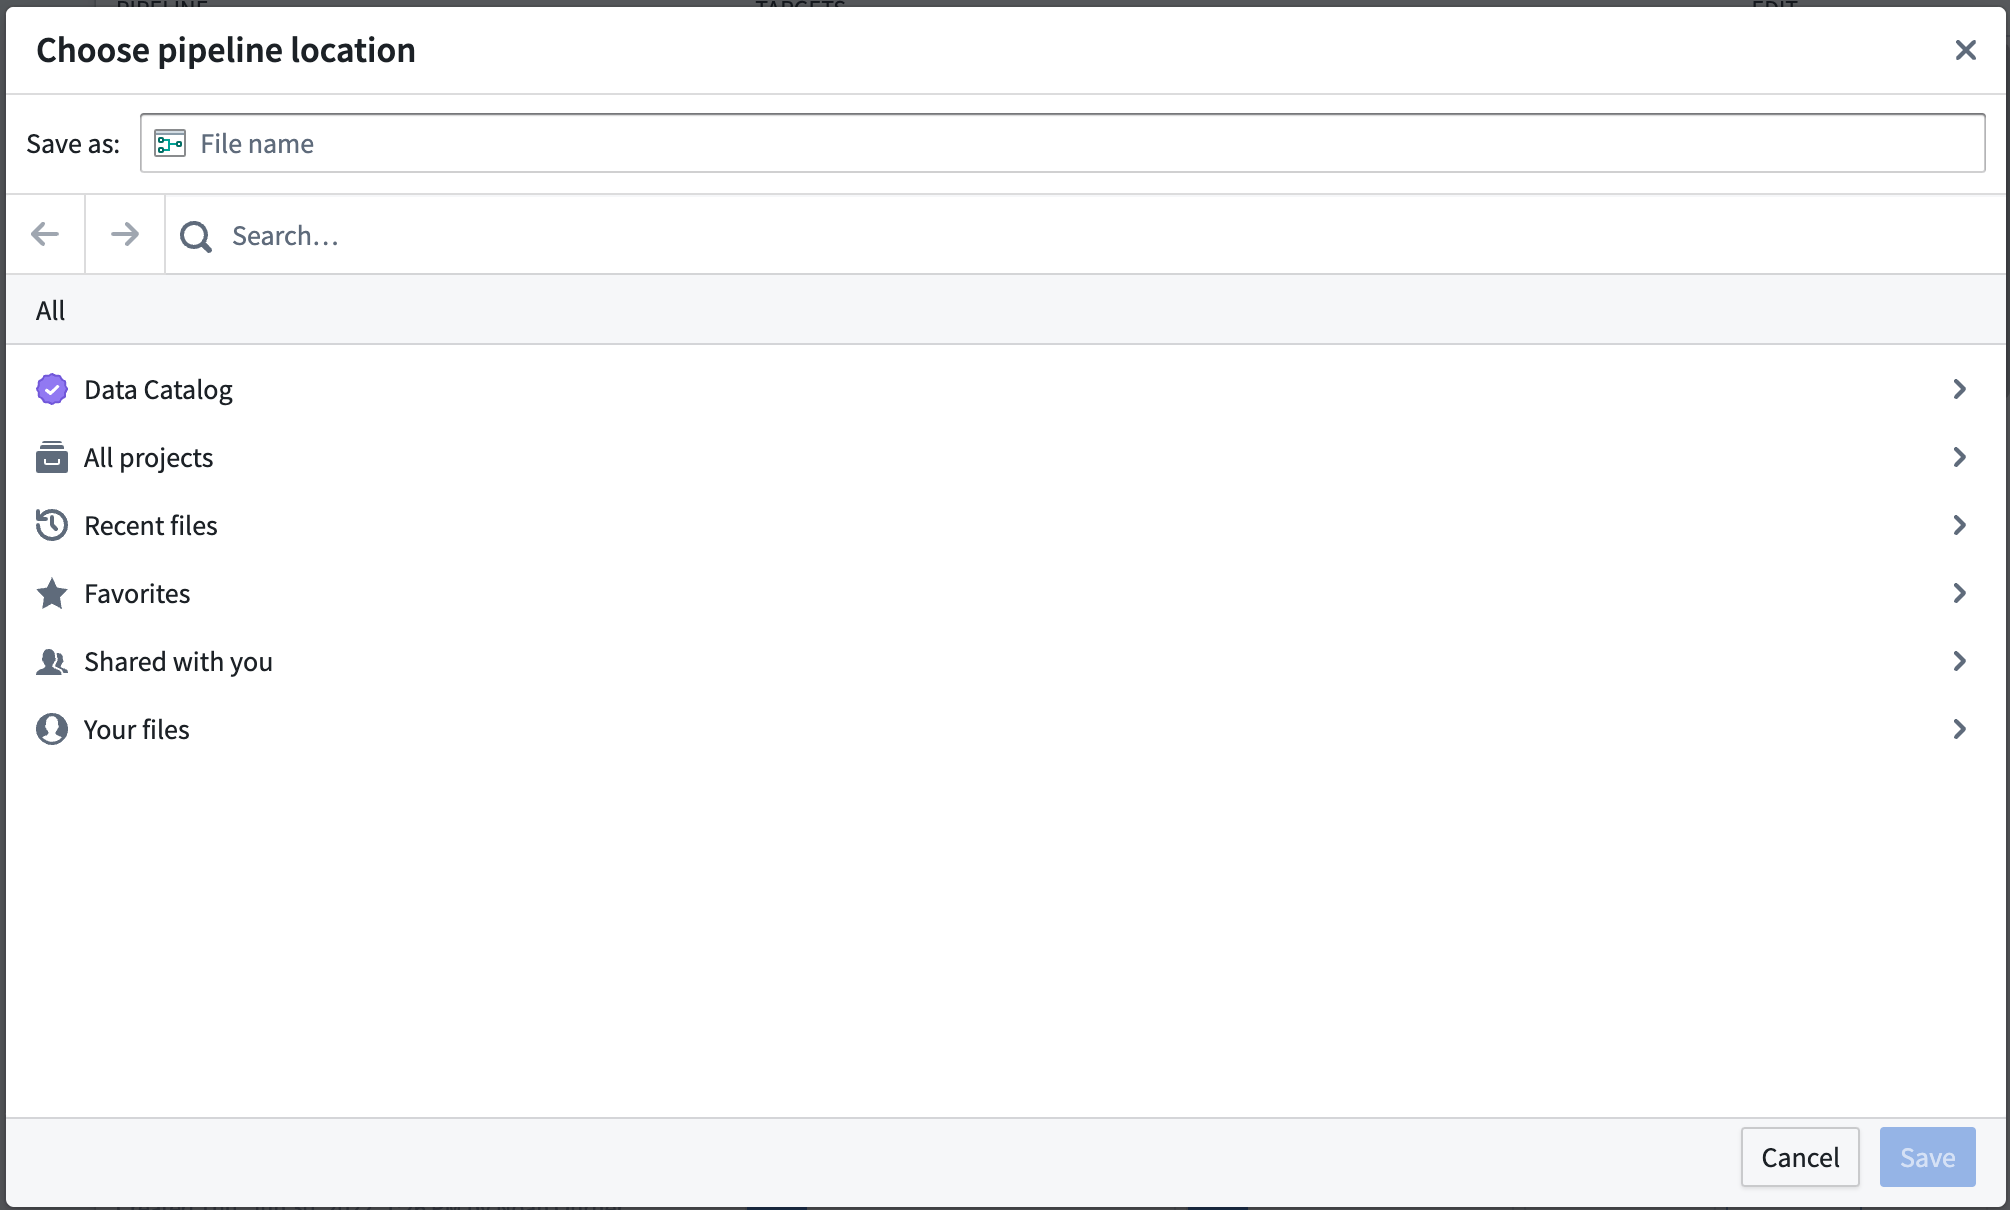
Select a location to save your pipeline. Note that pipelines cannot be saved in personal folders.
-
Choose Create pipeline.
Part 2: Add media sets
Now we can add datasets to our pipeline workflow. For this tutorial, we will use PDFs of publicly-available documents from Palantir.
-
From the Pipeline Builder page, select Add Foundry data on the home page.

You can also select the Add data action on the top panel.

Alternatively, you can drag and drop a file from your computer to use as your media set.
-
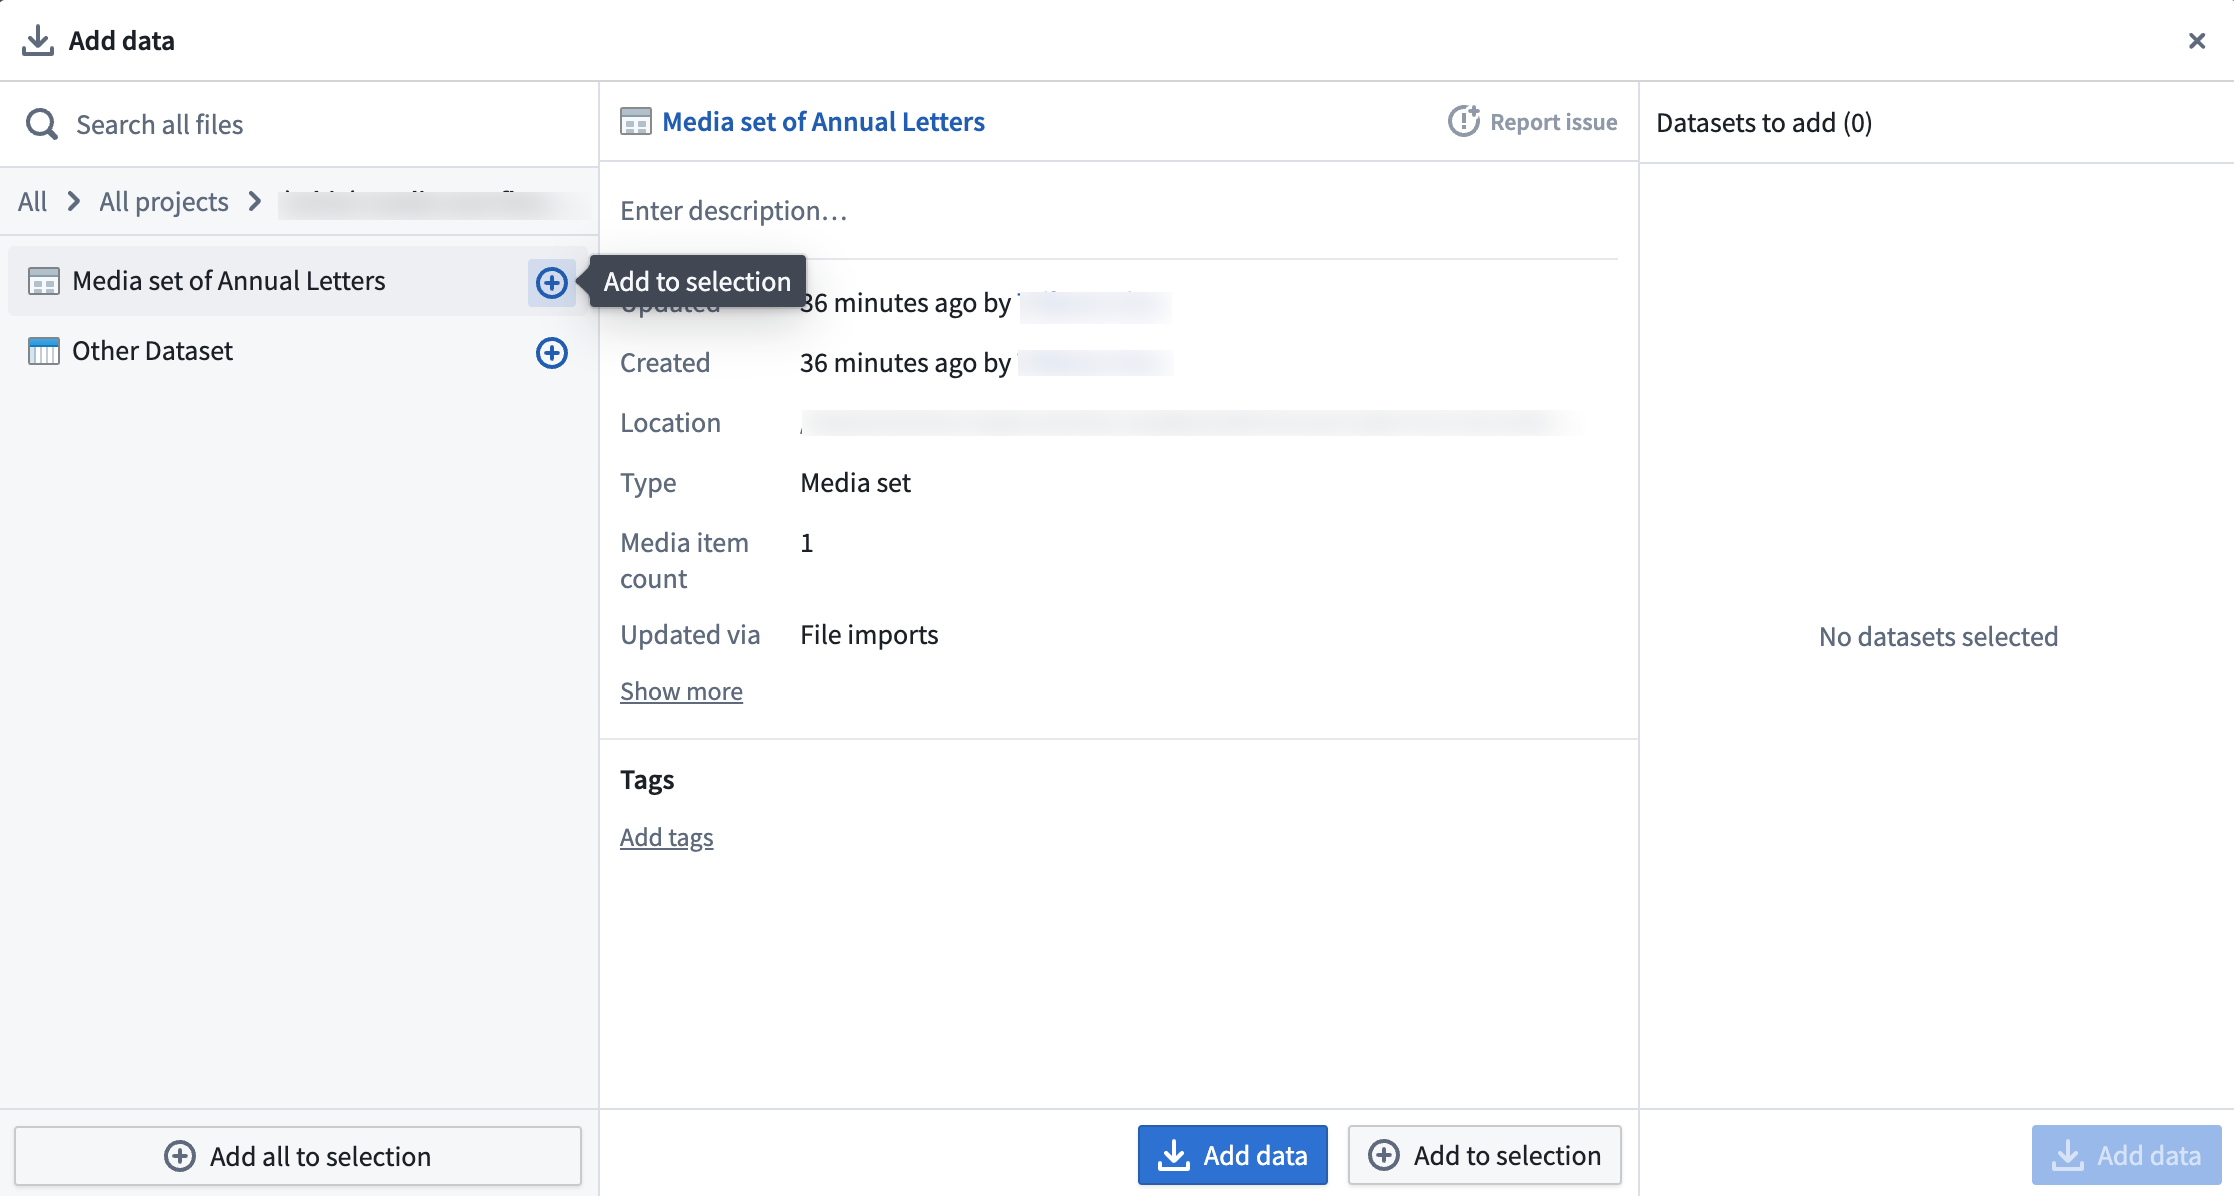
If you selected Add data or Add Foundry data, you will have the option to select your desired media sets.
-
When all media sets are selected, choose Add data.
-
When you have imported your media set you will be able to see the media set with thumbnail preview.

Part 3: Media set transformations
After adding raw media sets, we can perform some basic transformations. For this workflow we will be extracting the text from these PDF files.
Extract text from PDF
You can directly transform media or extract information from media using media references. In this example, we will extract text from the Media set of Annual Letters media set.
-
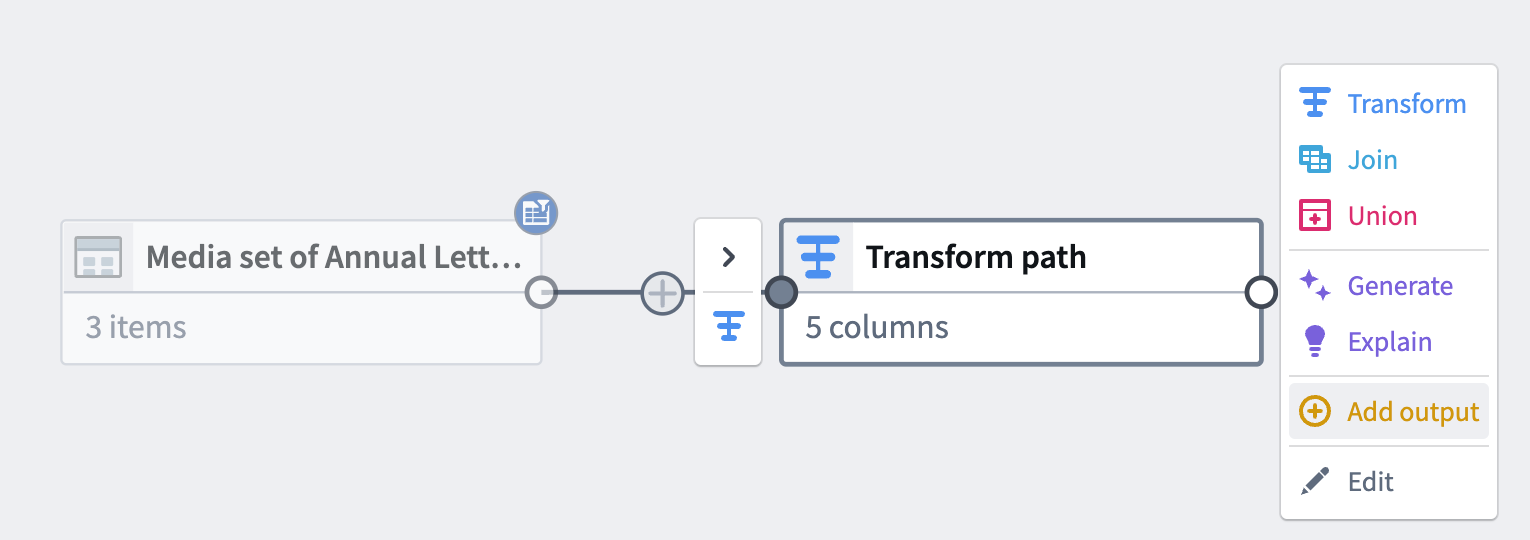
Choose the
Media set of Annual Lettersnode in your graph. -
Select Transform.
-
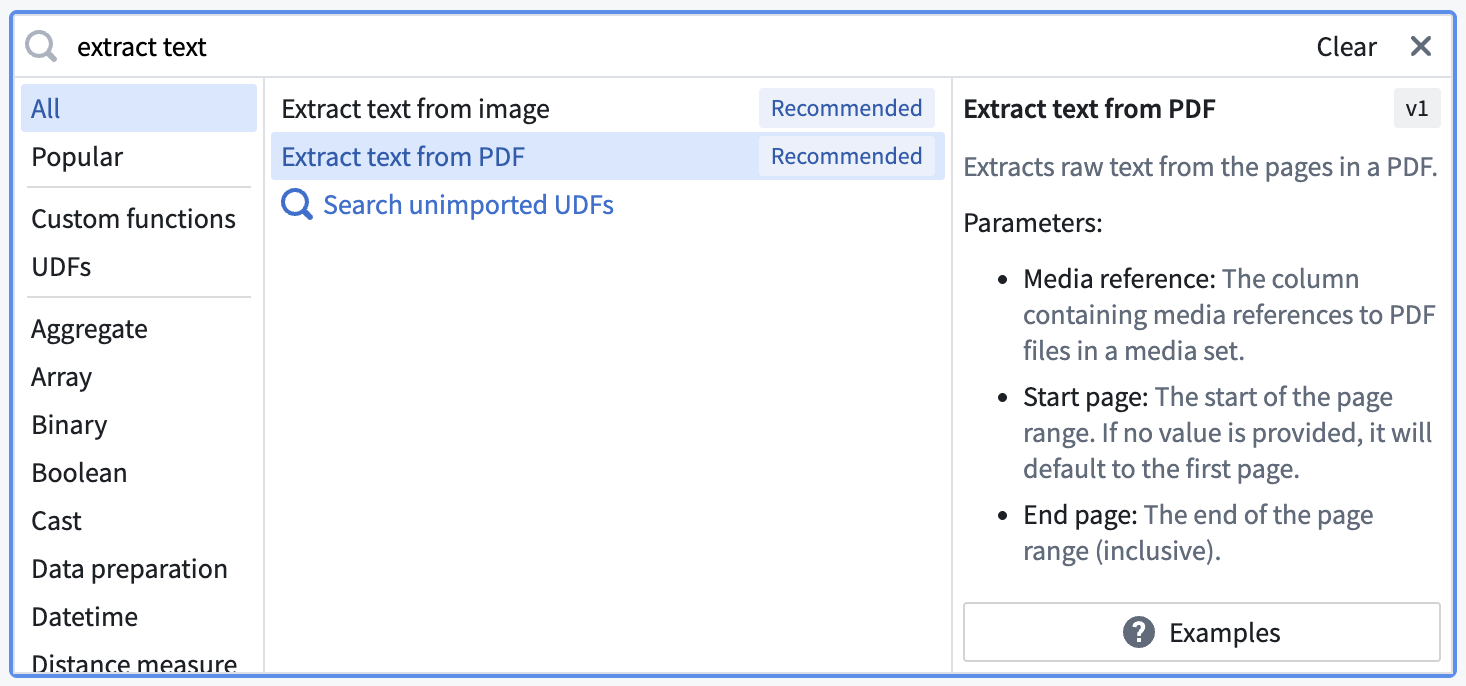
Search for and select the Extract text from PDF transform from the dropdown to open the board.
-
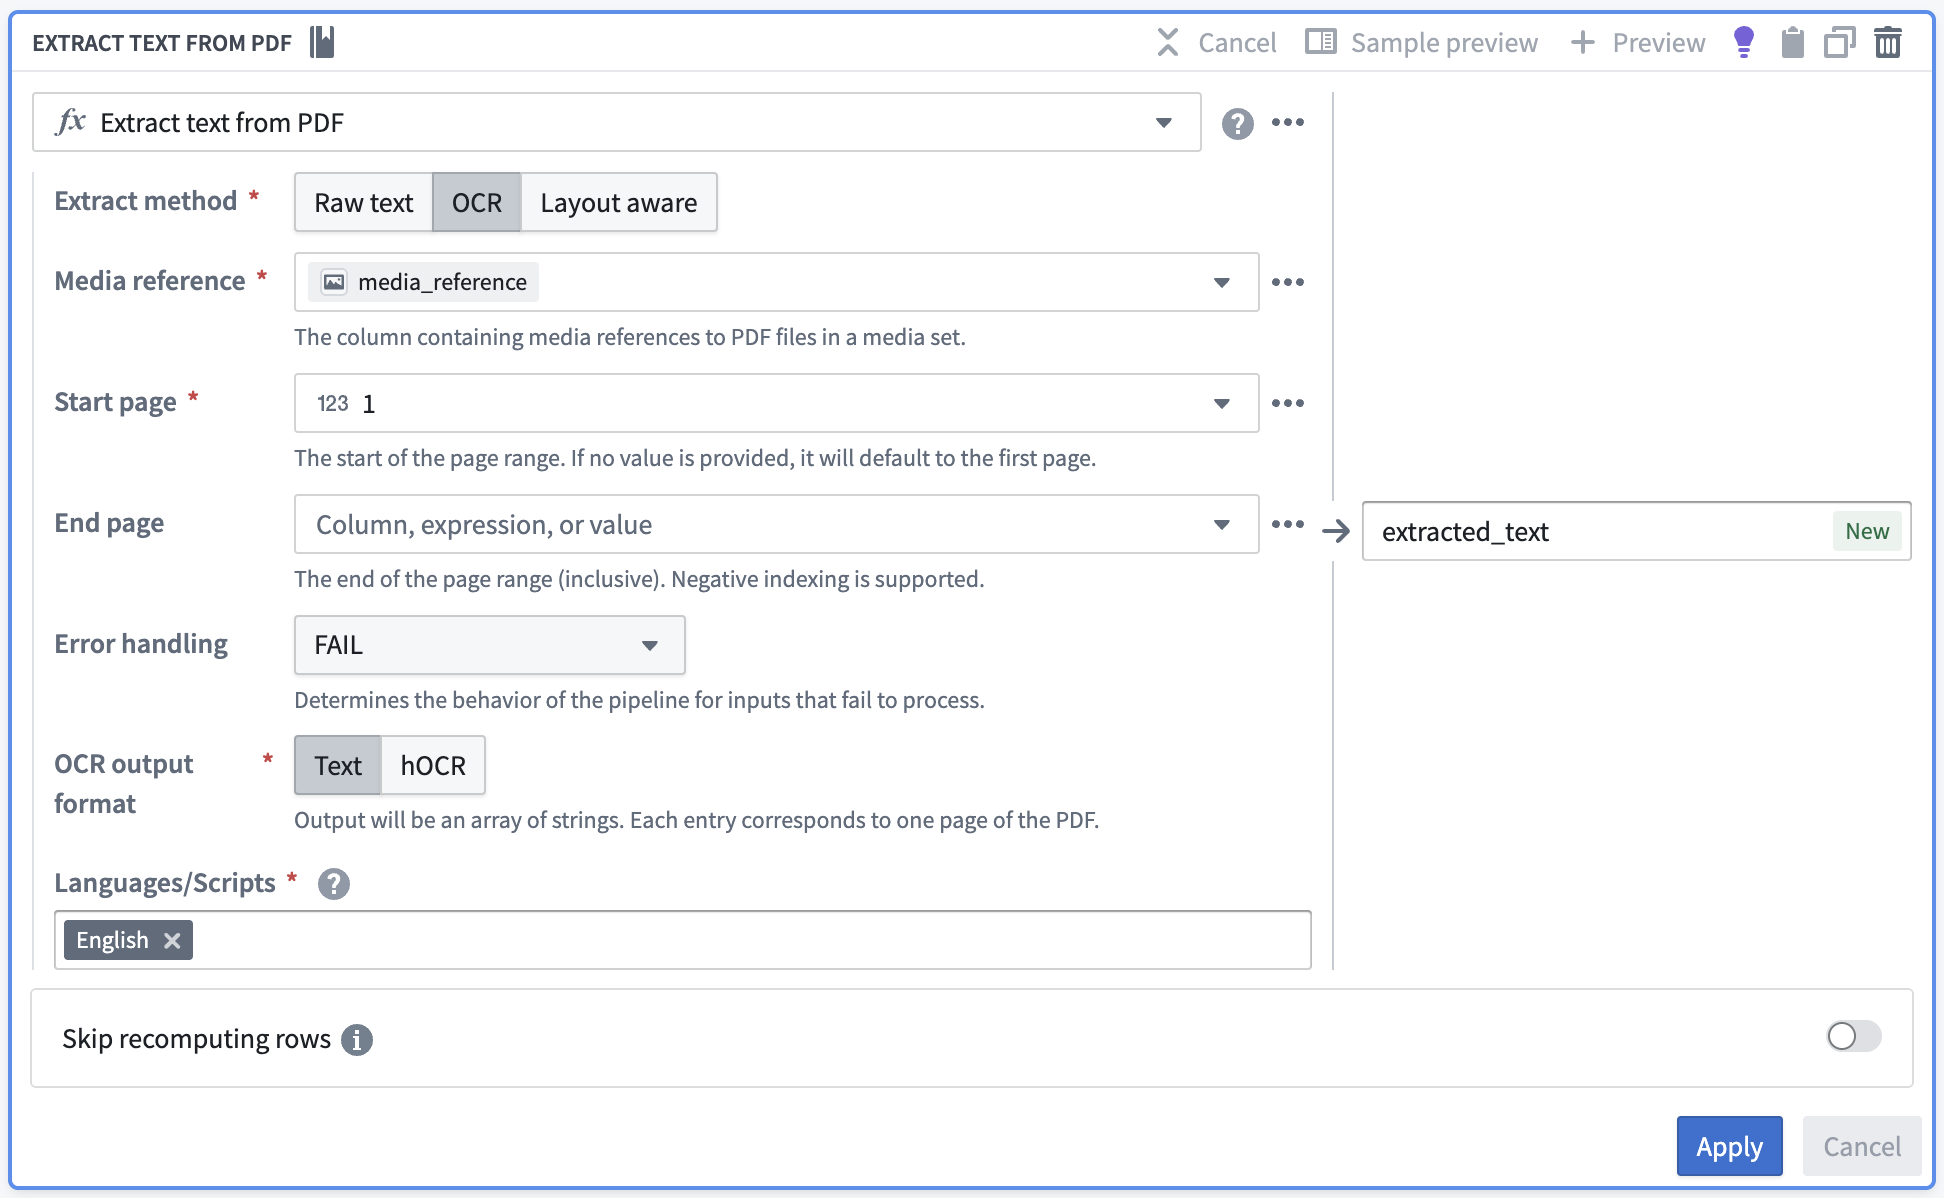
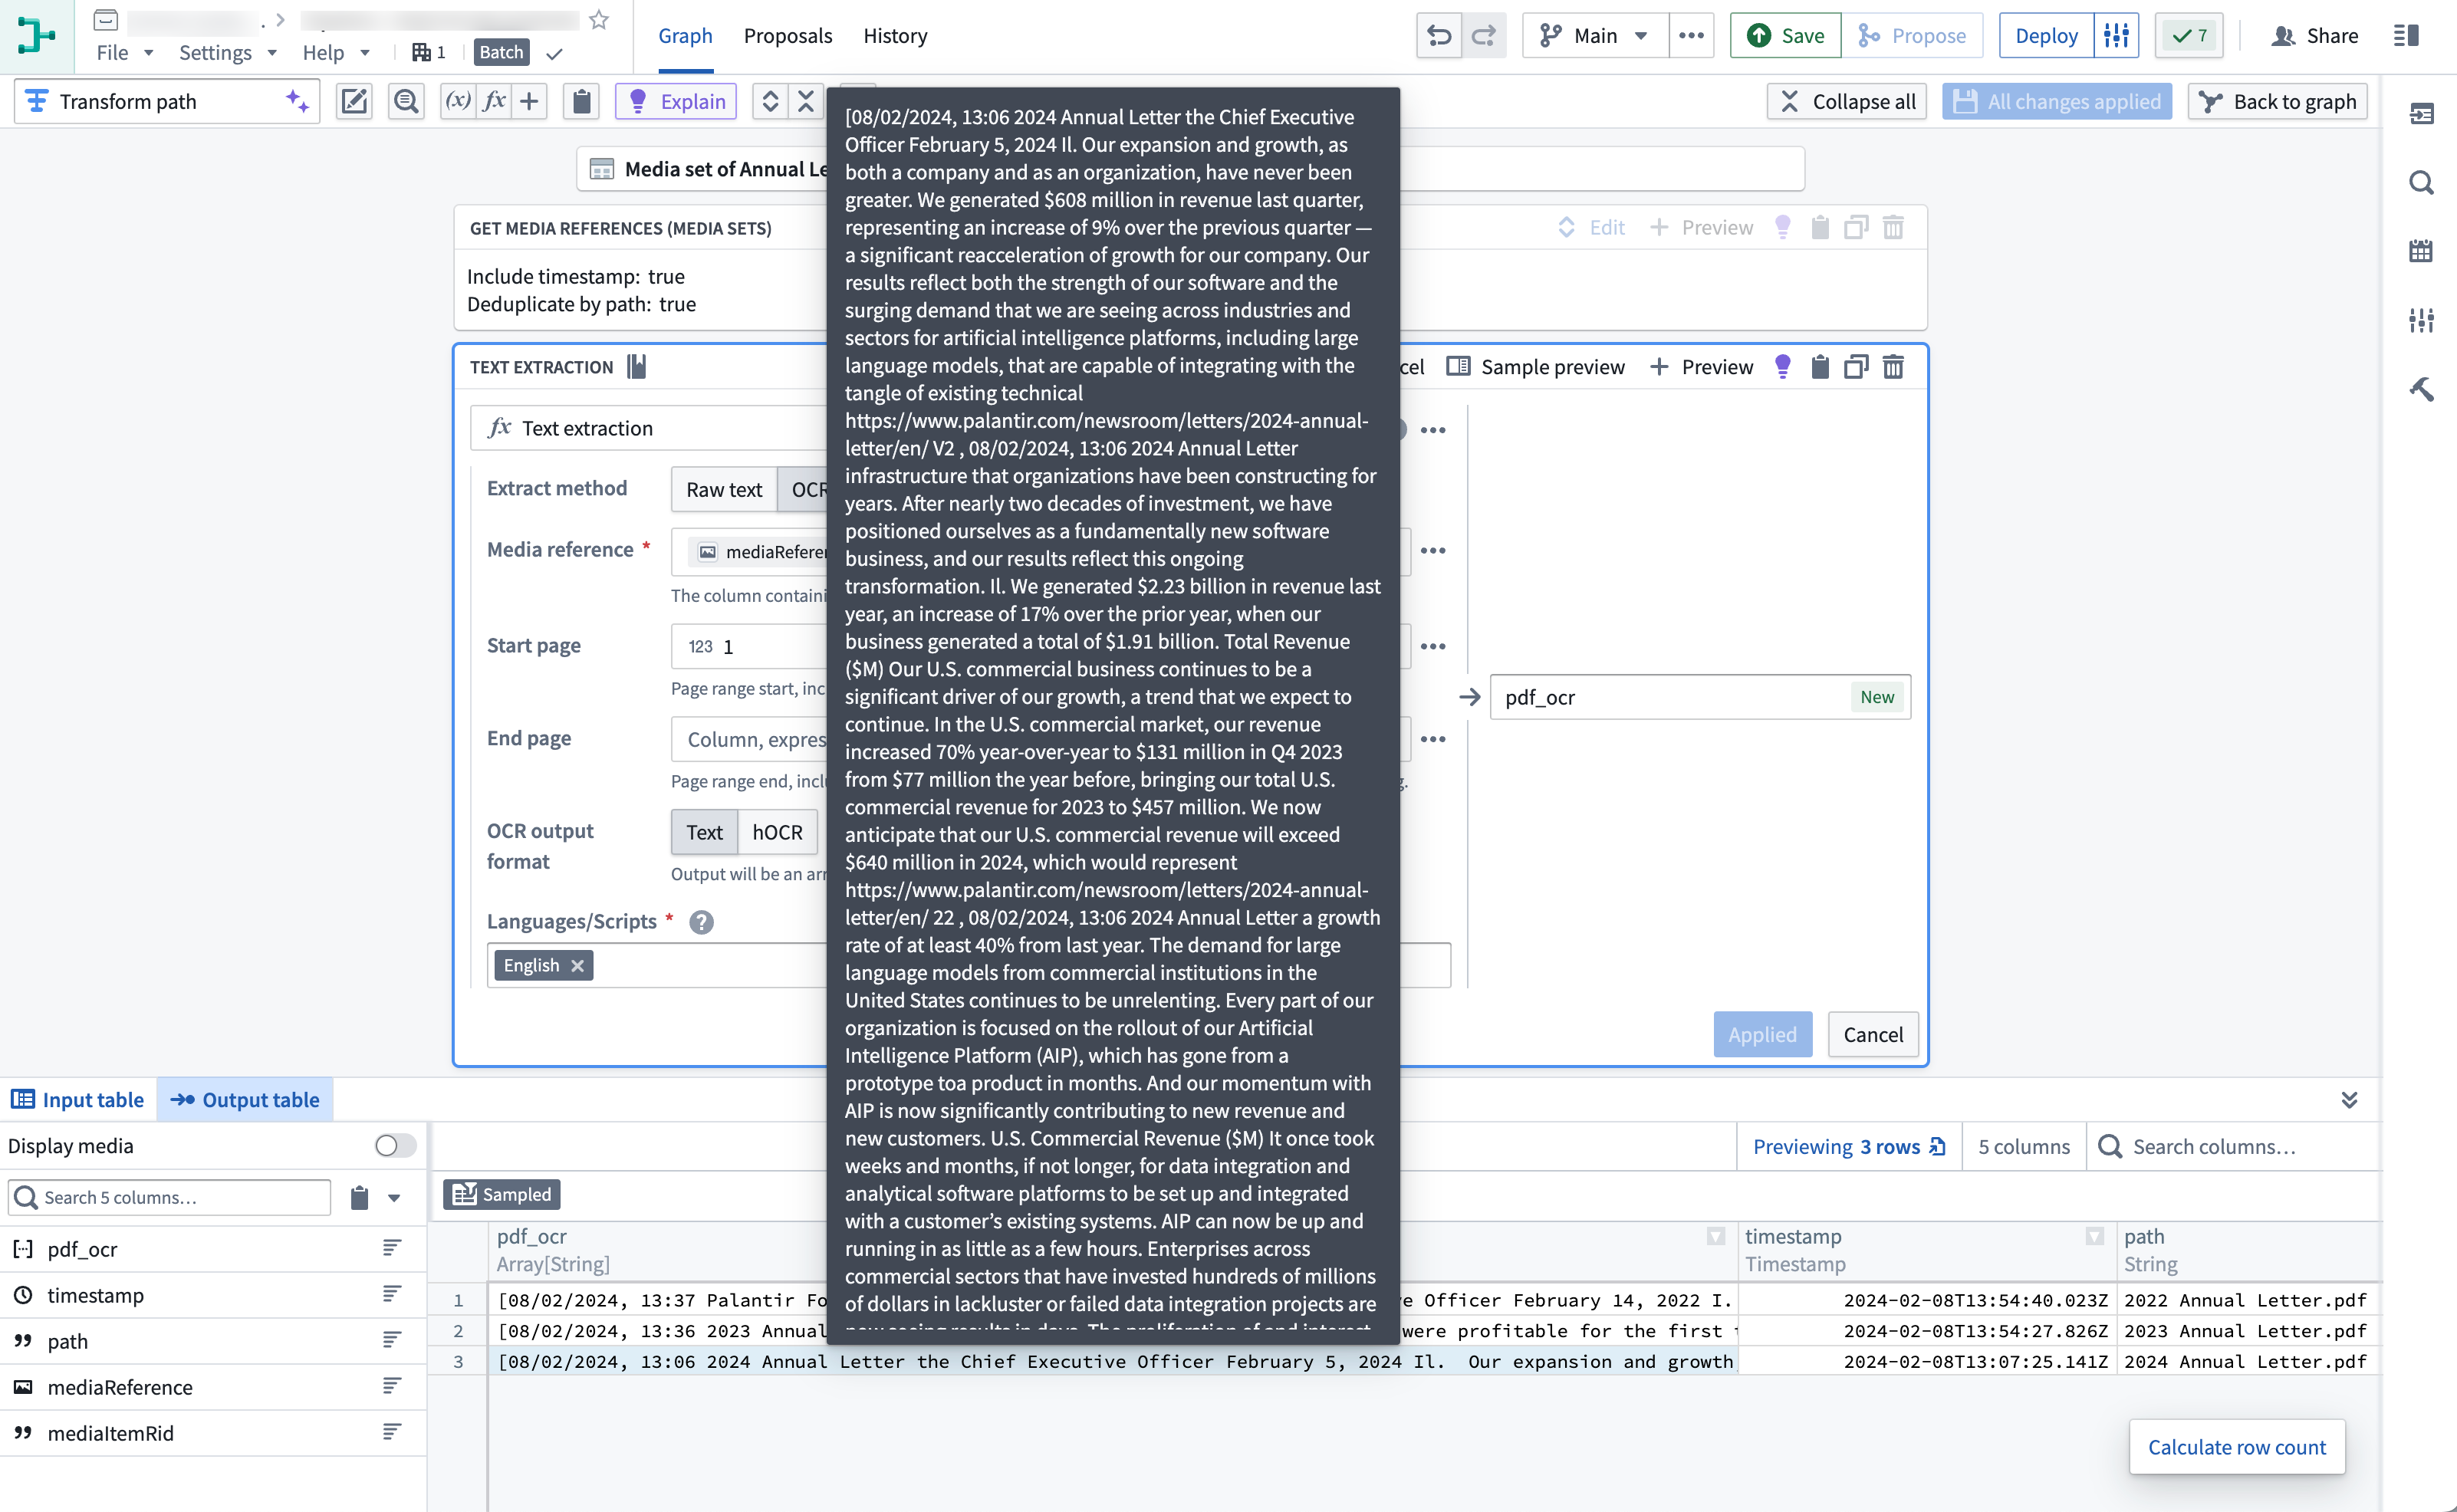
Select the extract method according to your needs and fill out the rest of the parameters.
Raw text: Computer-generated PDFsOCR: PhotocopiesLayout aware: Text and bounding boxes
-
Choose Apply to add the transform to your pipeline.
-
Your output should look like this when you hover over the extracted text:
You can now run available string transformations on the extracted text column.
-
Select Close at the top right to return to your pipeline graph.
(Optional) Semantic search workflow
If desired, you can continue with a semantic search workflow with your extracted text.
Part 4: Add an output
Now that we have finished extracting text from our PDFs and potentially running extra string transformations, we can add an output. For this tutorial, we will add an object output.
-
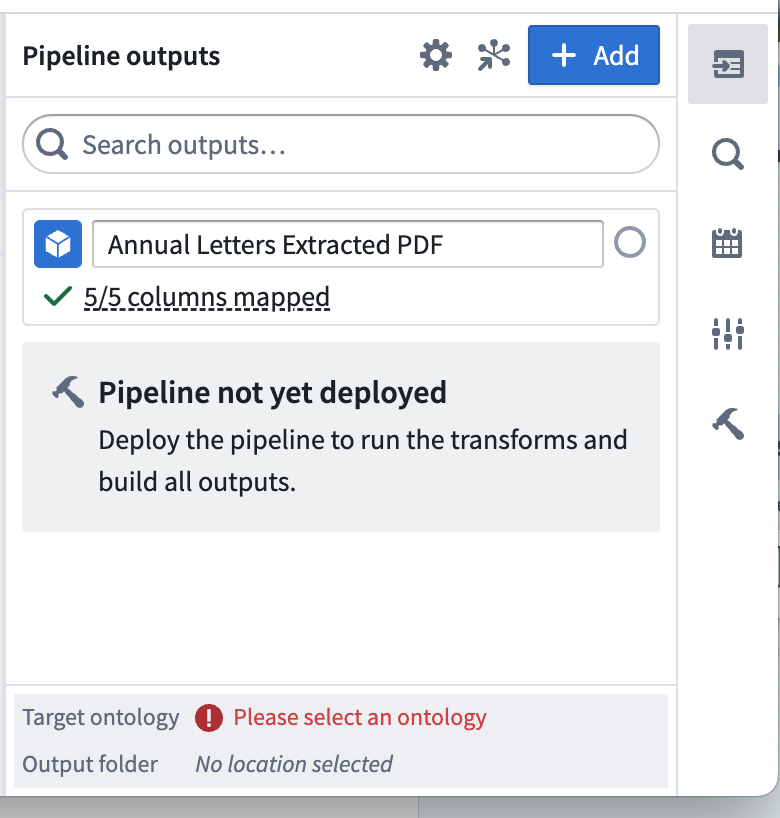
In the
Transformsnode where you have completed your transformations, select Add output.
-
Select New object type.

-
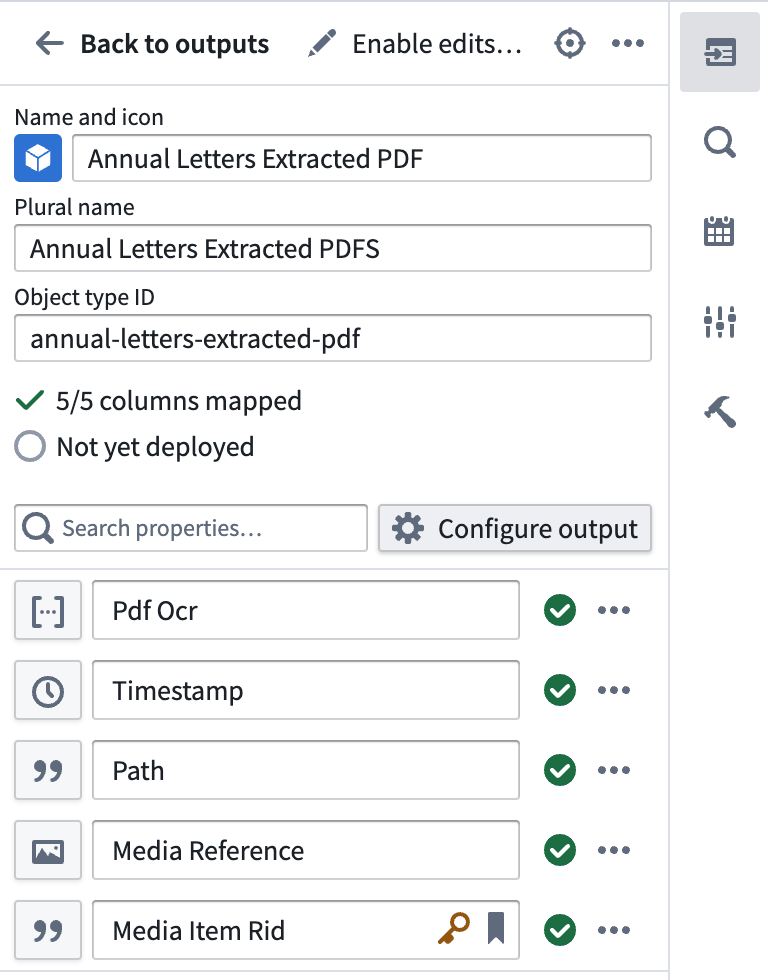
Name your object type and set the Ontology by choosing Please select an ontology.
-
Select Edit and edit any column mapping. Ensure that you choose a valid column for the primary key.
Part 5: Build the pipeline
-
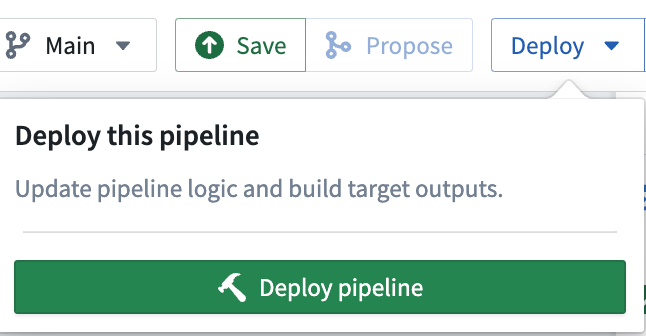
To build your pipeline, make sure to select Save, then Deploy > Deploy pipeline.
-
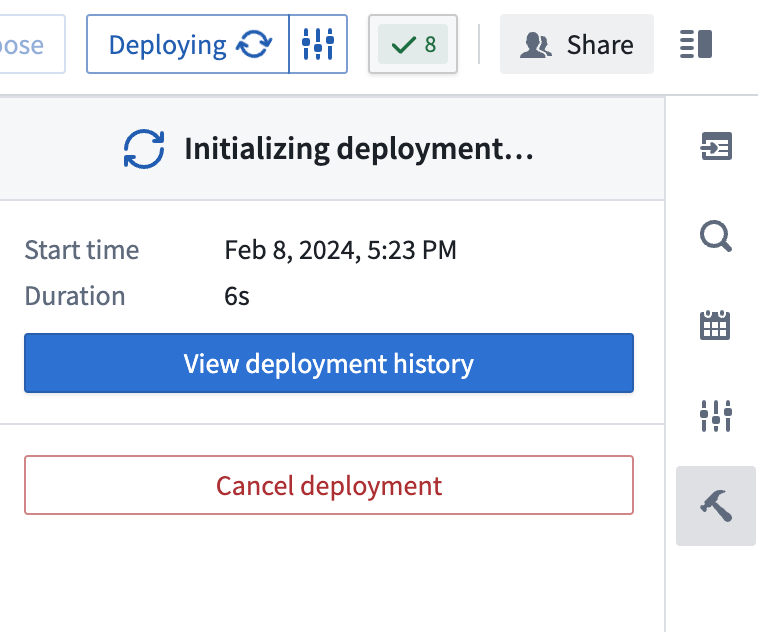
You should see
Intializing deploymentunder theDeploy Pipelinesidebar option.
-
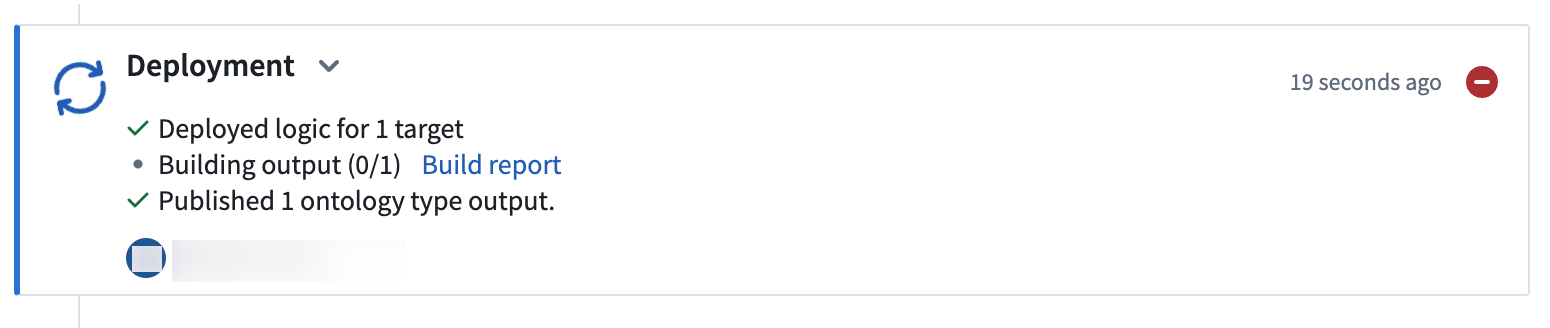
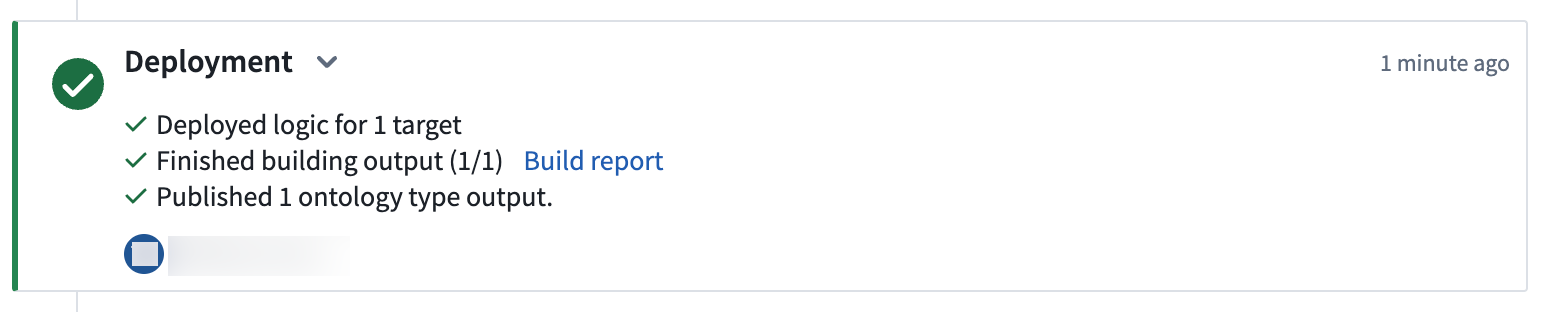
Select View deployment history to track the progress of your deployment. You should be led to the
Historytab in your pipeline where you can view the statuses and history of your deployments:
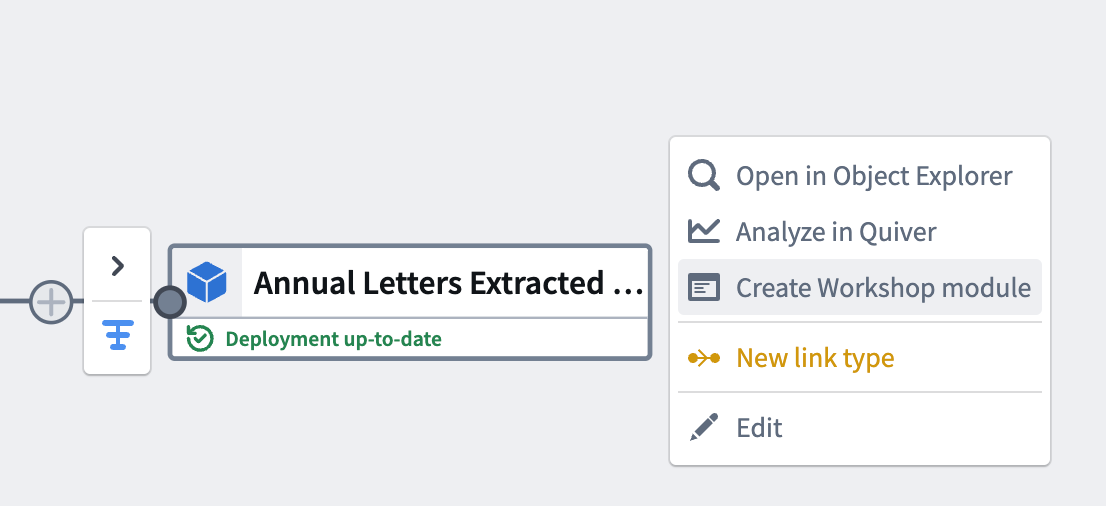
(Optional) Part 6: North of the Ontology
Once deployment has completed and your object is initialized, you should be able to directly action on your object output. Select Create Workshop module to generate a Workshop module with your pipeline output.
With this last step, we have generated our pipeline output and generated a Workshop module.