- Capabilities
- Getting started
- Architecture center
- Platform updates
Set up a direct connection
This documentation is outdated and retained for historical reference only. For updated guidance on connection set up, refer to our documentation on setting up a source.
Direct connections depend on Foundry's container infrastructure which is only available in Foundry's managed SaaS platform. As a result, cloud-based direct connections may not be available in your environment.
If you are trying to connect to a data source which is accessible over the Internet, such as a REST API, an SFTP server, or an Azure storage account, you can configure a direct connection to avoid needing to set up an agent. Using a direct connection has a number of advantages:
- No need to provision, configure, and manage an agent and its host
- Avoids routing Internet-to-Foundry through your network
- Offers excellent uptime and performance as cloud-based Syncs do not depend on an agent software package or its host
If you are interested in configuring a cloud-based direct connection, follow these steps:
- Configure a network egress policy for your enrollment.
- Provision credentials to connect to your data source.
- Create the Source in Data Connection.
Configure a network policy
You must have the Information security officer role on your Enrollment to configure network egress. If you do not have permissions to configure egress, contact your Palantir representative for help.
The Information security officer role can be found in the Enrollment permissions section of the Control Panel. An administrator needs to have the Enrollment administrator role in order to see this section.
To configure a network policy, navigate to Control Panel using the Other workspaces link in the Workspace sidebar. In Control Panel, select Network egress in the sidebar. If you can't see this option, contact your Palantir representative to go through the following steps.
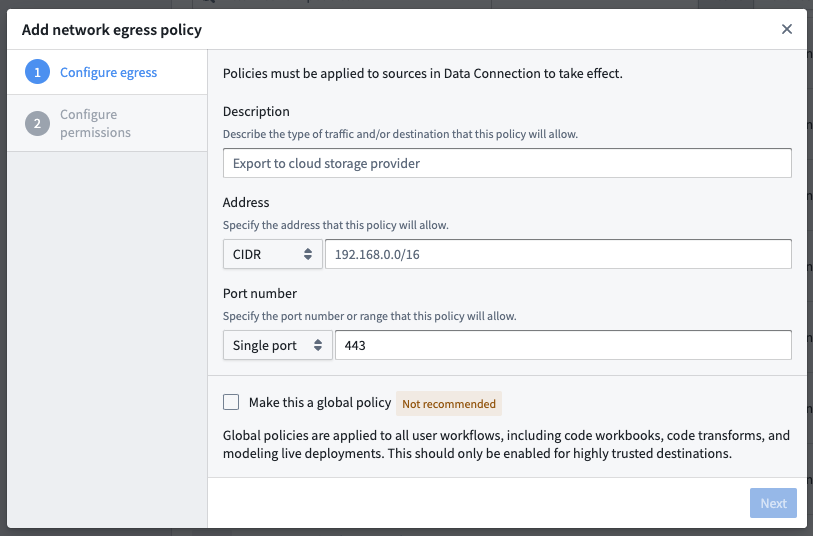
Add a network policy by selecting Add network policy. Add a description and connection details, similar to the details you provided when contacting Palantir:
- If you are connecting via HTTP(S), add the DNS hostname of your data source
- If you need to use a non-HTTP protocol, add a CIDR address and port
Keep the default Optional policy type selection, and select Add network policy.
Provision credentials
In the majority of cases, Foundry will require authorized credentials (such as a username and password) to access Sources. It is best practice to use a service account specifically for Foundry.
Provision a service account for the Source following any internal guidelines and processes that your organization has for establishing service accounts. Note the credentials before proceeding to the next step.
Create the Source in Data Connection
Once the above steps are done, you can proceed with creating the Source in Data Connection:
- After logging in, navigate to Data Connection using the sidebar.
- Select the Sources tab.
- Select New source in the top-right.
- Select the source type corresponding to your data source.
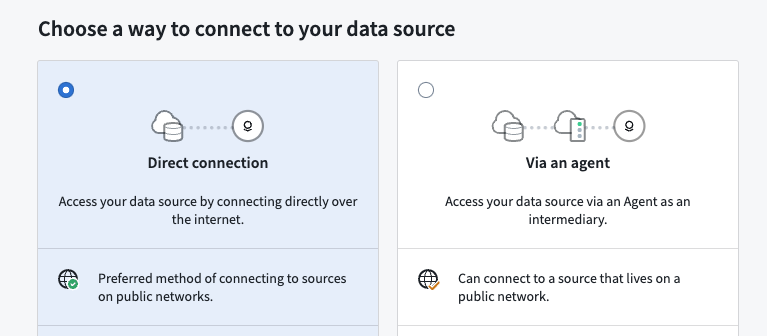
- Select Direct connection, then select Continue in the bottom right.
Save the Source in a Project
Next, name your Source and choose a Project to place it in. We generally recommend creating a new Project for each Source, as this provides the cleanest way to permission datasets derived from this Source. Consult the Source permission best practices for more information. Full guidance for how to structure data pipelines end-to-end in Foundry is available in the recommended Project structure documentation.
Select Create source and continue in the bottom right.
Choose your network policy
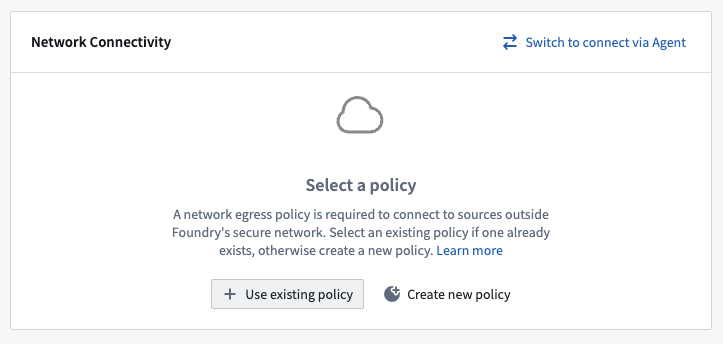
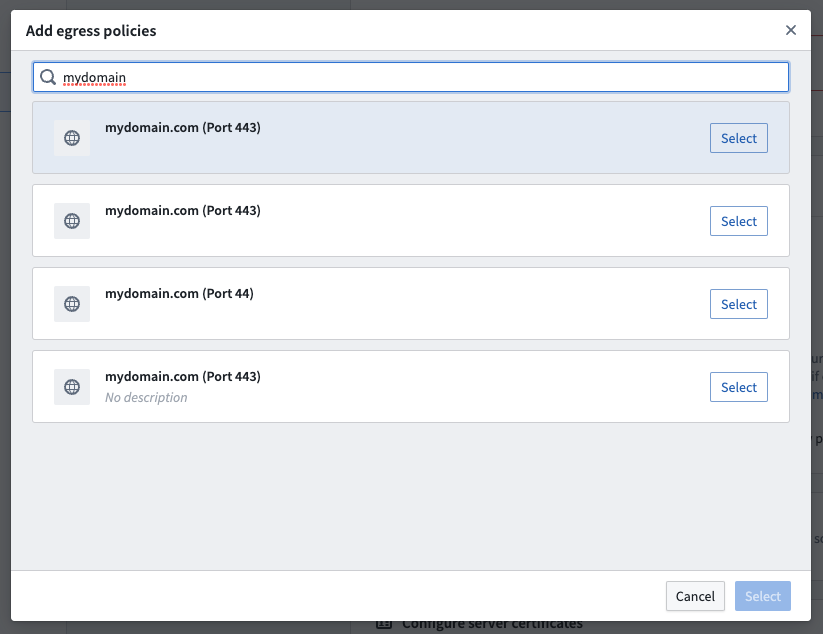
On the next page, select the network policy you configured earlier by clicking Use existing policy and searching for the policy name.
Configure Source and add drivers
Add details about how to connect to your source. These details will depend on the source type you are using and typically consist of basic credentials such as connection URLs, cloud provider regions, and so on.
JDBC sources may require adding and selecting drivers required to connect to your source. Although many drivers ship out-of-the-box with Foundry, you may need to upload and select a driver to proceed.
Add credentials
Add the credentials you provisioned previously to allow the direct connection to connect to your data.
Save and continue
Select Save in the bottom right to complete setting up your direct connection. Once your Source is fully set up, you can proceed to set up a Sync to bring data into Foundry.