Create a Machinery process
This feature is in beta. Machinery is not available on AIP Now enrollments.
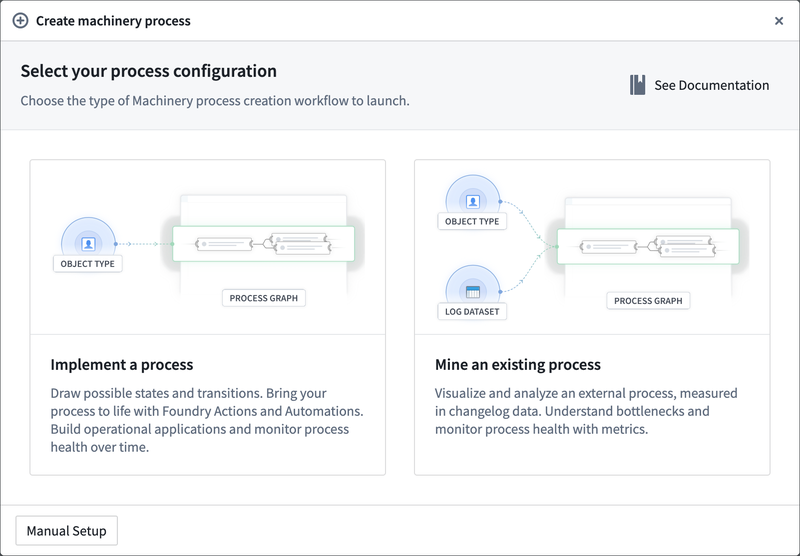
You can create a new process by choosing New Process in Machinery, or from the Dependents section of your object type in Ontology Manager. You will be prompted to choose one of the following setup options:
-
Implement a process: Choose this option if all the components of your process are in Foundry, meaning there is no external changelog. The components of a process are the
Processobject type, Actions, and Automations. You may already have some of these, otherwise you can generate them as part of the setup workflow. -
Mine an existing process: Choose this option if you want to understand and monitor an external process. The main required input is a changelog dataset tracking changes of process objects over time. As Machinery is Ontology-aware, you can either provide the Process and a Process Log object types or allow Machinery to generate them for you.
-
Manual setup: If you already maintain an object type that tracks changes over time, and that fulfills Machinery's specification, you can choose the manual setup. Selecting this option skips the configuration dialog, so you can directly start drawing and configure your Ontology at any time later.
Machinery currently supports a read-only view for external processes. If you also want to define Actions on the externally-minded process in Foundry, the external and internal changes need to be reconciled manually via manual setup.
Requirements
When you configure object types in Machinery, you can map your properties (with their names) to the required fields.
Process object type
The object type that represents entities going through the process.
- Process ID (string) [required]: The primary key of the process entity.
- State (string) [required]: The current state of the process entity.
Changelog dataset
This configuration is only needed for the Mine an existing process setup option. It represents your measurement of the external process. Each row in the dataset denotes a change to a process object at a given time.
- processId (string) [required]: A unique identifier of the process entity.
- state (string) [required]: The new state the process has entered.
- timestamp (timestamp) [required]: The timestamp at which the transition occurred.
- isDeleted (boolean) [optional]: Property that flags an entity as deleted. If isDeleted of the latest log is
True, that object will not appear in the Ontology.
Process Log object type
A Log represents a transition from old state to new state at timestamp T. The Process Log object type is typically created and maintained by Machinery. If you choose the manual setup option, you must provide the following properties. If optional properties are missing, some of Machinery's functionality will not be available.
- Log ID (string) [required]: The primary key of the Log object.
- Process ID (string) [required]: The primary key of the process object that is being tracked. Use when setting up an Ontology link between the Process object and the Log object.
- Old State (string) [required]: The start state of the transition.
- New State (string) [required]: The end state of the transition.
- Timestamp (timestamp) [required]: Timestamp of entering the end state.
- isLatest (boolean) [optional]:
Trueif this log is the most recent for the Process object, otherwiseFalse. - Duration (long) [optional]: Duration in milliseconds since entering the old state.
- Path (string) [optional]: A list of all states encountered so far, including the current state. Must be a serialized JSON string.
Create a process
Machinery is where you outline your process - detailing what can or should occur. You should define the following components of a process which are represented as nodes and edges on the Machinery graph:
- Allowed states
- Possible state transitions
- Actions that are responsible for state transitions
- Actions that can occur automatically based on reaching a declared input state
To start, create new states and link them via a transition, where you can add Actions if desired.
Use Add new state to create placeholder states, represented visually by nodes. Then link the relevant nodes together, by selecting the handles to the left or right of a node and holding your cursor until you select the handle of another node. You can label your states as you go along.

At each transition, you can optionally add an Action between the states you connect by selecting the Action icon located in the transition link. Optionally, name it in the summary panel on the right and give a description.

At any time, you can reorganize the appearance of your graph by dragging nodes to adjust their positions. You may also choose the auto-layout feature from the control bar.
Summary panel
At the top right of the graph, a summary panel is accessible and will show context-related details when you select elements on the graph.
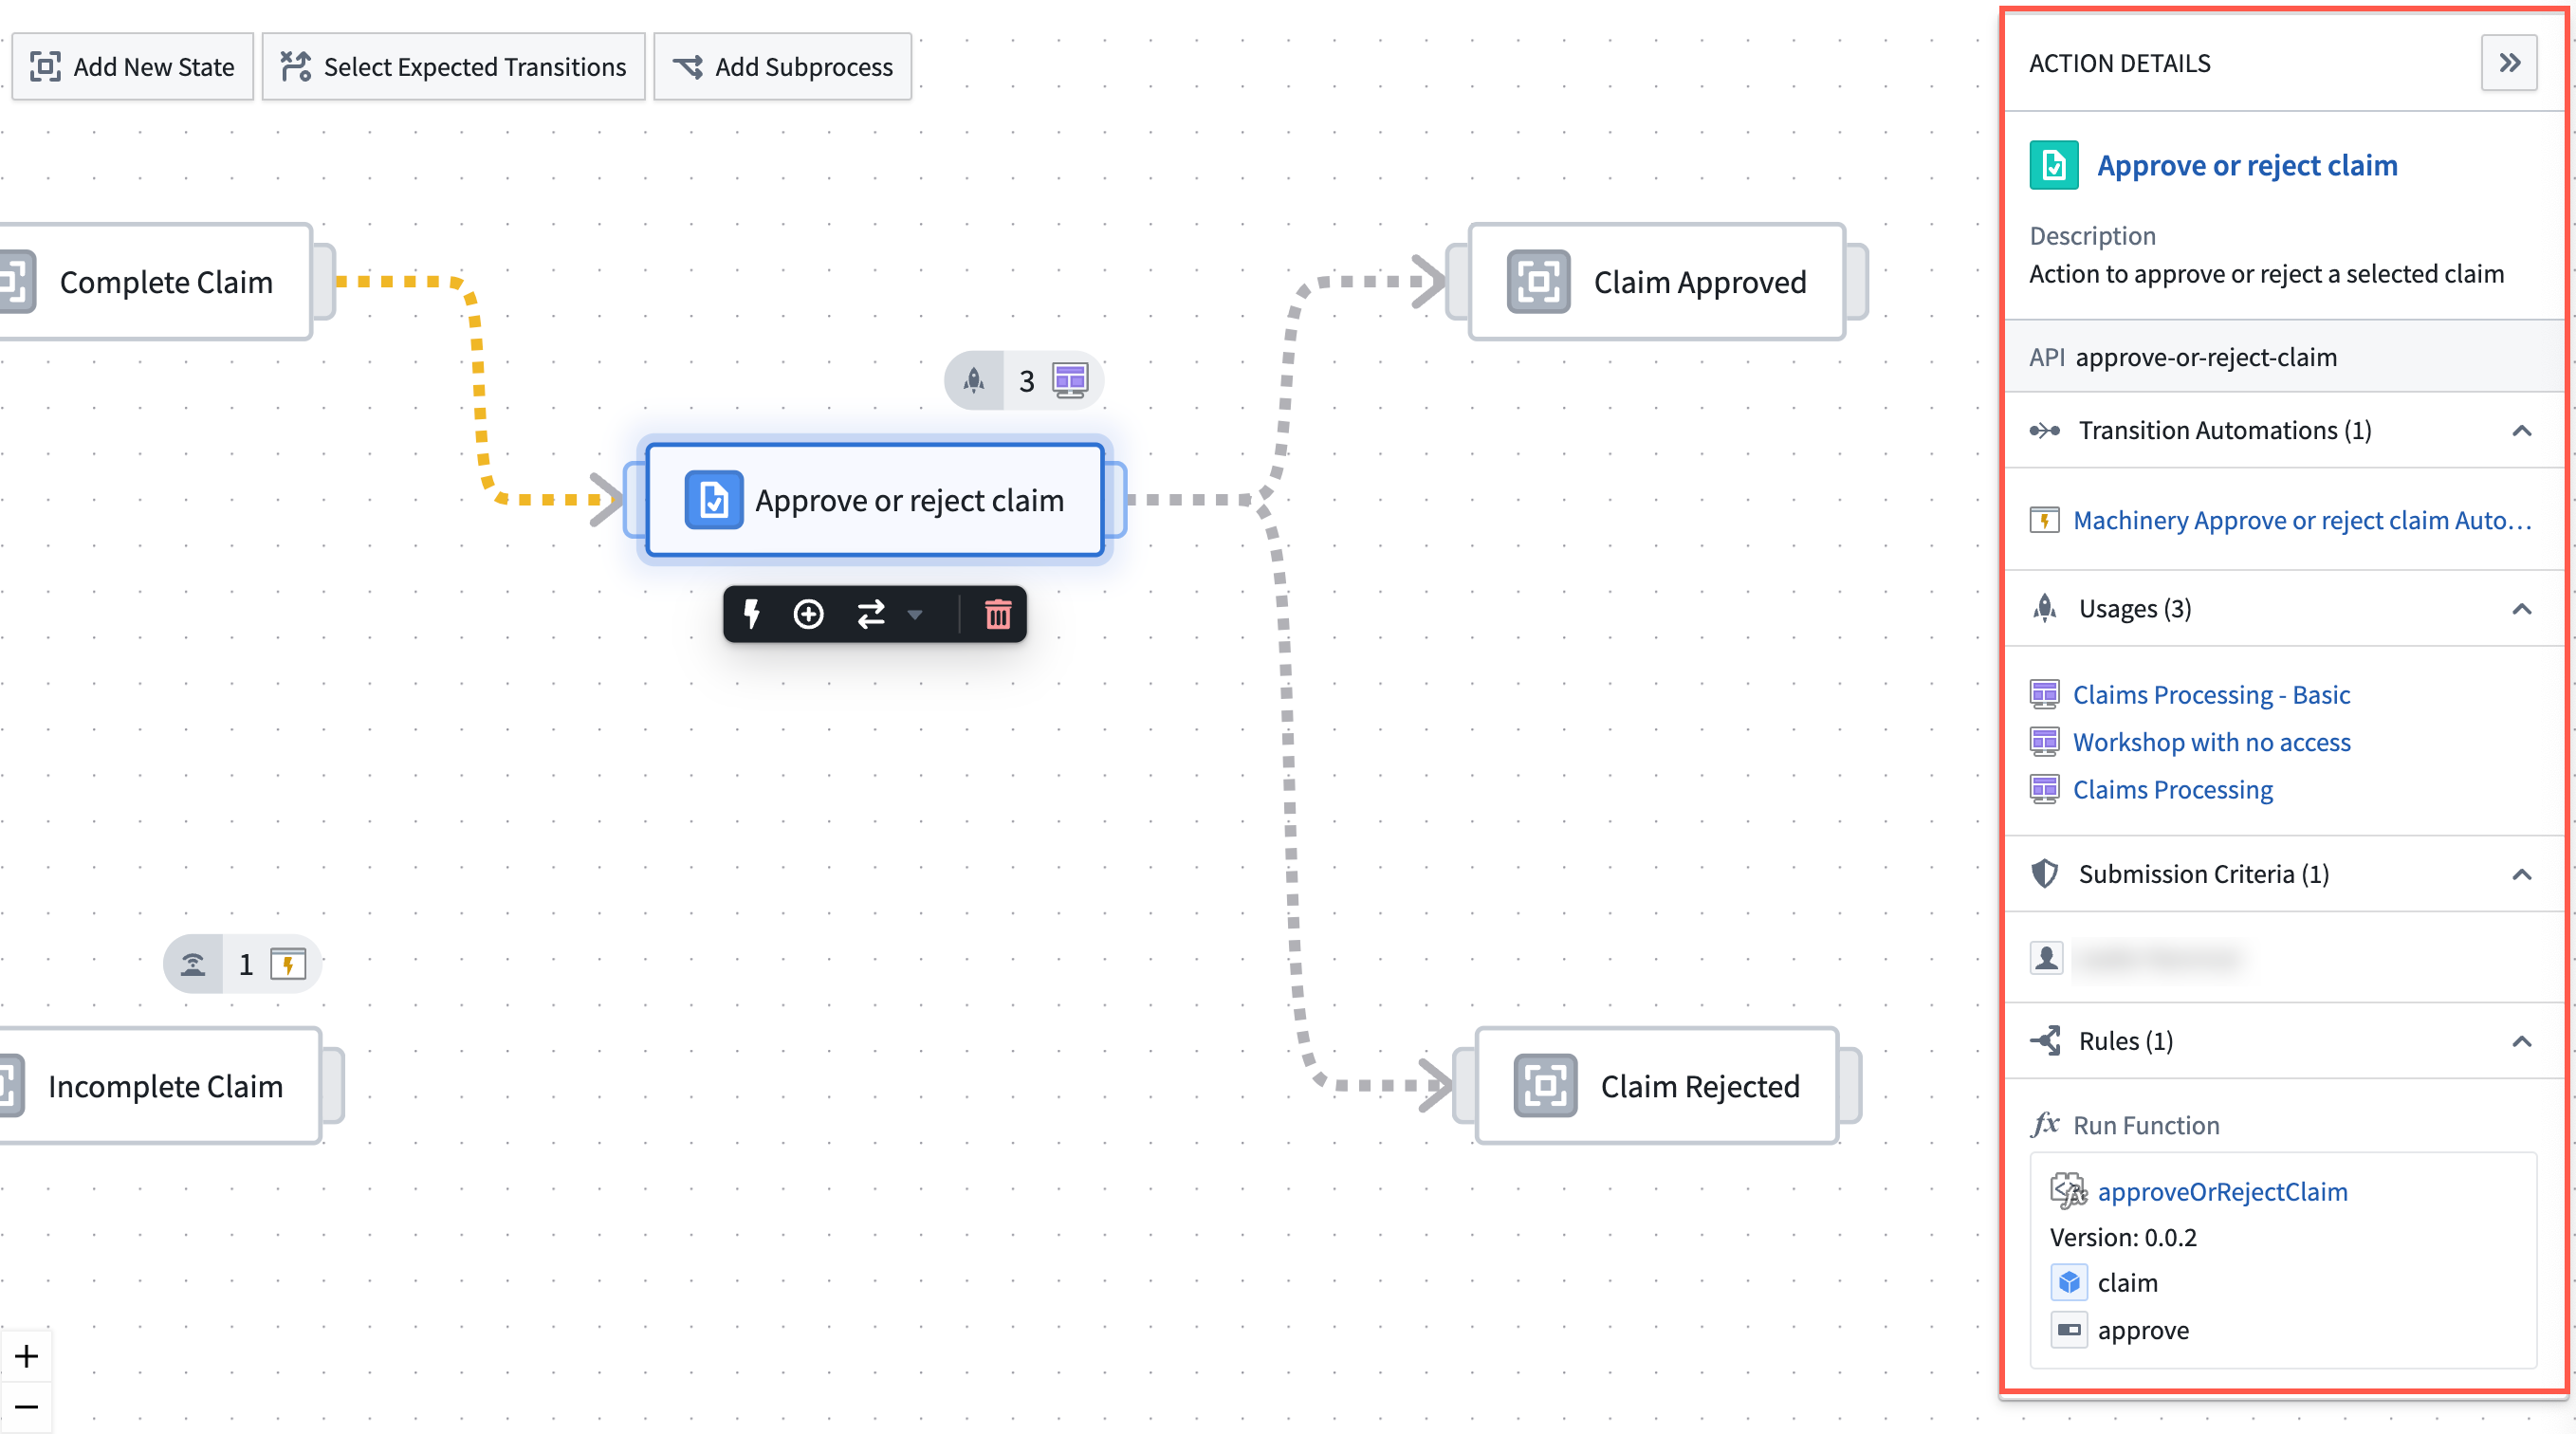
Placeholder details: When an unassigned Action is selected. Once assigned, you will see Action details. These details include:
- Description
- ID
- Side effects (if any)
Transition details: When the transition line between two nodes is selected.
Action edge detail: When the transition line between an Action node (blue) and state node (gray) is selected.
State details: When a state node is selected. These details include:
- Description
- Name
- ID
Create or use existing Actions (optional)
Once you have organized transitions between states, you can designate Actions to go along with state transitions. This Function can be further configured in the AIP Logic application.
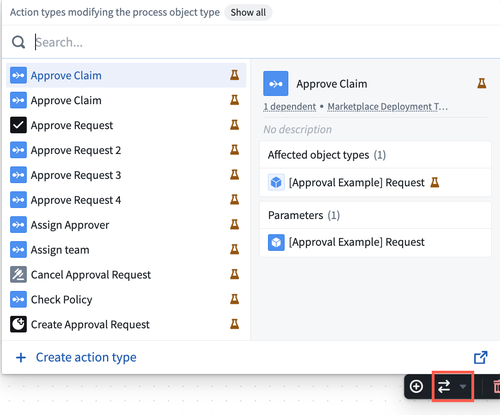
To use an existing Action:
Select the specific transition and use the Select existing Action option that appears below. Then, select an existing Action that you would like to use as the transition between two states.
To create a new Action:
Use the Action icon ![]() to add an Unlabeled Action node.
to add an Unlabeled Action node.
Hover over the new Unlabeled Action node to find the + Create New Action option and select it.
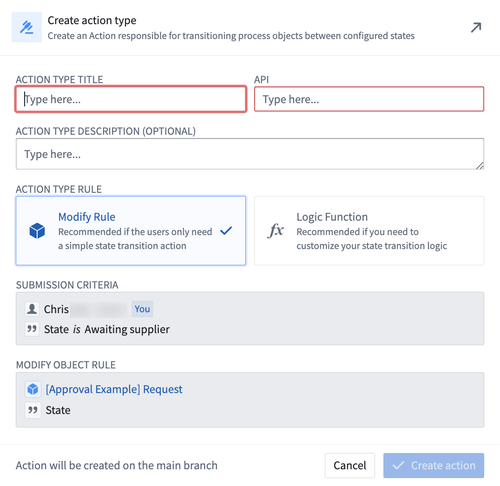
From the Create Action type prompt, you can choose for the Action to Modify Object or Logic Function.
If you use Modify Object (for an Action that implements simple modification rules), set up and review the following details:
- Action type title
- API name
- Action type description
- Select Modify Object
- Submission criteria
- Modify Object Rule
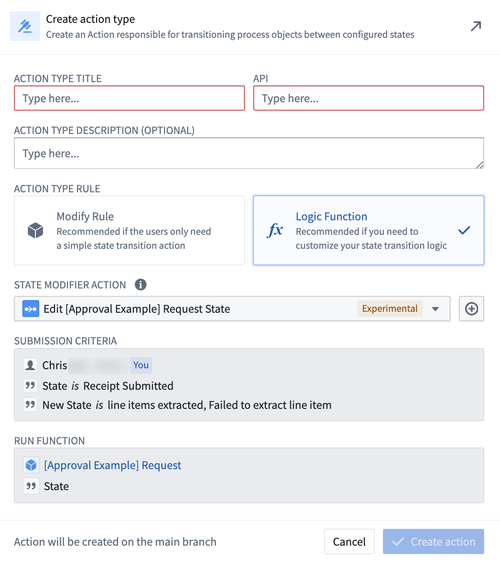
To create an Action backed by a Logic Function, set up and review the following details:
- Action type title
- API name
- Action type description
- Select Logic Function
- State modifier action
- Submission criteria
Automate Action
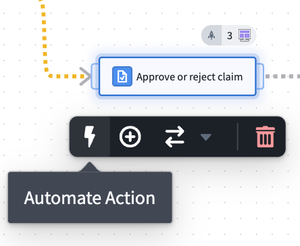
You can Automate existing Actions with the Automate (depicted as "lightning bolt") icon once you hover over the Action node.
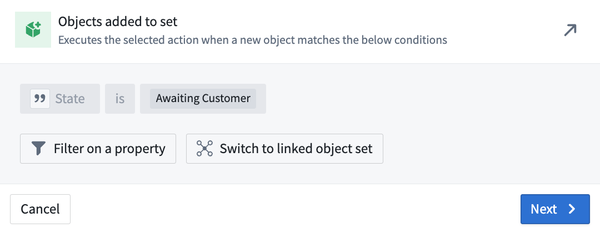
Choose Filter on a property if you would like to set conditions on when an Action will be automatically run. For example, when a new insurance claim enters the Claim received state and amount is > $50, you can run a specific Action. Filters essentially act as a custom rule to automate the transition and run the Action.
You can also use Switch to linked Object to use rules based on object set properties. For example, running a service ticket automatically through an alternative, expedited process when it is linked a high value priority customer.
Once configured, select Next to create an Automate resource where you can configure your Automate resource filename, and choose between user scoped and Project scoped (Experimental) execution modes to finalize.
Mining
Alternatively, once the Log object type has successfully indexed and has data, you can obtain the set of states and transitions by mining historical data. This is the most common workflow for processes backed by a changelog dataset. Choose Mine from the Actions menu.
Value Types
The state IDs in Machinery are equivalent to the state values in your data. To avoid typing errors or diverge otherwise, you can back your state property by an enumeration Value Type. This will guarantee that the data in the Ontology can only assume a predefined set of values. Machinery will discover that setup and keep the process states in sync.
Expected transitions
When mining states and transitions from historical logs, data health issues can often lead to unexpected transitions. For instance, for a hospital-related process, you may notice a Patient going from in treatment into the admitted state, which is not a logical transition. By switching to the Expected Transitions mode, you can define the edges that you expect. This filter is used in the Machinery widgets to show only the relevant portion of the graph.