Save scenarios
Saving and loading scenarios enables the reuse of long-lived scenarios across sessions and allows users to share and collaborate on scenarios.
It is often useful to store workflow specific metadata alongside the stored scenario to make organizing and finding relevant stored scenarios easier.
To accomplish this, we leverage the Ontology to create objects that represent the stored scenarios.
Users can then customize the name, additional properties, and even relationships between the scenario object and other objects.
Object scenario capabilities
Before we can start saving scenarios, we will need to create an object that implements the scenario trait.
At minimum, this requires a property to hold the scenario ID and another for the scenario name.
We strongly encourage using the primary key and title properties of the object, respectively, for this purpose.
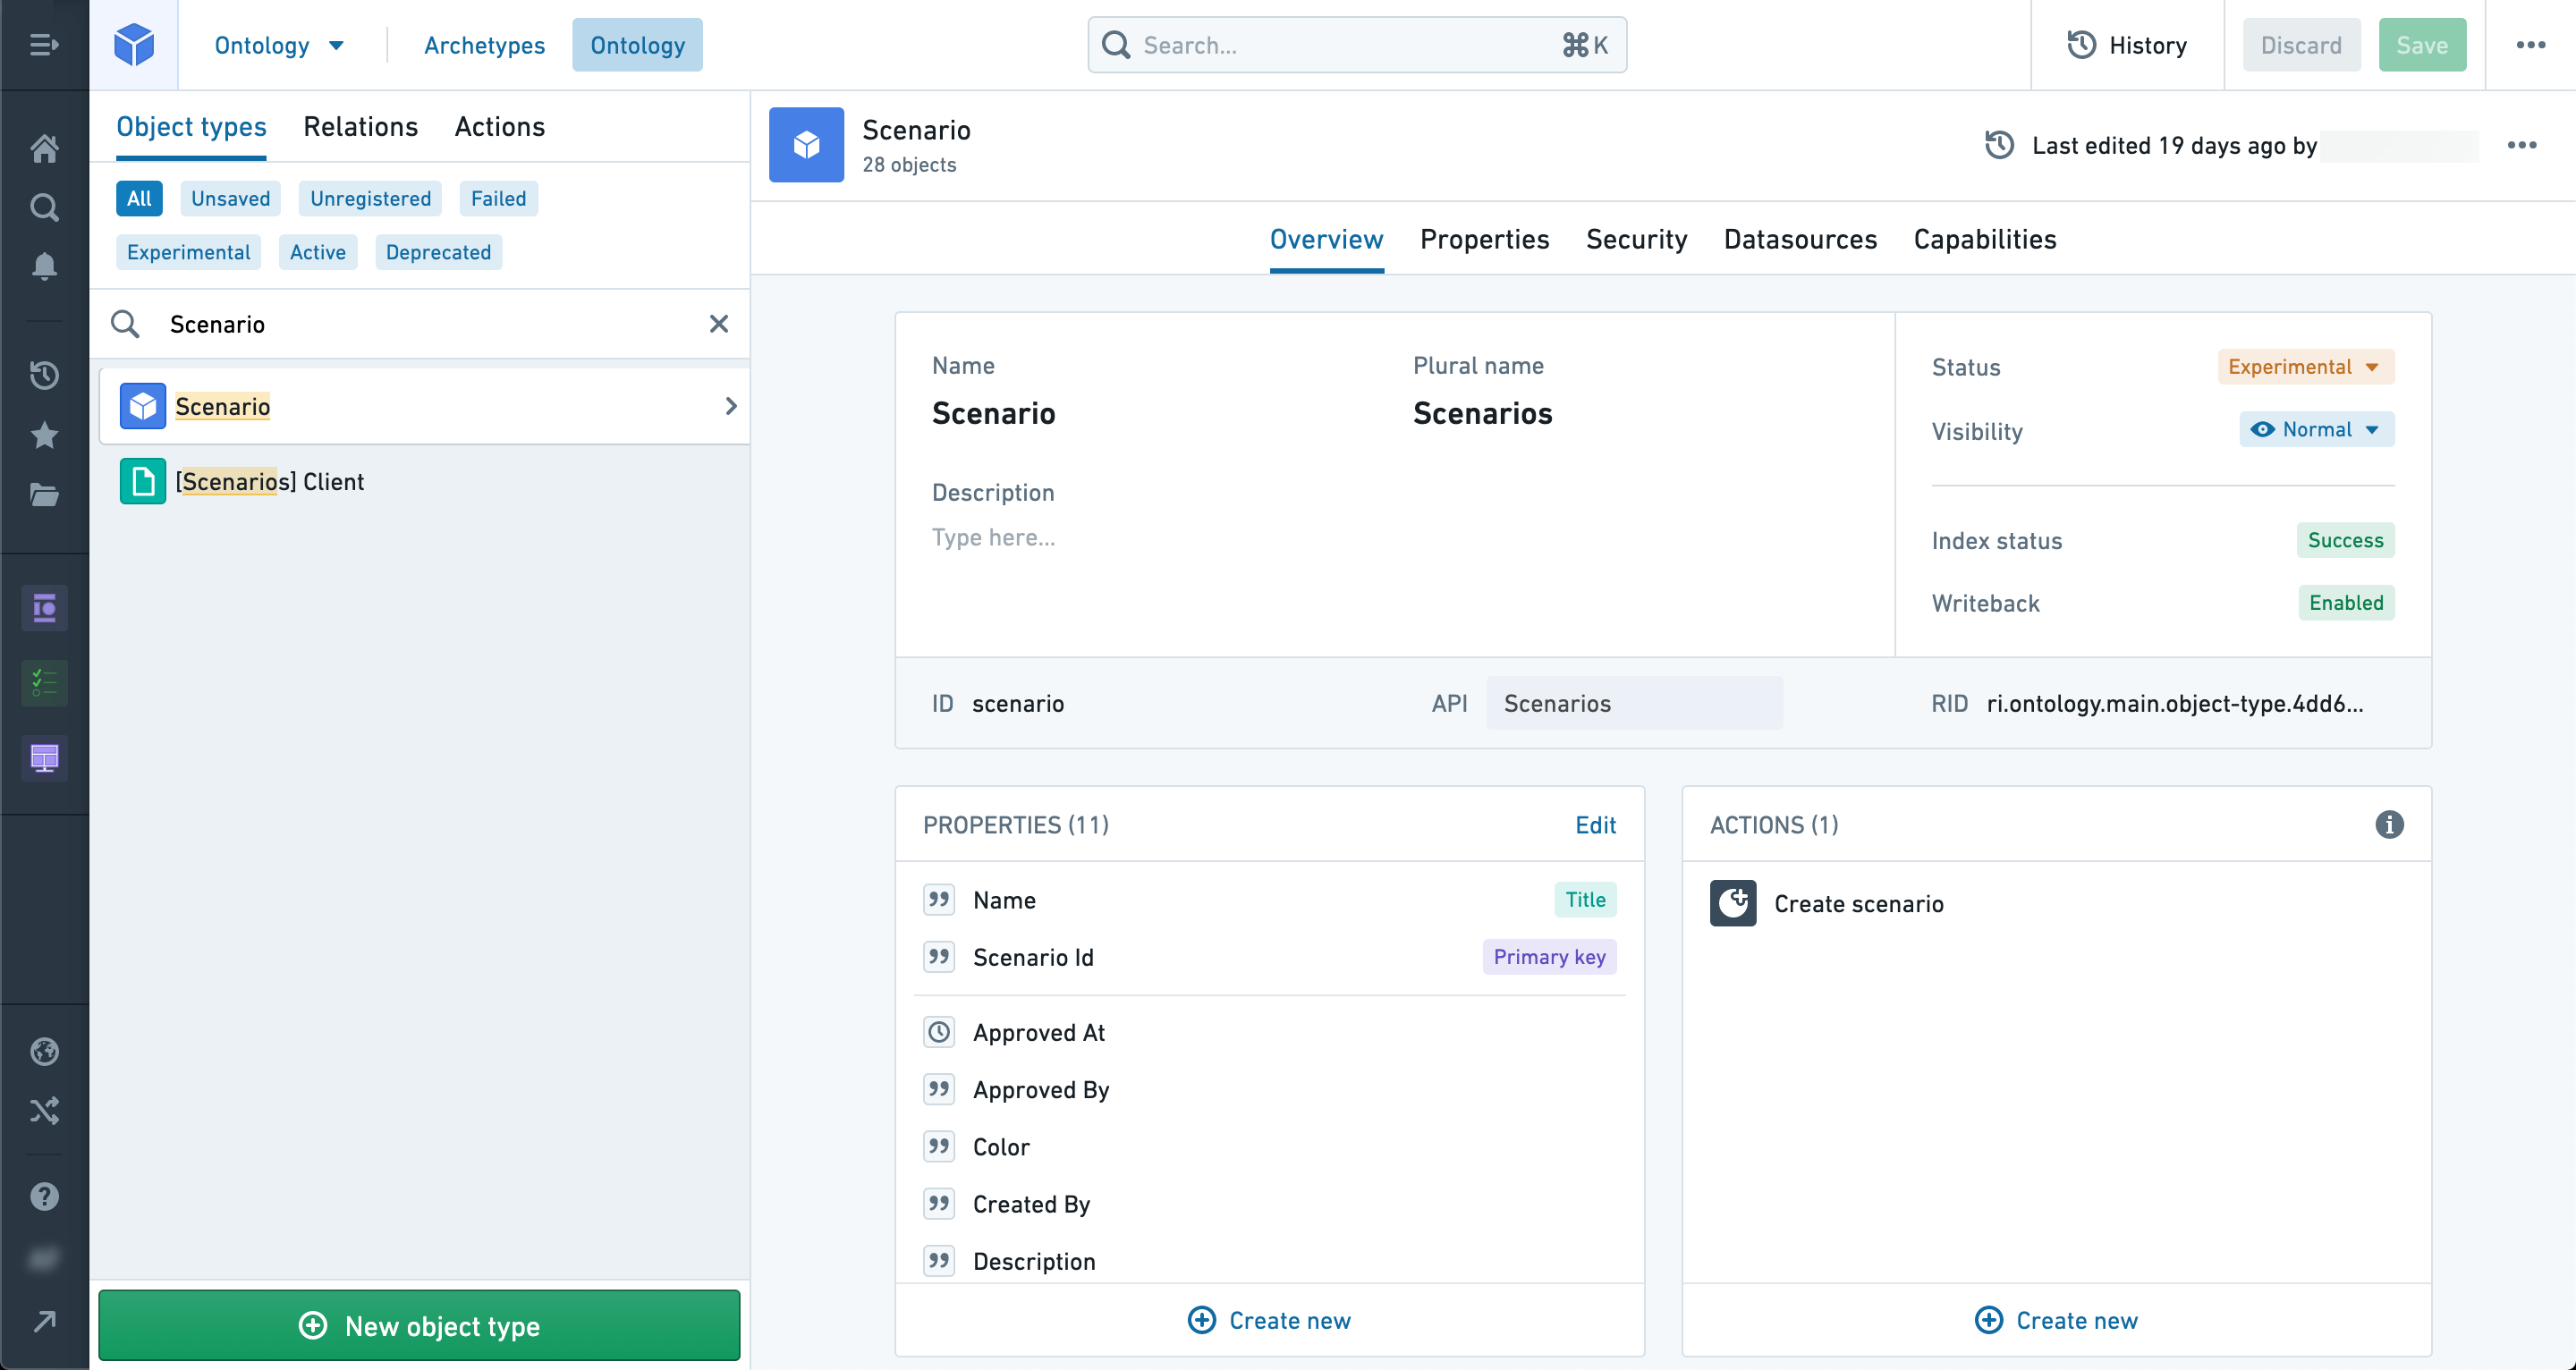
You can also add other properties to hold additional information about the scenario such as Created By or Description.
In the properties tab of your scenario object, select your ID property and add the type class scenarios:versioned-scenario-rid as shown below.
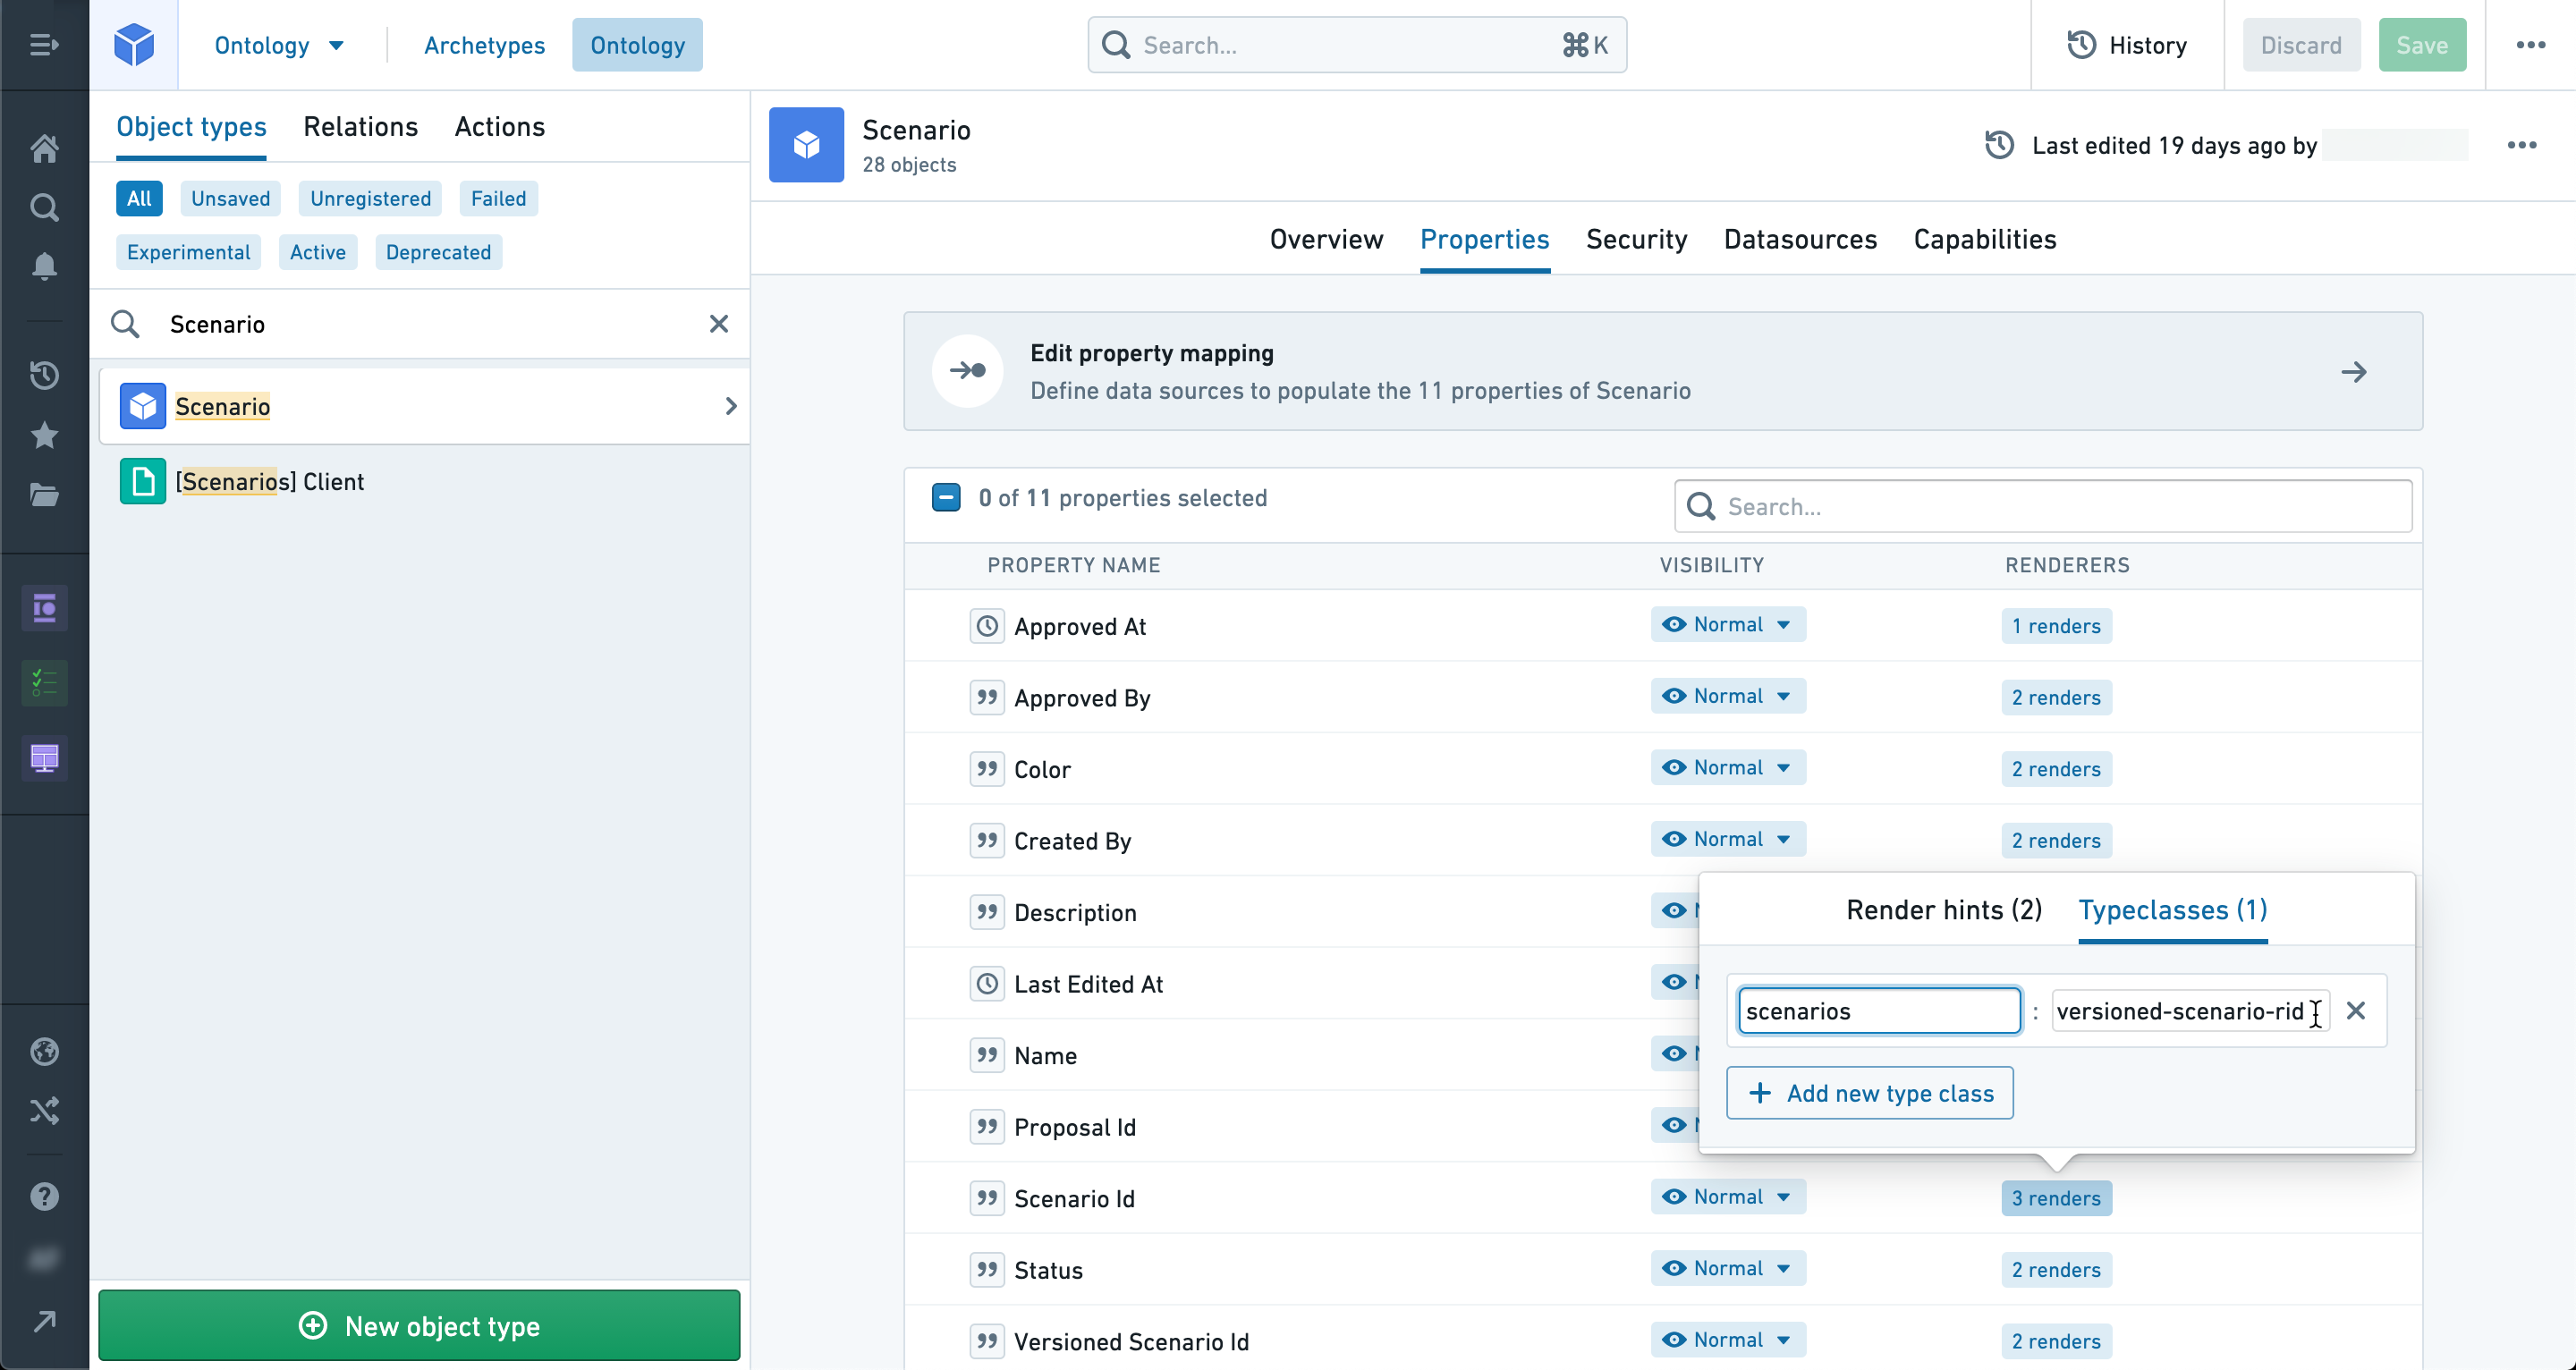
Then select your name or title property and add the type class scenarios:scenario-name.
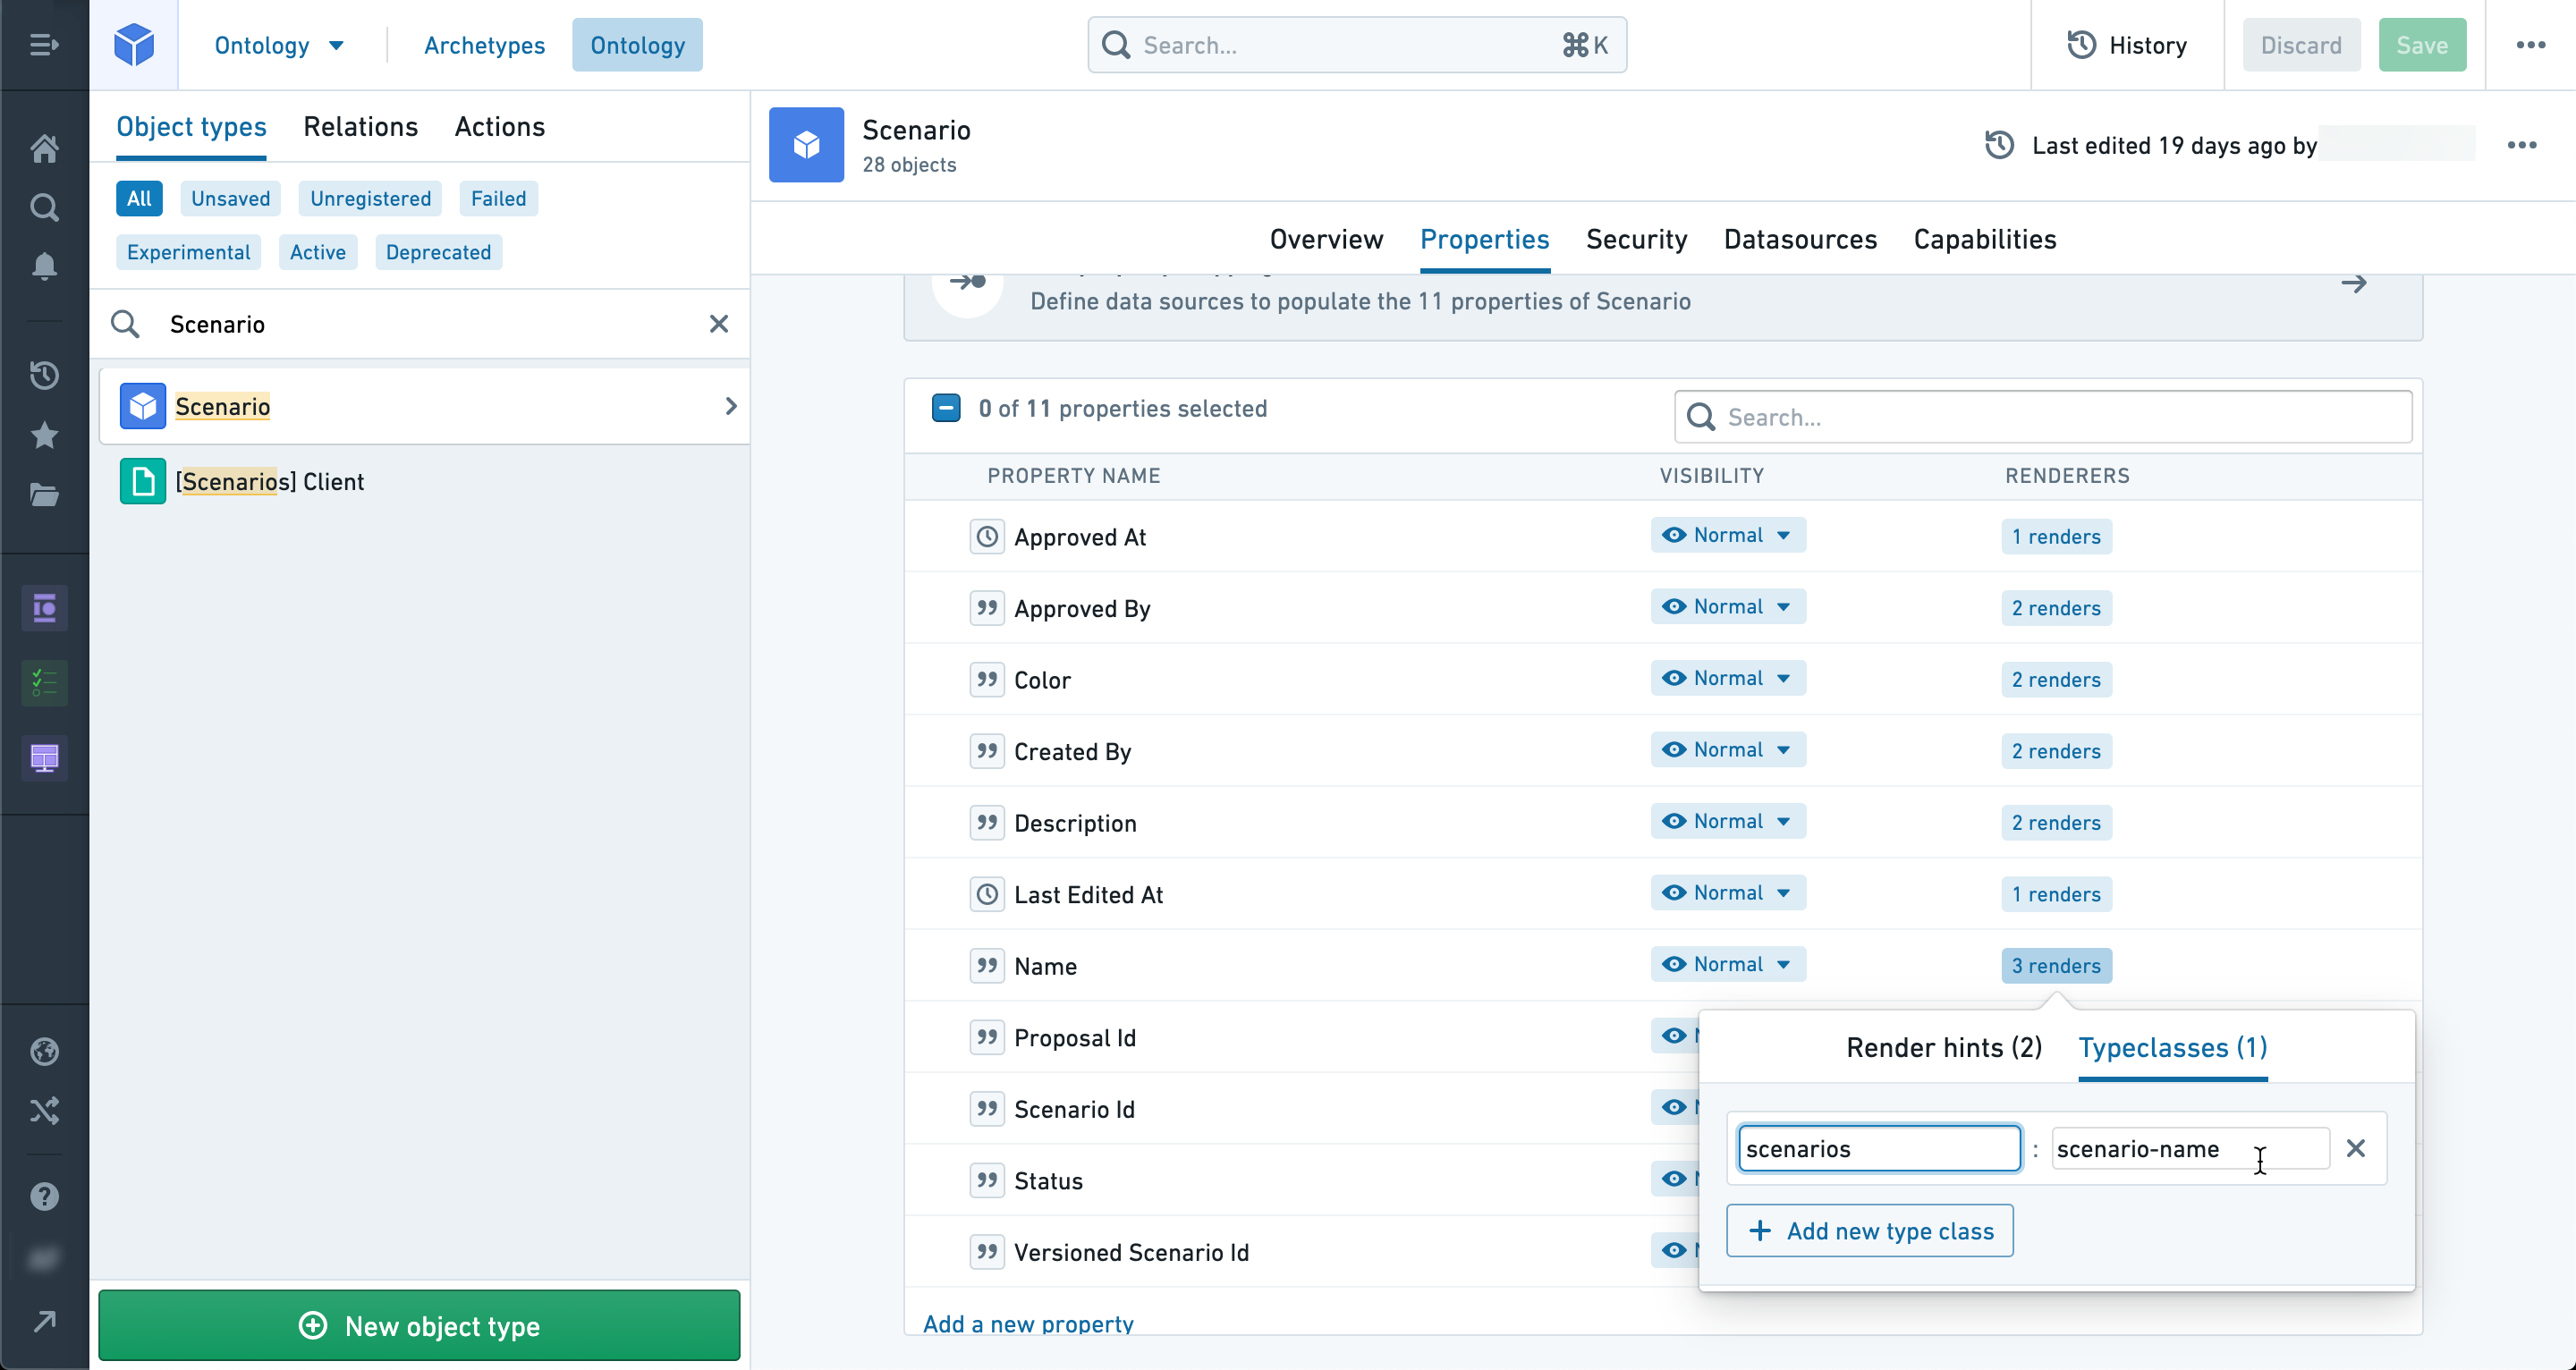
Your scenario object is now ready to store saved scenarios, but before you’ll be able to save scenarios to this object in Workshop, you will need to set up an Action that creates objects of this type.
Scenario Actions
In addition to a scenario object, we need to have Actions that create and update scenario objects to use in Workshop when saving scenarios.
Create scenario Action
We start by creating an Action that produces an object that implements the scenario trait.
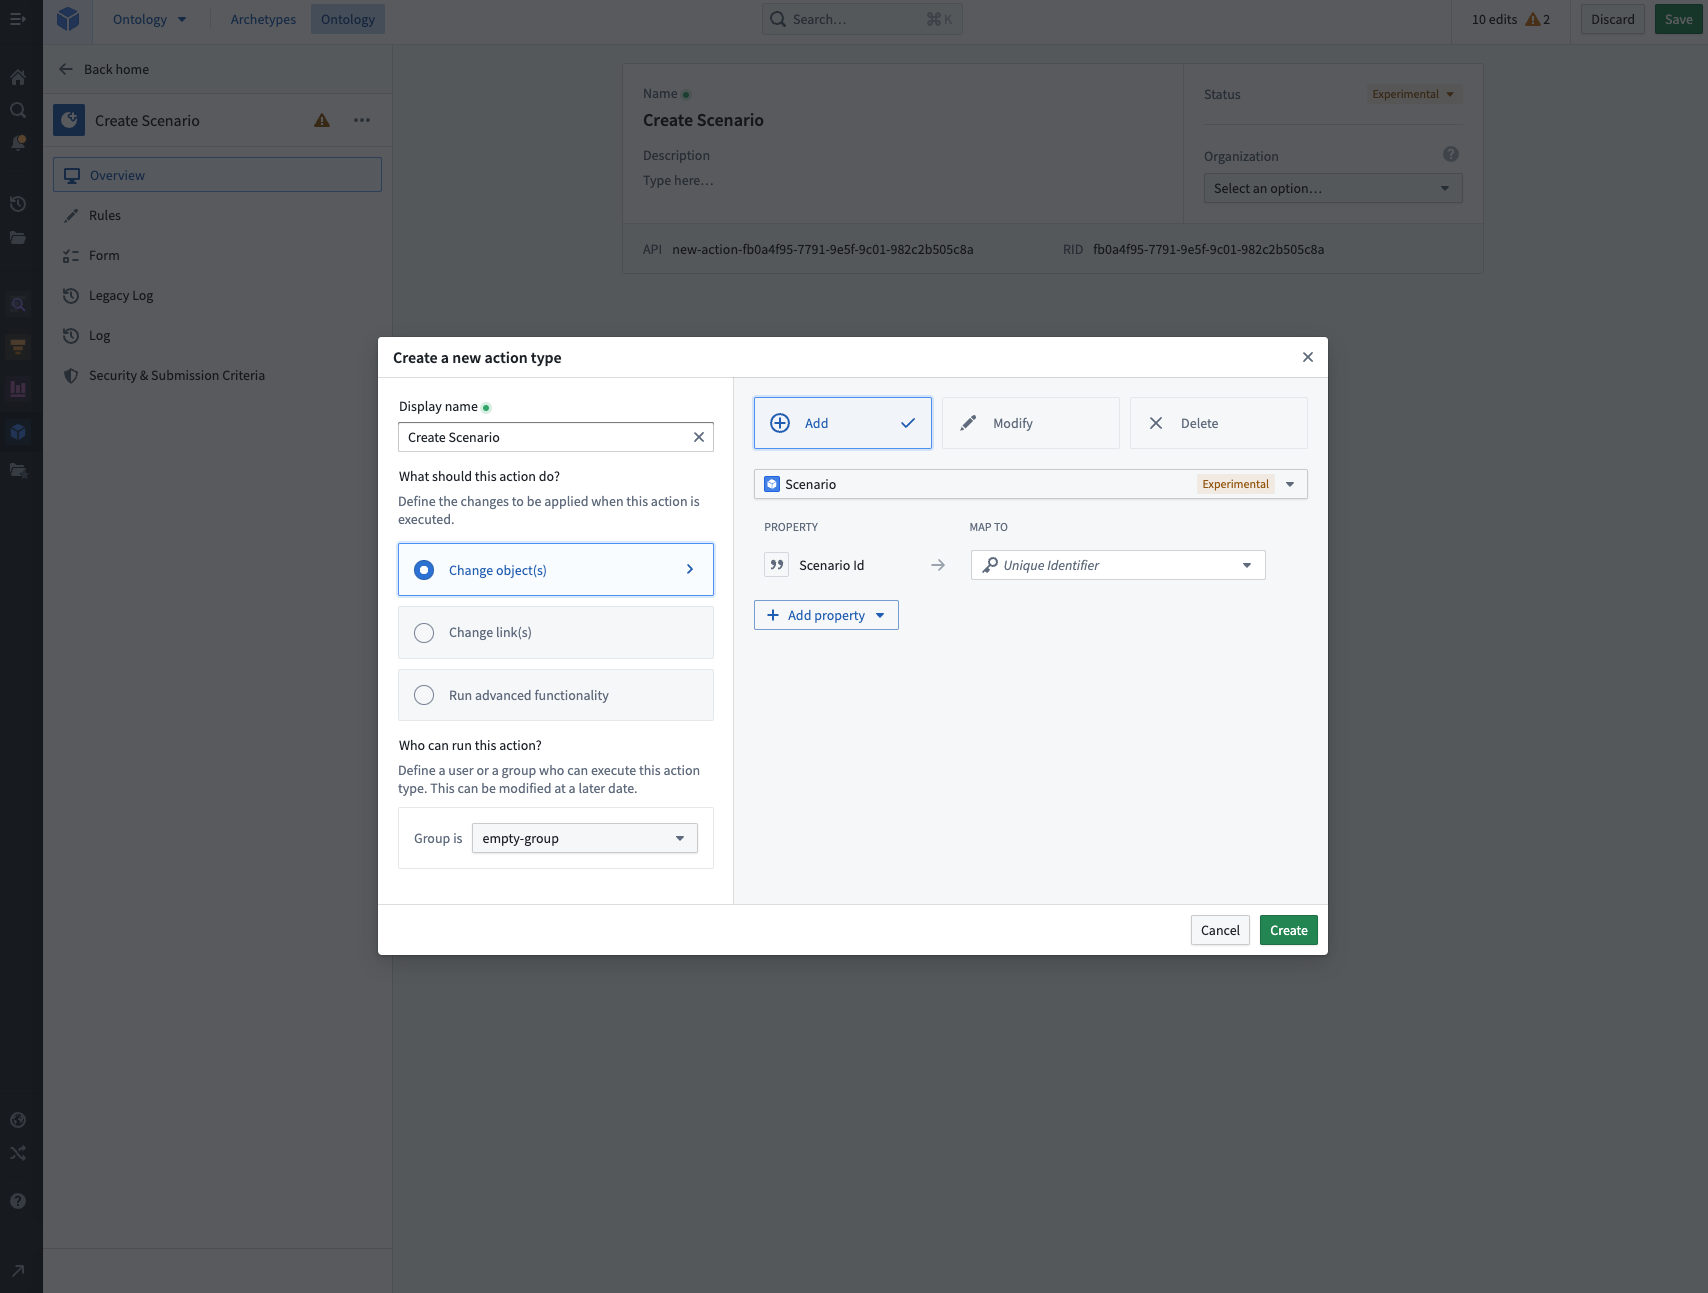
In the Rules tab, add properties that need to be provided during the creation of a scenario.
At a minimum, the scenario's Scenario Id and Name properties must be added.
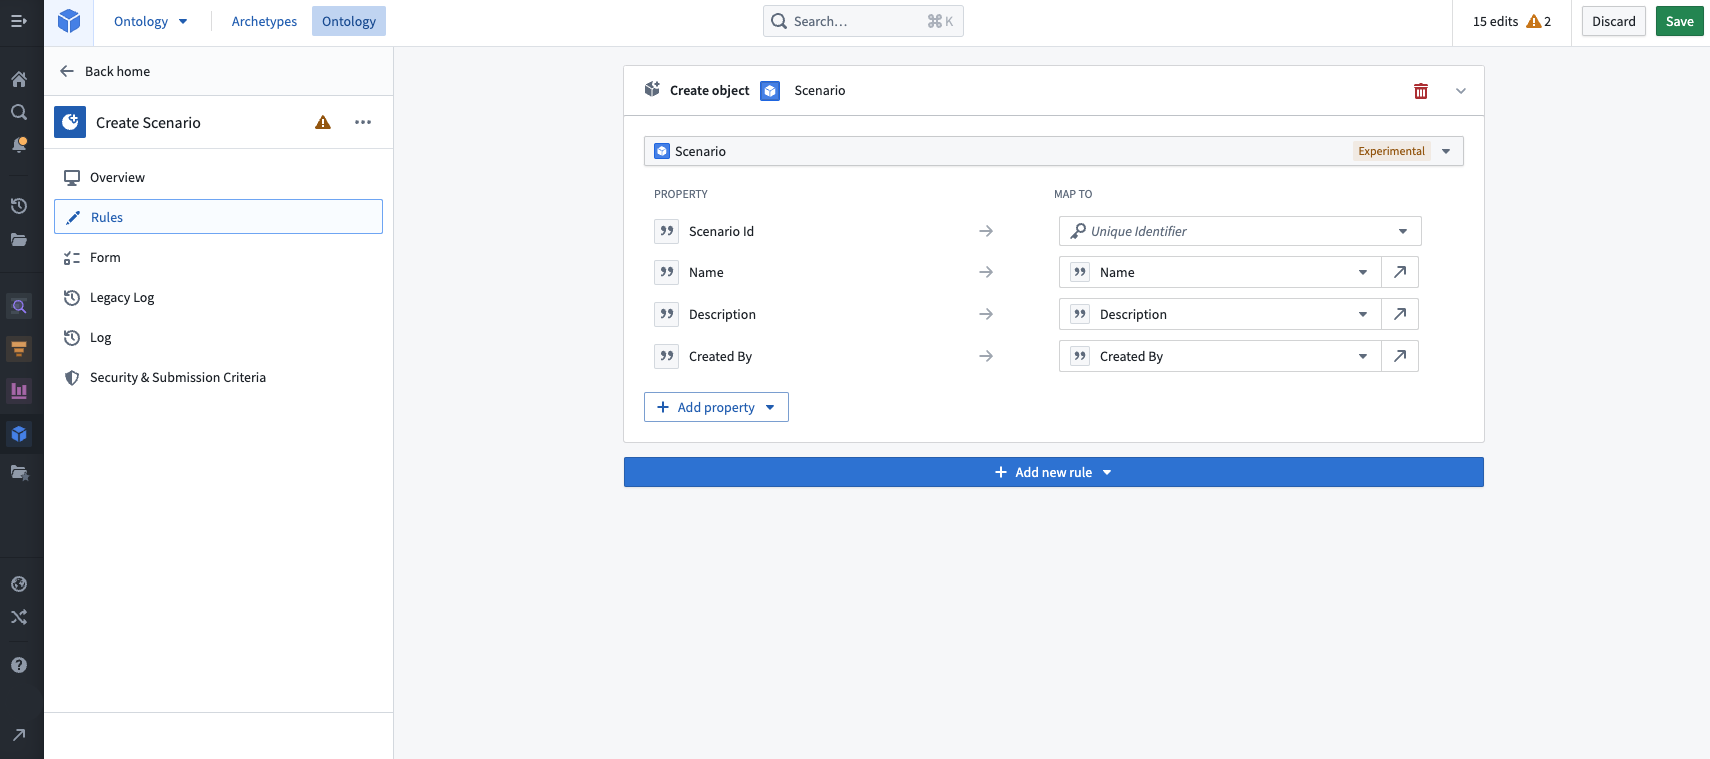
Now we need to ensure that the Scenario ID and Name properties have the correct type class.
In the Forms tab, we can remove the scenario object from the list of properties since the action we are making creates a new scenario.
Create a new string property named Scenario Id.
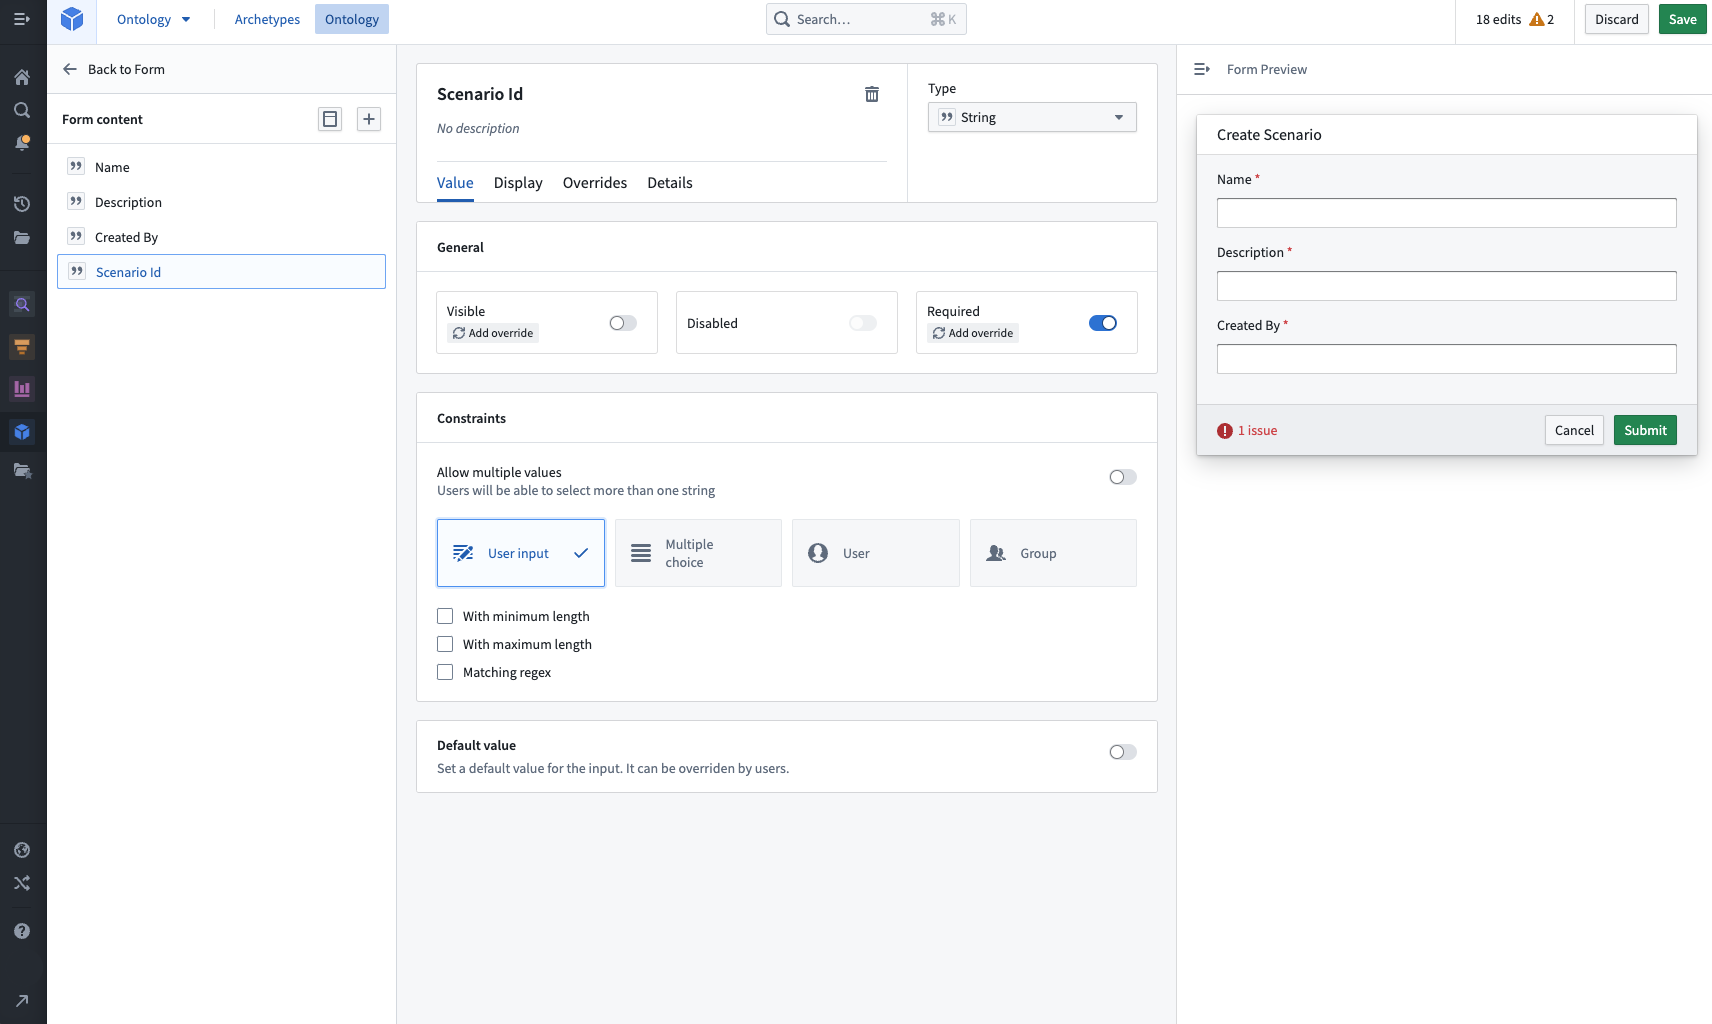
In the Details tab, add the type class scenarios:versioned-scenario-rid.
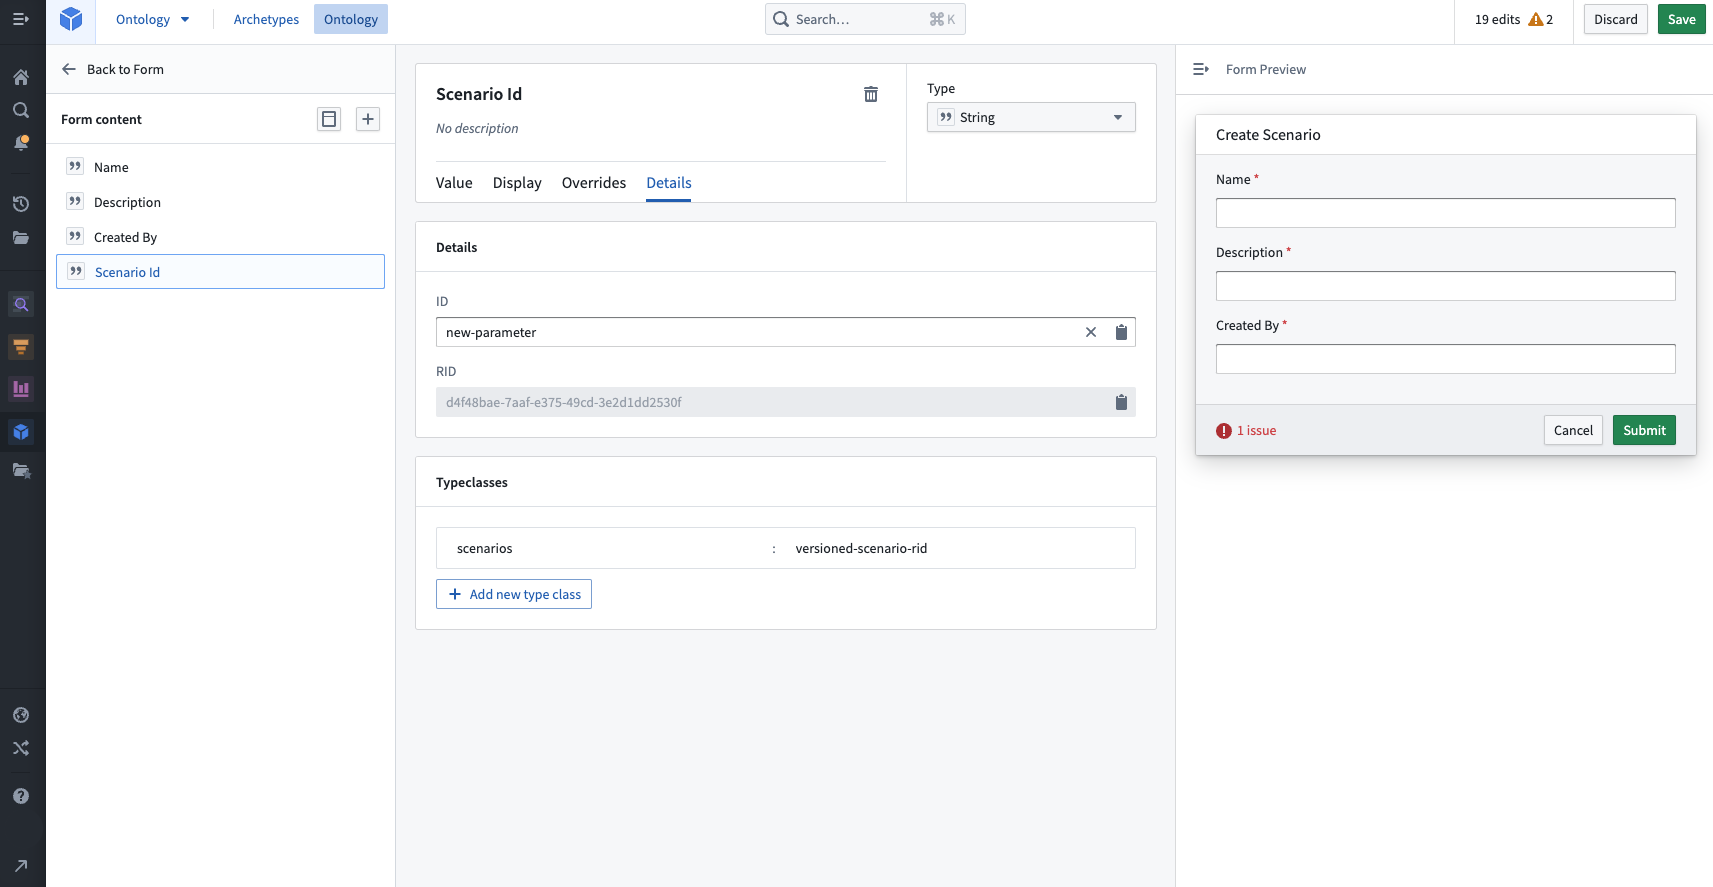
For the Action property that sets the scenario name, add the type class scenarios:scenario-name if it is not already set.
In the Rules tab, the Scenario ID can now be set to the recently created string value.
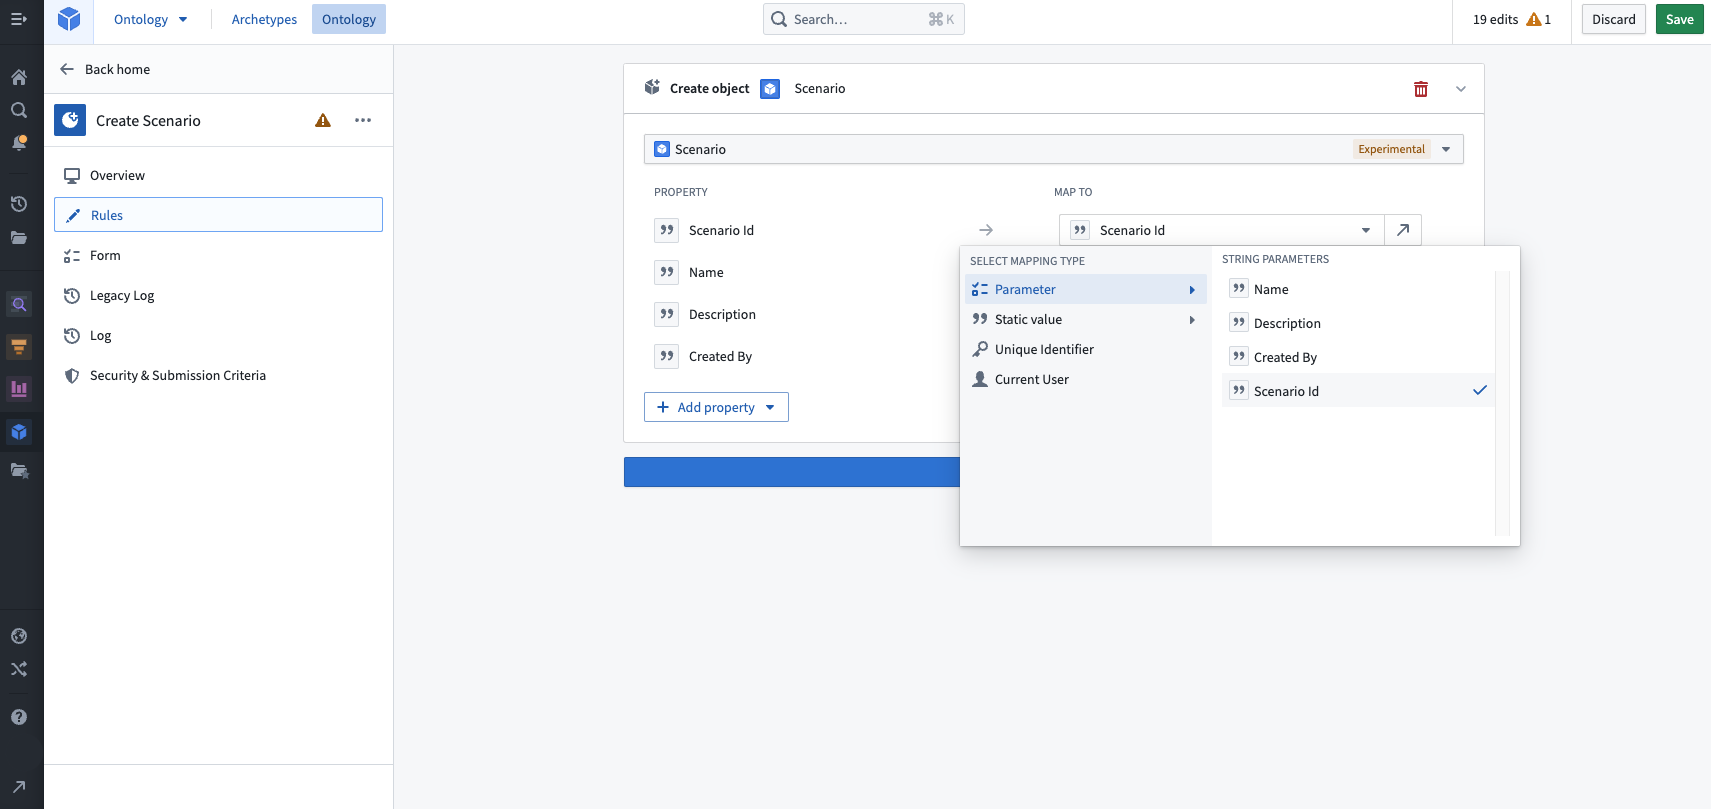
Update scenario Action
Next, we will create an Action that updates an object that implements the scenario trait.
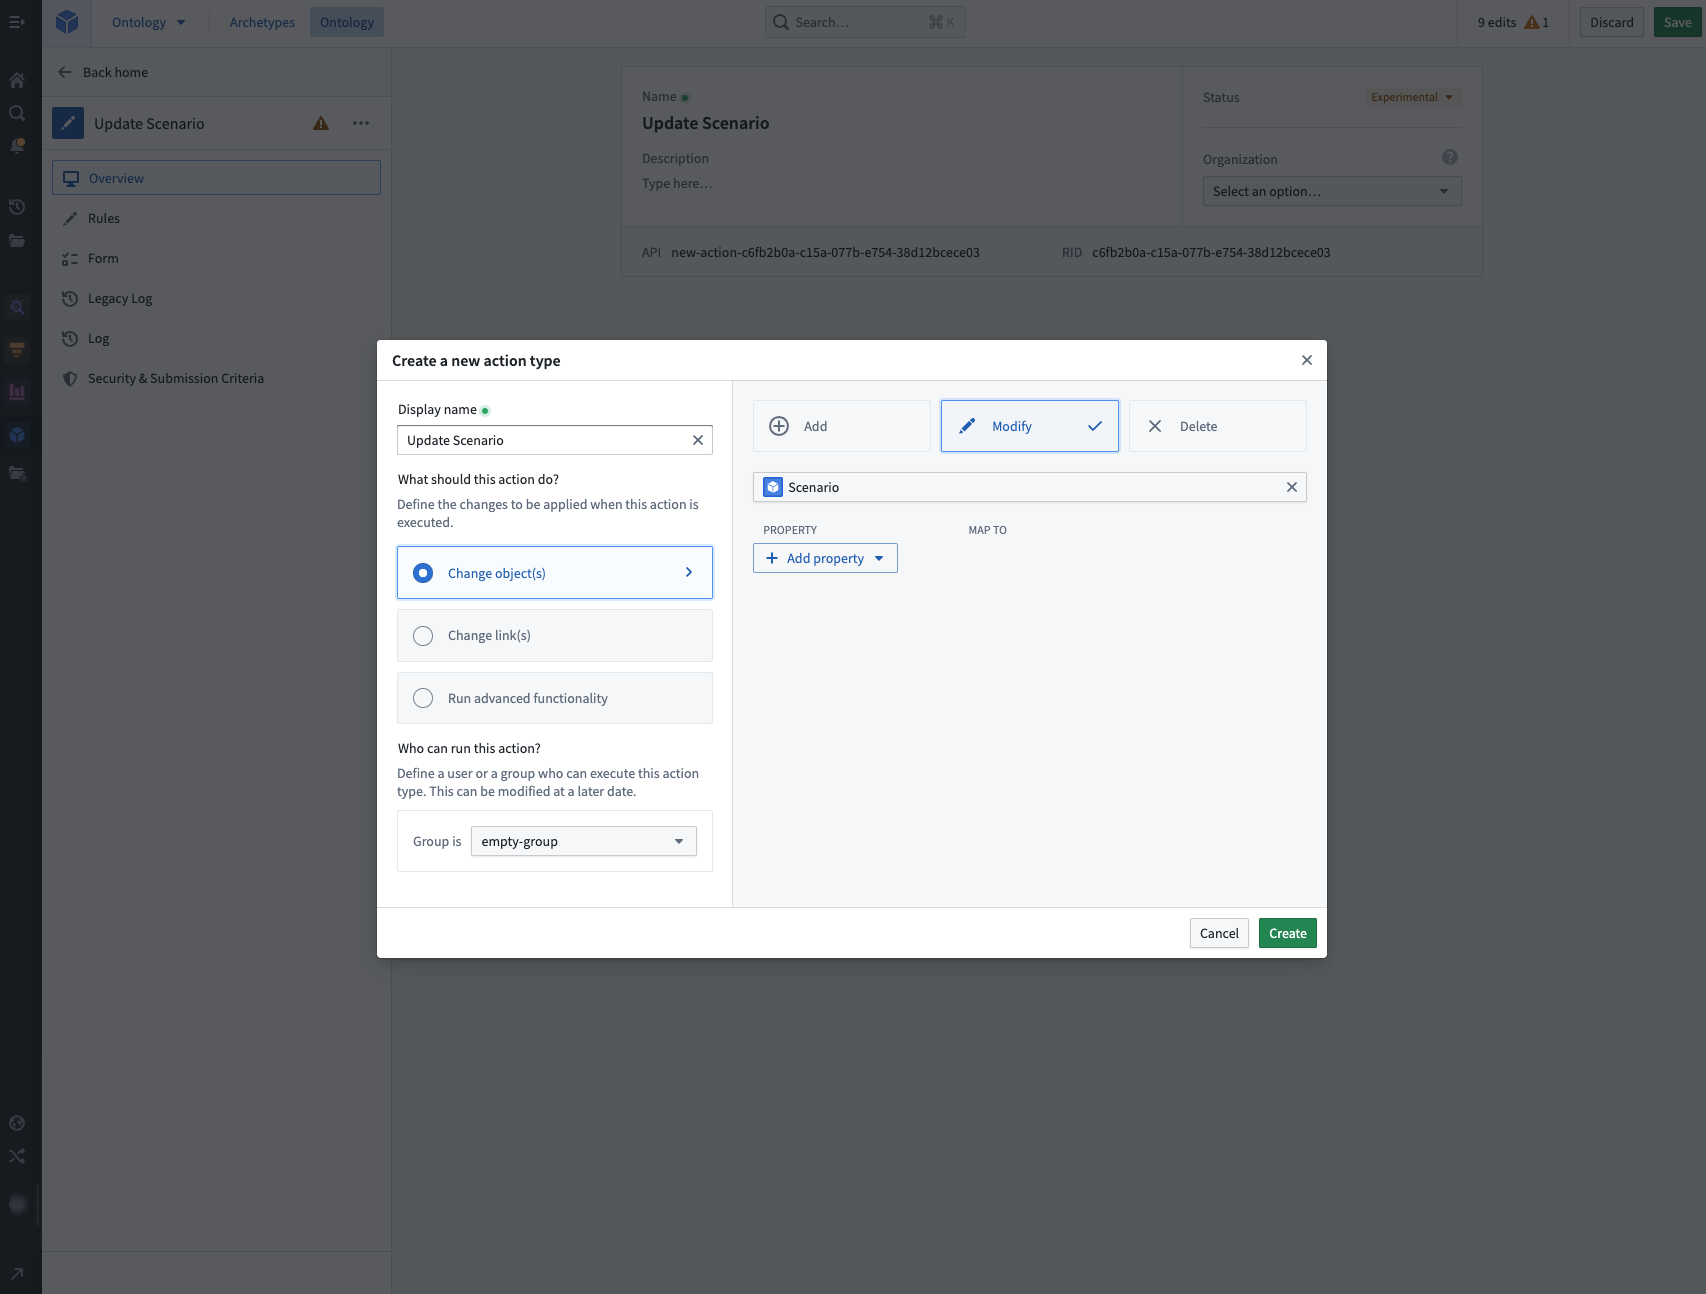
In the Rules tab, add a Name property.
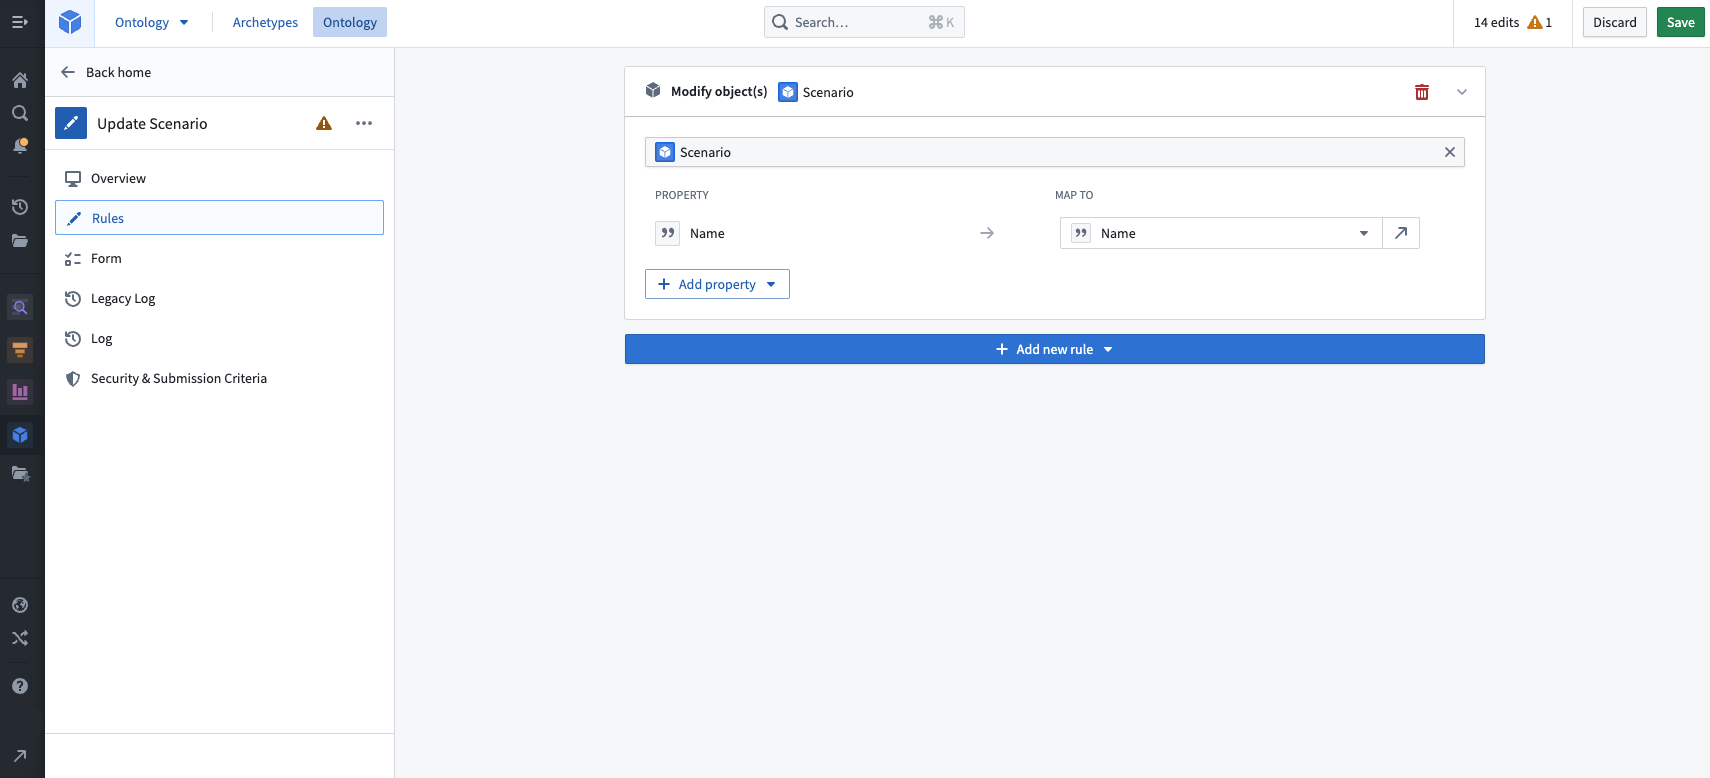
In the Forms tab, add the type class scenarios:scenario-object-locator to the Action property that determines the scenario object to be modified.
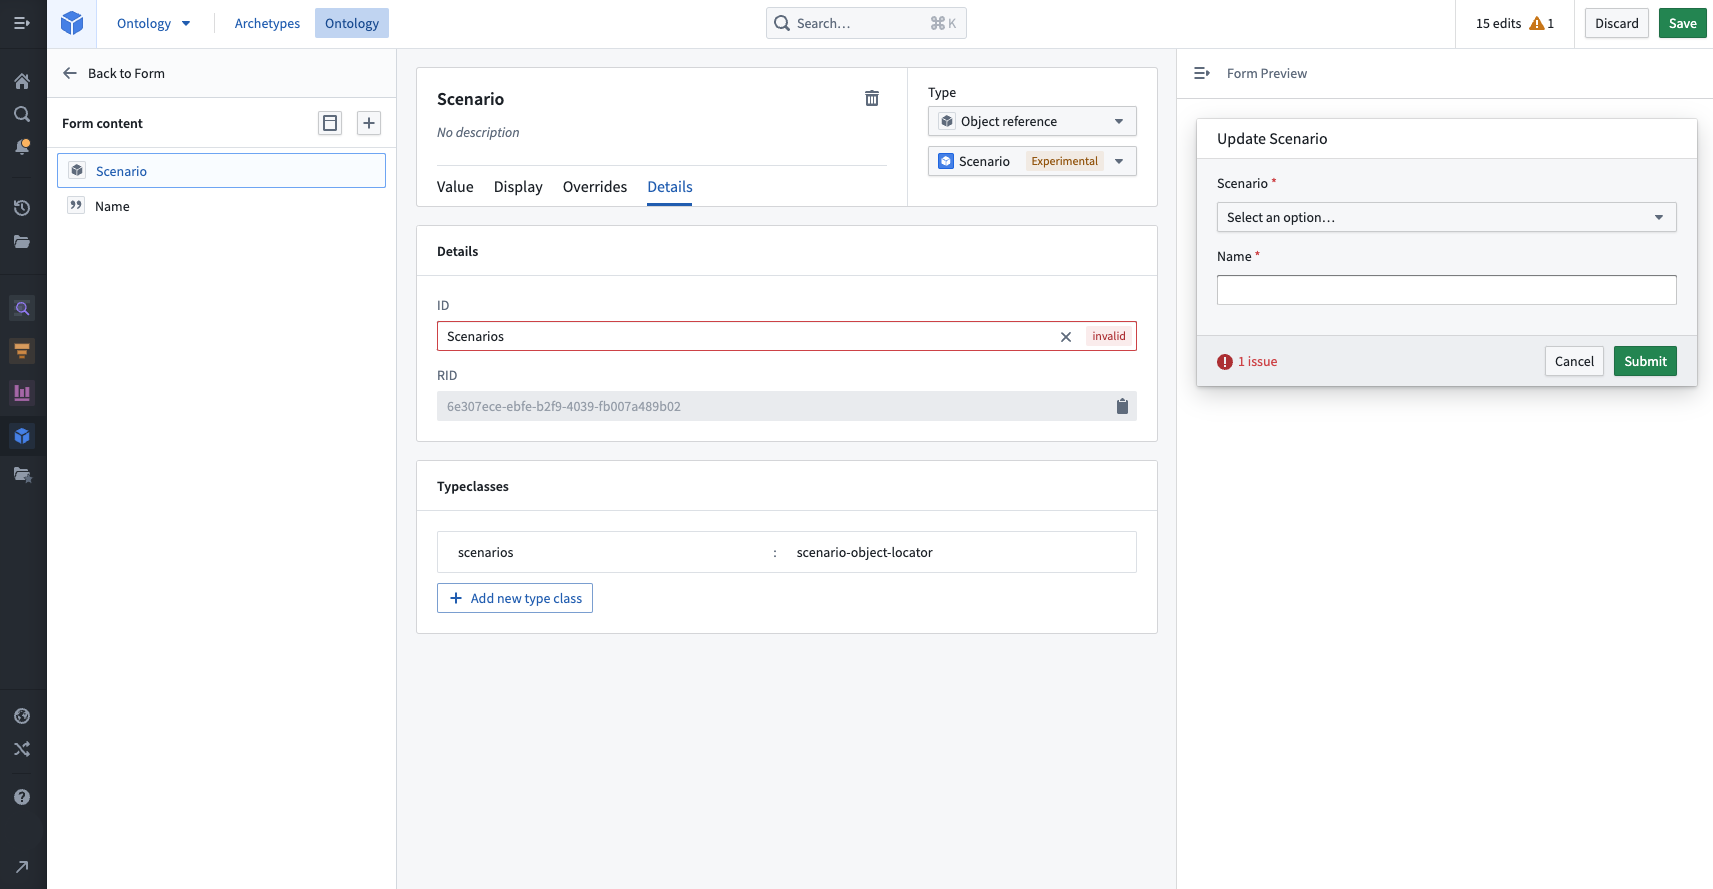
For the Action property that updates the scenario name, add the type class scenarios:scenario-name if it is not already set.
The scenario object and Actions are now ready to be used in Workshop to save and update stored scenarios.
Configure a Save Scenario button
We will enable saving scenarios from a button in the core button group widget.
To start, we have added a new button to our button group and selected the "Save Scenario" event on click.
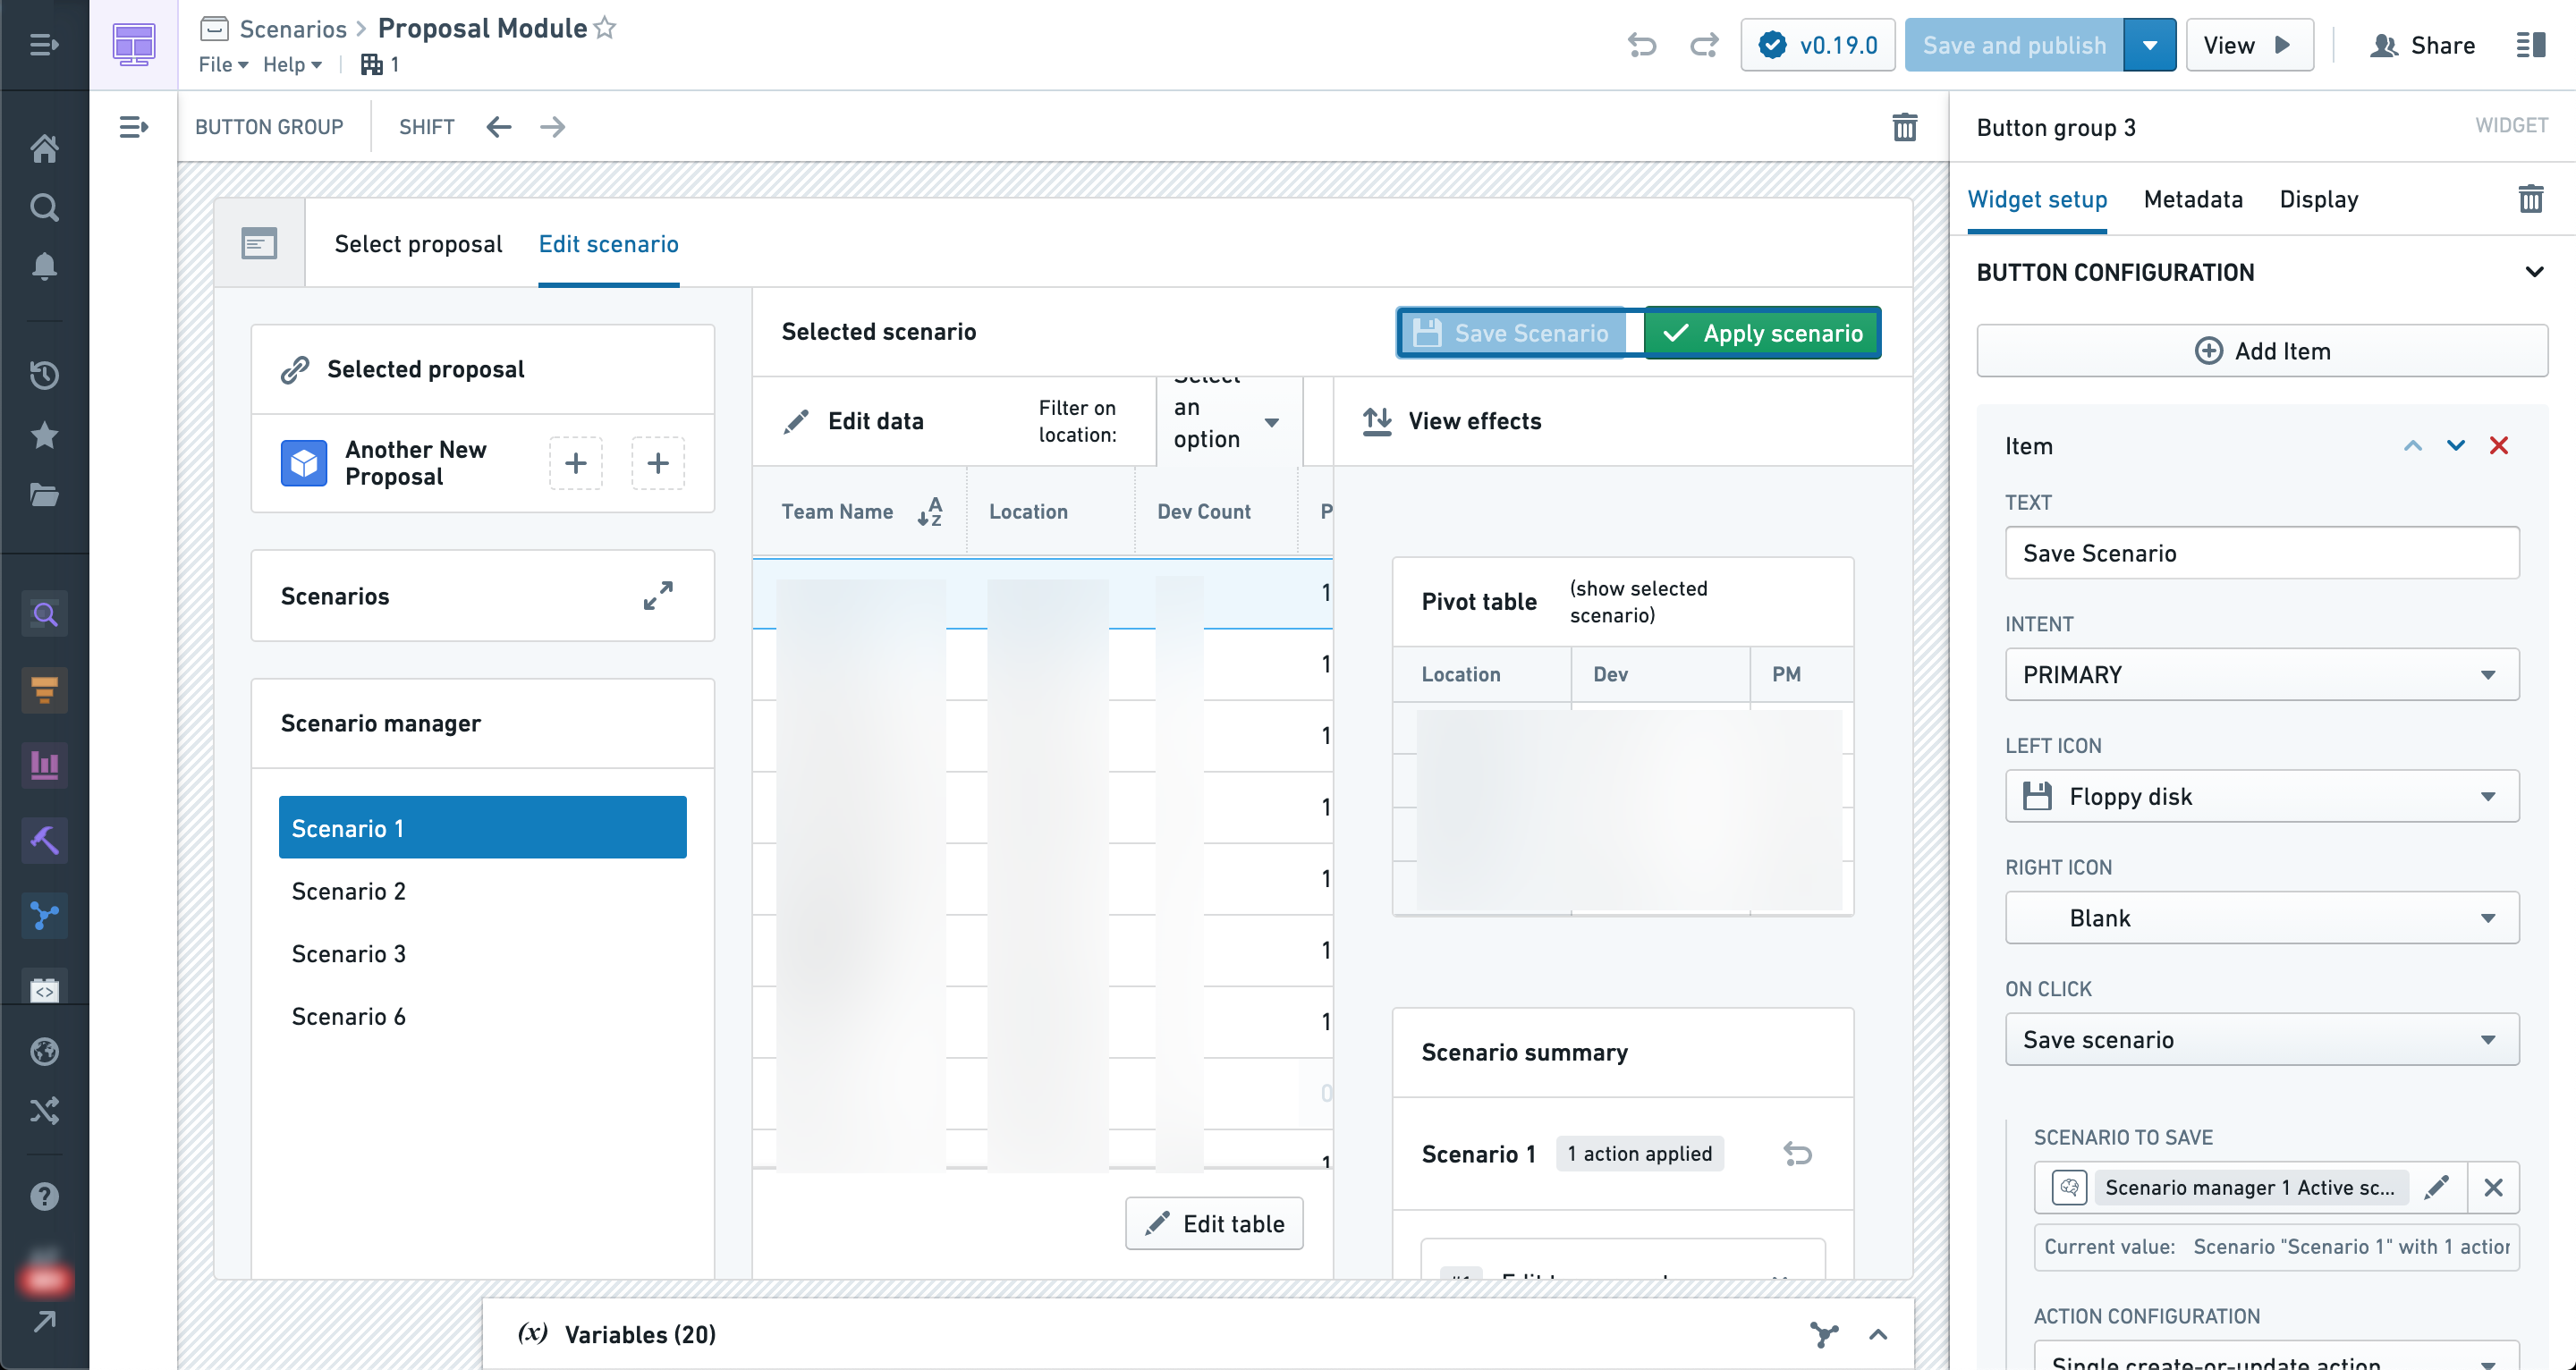
In order to save to an object, we must select an object type that implements the scenario trait.
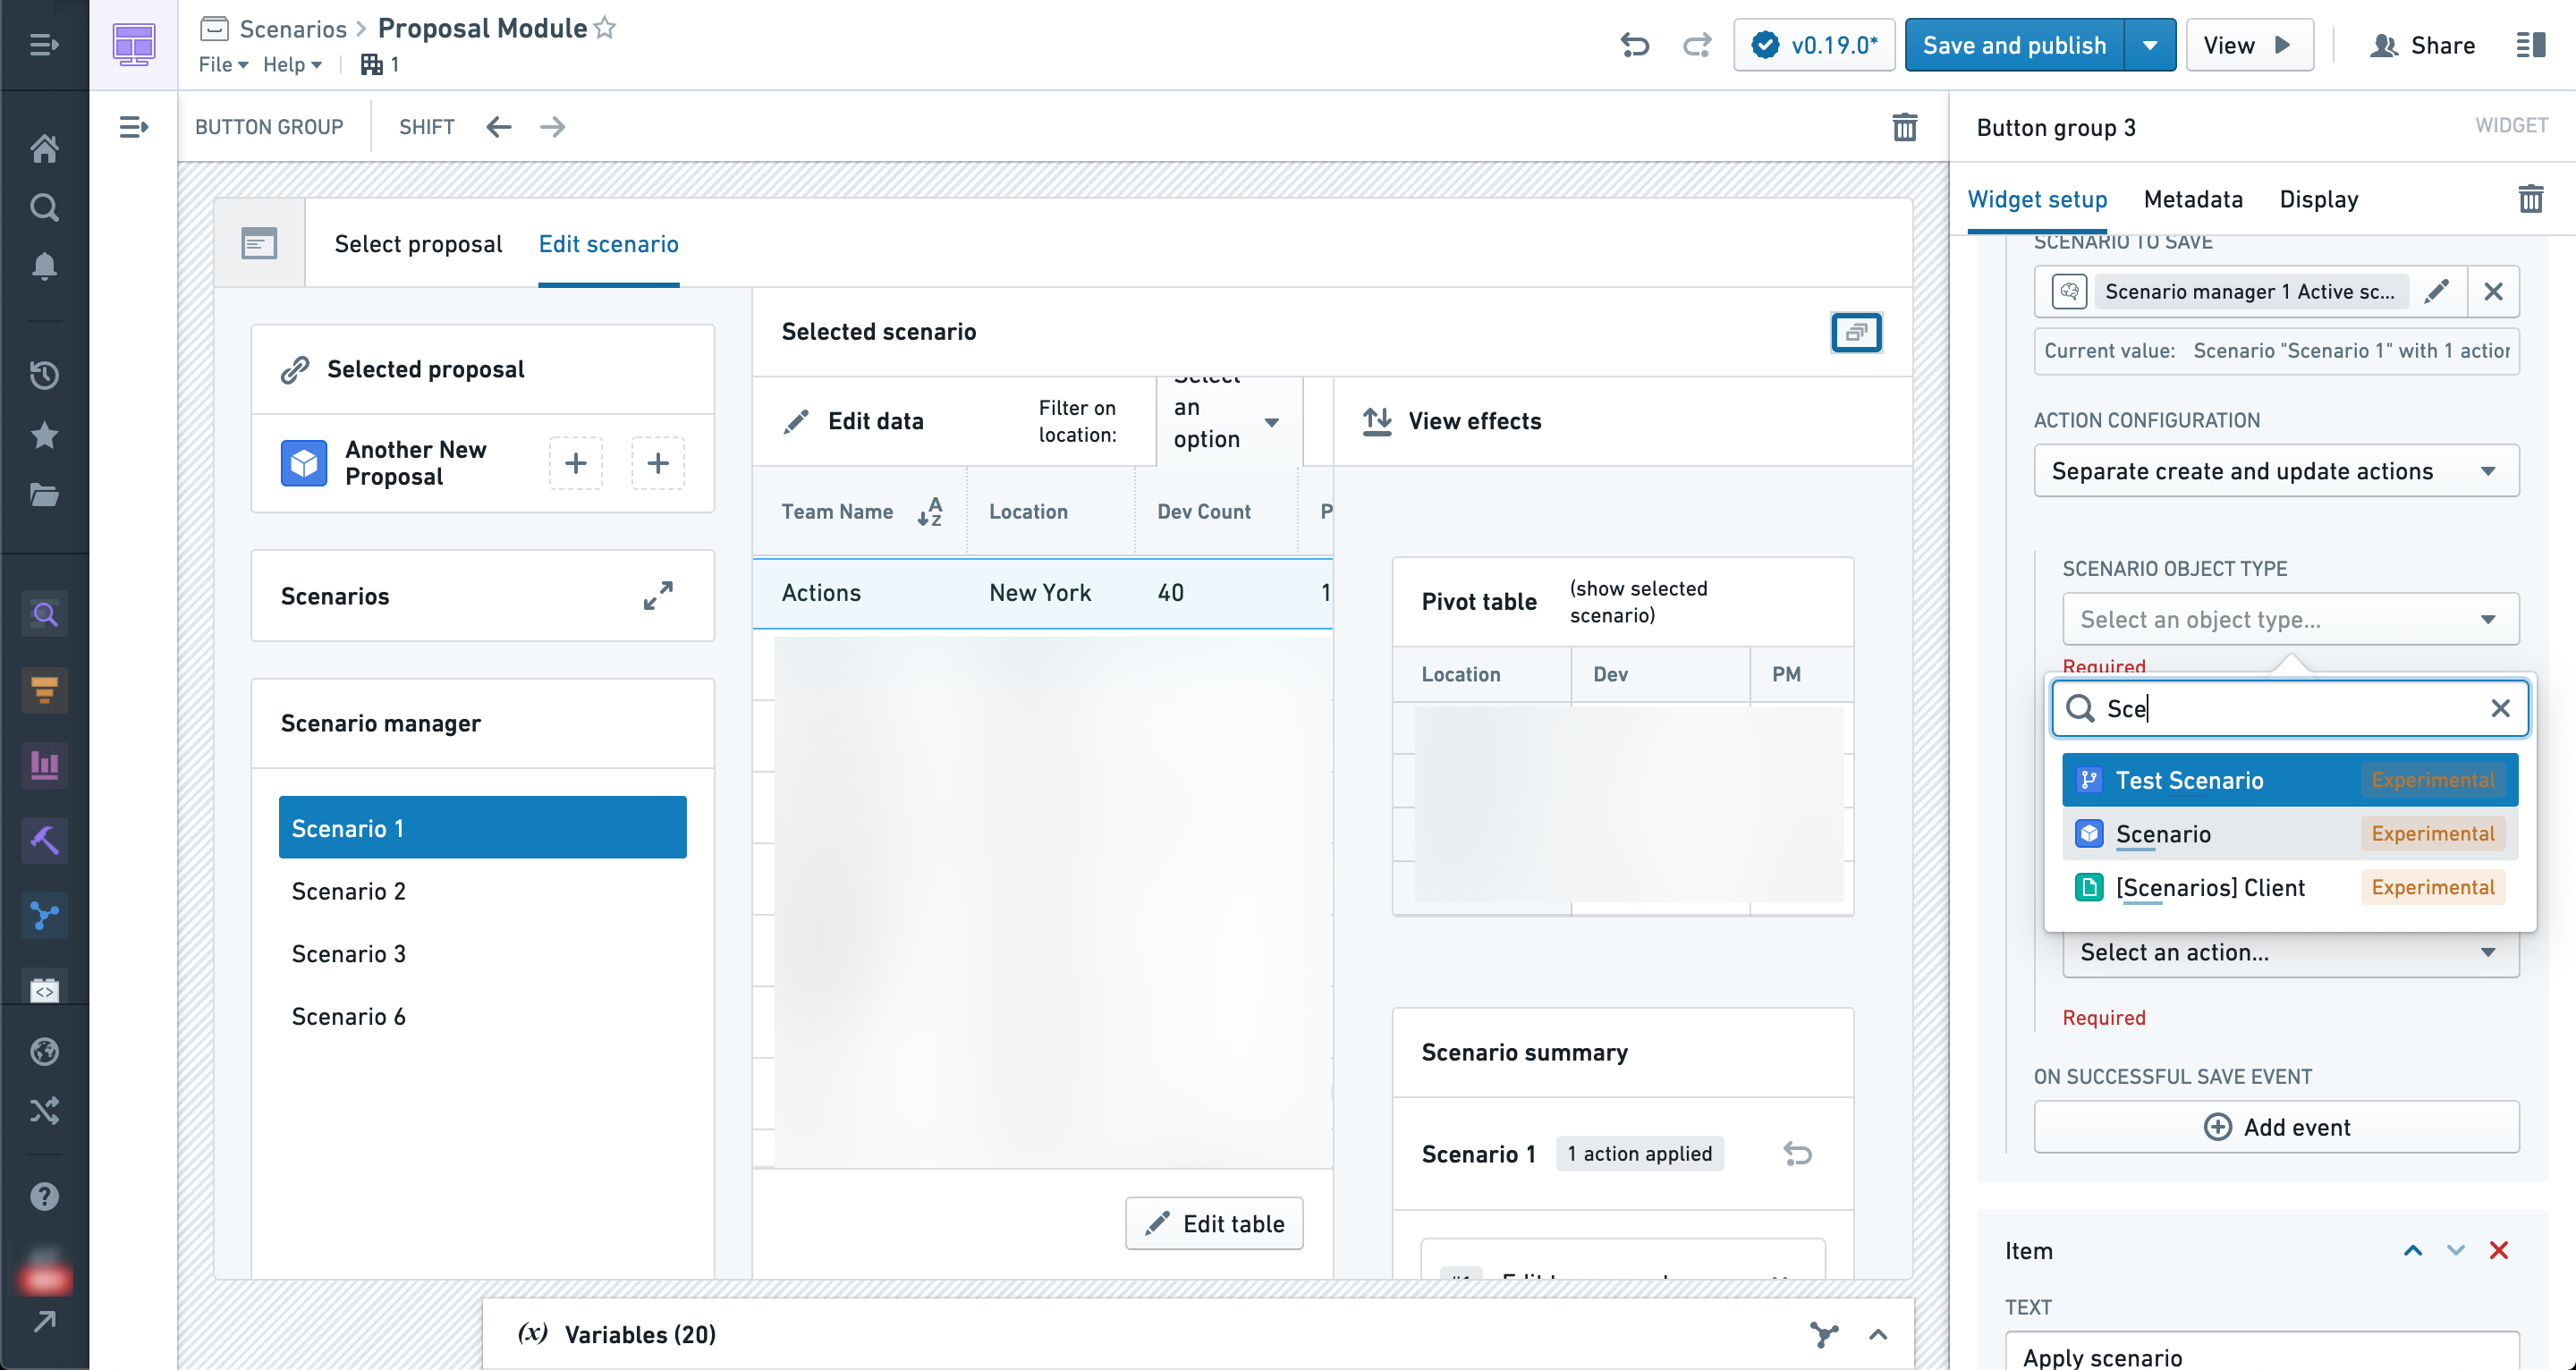
After selecting an object type, we must select an Action that creates scenario objects of that type.
If the type classes for the Action parameters are configured properly, then the Scenario ID and name parameters should be automatically filled in (as shown below).
Other Action parameters can be configured the same way as other Actions in Workshop, so you can set default values or leave them blank for the user to fill in.
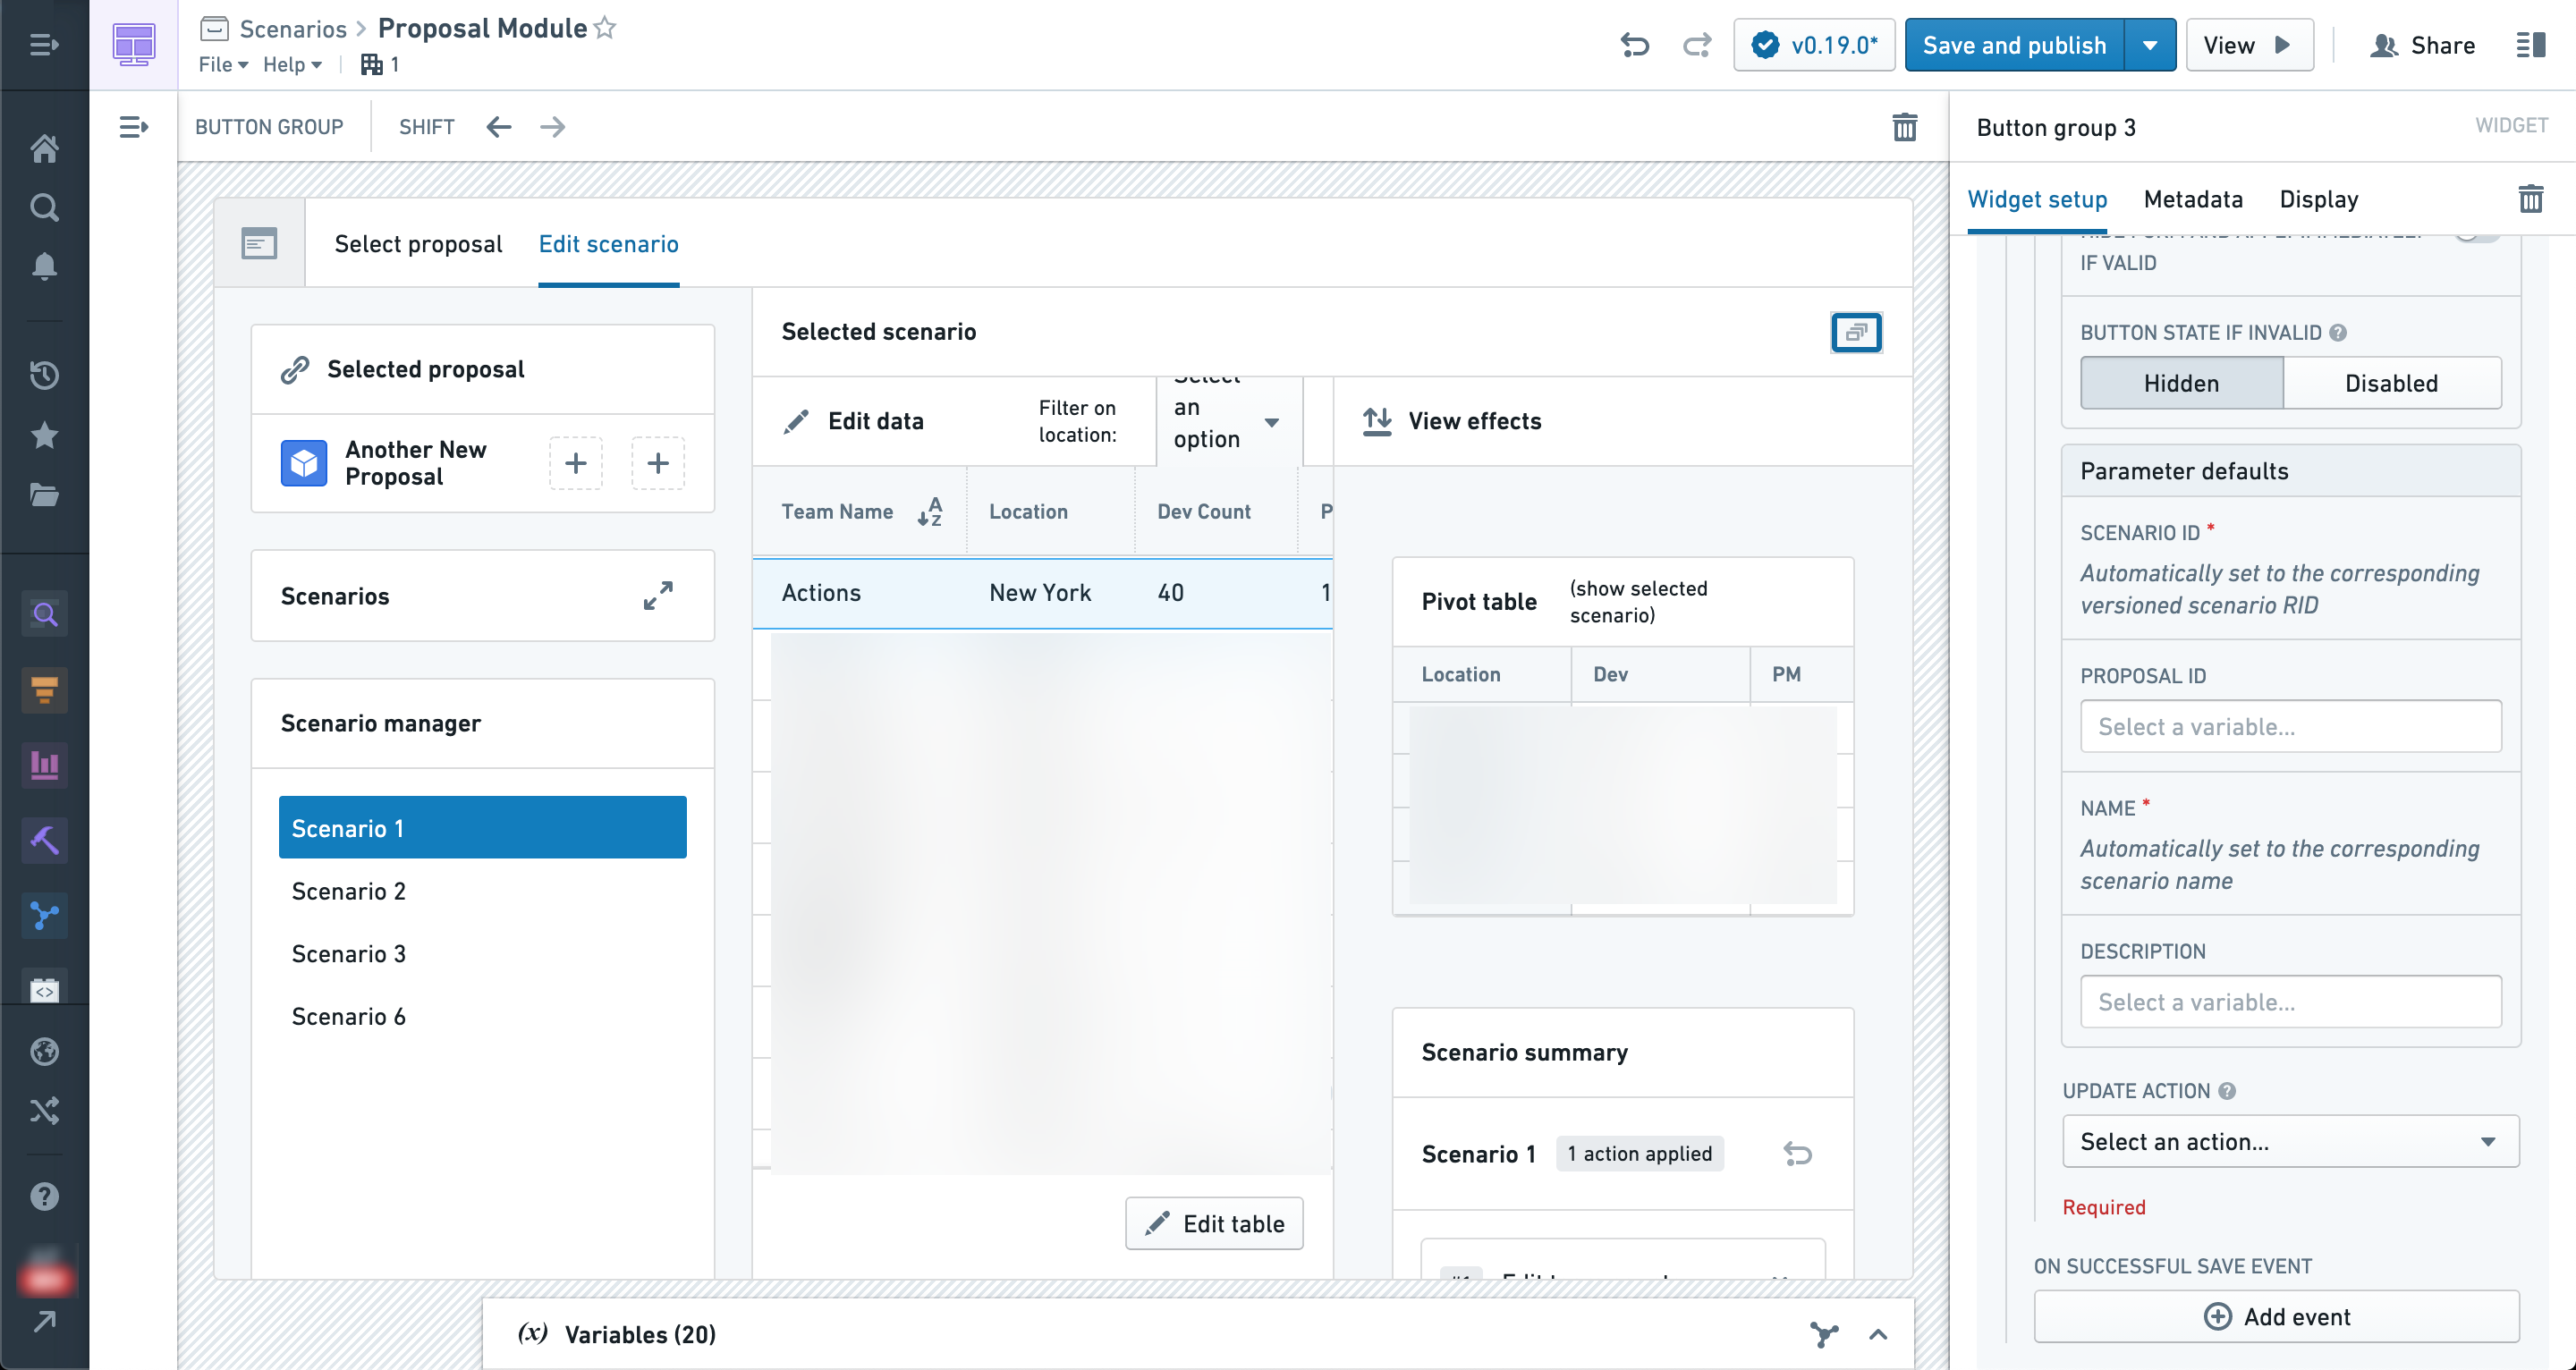
For example, you can use the Current user special variable to populate a created by parameter.
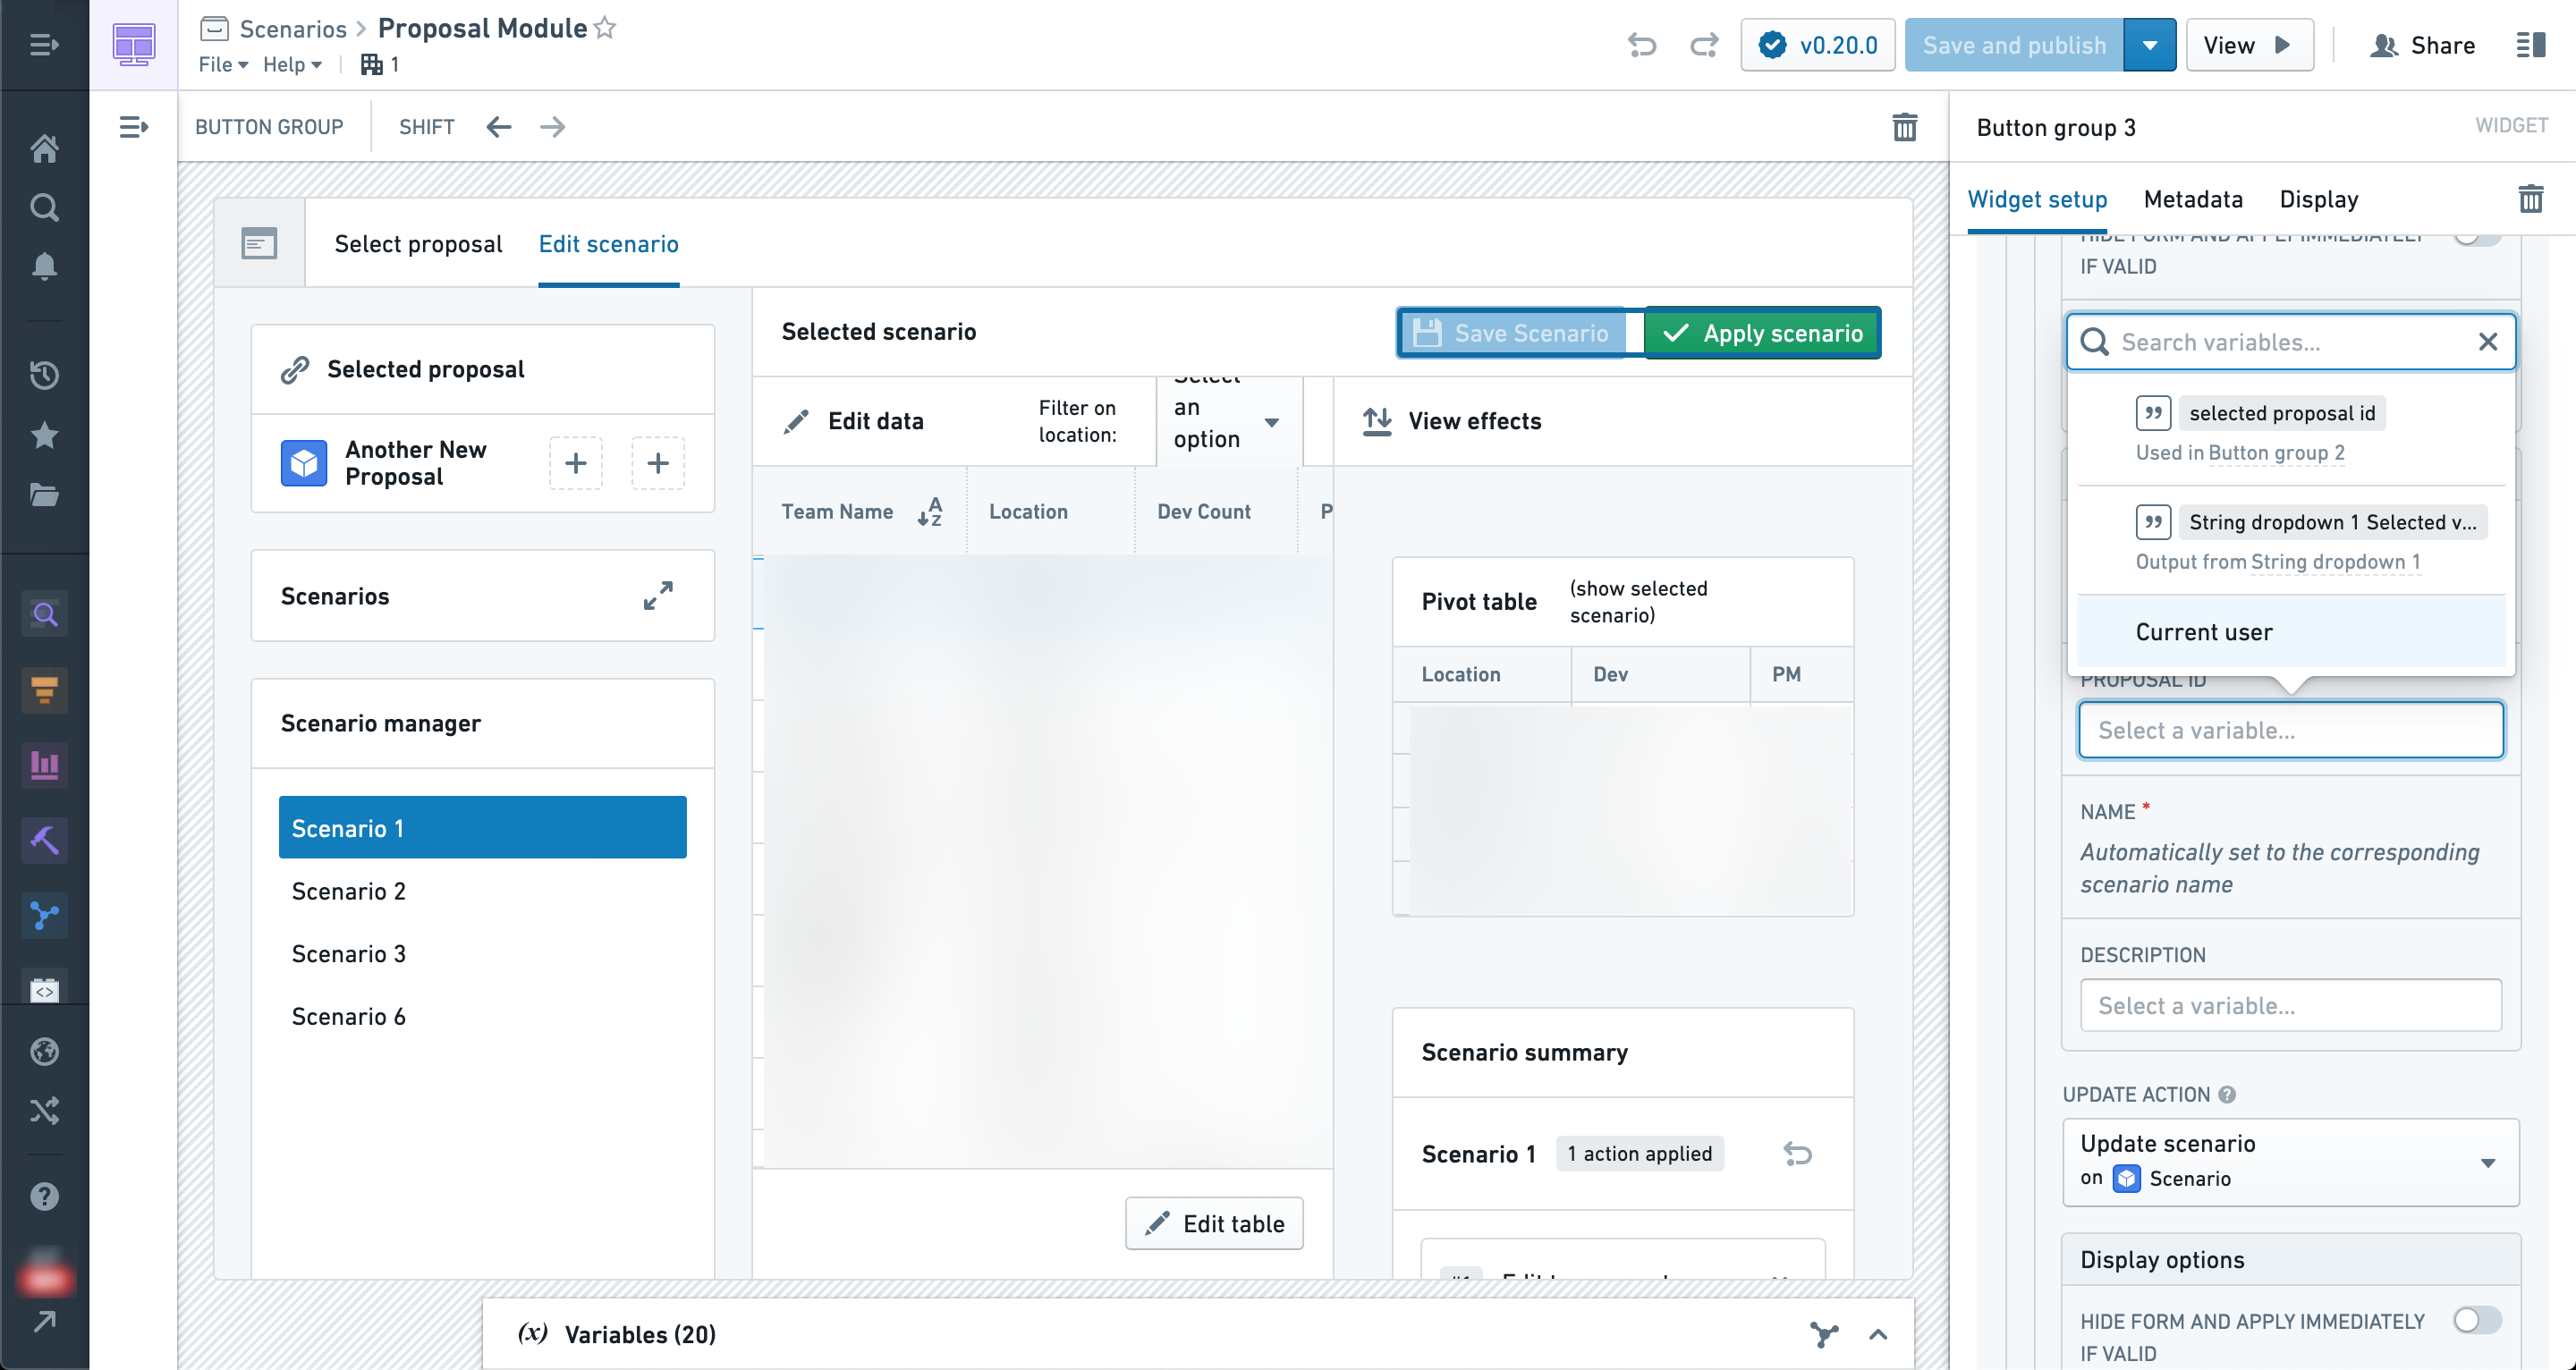
With the Create and Update Actions configured, the widget now allows users of the module to save scenarios.
Saving scenarios as a user
Users can save newly created scenarios as well as update existing scenarios using the configured save button.
Additionally, in the Scenario manager when a scenario has been created but not yet saved the scenario will show the “New” tag until it has been saved, or "Updated" if the scenario has previously been saved and modified.
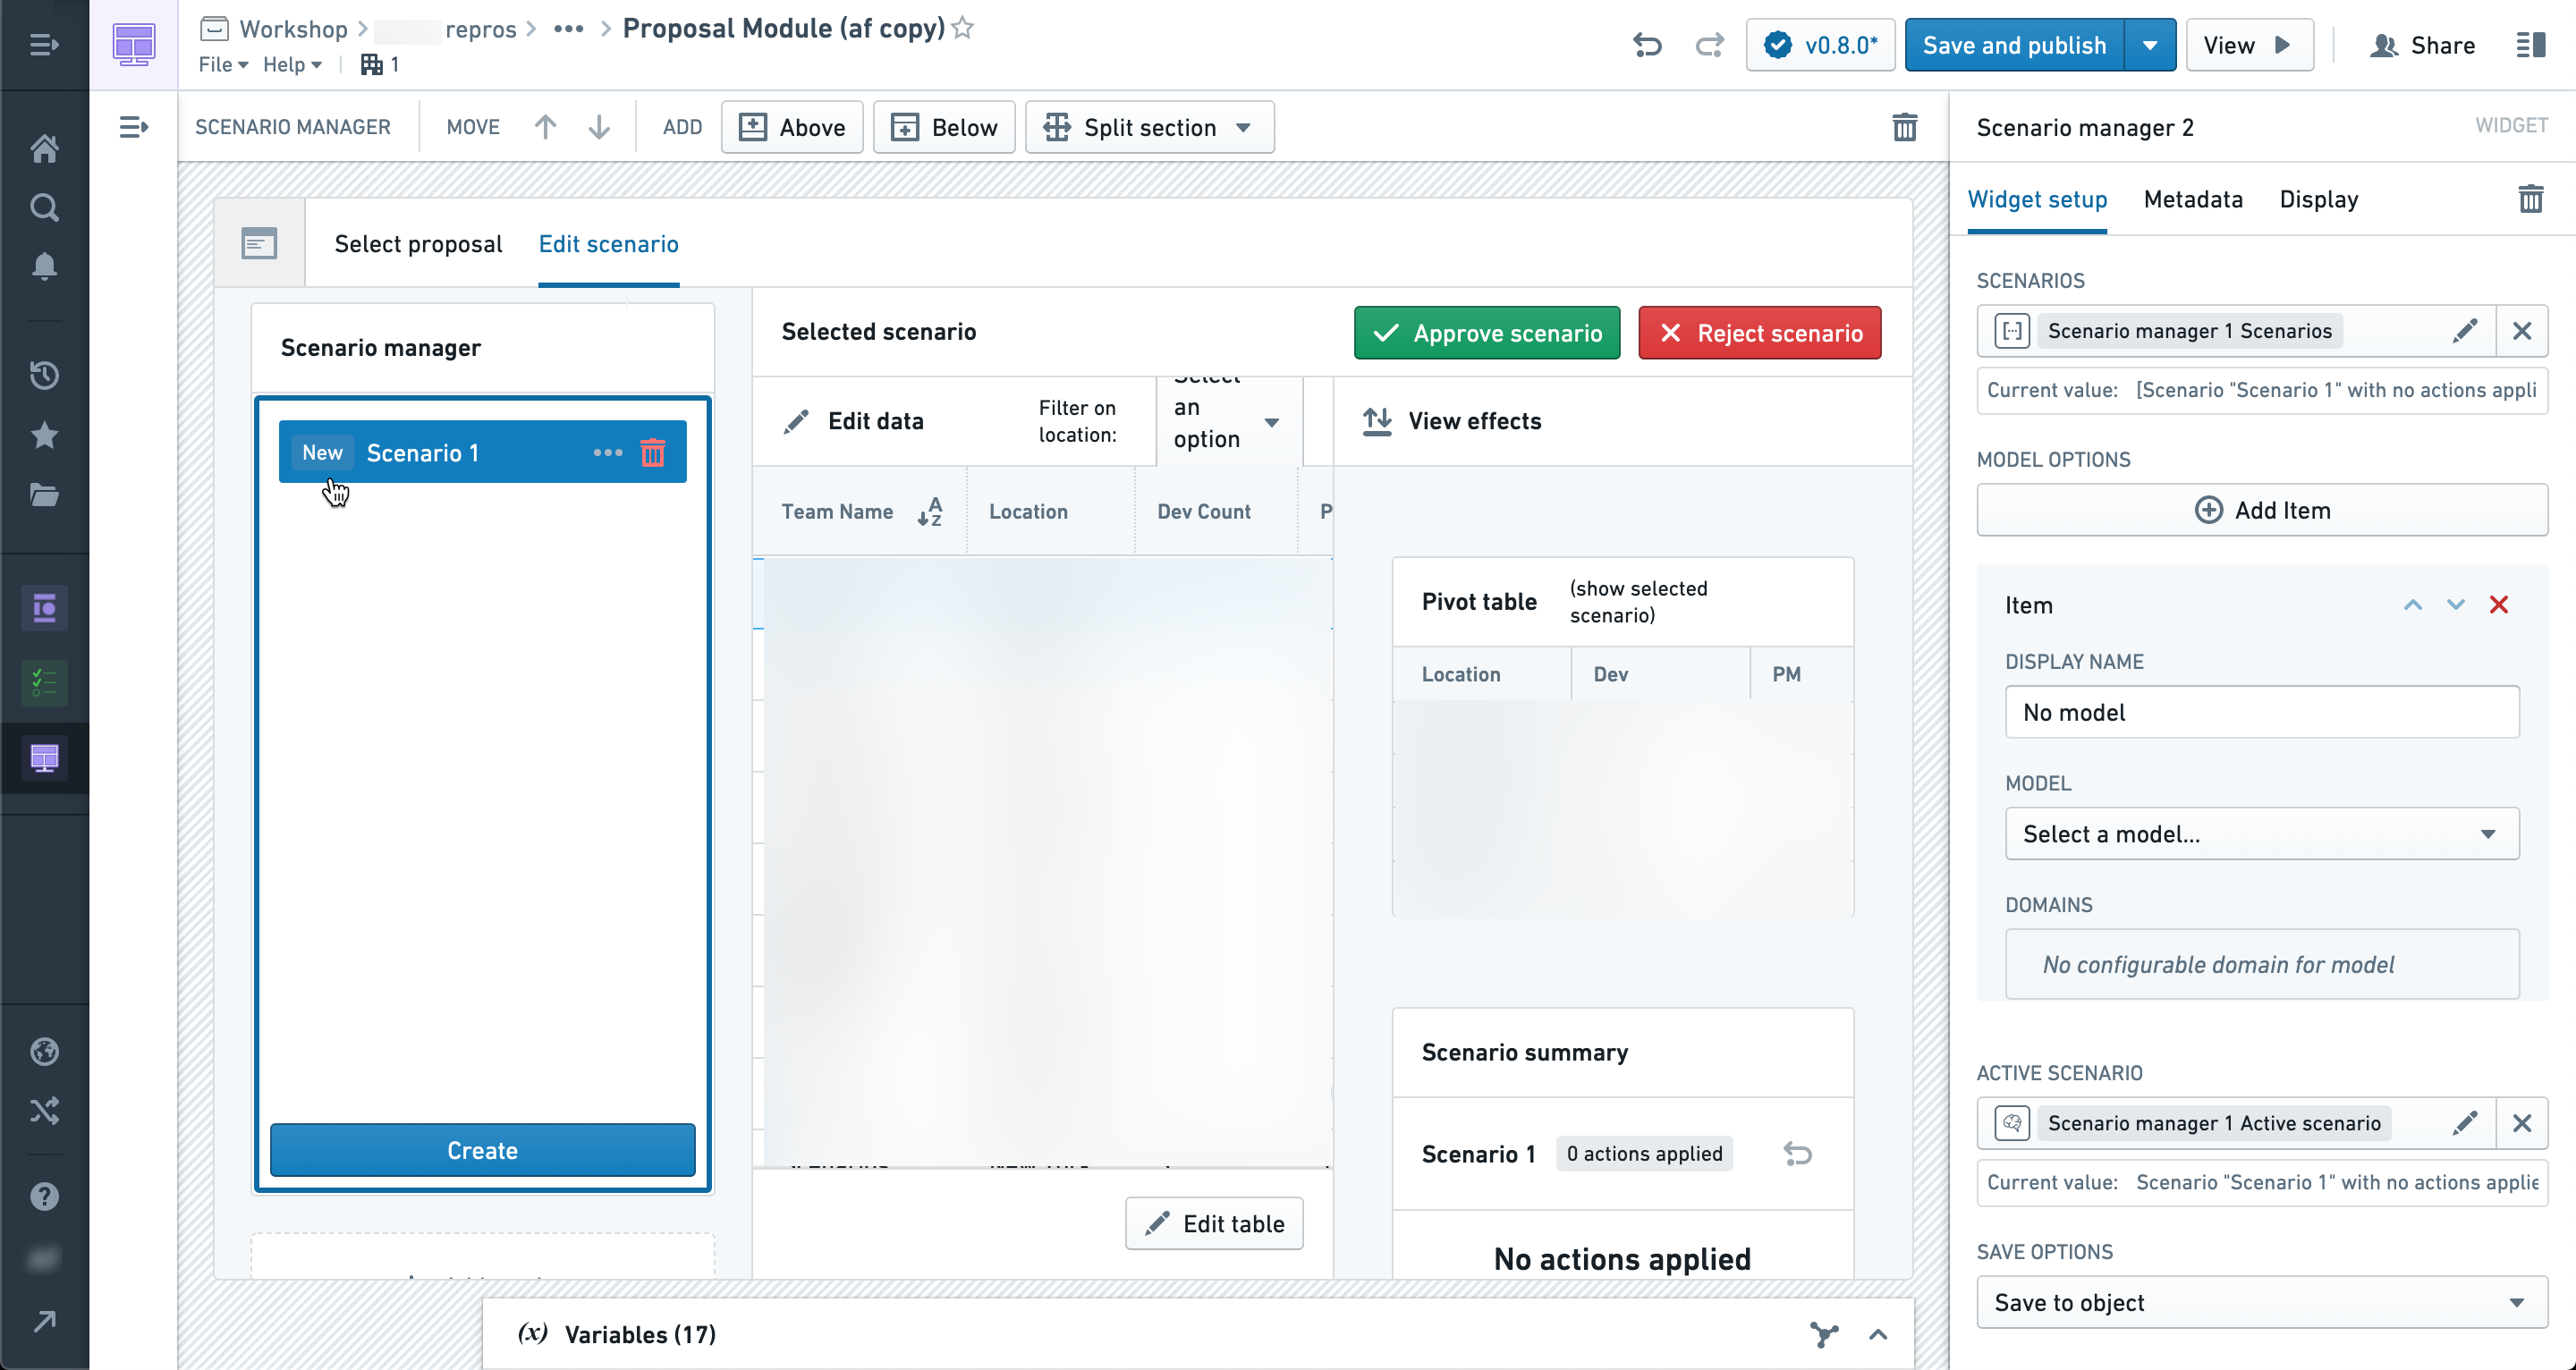
When saving a new scenario, this will open the Create scenario action dialog.
The name and scenario ID will be automatically filled in, and the user will have the opportunity to enter or change values for any additional action parameters.
In this case, we’ve added a description field that the user may populate to save along with the scenario.
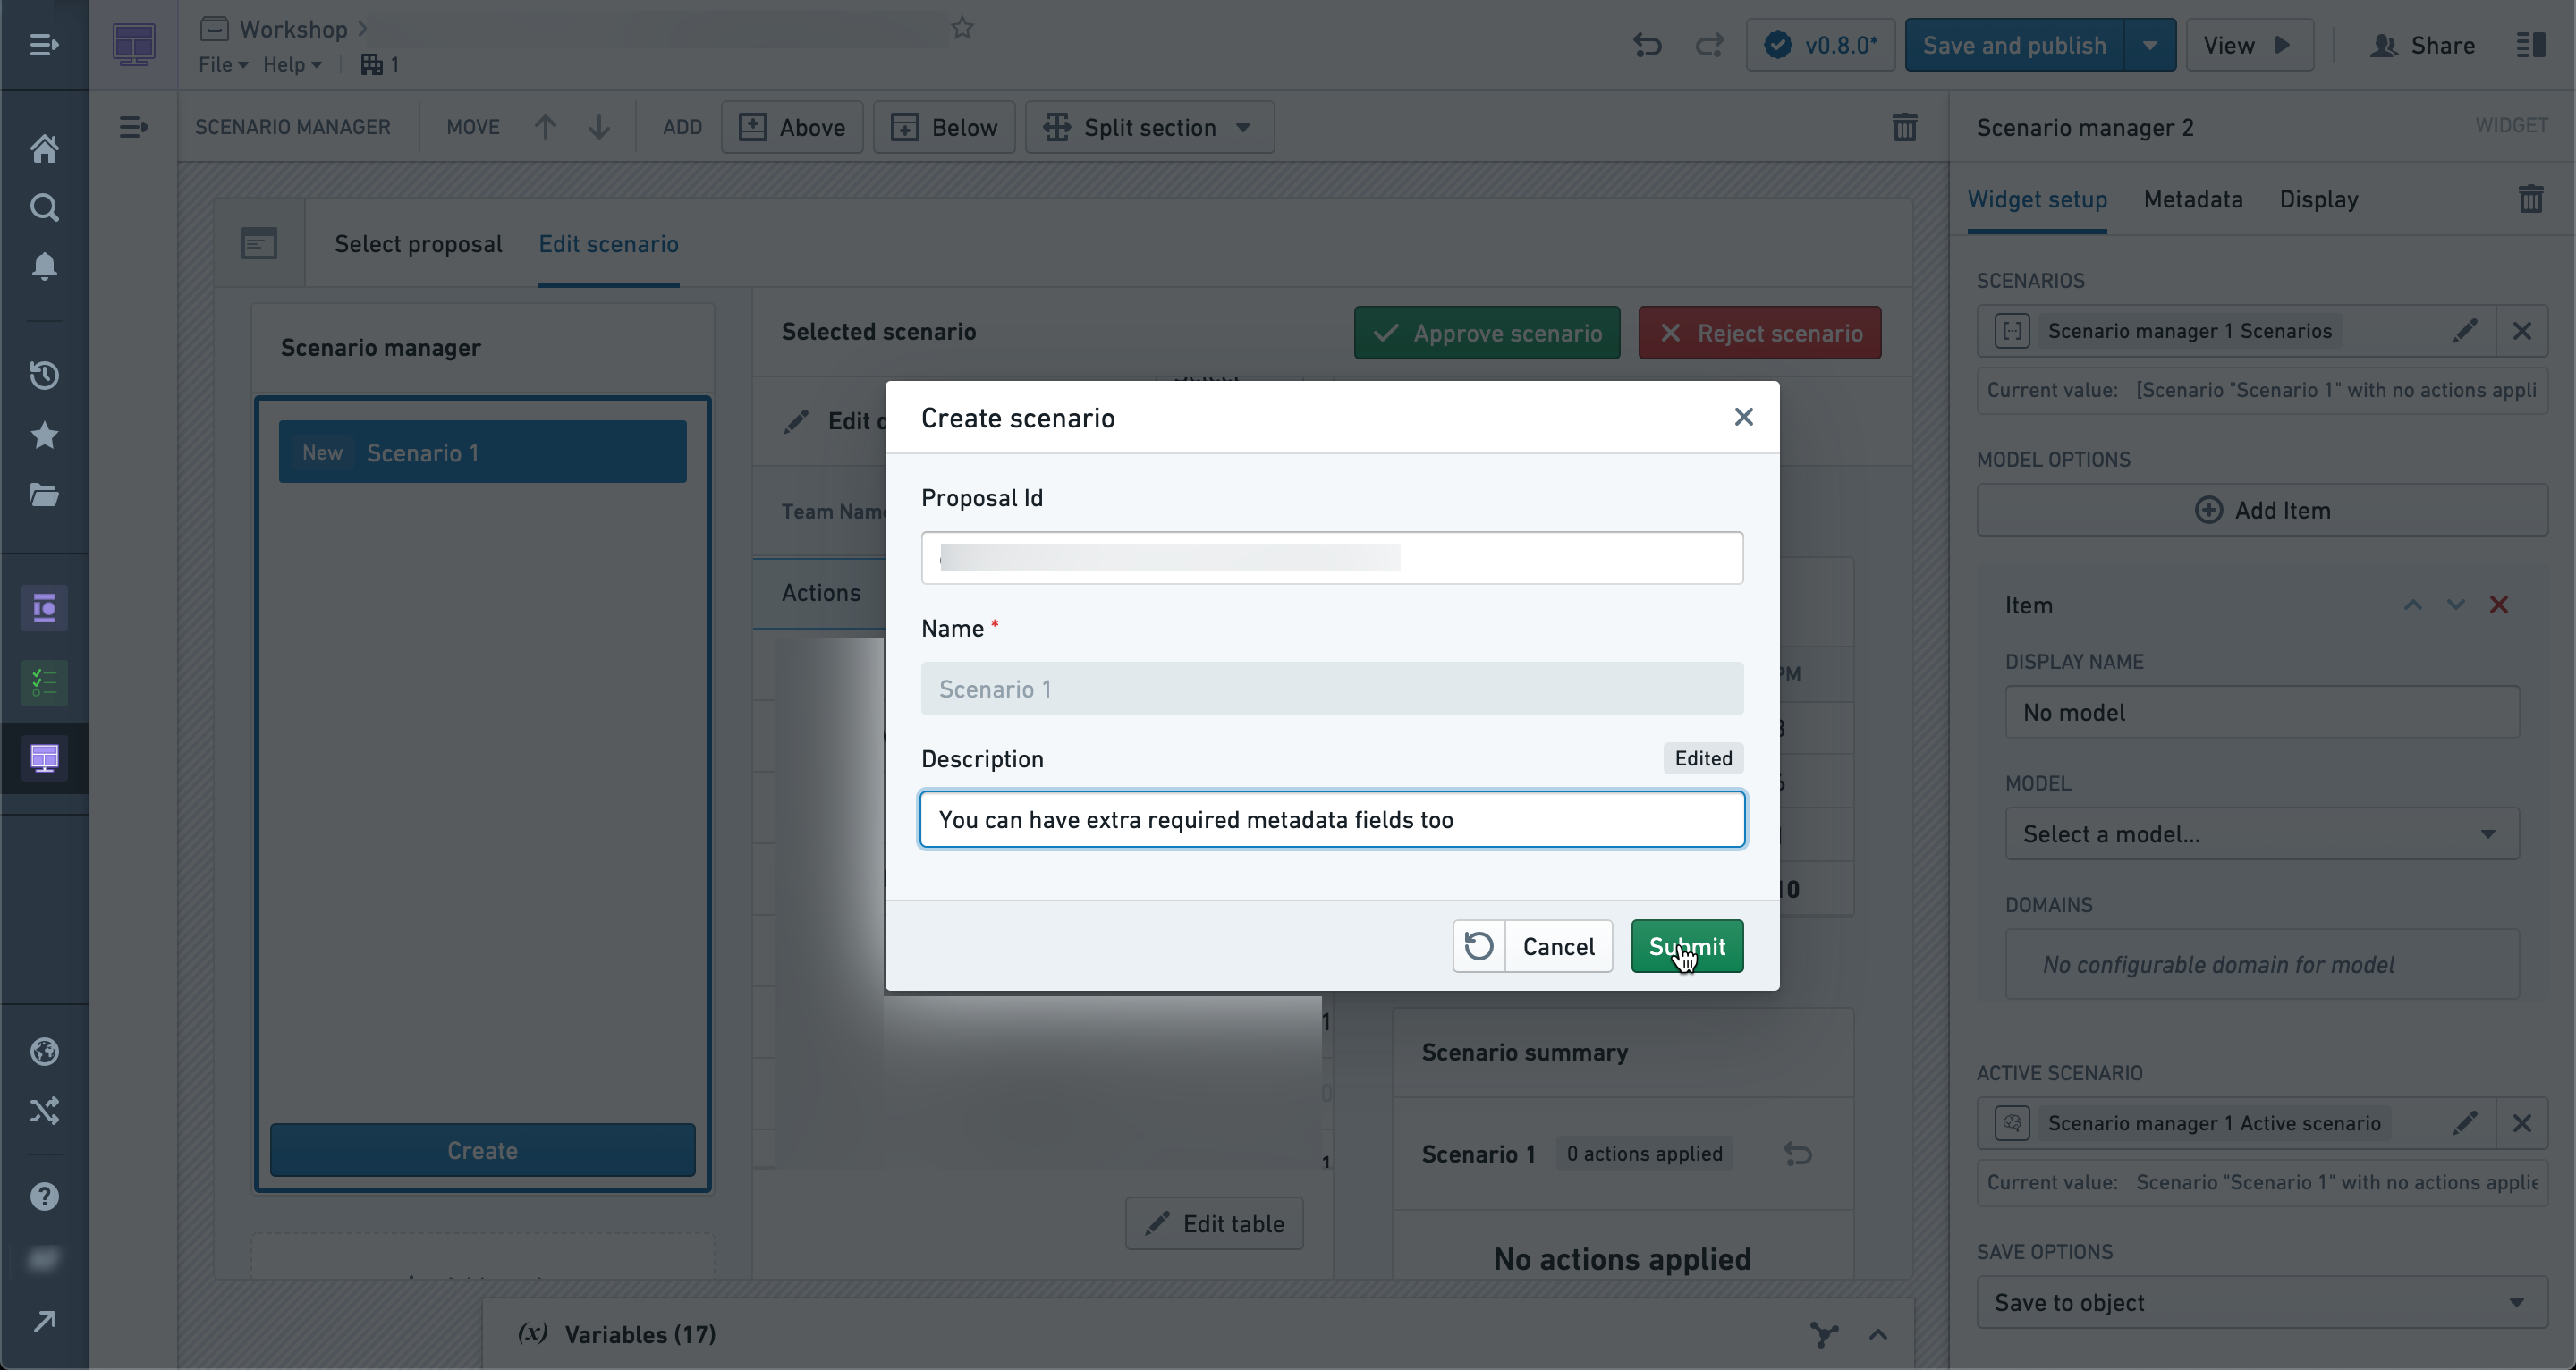
After clicking Submit, the Scenario will be saved and will no longer show a "New" indicator.
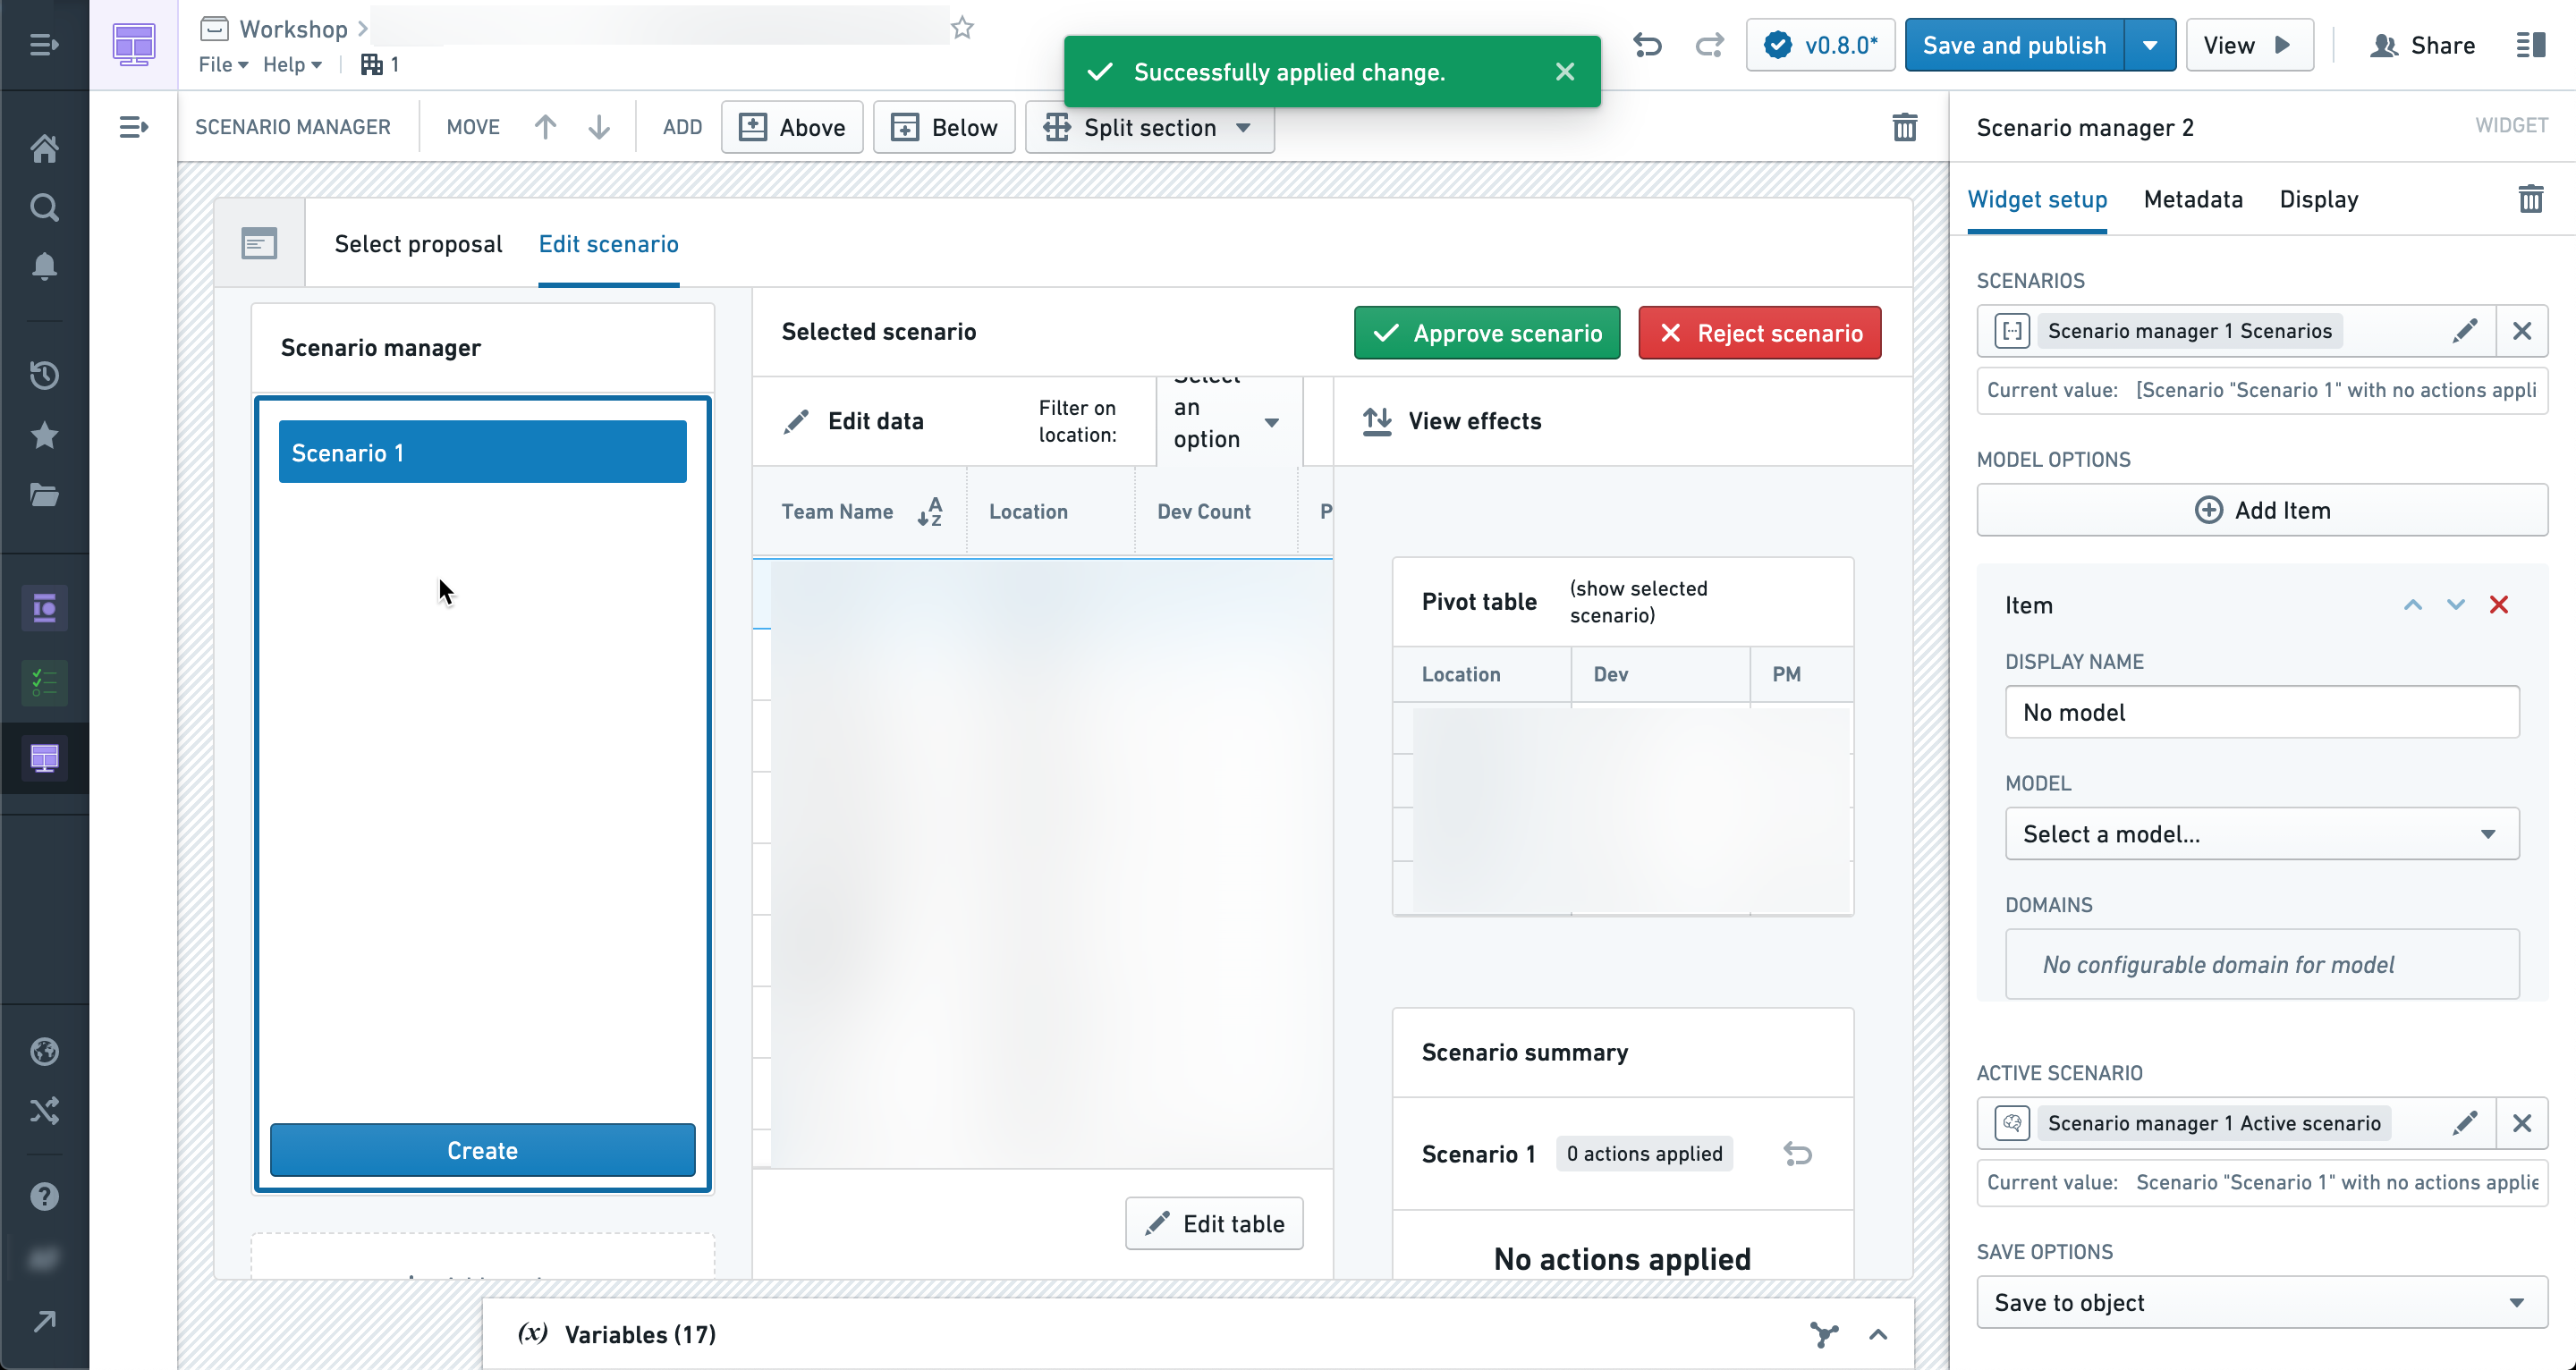
At this point, the scenario has been saved, but it will not be loaded by default when visiting this application unless configured to do so.
See the Loading scenarios tutorial to learn how to configure this behavior.
Save scenarios without the editor role
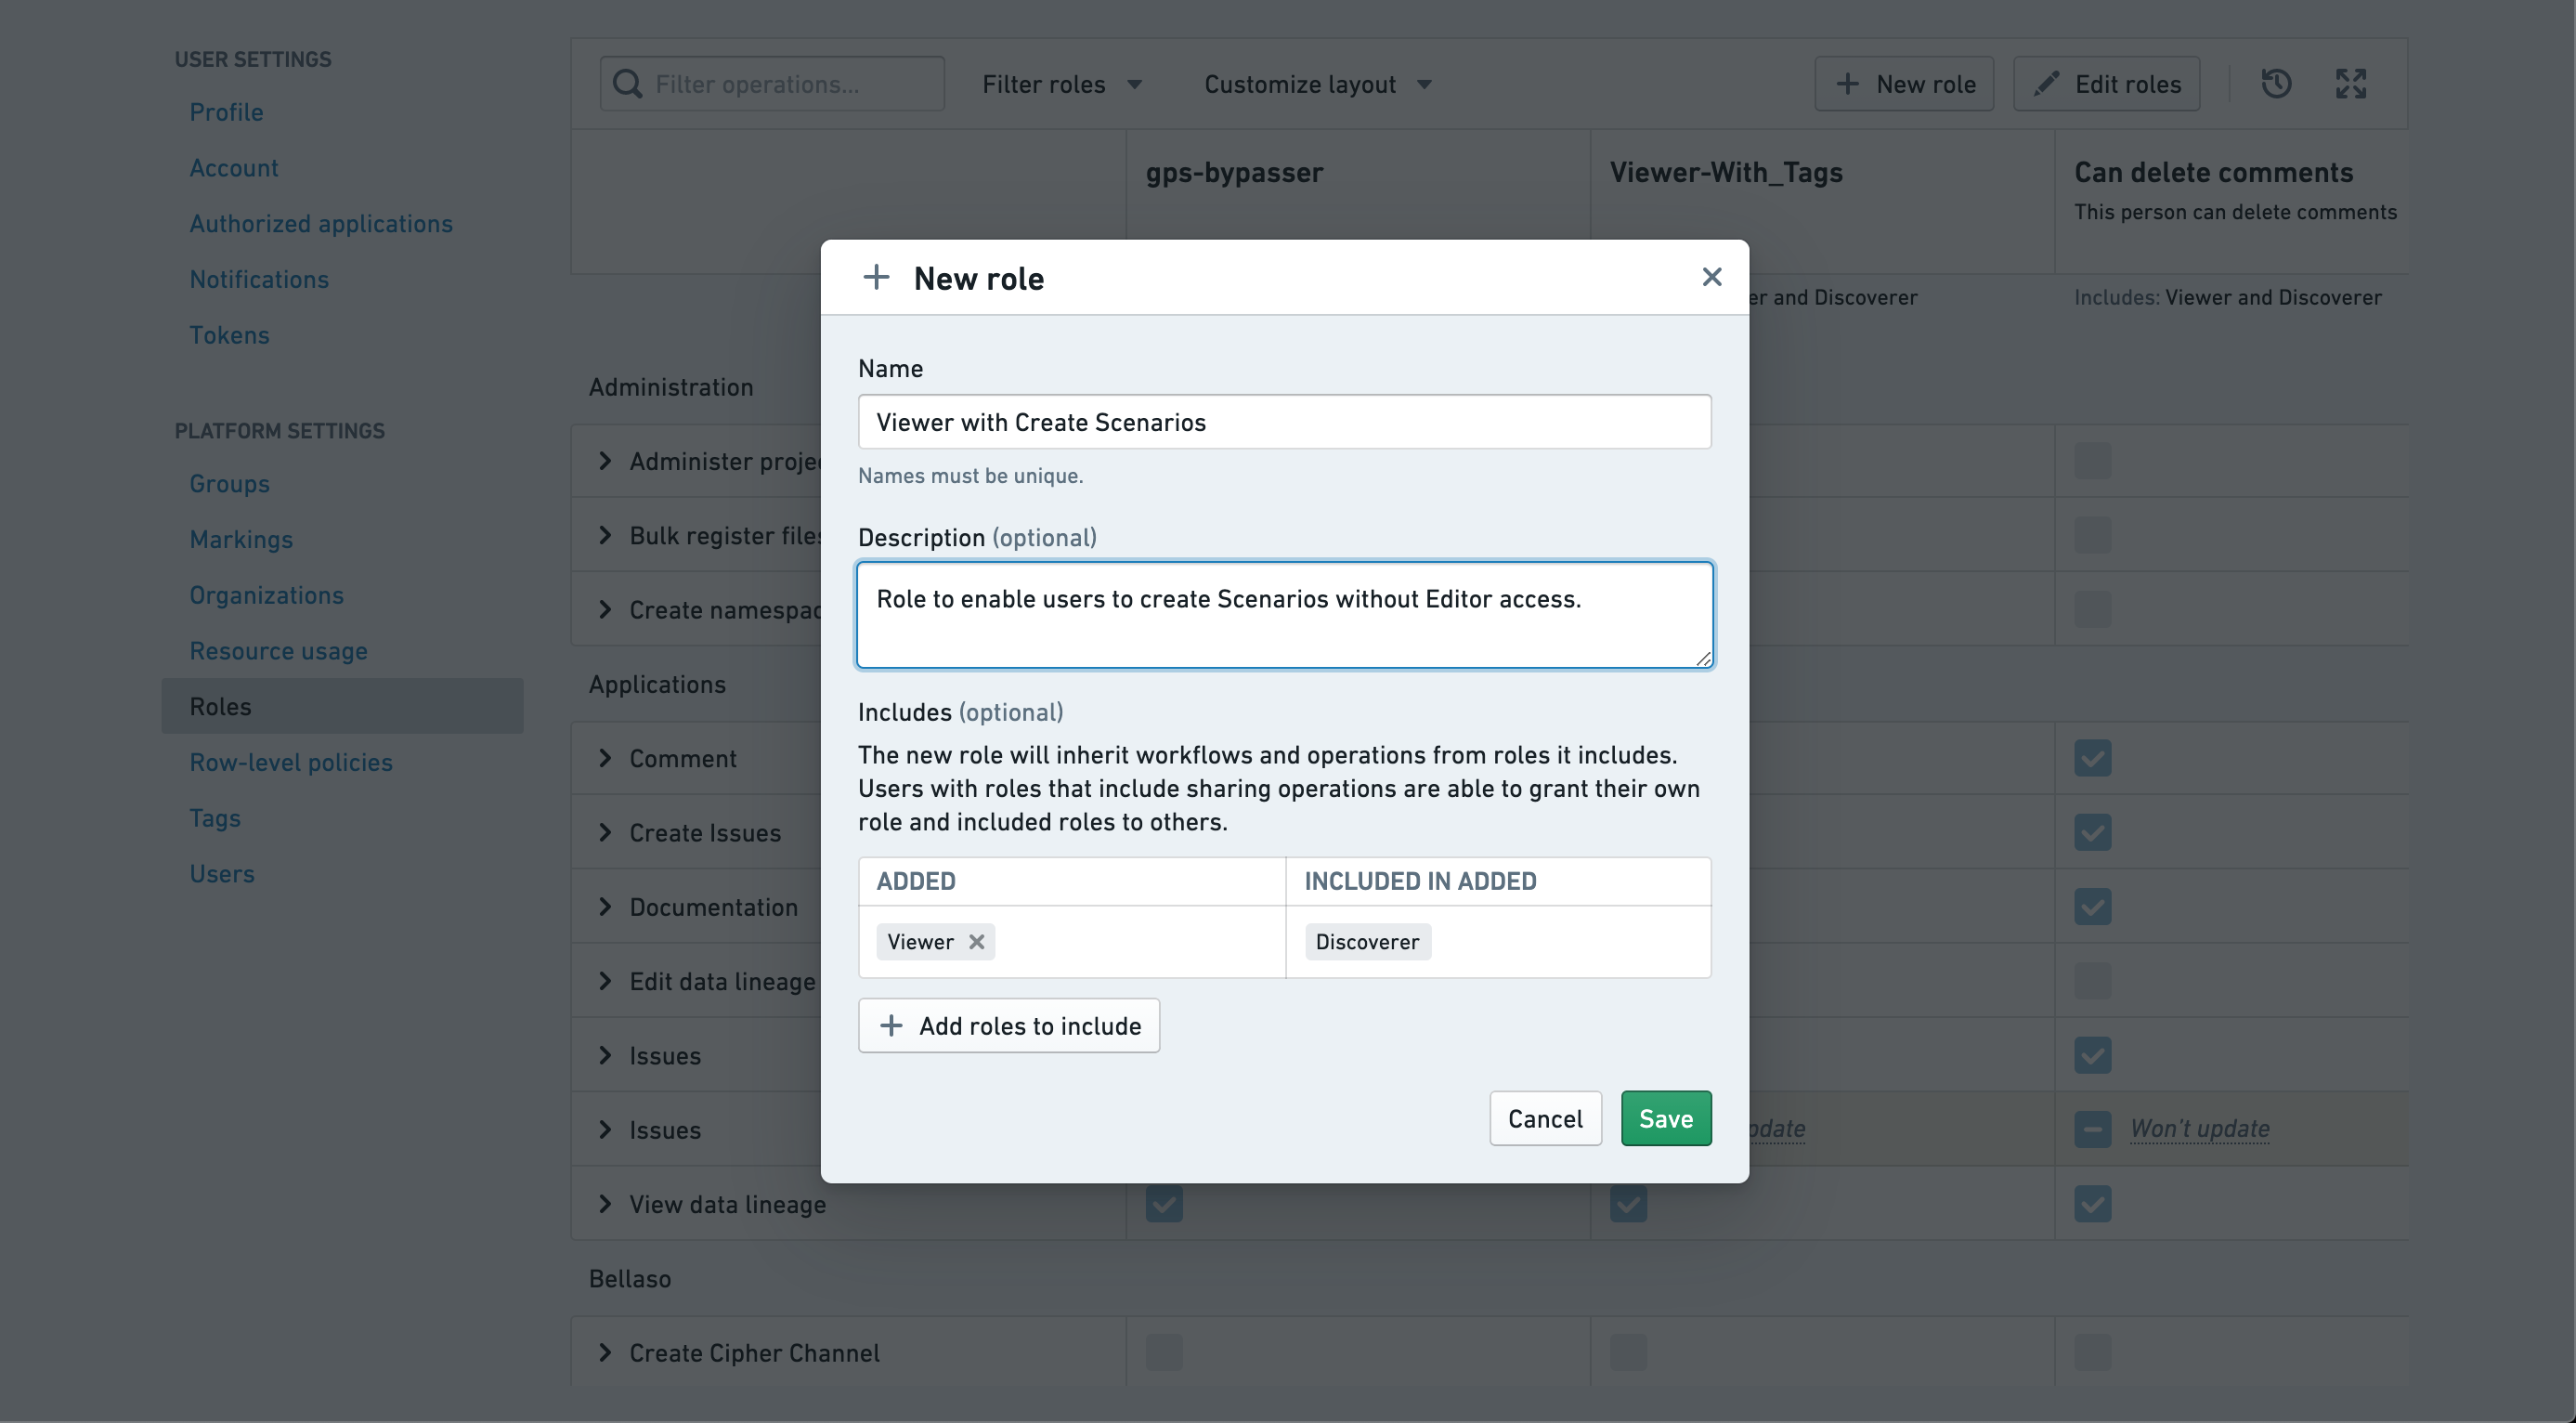
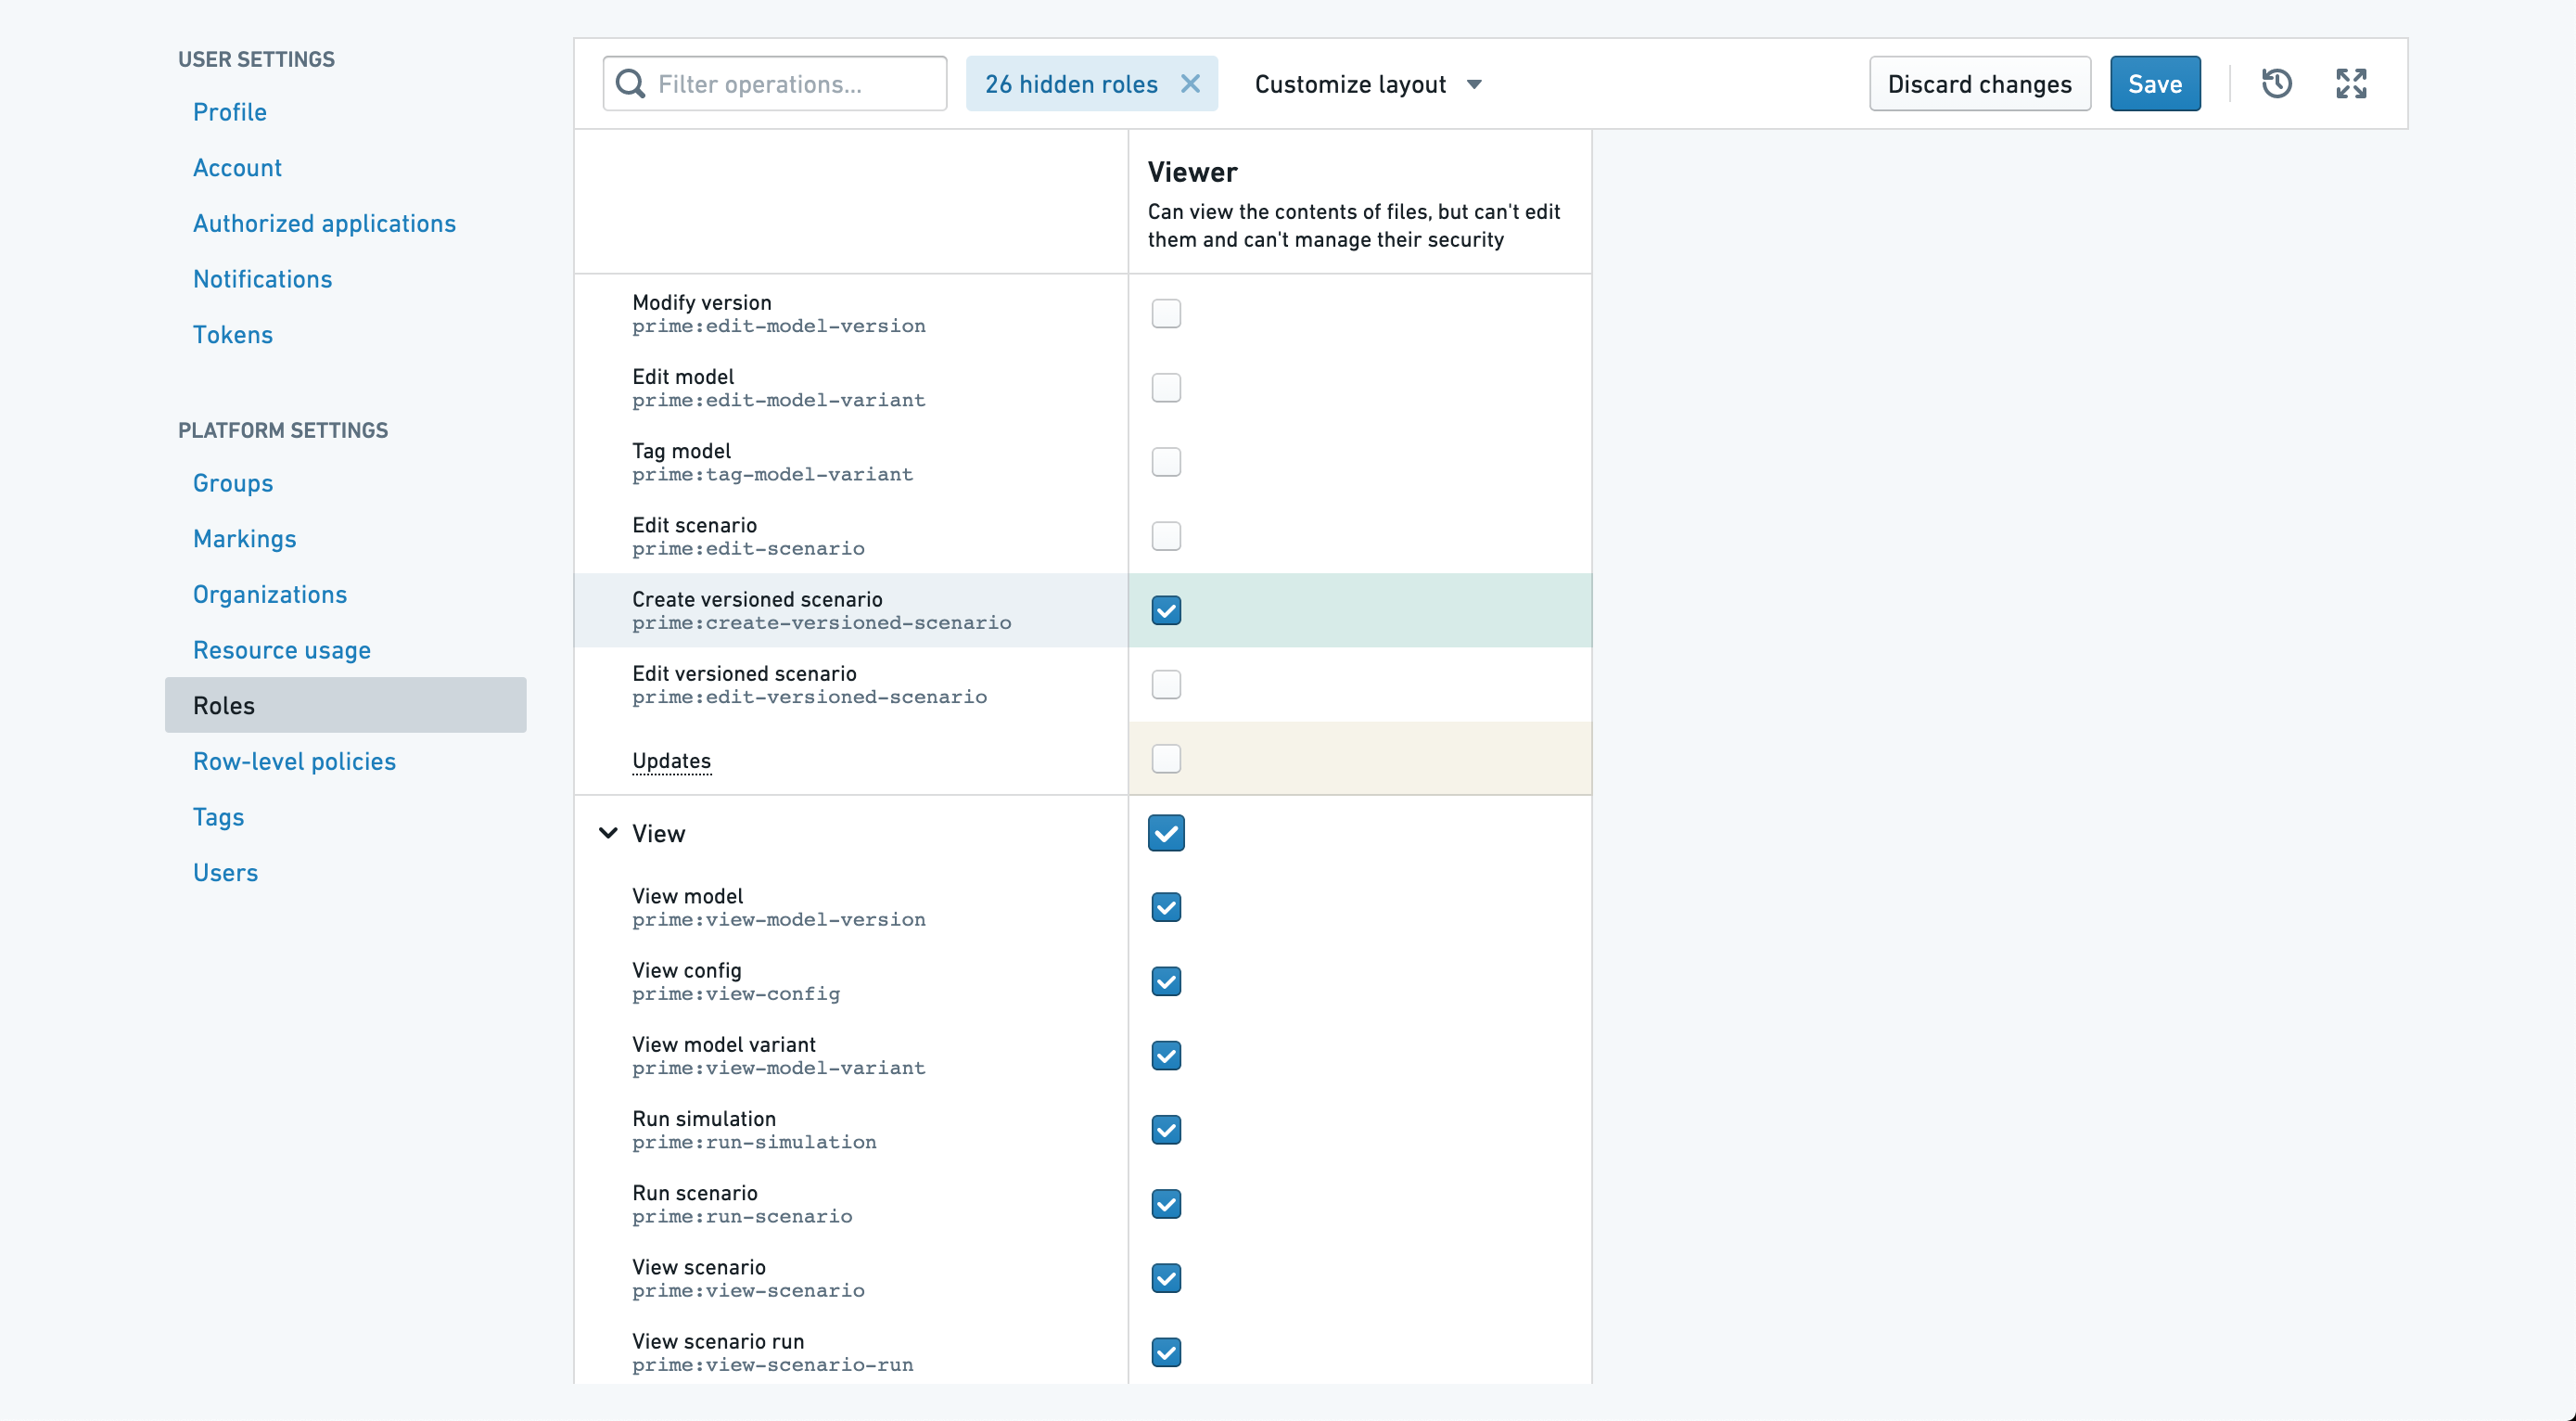
If you are facing issues saving your scenarios within your Workshop Module, this may be because your Foundry permissions are missing the Editor role. This is an issue specifically if you want to enable saving scenarios in a Workshop module without having to grant edit permissions on the module. This should not be an issue if you do not plan to save your scenario.
For this issue, contact your Palantir representative to (1) create a “Viewer with Create Scenarios” role and (2) update the Viewer items checked in the second image below.
