- Capabilities
- Getting started
- Architecture center
- Platform updates
Getting started
This tutorial walks you through how to build a simple mobile Workshop application that allows users to view flight data, filter flights, and view details about each flight. This tutorial uses example data that is included in most Foundry environments. Since the Foundry Ontology is customized to your needs and data, you may not have access to the exact object types described in the tutorial.
This tutorial focuses on the steps required to create a mobile Workshop application, and assumes you already have some familiarity with building a Workshop application and configuring writeback using Ontology Actions. If you have never used Workshop or Actions, consider starting with the general Workshop and Action types tutorials:
Part 1: Initial setup
To start, we'll create a basic application that can be used to scroll through flights data using the following steps:
-
Create a new Workshop module.
-
Select Settings in the left sidebar, and switch to the Mobile device type. The editor's dimensions will switch to those of a mobile device, and the layout will be updated to have a single column.
-
For now, toggle off the navigation bar by disabling the switch next to Module navigation bar visible in the top-right.

-
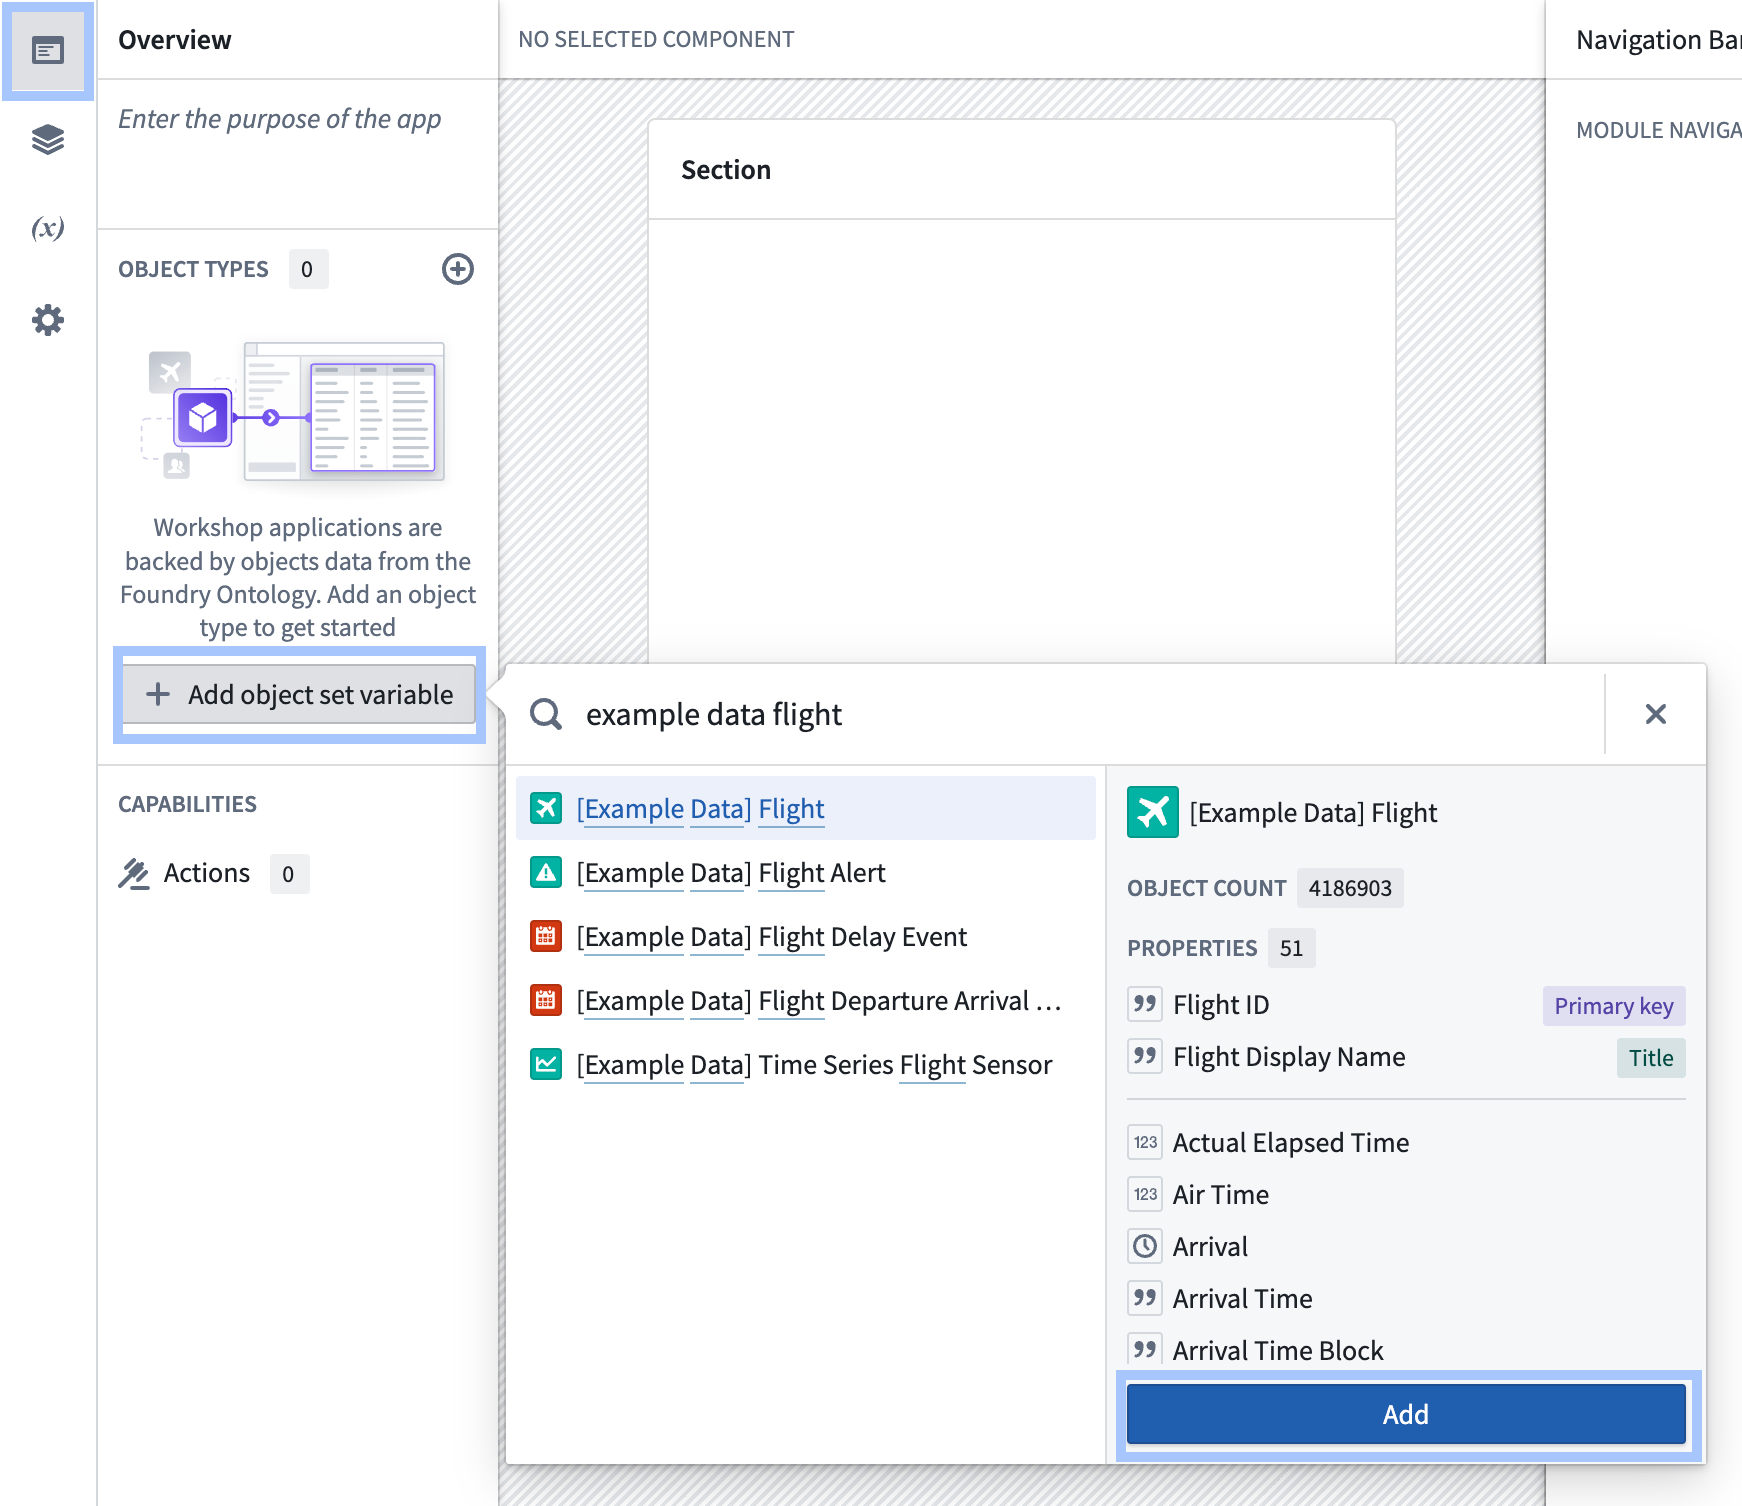
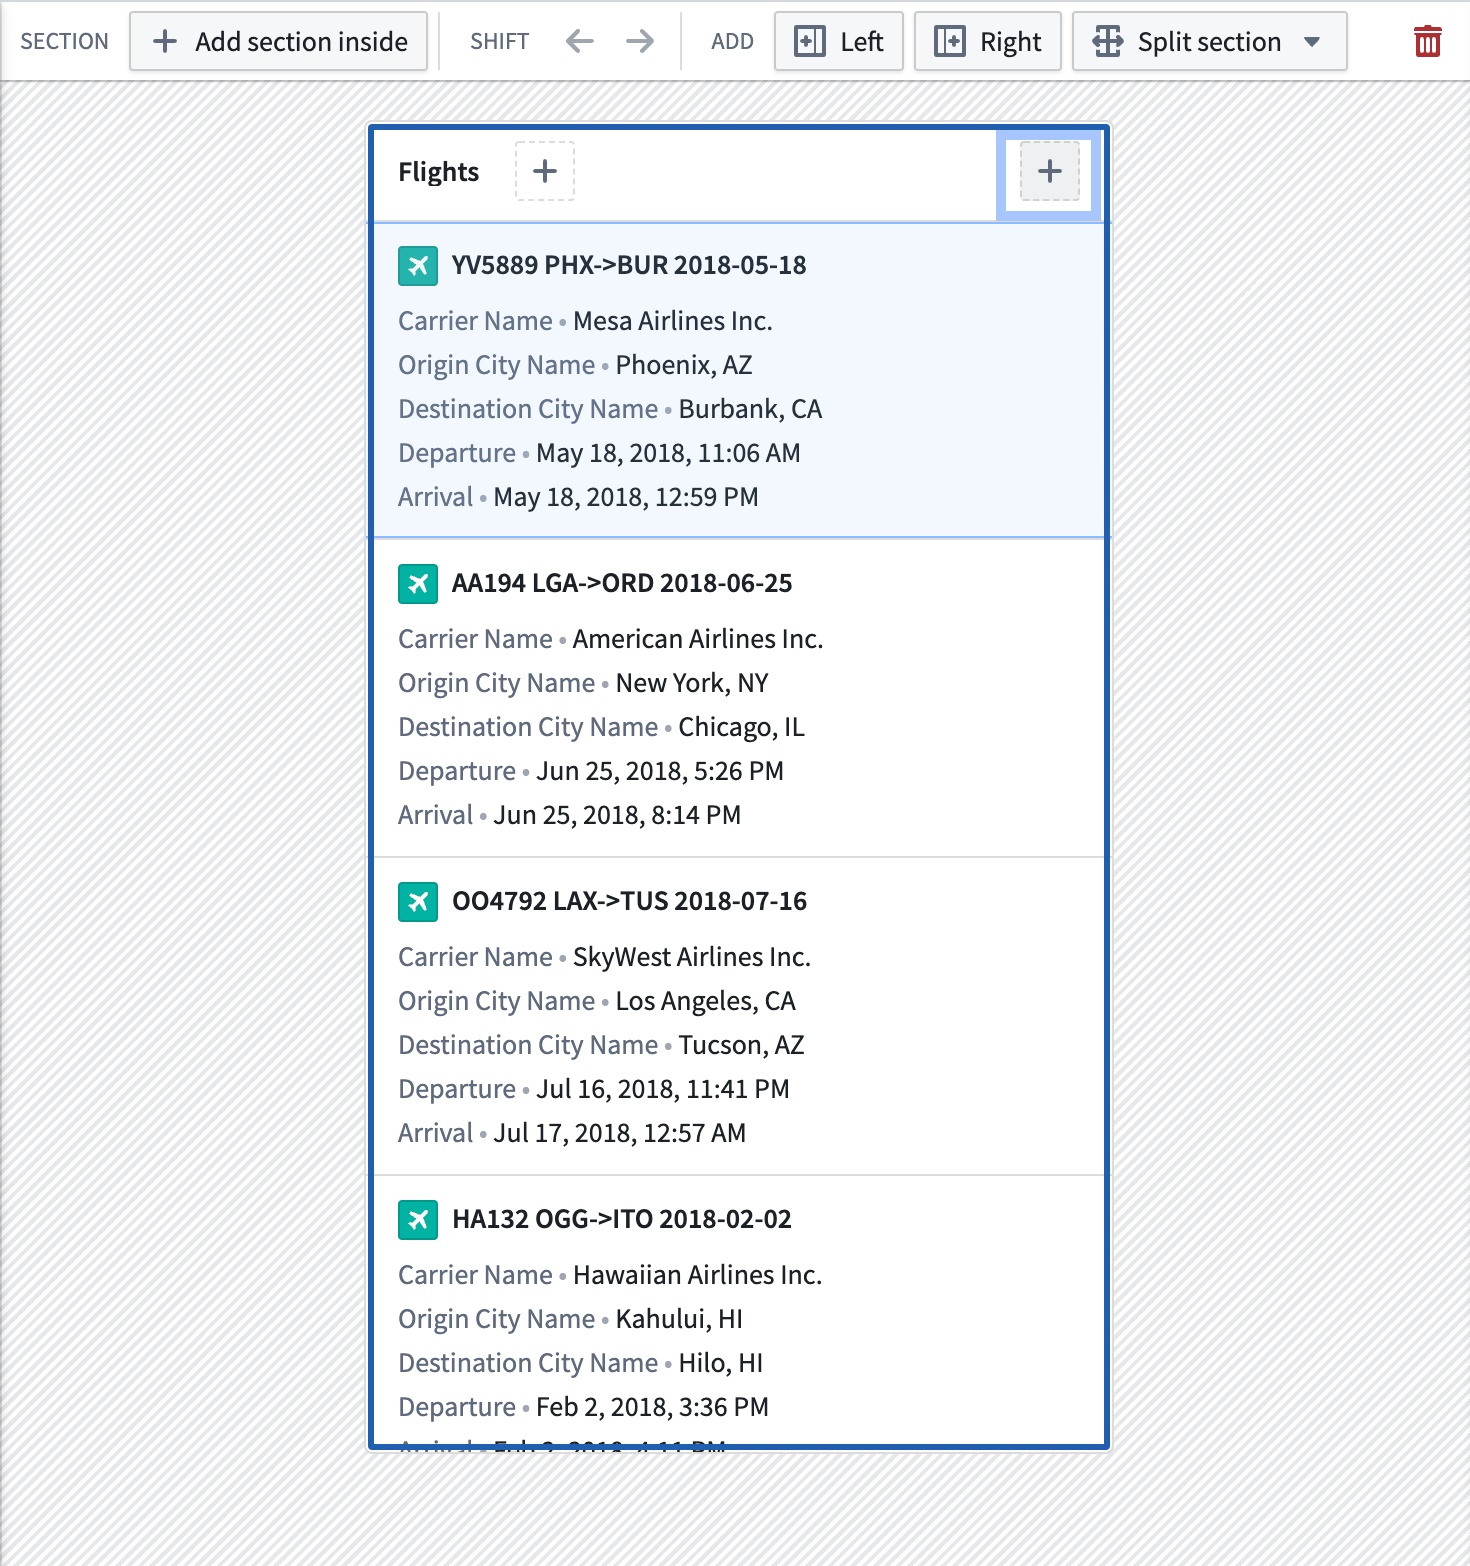
Select Overview in the left sidebar, then select Add object set variable to start adding data to your application. In this case, add the [Example Data] Flight object type to your module.
-
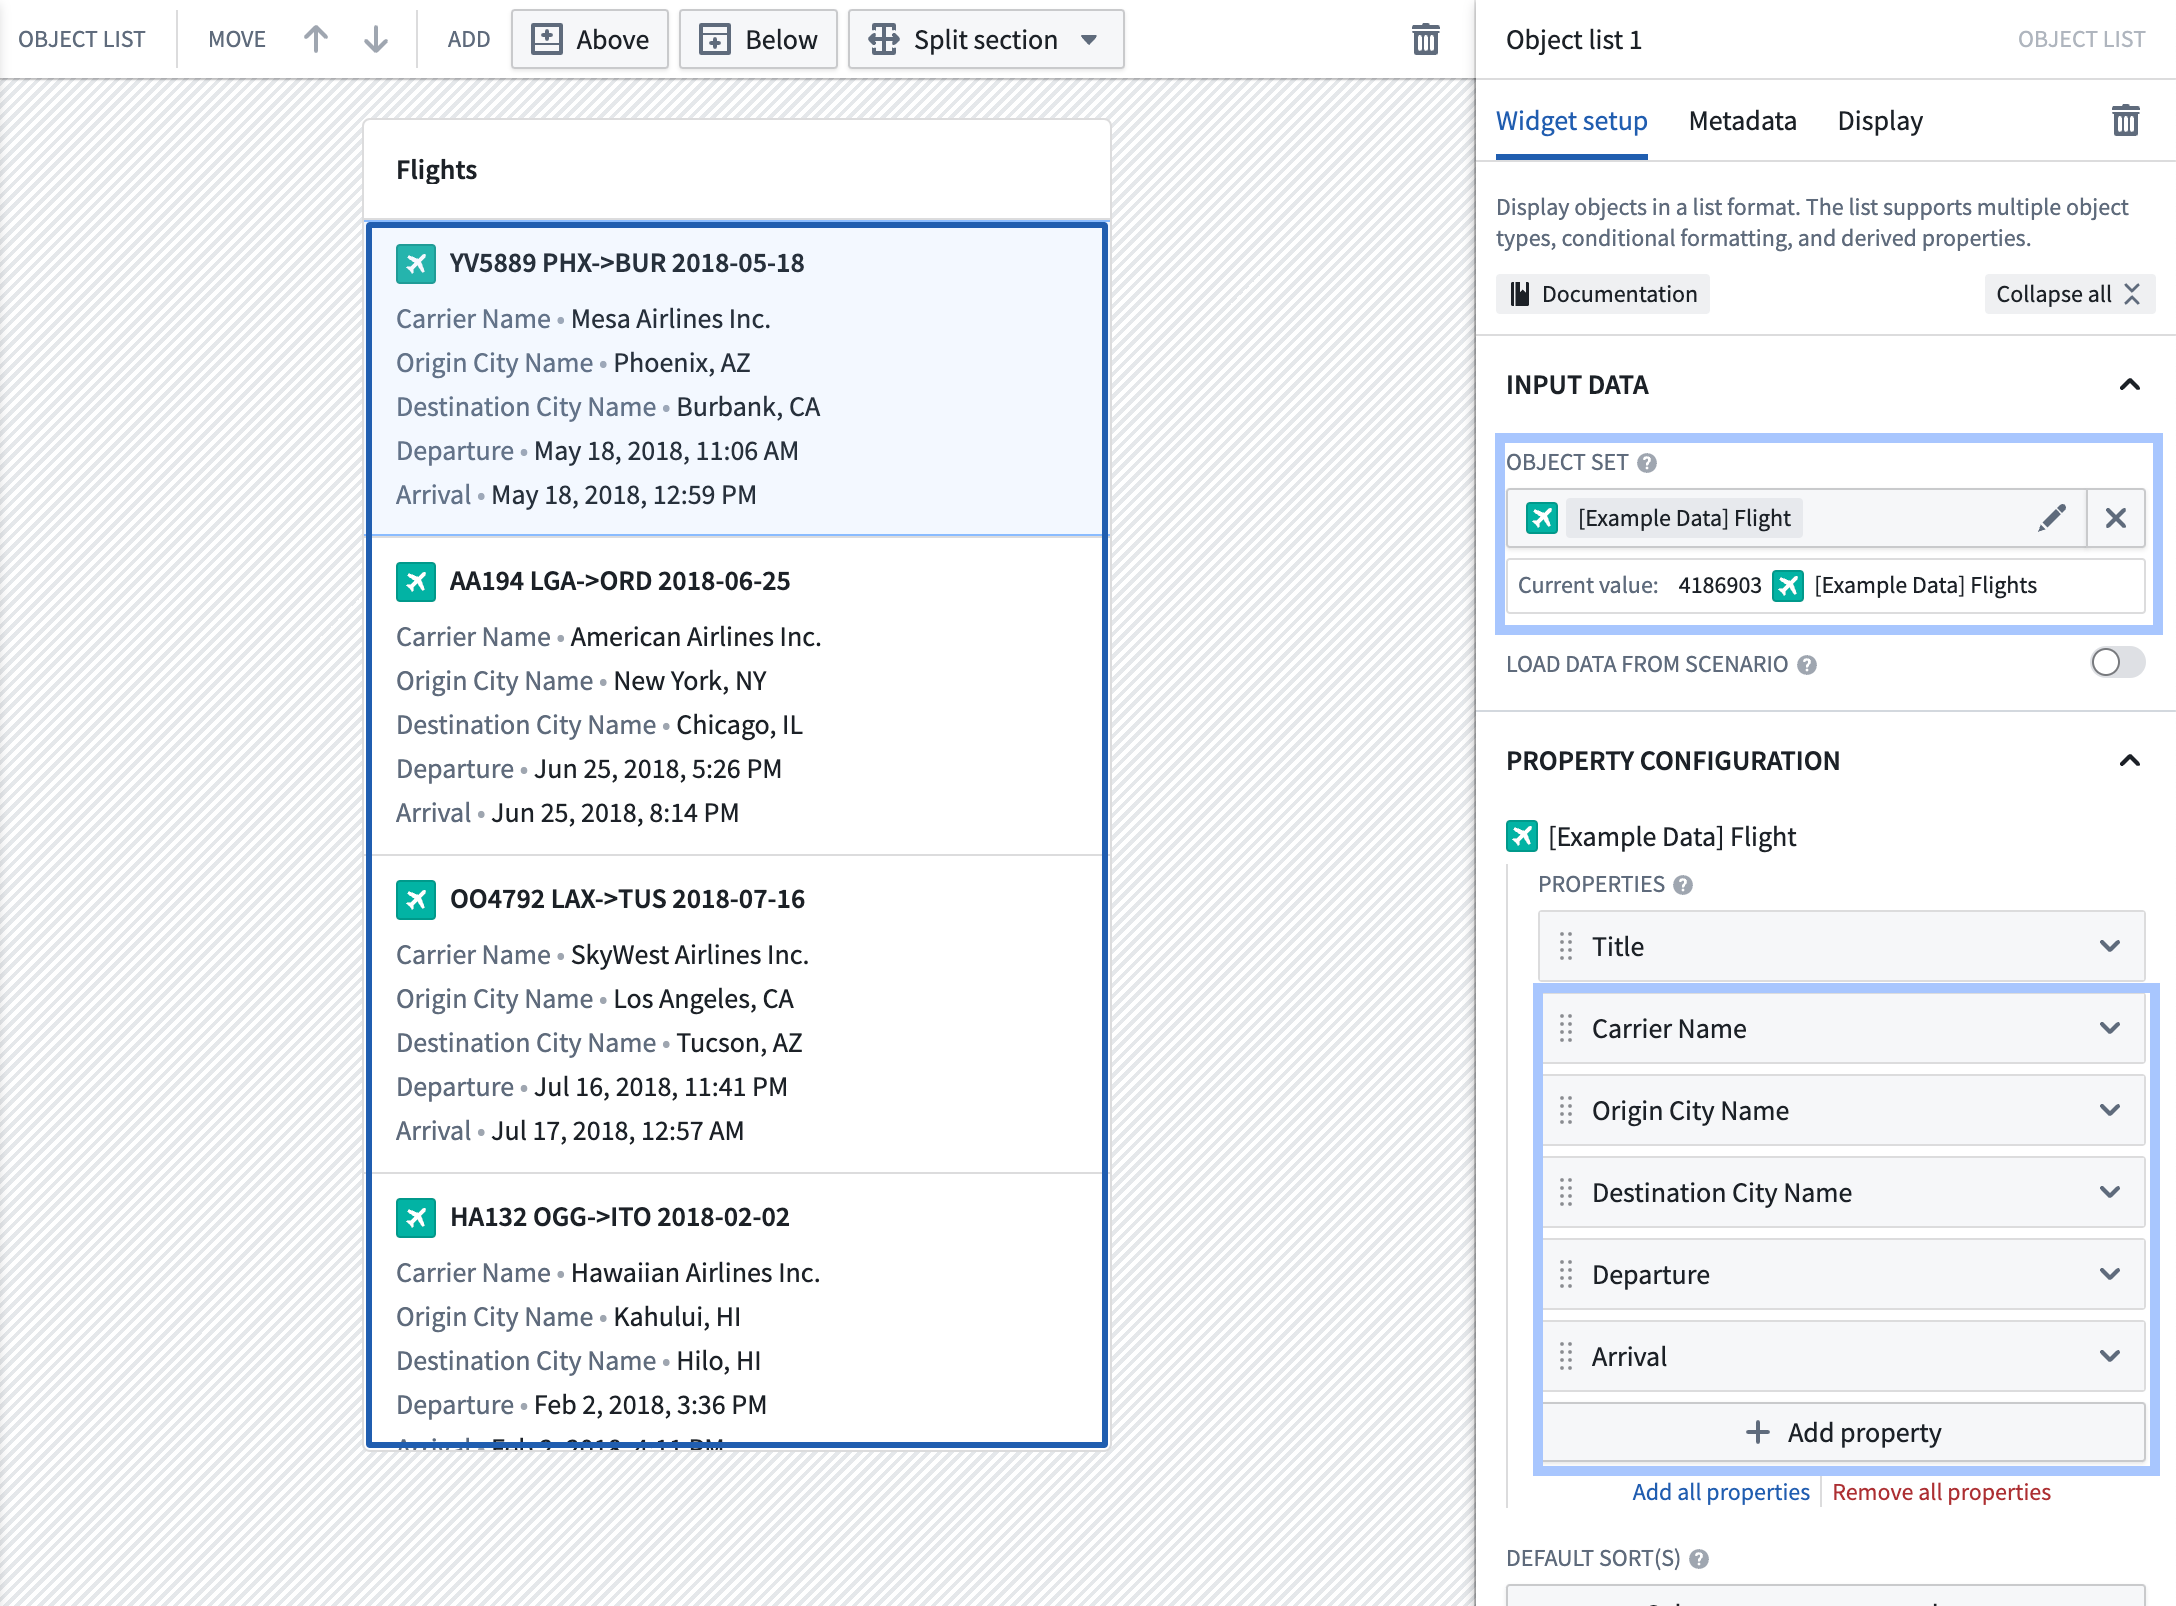
Select + Add widget and add an Object list widget to your application. Configure the widget to use your flights object set variable, then select properties to show in the list. In this case, we'll add the properties Carrier Name, Origin City Name, Destination City Name, Departure, and Arrival to the list.
At this point, you've created a basic application that can be used to scroll through flights data. In the next step, we'll add some interactivity to this application.
Part 2: Add filtering
In this part of the tutorial, we'll add the ability to filter the list of flights. To provide the user with enough screen space to apply filters, we'll nest the filtering within a Workshop drawer.
-
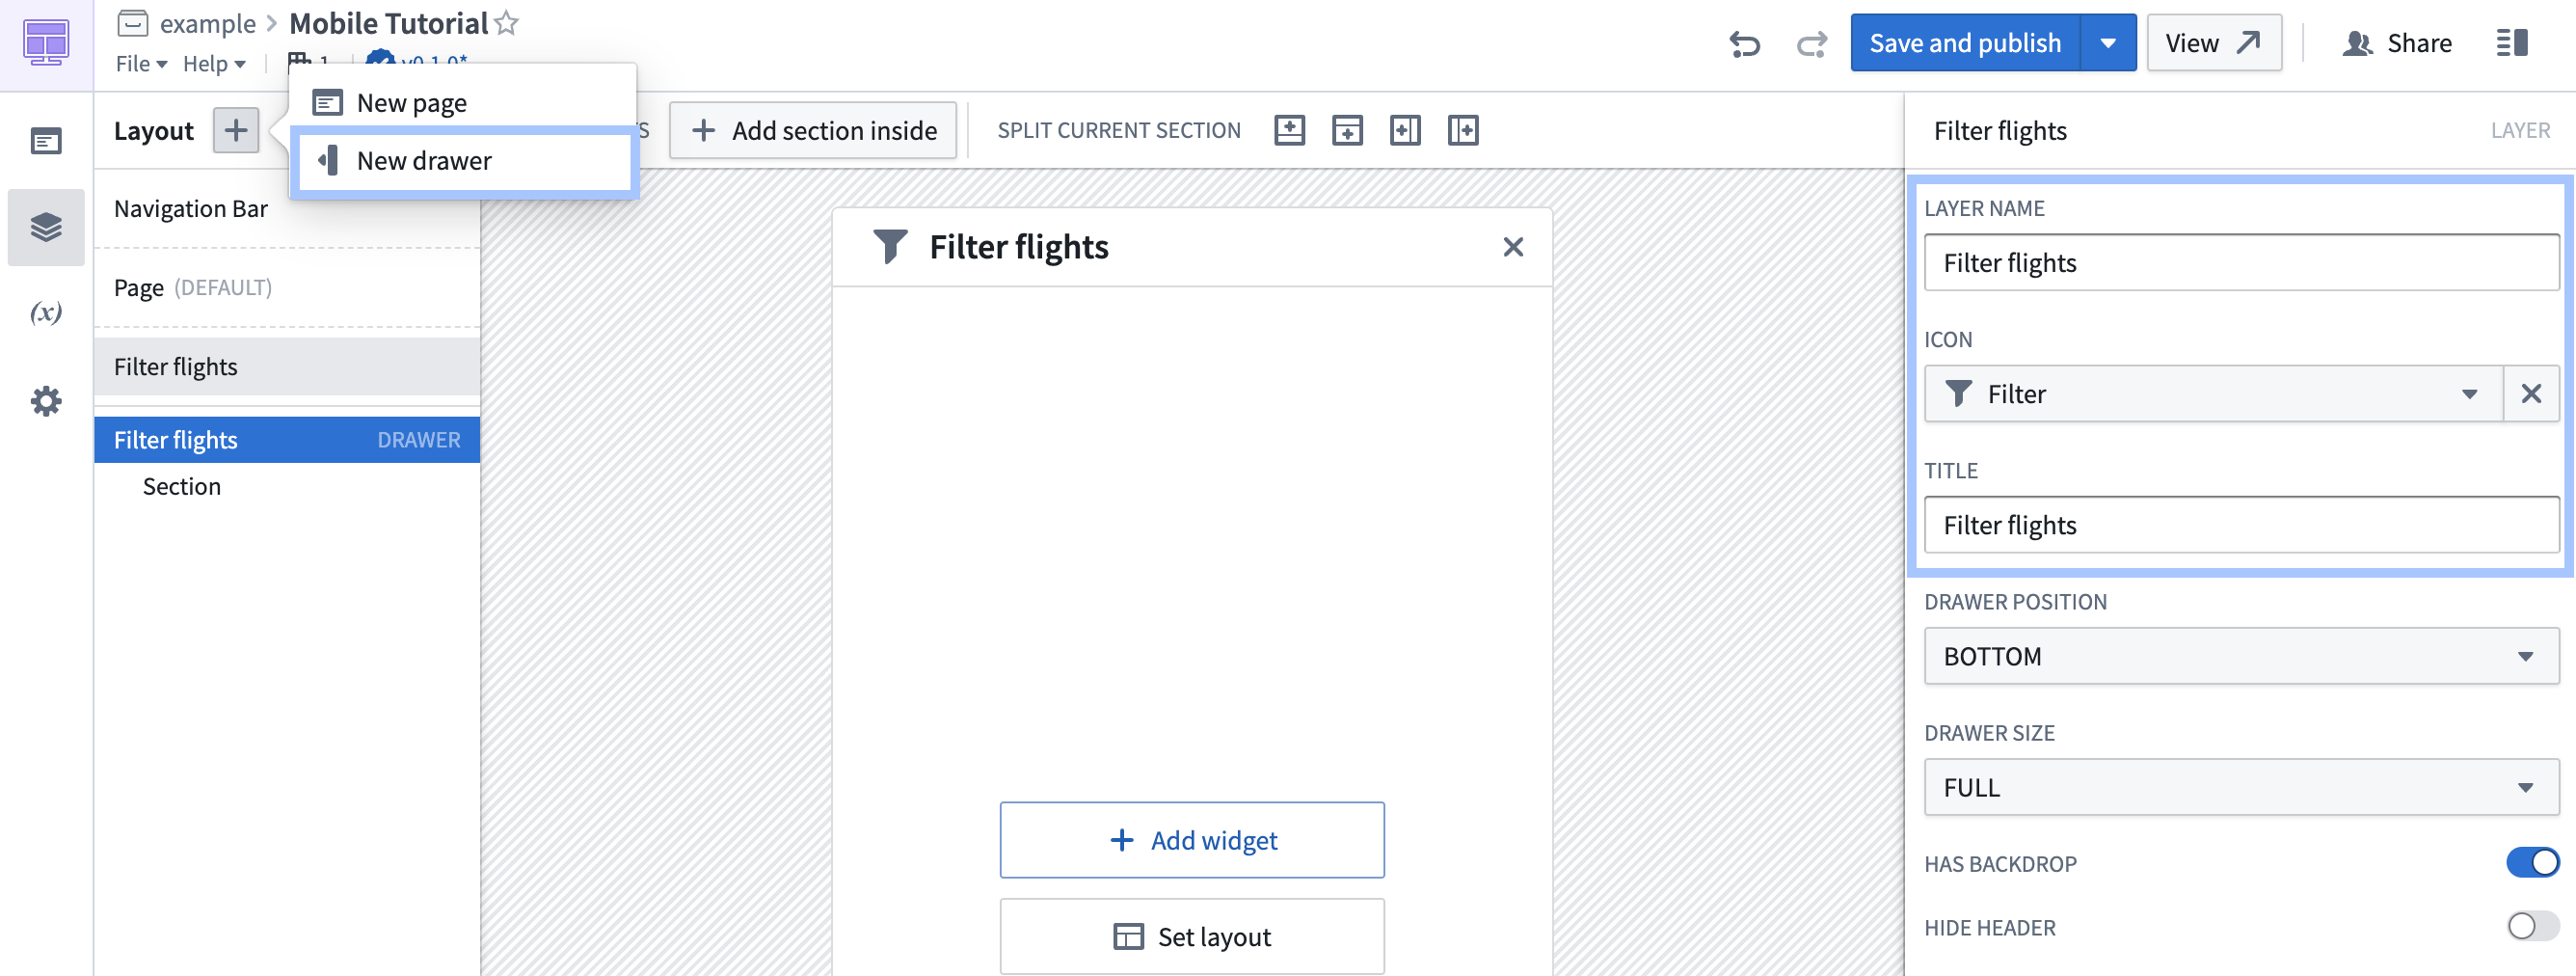
Select Layout in the left sidebar, then select the + and add a New drawer to the application. Update the drawer's title and name to "Filter flights" and set its icon to the filtering icon.
-
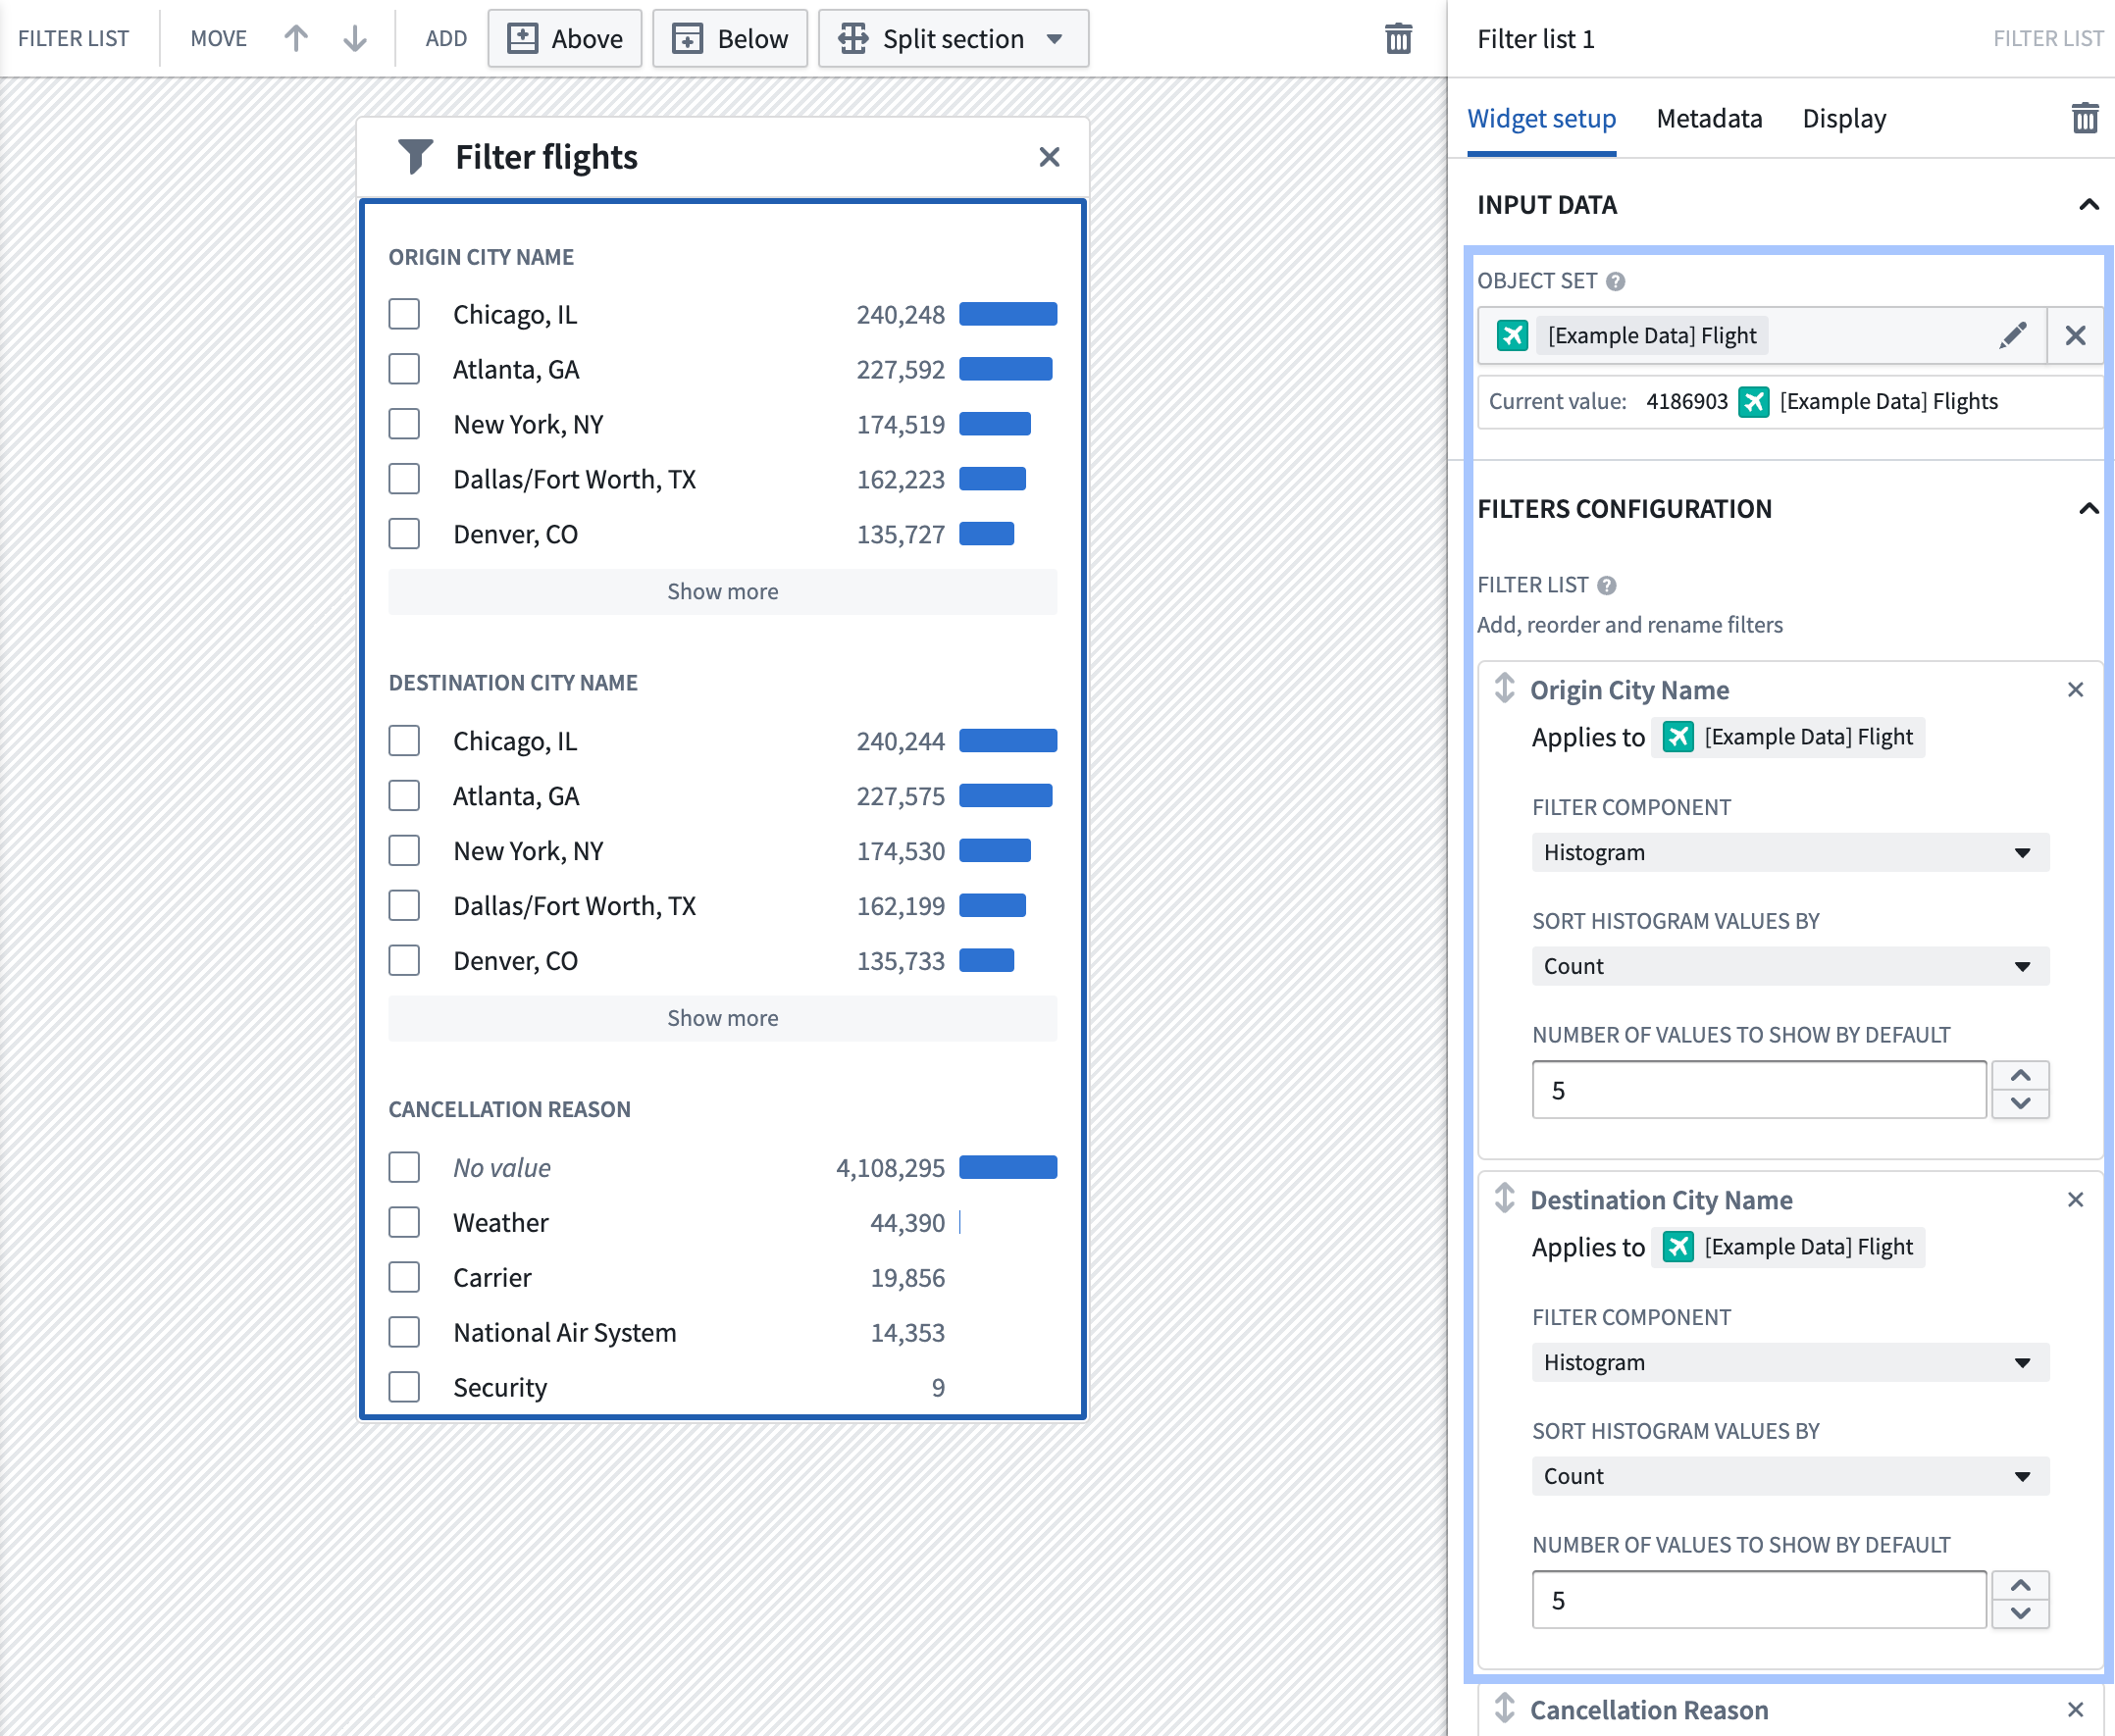
Within the drawer, select + Add widget and add a Filter list widget. Configure the Filter list's input data to be the Flights object set variable you created earlier.
-
Under Filters configuration, select a few properties that users should be able to filter. In this case, we'll add filters on the Origin City Name, Destination City Name, and Cancellation reason properties.
-
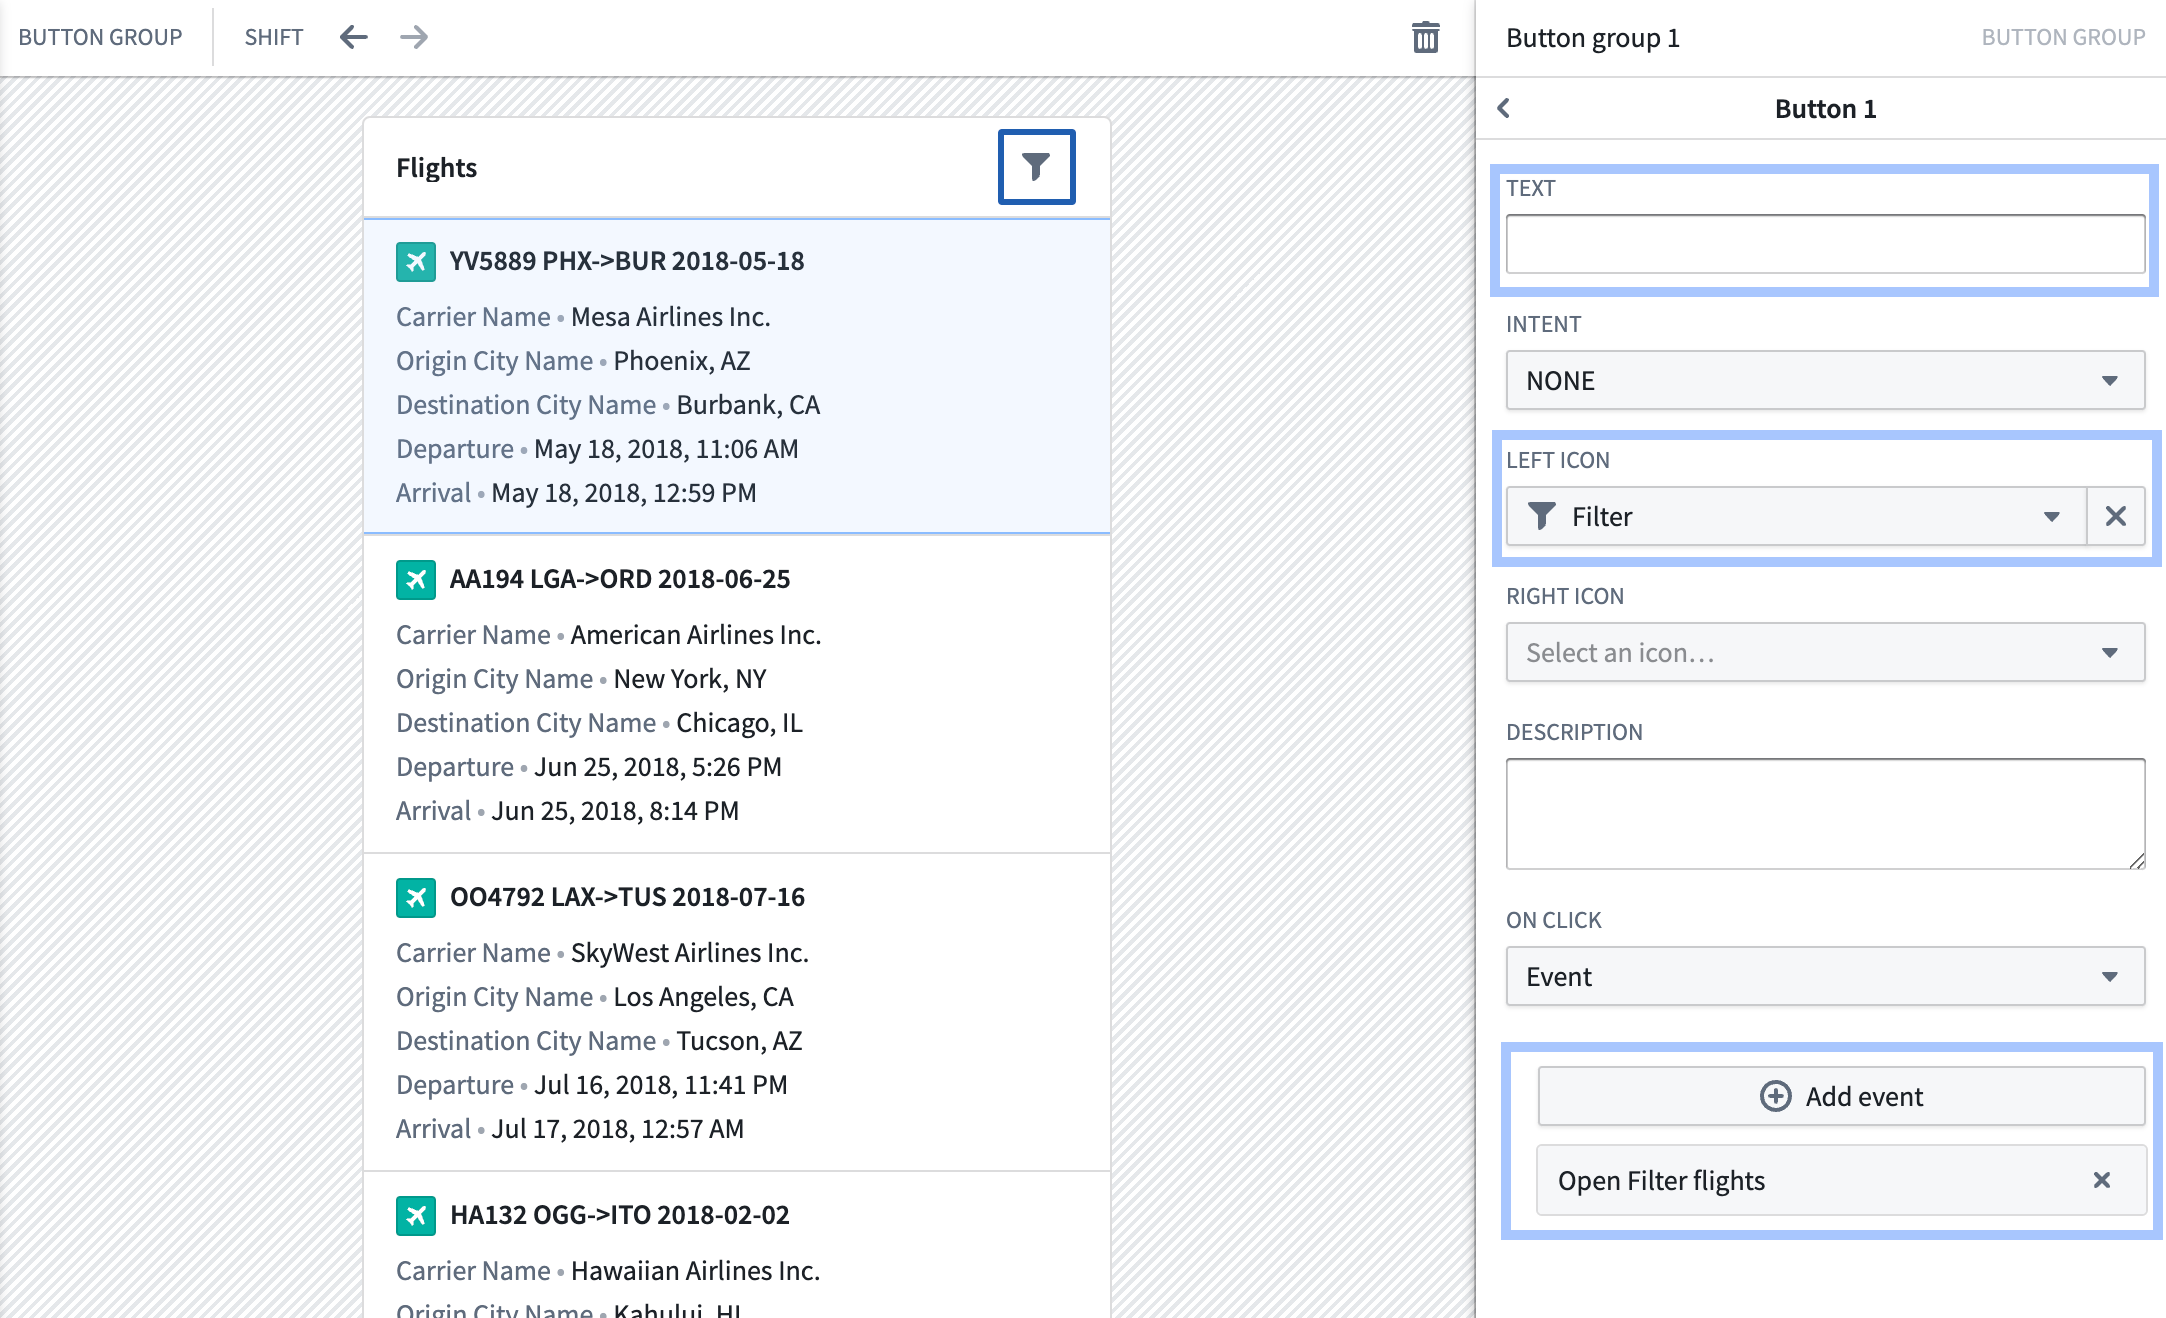
Close the drawer using the X in the top-right of the editor view. Back in the flights view, click the + in the top toolbar to add a widget in the toolbar. Select the Button group widget.
-
Set the button to have a minimal style and large style, then select Button 1 to configure the button and its behavior. In this case, we want the button to just show the filter icon. Remove the button text, then select the filter icon under Left icon. Select + Add event, then select Open Filter flights.
-
Next, update your object list to respect the filter being produced by the filter list widget. Select the object list widget, then remove the object set variable configuration by selecting the X under Input data.
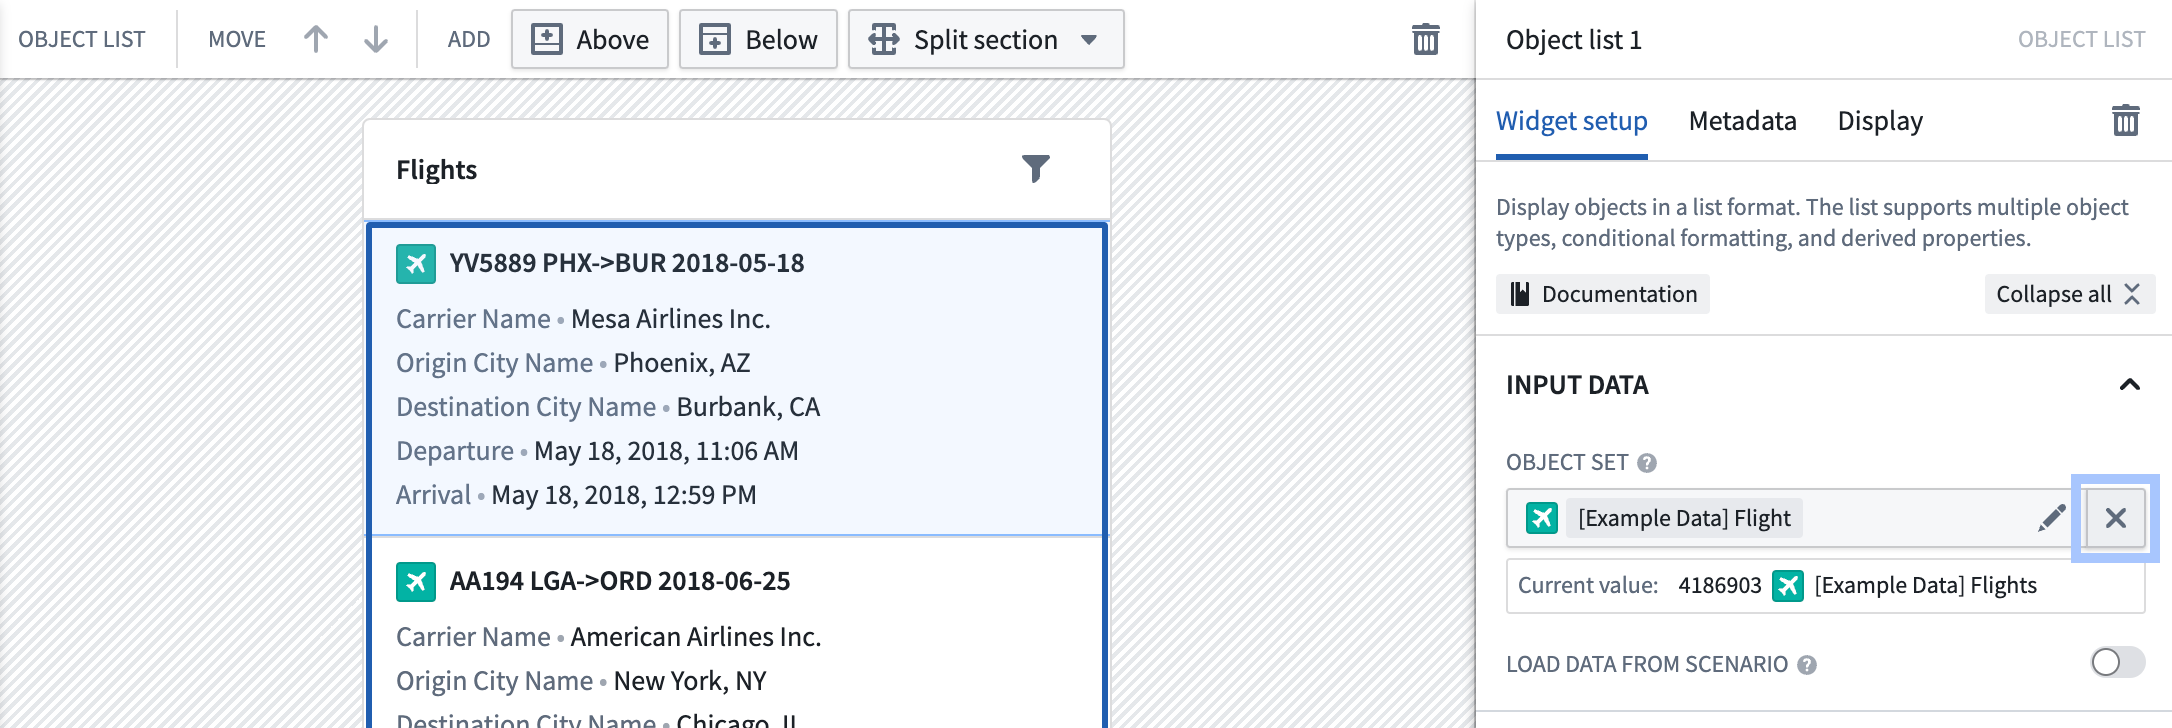
-
Select New object set variable, and name your new variable "Filtered flights".
-
Under Starting object set, select your existing object set variable named "[Example Data] Flight". Next, select Filter using variable and choose the output from your Filter list widget.
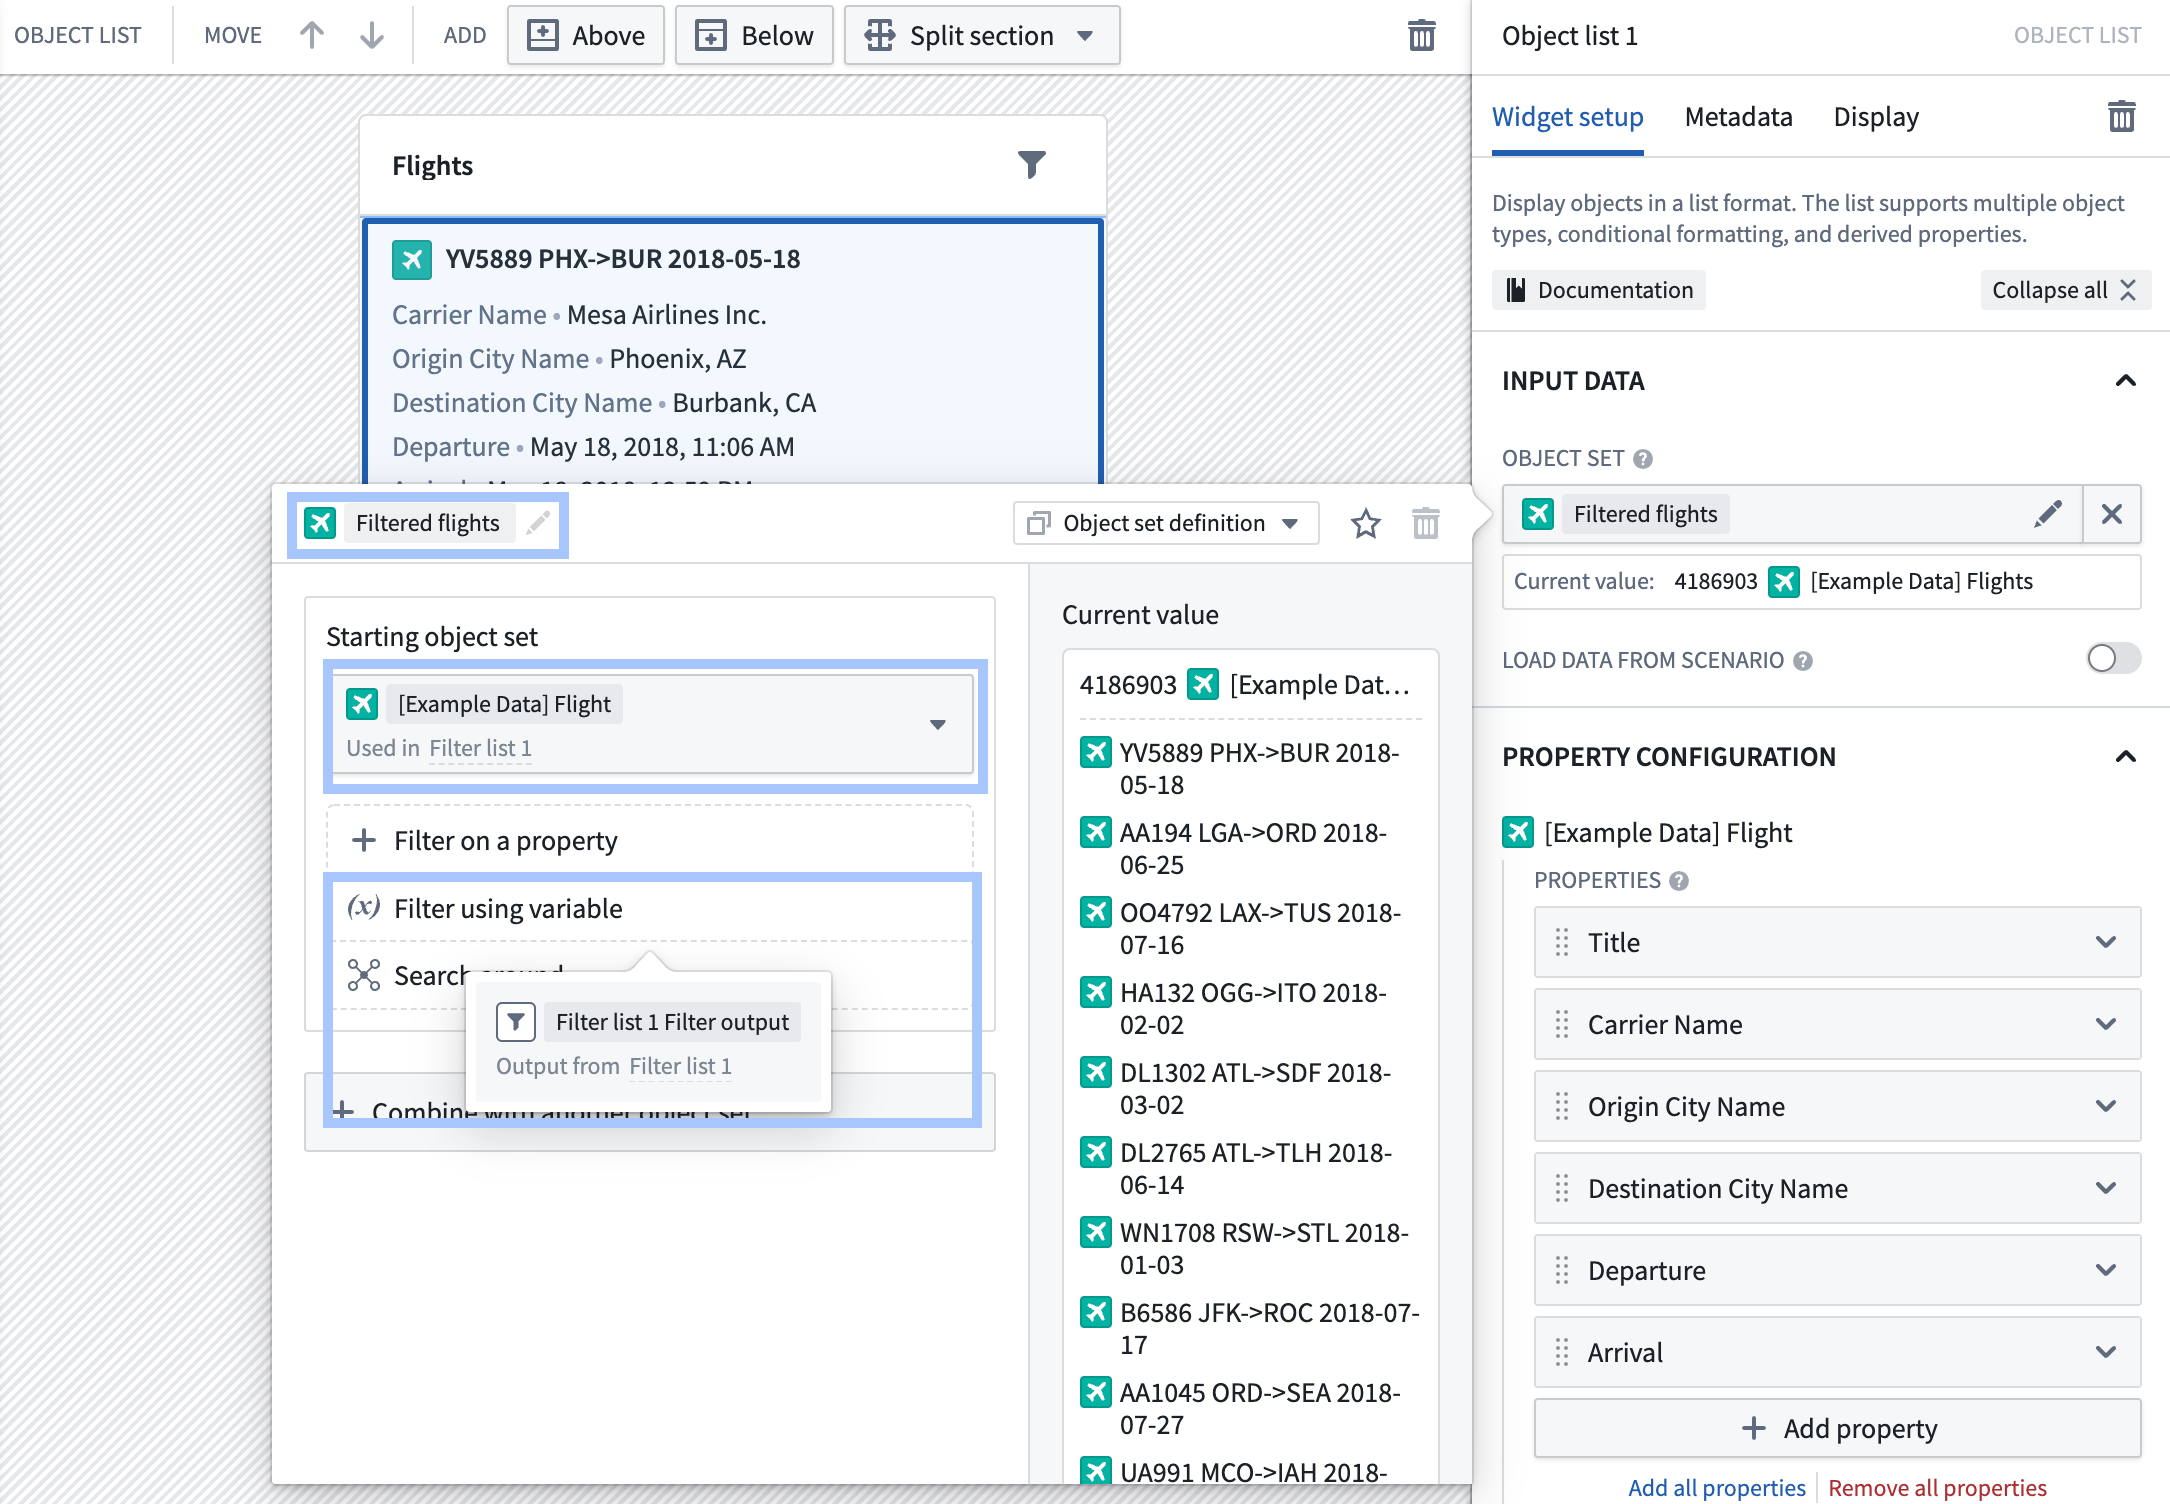
At this point, you've added the ability for users to filter the list of flights based on a set of properties that you've configured. To avoid UI clutter, these filters show up in a full-page drawer so that users can easily configure multiple filters at once before returning to their filtered list.
Try opening the drawer and filtering to flights from Denver, CO that were canceled due to Weather. Close the drawer and you'll see that the list of flights has been updated appropriately.
In the next step, we'll let users explore more details about a selected flight.
Part 3: Add selected object view
In this part of the tutorial, we'll enable users to navigate to a different page to view details when they select a flight from the list.
-
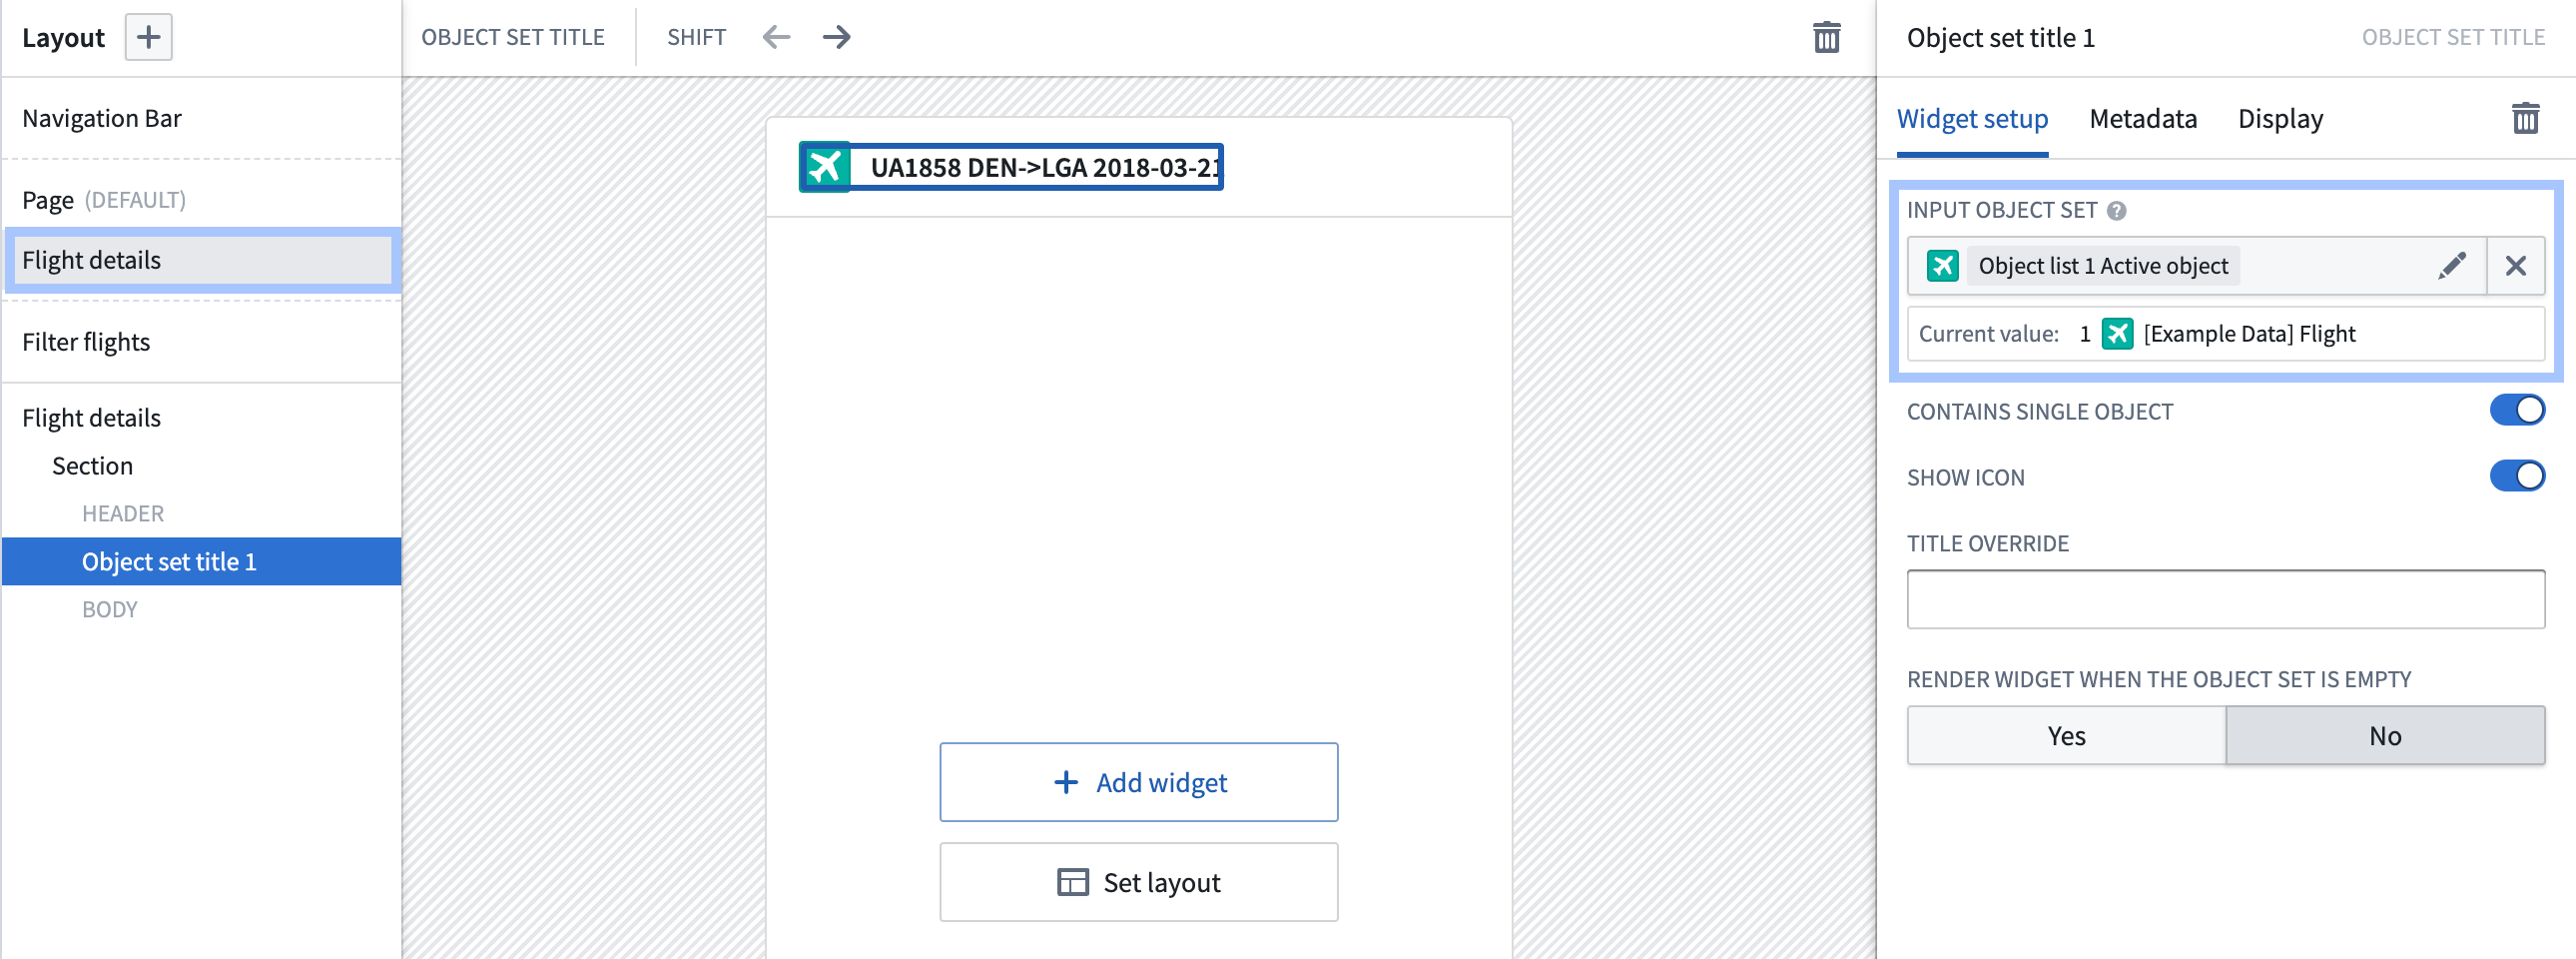
Select Layout in the left sidebar, then select the + and add a New page to the application. Update the page's name to "Flight details". In the header for your new page, remove the section title.
-
Select the + on the left side of the toolbar and add an Object set title widget. Configure the widget to use "Object list 1 Active object" as its input object set.
-
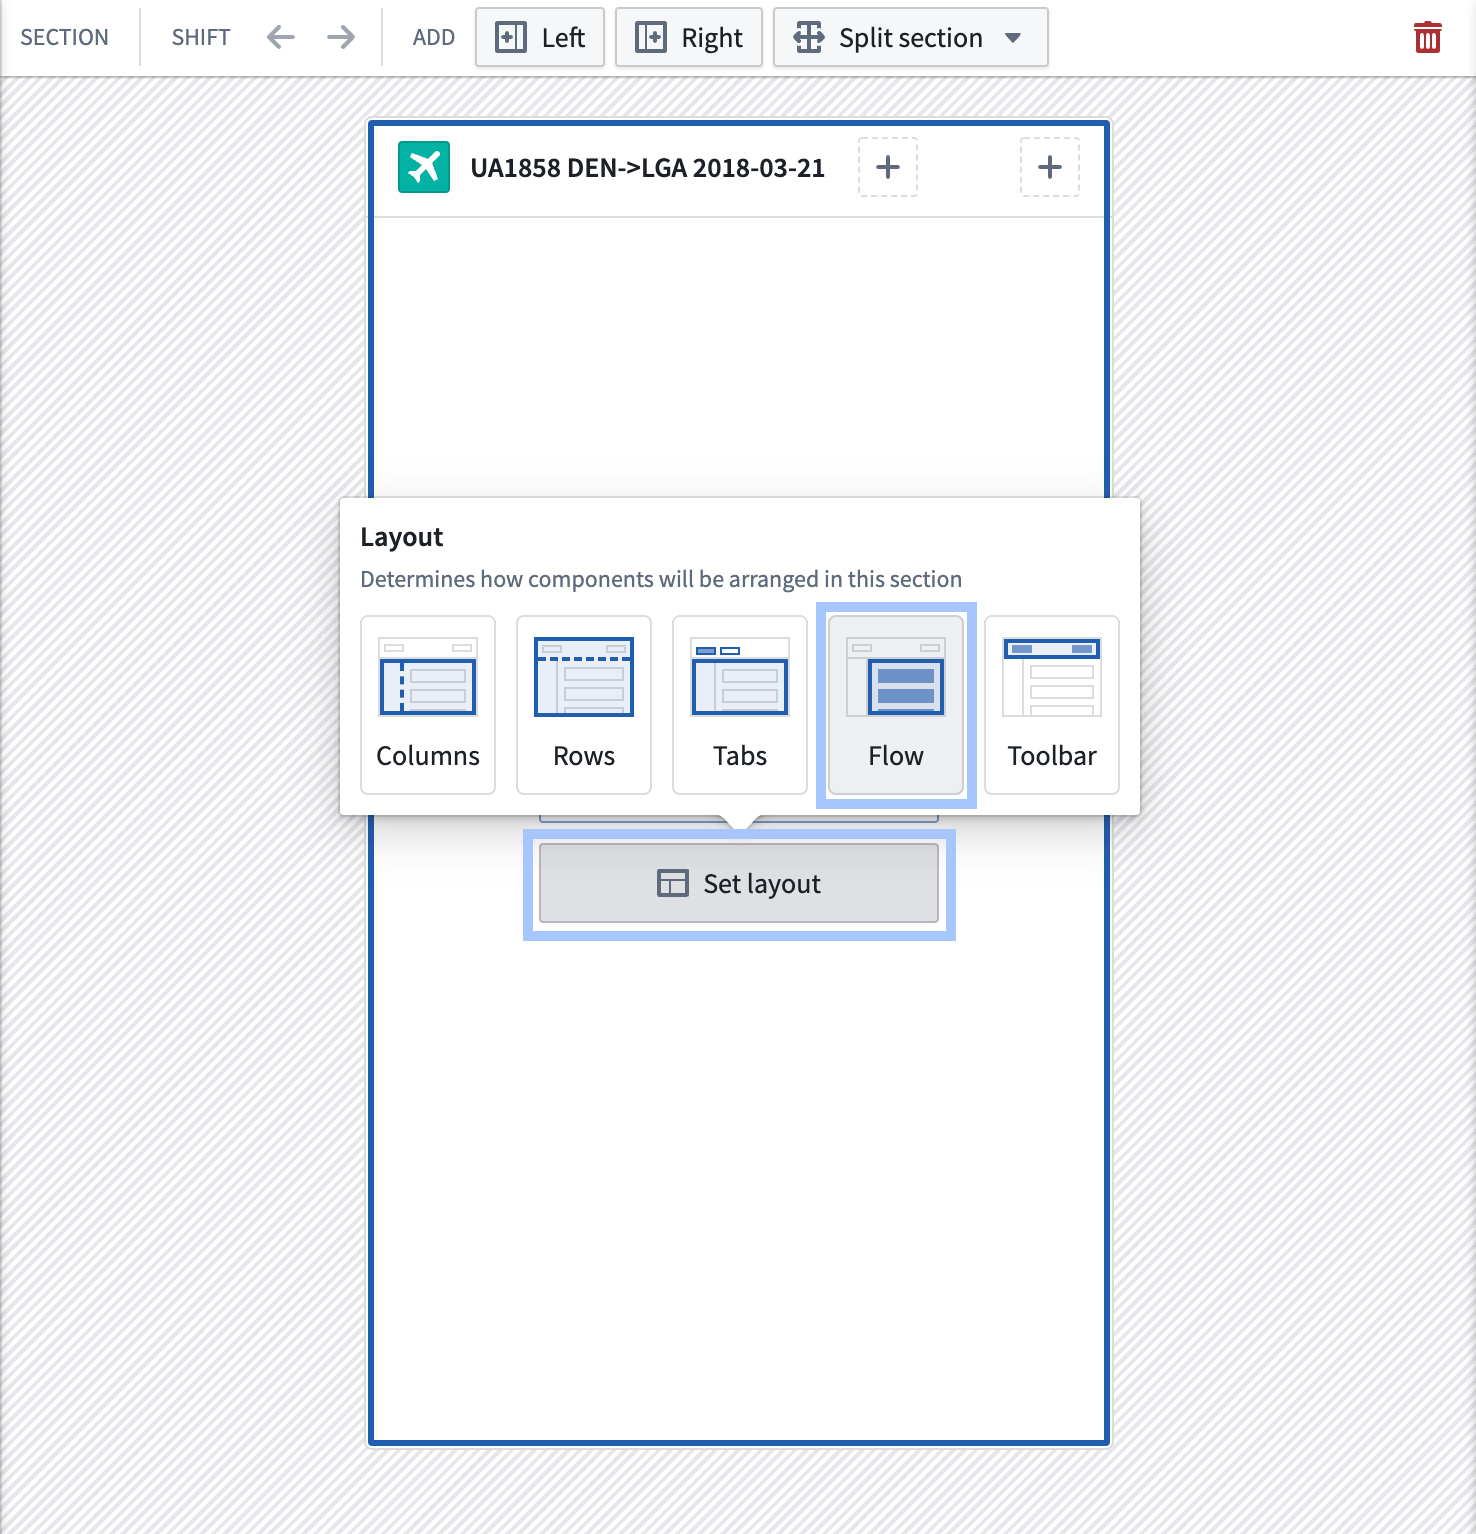
Within the page, select Set layout and then select the Flow layout. This adds a scrollable body to your page that can contain multiple widgets.
-
Next, we'll show some of the current flight's properties:
-
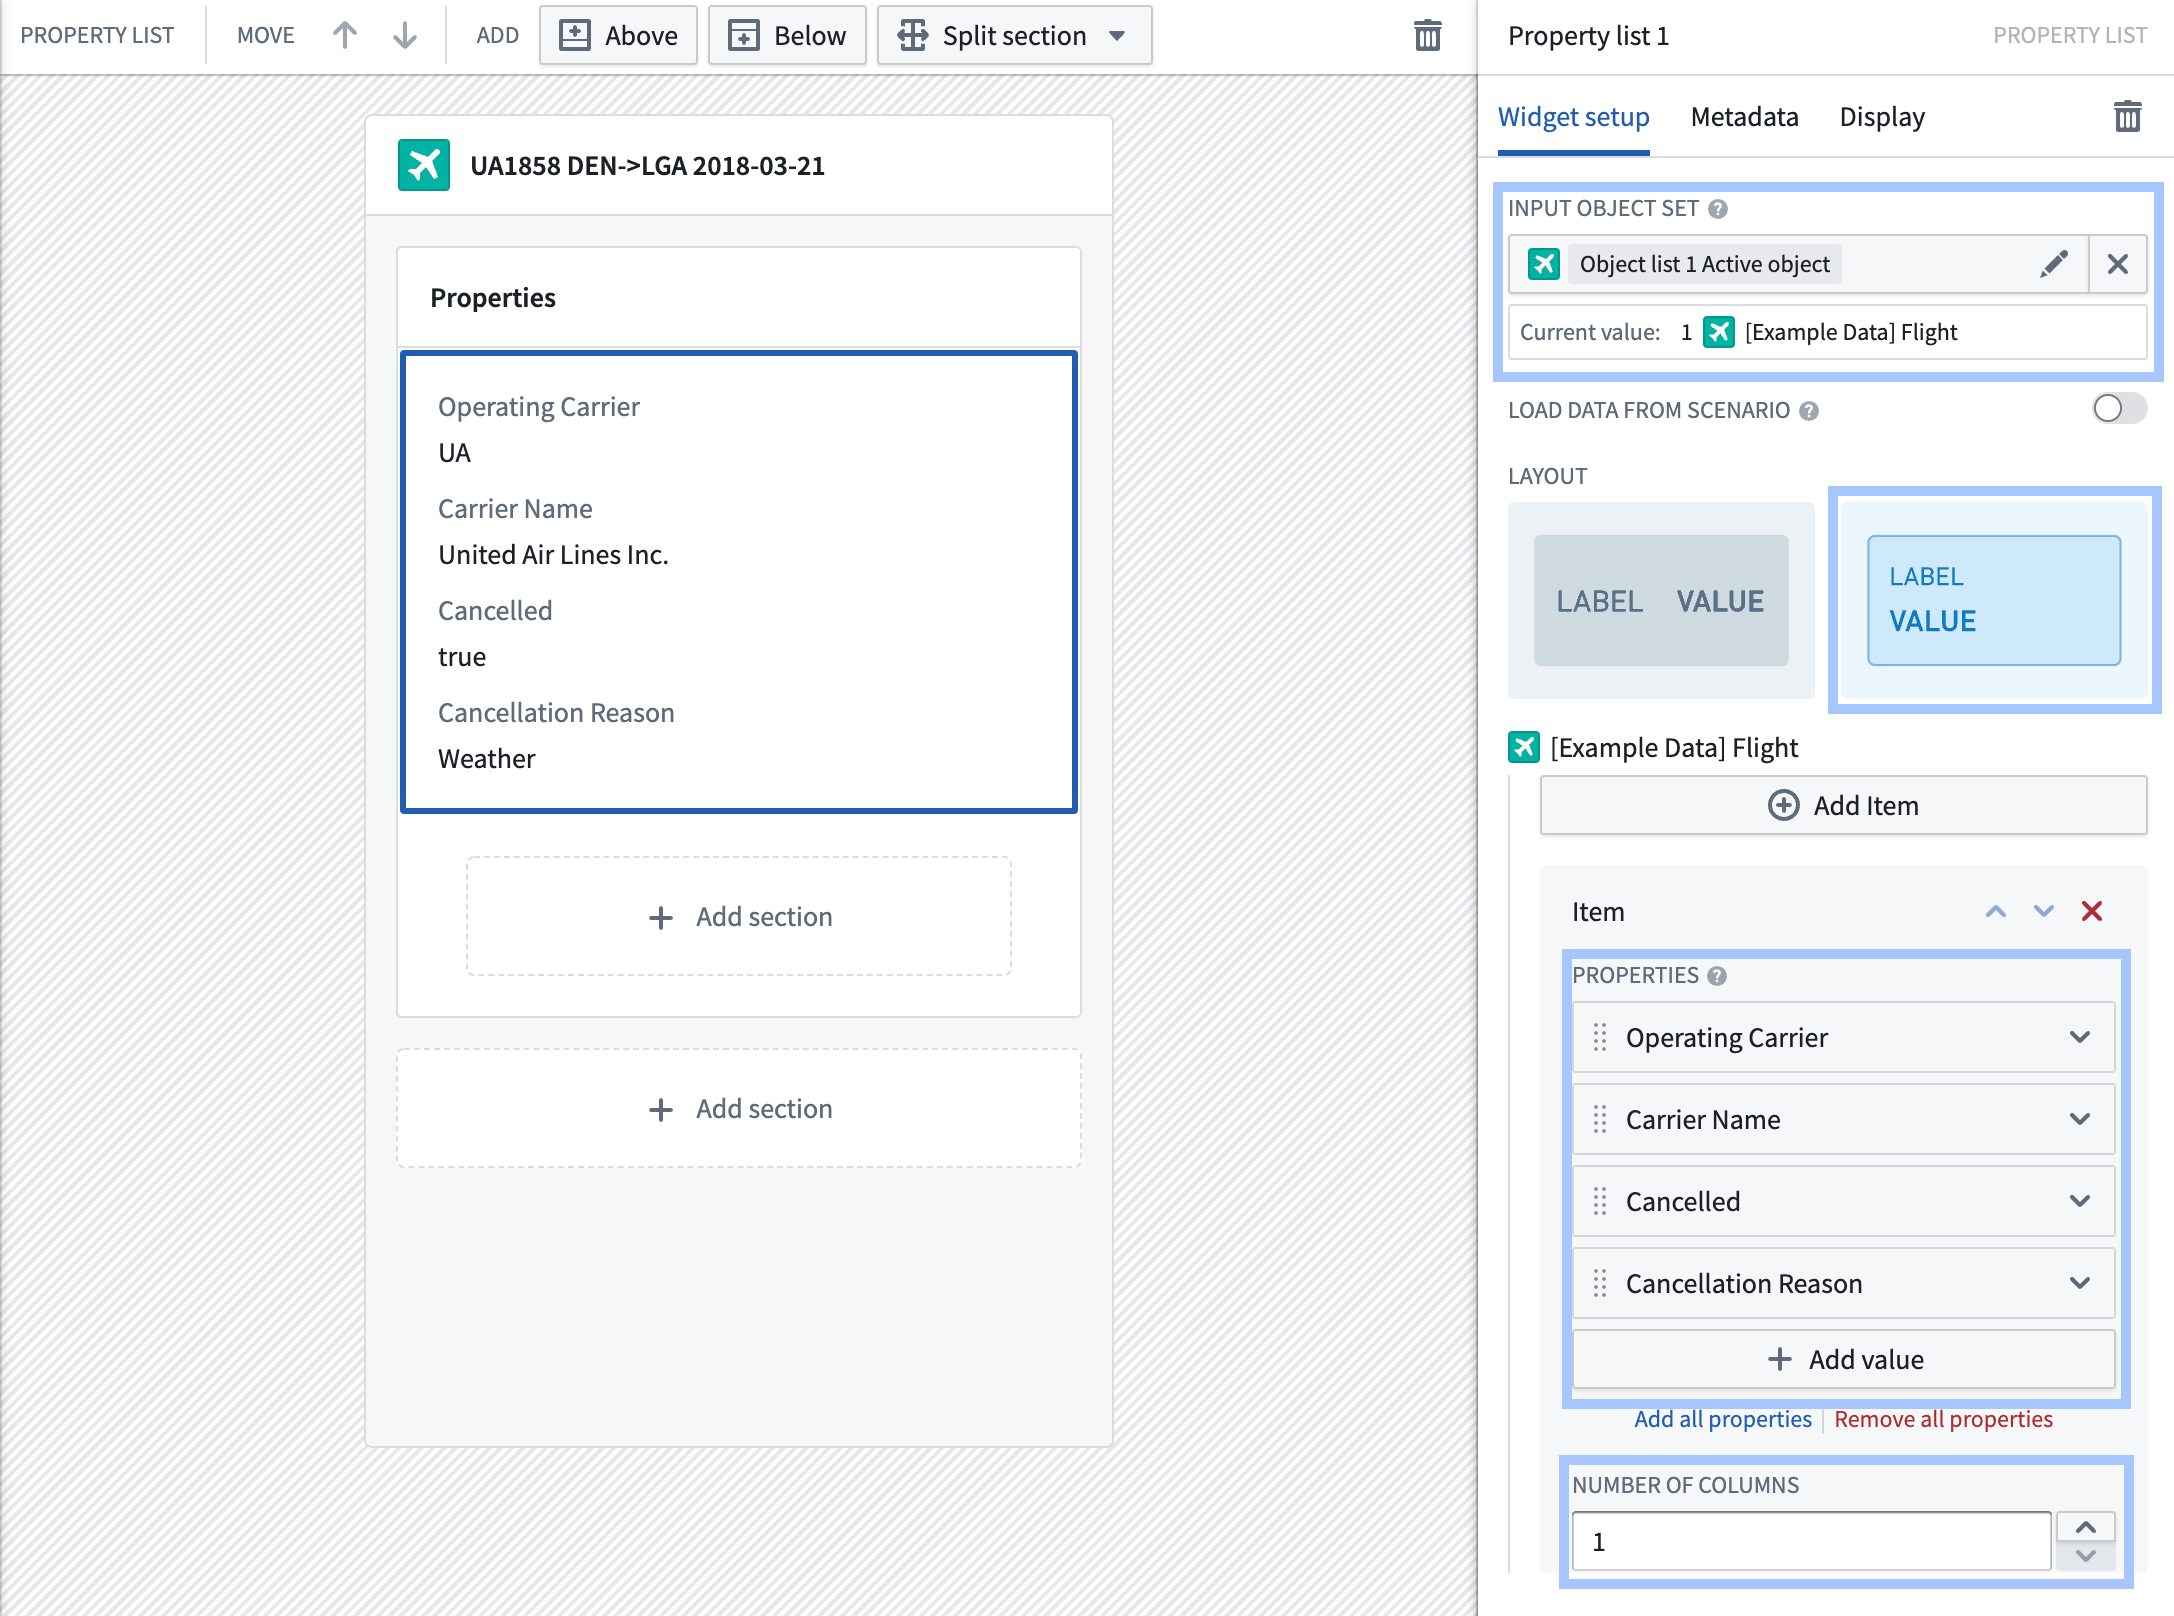
Select the section in your new Flow layout and update its title to "Properties".
-
Select + Add widget and add a Property list widget
-
Configure the property list widget to also use "Object list 1 Active object" as its input object set
-
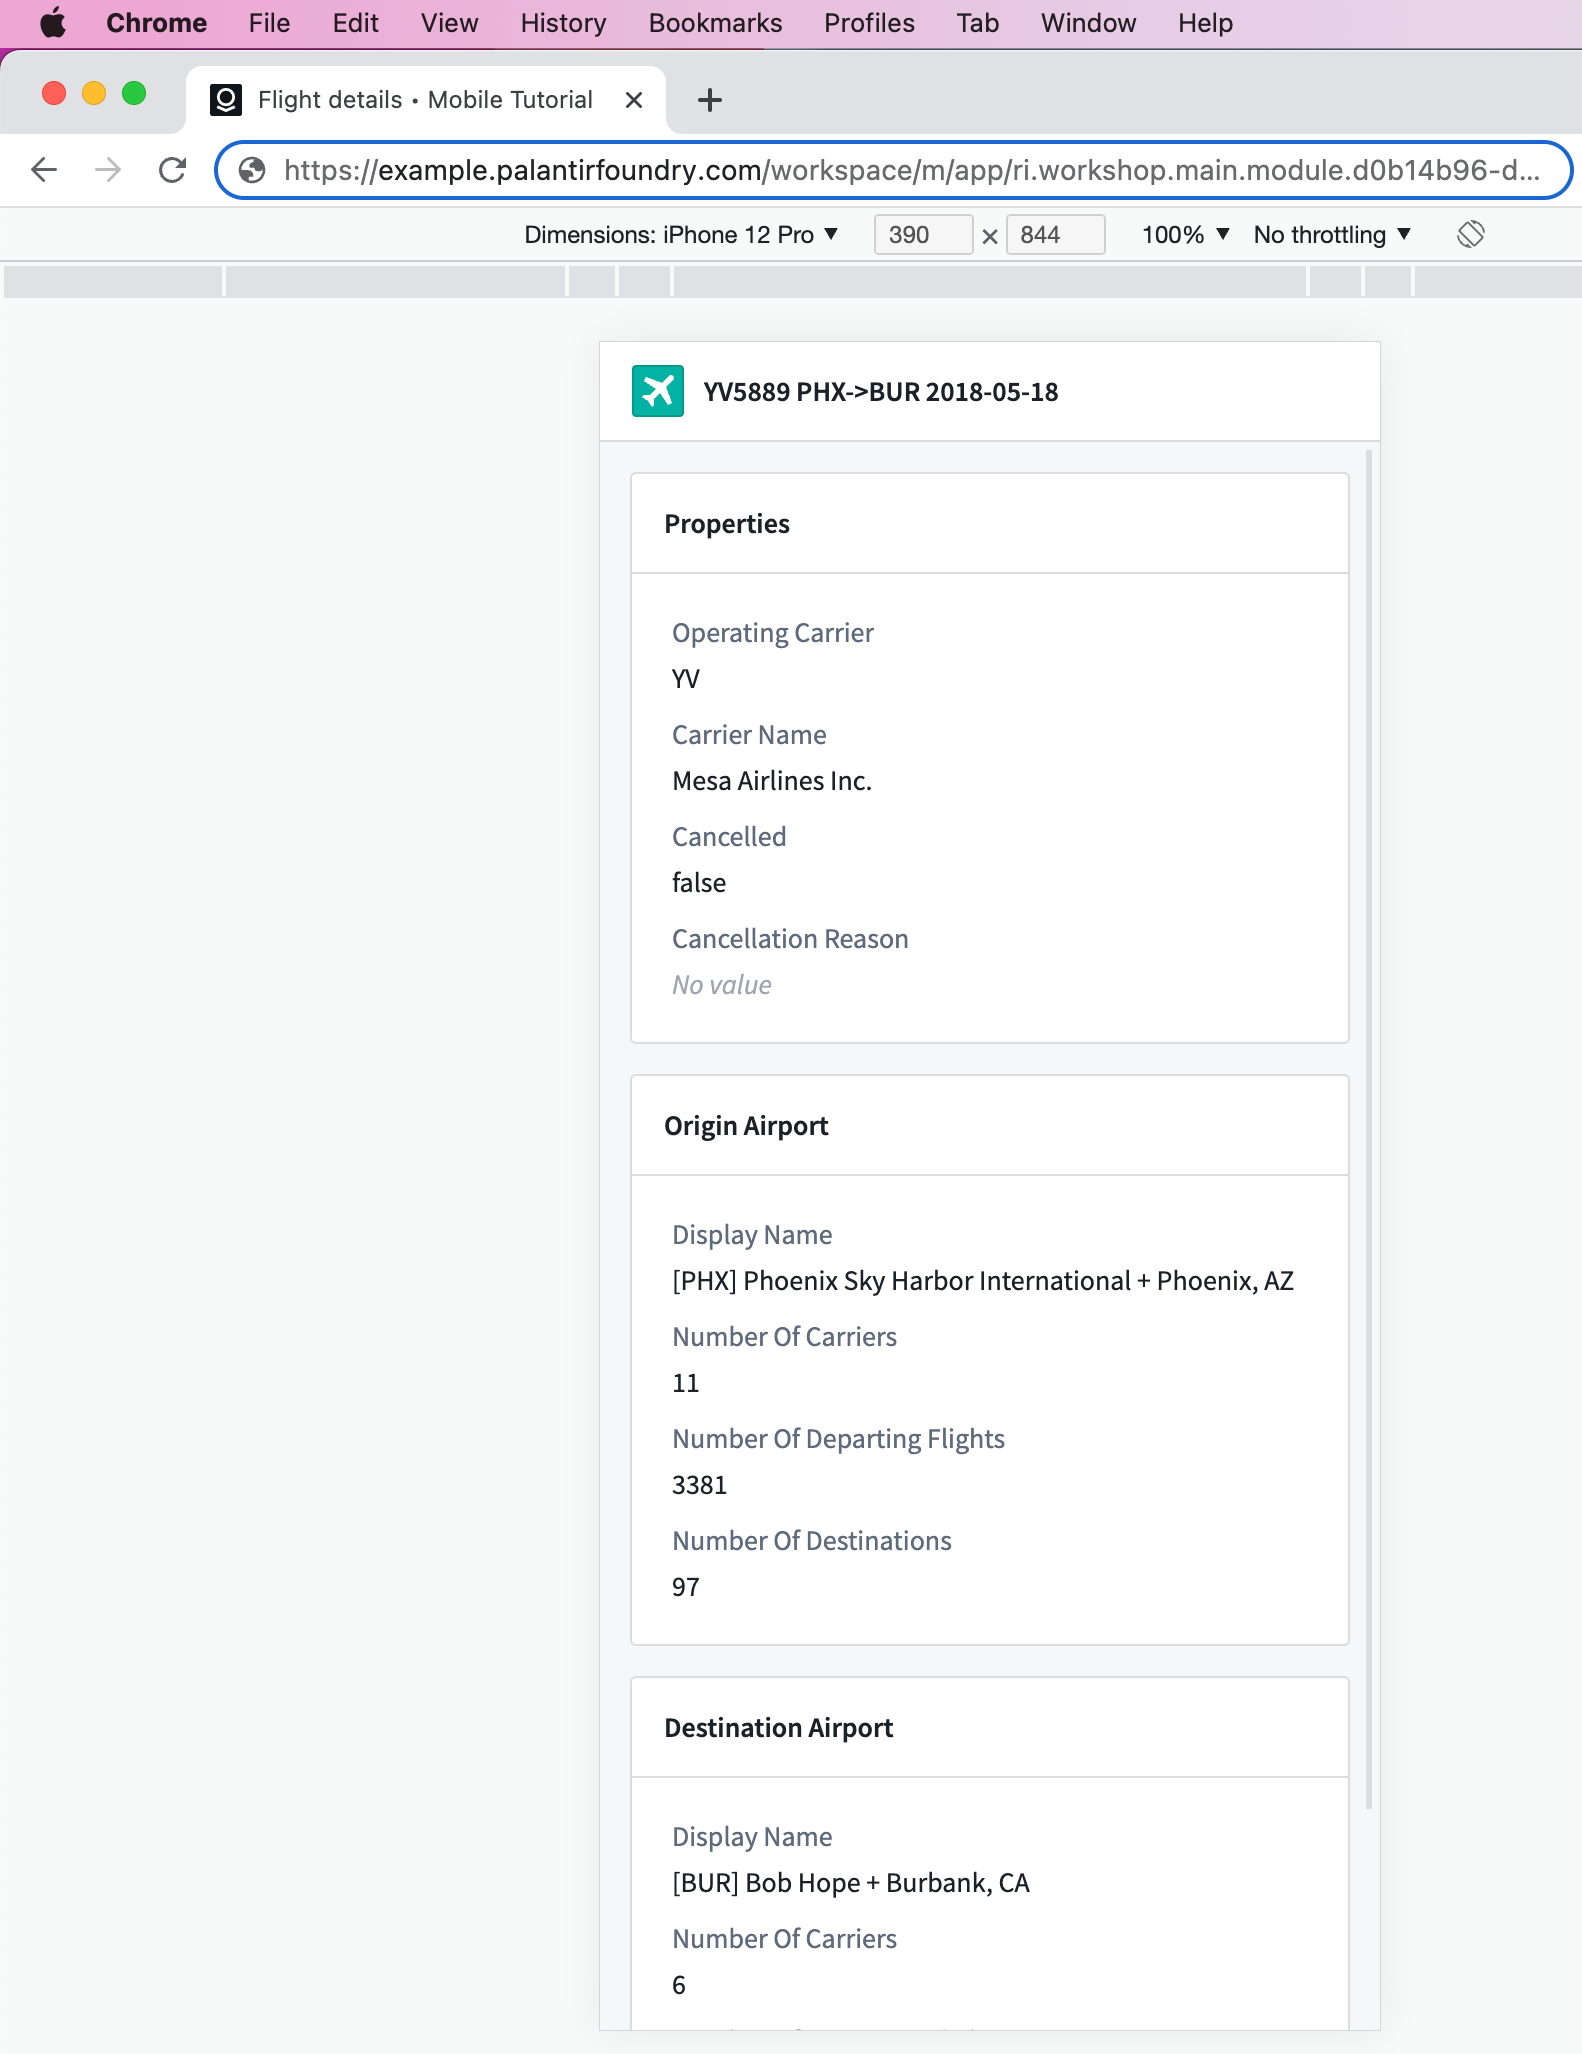
Update the property list widget to use a stacked label layout and have 1 column, then select a few properties to surface. In this case, we'll show the Operating carrier, Carrier Name, Cancelled, and Cancellation Reason.
- Then, we'll show information about the origin and destination airports:
- Select + Add section at the bottom of your Flow layout. Update the new section's title to "Origin Airport"
- Select + Add widget and add a Property list widget
- Click Select object set variable... and then + New object set variable. Start with the "Object list 1 Active object" variable, then Search around using the [Example Data] Origin Airport link. Rename this new variable to "Active flight origin airport".
- Update the property list widget to use a stacked label layout and have 1 column, then select a few properties to surface. In this case, we'll show the Display Name, Number of Carriers, Number of Departing Flights, Number of Destinations properties.
-
Repeat the above steps to add a section showing information about the destination airport as well.

-
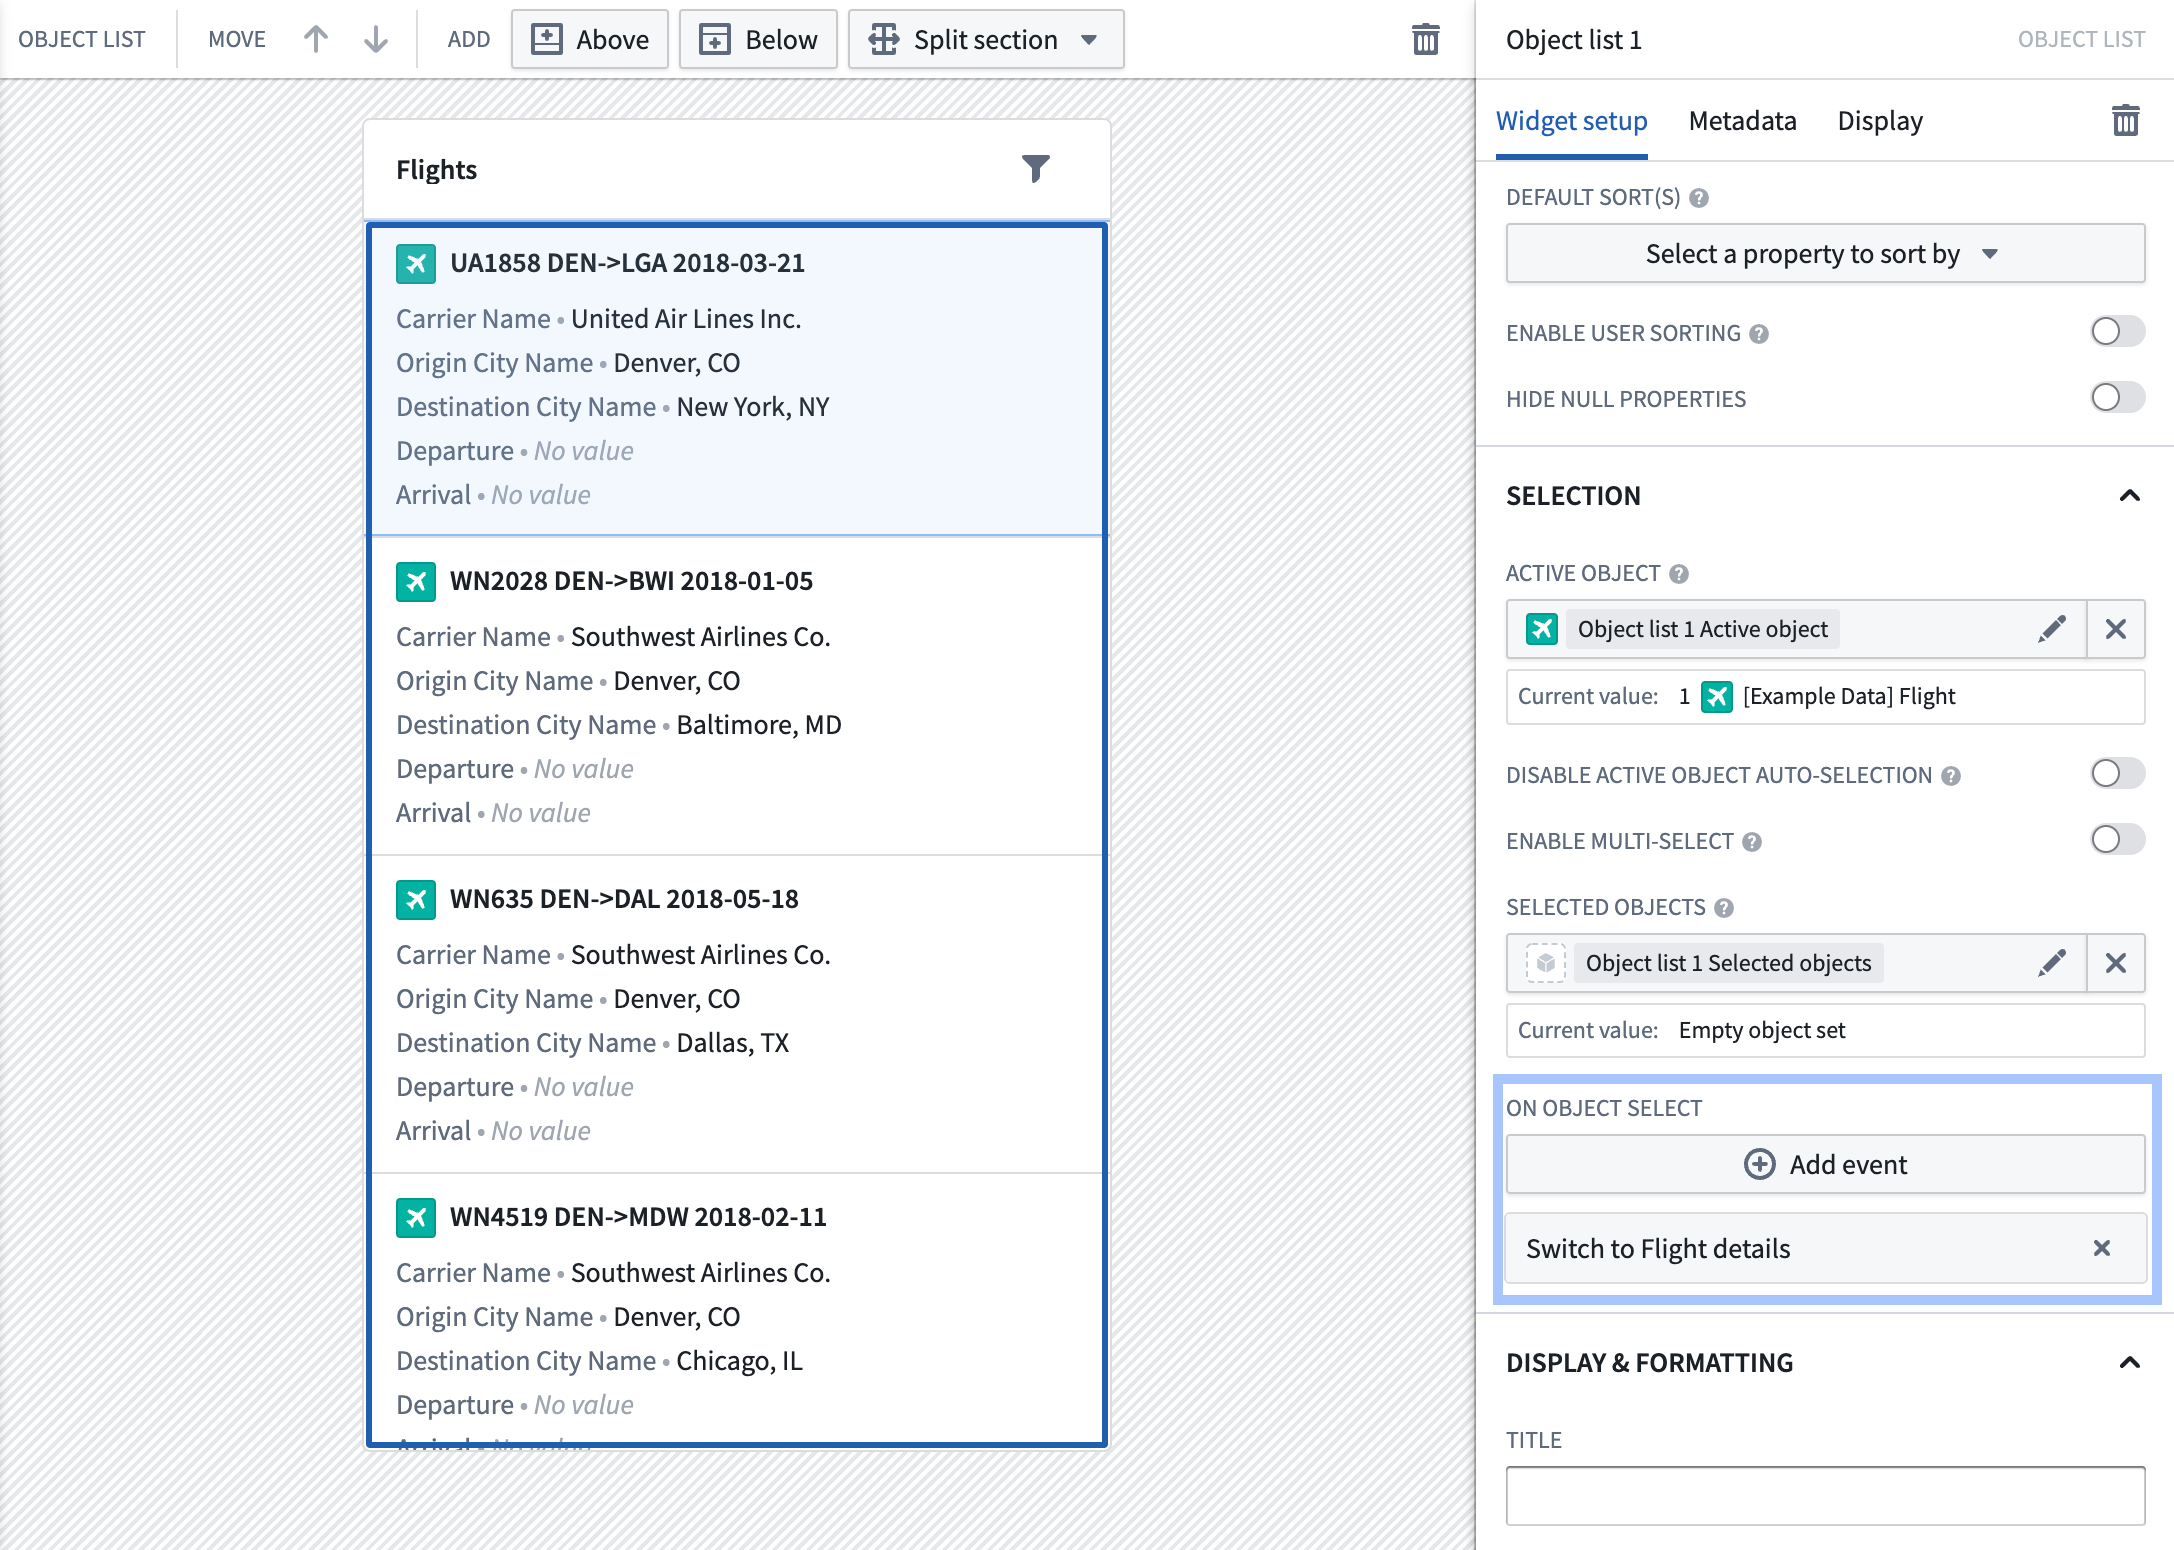
Switch back to your original page showing the object list of flights using the Layout sidebar on the left. Select your object list, then select + Add event under On active object selection in the configuration options. Select Switch to Flight details.
At this point, you've added the ability to navigate to a different page to view details about each flight in the list. Try selecting a flight in your object list to navigate to the "Flight details" page you just created.
Finally, we'll preview your mobile application in your desktop browser and on your phone.
Part 4: View and use module
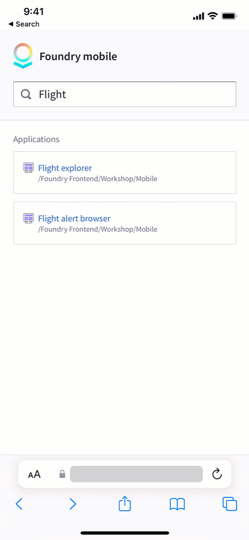
Select Save and publish in the top-right to save your module, then select View ↗. This will open your application in Foundry's mobile app launcher.
At this point, you have different options to preview your mobile application in your desktop browser and on your phone:
-
Desktop browser preview. To preview what your application will look like on an actual phone, use your browser's support for mobile device emulation:
-
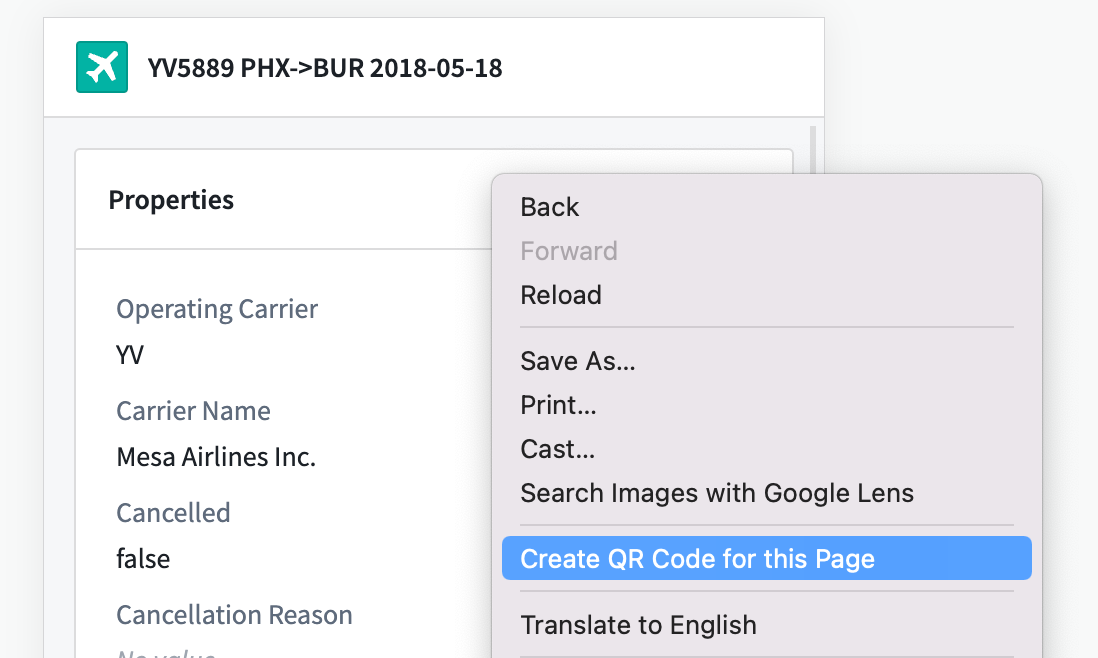
On a mobile device. If you have a mobile device with network access to your Foundry environment, you can also navigate to your application by opening the URL from your phone. In some browsers such as Chrome and Edge, you can easily do this by right-clicking on the page and selecting Create QR Code for this Page. Then, you can scan the QR code using your mobile device to open the application.
Note that in the mobile app launcher, you can use the browser's Back and Forward interactions to navigate through pages. On an Android device, you can use the device's Back button to navigate, and on iOS, you can swipe from the left or right as illustrated below.
Next steps
This tutorial walked you through how to build a simple application for exploring flight data on a mobile device. Continue learning about Workshop's mobile support using the following resources: