Loop layouts
This page discusses loop layouts. For an overview of Workshop embedding features, see the embedding overview page.
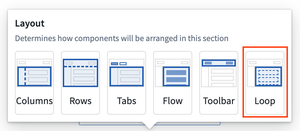
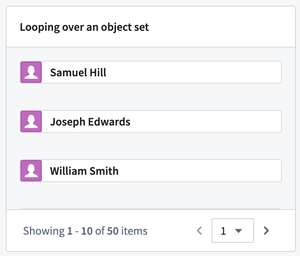
Loop layouts allow you to loop over an object set or array, displaying an embedded module for each object in the set or each entry in the array used as input.
Each embedded module in the loop layout functions independently from other embedded module instances, and has its own variable scope and layout state. Loop layouts offer more control over how object sets are displayed than other object set display widgets, such as object table or object list widgets. While other object set display widgets come with a fixed set of features, the loop layout allows any feature combination available in Workshop to be used for the display of each object in the object set, or each entry in the array.
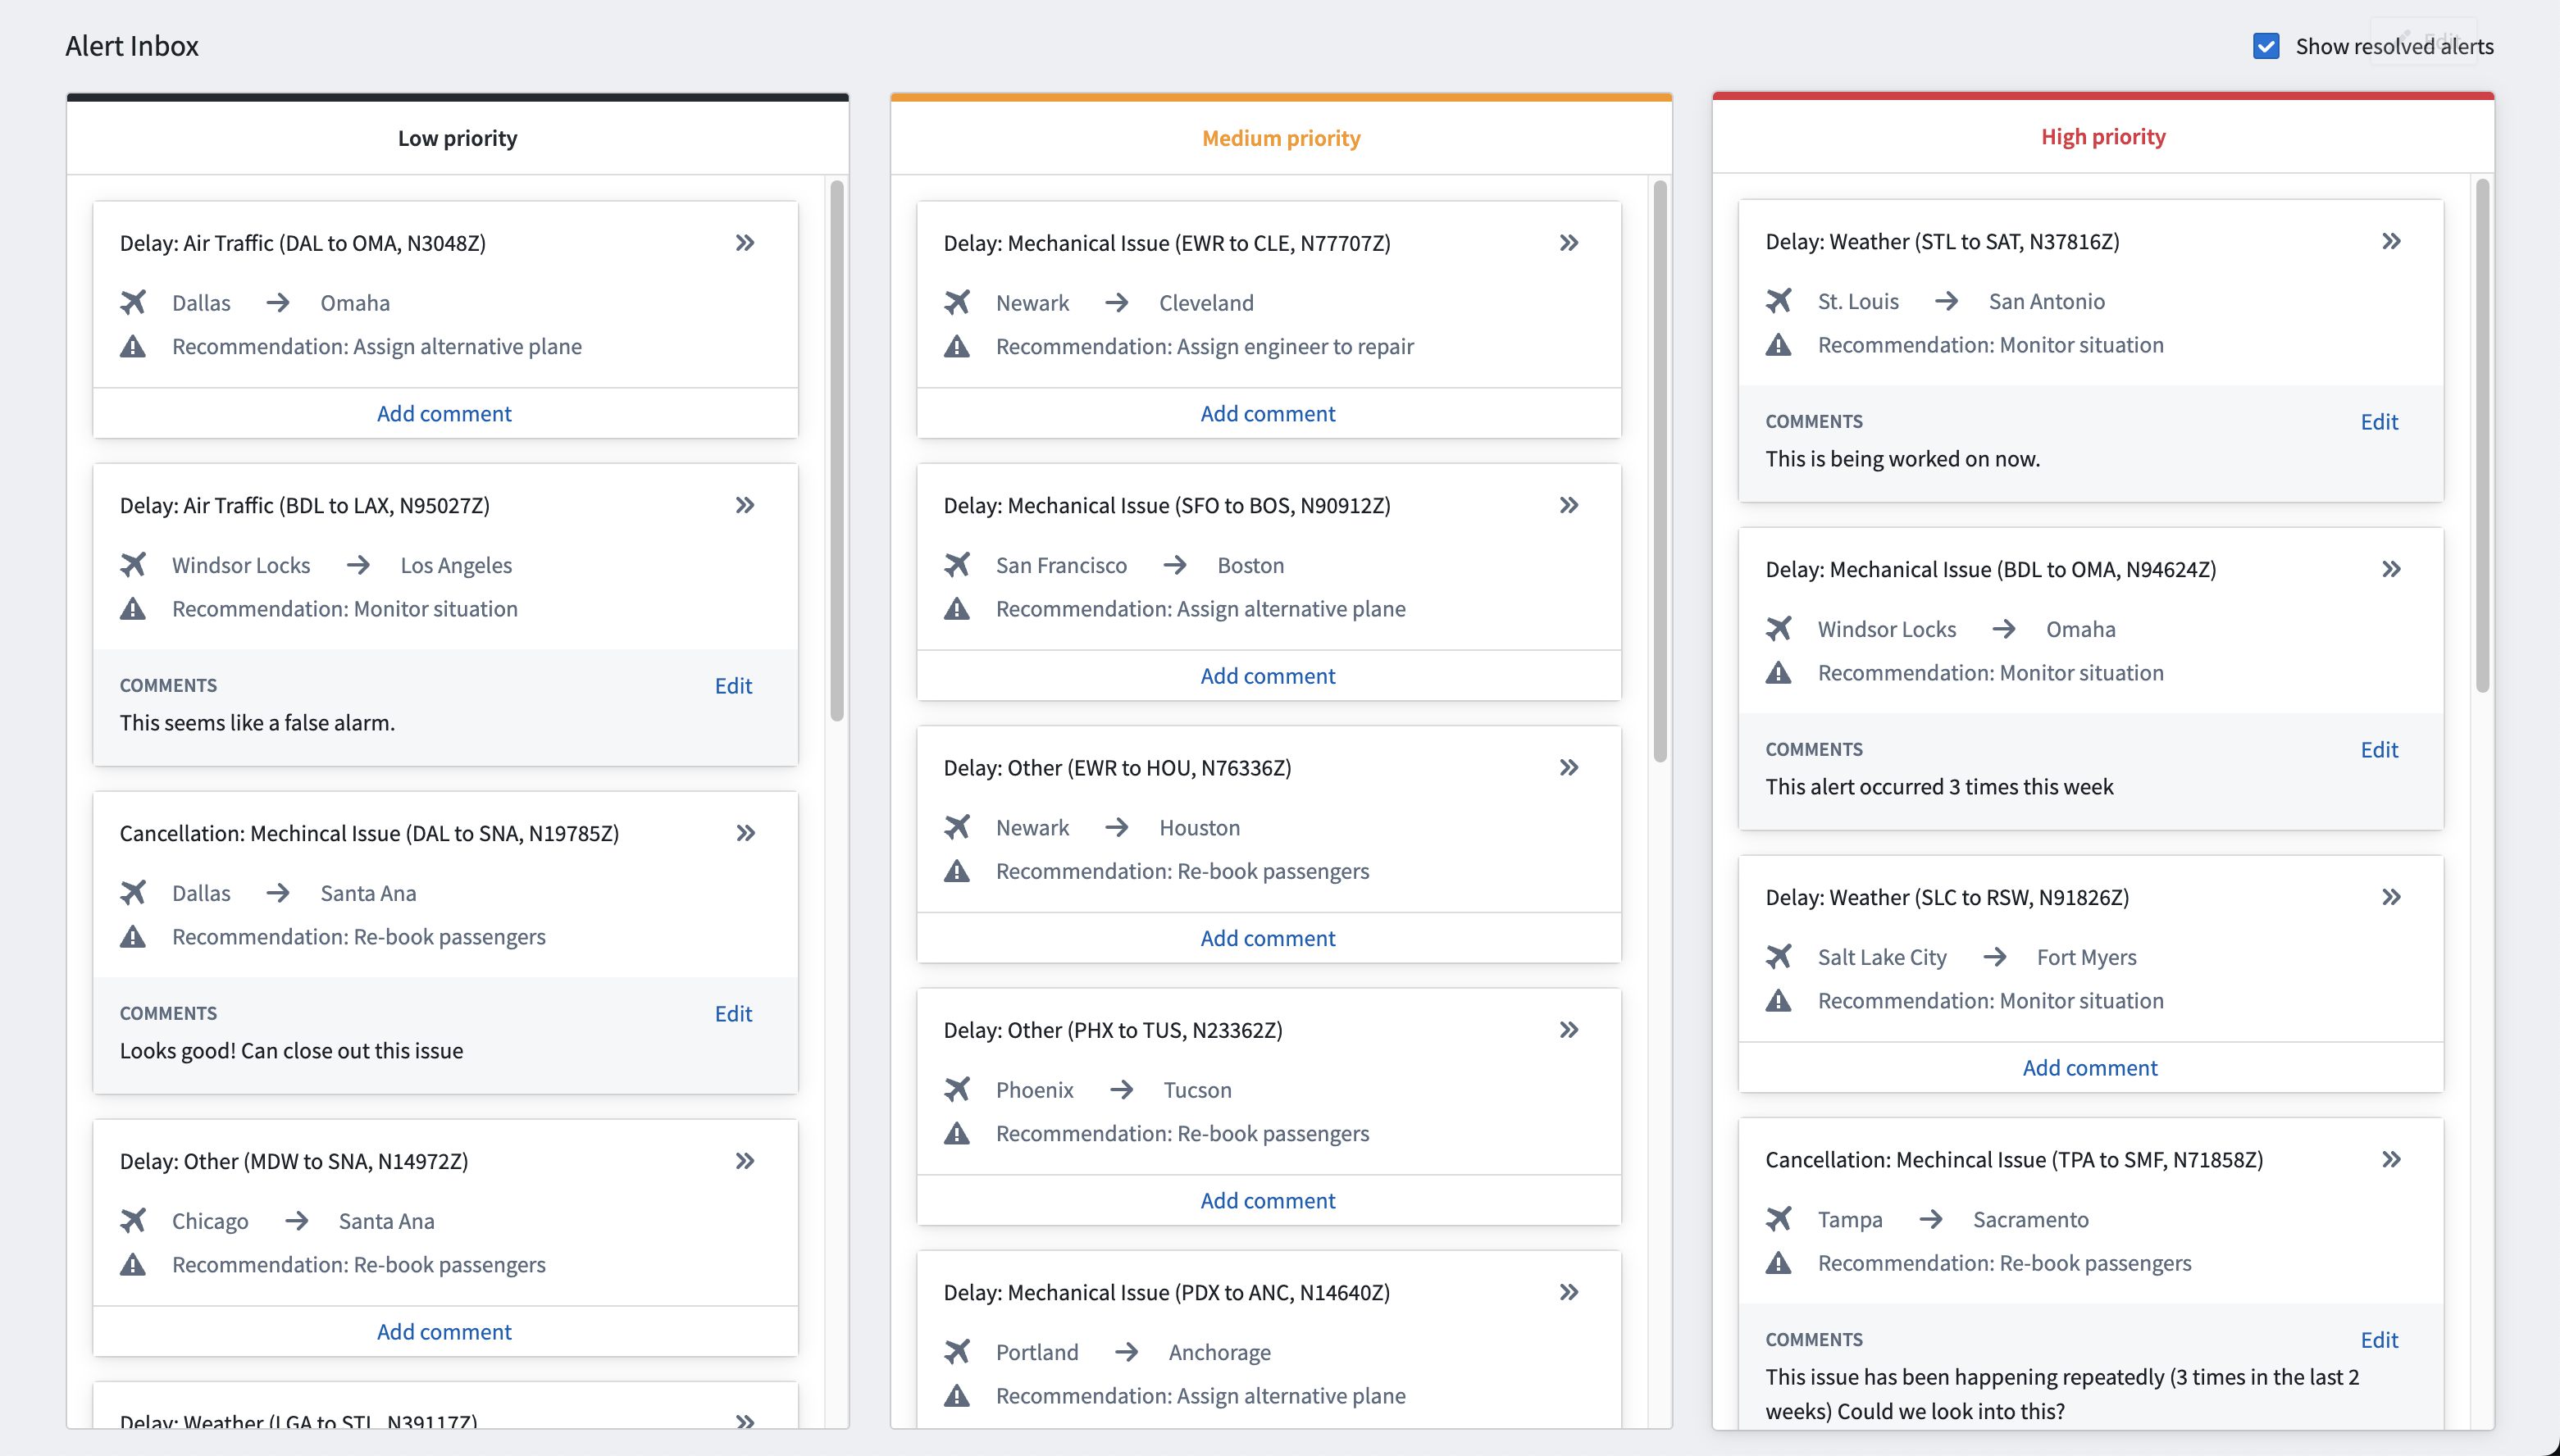
Below is an example of a loop layout to create interactive ticket cards for each object in three object sets (one per column), to create a kanban style application. Each ticket card is an embedded module instance populated with an object from the object set provided to the column's loop layout. In this embedded module, full layout control is available, and the builder can configure exactly what to display, and what actions are available for each object, offering greater flexibility than what is offered by other object set display widgets.
Configuration
Loop layout configurations allow builders to select an object set or array, a module to embed for each object in the set or entry in the array, and controls for sorting and paging styles.
Loop over an object set
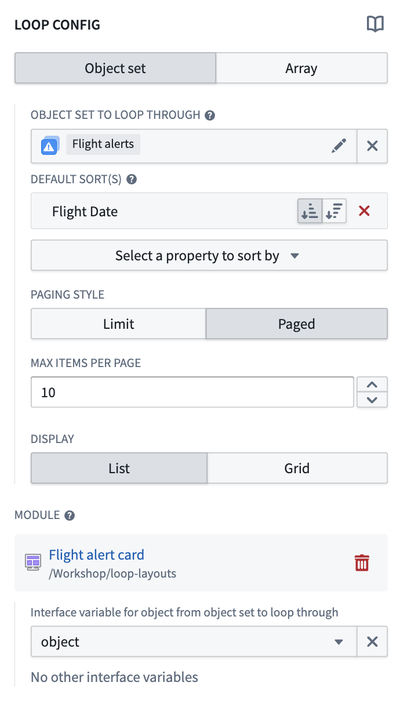
Object set to loop through
If the object set option is selected, the first configuration made in a loop layout is the “object set to loop through” variable input. This object set will be looped through in the loop layout, with each object from this set used to display an instance of the child embedded module configured in the “module selection” step.
Sort
Property sorts may be applied to the object set being looped through to determine the order in which the objects will be displayed in the looped layout.
A custom sort may be achieved by returning a static object set with the desired sort order in the object set definition from a function backed object set variable.
For object sets of a single object type that are not static object sets, a primary key sort will be applied behind any user configured sorts to ensure a consistent ordering of objects. This may cause the loop layout to fail to display if the primary key is not sortable.
Loop over an array
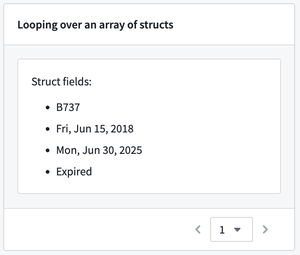
Loop layouts support looping over various array types, including string, Boolean, number, date, timestamp, and struct arrays.
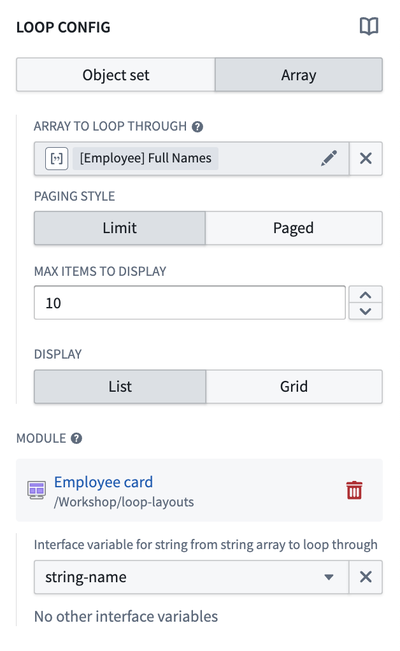
Array to loop through
If the array option is selected, the first configuration is the array to loop through variable input. Loop layouts iterate through each entry in the array, and each entry is displayed as an instance of the embedded module configured in the Module selection step. Modules are ordered by the entry's position in the array. Inserting, re-ordering, and deleting entries from the array will be reflected in the looped layout.
Paging style
- Limit: This paging style will display only a single page which displays up to the first X objects or array entries, where X is the value configured in the “Max items to display” configuration.
- Paged: This paging style will display pages of objects or array entries of size X, where X is the value configured in the “Max items per page” configuration. Loop layouts are currently limited to paging through the first ten thousand objects.
Display
- List: This display option will display the objects or array entries in a list. There are no additional configuration options.
- Grid: This display option will display the objects or array entries in a grid. Additionally, a max number of columns and min card width in pixels may be configured.
With either option, a consistent height for each row may be achieved by configuring an absolute or max height on the top level section in the selected child module.
Module selection
Loop layout module selection works similarly to embedded module widget module selection, requiring selection of a child module. Builders may either select an existing module through the Compass resource selector or create a new embedded module using the Create new option.
The module selected for a loop layout must have a module interface object set variable if configured to loop over an object set, or a variable typed to the array type if configured to loop over an array.
Embedded modules created using the 'Create New' option will feature a basic module with a preset module interface variable matching the array type or object set and a widget for displaying each entry or item. Looped sections configured to use object sets will feature an Object Set Title widget, while looped sections configured to use arrays will feature a Markdown widget to display the value of the array entry. When using an array of structs, the struct-typed module interface variable will contain a variable transform, rendering the fields of each struct entry of the array in the Markdown widget.
Interface variable
In this configuration, builders must specify the module interface variable from the child module that will be mapped to objects from the object set to loop through variable, or entries from the array to loop through variable, depending on which one the loop layout is configured to iterate through. Refer to configuring the module interface for the selected module for more information.
If this variable value is changed in the child module, for instance through a “set variable value” event, unexpected behavior may occur.
Interface configuration
Other than the module interface variable input described above, loop layout variable mapping works the same way as the embedded module interface configuration for all other module interface variables.
Unlike the object set to loop through variable, these additional variables may be changed in the child module template. Each variable will be the same variable reference for each looped instance, allowing variable state to be shared across looped instances and the parent module.
Layout settings
Padding
This is the same padding configuration offered on other Workshop layouts. The configured padding will be applied around each instance of the embedded module in the loop layout.
Inner border style
If padding is applied to the loop layout, a border style may be selected which will be applied to each instance of the embedded module in the loop layout.
Share variables
The interface configuration in loop layouts allows variable values to be shared across loop layout embedded modules. This may be useful to share something like the state of a selected object. In this use case, each embedded module has the ability to have an event set the value of the shared selected object variable, which can then be used in the parent module.
Limitations
Loop layout paging limit
Loop layouts are currently limited to paging through the first ten thousand objects; this limit may change in the future.
Dynamic values
Any variable values that are dynamic per module instance must be derived from the passed in object. The passed in object is the only way that each module instance is differentiated. Additional variables may be passed to every module instance in the loop layout and these variables will be shared across instances.