Use Actions in Workshop
Actions in Foundry allow users to edit, create, delete, and link object data based on defined rule sets (known as action types). For example, an Action might allow a user to do one or more of the following:
- Create a new
Flightobject and fill in itsFlight Number,Time of Departure,Origin, andDestinationproperties. - Modify an existing
Flightobject to change theDestinationproperty. - Link a specific
Flightobject to a specificPassengerobject. - Delete a
Flightobject that was created by mistake.
By creating a user-friendly wrapper for complex object data edits, Actions enables application creators to use meaningful and secure building blocks for user writeback to object data. These building blocks can then be:
- Used in multiple applications (such as Workshop or Object Views) to support business process workflows.
- A Form component is automatically generated based on the Action definition, so writeback to object data and the user interface associated with it are not defined separately. The core interactions of Workshop and Actions are detailed below.
- Granularly permissioned to support different writeback permissions for different users and conditions.
- For example, an analyst may be allowed to start a new investigation, but the ability to close investigations may be restricted to members of the manager user group.
Define an Action in the Ontology Manager
In order to create, configure, or edit an Action, a given Palantir Foundry user must belong to the actions-admins group.
For full details on defining Actions, see the Actions documentation. The documentation below provides a brief notional example of Action configuration focused on using Actions within Workshop.
Actions Administrators can create, configure, and edit action types in the Ontology manager. To access, select Ontology manager from the Apps sidebar. The Action types tab (seen in the screenshot below) provides a list of existing action types, which can be selected to be viewed and edited. The New action type button allows you to define a new action type from scratch. Alternatively, you can also create action types right from the Object Type which it should be based on. Navigate to the object type and click Create new in the action types box.
Note that this example is illustrative and you may not be able to complete every step as written. Since your Foundry Ontology is customized to your needs and data, you may not have access to the ontology objects required to complete the tutorial.
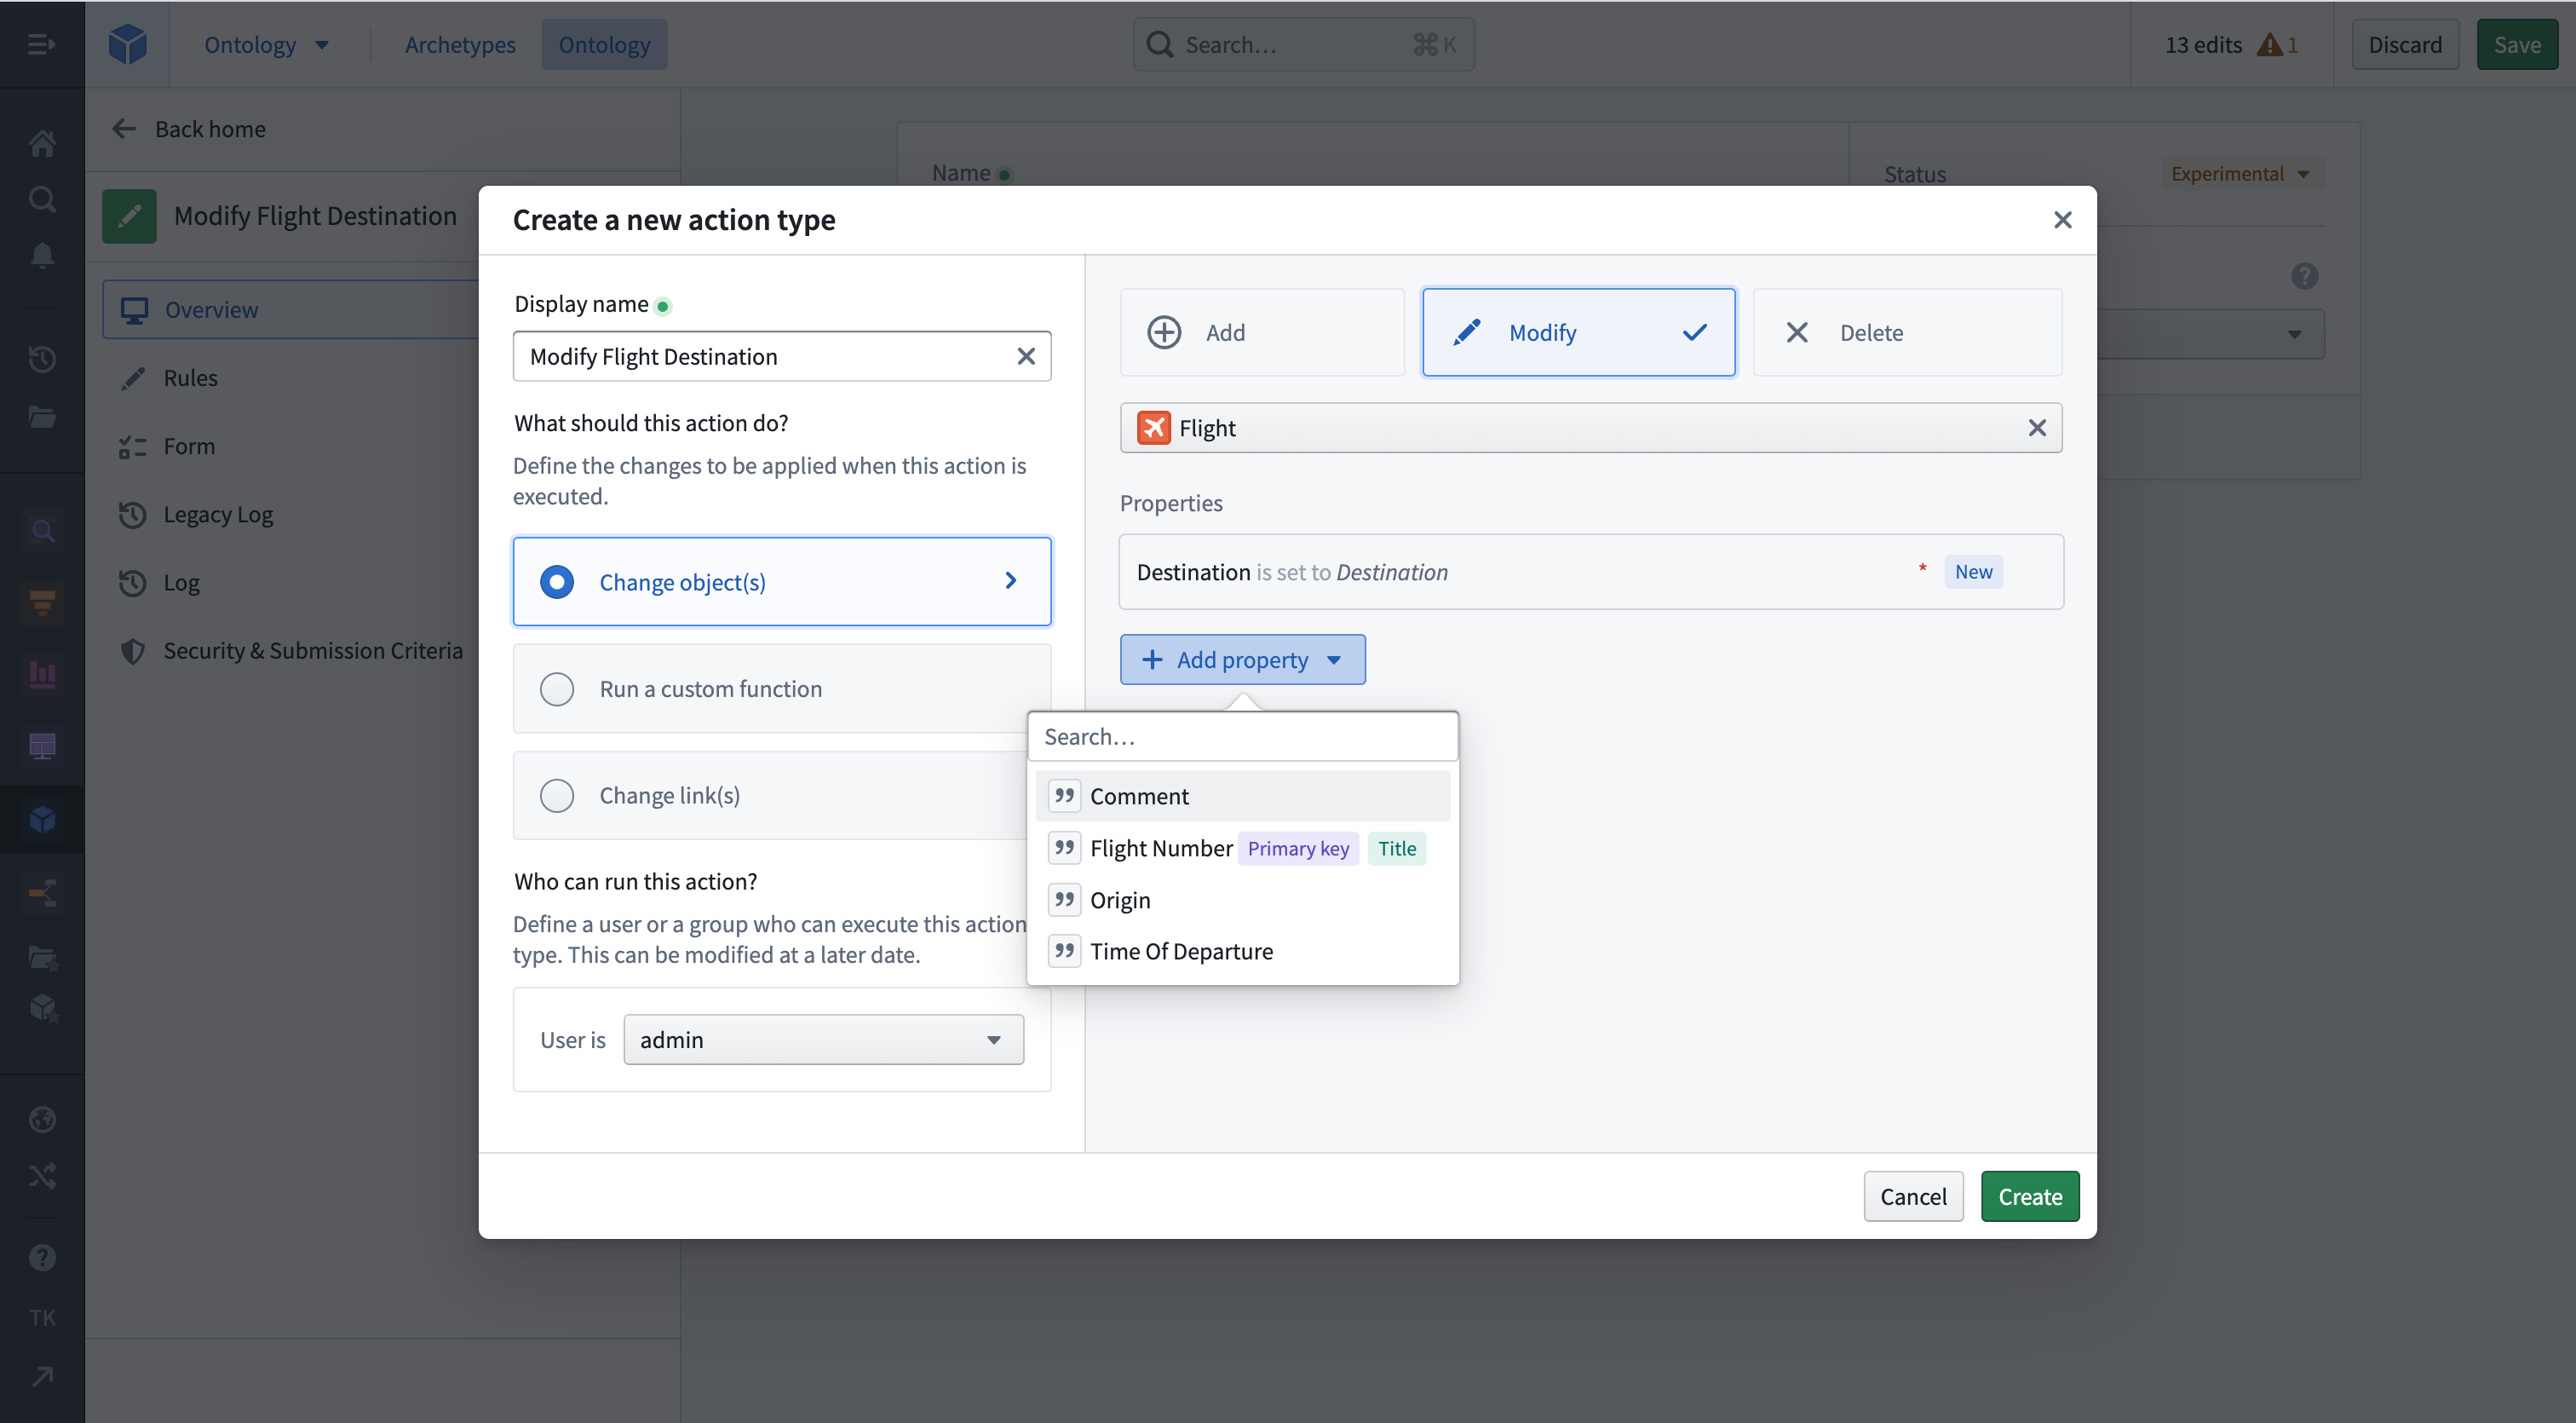
Click the Create new button on the Object Type to begin. In this example, we’ll be defining a “Modify Flight Destination” action that will allow users to modify the Destination property on an existing Flight object.
The creation wizard walks you through the most important steps to bootstrap your new action type. Enter a Display name and select Modify under the Change object(s) option to configure your action type. From the object dropdown, select your previously created Flight object and then select the Comment and Destination properties which this action type should modify.
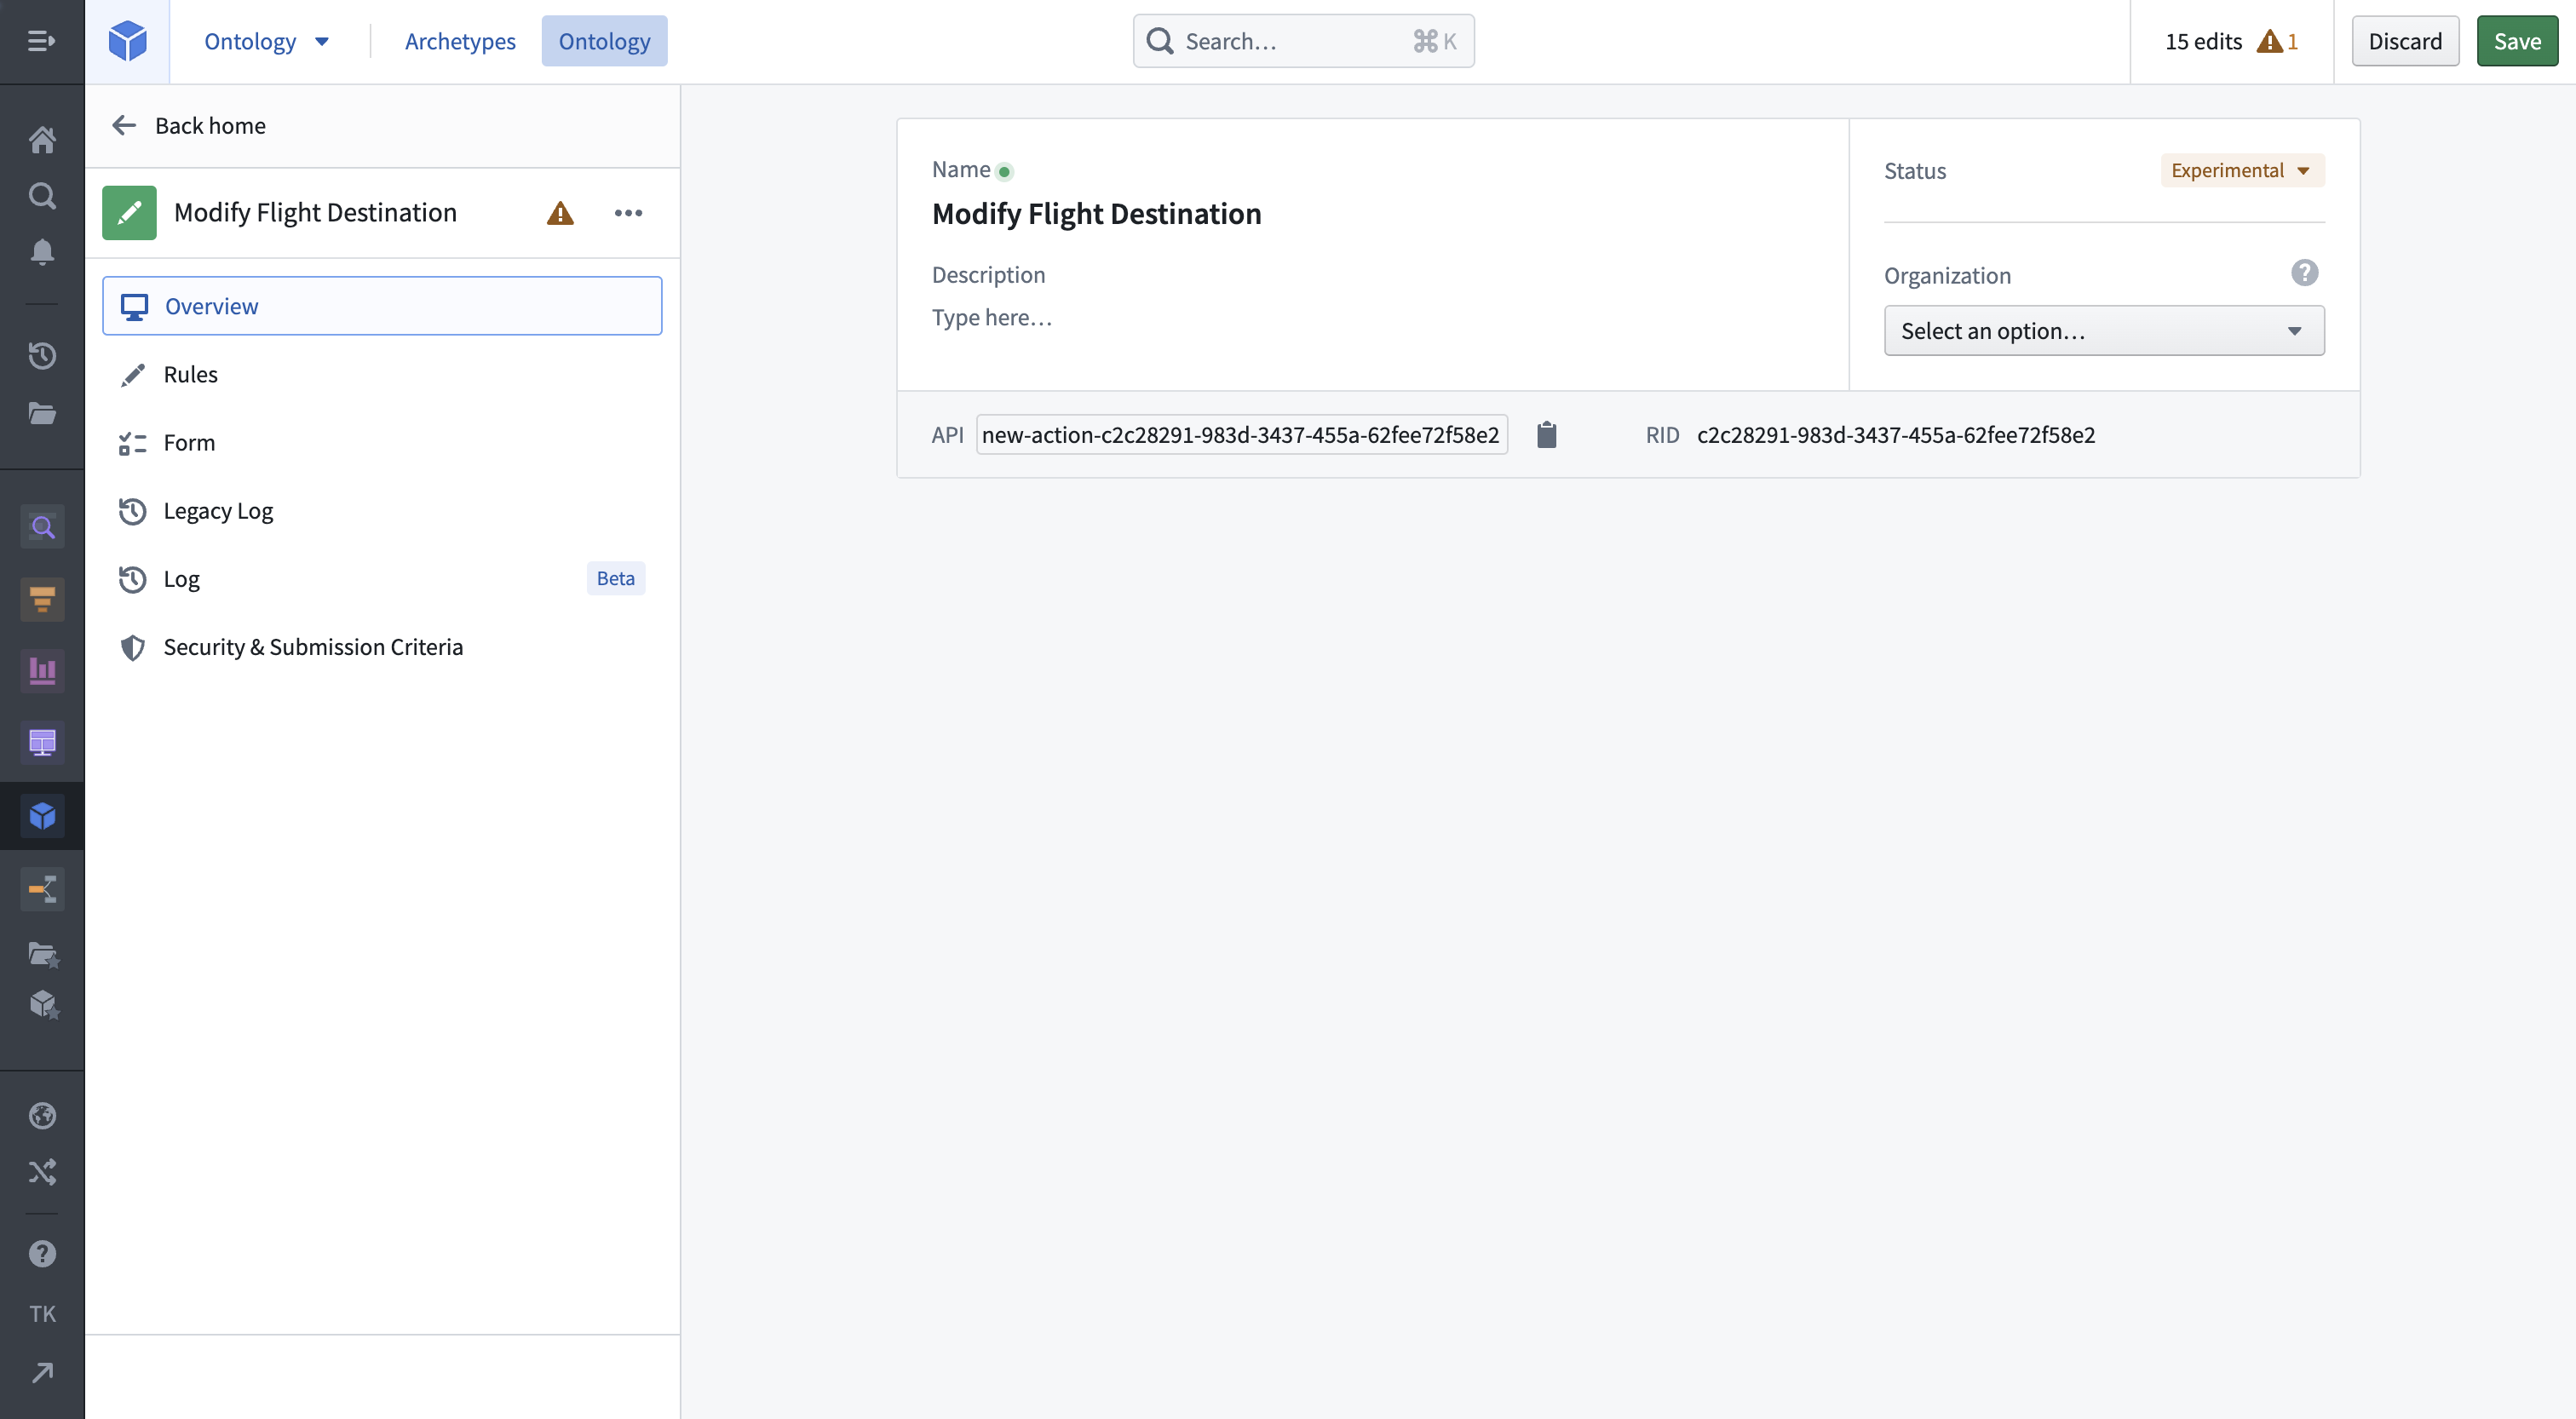
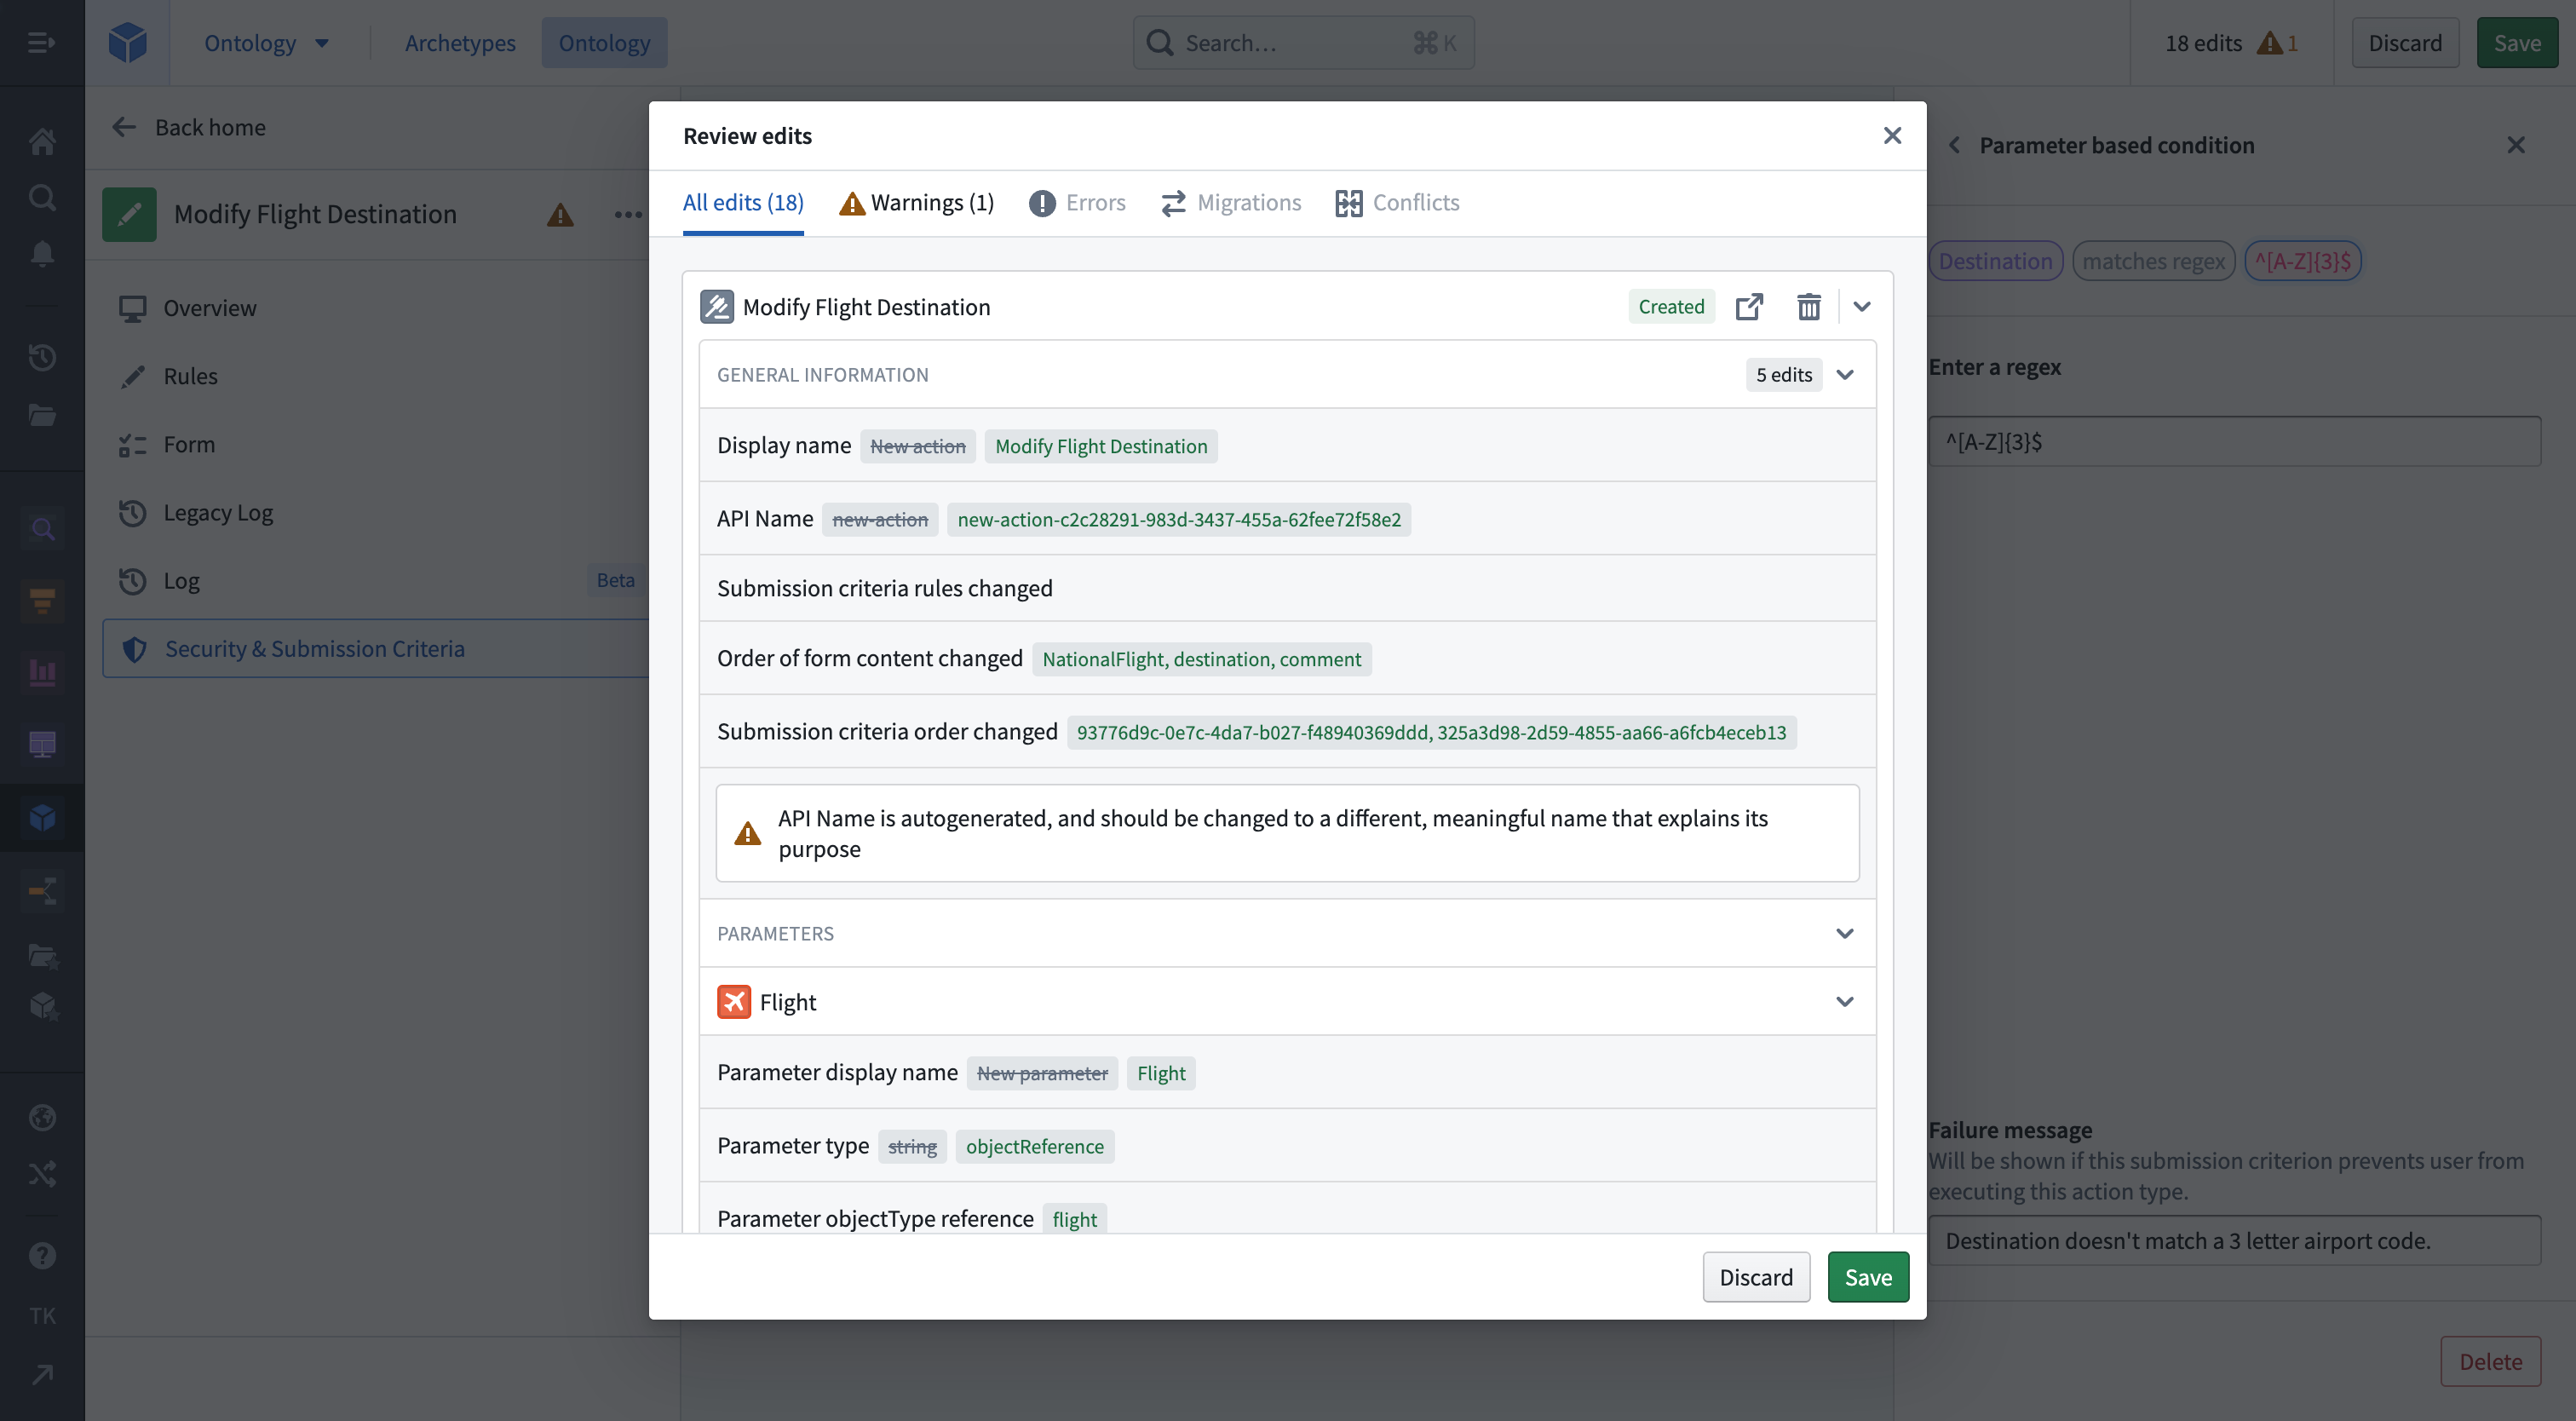
The first tab of an action type definition is called Overview and allows you to define the API Name (a unique ID), the user-facing Display Name, the user-facing Description, and Status of the Action. Some of these fields will already be filled based on the previous step. Fill the missing fields with values such as those seen below. The API name cannot be edited after saving, so it is important to take care when choosing an API name.
Next, click into the Rules tab of this action type definition. This is where you’ll configure the core of your action type: its Rules or outputs / execution. After selecting the object type and the kind of changes you want this action type to perform, you can see the Rule configured as a modification rule as well as the added properties. You can add additional properties from the dropdown if needed.
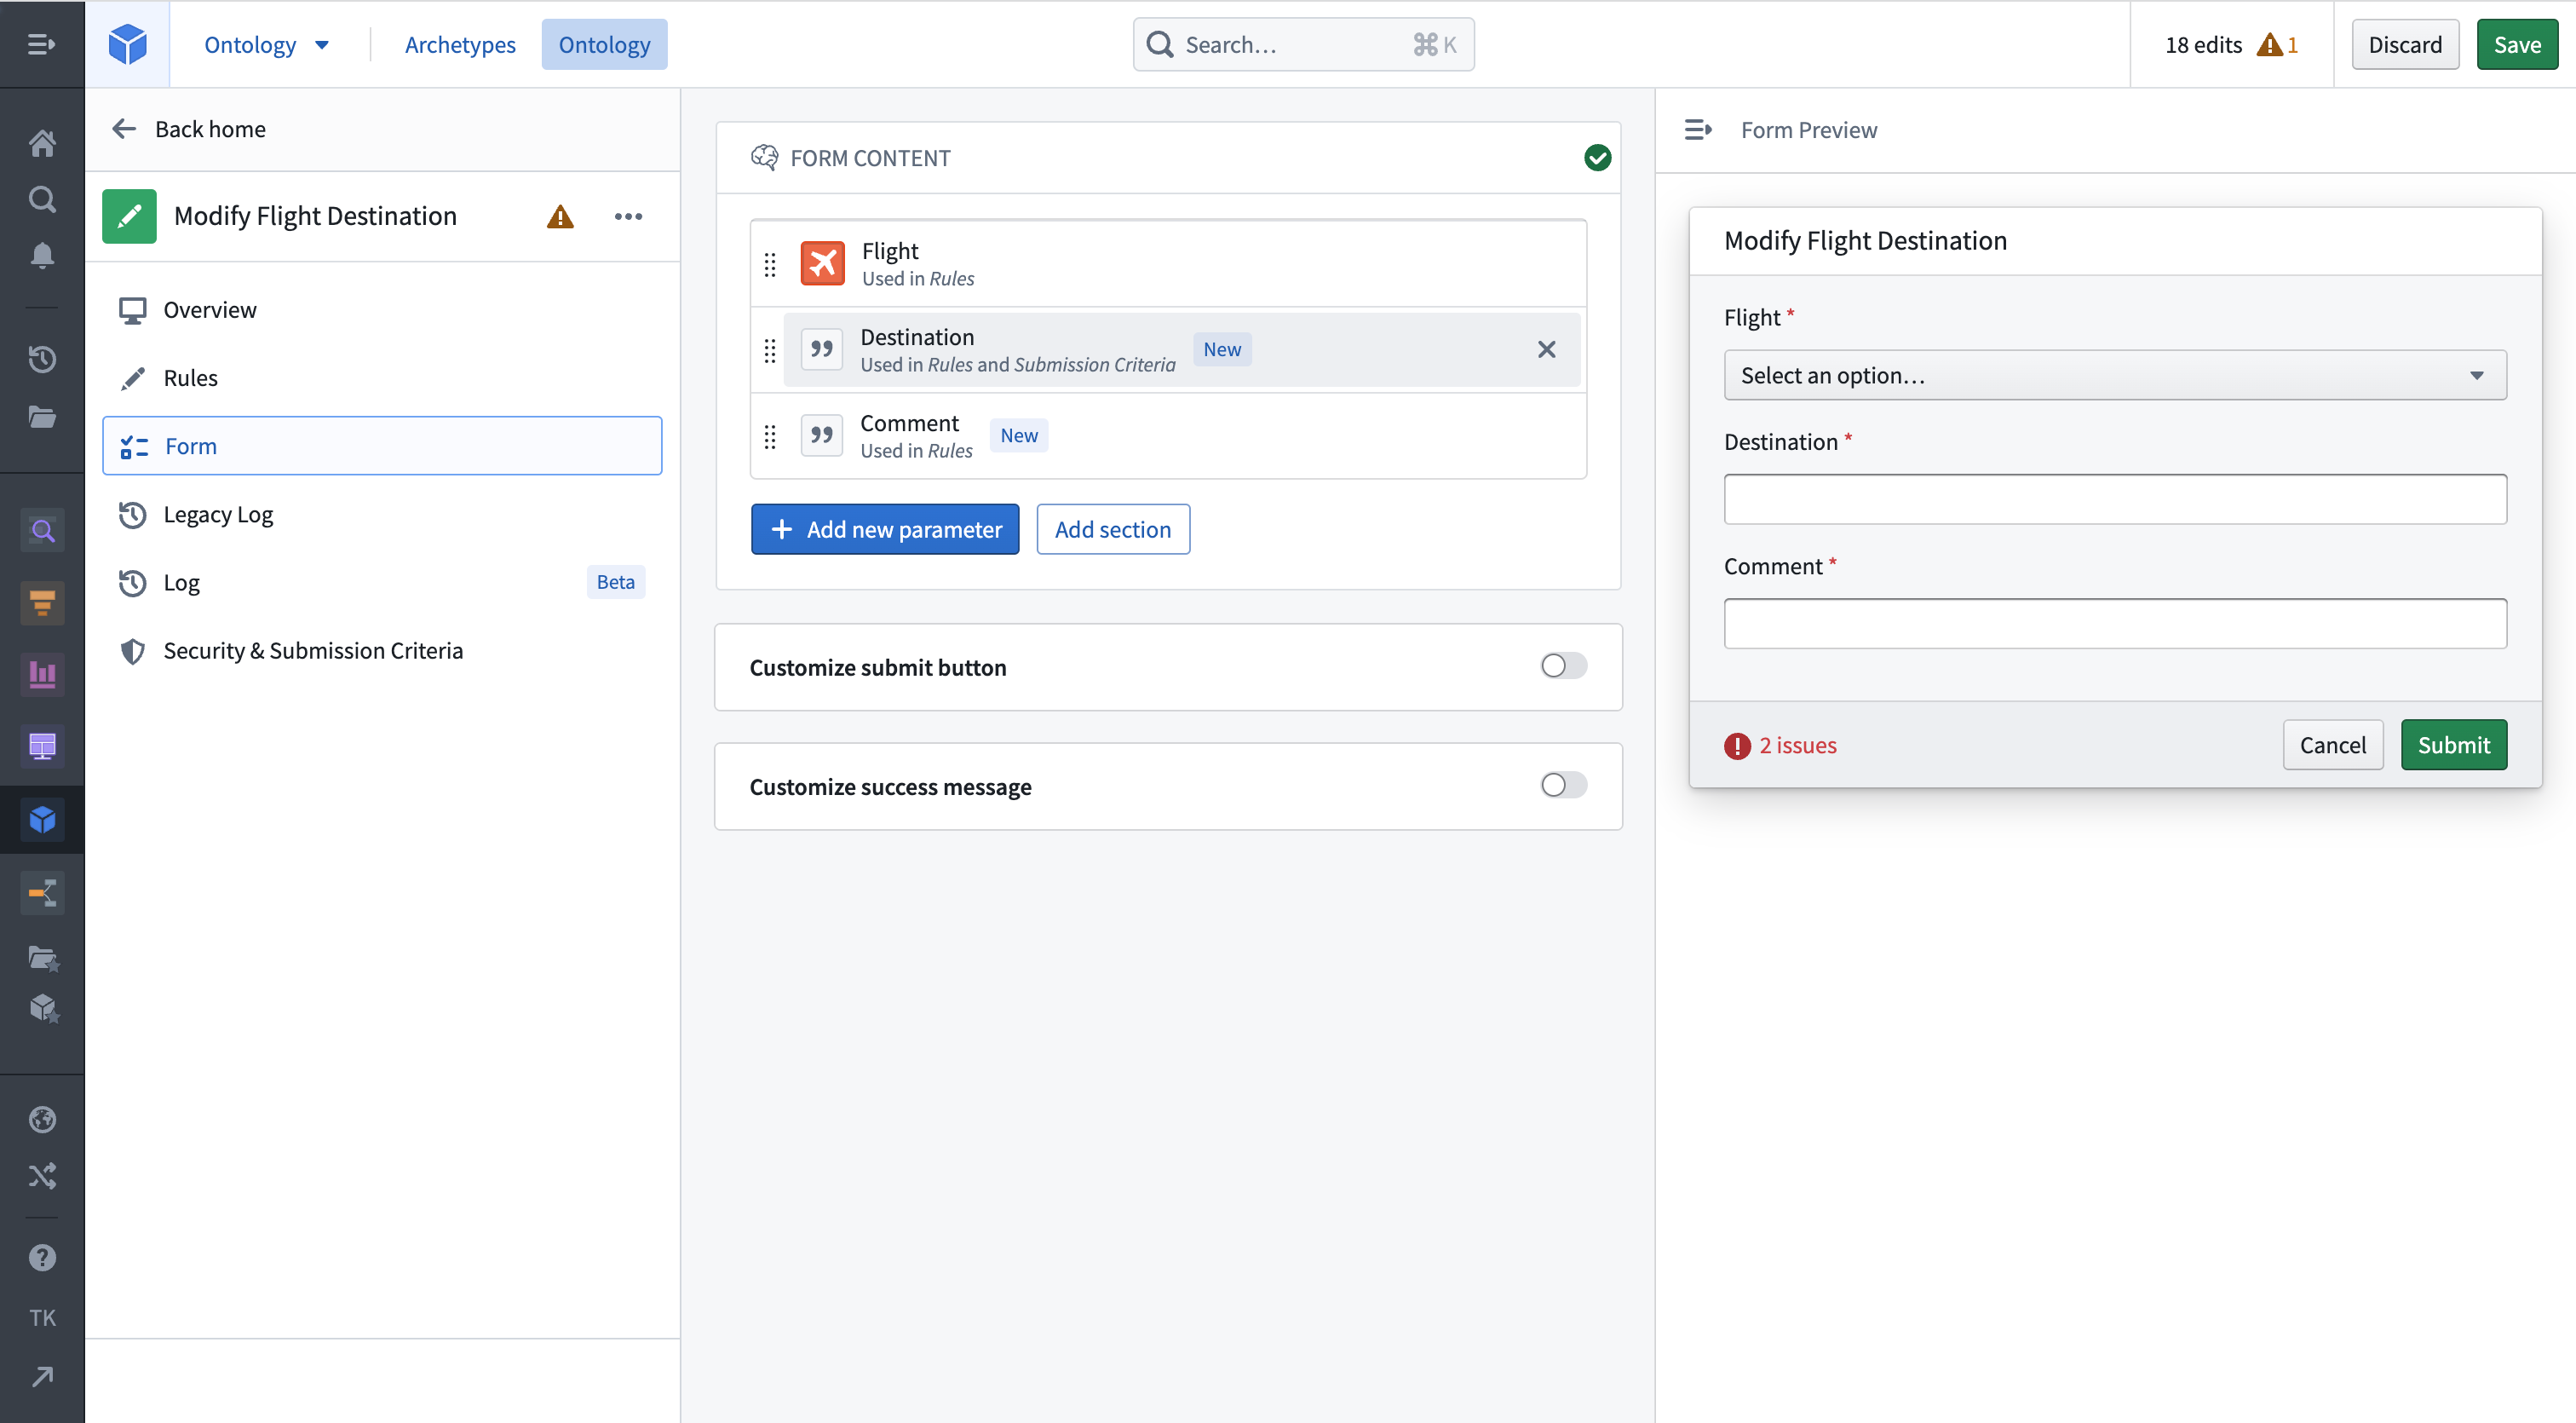
The Form tab lists the Parameters or inputs of your action type. The parameters have already been added automatically by the Rules section.
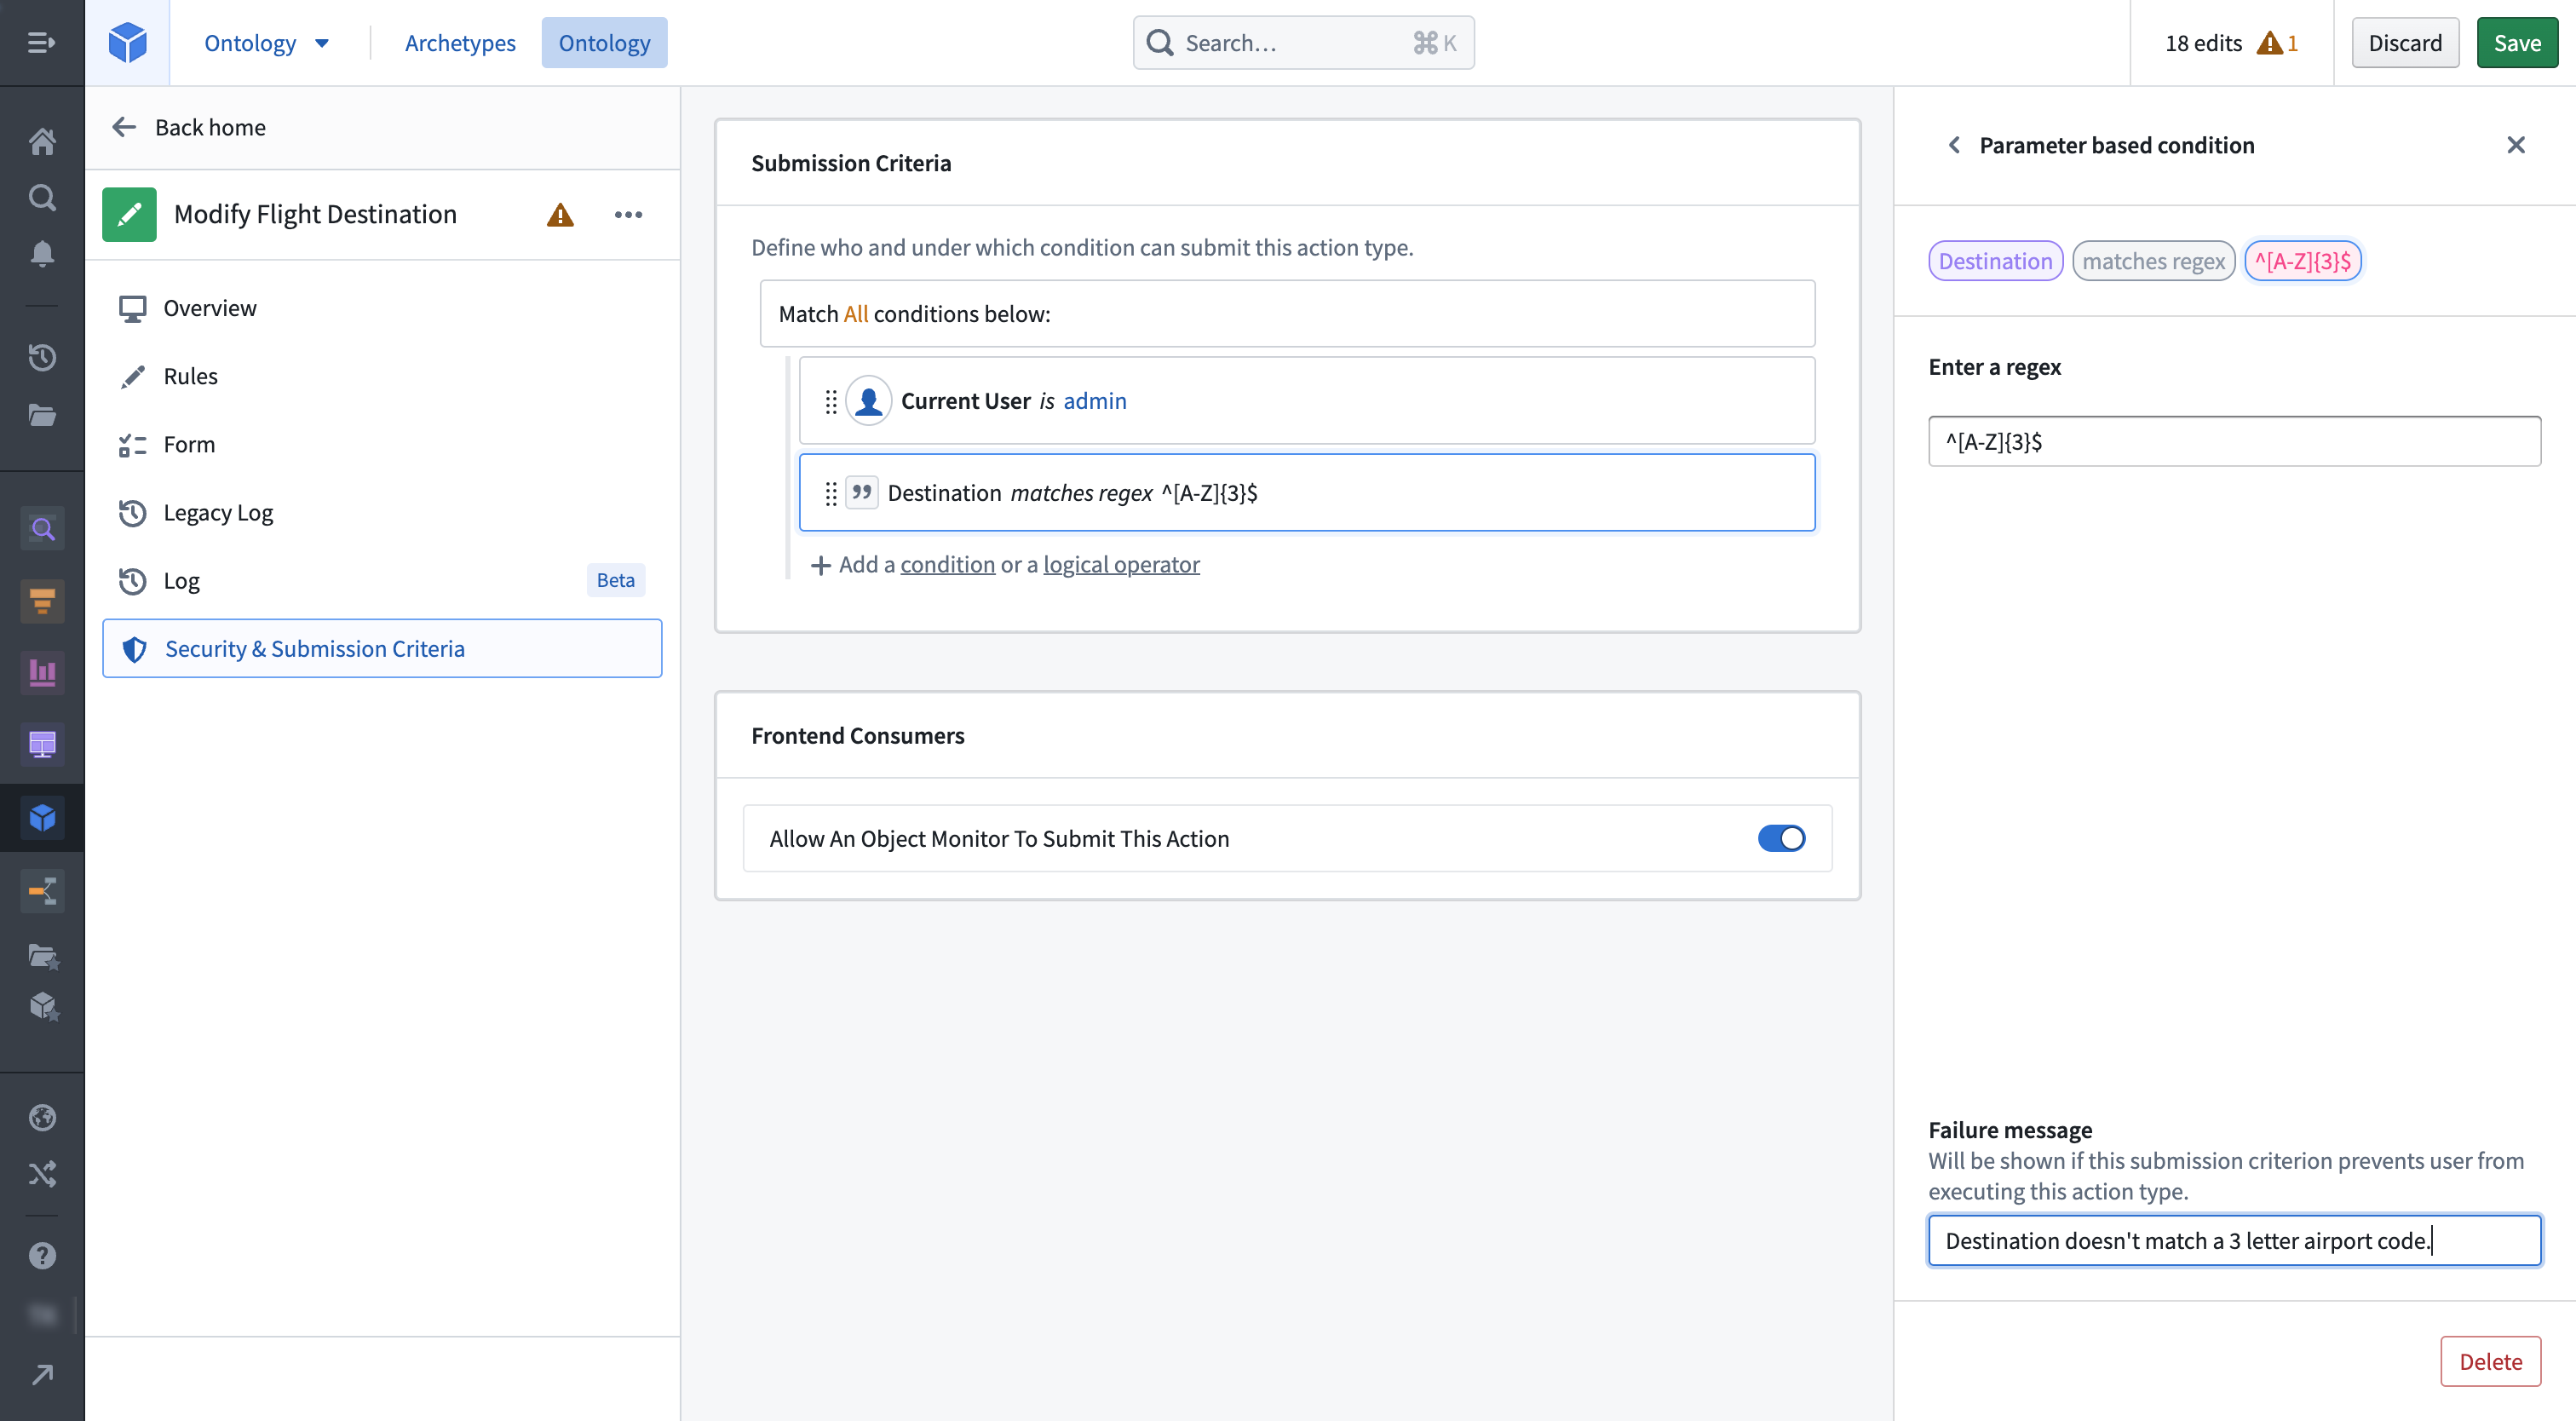
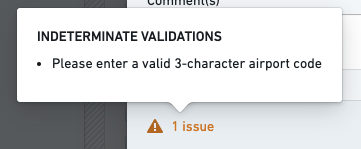
Next, let’s configure some basic Submission Criteria for our action type. In this example, we want to confirm that the user has entered a valid three-character airport code (like EWR) for their modified destination. Navigate to the Security & Submission Criteria tab and click Add a condition in the Submission Criteria section. Use the Parameter condition template in this example to compare the Destination property with a regular expression like ^[A-Z]{3}$; this lets us confirm that the value entered for our destination parameter is exactly three characters. To give the user more information about why a submission is potentially failing on a condition, add an error message at the bottom of the sidebar.
To test the new action type, navigate back to the Form tab and use the preview of the form on the right side of you screen to test your action type. You can enter different values and click the Submit button. This only tests whether an action would be submittable and does not actually submit an action.
You’ve now finished configuring your first action type and need to save it on our Ontology. To do so, click the Save button at the top right of the screen, review the list of modifications that appear in a modal, and then click Save again twice to confirm.
Your first action type is now saved, and we can head to Workshop to build a module that will allow users to execute this action type.
Use an Action within Workshop
The below section assumes familiarity with building Workshop modules. See this page for a tutorial covering these topics.
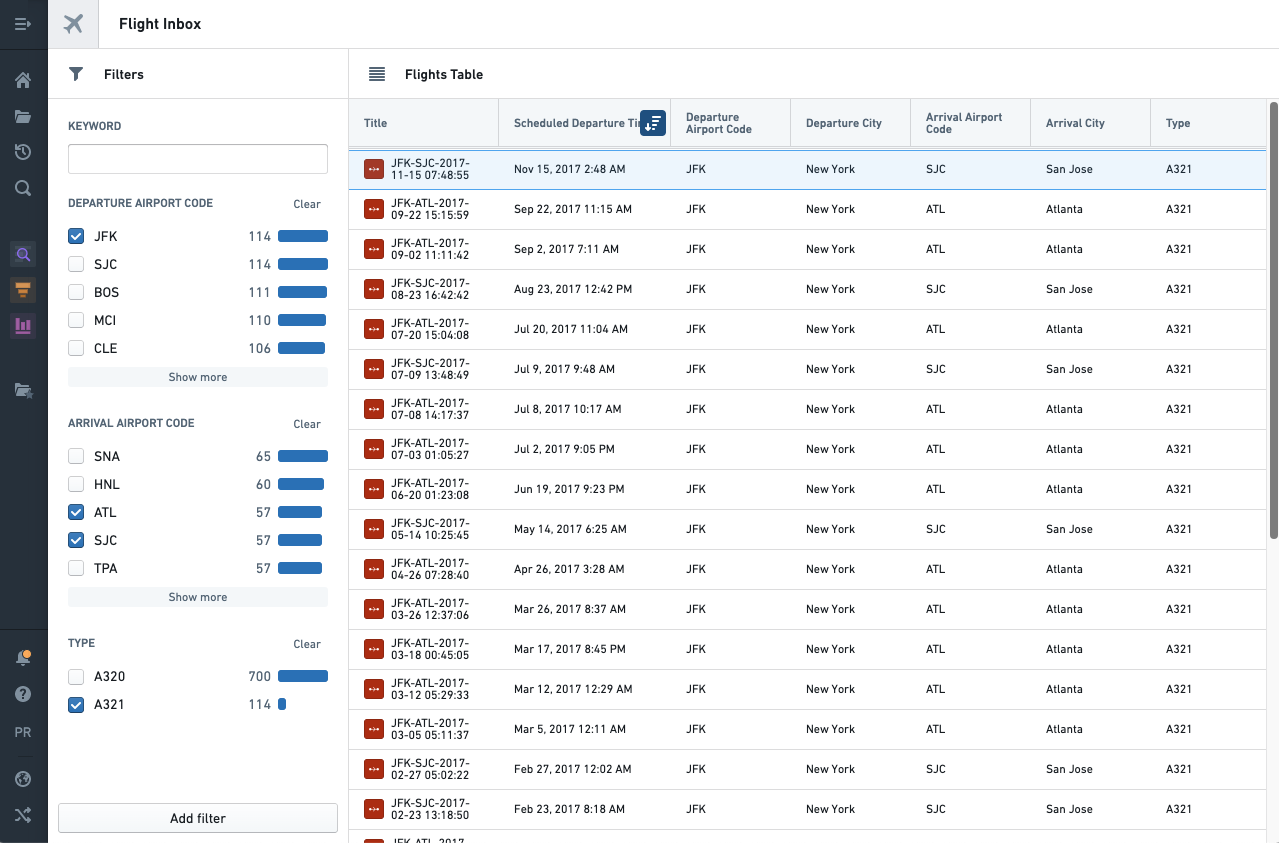
Within Workshop, Actions can be exposed to users through a number of different widgets, including Button Groups and the Create Action panel. The example below begins with a Flight Inbox module and describes how to trigger Actions via a Button Group from within this Workshop module.
Button Groups
The Button Group widget in Workshop allows a module builder to add one or more buttons to their module. For this example, we’ll focus on how Button Groups can be used to expose an Action in Workshop.
Configuring an Action in a Button Group
After a Button Group is added to your Workshop module, single-clicking on the Button Group within your on-screen module will open the widget’s configuration panel in the right-hand side of your screen. The core configuration options can be found in the Widget setup tab and are divided into three sections — Layout, Style, and Buttons. The Layout and Style sections control advanced display options, but this example focuses on the Buttons section, where a module builder can configure basic display options and determine how Actions are applied when a button is clicked.
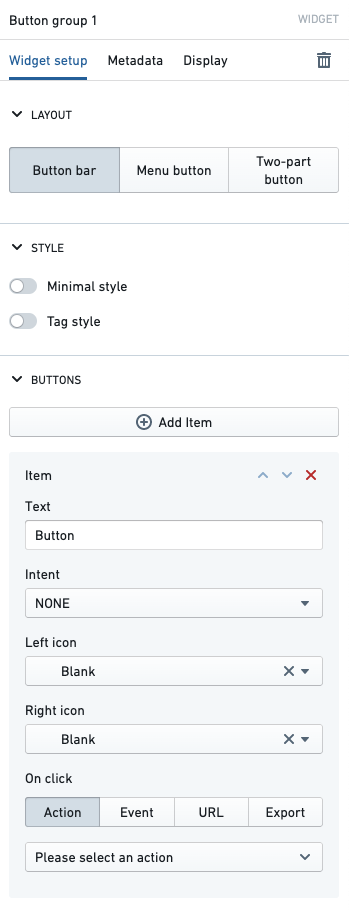
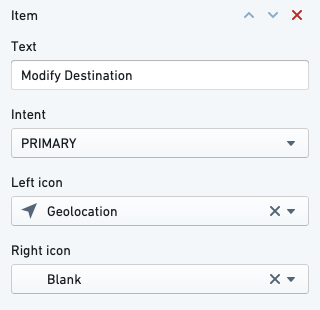
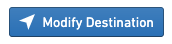
Within the Buttons section of the above, you can adjust the Text, Intent, Left icon, and Right icon options to control the display of their button. As example, let’s configure these four options for the "Modify Destination" Action we intend to trigger from the button.
This above configuration will produce a button that looks like the below. Accurately labeling a button with appropriate text, intent (color), and an icon will help users understand the intent of the button and what will happen when they click it.
Now that our button is labelled, we proceed to the On click section to connect our intended action. To do so, click into the Select an action... dropdown and then filter to and select the "Modify Destination" action. Doing so will cause the below to appear, which contains all three of the Action parameters that we defined when creating the "Modify Destination" action above.
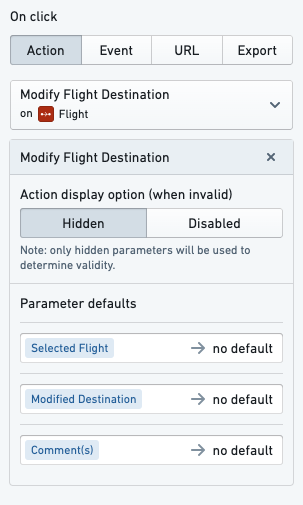
The Parameter defaults allows the user to optionally set default values for the Action parameters. As a reminder, each parameter corresponds to an input in the action type Definition (an object list, object reference, integer, string, and so on). For each parameter the user has two options:
- Set a default value equal to a variable in the Workshop module
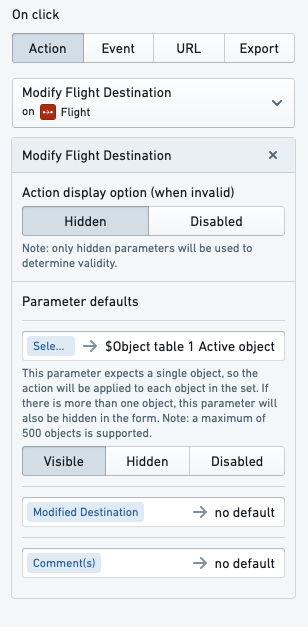
- To do this we can click into the Selected Flight parameter's "no default" value and set this instead to be the "Active object" variable output by our object table of flights. Once this is set, additional options will appear to set the parameter to be Visible (default value can be further modified by a user in the Actions form), Hidden (the parameter is entirely hidden from the user in the Actions Form), or Disabled (parameter appears as read-only to the user in the Actions form). In this example, let’s keep the default option of Visible.
- Leave no default
- Parameters with no default will initially appear as empty fields in the Actions form, and the values will be input by the user.
- In this example, we leave Modified Destination and Comment(s) fields without defaults.
Applying an Action from a Button Group
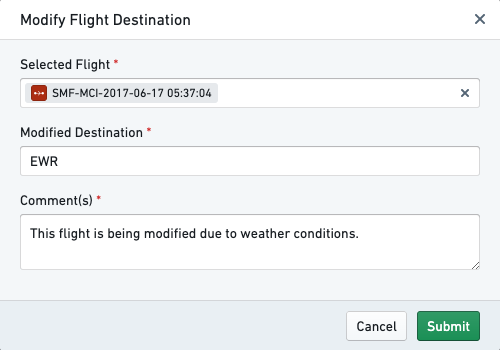
After configuring the Action in the Button Group, when a user clicks on the Modify Destination button in the Workshop module they will see an Actions form appear. The default values of a field are based on the above configuration; the Selected Flight field is auto-populated based on the module variable, while the Modified Destination and Comment fields are left empty for user input.
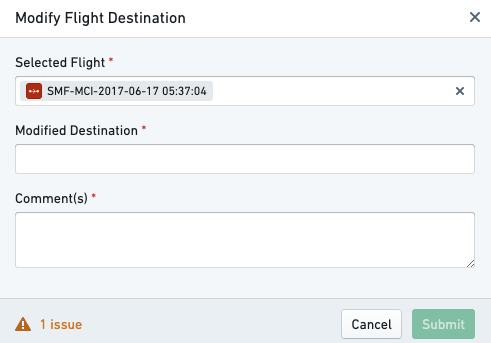
In the form above, 1 issue is flagged at the bottom left of the Actions form. By hovering over the 1 issue text, the user can see that the issue is that the Modified Destination field is not currently a valid three-character airport code.
When the Actions form is filled out and all parameters pass validation, the Action can be submitted (the submit button will be available).
After clicking submit, a user will see a green toast appear on top of the module, indicating that the Action was successfully completed and the selected Flight object was updated to reflect the changes entered.
