Create drag-and-drop integration points
The following tutorial only covers dragging and dropping between drag and drop zones that transfer or accept the same media type. For example, if your drag zone adds the Foundry object RID media type data to the DataTransfer, you can only drag it onto drop zones that accept the Foundry object RID media type. If you want to support dropping Foundry object RID data on drop zones that accept the Gotham object media type for example, you will need to enable type mapping for your objects and follow the enrichment tutorial after this tutorial.
Drag and drop allows users to dynamically move data within and between applications. The following tutorial will teach you how to drag data between your application and the Palantir platform, including both Gotham and Foundry. Adding just one drag-and-drop integration point to your application will allow users to seamlessly perform workflows across your application and the Palantir platform.
Implementing drag and drop zones consists of two main components:
We recommend installing the latest version of our platform for increased drag-and-drop interoperability between your application and the Palantir platform.
Create a drag zone
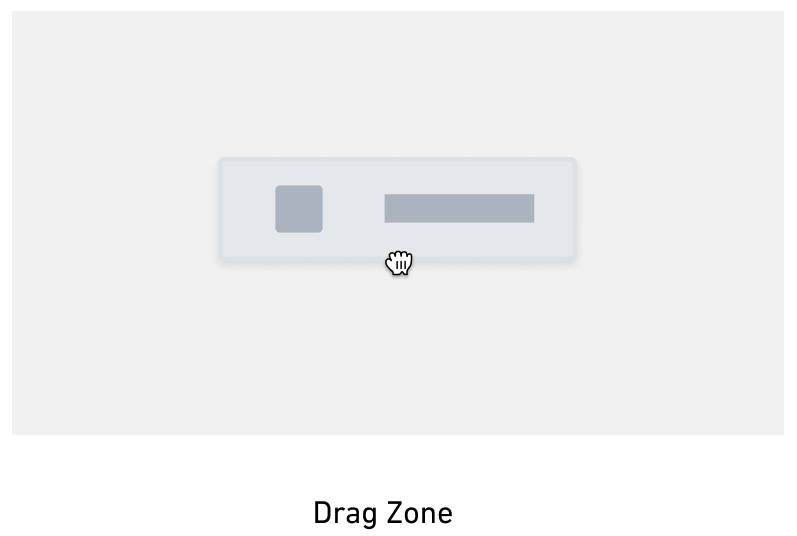
A drag zone is an interactive DOM element that allows users to "grab" data and transfer it elsewhere by "dropping" it on a drop zone. Drag zones write data to the DataTransfer object, allowing it to be transferred when the user drags a draggable element. The steps below detail how to make an element draggable, add data to the DataTransfer object, and handle drag events. Refer to drag zones and the DataTransfer object for details on these concepts.
Make the HTML element draggable
Make an HTML element a drag zone by setting the draggable attribute to true. To attach data to the drag event, add an ondragstart handler, which will set data on the DataTransfer.
Copied!1 2 3<p id="p1" draggable="true" ondragstart="handleDragStart (event)"> Draggable Element </p>
Add data to the DataTransfer
To add data to the drag event, call the dataTransfer.setData method for the attached DataTransfer. This method adds data to the DataTransfer in the given media type format. Refer to the MDN DataTransfer documentation ↗️ for more information.
Copied!1 2 3 4 5 6 7 8function handleDragStart(event) { event.dataTransfer.setData( <media type>, <data> ); event.dataTransfer.effectAllowed = "move"; }
Replace <media type> above with the dragged data's media type, for example application/x-vnd.palantir.rid.phonograph2-objects.object for Foundry object RIDs. Replace <data> with a serialized version of the data by using JSON.stringify to convert the data to a string. Refer to the Palantir media types documentation to determine the correct media type for your use case.
Keep security concerns in mind when adding data to your DataTransfer. Any drop zone will be able to access this data.
Below is an example of a drag start handler for Foundry object RIDs:
Copied!1 2 3 4 5 6 7 8 9function handleDragStart(event) { const foundryObjectRids = ["ri.phonograph2-objects.main.object.XXXXXXX", "ri.phonograph2-objects.main.object.YYYYYYY"] event.dataTransfer.setData( "application/x-vnd.palantir.rid.phonograph2-objects.object", JSON.stringify(foundryObjectRids) ); event.dataTransfer.effectAllowed = "move"; }
This handler adds the Foundry object RID media type to the DataTransfer. Any drop zone that accepts Foundry object RID data will be able to receive the data in foundryObjectRids when the dragged DataTransfer is dropped.
At this point, you should be able to drag from your drag zone onto drop zones that accept the media type in the DataTransfer. Refer to Palantir media types to find drop zones that accept your drag payload depending on the media type.
Create a drop zone
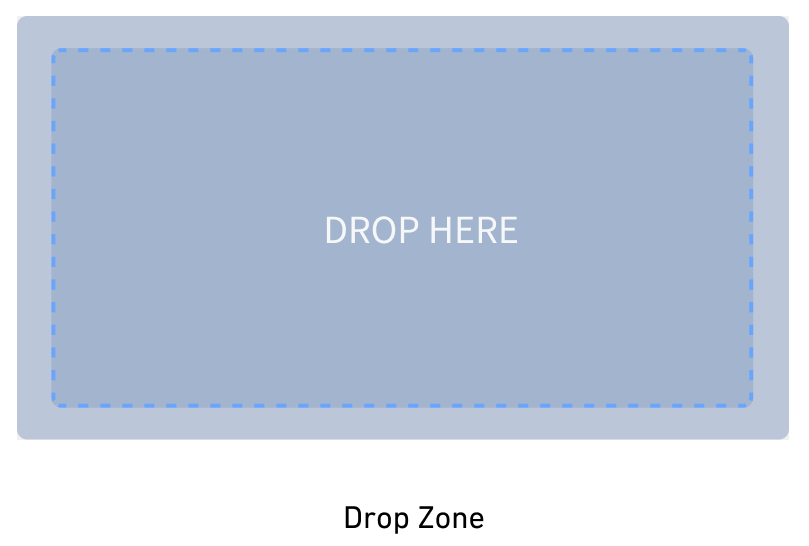
Drop zones are interactive elements on the DOM that receive "dropped" data from a drag zone. Drop zones work by listening to the ondrop event and accessing information from the event's DataTransfer when the event is fired. Refer to drop zones and the DataTransfer object to learn more.
You can turn an HTML element into a drop zone by adding an ondragover handler, which prevents the default event behavior. Add an ondrop handler to process the dropped DataTransfer.
The steps are as follows:
This tutorial covers creating a drop zone that accepts the Foundry object RID media type, but your implementation can replace this with a media type of your choice.
Enable items to be dropped on your drop zone
- Write functions to prevent the default
dragoveranddragenterevent handling. The default event behavior does not accept dropped data, so we cancel this behavior to allow the element to accept dropped data, which is necessary for drop zones.
Copied!1 2 3 4 5 6 7 8 9 10 11 12 13 14// this is necessary to ensure the drop event will fire // only prevent the default behavior if the drag payload is accepted function handleDragOver(event){ if(event.dataTransfer?.types.includes("application/x-vnd.palantir.rid.phonograph2-objects.object")){ event.preventDefault(); } } function handleDragEnter(event){ if(event.dataTransfer?.types.includes("application/x-vnd.palantir.rid.phonograph2-objects.object")){ event.preventDefault(); } }
- Add the
handleDragOverevent handler to your drop zone
Copied!1 2 3 4 5 6 7<div id="my-cool-drop-zone" ondragover="handleDragOver(event)" ondragenter="handleDragEnter(event)" > Drop Zone </div>
Handle the drop
-
Create a function to handle the drop by accessing data from the DataTransfer once it has been dropped, and prevent the default event behavior, which is to open link data. Call the DataTransfer
getDatafunction to return data from the DataTransfer in string format.getDatareturns an empty string if the DataTransfer has no data or if the DataTransfer has no data for that media type. Refer to the MDN getData documentation ↗️ for more information on this method.Below is an example of an
ondropcallback for getting Foundry object RIDs from a DataTransfer. Replace the media type in theevent.dataTransfer.getDatacall with a media type that reflects the type of data you would like to transfer.
Copied!1 2 3 4 5 6 7 8 9 10 11 12 13 14 15 16 17 18 19 20 21 22 23 24function handleDrop(event) { // prevent default open-link behavior event.preventDefault(); // get Foundry object RIDs data const data = event.dataTransfer.getData( "application/x-vnd.palantir.rid.phonograph2-objects.object" ); try { if (data != null && data !== ""){ // try to parse the returned data const dataParsed = JSON.parse(data); // print the data console.log(dataParsed); // do something with the data doCoolThingWithFoundryObjects(dataParsed); } } catch (error) { console.error("Unable to parse data", error) } }
- Add the
handleDropfunction to your drop zone component as shown below:
Copied!1 2 3 4 5 6 7<div id="my-cool-drop-zone" ondrop="handleDrop(event)" ondragover="handleDragOver(event)" > Drop Zone </div>
At this point you should be able to drop data onto your drop zone. Refer to the Palantir media types documentation to find drag zones that can be dropped on your drop zone.
- (Recommended) We recommend using a runtime type guard/validator if possible when getting data off of the DataTransfer. While the media type to media type data connection exists as a contract, adding a type guard ensures that the received data follows that contract.
Refer to the following documentation for supported Palantir media types:
Style your drop zone
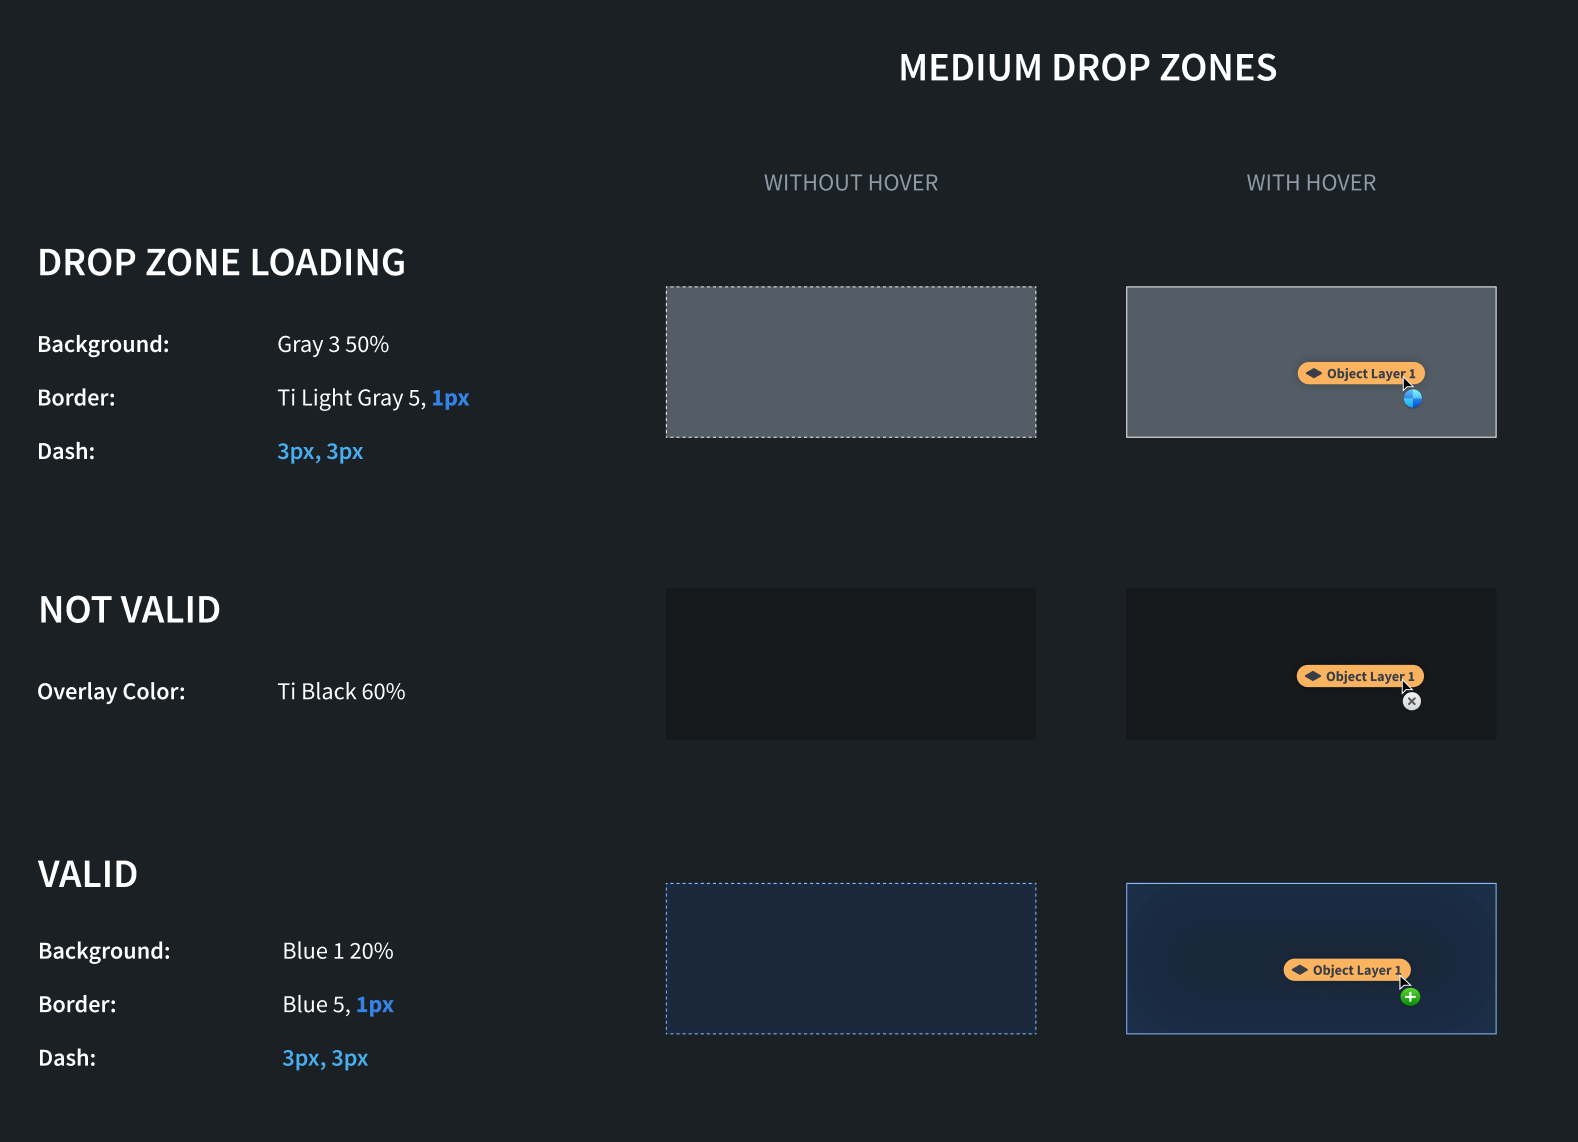
Applying styling to your drop zone is crucial so users can see whether drop zones accept their drag payload. Without this, usability of your drop zones will be suboptimal. We recommend applying different styling to your drop zone depending on whether the drag payload is valid for the drop zone, or if the drop zone needs to perform additional work to determine if it accepts the drag payload. Drop zone styling should be cleared after a drop, which is covered in the steps below.
By the end of this tutorial your drop zone will "light up" if it accepts the drag payload, but this tutorial does not cover implementing the "invalid" and "loading" styles outlined in the design guidelines. We recommend implementing these additional styles for more cohesive and user-friendly drag-and-drop interactions.
After following steps one through four, your drop zone should "light up" when a user drags a payload onto your application with an accepted media type. After following steps five through seven, your drop zone will "light up" when a user starts dragging from inside of your application. After following step eight, the hover styling shown in the image below will be applied to your drop zone.
-
Copy CSS class implementations. In order to apply styling to your drop zone, create a CSS file for your styling and add the appropriate drop zone style classes from the design guidelines. Note that we have different style recommendations based on the size of your drop zone.
-
Add styling when your drop zone accepts the drag payload by writing a function to conditionally add styling if the drag payload contains an accepted media type. This function uses the classlist ↗️ property to add an additional classname to our drop zone if it accepts the drag payload. See the design guidelines for the CSS drag hover styling.
Copied!1 2 3 4 5 6 7 8 9 10function conditionallyApplyStylingToDropZone(event, className){ // our drop zone accepts the drag payload if it has a Foundry object RIDs media type if(event.dataTransfer?.types.includes("application/x-vnd.palantir.rid.phonograph2-objects.object")){ const dropzone = document.getElementById("my-cool-drop-zone"); if(dropzone != null){ // add the style's classname dropzone.classList.add(className); } } }
- Write a function to remove the styling from the drop zone using the classlist property.
Copied!1 2 3 4 5 6function removeStylingFromDropZone(){ const dropzone = document.getElementById("my-cool-drop-zone"); if(dropzone != null){ dropzone.classList.remove(className); } }
- Apply styling to your drop zone when data is dragged over it from an external drag zone by adding
dragenteranddragleaveevent handlers. Note that you will want to listen to these events on thecapturephase of the event in case child elements prevent the event from propagating farther upwards. See the MDN event listener capture documentation ↗️ for more.
Here, we need to locally track how many times each event fires. These events will get fired by all child elements on the page.
Copied!1 2 3 4 5 6 7 8 9 10 11 12 13 14 15 16 17 18 19 20let dragInsideApplicationCount = 0; function handleDragEnter(event){ if(dragInsideApplicationCount === 0){ maybeApplyValidStylingToDropZone(event, "valid-small"); } dragInsideApplicationCount += 1; } function handleDragLeave(event){ if(dragInsideApplicationCount === 1){ removeValidStylingFromDropZone("valid-small"); } dragInsideApplicationCount -= 1; } document.addEventListener("drag-enter", handleDragEnter, {capture: true}); document.addEventListener("drag-leave", handleDragLeave, {capture: true});
The above code snippets will only make the drop zone light up if the drag was initiated from a drag zone on an external application or window. If you would like to make the drop zone light up for drag payloads coming from your application, you need to add a dragstart listener as detailed below.
At this point, you should be able to drag payloads from external applications or windows and have your drop zone light up if it accepts the drag payloads. Refer to the Palantir media type documentation to find drag zones that can be dragged onto your drop zone. Note that after the drag payload is dropped, the styling will still be applied to your drop zone; instructions for removing the styling on-drop are in a later step.
- Write a global
dragstartevent listener to apply a style to your drop zone when it accepts the drag payload. This event listener will fire when the user initiates the drag from a drag zone on the same page. This styling indicates that your drop zone accepts the drag payload. See the MDN drag start documentation ↗️ for more.
Copied!1document.addEventListener("dragstart", maybeApplyValidDropStylingToDropZone, {capture: true});
- Change the drop zone style when it is dragged over. In order to show users a visual change when the drag payload is on top of the drop zone, add
drag-enteranddrag-leavehandlers to your dropzone to apply and remove those styles. This differs from the globaldrag-enteranddrag-leaveevent listeners above in that these events will only be triggered bydragenteranddragleaveevents on the drop zone.
Copied!1 2 3 4 5 6 7 8 9 10 11 12 13 14 15 16 17let dropHoveringOverDropZoneCount = 0; function handleDragEnter(event){ if (dropHoveringOverDropZoneCount === 0 && event.dataTransfer?.types.includes("application/x-vnd.palantir.rid.phonograph2-objects.object")){ // allow the drop and apply styling if the drop zone accepts the drag payload event.preventDefault(); conditionallyApplyStylingToDropZone(event, "valid-small-hover"); } dropHoveringOverDropZoneCount += 1; } function handleDragLeave(event){ if (dropHoveringOverDropZoneCount === 1){ removeStylingFromDropZone("valid-small-hover"); } dropHoveringOverDropZoneCount -= 1; }
- Add the
handleDragEnterandhandleDragLeavedrag event handlers to your drop zone component:
Copied!1 2 3 4 5 6 7 8 9<div id="my-cool-drop-zone" ondragover="handleDragOver(event)" ondrop="handleDrop(event)" ondragenter="handleDragEnter(event)" ondragleave="handleDragLeave(event)" > Drop Zone </div>
- Update the drop zone to perform style cleanup. After data is dropped, remove the drop style CSS classes from the drop zone. This is necessary so the drop zone does not stay in its "light up" stage. Also reset the drag counters so new drags events are handled from scratch.
Copied!1 2 3 4 5 6 7 8 9 10 11 12 13 14 15 16 17 18 19 20 21 22 23 24 25 26 27 28 29 30 31 32 33function handleDrop(event) { // prevent default open-link behavior event.preventDefault(); // perform some styling cleanup // remove CSS classes now that there is no active drag payload removeStylingFromDropZone("valid-small-hover"); removeStylingFromDropZone("valid-small"); // reset counters dropHoveringOverDropZoneCount = 0; dragInsideApplicationCount = 0; // get Foundry object RIDs data const data = event.dataTransfer.getData( "application/x-vnd.palantir.rid.phonograph2-objects.object" ); try { if (data != null && data !== ""){ // try to parse the returned data const dataParsed = JSON.parse(data); // print the data console.log("dropped data: ", dataParsed); // do something with the data doCoolThingWithFoundryObjects(dataParsed); } } catch (error) { console.error("Unable to parse data", error) } }
After this step, you should have a working drop zone. The drop zone should light up when it accepts the data on the drag payload, and the data should be printed in the console after the drag payload is dropped. Your drop zone should also remove styling after the drag payload has been dropped.
If your workflow involves transferring data between Gotham and Foundry, follow the data enrichment tutorial to implement this functionality.