Parameters
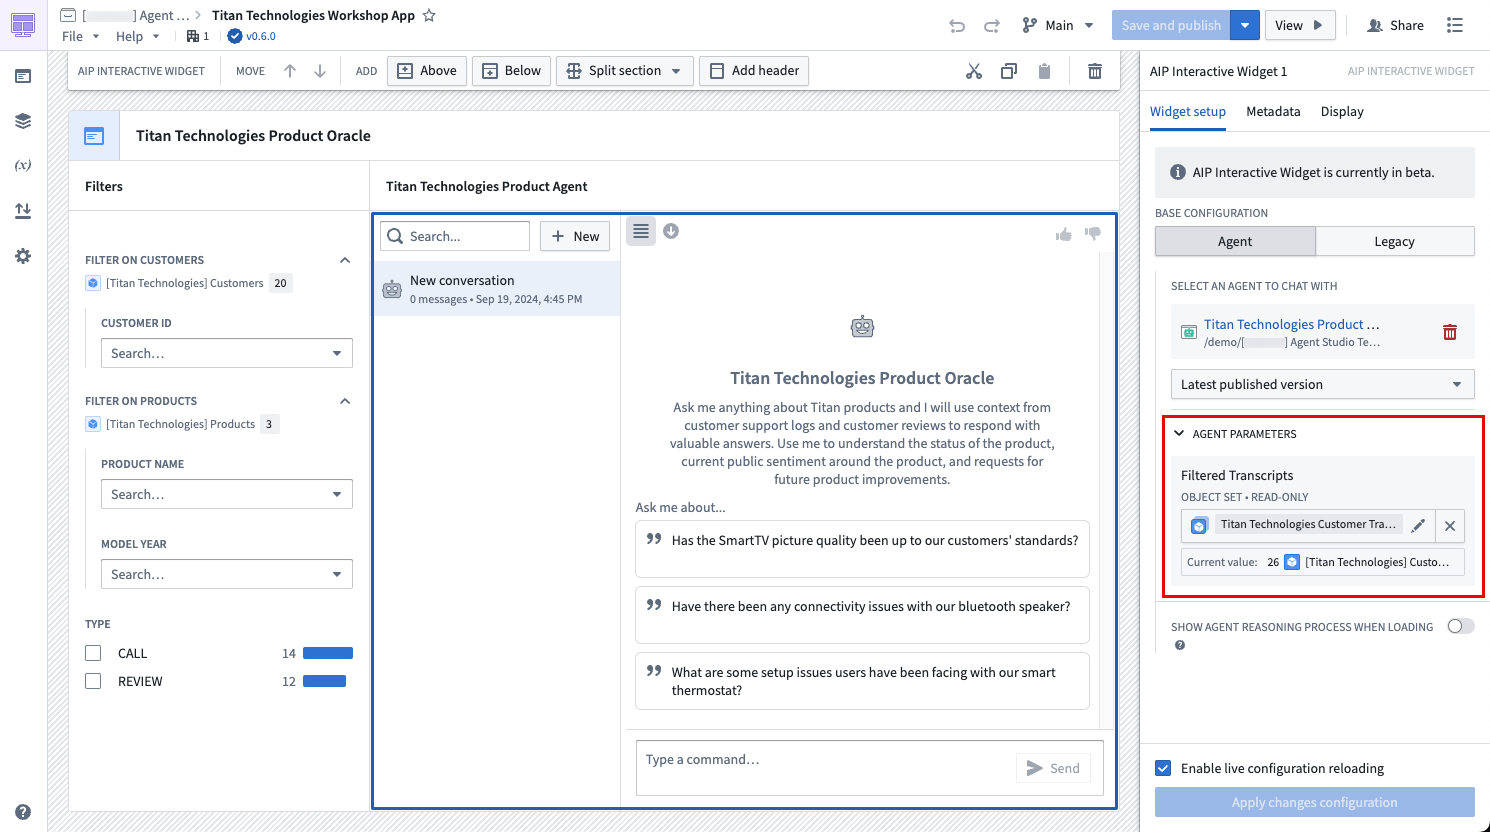
You can configure string or object set parameters on an AIP Agent. When an AIP Agent with parameters is embedded in the AIP Interactive Widget, the list of parameters will appear, and users can map each parameter to a workshop variable of the corresponding type.
Configuration in AIP Agent Studio
When setting up parameters, make sure to do the following:
- Identify the right parameters: Start by identifying what the LLM should be able to interact with. These might either already exist in your workflow, such as a variable representing the user’s current selection, or be a new variable to which the LLM writes results.
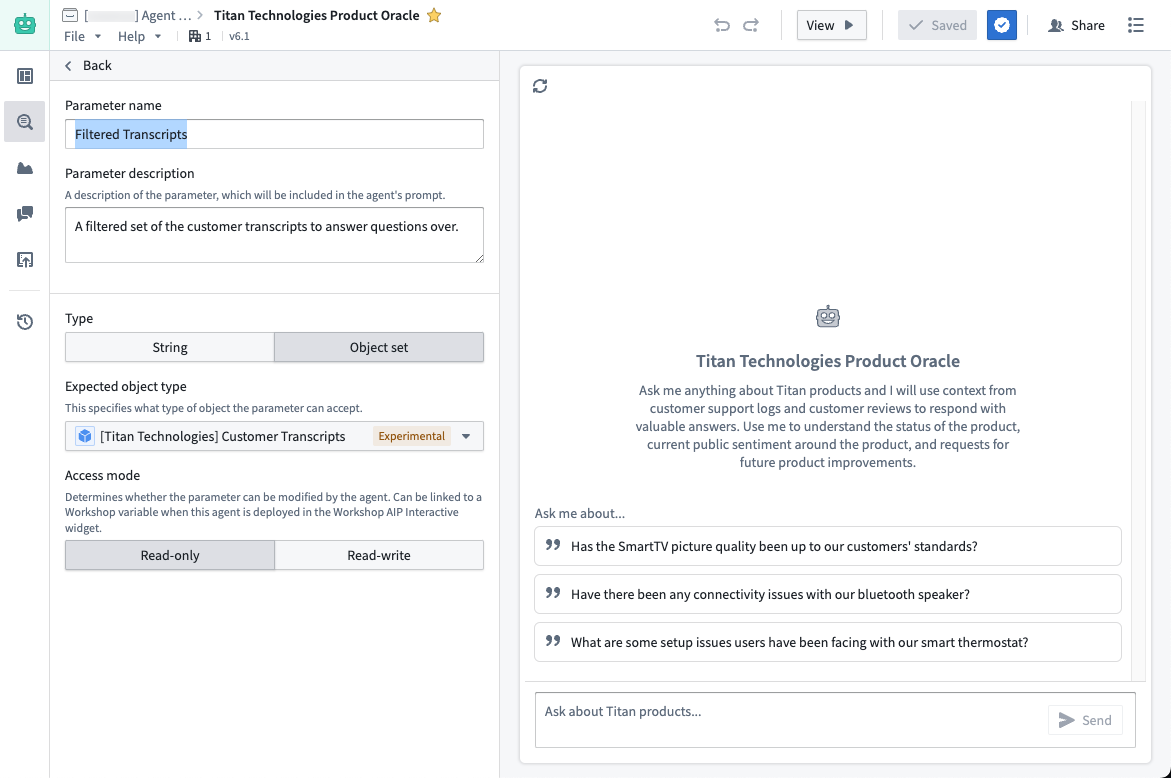
- Name and describe the parameters: For each parameter, write a description that explains its role. This description will be injected into the agent's prompt, providing context for the LLM on when to use it.
- Declare access mode: Specify whether the LLM should have read access, write access, or both for each parameter. This step determines how the LLM can interact with the parameter.
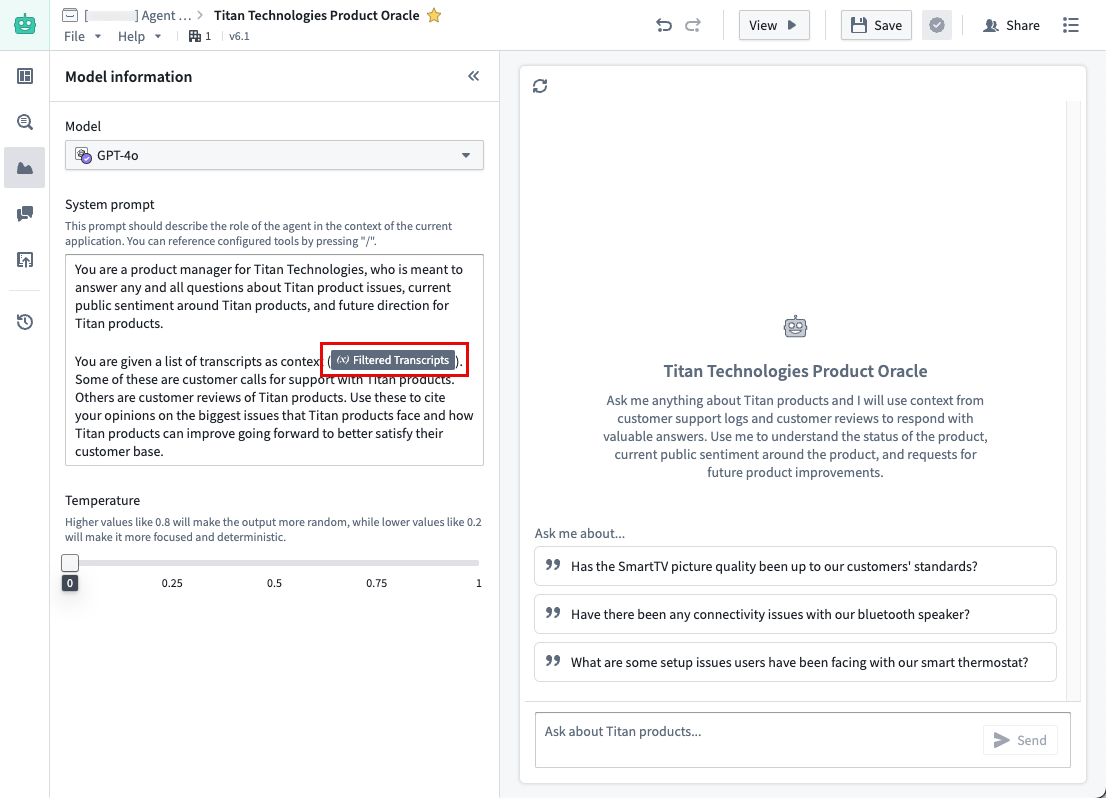
Parameters can also be referenced in the user-defined System prompt in the Model tab using the slash command / on your keyboard.
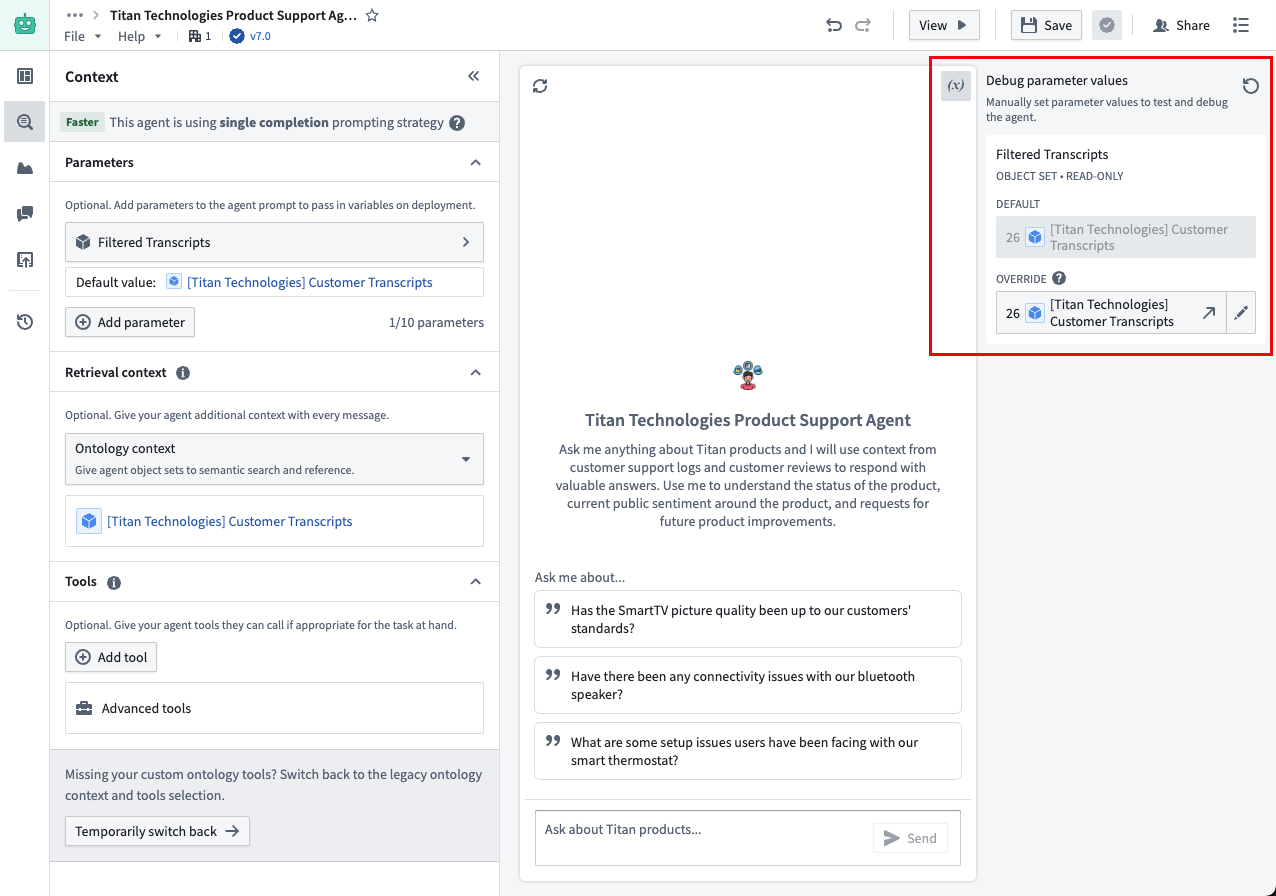
Parameters can be tested using the Debug parameter values section. You can manually override the values of each parameter and the debug section will provide visual feedback when the agent updates a parameter value.
Configuration in Workshop
The option to configure an agent's parameters in Workshop will show up if an AIP Agent has been configured with parameters. For more details on this, review the AIP Interactive Widget documentation.