- Capabilities
- Getting started
- Architecture center
- Platform updates
Build a pro-code agent in Foundry
This guide walks you through building a pro-code agent, from creating the repository to publishing the agent as a Foundry function. Once published, you can call the agent from Workshop or the Ontology SDK.
Prerequisites
Before you begin, ensure that you have the following:
- Access to an Ontology that your agent will read from and write to.
- Permissions to create a code repository in your Foundry environment.
Step 1: Create the pro-code agent
First, select an agent template for your pro-code agent. Select the + New repository button to create a new code repository, then search under What are you building? to find the template that matches your agent framework. Repository types are available for the Claude Agent SDK ↗, OpenAI Agents SDK ↗, and Google Agent Development Kit (ADK) ↗.
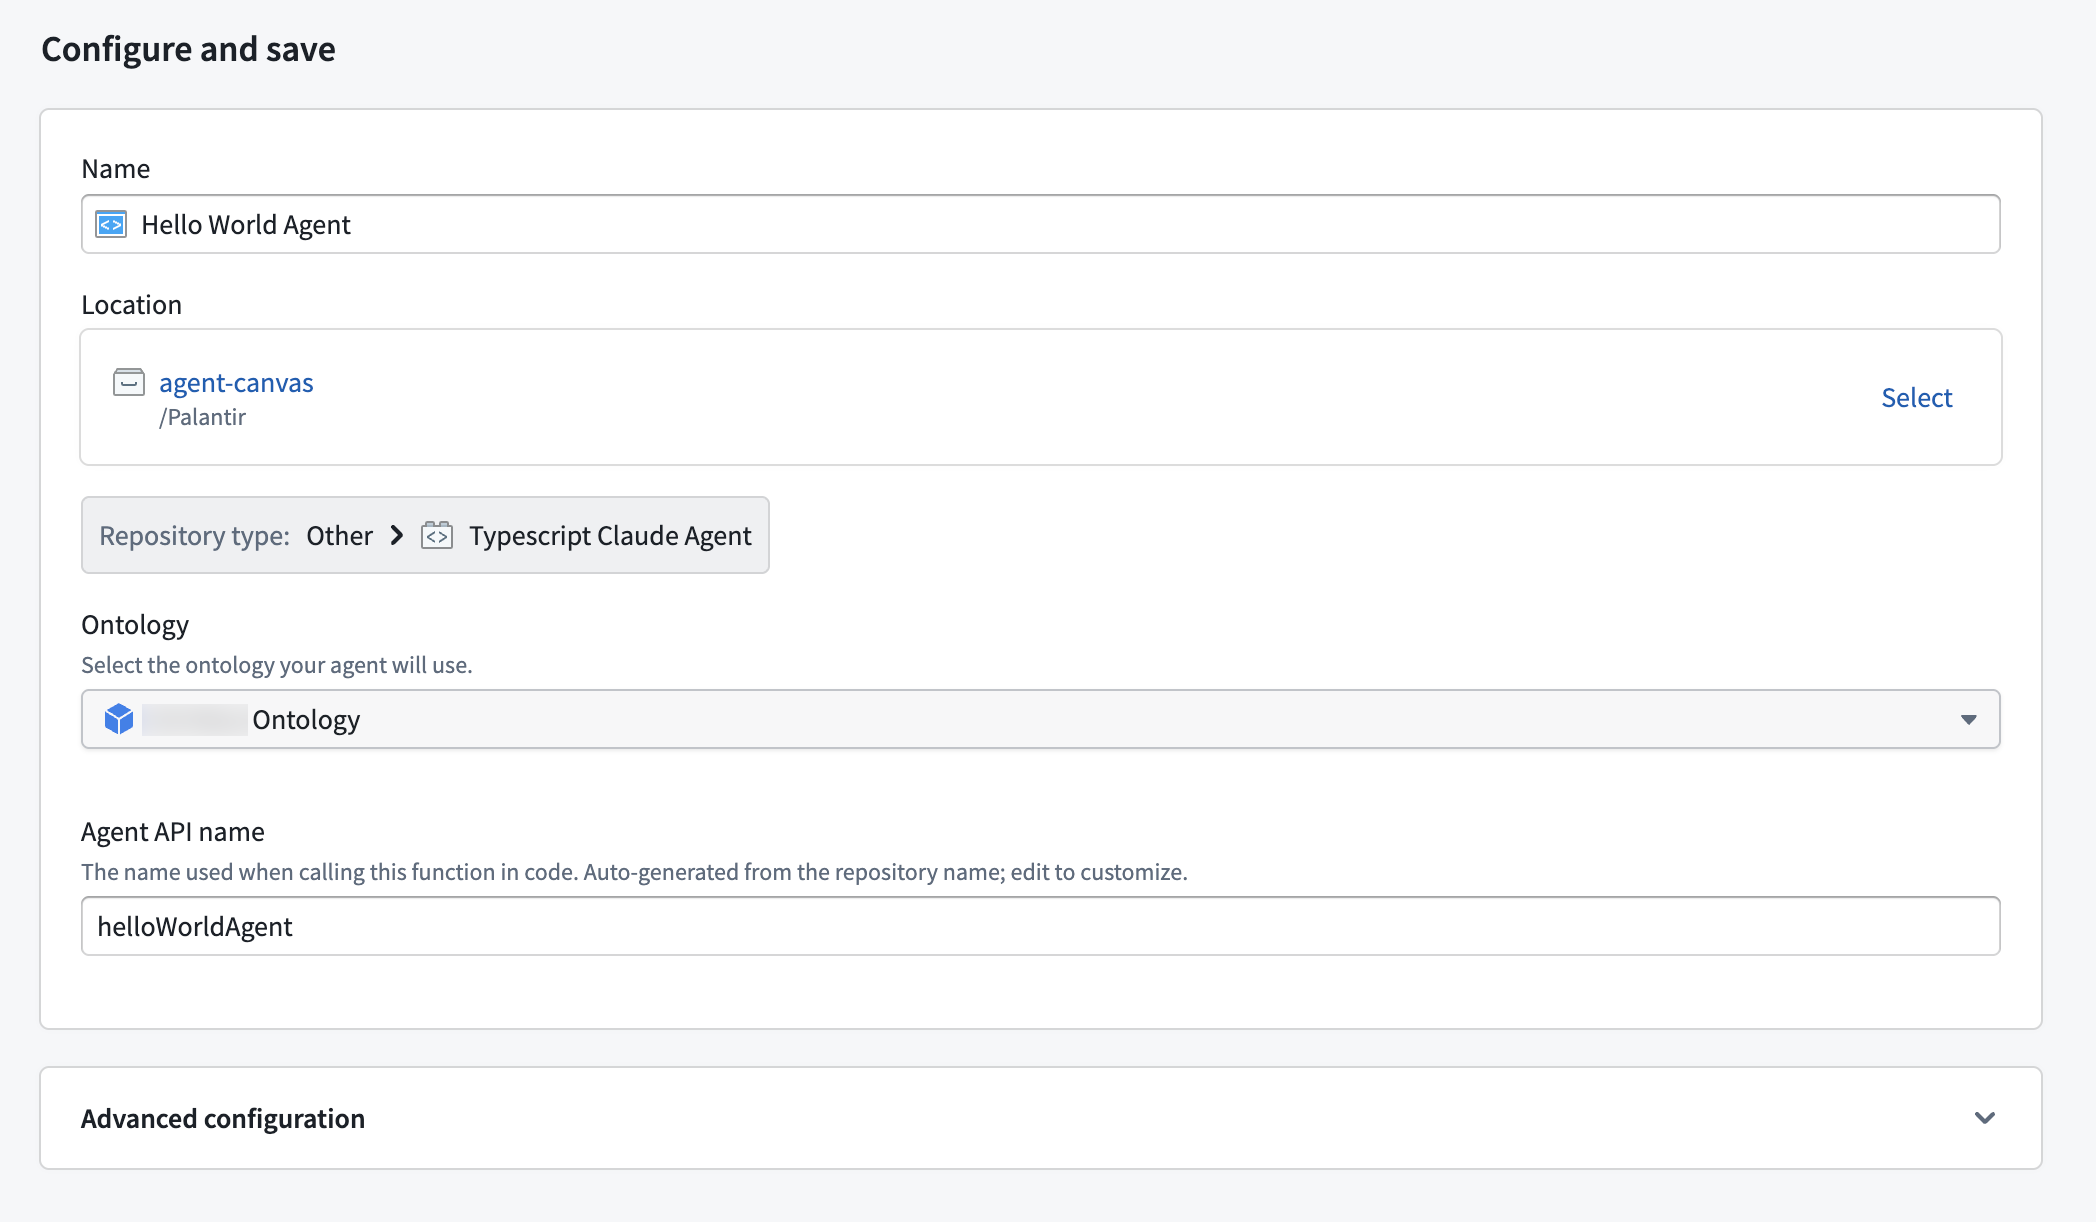
After selecting a template, complete the following on the repository configuration page:
- Enter a Name for your pro-code agent and select a Location for the repository.
- Confirm that the Repository type matches your agent framework.
- Select the Ontology your pro-code agent will use. This selector is required, and it determines the Ontology binding used by the agent's scoped permissions.
- Review the Agent API name. The name is auto-generated from the repository name and can be edited. The agent API name identifies your pro-code agent's function when it is called from Workshop or OSDK.
Once the repository is generated, you are navigated to the Build agents in Foundry page and guided through the next steps of building your pro-code agent.
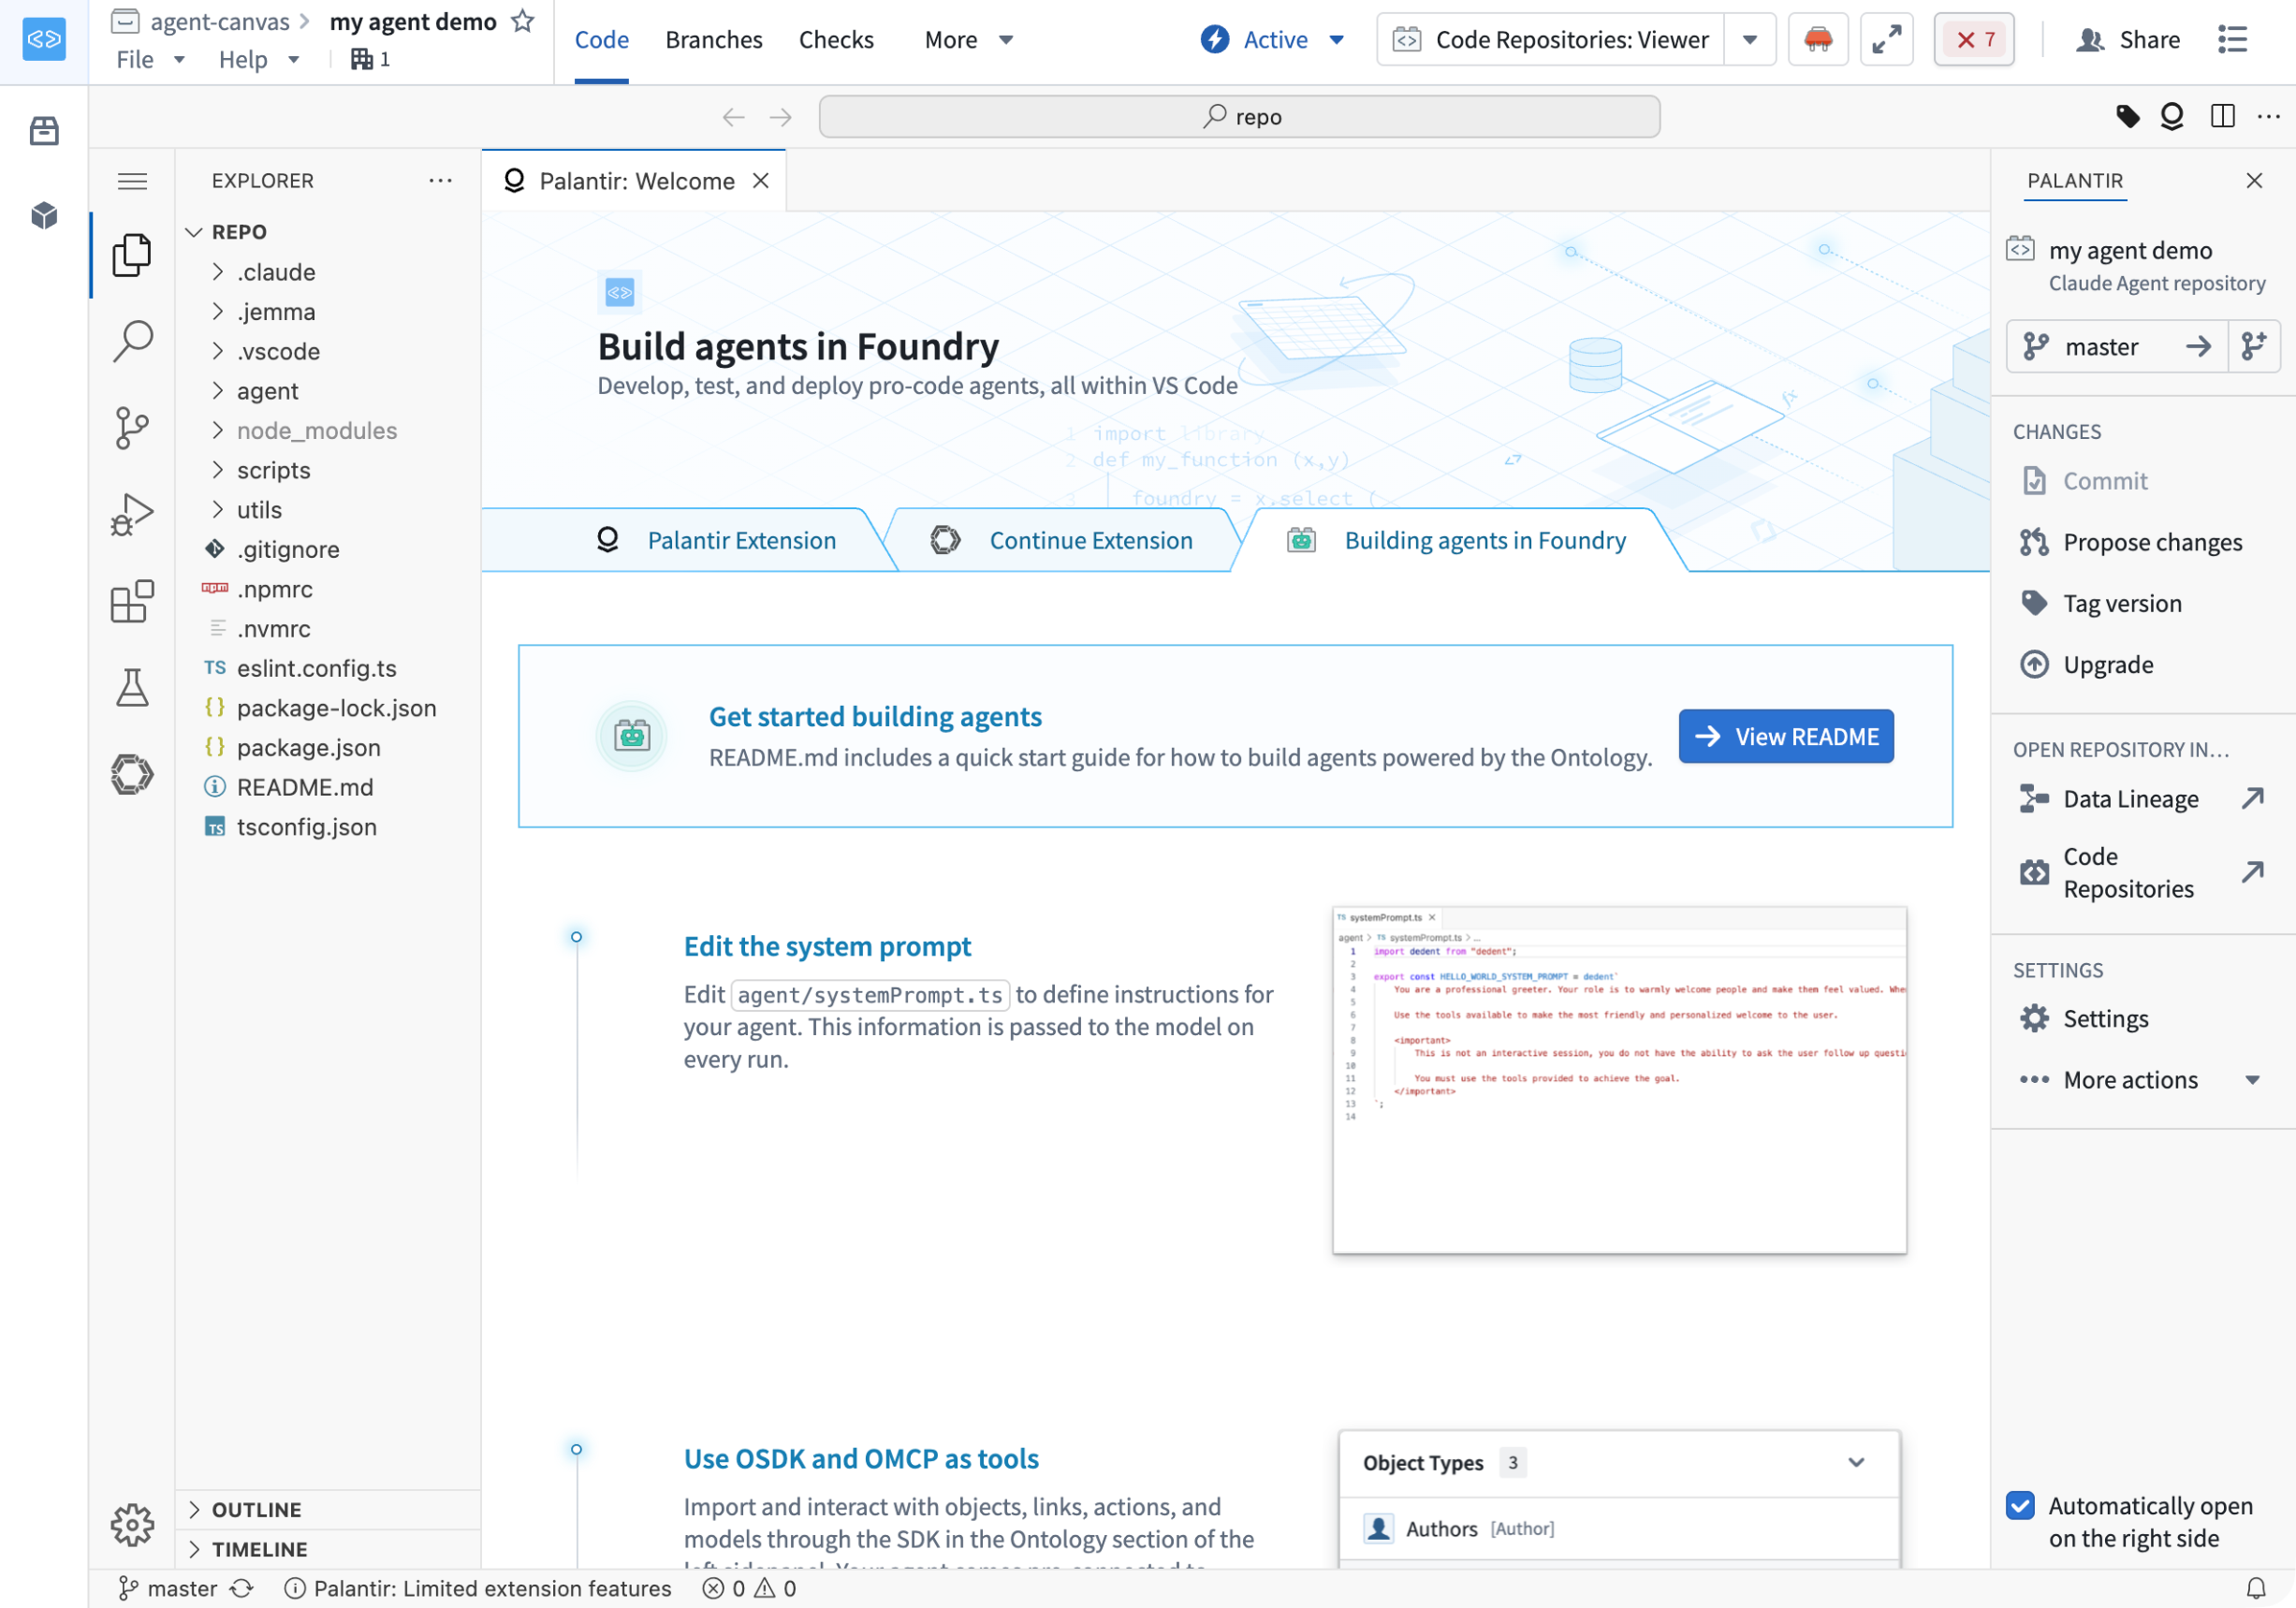
The generated repository follows the structure described in the documentation, with your agent logic in the agent/ directory and shared platform tooling in utils/.
Step 2: Configure the pro-code agent
The generated repository ships with simplified configuration for the Ontology SDK (OSDK), Ontology MCP (OMCP), and Palantir MCP. Because the agent uses scoped permissions, you do not need to provide a client ID, secret, or Foundry token.
Construct the OSDK client bound to your Ontology and retrieve the Ontology MCP configuration:
Copied!1 2 3 4 5import { getOntologySdkClient } from "@palantir/agent-templates-bundle"; import { getOntologyMcpConfiguration } from "@palantir/agent-templates-bundle/mcp/anthropic"; import { $ontologyRid } from "@ontology/sdk"; const client = await getOntologySdkClient($ontologyRid);
Step 3: Define the pro-code agent's logic
Implement the pro-code agent's behavior in the runAgent entry point. Define the prompt, pass the OMCP configuration to the model query as an MCP server, and consume the agent's response stream:
Copied!1 2 3 4 5 6 7 8 9 10 11 12 13 14export async function runAgent(args: AgentArgs) { const omcpConfig = await getOntologyMcpConfiguration(); const iter = query({ prompt: "...", options: { mcpServers: { ["ontology_mcp"]: omcpConfig, }, }, }); // Consume the agent's response stream }
For more detail on the configuration the template provides, review Pro-code agent templates.
Step 4: Test the pro-code agent locally
During development, run the pro-code agent locally to test its behavior. Open a terminal in your repository, install dependencies, and start the agent, providing any arguments defined in your AgentArguments schema:
Copied!1 2npm install npm run start -- --json-args '{ "additionalAgentContext": { "type": "string", "string": "some context" } }'
You can also provide arguments from a JSON file with --json-args-file.
Before you publish, build the pro-code agent and confirm that it completes with no errors:
Copied!1npm run build
Step 5: Publish the pro-code agent
When your pro-code agent builds successfully, publish it by tagging a version. Tagging registers the agent with its Ontology binding and agent API name, and the template's continuous integration deploys the tagged build as an asynchronous Foundry function.
First, commit your changes. You can edit and commit from the in-platform code repository interface or from your editor with the Palantir extension for Visual Studio Code.
Then tag a version in either of the following ways:
- Repository interface: Select Tag version to tag a release off your default branch, set the tag name based on the extent of your changes, and then select Tag and release. This flow mirrors how other TypeScript functions are published.
- Git tag: Create and push a git tag from your local clone, for example
git tag 1.0.0followed bygit push --tags.
Step 6: Run the pro-code agent
After publishing, we recommend running the pro-code agent from Automate using a function effect that points at the agent's function. You can also call the agent from Workshop, the Ontology SDK, and Ontology actions.
Because an agent function returns no value, have your pro-code agent write its results to Ontology objects to consume its output. For details and caveats, review Trigger a pro-code agent.
Log and debug the agent
Add console.log(), console.warn(), or console.error() statements to your TypeScript agent code to record information for debugging. Include non-sensitive identifiers and context that help you trace a specific run.
Where your log messages appear depends on how the agent runs:
- During local testing: When you run the agent locally with
npm startas described in Step 4, log output is written to your terminal alongside the agent's response stream. - After publishing: Because the agent is deployed as an asynchronous Foundry function, its runtime logs are available in Workflow Lineage. Open a specific execution and select View log details to inspect its service logs.
To review logs across executions, use Log search from the source executor, which is the first executable resource in the call chain. For example, if an Automation invokes the agent, search from the Automation node rather than the agent function.
Log visibility depends on your permissions. You can view logs for your own executions from the past 24 hours, except on CBAC stacks. Access to other executions requires Edit permission on the source executor, enabled log access, and access to all markings applied to the logs. Follow the effective logging guidance to choose log levels and avoid recording sensitive data.