Base image vulnerability management
Base images often account for many operating-system vulnerability findings that application teams cannot patch themselves. Managing these findings at the shared-image level reduces duplicate triage across every product that uses the image. Declarations and suppression requests remain governed: your product’s Authorizing Official (AO) reviews them, and every decision retains a full audit trail.
You can use Apollo's base image settings in the Risk Management application to declare the shared operating-system images your product uses. You can scan these images and request suppression for related findings in bulk. This page covers the complete base-image workflow, from registering an image to obtaining approval for a suppression.
Key concepts
| Concept | Definition |
|---|---|
| Base image | A container image you declare as a shared upstream layer. This term refers to the scanned artifact itself, identified by a registry path, not just an operating-system name string. |
| Package | A software component identified by a package URL (PURL) of the form pkg:type/namespace/name. The type is part of the identity, so pkg:rpm/redhat/coreutils and pkg:deb/ubuntu/coreutils are different packages. A package can come from the operating-system layer or from outside it. |
| Finding | A (package, CVE) pair found in one or more scanned base images. This is the unit you suppress. |
| Scope | How widely a suppression applies, such as specific images, an image name prefix, a distribution, a scanner, or global. |
| Category | The reason a finding is being suppressed. It drives downstream review and automation. |
| Status | Where a finding sits against its SLA, for example, in grace period, overdue, or suppressed. A pending suppression pill is displayed when a change request is being applied. |
| Package Vulnerability Suppression | A suppression type that targets a software package by its PURL and mutes all current and future vulnerabilities in it, regardless of which layer the package sits in. This suppression lets you accept risk package by package rather than for a whole base image or operating system. |
Prerequisites
- Have access to the Risk Management application and permission to use base image settings for your space.
- Have the full registry path for each base image. The scanner must be able to locate and pull the image from that path.
- Every image declaration, removal, and suppression request follows your product's approval workflow. Your AO must approve the request before it takes effect; nothing is suppressed silently.
Step 1: Declare your base images
- Open the Risk Management application, select Base images, and select Manage base images. The Manage base images tab is where you specify which base images the scanner should scan.
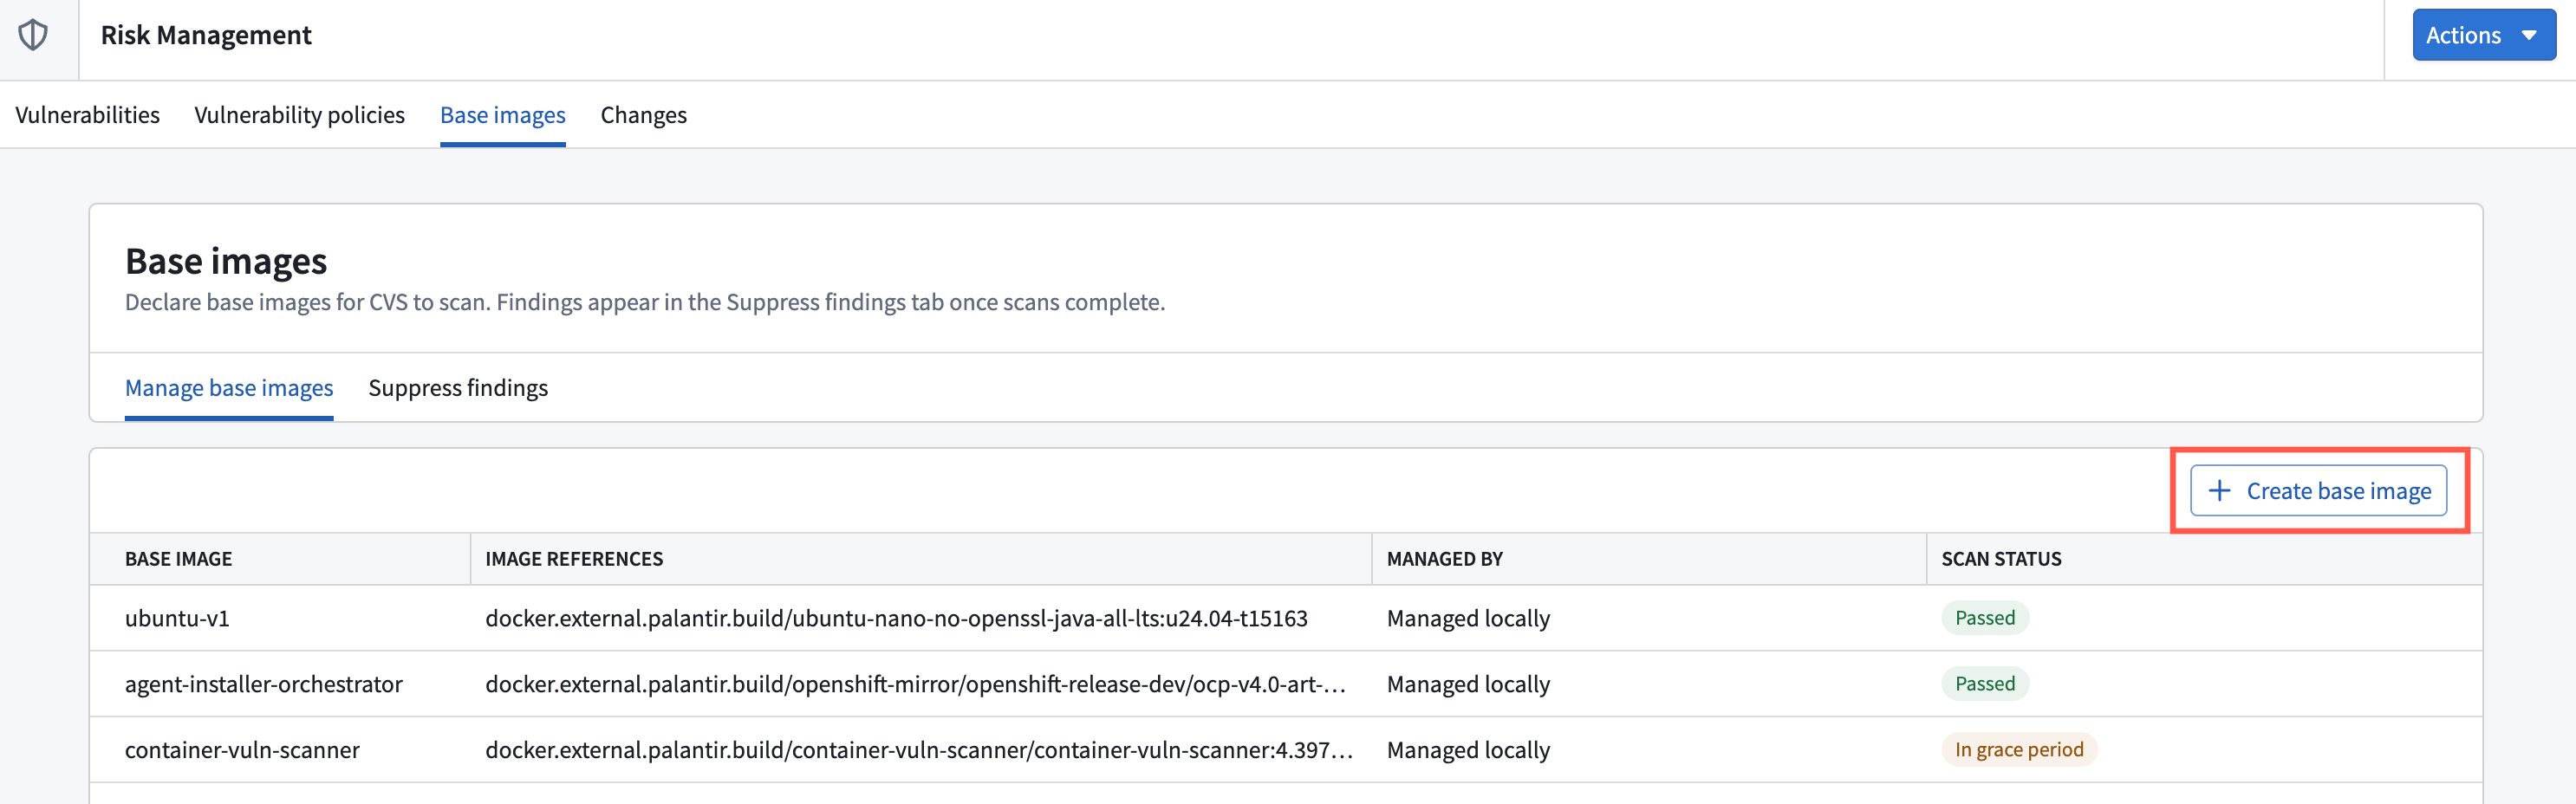
- Select Create base image, then enter the registry path, a clear display name, and an optional version.

-
Wait for path validation. You can continue only after the dialog confirms that the image was found. If validation fails, verify the path and that the scanner can access the registry.
-
Track the scan status in the base images table. Each row shows the scan status (completed, in progress, failed, or never scanned) along with the display name, path, version, and attribution (who added the image or which pipeline imported it).
-
Use the row actions to rescan or remove an image. A rescan starts immediately; removal requires AO approval.

Step 2: Review and suppress findings
- Open the Base images settings in the Risk Management application and select Suppress findings. The Suppress findings tab shows every (package, CVE) pair across your scanned base images, ranked so you can triage from the top down. Select an image to inspect its SBOM packages, detected vulnerabilities, and the Product Releases that use it.
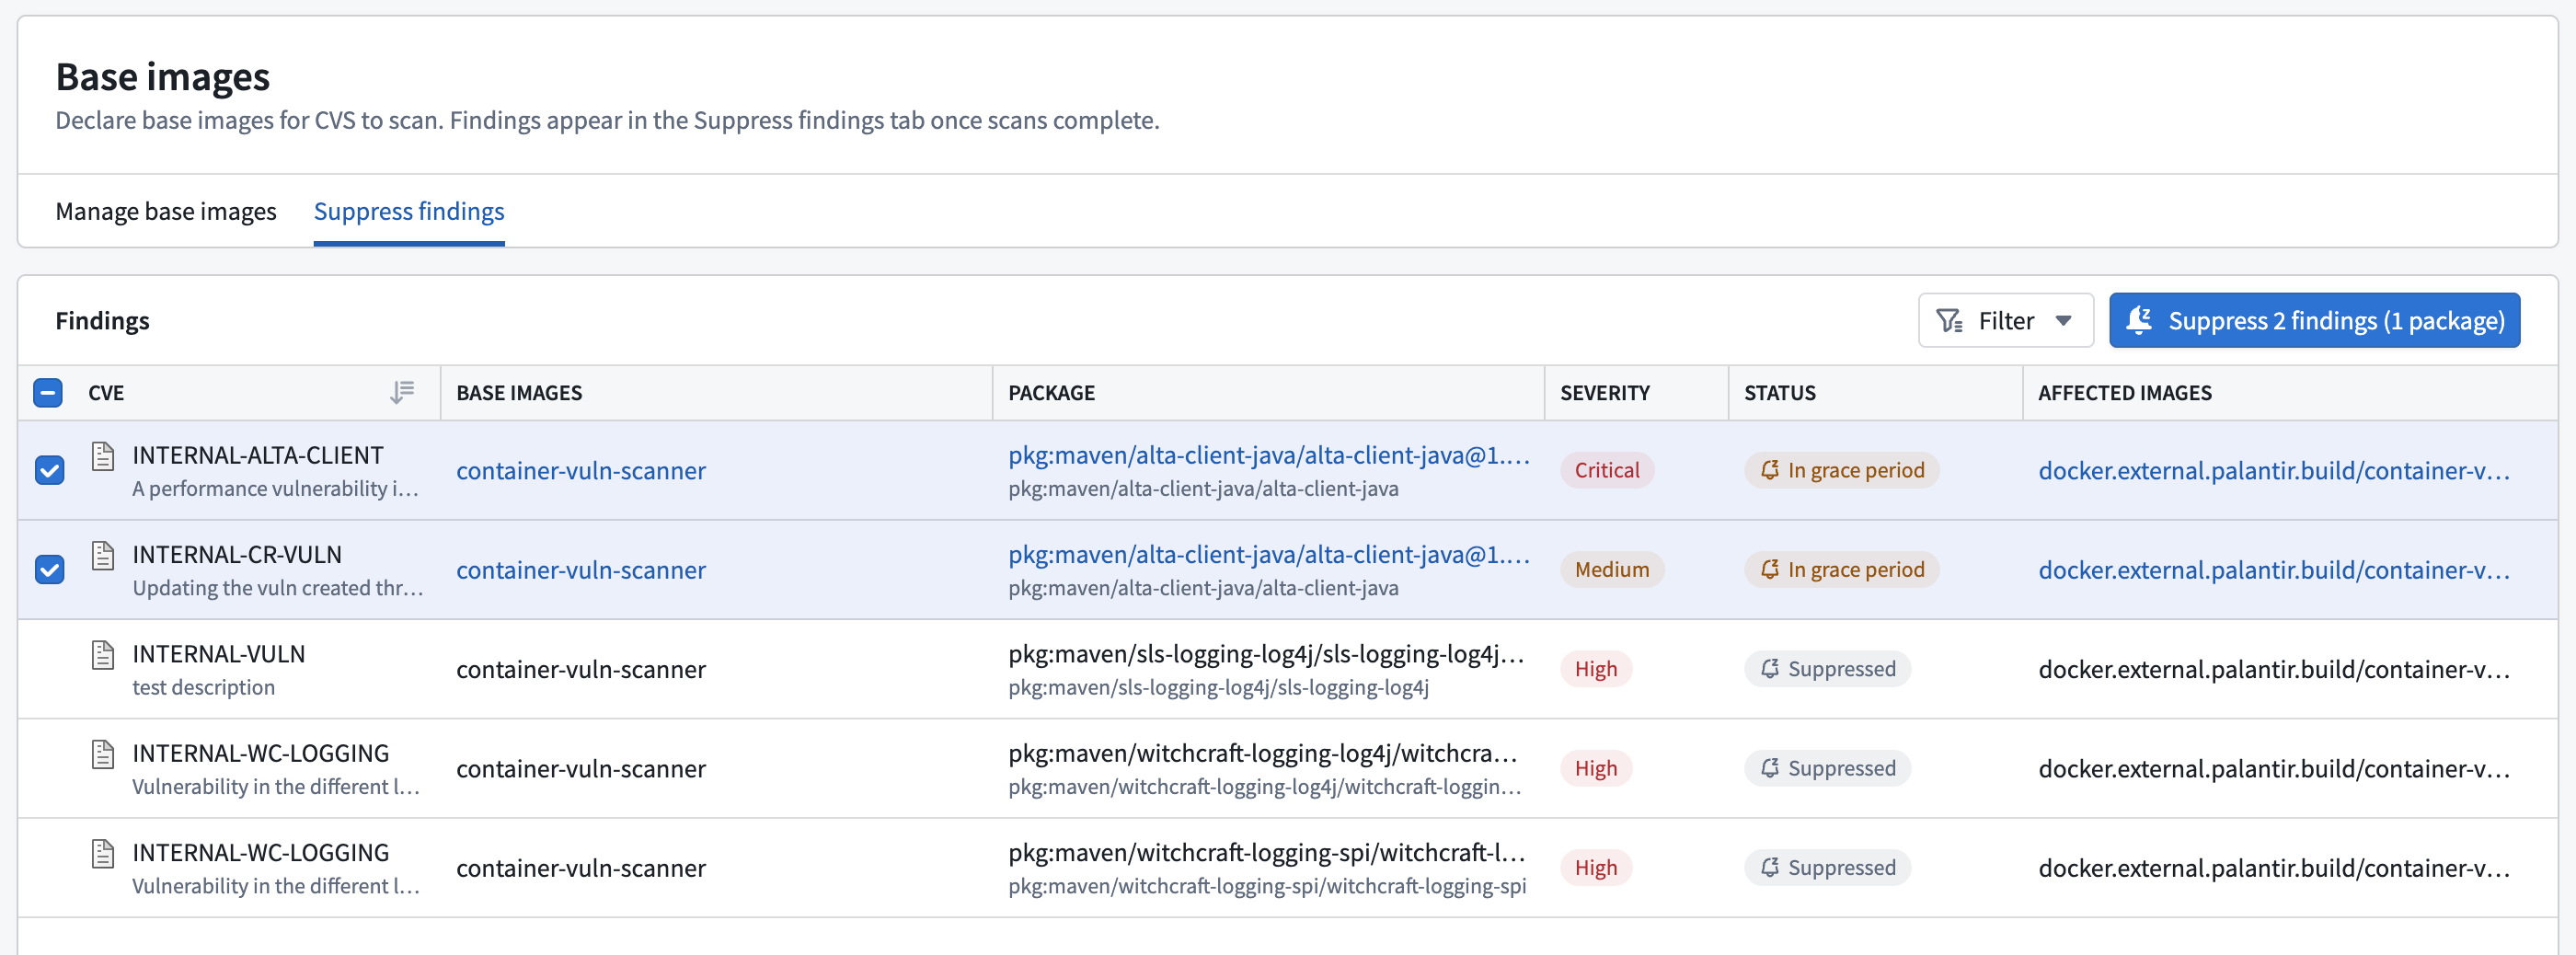
- Review the findings table. Each row shows the CVE, the package as a PURL, severity, the number of affected images (with a popover listing them), whether a fix is available, and the status. Use the filters for status, base image, package, and CVE to narrow the list. The stats header at the top rolls up declared image counts, scan-status counts, and aggregate finding counts.
- Select one or more (package, CVE) pairs. Put only findings with the same risk rationale in one request.
- Open the create suppression dialog by selecting the Suppress findings action. Your selected pairs appear in a preview at the top. The vulnerability and package fields are fixed by that selection, so they are not editable in this step.
- Choose the narrowest scope that covers the case. The form defaults to the images where the findings appear, but you can narrow or widen it. Scope changes the amount of risk your AO evaluates, not the approval route. See Scope reference below.
- Choose a category. See Category reference below.
- Set a Valid Until date. This is required. It is when the suppression expires and the finding comes back into view.
- Write a rationale that applies to every selected pair. Explain why the risk is acceptable in your product's environment and include enough context for the AO to decide without follow-up.
- Submit the request. The confirmation links to the change request, and the selected findings show
Pending suppressionwhile the AO reviews it. - Your product’s AO reviews the request. Once approved, the findings move to
Suppressed. If the request is rejected, the findings remain in the triage list for further action.
Category reference
Use the category that matches why the finding is being suppressed.
| Category | When to use it |
|---|---|
FALSE_POSITIVE | The finding is not a real vulnerability in this context. The affected component is not actually present or is not reachable. |
ACCEPTED_RISK | The risk is understood and accepted as-is, backed by a compensating control or an explicit decision to carry it. |
RECASTED_RISK | The severity has been re-evaluated to a different level because of an environmental factor the base CVSS vector assumes but this context lacks. |
VENDOR_DEPENDENCY | The vulnerability originates in a vendor or upstream dependency the team cannot patch. |
PLANNED_FIX | A fix is scheduled. Name the concrete fix (target version, PR, or ticket) in the rationale. |
Scope reference
Scope your suppressions as narrowly as the situation allows. Narrower scope means less risk carried and an easier review.
| Scope | What it covers |
|---|---|
| Image | The specific base images the finding appears in. This is the default and the narrowest choice. |
| Image prefix | Every image whose name matches a given prefix. |
| Distribution | A whole distribution, for example Red Hat or Ubuntu. |
| Global | Everywhere. Use only when the package scope alone already makes the suppression safe, and expect closer review. |
Governance and review
Every base image declaration and suppression request must be approved by your product's AO. You should include the following for a smooth review:
- A clear, environment-specific rationale. Explain the operational need, the affected products or images, and why the remaining risk is acceptable.
- An expiry on every suppression. Valid Until is required, so no base image suppression is open-ended.
Scope does not change who approves the request. It changes the amount of risk the AO evaluates, so use the narrowest scope that meets your product needs.