- Capabilities
- Getting started
- Architecture center
- Platform updates
Branching restricted views
Restricted views integrate with Global Branching to enable safe, isolated development of granular permissioning policies. This documentation covers how to work with restricted views on branches, including adding, viewing, and removing branched resources, propagating changes downstream, merge requirements, rebasing, and known limitations.
For general information on Global Branching concepts and workflows, refer to the Global Branching documentation.
Add, view, and remove resources
Add a restricted view to a branch
To add a restricted view to a branch, select the branch from the branch selector, then select Add resource to add the restricted view to the branch. This allows you to build the restricted view or modify its policy and markings on your branch. The branch must already exist on the backing dataset, or you may receive an error.
By default, accessing a restricted view on a branch displays content from the main branch. If you are already on a branch and edit the restricted view's policy or markings, the restricted view is automatically added to the branch with those edits.
By default, owners and editors can add a restricted view to a branch. Owners can edit the policy and markings when adding the restricted view to the branch, while editors can only build the restricted view. This allows editors to add the restricted view to their branched workflow and test it without needing ownership of the restricted view.
Adding a restricted view to a branch automatically builds the restricted view on the branch. If the restricted view backs any object types, those object types are also automatically re-indexed on the branch to reflect the change.
View a branched restricted view
The permissions on a branched restricted view are the same as the parent restricted view. If you can view the original restricted view, you can view its branched versions.
If the backing dataset on a branched restricted view has different markings than on main, a viewer may be able to see data that was previously restricted on main. Confirm that branch-level marking changes are appropriate before sharing the branch. See Known limitations.
Remove a restricted view from a branch
You can remove a restricted view from a branch when you no longer need it. Removing a restricted view from a branch discards any branch-only changes to its policy, markings, or build outputs, and reverts the branch to reading the restricted view from main. The restricted view on main is unaffected.
Removing a restricted view from a branch cannot be undone. Any branch-only edits to the policy, markings, or build outputs are discarded.
To remove a restricted view from a branch, open the branch taskbar and select the branch. Locate the restricted view in the list of modified resources and select Remove from branch in the action menu, then select Confirm to complete the removal.
Propagate changes
If a restricted view is updated on a branch, object types backed by the restricted view need to be indexed on the branch to reflect these changes. In Ontology Manager, use the Index object type option on the top banner to index the object type on the branch. Once indexed, Workshop modules referencing these objects and Ontology Manager reflect the restricted view changes on the branch.
Merge requirements
Before a restricted view can be merged to main from a branch, the following requirements must be met:
- Approvals are satisfied: All required approvals for the branched restricted view must be satisfied before the branch can be merged. See Reviewer experience below.
- Restricted view is rebased with
main: Before merging, if changes have been made on themainbranch of the restricted view, rebase those changes onto your branch. See Rebasing and conflict resolution below.
Protected restricted views
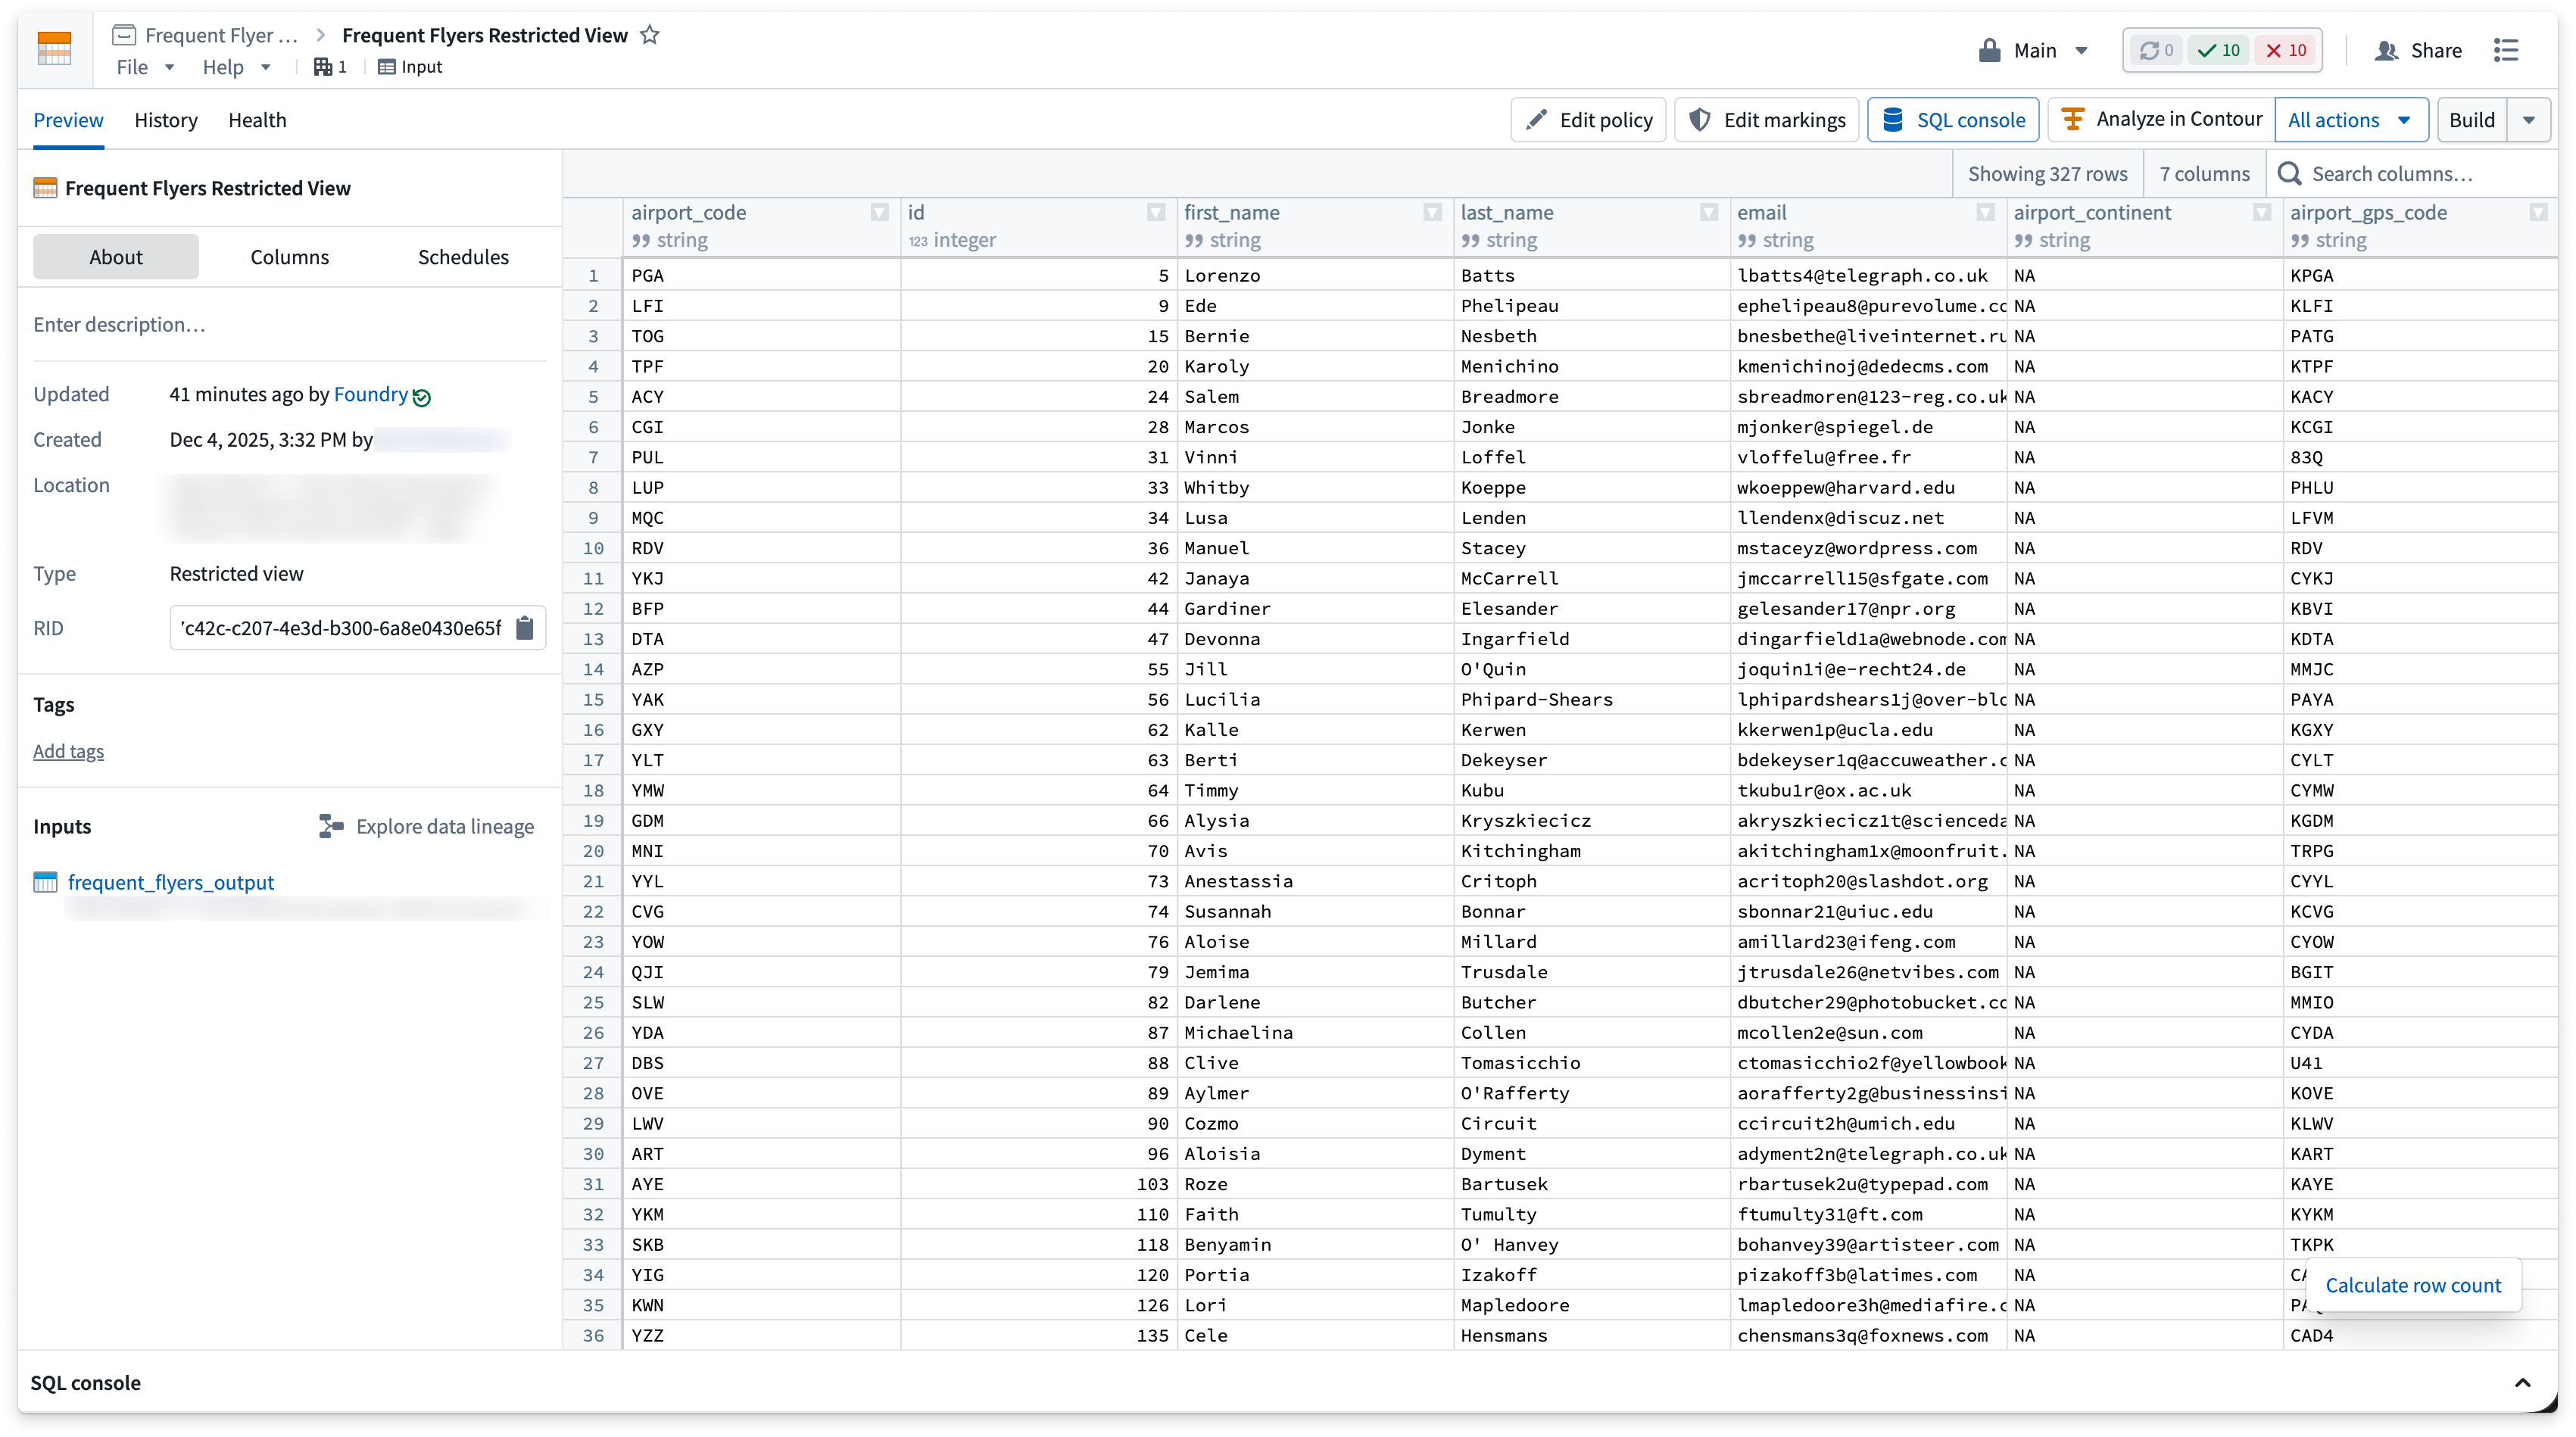
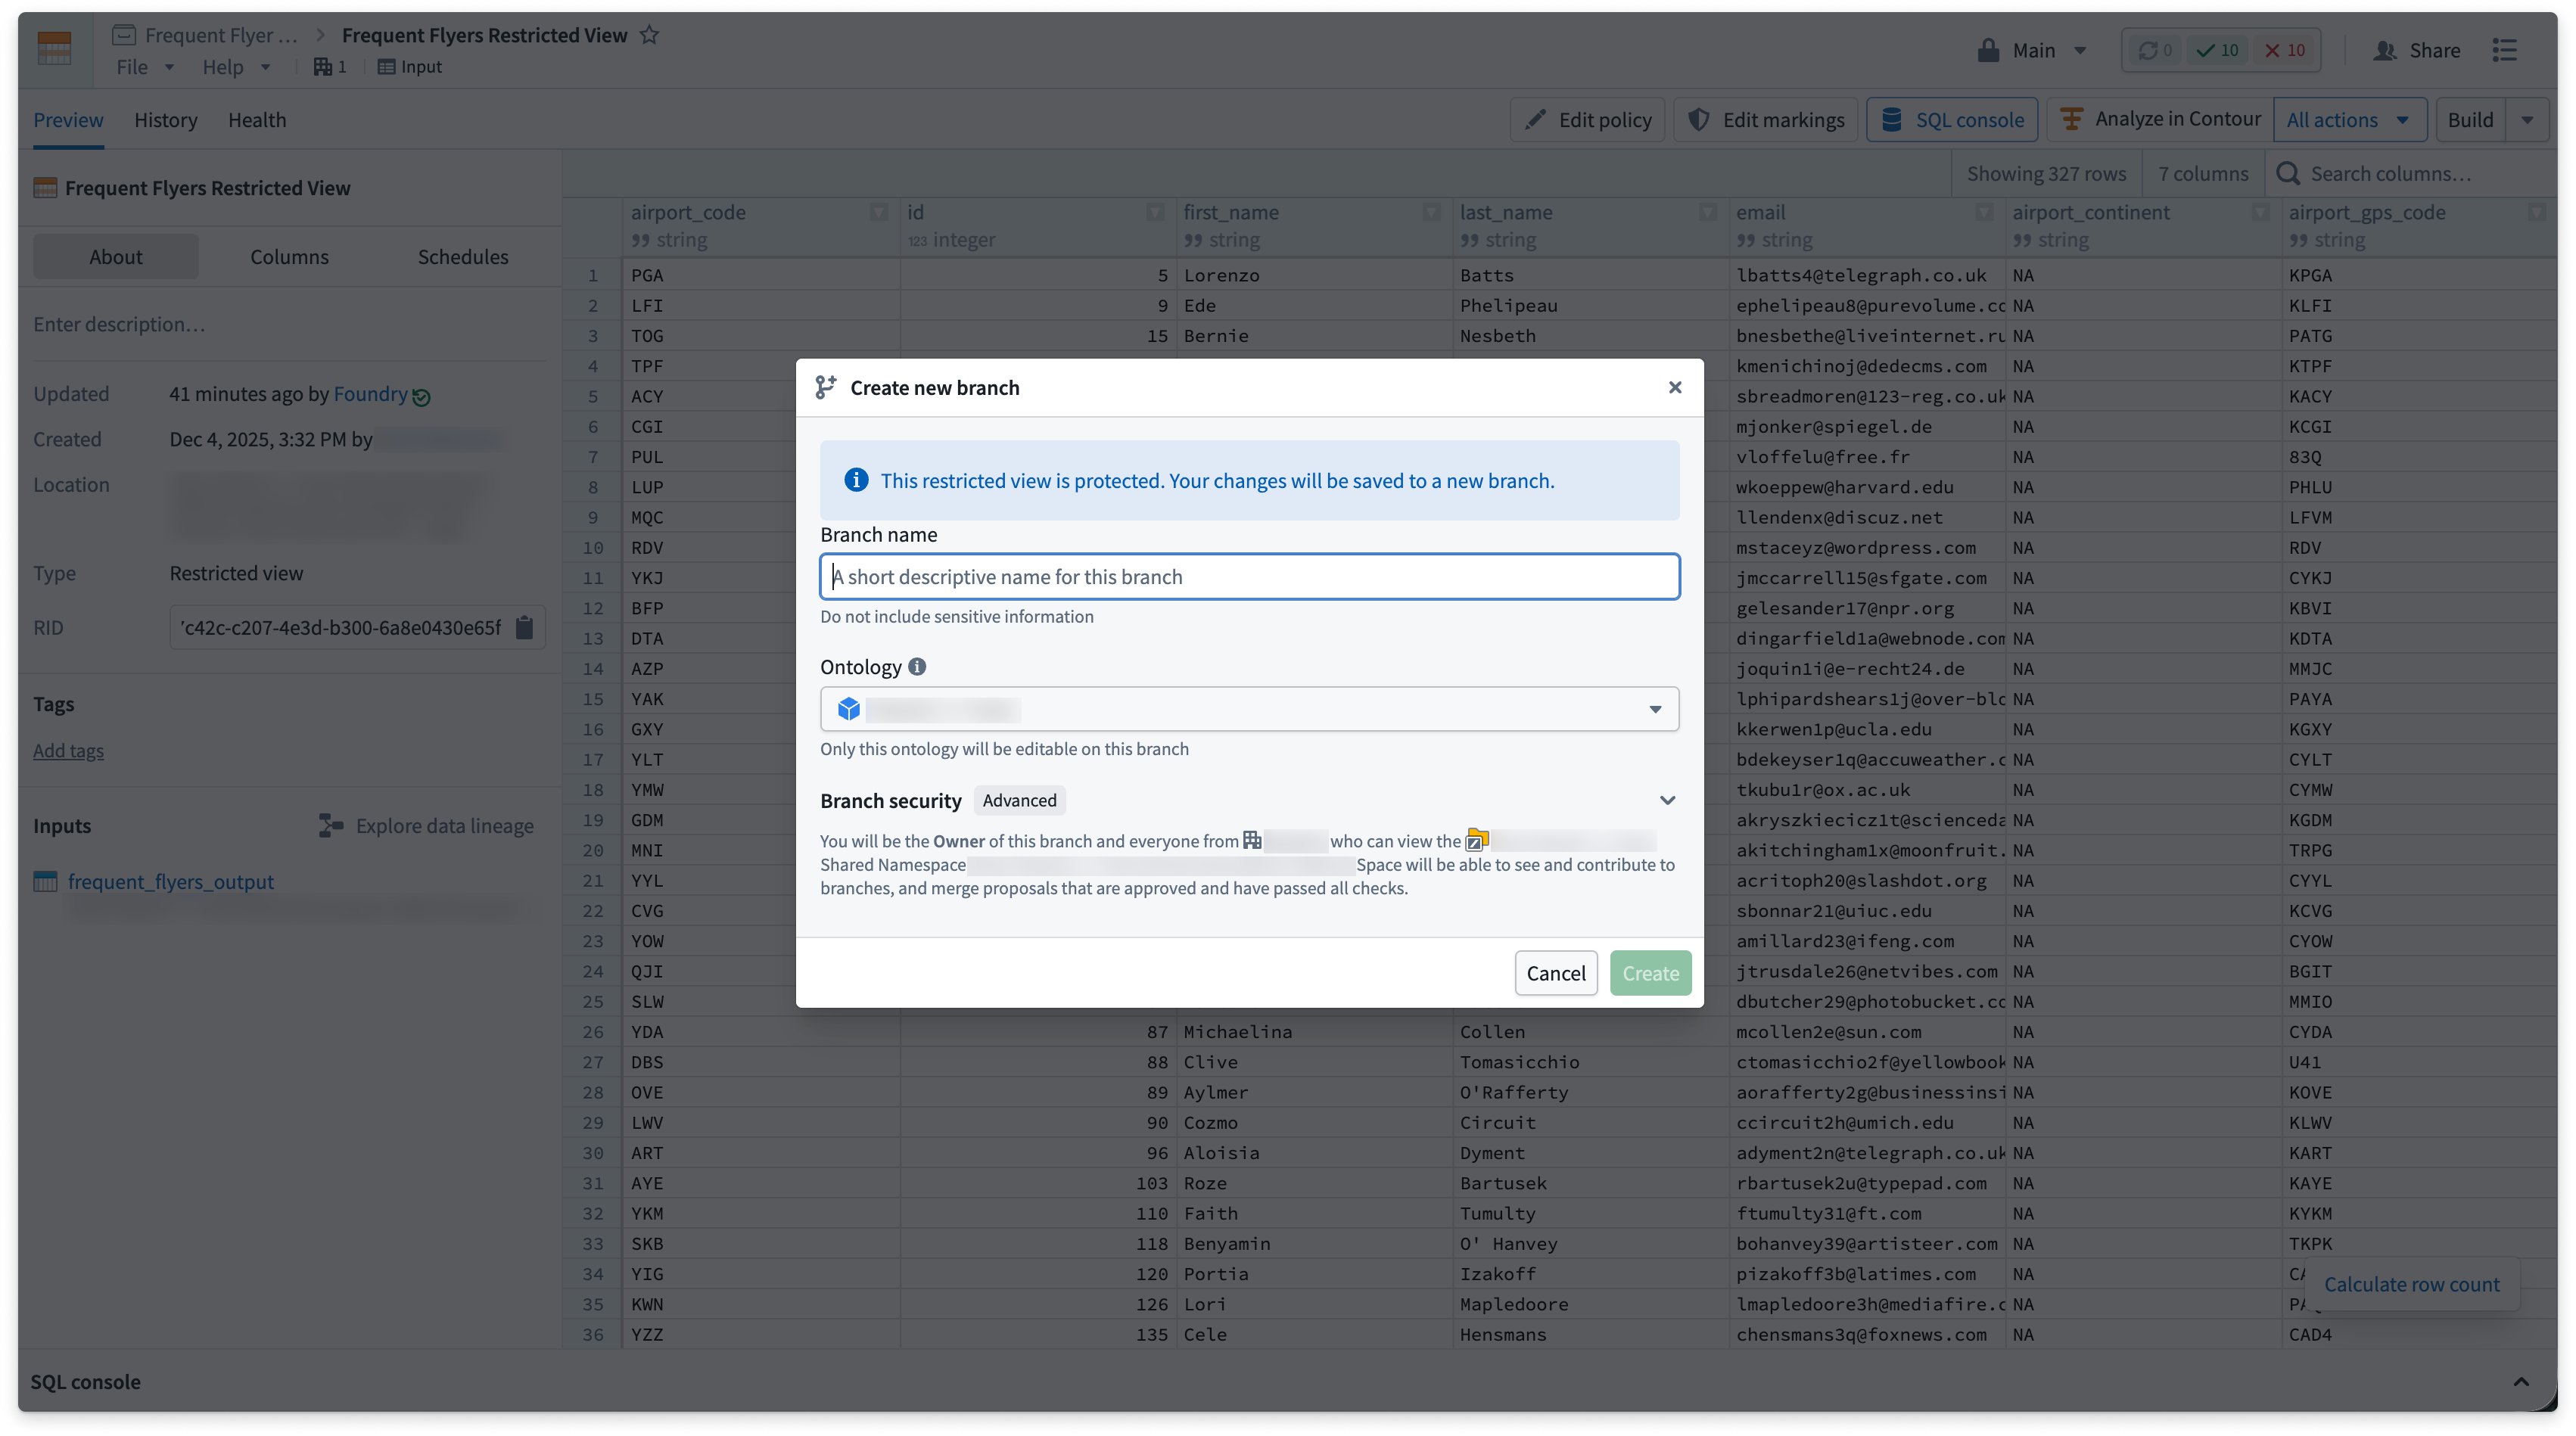
To guarantee that all edits to a restricted view go through the branching and review process, you can protect the main branch of that restricted view.
To protect the restricted view main branch, navigate to the resource in the file system and select Branch protection > Protect with project policy.
When the main branch of a restricted view is protected, editing its policy or markings on main requires users to go through a global branch on save.
Reviewer experience
Editors can only build restricted views on a branch, while owners can build restricted views and modify their policies and markings on a branch.
Once a proposal is created, reviewers can be added to the restricted view in the Global Branching application or via the Approvals banner. Users added as reviewers receive an email requesting their review with a link to the proposal.
Select Manage to add reviewers and view the approval policies that must be satisfied before the proposal can be merged.
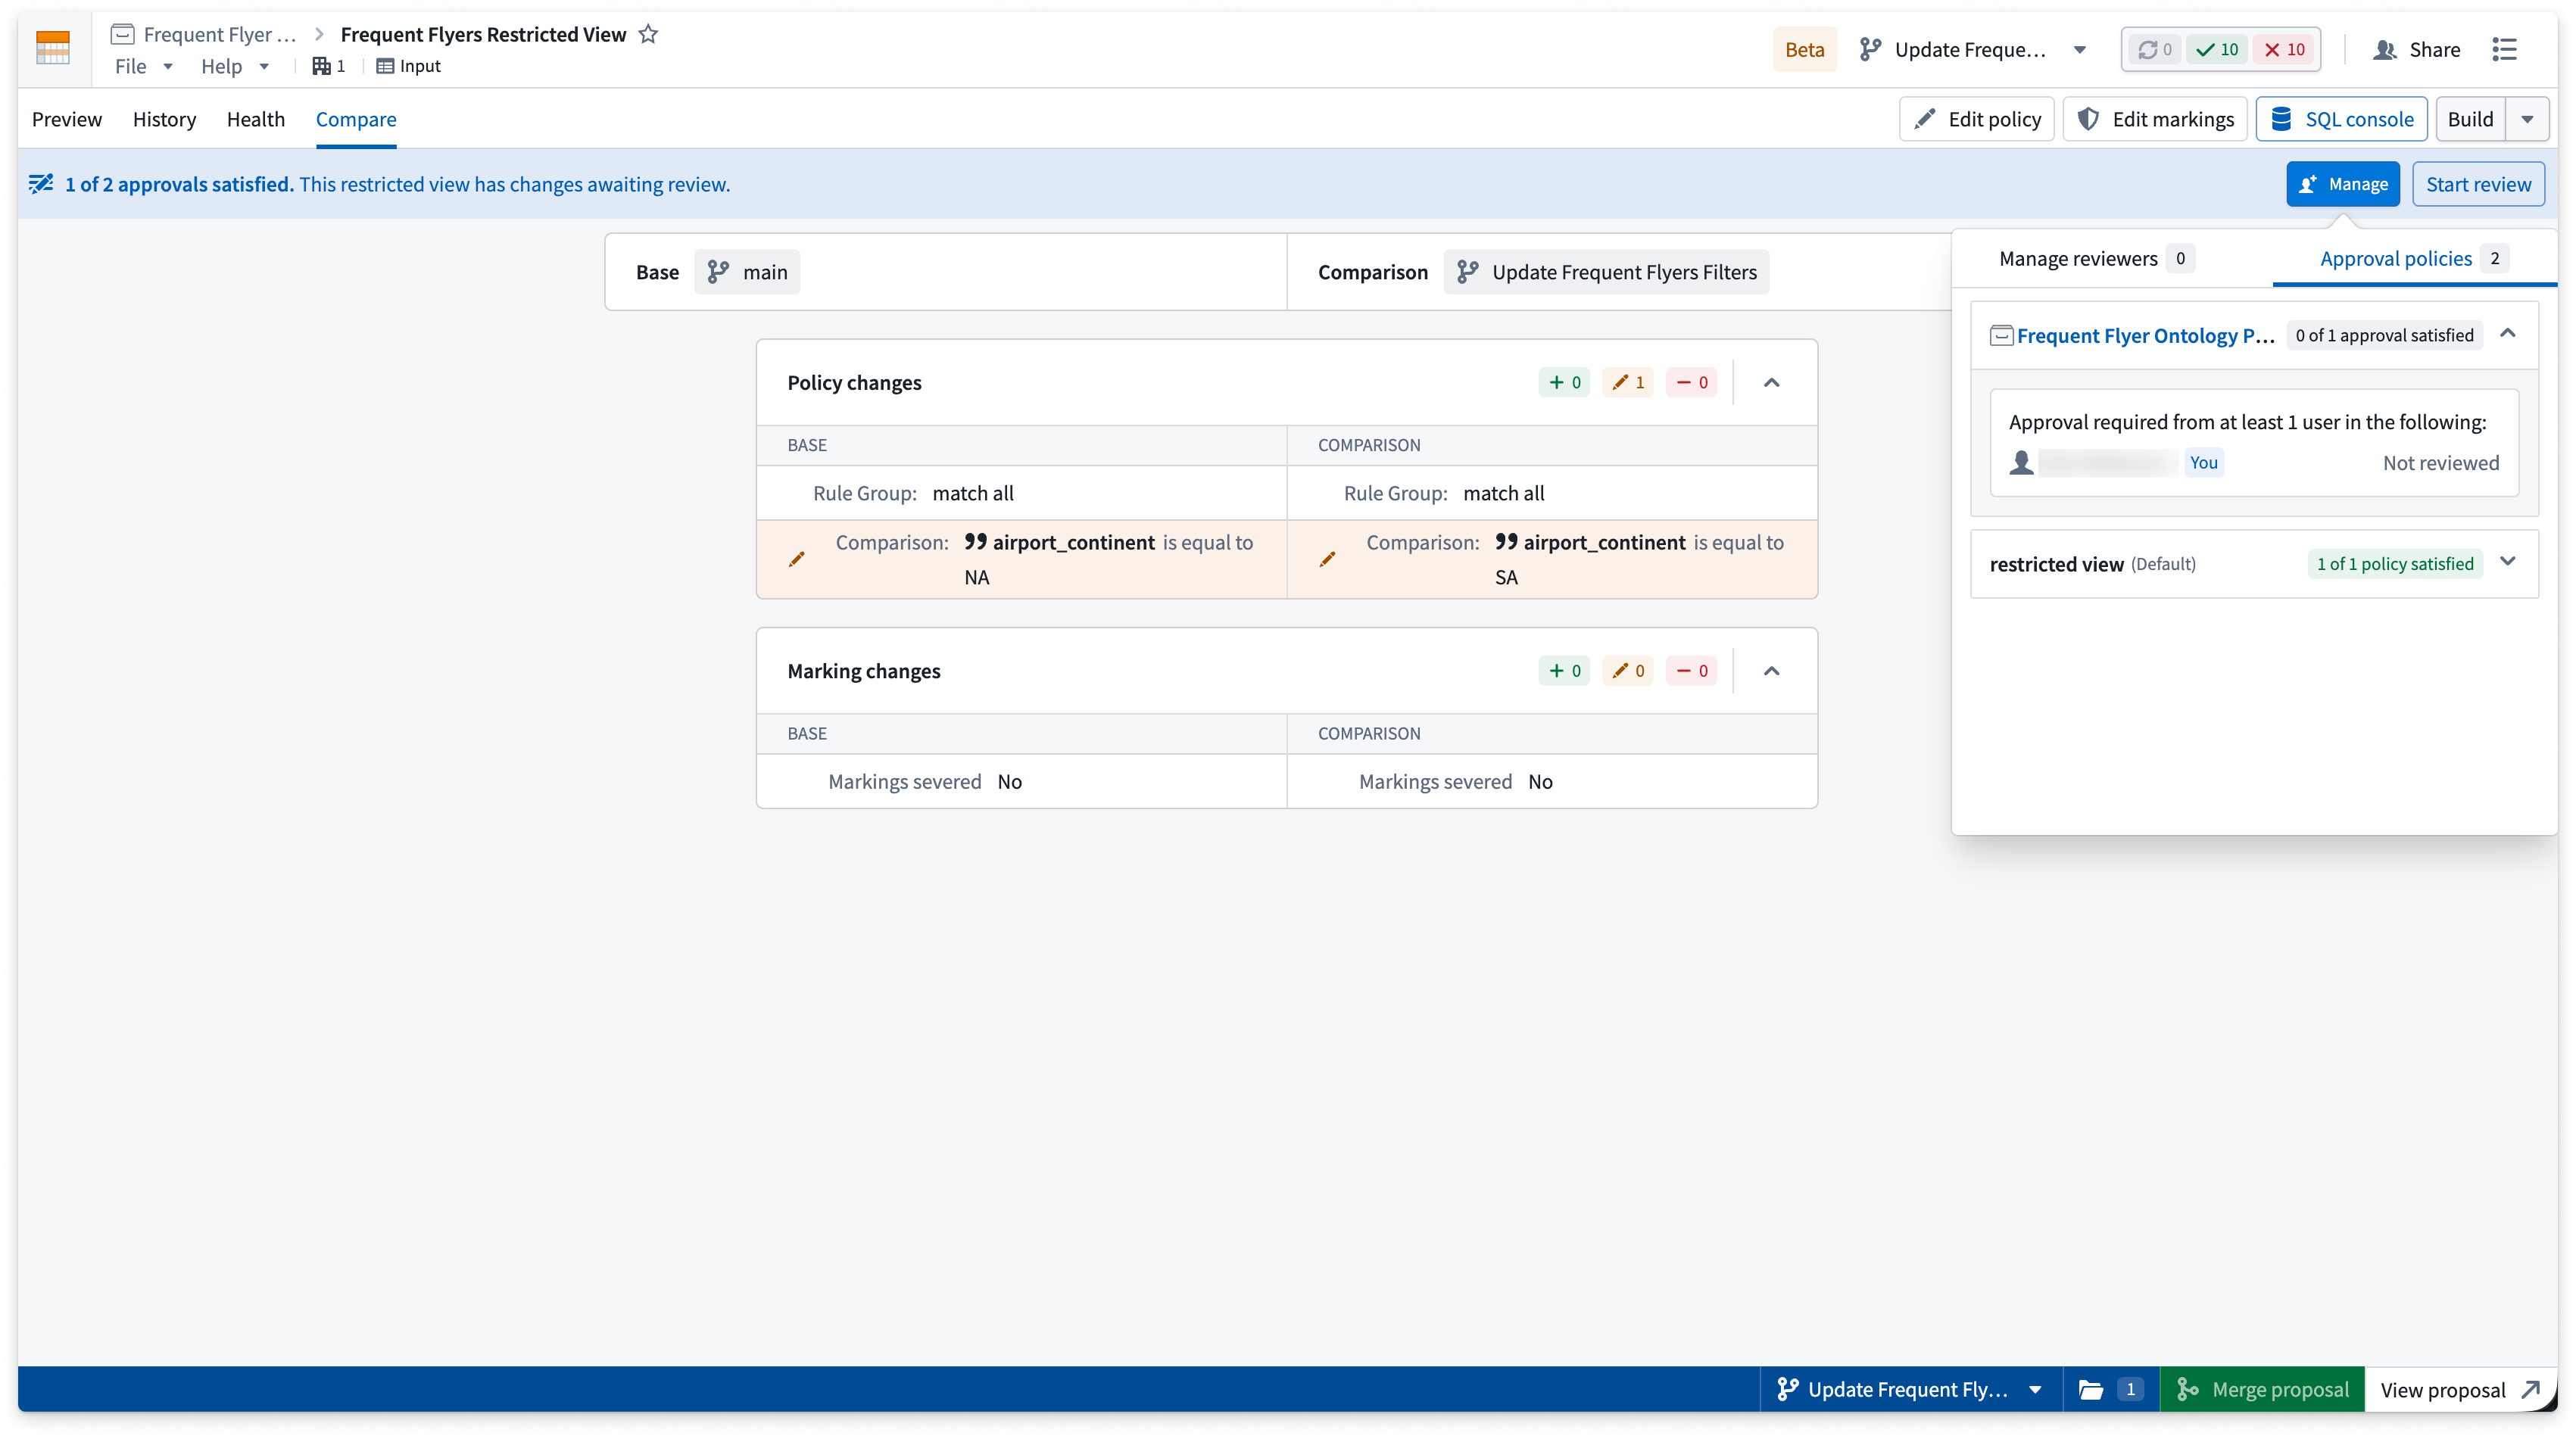
When a restricted view has changes awaiting review, a banner at the top of the page displays the number of approvals satisfied. Reviewers can select Start review to open the Compare tab and view a side-by-side comparison of main versus the branch changes. They can then approve or reject the changes by selecting the Your review option.
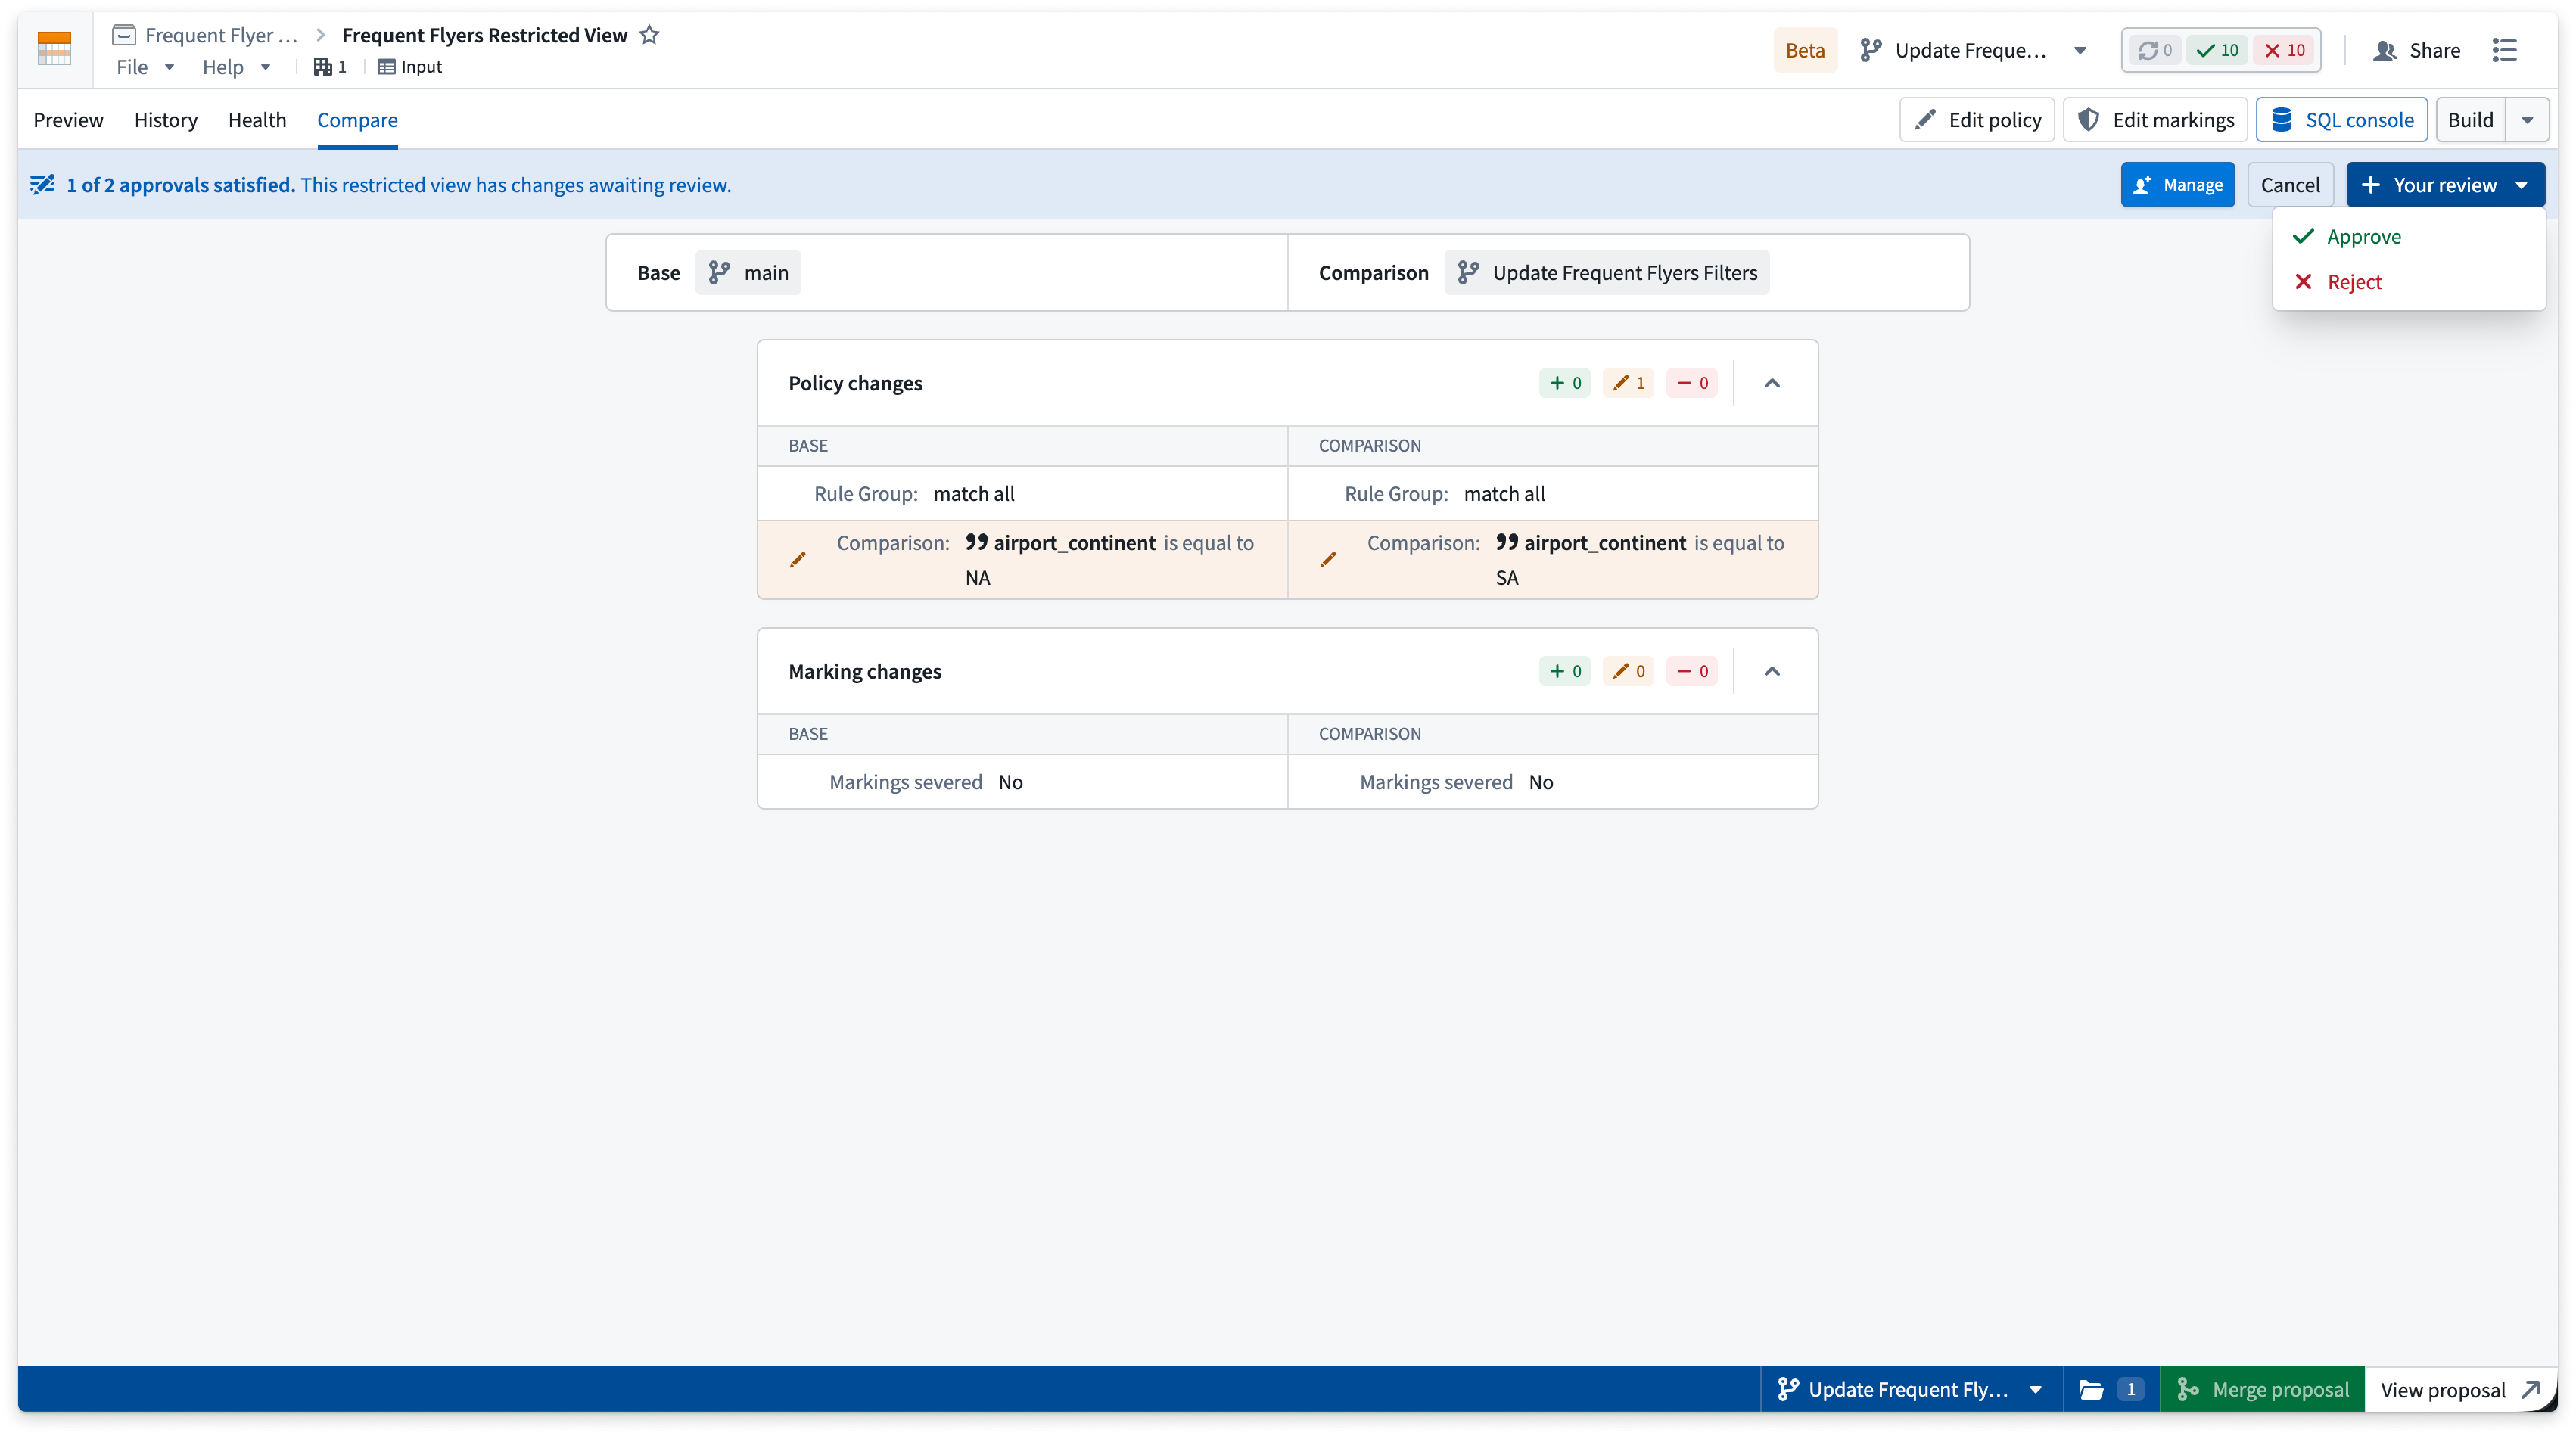
Once all required approvals are satisfied, the changes are approved and the proposal can be merged for this resource.
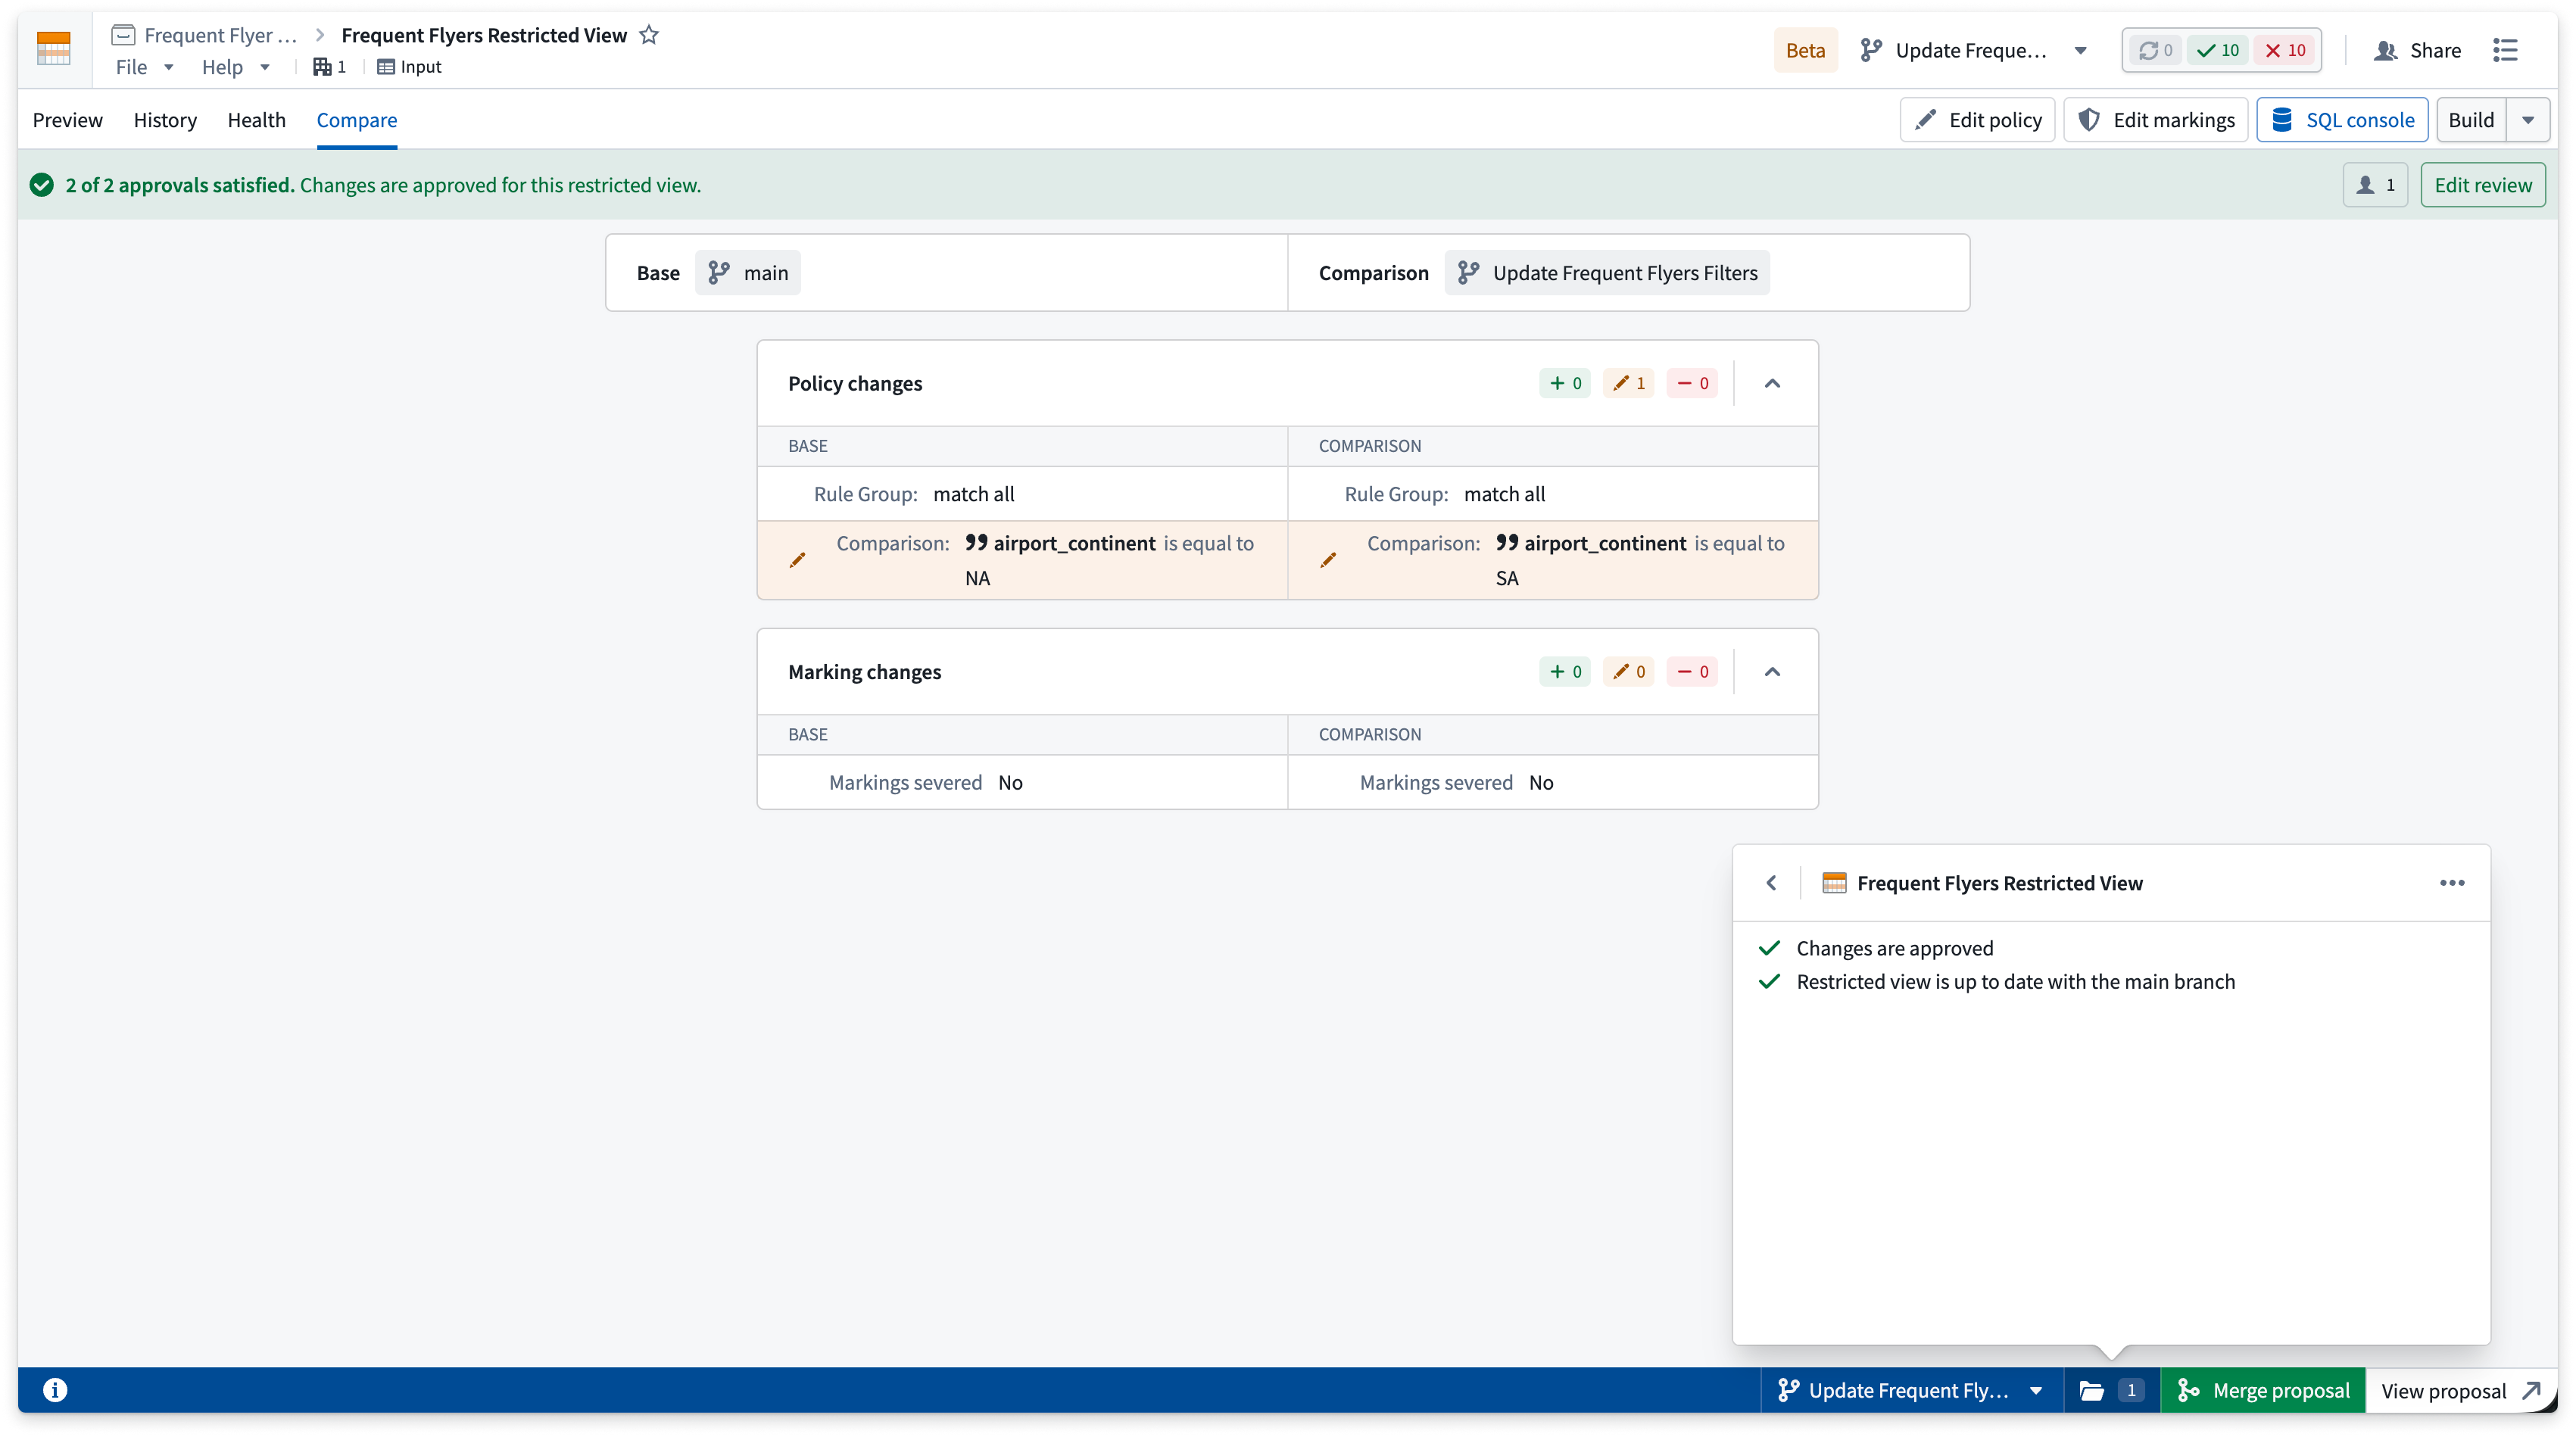
Rebasing and conflict resolution
Rebasing is required when main has been modified since your branch was created or last rebased.
A banner appears at the top of the restricted view prompting you to rebase your branch with the latest changes.
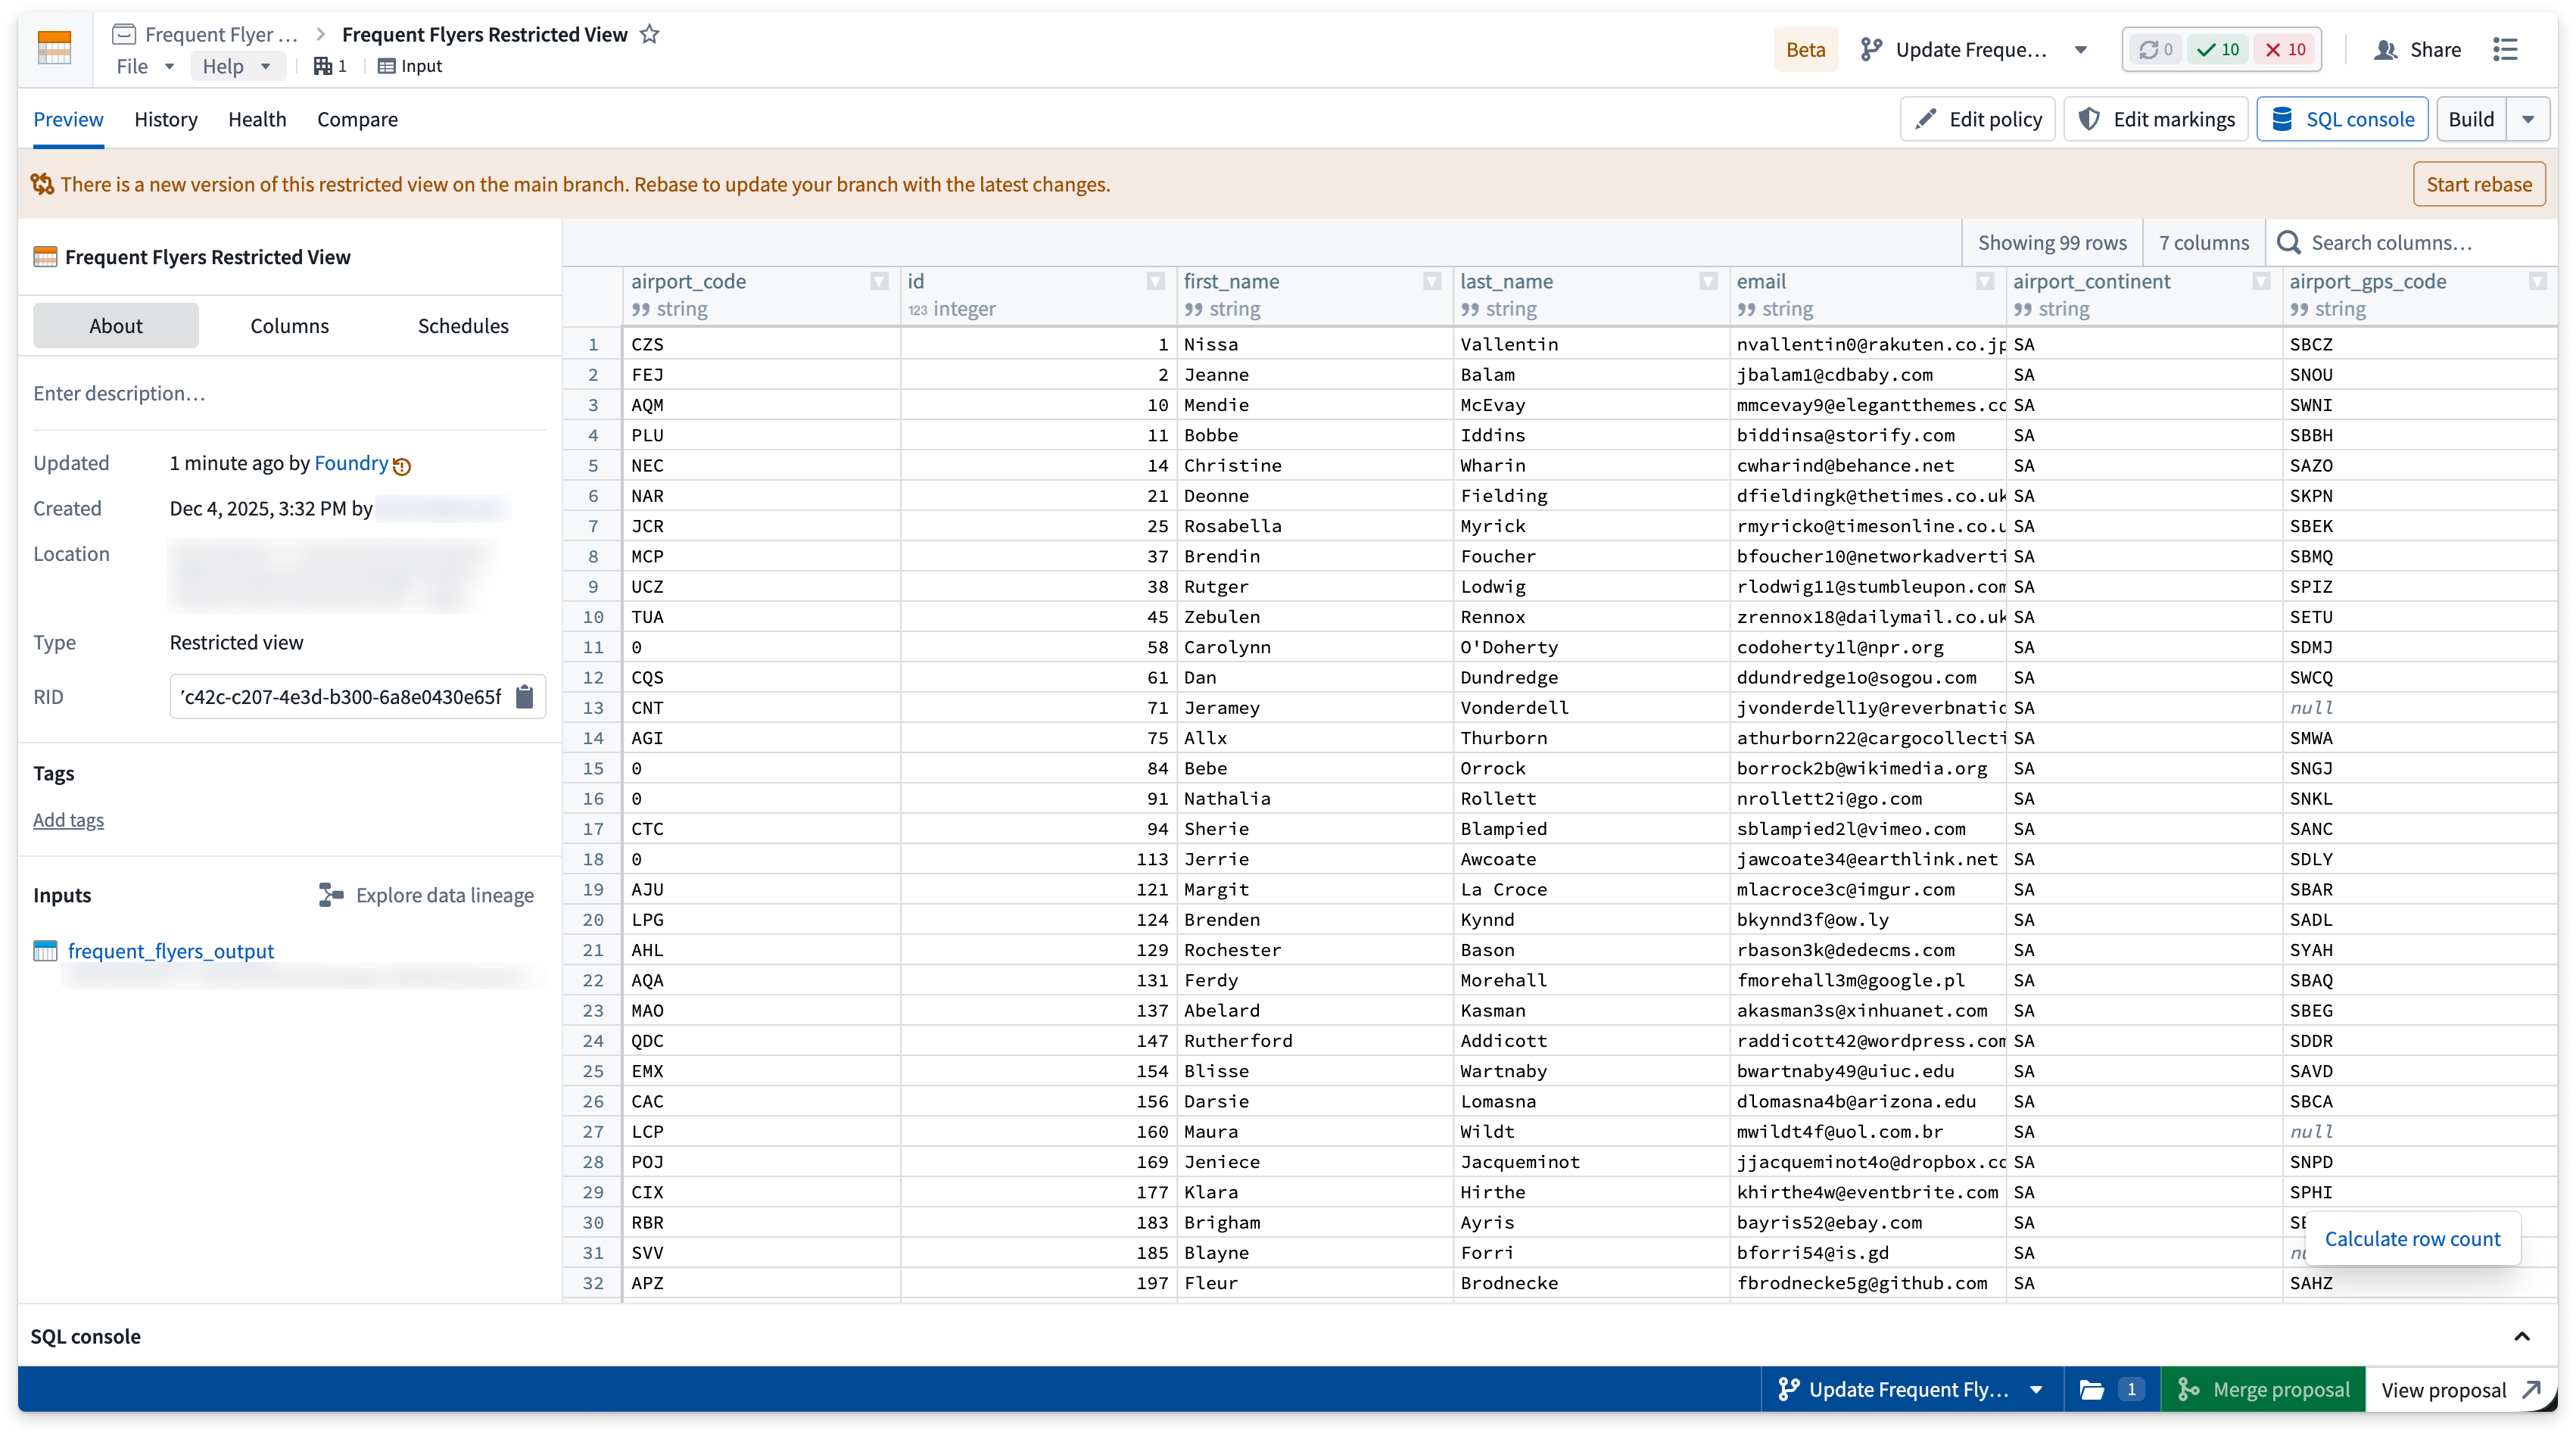
To rebase your branch, select Start rebase in the banner. The Compare tab opens with the rebase in progress, showing a side-by-side comparison of the main branch and current branch versions. For each change, select Keep this version on either the Base (main branch) or Comparison (current branch) column, then select Rebase and save to apply your selections.
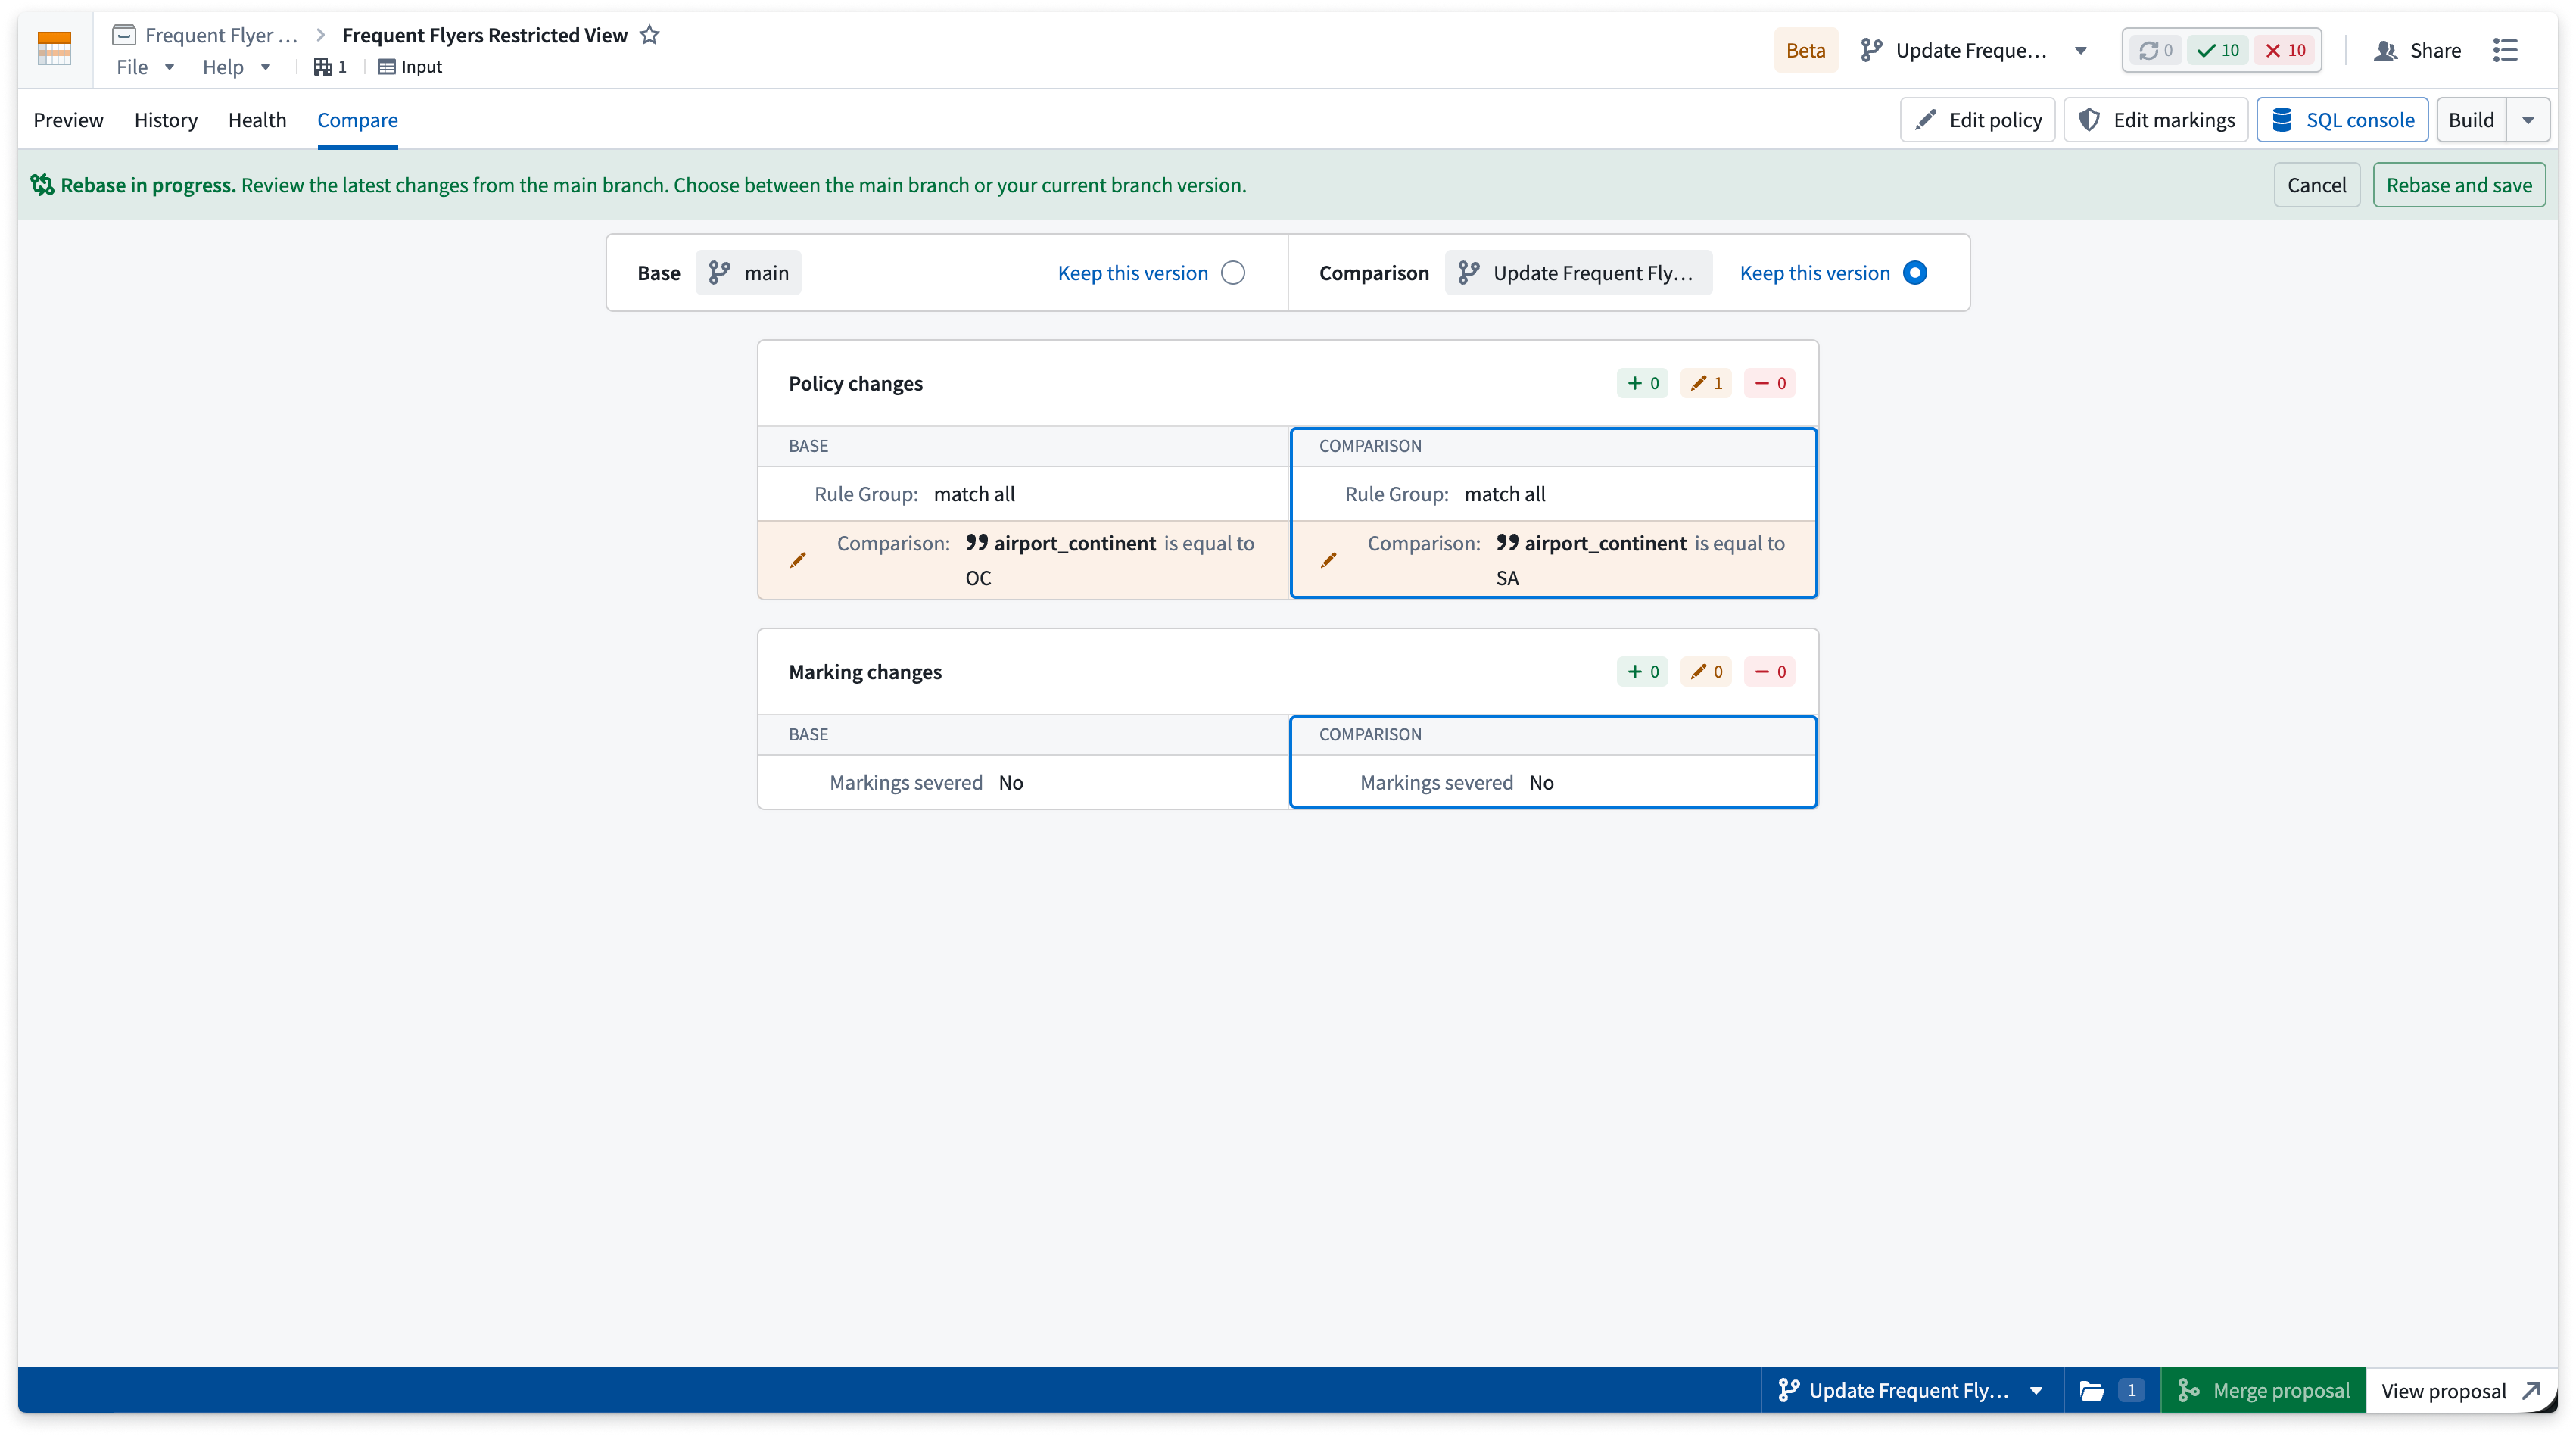
If both rebasing and approval are required, you must resolve the rebase before reviewers can review the changes.
Known limitations
- If the backing dataset on a branched restricted view has different markings than on
main, a viewer may be able to see data that was previously restricted onmain. See View a branched restricted view. - Rebasing requires you to choose either the changes from
mainor the changes on your branch. There is currently no way to resolve diffs at a finer granularity. - Some backing datasets cannot be branched. Datasets backing edit-only workflows, datasets created by importing, or datasets built from a Fusion sheet cannot currently be added to a branch, so restricted views relying on such datasets cannot be built on a branch. Refer to the Global Branching integrations documentation for the full list.