- Capabilities
- Getting started
- Architecture center
- Platform updates
Enabling SCIM on a Foundry authentication provider
The following are steps to take to enable SCIM on an authentication provider within Foundry. Note that these steps are only one part of the equation — for SCIM to be completely configured, you will need to enable it both within Foundry and within your identity provider. See the sections below for guidance on enabling SCIM for Microsoft Entra ID.
To update your authentication provider in Foundry, you must have either the Authentication administrator or Enrollment administrator role.
1. Determine if you need a SCIM subdomain
Control Panel supports creating a subdomain of your enrollment host domain specifically for SCIM. This is necessary if you expect your identity provider to send SCIM requests from IP addresses that are not included in the ingress policy of your enrollment's host domain.
For example, if your enrollment allows ingress from 34.216.227.26/32, but you expect SCIM requests to come from IPs outside of this CIDR block and do not want to open up your top-level domain to these new IPs, you should create a SCIM subdomain.
2. Enable SCIM on the authentication provider
To enable SCIM on an authentication provider, create a third-party application (TPA) that uses the OAuth 2.0 client credentials grant to provide credentials to the identity provider.
Steps to create the TPA:
- Navigate to Control Panel > Authentication > [Provider name] > Manage > Enable SCIM. Enable SCIM by switching on the toggle.

- Select Set up SCIM domain, choose your desired domain, and select either Use a SCIM subdomain or Use this domain, depending on your decision from Step 1.

- Save your changes.
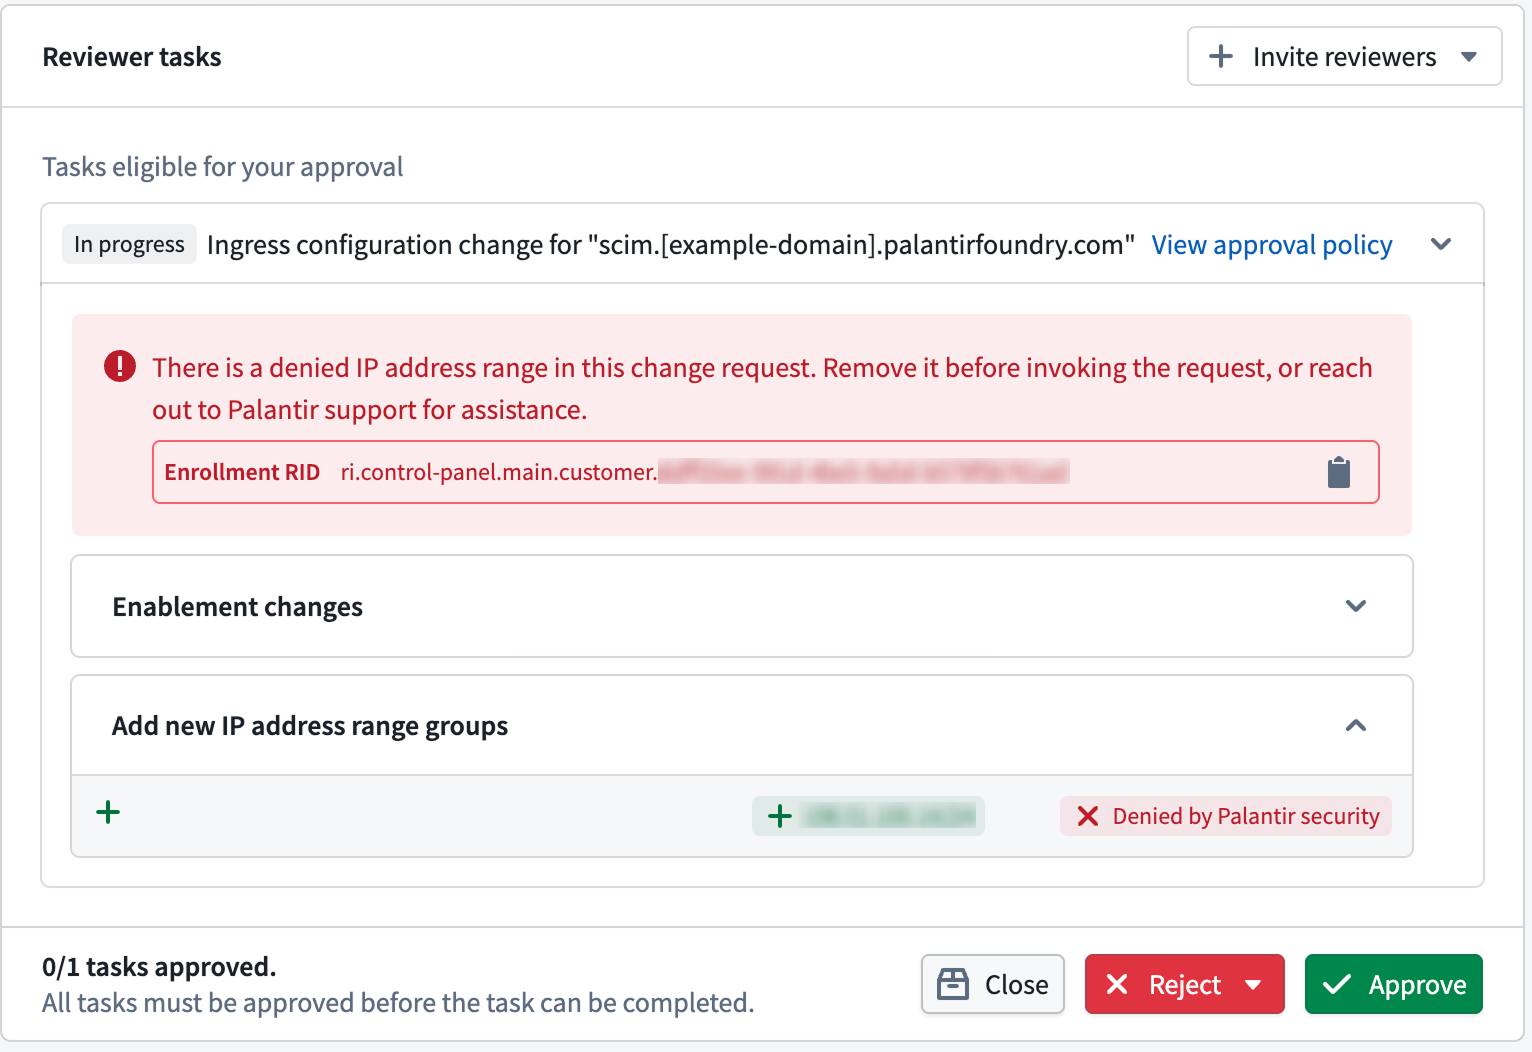
3. Configure network ingress
Whether you use a SCIM subdomain or plan to route SCIM requests to your top-level domain, you should check the CIDR ranges and countries that your identity provider will use to make SCIM requests. You will need to ensure that the CIDR ranges and countries are allowed in the Control Panel Network ingress extension. Adding the CIDRs or countries to the network ingress allowlists will enable the SCIM domain to receive incoming requests.
See configuring network ingress on your enrollment for further instructions. You can navigate to the Network ingress extension in two ways:
- Select Actions > View ingress.
- Search for the extension (
Cmd+Jfor macOS,Ctrl+Jfor Windows).
If you see the warning There is a denied IP address range in this change request. Remove it before invoking the request, contact Palantir Support.
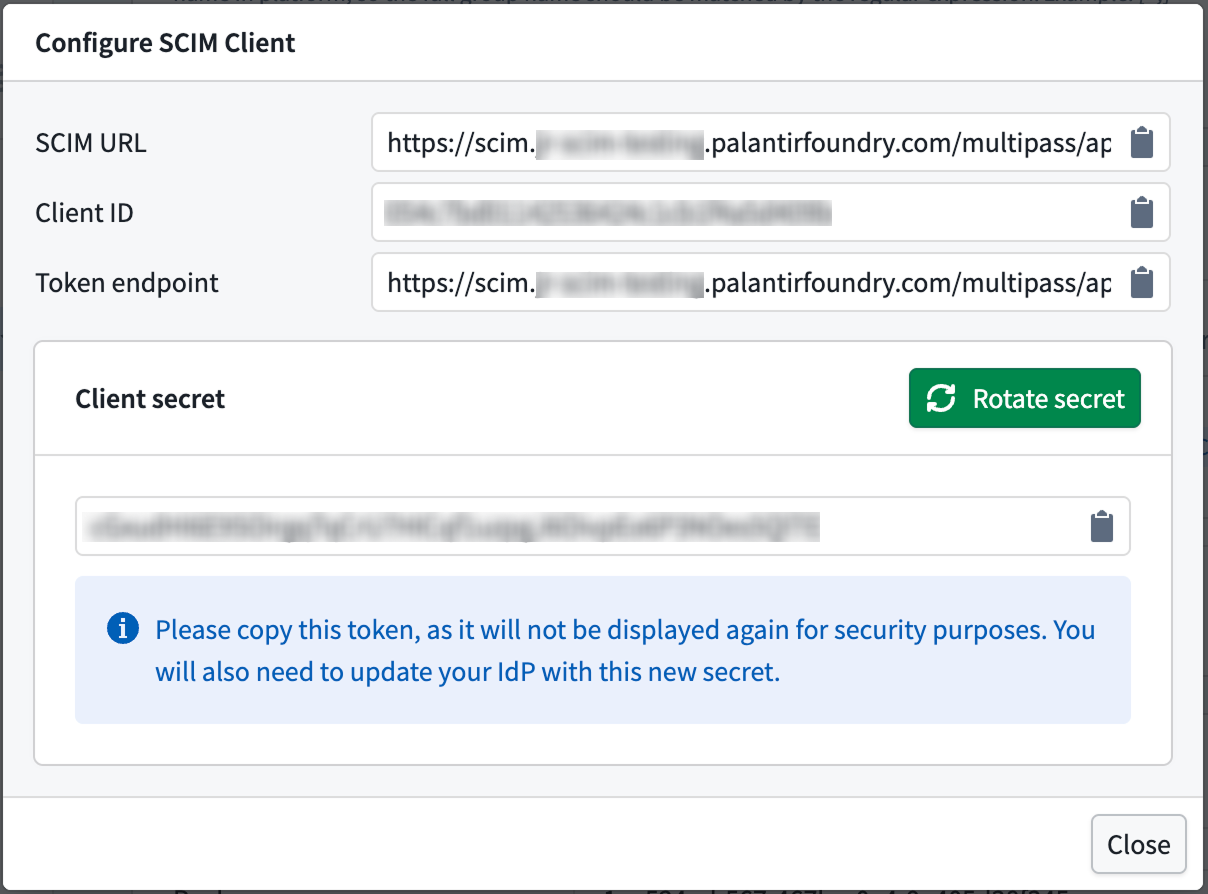
4. Generate SCIM credentials
-
Navigate back to Authentication > [Provider name] > Manage.
-
Select Generate SCIM credentials, and choose an organization that the third party application client will be created in. Note that the organization you choose will determine which users have permissions to manage the SCIM client and rotate the secret if needed. If a user does not have permissions to edit third party applications on the selected organization, they will only have the option of creating a new SCIM client, rather than rotating the secret of the original one. By creating a new client, they would invalidate the credentials of the original one that is created.

-
You now have a SCIM URL, Client ID, Token endpoint, and Client secret. Use these to configure SCIM on the identity provider side.
The token endpoint provided should use the same domain as Step 2.2 — if you are using a SCIM subdomain, the token endpoint should be of the form
https://scim.{domain}/multipass/api/oauth2/token. If you are using the top-level domain, the token endpoint should be of the formhttps://{domain}/multipass/api/oauth2/token.