- Capabilities
- Getting started
- Architecture center
- Platform updates
OSDK integration
The Ontology SDK (OSDK) can be used within compute modules to interact with Foundry ontology objects. This page covers how to grant the necessary permissions, configure your compute module, and use the OSDK in both local Docker builds and Code Repositories.
Prerequisites
Before using the OSDK in your compute module, you must grant your application service user access to the required Ontology resources and configure your compute module with the appropriate credentials.
Grant access to the application service user
The client ID from Developer Console must have access to the Ontology resources your compute module will use.
- Navigate to the OAuth & Scopes tab in Developer Console, and select Check access in the Resource access scope section.
- In the Security tab of the resource you want to access, search for your client ID and add the user.
- For Ontology objects backed by datasets, you may need to grant access to both the object set and the underlying dataset. Refer to the third-party applications documentation for the latest guidance on configuring access.
Configure your compute module
Your compute module requires network egress and application credentials to use the OSDK.
- Add a source for your Foundry hostname, since egress is disabled by default.
- From the Configure tab of your compute module, select Application permissions. For more information on execution modes, review the execution modes documentation.
- Select Use other app credentials.
- Enter the client ID and client secret from Developer Console, select Apply, and save your configuration.
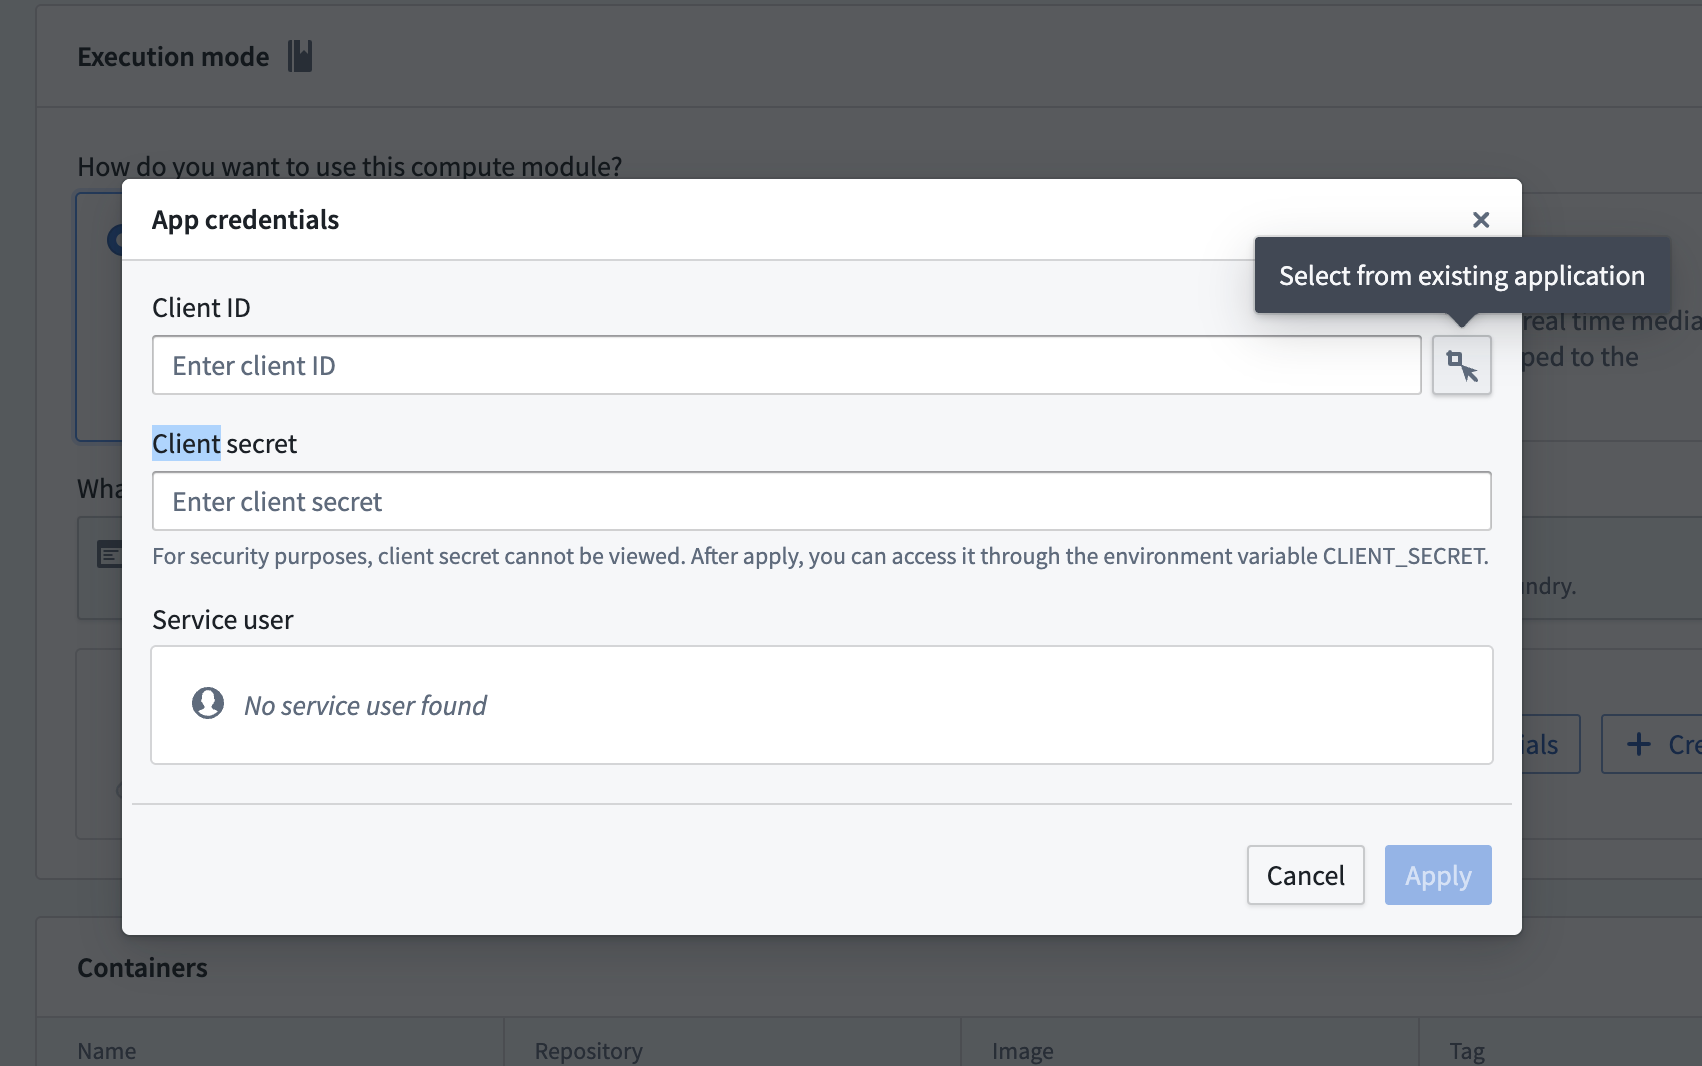
You can access the credentials from your compute module code using the reserved CLIENT_ID and CLIENT_SECRET environment variables:
Copied!1 2 3from compute_modules.auth import retrieve_third_party_id_and_creds client_id, client_secret = retrieve_third_party_id_and_creds()
Copied!1 2String clientId = System.getenv("CLIENT_ID"); String clientSecret = System.getenv("CLIENT_SECRET");
Use OSDK with local Docker builds (Python)
This section walks through creating an OSDK-backed compute module using a local Docker build with Python.
Set up your OSDK
- Create an application in Developer Console and generate your OSDK. Select Python as the language, Backend service as the application type, and Application permissions for the permission model.
- Install the OSDK library with pip using the command from Developer Console.
Write your compute module code
The following example demonstrates how to authenticate with the OSDK and query an Ontology object from within a compute module function:
Copied!1 2 3 4 5 6 7 8 9 10 11 12 13 14 15 16 17 18 19 20 21 22 23 24 25 26 27from demo_python_sdk import FoundryClient, ConfidentialClientAuth import logging import os from compute_modules.logging import get_logger, set_internal_log_level from compute_modules.auth import retrieve_third_party_id_and_creds from compute_modules.annotations import function CLIENT_ID, CLIENT_CREDS = retrieve_third_party_id_and_creds() set_internal_log_level(logging.INFO) logger = get_logger(__name__) logger.setLevel(logging.INFO) foundry_url = os.environ["FOUNDRY_URL"] @function def get_object(context, event): auth = ConfidentialClientAuth( client_id=CLIENT_ID, client_secret=CLIENT_CREDS, hostname=foundry_url, should_refresh=True, ) client = FoundryClient(auth=auth, hostname=foundry_url) EmployeeObject = client.ontology.objects.Employee logger.info(EmployeeObject.take(1)) return "Success"
Create your Dockerfile
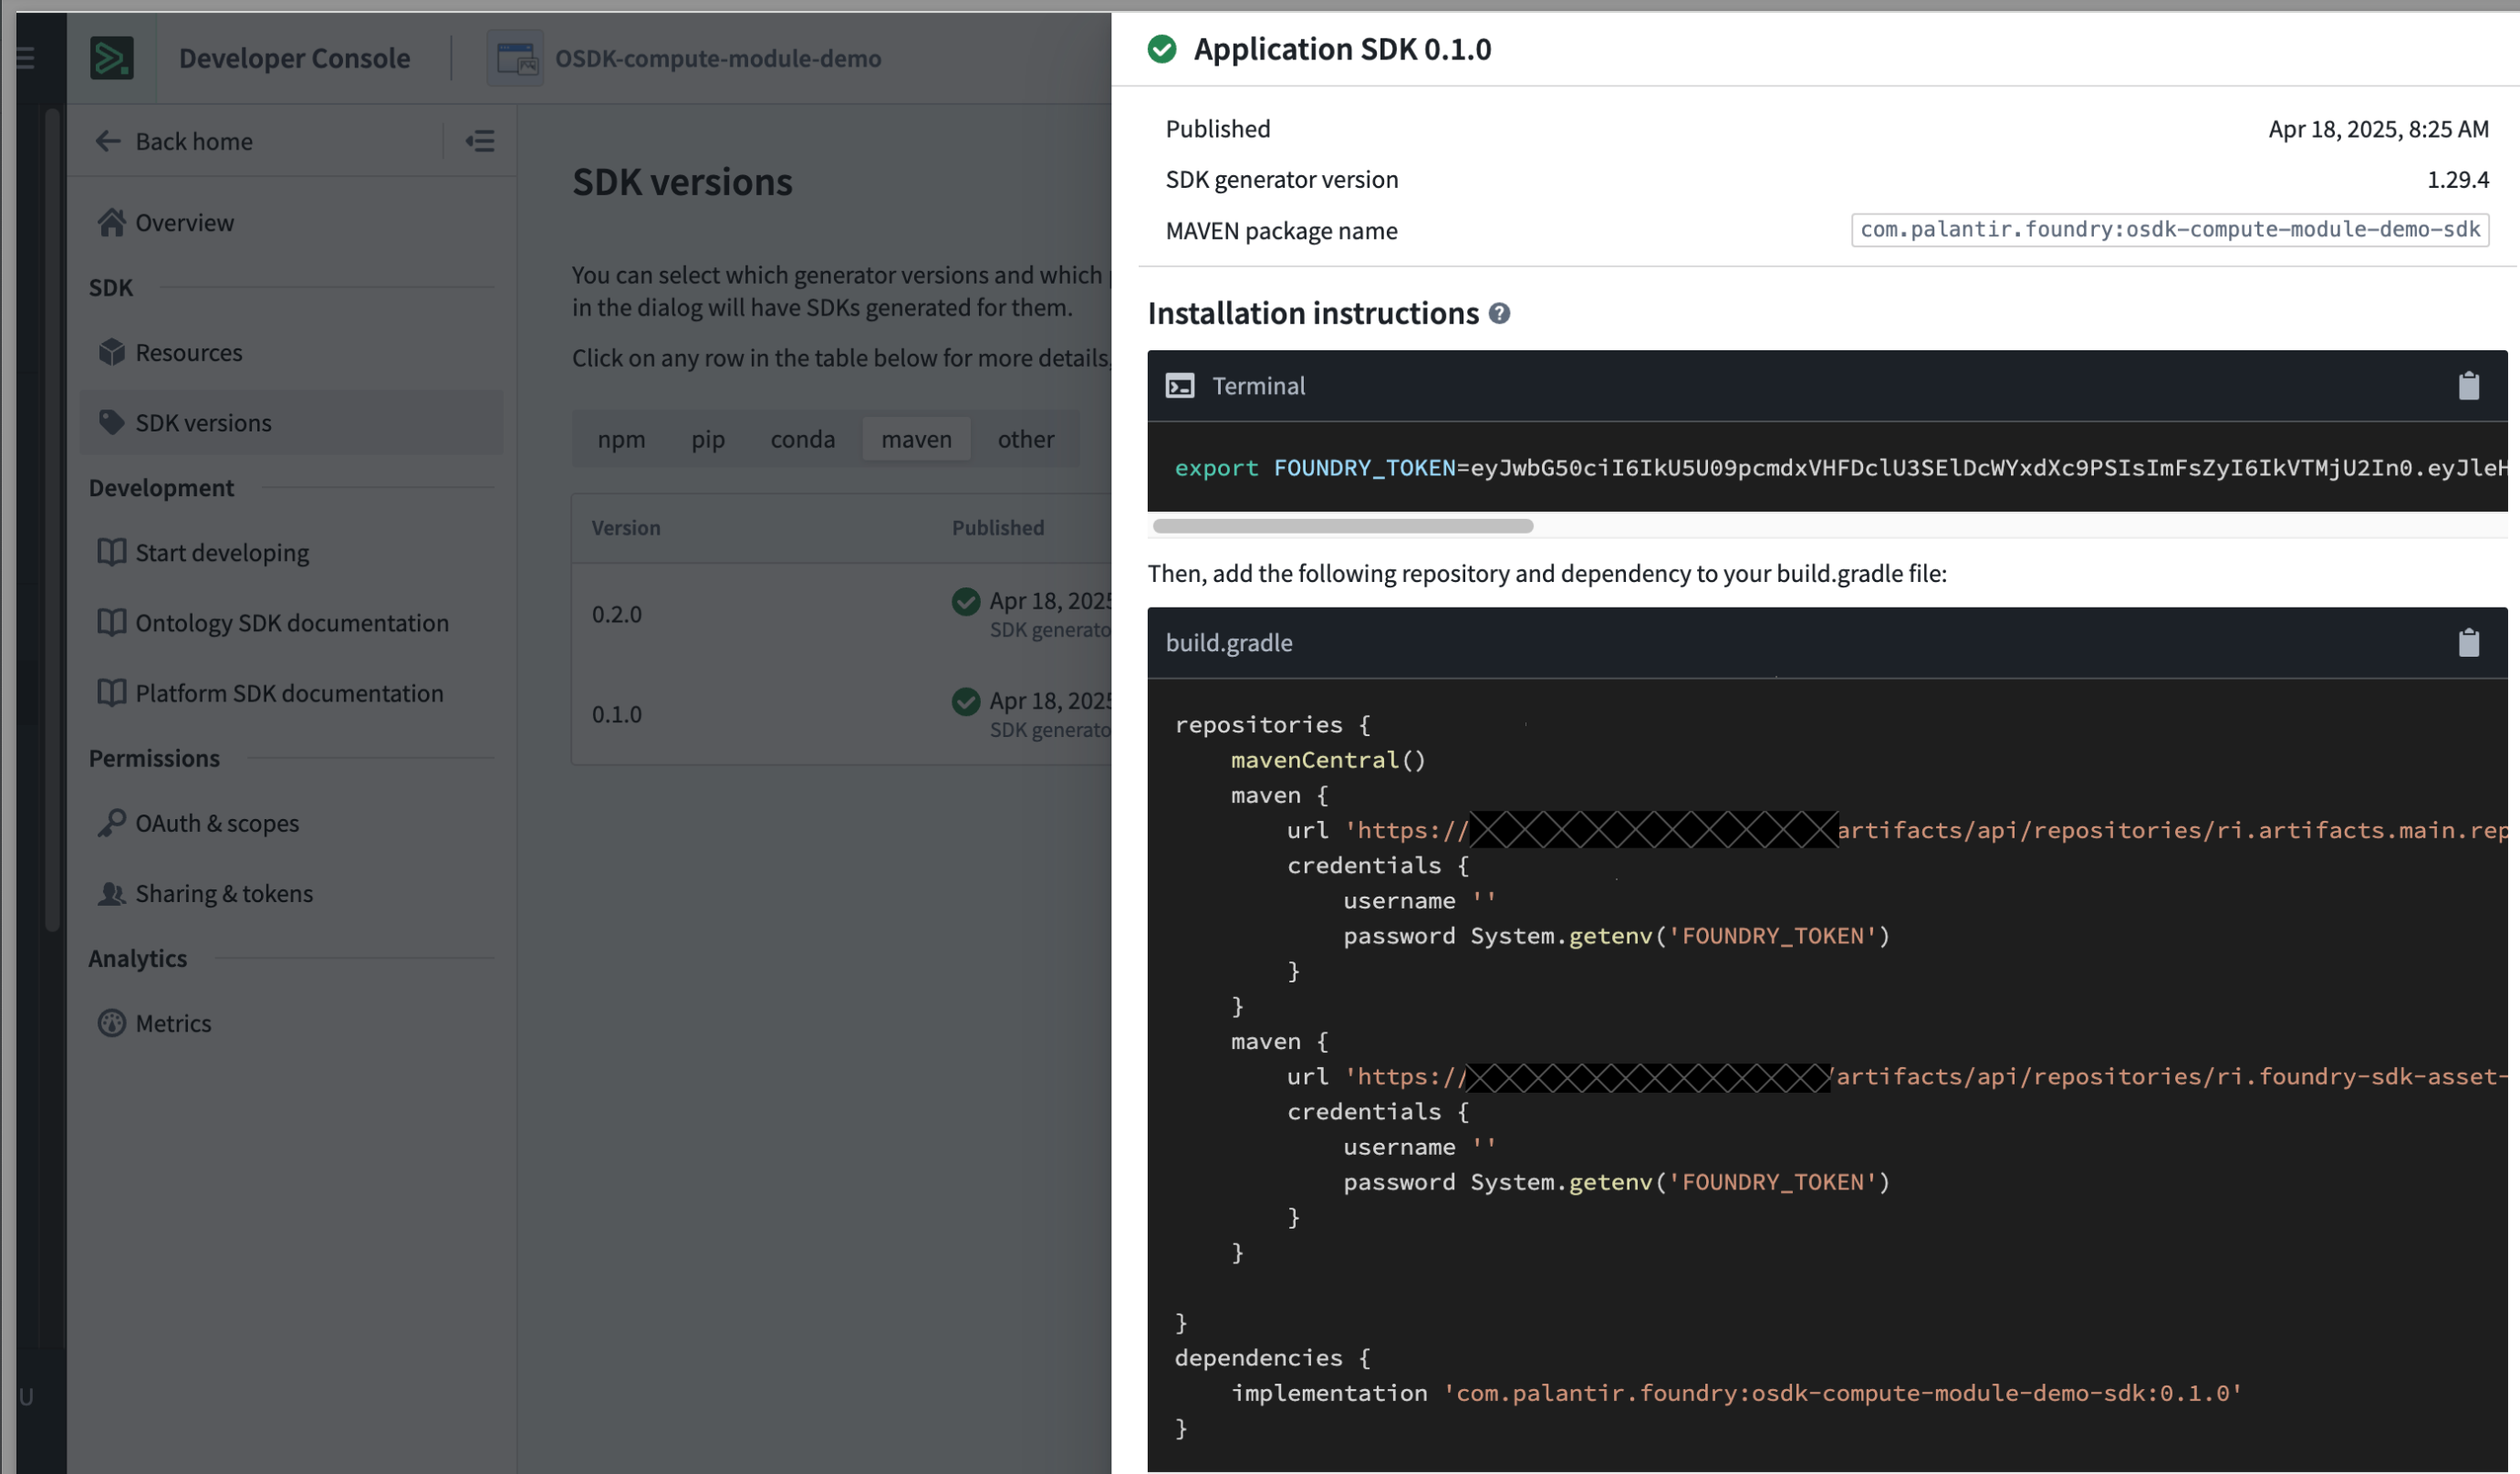
When building locally, the OSDK library is hosted in a private Foundry Artifact repository. You must use a FOUNDRY_TOKEN secret during the Docker build to authenticate with the repository.
Copied!1 2 3 4 5 6 7 8 9FROM --platform=linux/amd64 python:3.12 COPY requirements.txt . RUN --mount=type=secret,id=FOUNDRY_TOKEN,env=FOUNDRY_TOKEN \ pip install -r requirements.txt --upgrade \ --extra-index-url "https://user:$FOUNDRY_TOKEN@yourenrollment.palantirfoundry.com/artifacts/api/repositories/ri.artifacts.main.repository.REDACTED/contents/release/pypi/simple" \ --extra-index-url "https://user:$FOUNDRY_TOKEN@yourenrollment.palantirfoundry.com/artifacts/api/repositories/ri.foundry-sdk-asset-bundle.main.artifacts.repository/contents/release/pypi/simple" COPY src . USER 5000 ENTRYPOINT ["python", "app.py"]
Replace yourenrollment.palantirfoundry.com with your actual Foundry enrollment URL, and replace the repository RIDs with the values provided in Developer Console.
Build and push the image
Build the Docker image using the following command, passing the FOUNDRY_TOKEN as a build secret:
Copied!1 2 3docker buildx build --platform=linux/amd64 \ --secret id=FOUNDRY_TOKEN,env=FOUNDRY_TOKEN \ -t yourenrollment-container-registry.palantirfoundry.com/hello-world:0.0.1 .
For more information on building and publishing Docker images, review the containers documentation.
Use OSDK with Code Repositories
If you are developing your compute module in Code Repositories, you can add the OSDK as a library dependency instead of installing it locally.
Python
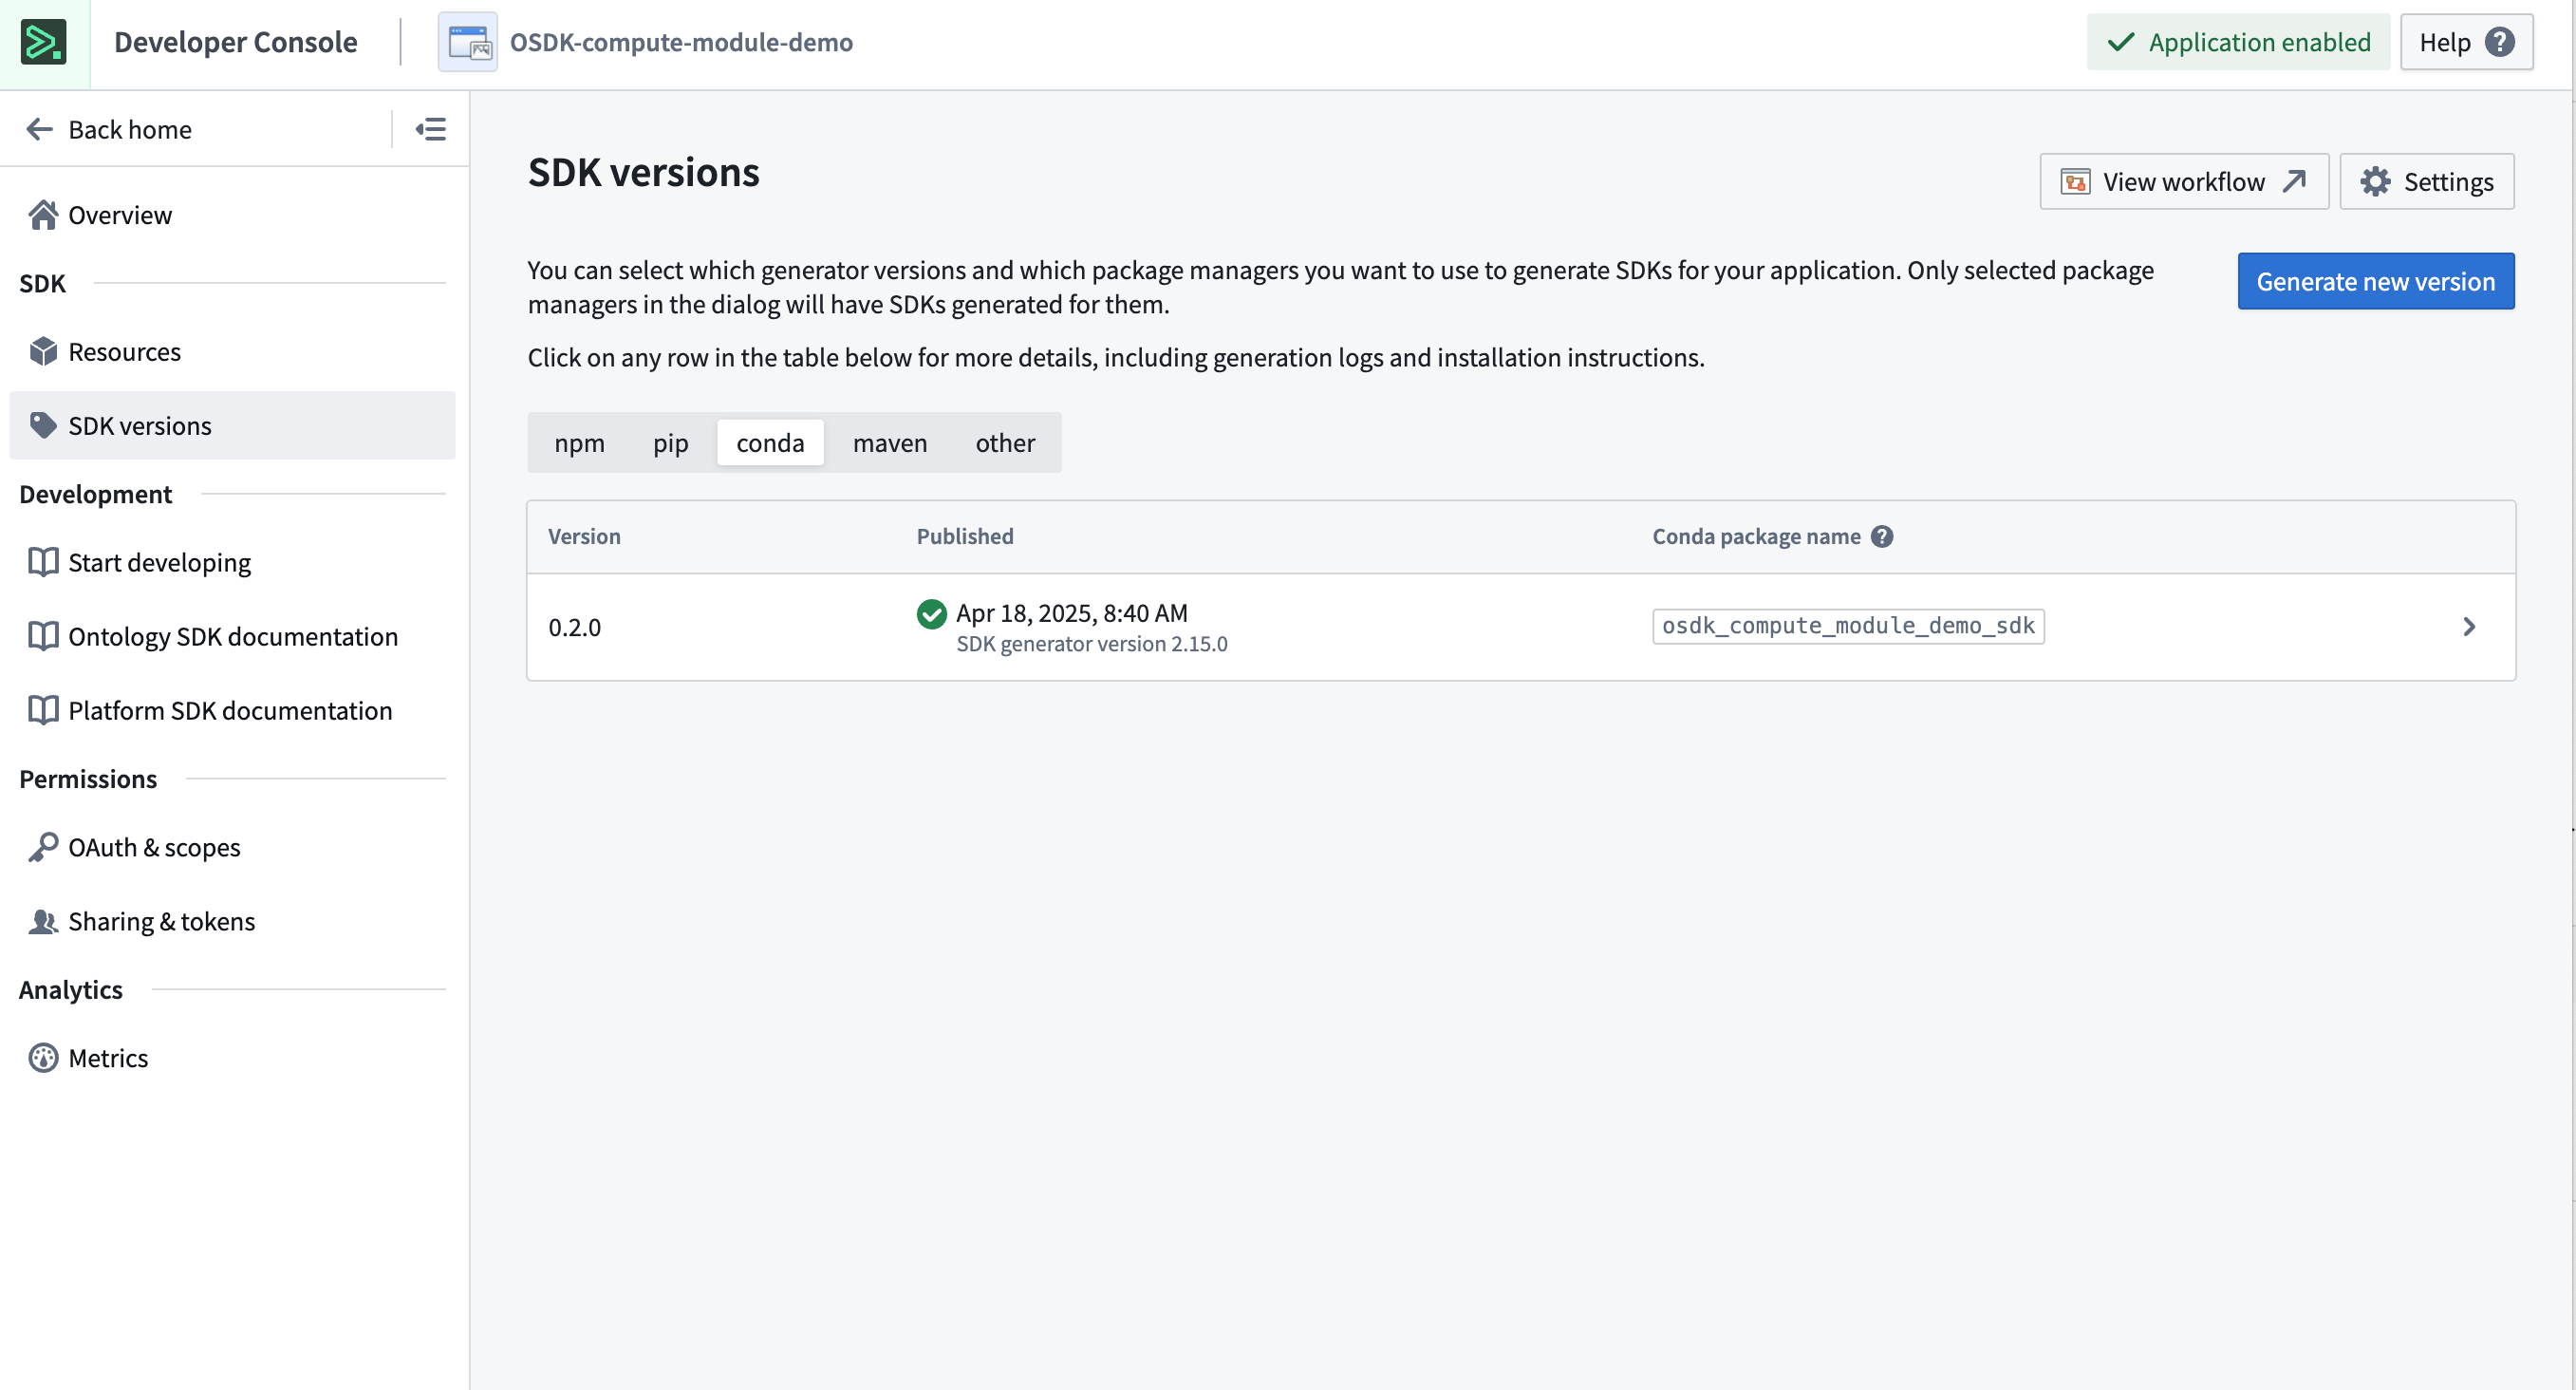
- Create an application in Developer Console and generate your OSDK. Select Python as the language, Backend service as the application type, and Application permissions for the permission model. A Conda SDK will be created.
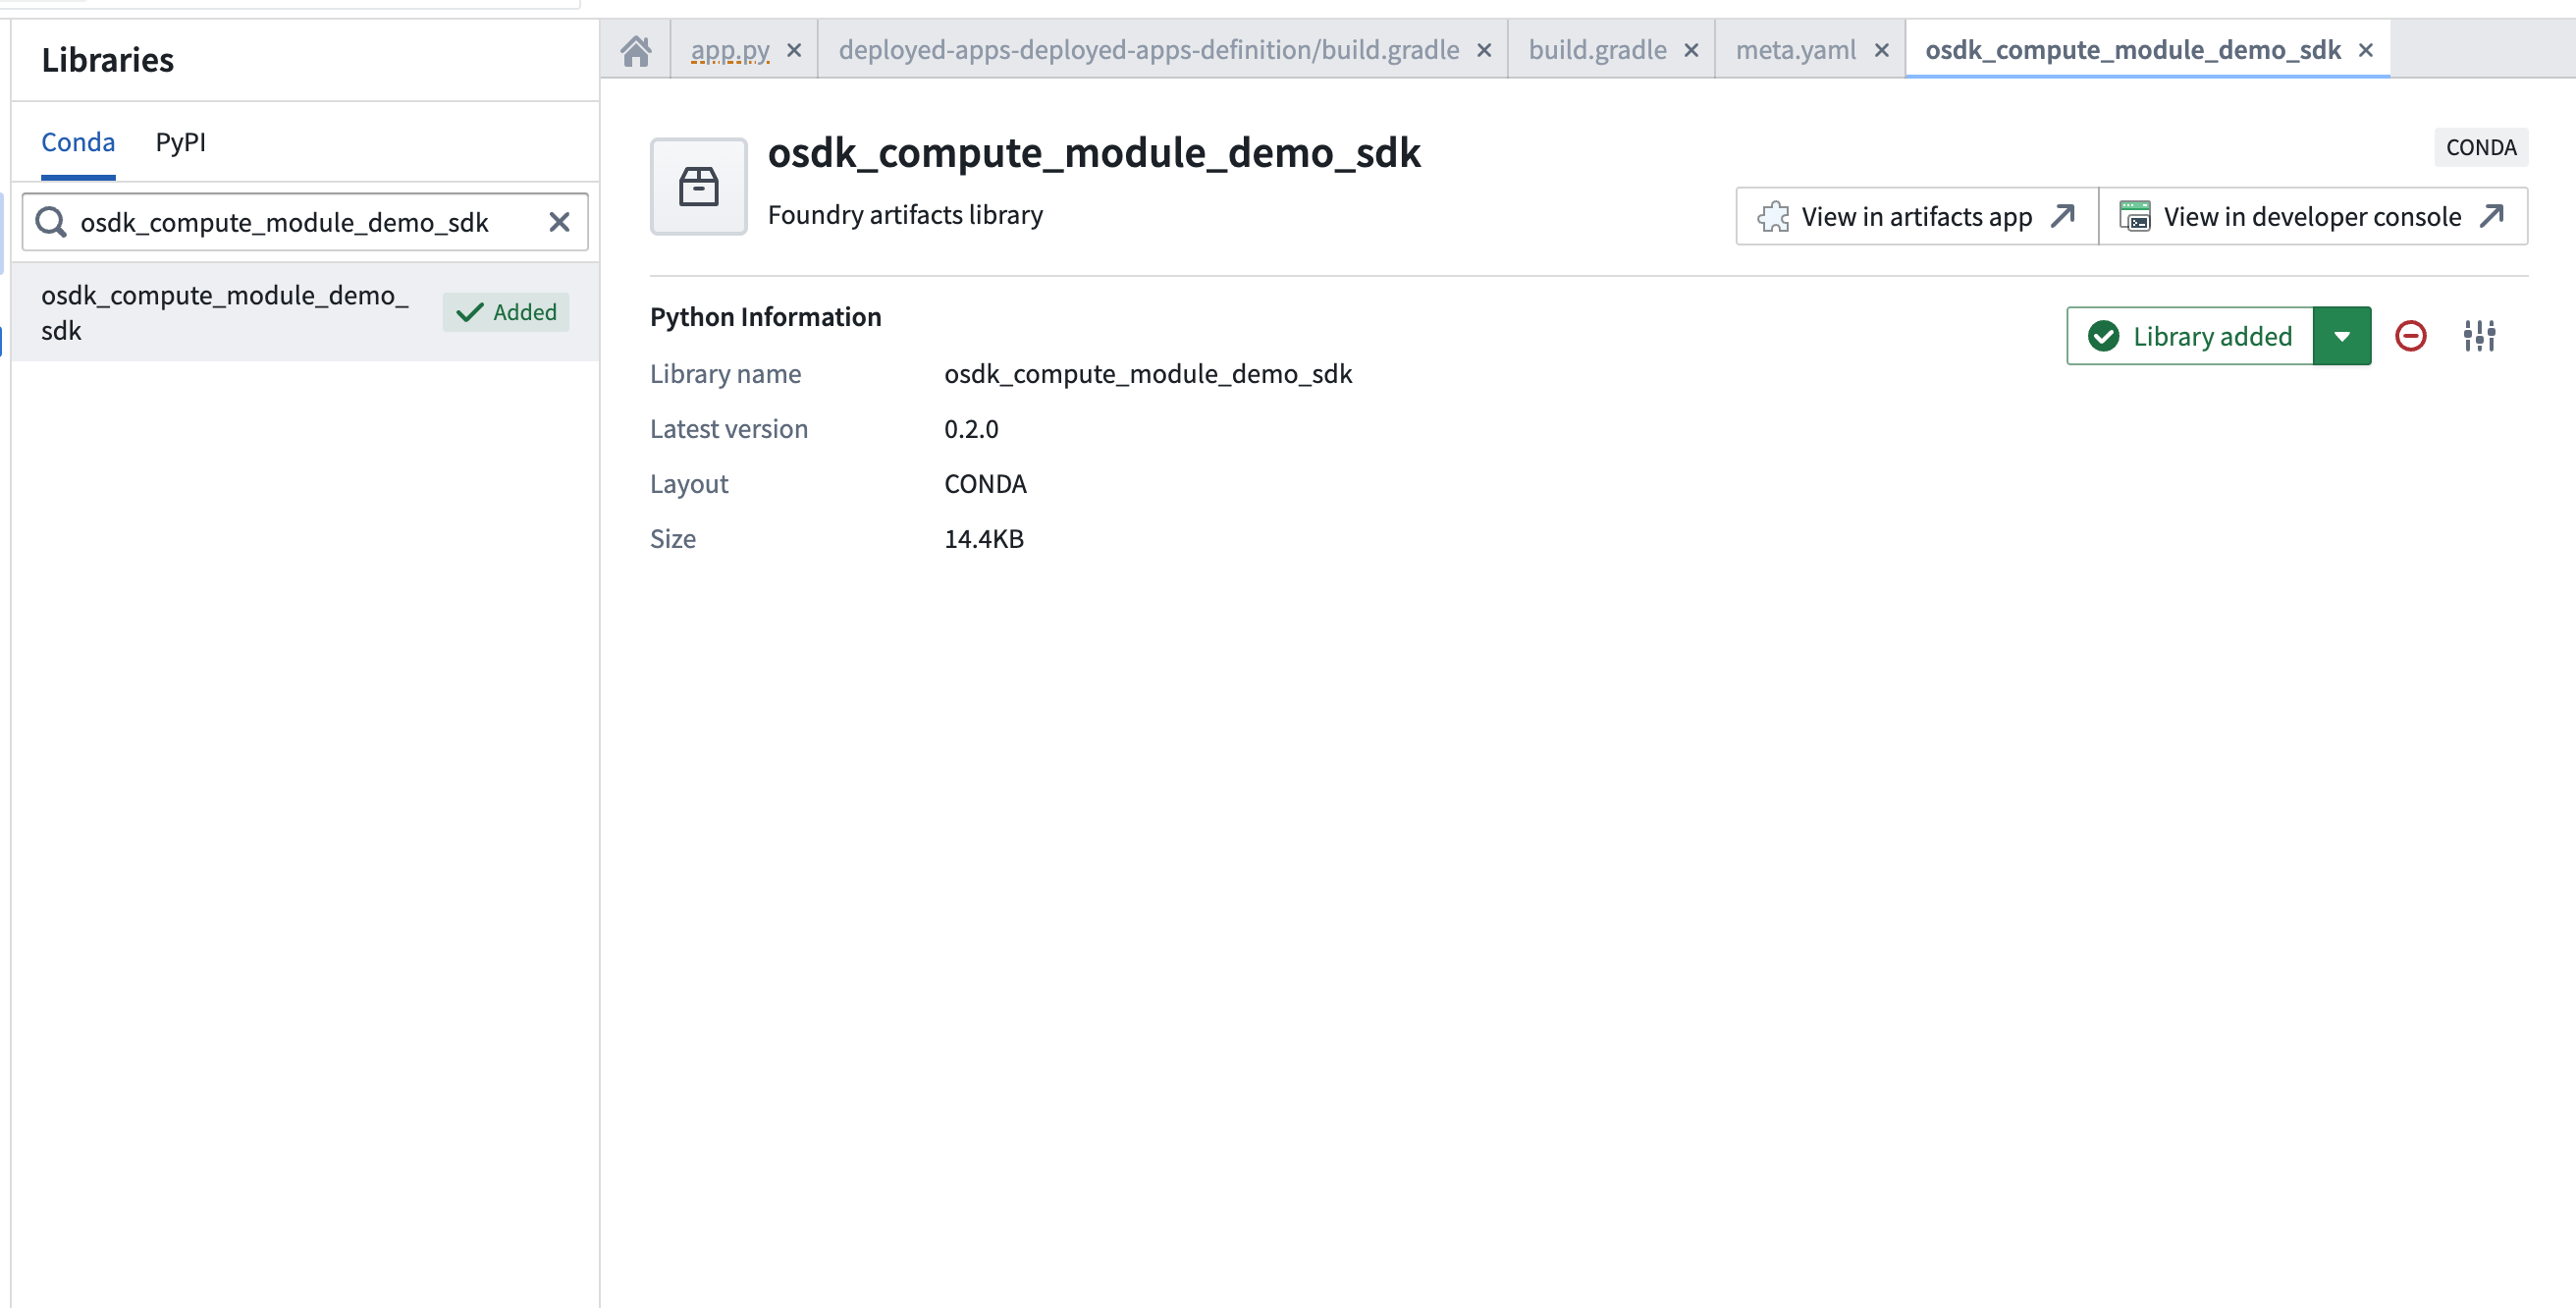
- In your Python Code Repository, open the Libraries panel, search for the Conda SDK generated in the previous step, and add it.
- Use the OSDK in your compute module code:
Copied!1 2 3 4 5 6 7 8 9 10 11 12 13 14 15 16 17 18 19 20 21 22 23 24 25import os from osdk_compute_module_demo_sdk import ConfidentialClientAuth, FoundryClient from compute_modules.auth import retrieve_third_party_id_and_creds from compute_modules.annotations import function foundry_url = os.environ["FOUNDRY_URL"] CLIENT_ID, CLIENT_CREDS = retrieve_third_party_id_and_creds() @function def print_object(context, event): auth = ConfidentialClientAuth( client_id=CLIENT_ID, client_secret=CLIENT_CREDS, hostname=foundry_url, should_refresh=True, scopes=[ "api:ontologies-read", "api:ontologies-write", "api:mediasets-read", "api:mediasets-write", ], ) client = FoundryClient(auth=auth, hostname=foundry_url) EmployeeObject = client.ontology.objects.Employee return str(EmployeeObject.take(1))
Java
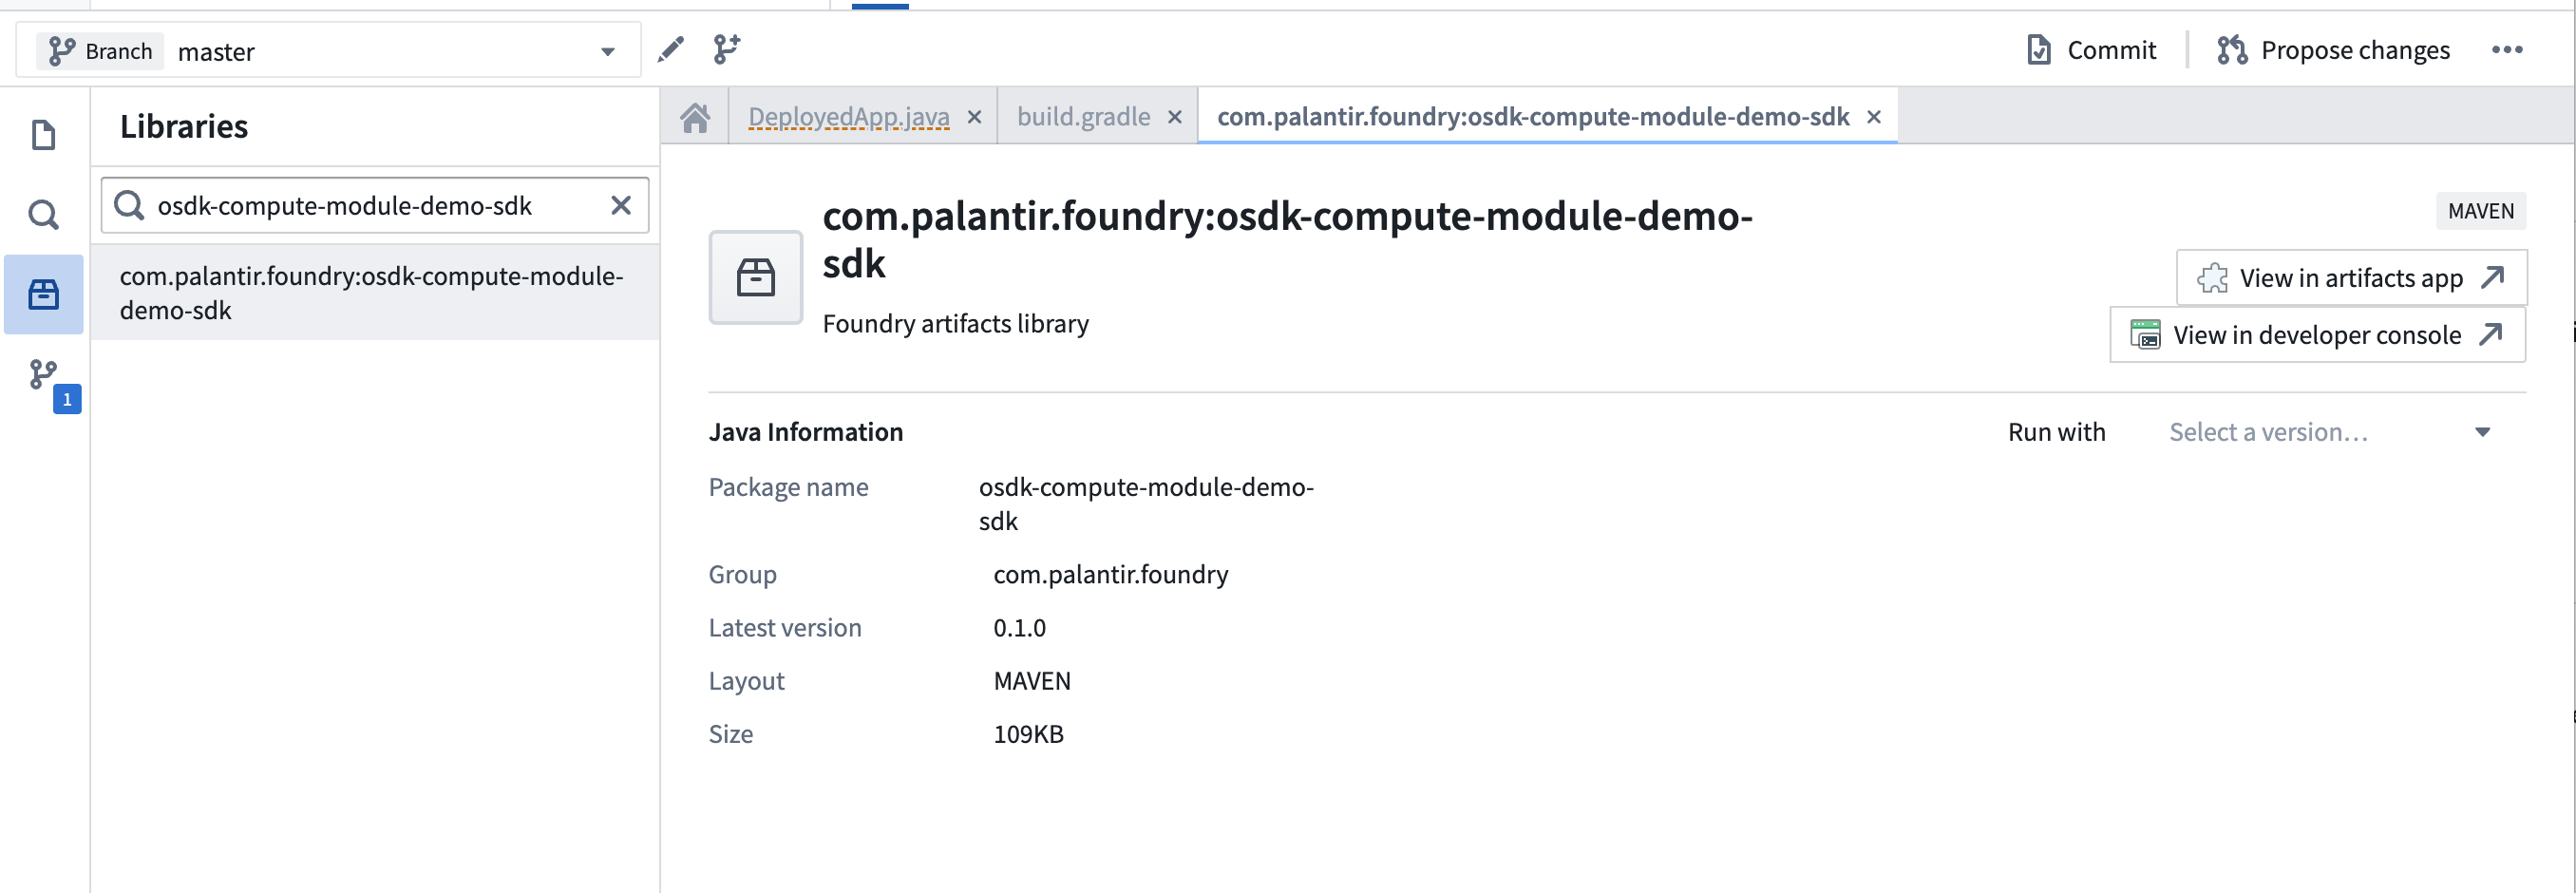
- Create an application in Developer Console and generate your OSDK. Select Java as the language, Backend service as the application type, and Application permissions for the permission model. A Maven locator will be provided, such as
com.palantir.foundry:osdk-compute-module-demo-sdk.
- In your Java Code Repository, open the Libraries panel, search for the Maven SDK generated in the previous step, and add it.
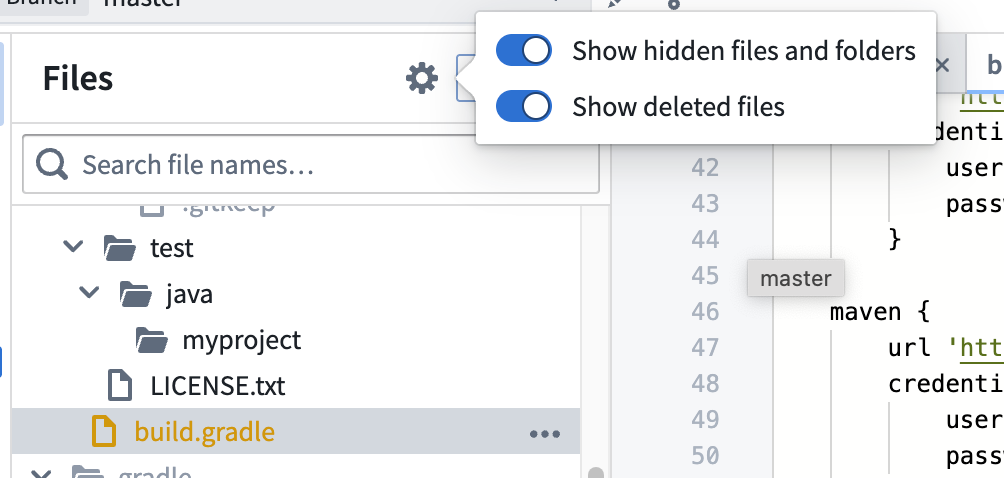
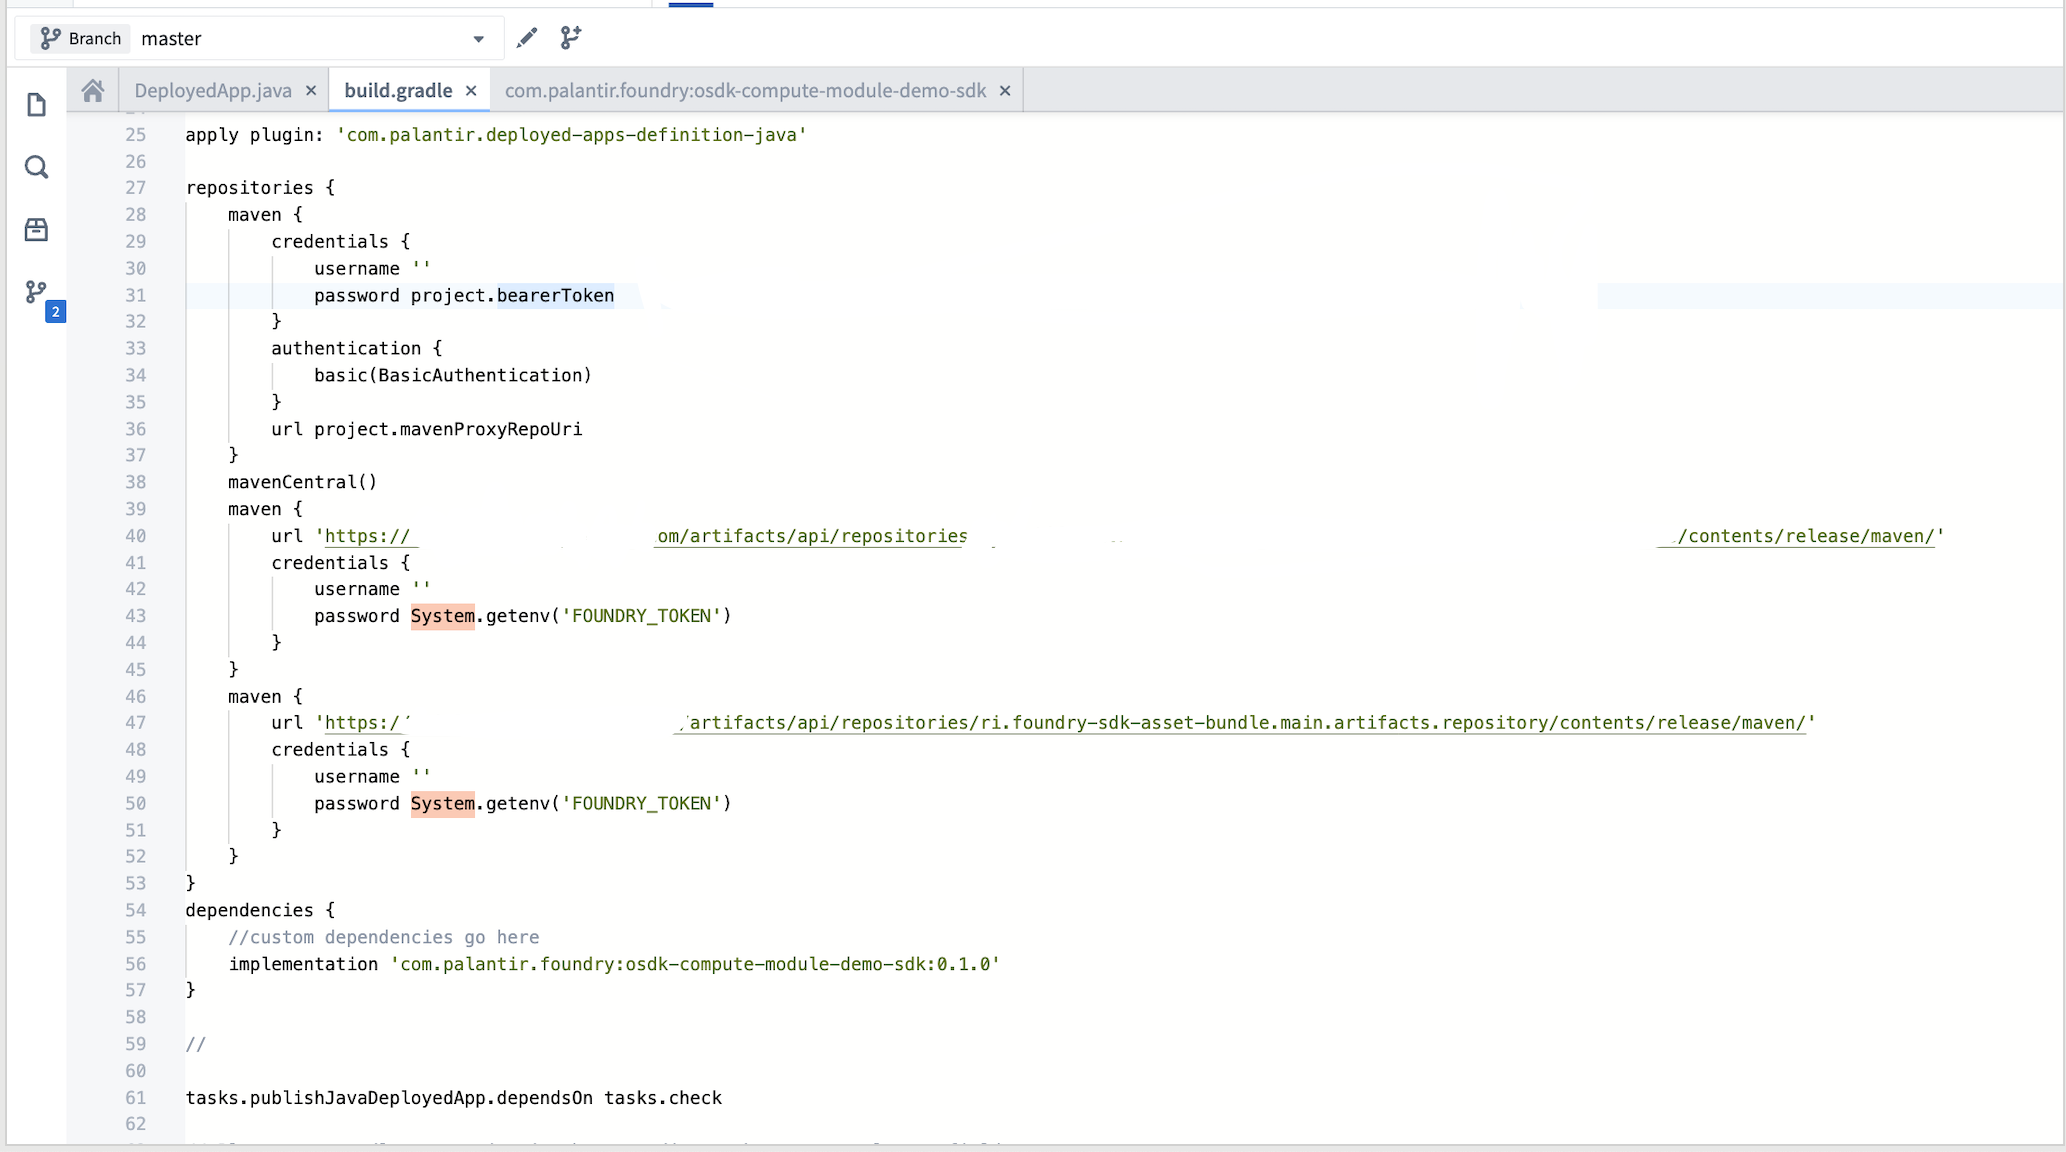
- Toggle hidden files and find the
build.gradlefile in your deployed application definition directory. Add the Maven locators as dependencies.
- Use the OSDK in your compute module code:
Copied!1 2 3 4 5 6 7 8 9 10 11 12 13 14 15 16 17 18 19 20 21 22 23 24import com.palantir.foundry.osdk_compute_module_demo_sdk.FoundryClient; import com.palantir.foundry.osdk_compute_module_demo_sdk.objects.Employee; import com.palantir.osdk.api.Auth; import com.palantir.osdk.api.auth.ConfidentialClientAuth; import com.palantir.osdk.internal.api.FoundryConnectionConfig; import java.util.List; static String return_object() { Auth auth = ConfidentialClientAuth.builder() .clientId(System.getenv("CLIENT_ID")) .clientSecret(System.getenv("CLIENT_SECRET")) .build(); FoundryClient client = FoundryClient.builder() .auth(auth) .connectionConfig(FoundryConnectionConfig.builder() .foundryUri("https://yourenrollment.palantirfoundry.com") .build()) .build(); List<Employee> objects = client.ontology().objects().Employee() .fetchStream().toList(); return objects.get(0).toString(); }
Marketplace-installed compute modules
When a compute module installed through Marketplace uses the OSDK, the ontology RID from the Marketplace installation project is linked to the compute module through the FOUNDRY_ONTOLOGY_RID environment variable. This is the ontology RID of the installation project, not the original source project.
The API names of all Ontology entities must match between the source and target ontologies. If the API names do not match, the OSDK will not be able to resolve the entities in the target ontology.
Use the FOUNDRY_ONTOLOGY_RID environment variable when initializing the OSDK client to ensure your compute module references the correct ontology:
Copied!1 2 3 4import os FOUNDRY_ONTOLOGY_RID = os.environ.get("FOUNDRY_ONTOLOGY_RID") CLIENT = FoundryClient(auth=AUTH, hostname=HOSTNAME, rid=FOUNDRY_ONTOLOGY_RID)
Copied!1 2 3const originalOntologyRid: string = "{YOUR_ORIGINAL_ONTOLOGY_RID}"; const ontologyRid: string = process.env.FOUNDRY_ONTOLOGY_RID ?? originalOntologyRid; const client: Client = createClient(url, ontologyRid, auth);