- Capabilities
- Getting started
- Architecture center
- Platform updates
Generate documentation from a workflow
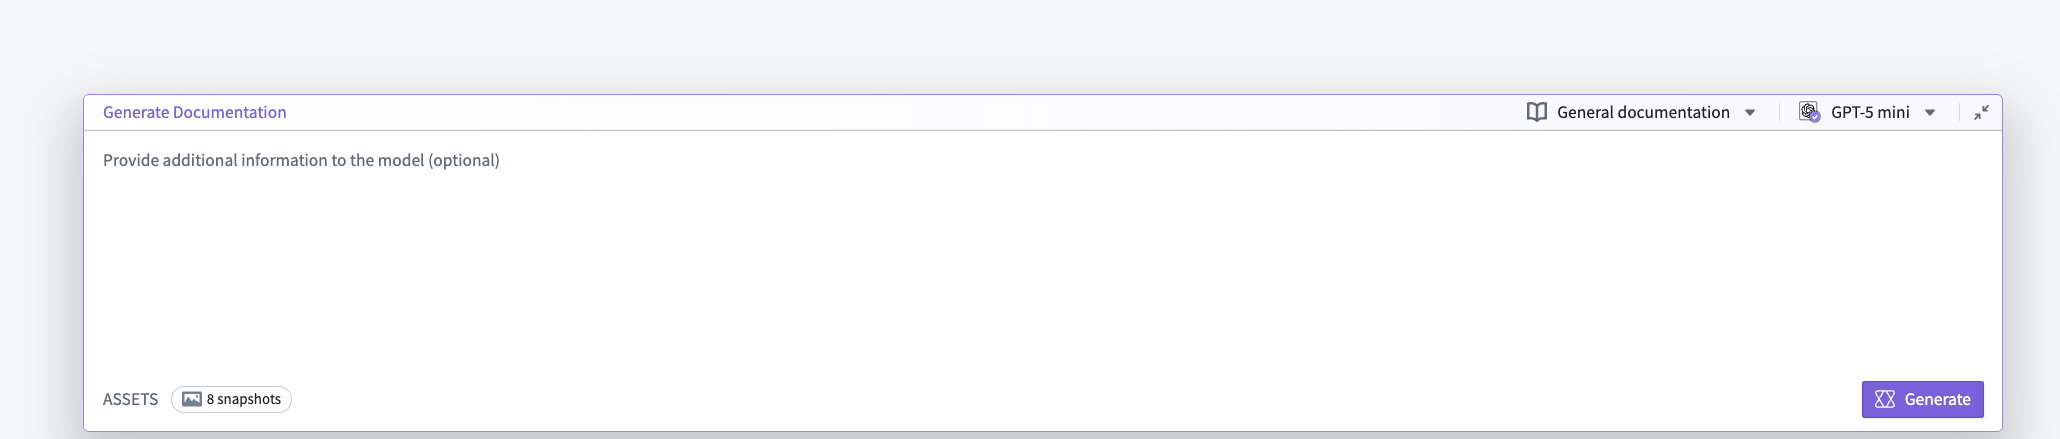
After recording a workflow, you can use the prompt bar at the bottom of the edit mode view in Flow Capture to provide additional context and generate documentation. Consider adding a target audience, required format, style guide, or specific instructions for content organization to improve generated content.
Choose a model
Select a model from the model selector in the top right of the prompt bar. Different models provide different context window sizes, speed, and cost characteristics. Choose the model that best matches your needs for accuracy and token capacity.
Different models support different images quantities per request. If your queries are failing, select a different model and try again.
At this stage, you can also change the prompt template using the selector to the left of the model selector.
Include assets in LLM context
Ensure that the screenshots and transcriptions you want to provide the model with are included in the generation context. Transcripts and images that have been added to the LLM context will display a purple In context tag. The Snapshots tag in the bottom left of the prompt bar will display the number of images currently available to the model.
Only assets that you have added to context are visible to the model during generation. Note that you can also upload images that were not captured during your flow capture session and include them in the LLM context.
Start generation
- Verify your prompt and assets.
- Select Generate in the bottom right of the prompt bar to start the generation process.
- Wait for the model to finish. The editor will display generated content in the Documentation tab when the process is finished.
Edit generated Markdown
After content has been generated, you can edit the results by switching to the Documentation tab and selecting Edit in the top right corner. Content will be displayed using Markdown syntax. To preview the result, you can toggle back to Preview.

Generation mode
You can also change the generation mode to regenerate or modify existing documentation. Choose one of the following generation modes using the selector in the top left of the prompt bar:
- Regenerate documentation: Overwrite existing documentation with a new prompt. Use this when you want a fresh document that does not depend on the current generated text.
- Append to or modify current documentation: Edit the existing documentation using the prompt. Use this when you want the model to revise, expand, or correct the current document while retaining its context.
Export generated documentation
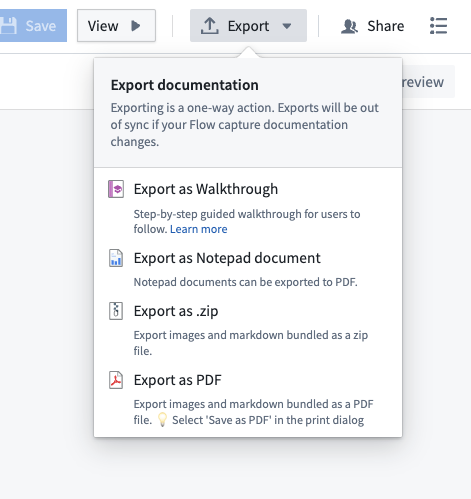
Flow Capture allows you to export generated content in various ways:
- Export as Walkthrough: Converts the content to a Walkthrough. Walkthroughs enforce a step-by-step structure, so Walkthrough content may differ after export from Flow Capture.
- Export as Notepad: Converts the content to a Notepad document.
- Export as .zip: Bundles Markdown content and images into a .zip file that can be downloaded.
- Export as PDF: Renders Markdown content as a PDF document that can be downloaded.