- Capabilities
- Getting started
- Architecture center
- Platform updates
Interact with the Ontology
Restricted View-backed Ontology entities and query functions are not yet supported in Code Workspaces.
Code Workspaces supports interacting with the Ontology using object, link, and action types in JupyterLab® and RStudio®.
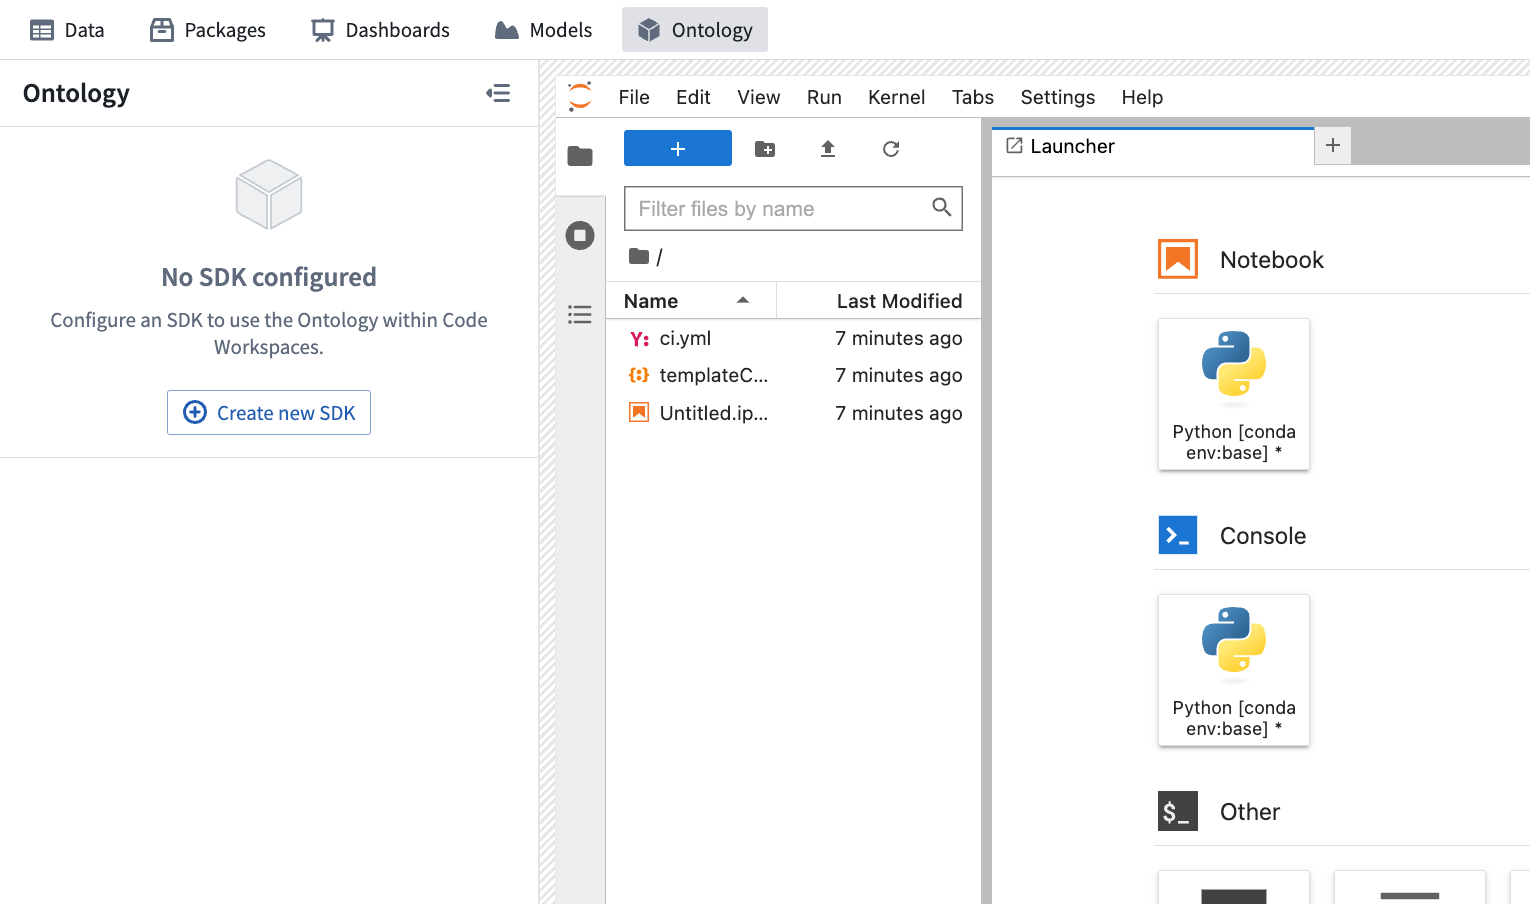
Create a new Ontology SDK
To create a new Ontology SDK in Code Workspaces, first navigate to the Ontology side panel. Each Code Workspace can have one SDK, and multiple versions of each SDK can be created. From the Ontology side panel, select Create new SDK to open the SDK configuration form.
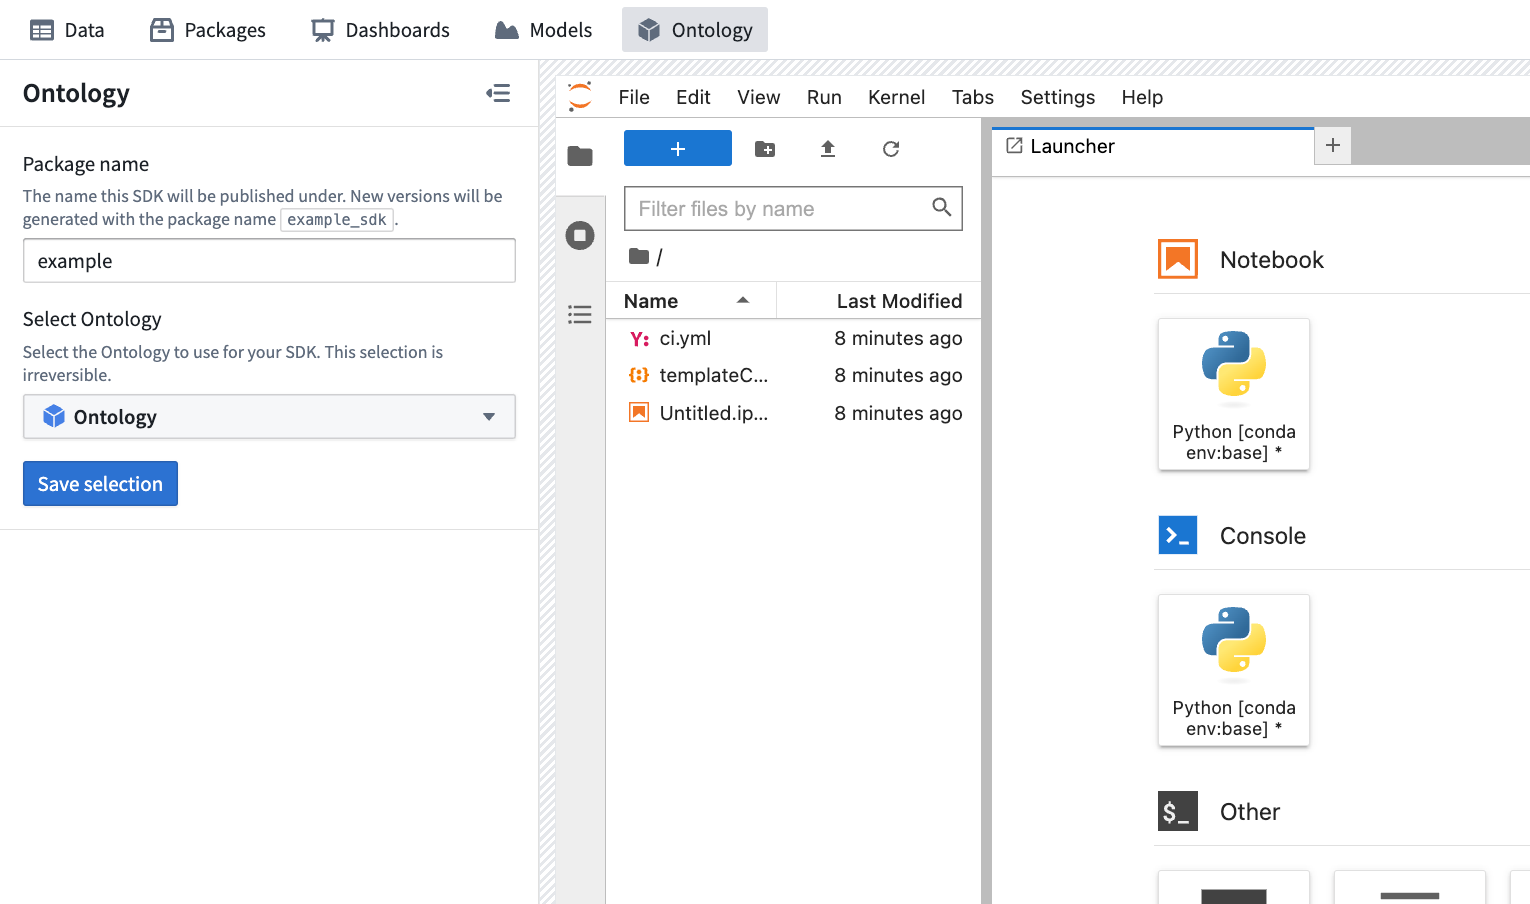
New Ontology SDKs require a package name and an associated Ontology. The package name is used to determine how your SDK is accessed in code: versions of an SDK with a package name of example would be importable under the library name example_sdk. SDK package names can only contain letters, numbers and hyphens, and cannot end with a hyphen. Once published, SDK package names cannot be changed.
After configuring your SDK, select Save selection to continue.
Select data entities
The Ontology side panel contains two tabs: Data entities and SDK generation.
- The Data entities tab is used to import object and action types from your Ontology.
- The SDK generation tab is used to inspect and install SDK versions.
To select data entities, navigate to the Data entities tab. Select Add and choose the desired data entity type to open a resource selector dialog which enables browsing for and selecting data entities. After selecting data entities, your selection can be saved using the Save button at the bottom of the side panel. After selecting Save, a new SDK version will be generated with access to the selected data entities.
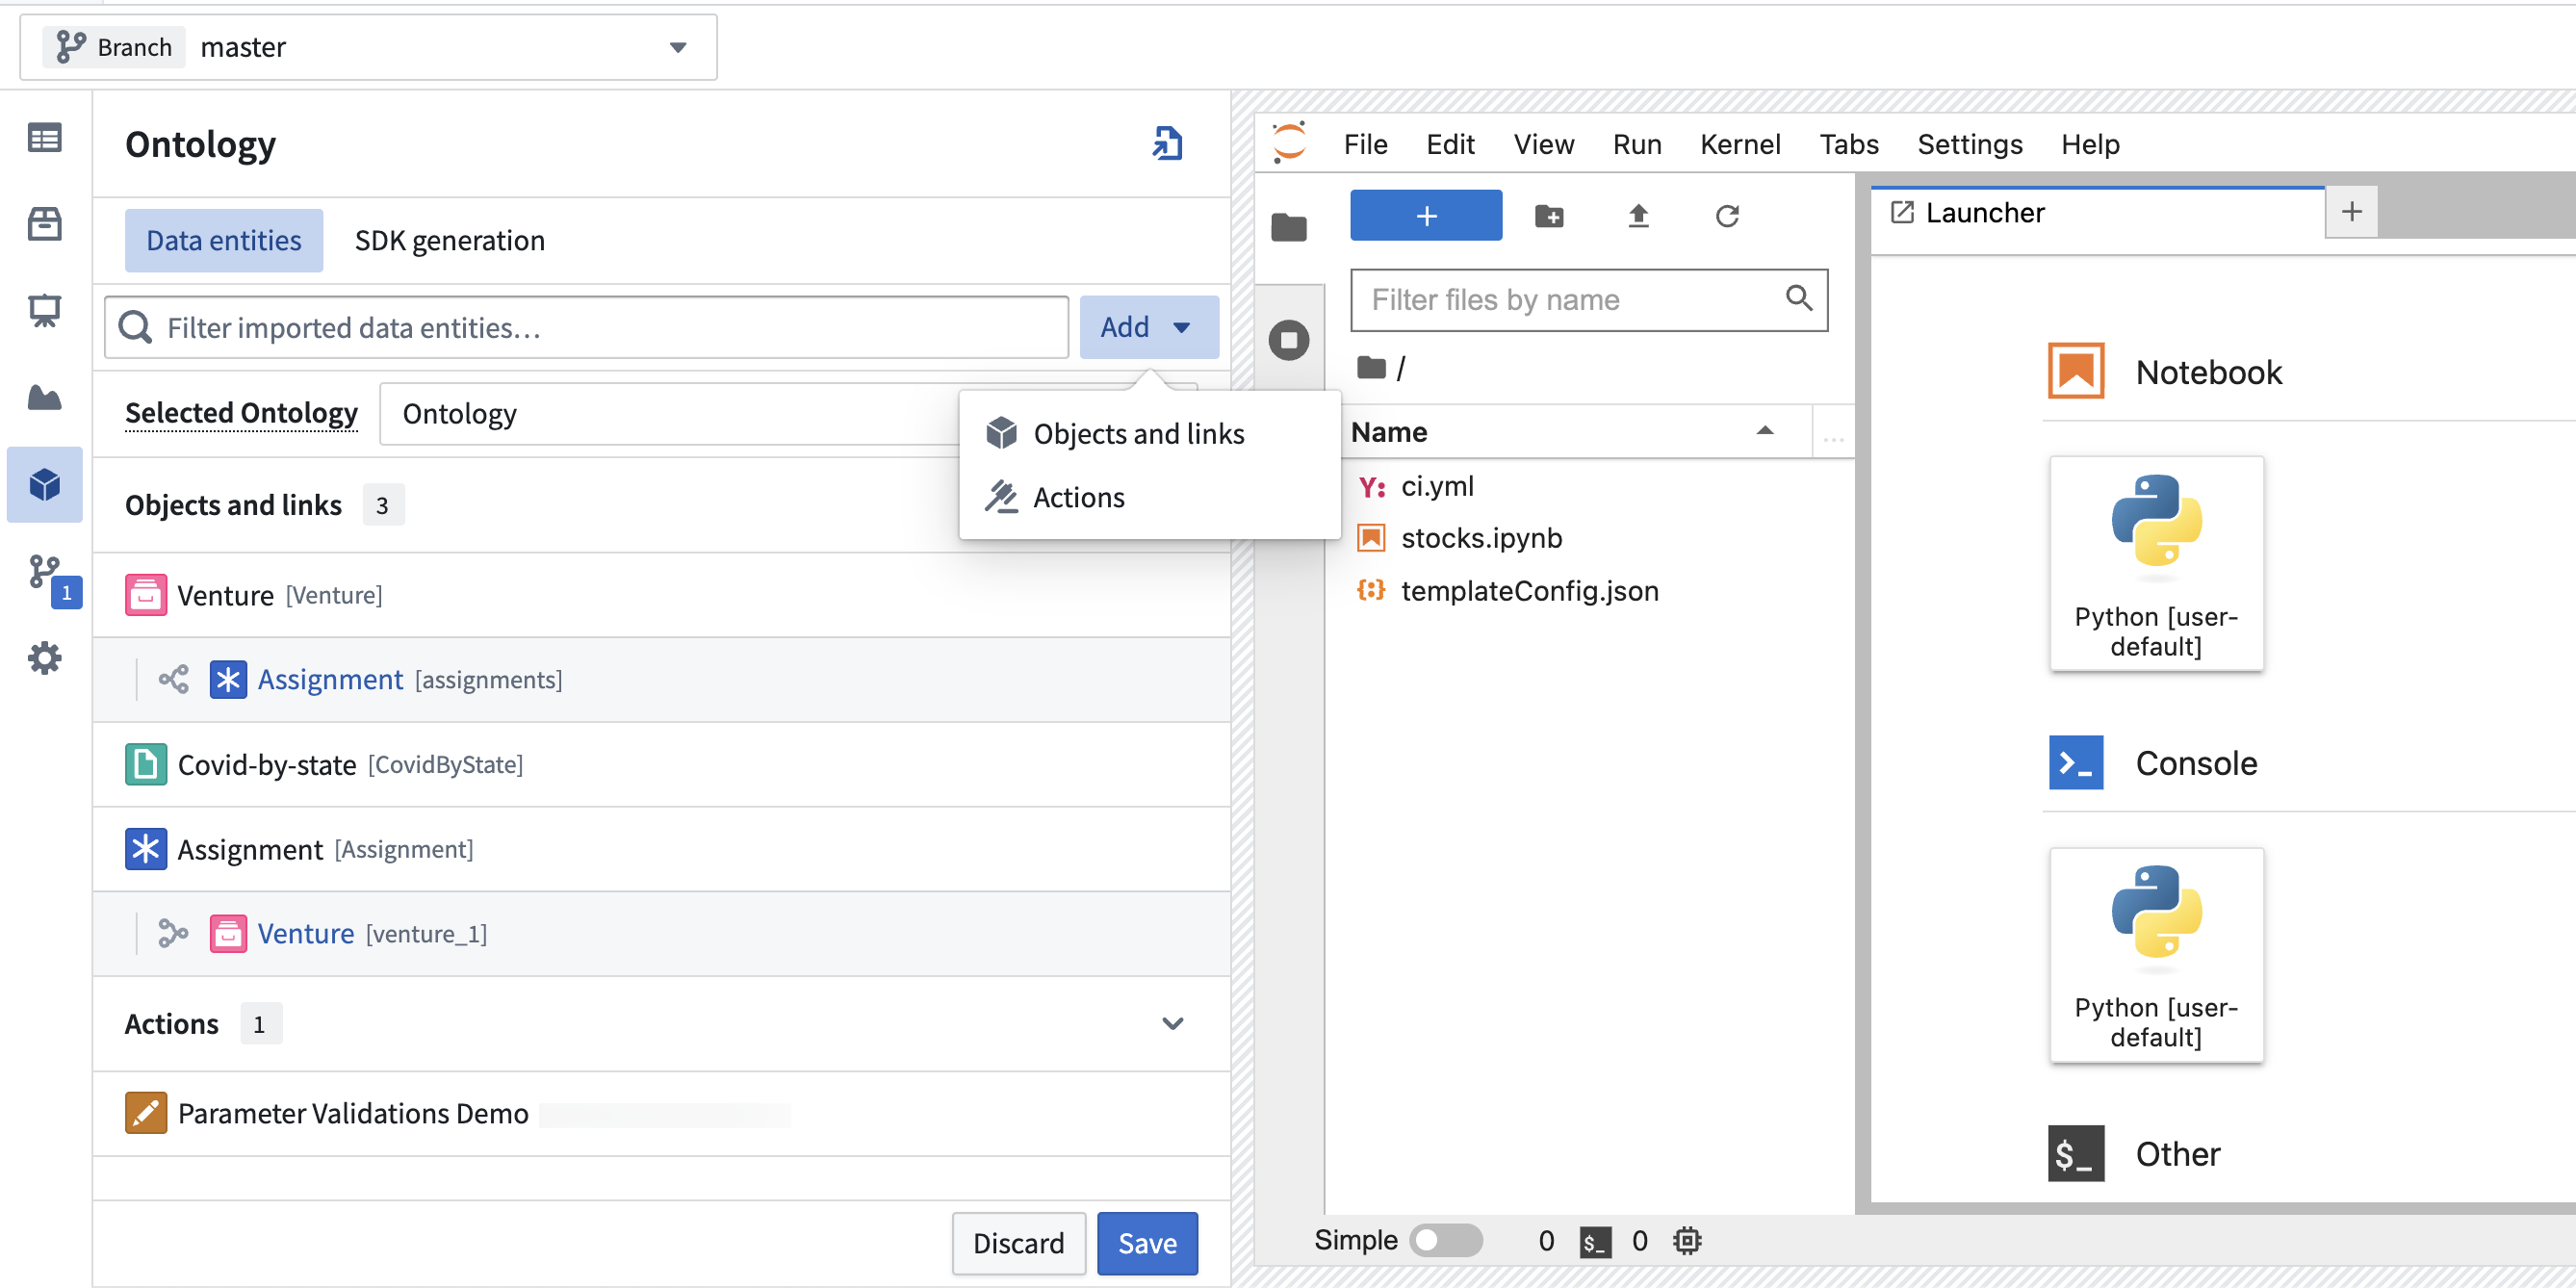
When selecting action types that affect object types or have object types as parameters, those object types will also be added to the selection automatically. If any selected object types have backing data sources which have not yet been imported into the project scope of your Code Workspace, you will also be prompted to confirm the automatic import of these data sources.

Change the selected Ontology
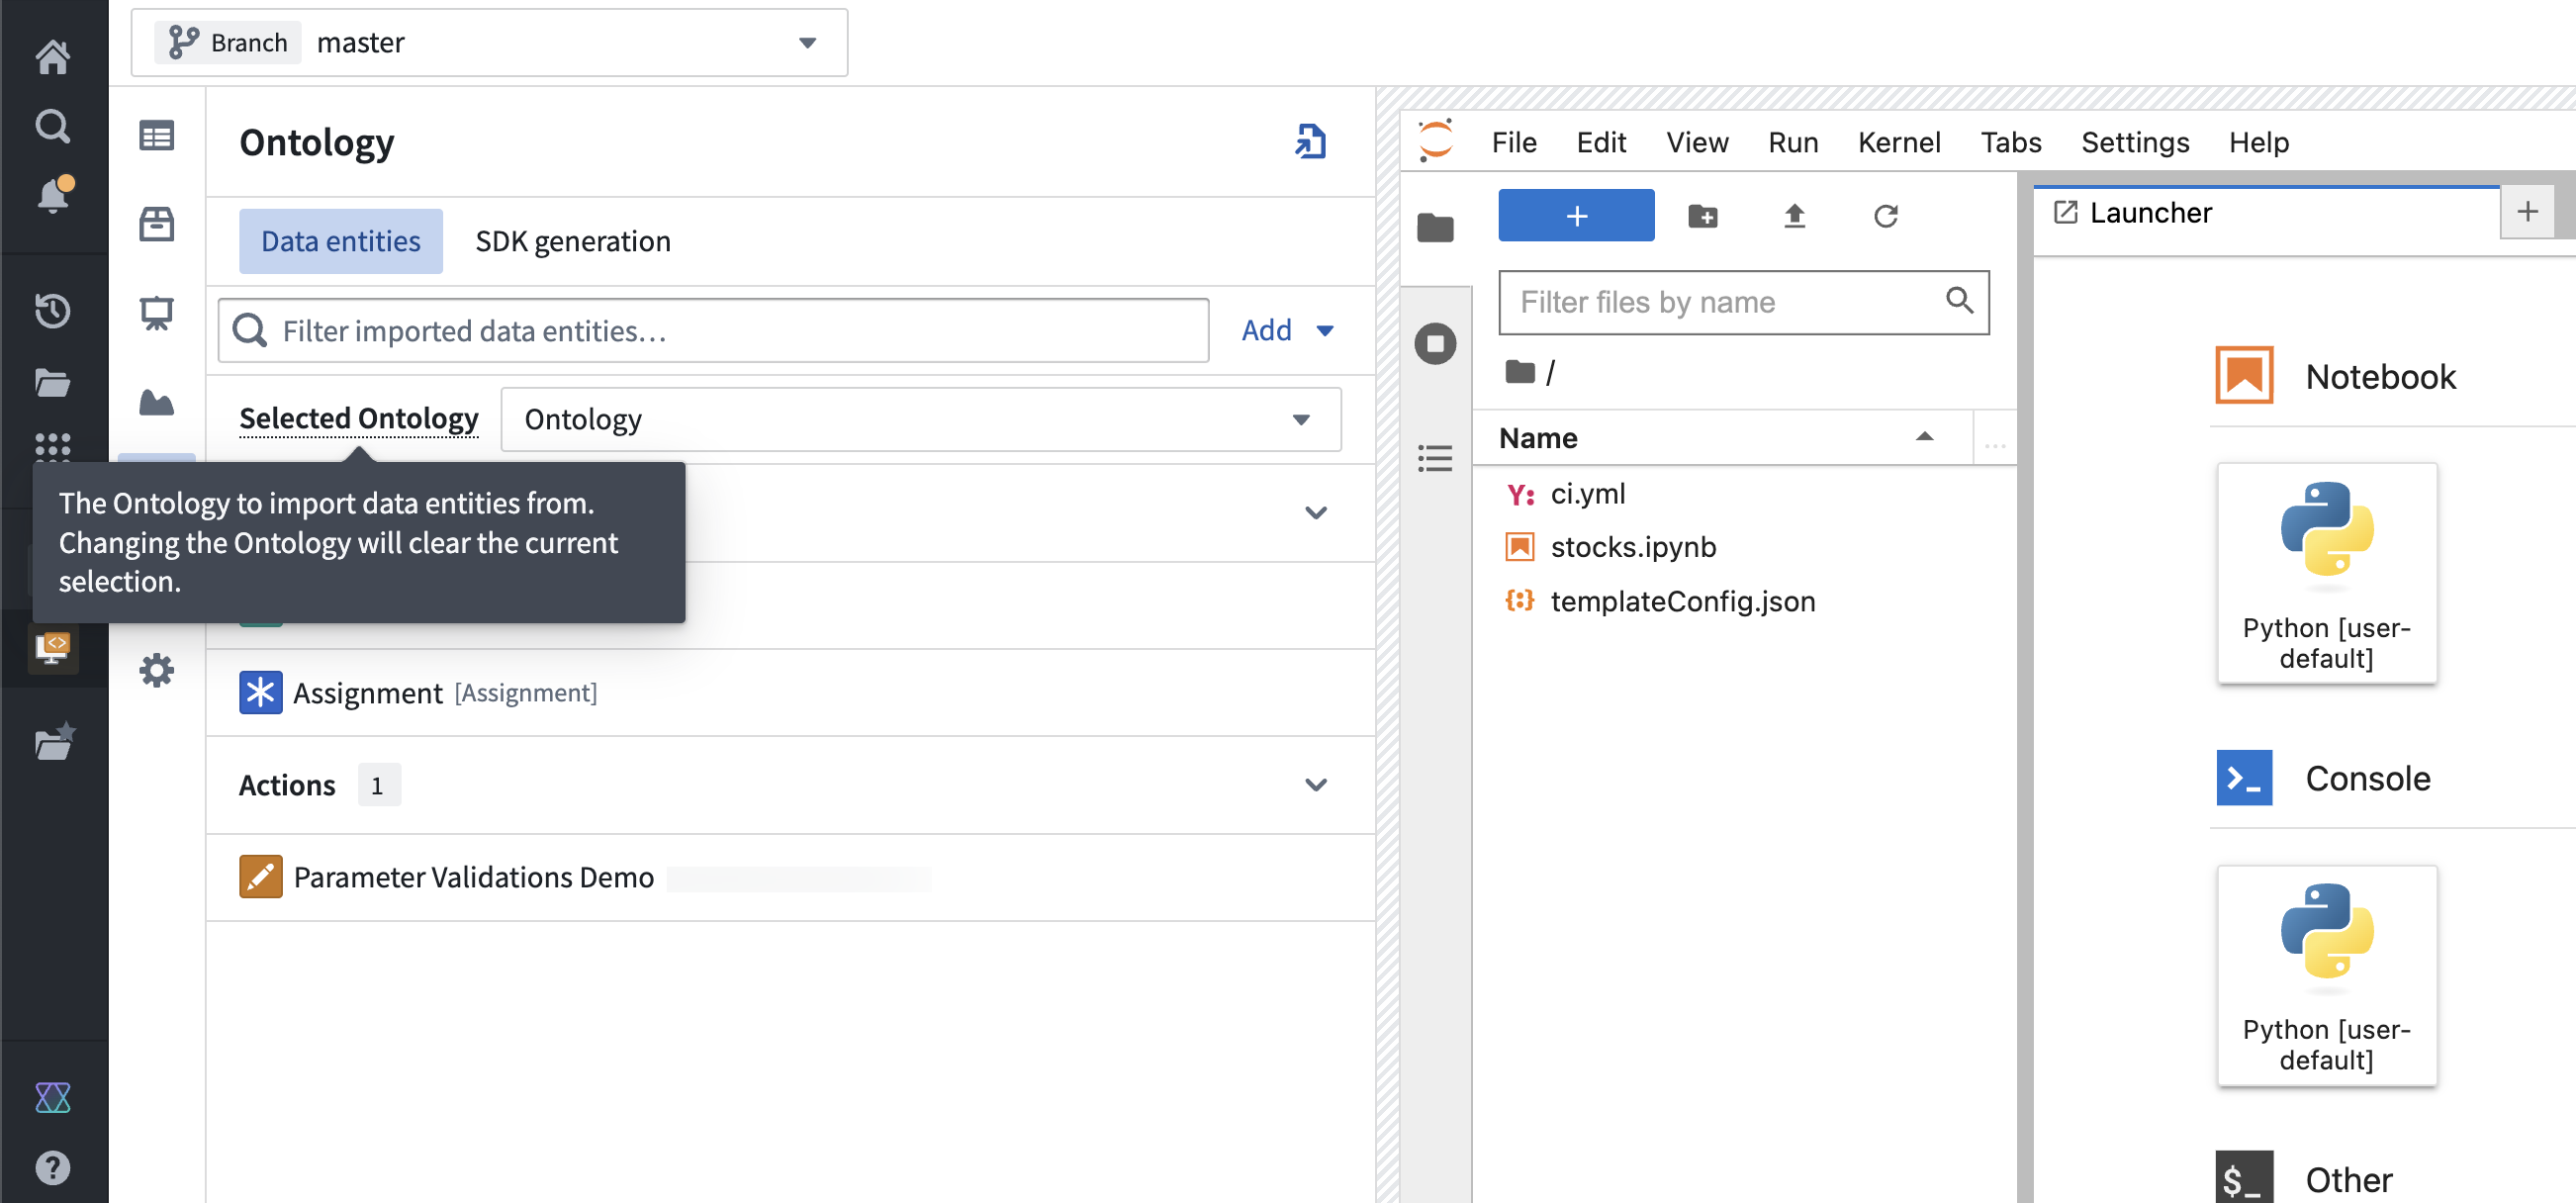
To import Ontology entities from a different Ontology, use the Ontology selector found in the Data entities tab. After selecting a different Ontology, select Save to apply changes and generate a new version. Changing the selected Ontology will reset the data scope of the SDK, clearing any selected object, action or link types.
Publish new Ontology SDK versions
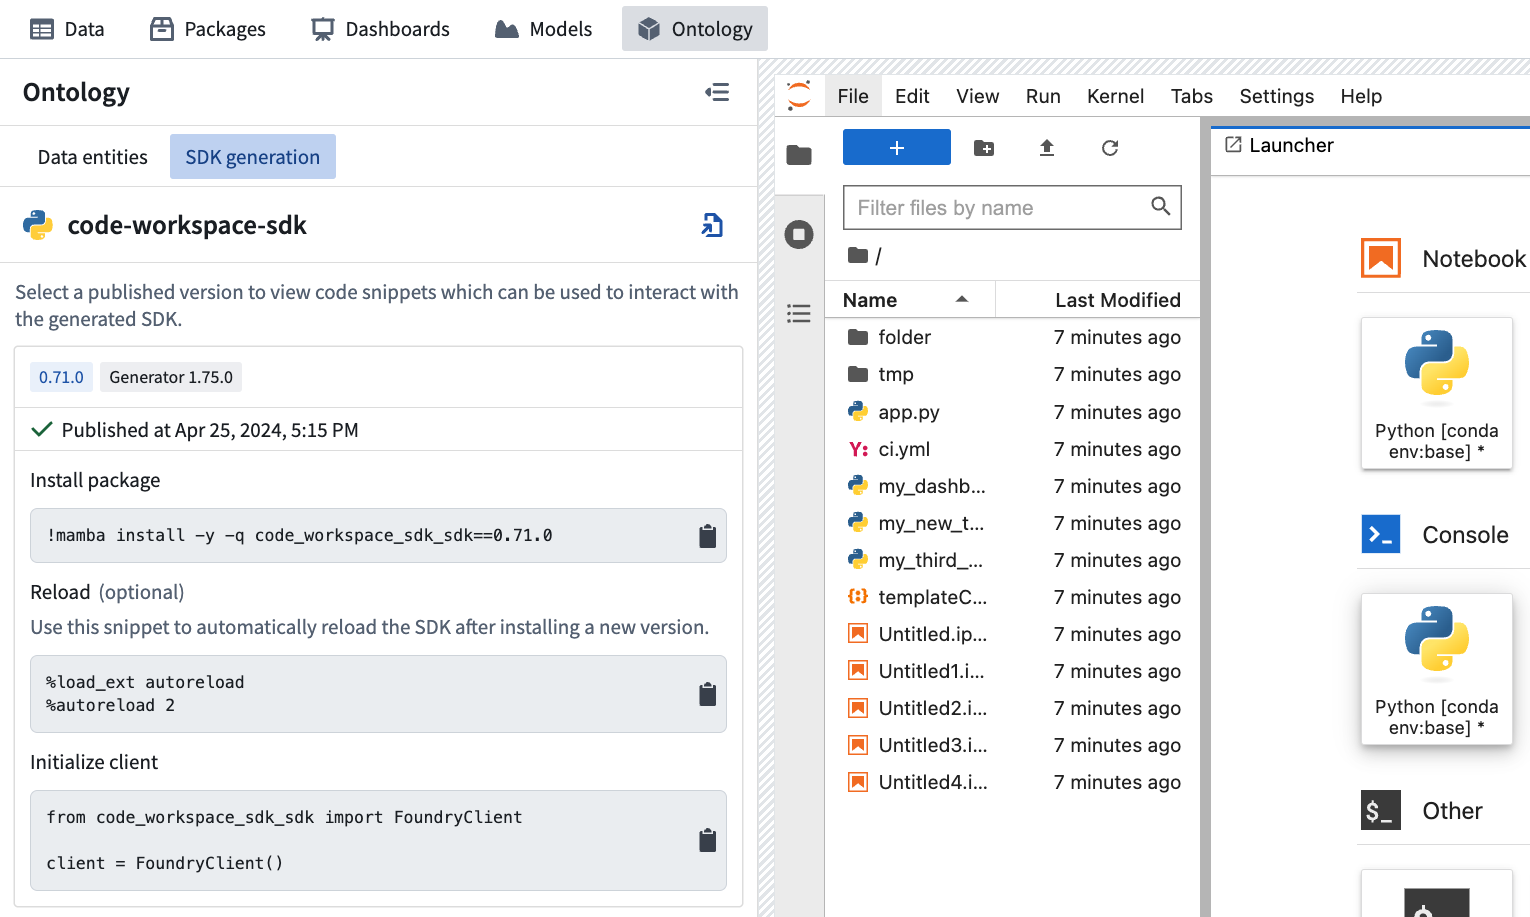
Once configured, new Ontology SDK versions can be published using the Generate new version button found at the bottom of the Ontology side panel. Published and pending versions can be inspected through the SDK generation tab.

After selecting Generate new version, the newly created version will be visible in the SDK generation tab. SDK versions are not usable until the status shows as “Published”.
Common reasons for publishing to fail include:
- Using action types without importing dependent object types.
- Using object types that have backing data sources which are not present in the project scope.

Use Ontology SDK versions in code
Successfully published versions can be imported and used in code from within your editor. First, click on the card for the version you want to use within the SDK generation tab of the Ontology side panel. This will expand the card with several code snippets tailored to your editor’s language. Clicking on a snippet will add it to the clipboard so that it can be pasted into your editor.
The visible snippets will vary depending on your editor’s language. All supported languages have the “Install package” snippet which is used to install a version of your SDK and the “Initialize client” snippet which is used to import the SDK and initialize a Foundry client to interact with the Ontology.
Use the Ontology SDK
After the Ontology SDK has been successfully published, follow the instructions to install and import the SDK. You can run the following the command:
!mamba install -y -q my_sdk_package
Next, the following code snippet is used to initialize the FoundryClient, which will enable you to start using the Ontology SDK.
Copied!1 2from my_sdk_package import FoundryClient client = FoundryClient()
Basic usage examples
Any imported object or link type can be selected in the Data entities tab to view usage examples for that specific resource. The following examples are longer, more general examples that demonstrate end-to-end OSDK usage in Code Workspaces.
Python OSDK usage example
The following example demonstrates how to interact with the OSDK using Python. This example assumes that the last successfully published version of your SDK includes object type "Aircraft" and action type "ActionMode". The term my_sdk_package in this example should be replaced with the package name of your SDK.
Copied!1 2 3 4 5 6 7 8 9 10 11 12 13 14 15 16 17 18 19 20 21 22 23 24 25 26 27AircraftObject = client.ontology.objects.Aircraft # Retrieve an object and view properties my_aircraft = AircraftObject.get(1) my_aircraft.date_of_manufacture # Iterate over objects for aircraft in AircraftObject.take(2): print(aircraft.current_location) # Aggregations AircraftObject.aggregate({"min_id": Aircraft.id.min(), "max_id": Aircraft.id.max(), "aircraft_count": Aircraft.count()}).compute() # Filter my_a330s = AircraftObject.where((Aircraft.type == "A330") | (Aircraft.id == 160)).take(1) # Actions: Validate and apply import datetime from my_sdk_package.types import ActionMode action_validation = client.ontology.actions.change_manufacture_date({"mode": ActionMode.VALIDATION_ONLY}, aircraft=1, date_of_manufacture="2020-05-01") if action_validation.result == "VALID": client.ontology.actions.change_manufacture_date(aircraft=1, date_of_manufacture="2023-05-26")
Time series properties
To access time series properties in a workspace, follow the preceding steps to create, publish, and import an Ontology SDK. Then access time series properties and manipulate them with the foundryTS library. This example shows how to retrieve the Denver object from a set of City objects and access its electricity price as a time series:
Copied!1 2 3 4 5 6 7 8 9 10 11 12 13 14from my_sdk_package import FoundryClient from foundryts import TimeSeries client = FoundryClient() city_objects = client.ontology.objects.City denver = city_objects.get("Denver") # This is the object's primary key denver_electricity_price_tsp = TimeSeries.from_osdk(denver.electricity_price) # Convert the series into a foundryts node node = denver_electricity_price_tsp.node() # Convert the series into a pandas dataframe df = denver_electricity_price_tsp.to_pandas()
R OSDK usage example
Code Workspaces supports OSDK in R via the reticulate ↗ package, which allows you to call Python from R.
This example demonstrates how to import a Python OSDK version into R and interact with an object type. This example assumes that your SDK includes an object type called "Aircraft". The term my_sdk_package should be replaced with the package name of your SDK.
Copied!1 2 3 4 5 6 7 8 9 10 11 12library(reticulate) osdk <- import("my_sdk_package") client <- osdk$FoundryClient() aircraft_object = client$ontology$objects$Aircraft # Retrieve 1 object aircraft_object$take(1L) # Retrieve object by ID aircraft_object$get("1")
As R and Python have different default numeric types, the L suffix has to be used within R when a Python API expects an integer. Learn more at the official documentation for reticulate. ↗
Jupyter®, JupyterLab®, and the Jupyter® logos are trademarks or registered trademarks of NumFOCUS.
RStudio® and Shiny® are trademarks of Posit™.
All third-party trademarks (including logos and icons) referenced remain the property of their respective owners. No affiliation or endorsement is implied.