Configure SAML 2.0 integration for Okta
This section contains Okta-specific steps for configuring the SAML 2.0 integration as part of the broader end-to-end authentication via SAML 2.0 tutorial.
If you received a Foundry setup link to configure your initial SAML integration, skip to the next step. Otherwise, you can add a new SAML provider by going to the Authentication tab in Control Panel and selecting Manage in the SAML section.

In Okta, create a SAML app integration by following these instructions ↗.
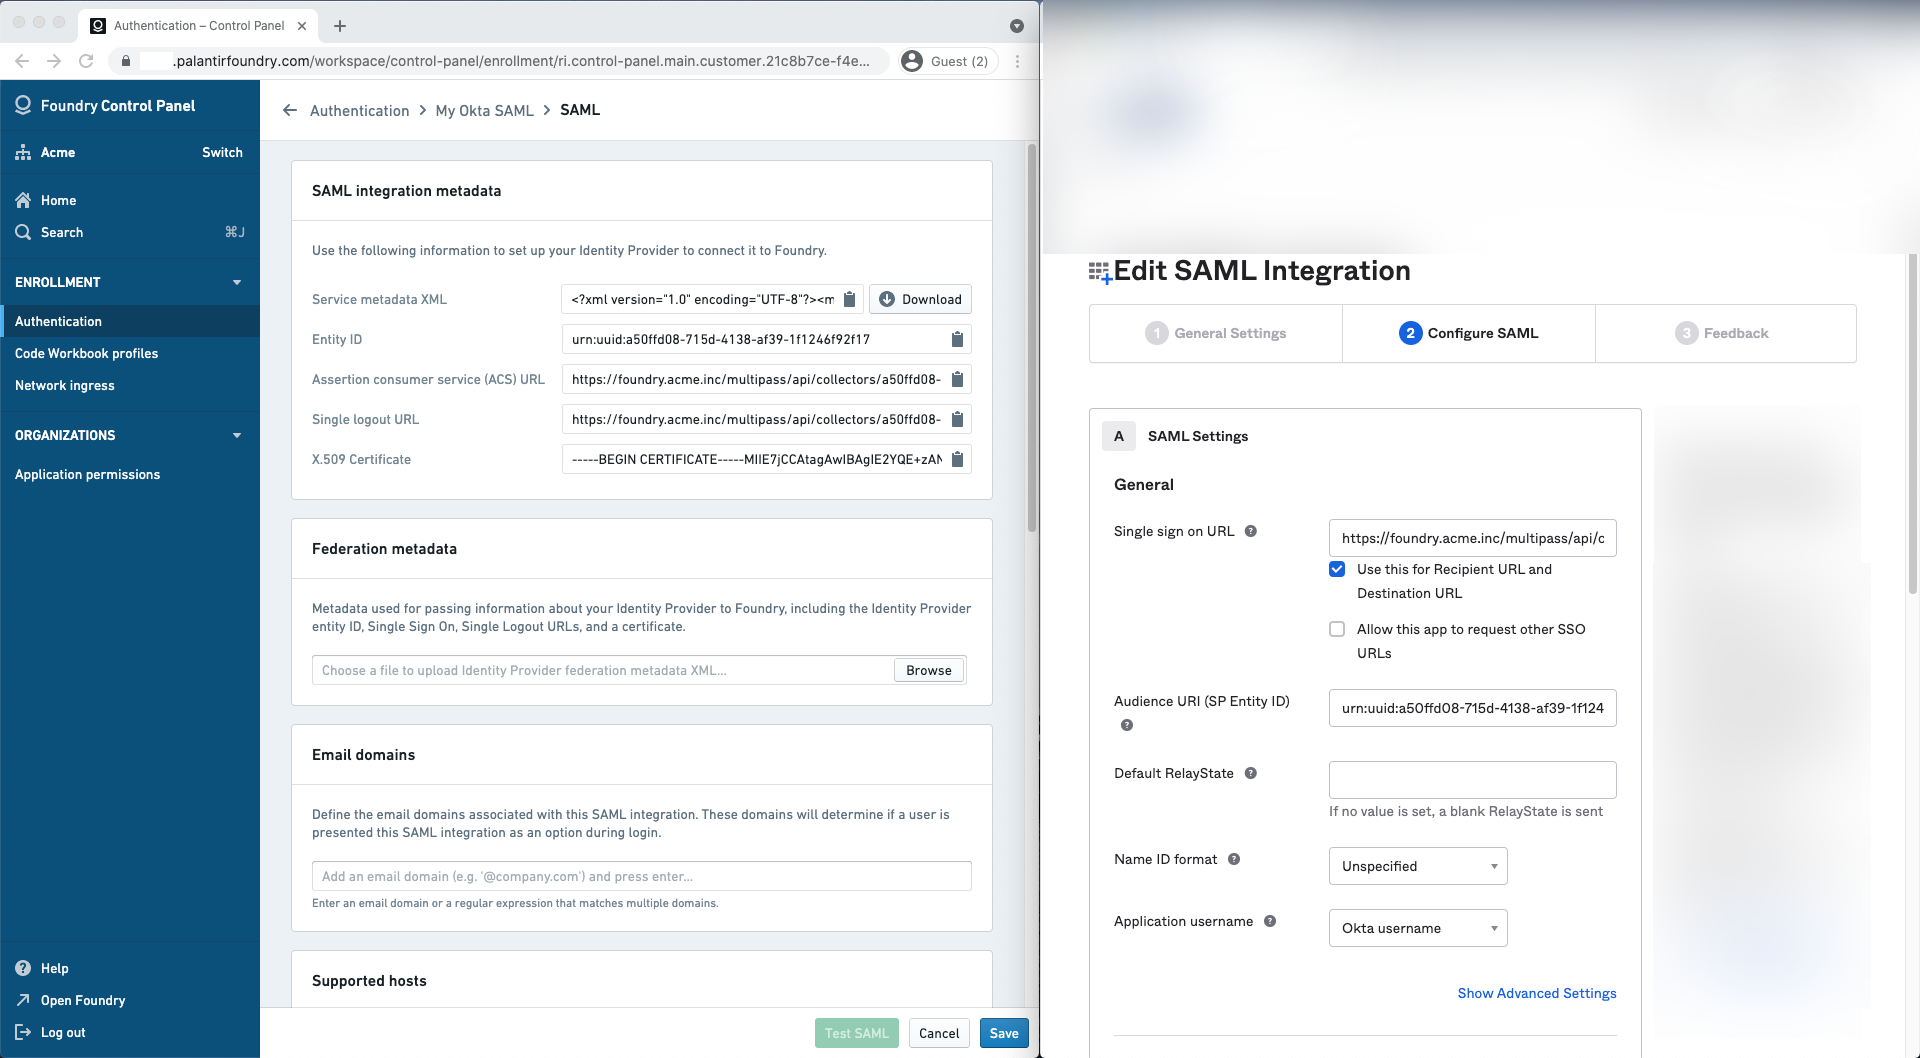
SAML integration metadata
Copy the following from the Foundry Control Panel (as shown on the left) to use in the Edit SAML Integration page for Okta (as shown on the right):
| Foundry | Okta |
|---|---|
| Assertion consumer service (ACS) URL | Single sign on URL |
| Entity ID | Audience URI (SP Entity ID) |

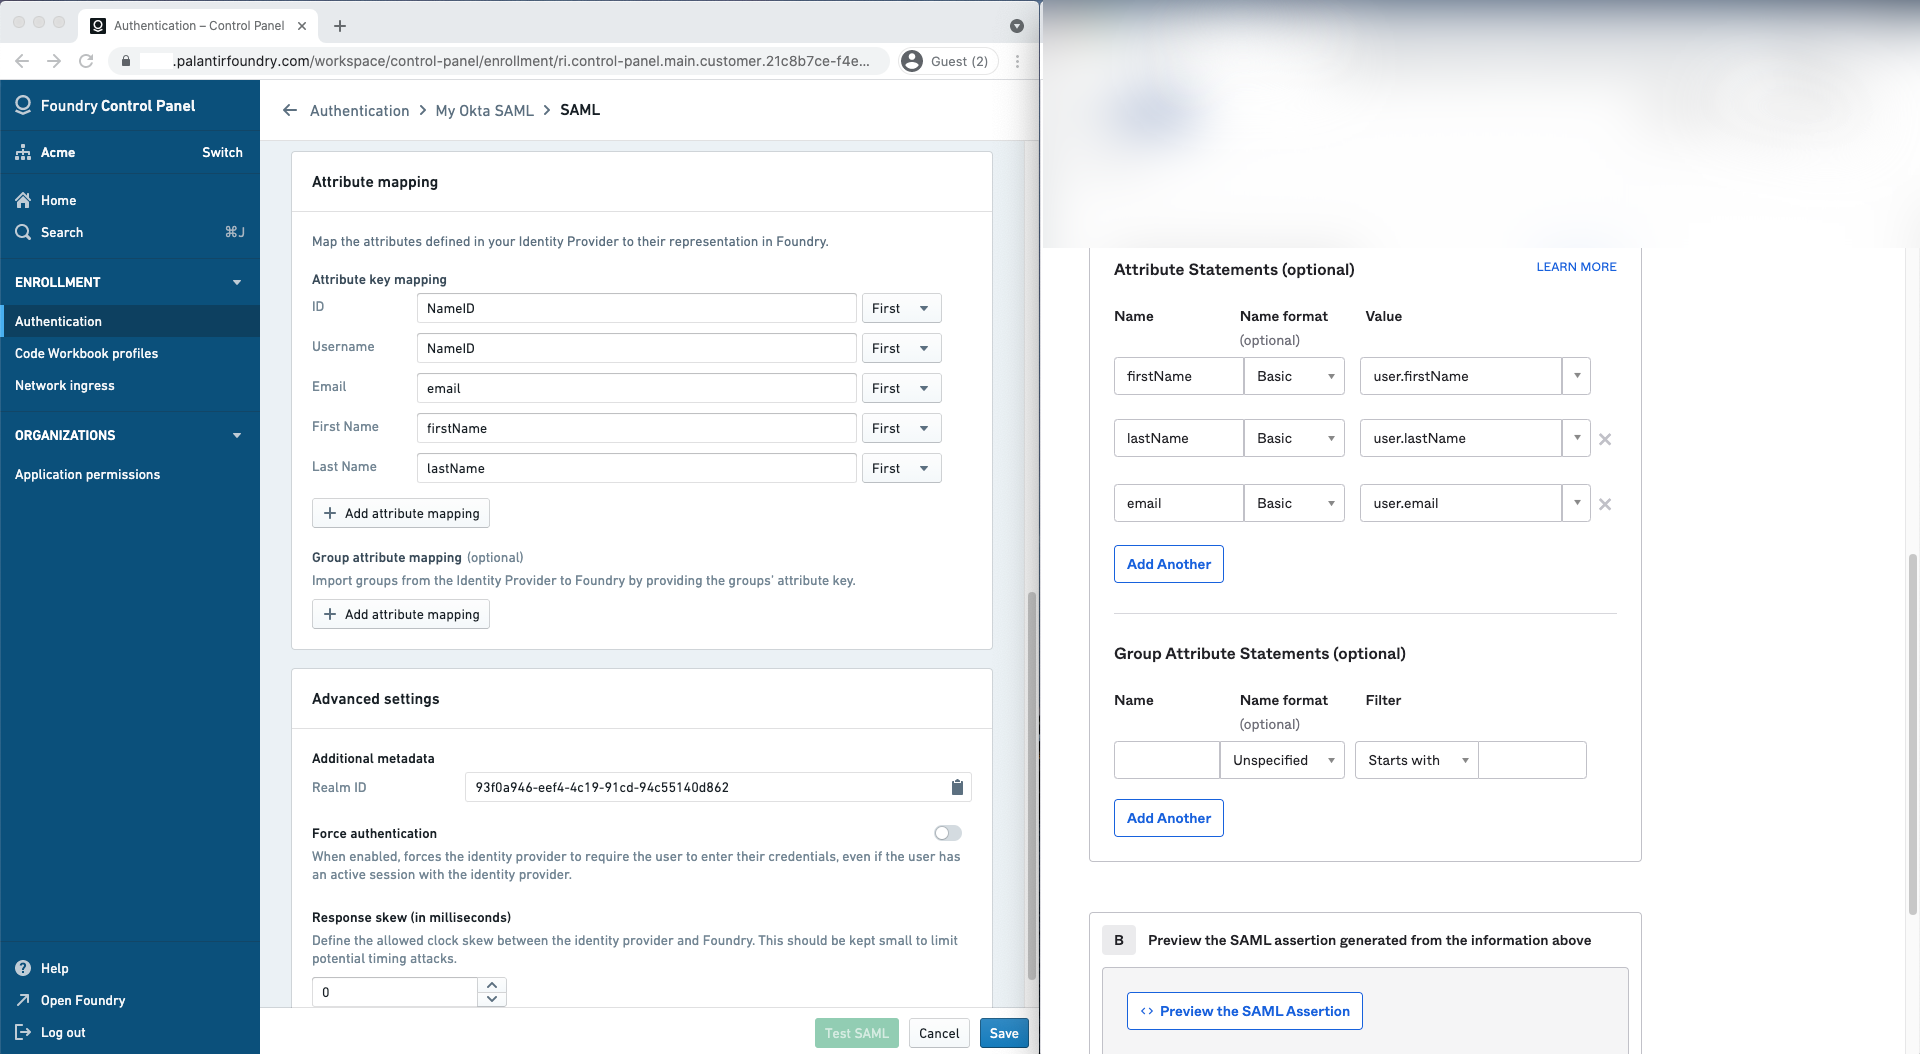
Attribute mapping
Okta does not define standard SAML attributes that can be used without further configuration beyond NameID. Attributes need to be defined in Okta first before they can be mapped in Foundry.
In Okta, declare the following attribute statements:
| Name | Name format | Value |
|---|---|---|
| firstName | Basic | user.firstName |
| lastName | Basic | user.lastName |
| Basic | user.email |
You can define the following mappings for user attributes in Attribute mapping. If using a Foundry setup link, Okta attribute mappings will be pre-filled.
- ID:
NameID - Username:
NameID(alternatively,email) - Email:
email - First name:
firstName - Last name:
lastName
You can also define attribute mappings to mirror your existing Okta groups in Foundry. Define one or more group attribute statements in Okta and map them in Group attribute mapping.

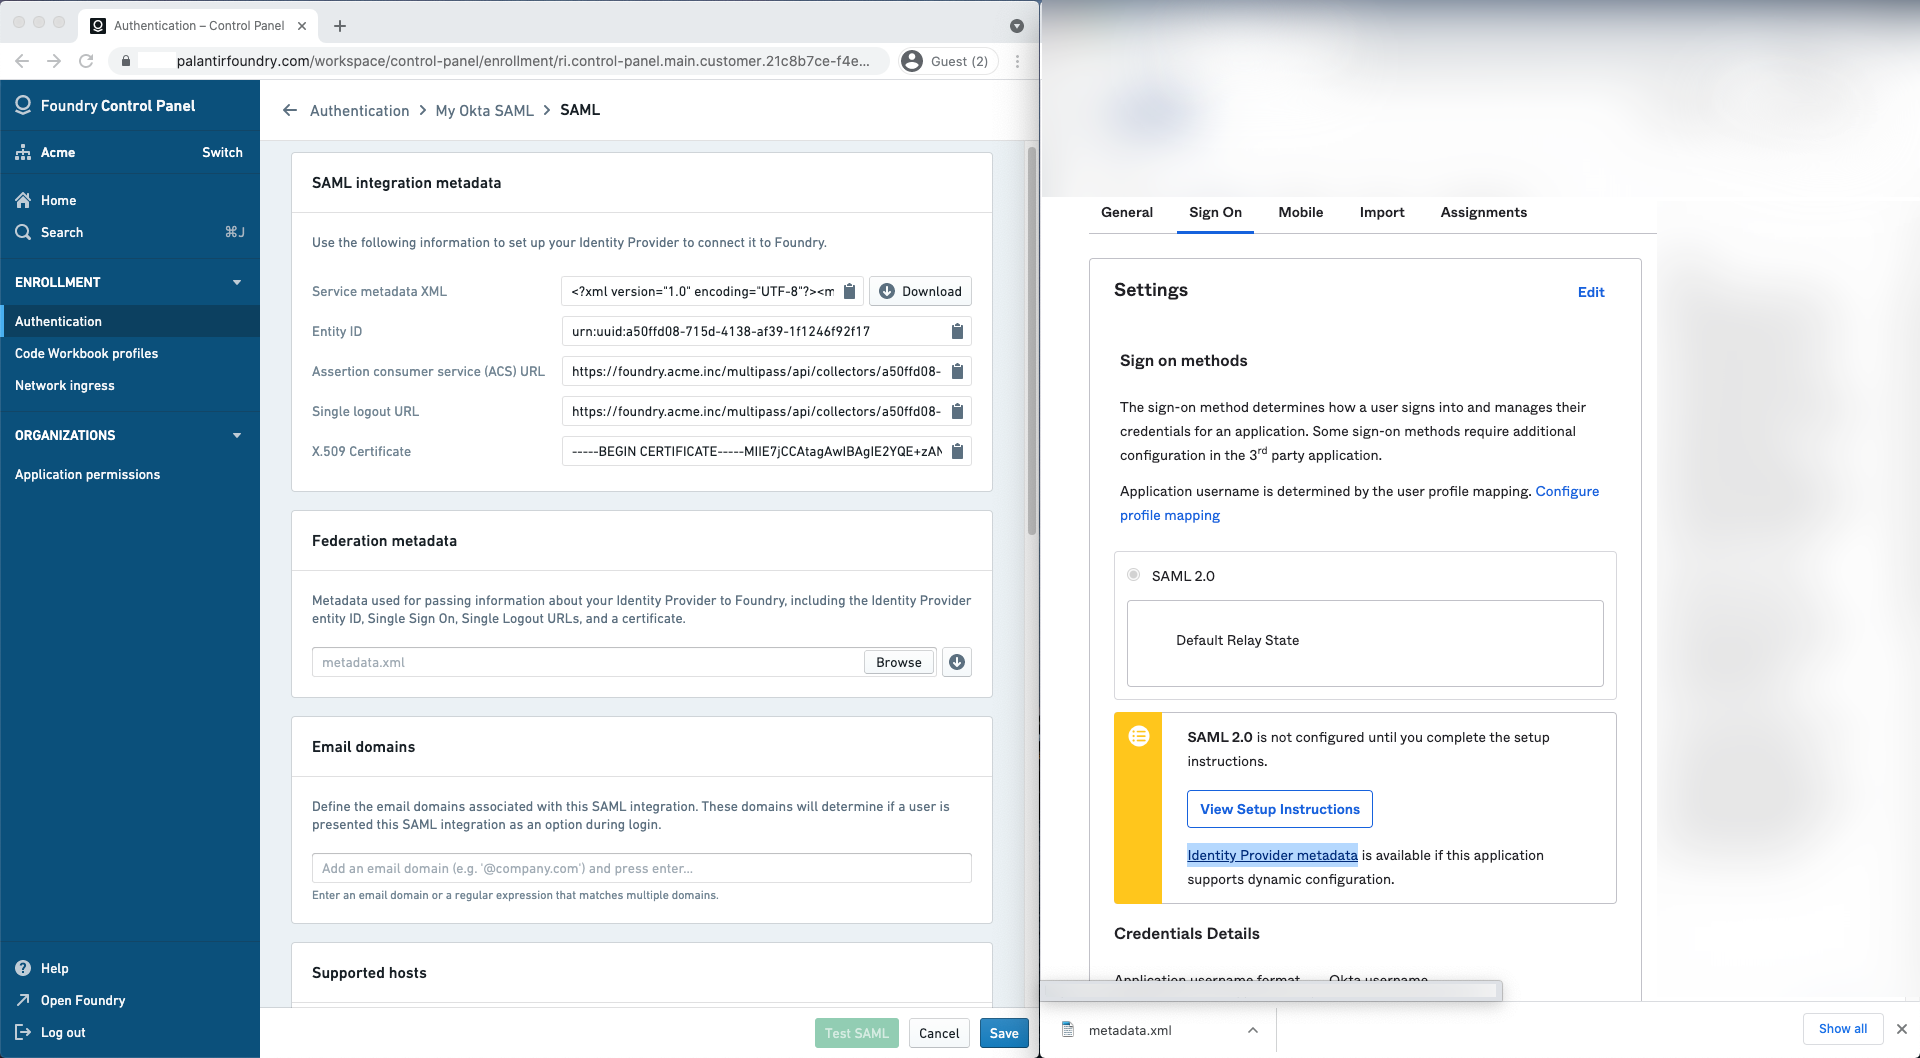
Identity provider metadata
In Okta, finish the creation of the SAML app integration then navigate to the Sign on tab to retrieve your identity provider’s metadata in an XML file under Identity provider metadata. Upload this to Foundry in the Identity provider metadata section.

Finish and save
In Foundry, add email domains associated with this SAML 2.0 integration under Email domains.
Finish by saving your SAML 2.0 integration and move on to multi-factor authentication.