Warning
注: 以下の翻訳の正確性は検証されていません。AIPを利用して英語版の原文から機械的に翻訳されたものです。
Copied!1 2 3 4 5 6 7 8 9 10 11 12 13 14 15 16 17 18 19 20 21 22 23 24 25 26 27 28 29# sklearnのデータセットからirisをロードします from sklearn.datasets import load_iris # データセットをトレーニングセットとテストセットに分割するための関数 from sklearn.model_selection import train_test_split # K近傍法を使用するためのライブラリ from sklearn.neighbors import KNeighborsClassifier # モデルの保存と読み込みをするためのライブラリ import pickle # アイリスのデータセットをロード iris = load_iris() # 特徴量をXに X = iris.data # ラベルをyに y = iris.target # データをトレーニングデータとテストデータに分割(テストデータの割合は40%) X_train, X_test, y_train, y_test = train_test_split( X, y, test_size=0.4, random_state=4) # K近傍法のモデルを作成(近傍の数は5) knn = KNeighborsClassifier(n_neighbors = 5) # モデルをトレーニングデータにフィットさせる knn.fit(X_train, y_train) # モデルをpickleファイルとして保存 with open("iris_model.pkl", "wb") as f: pickle.dump(knn, f)
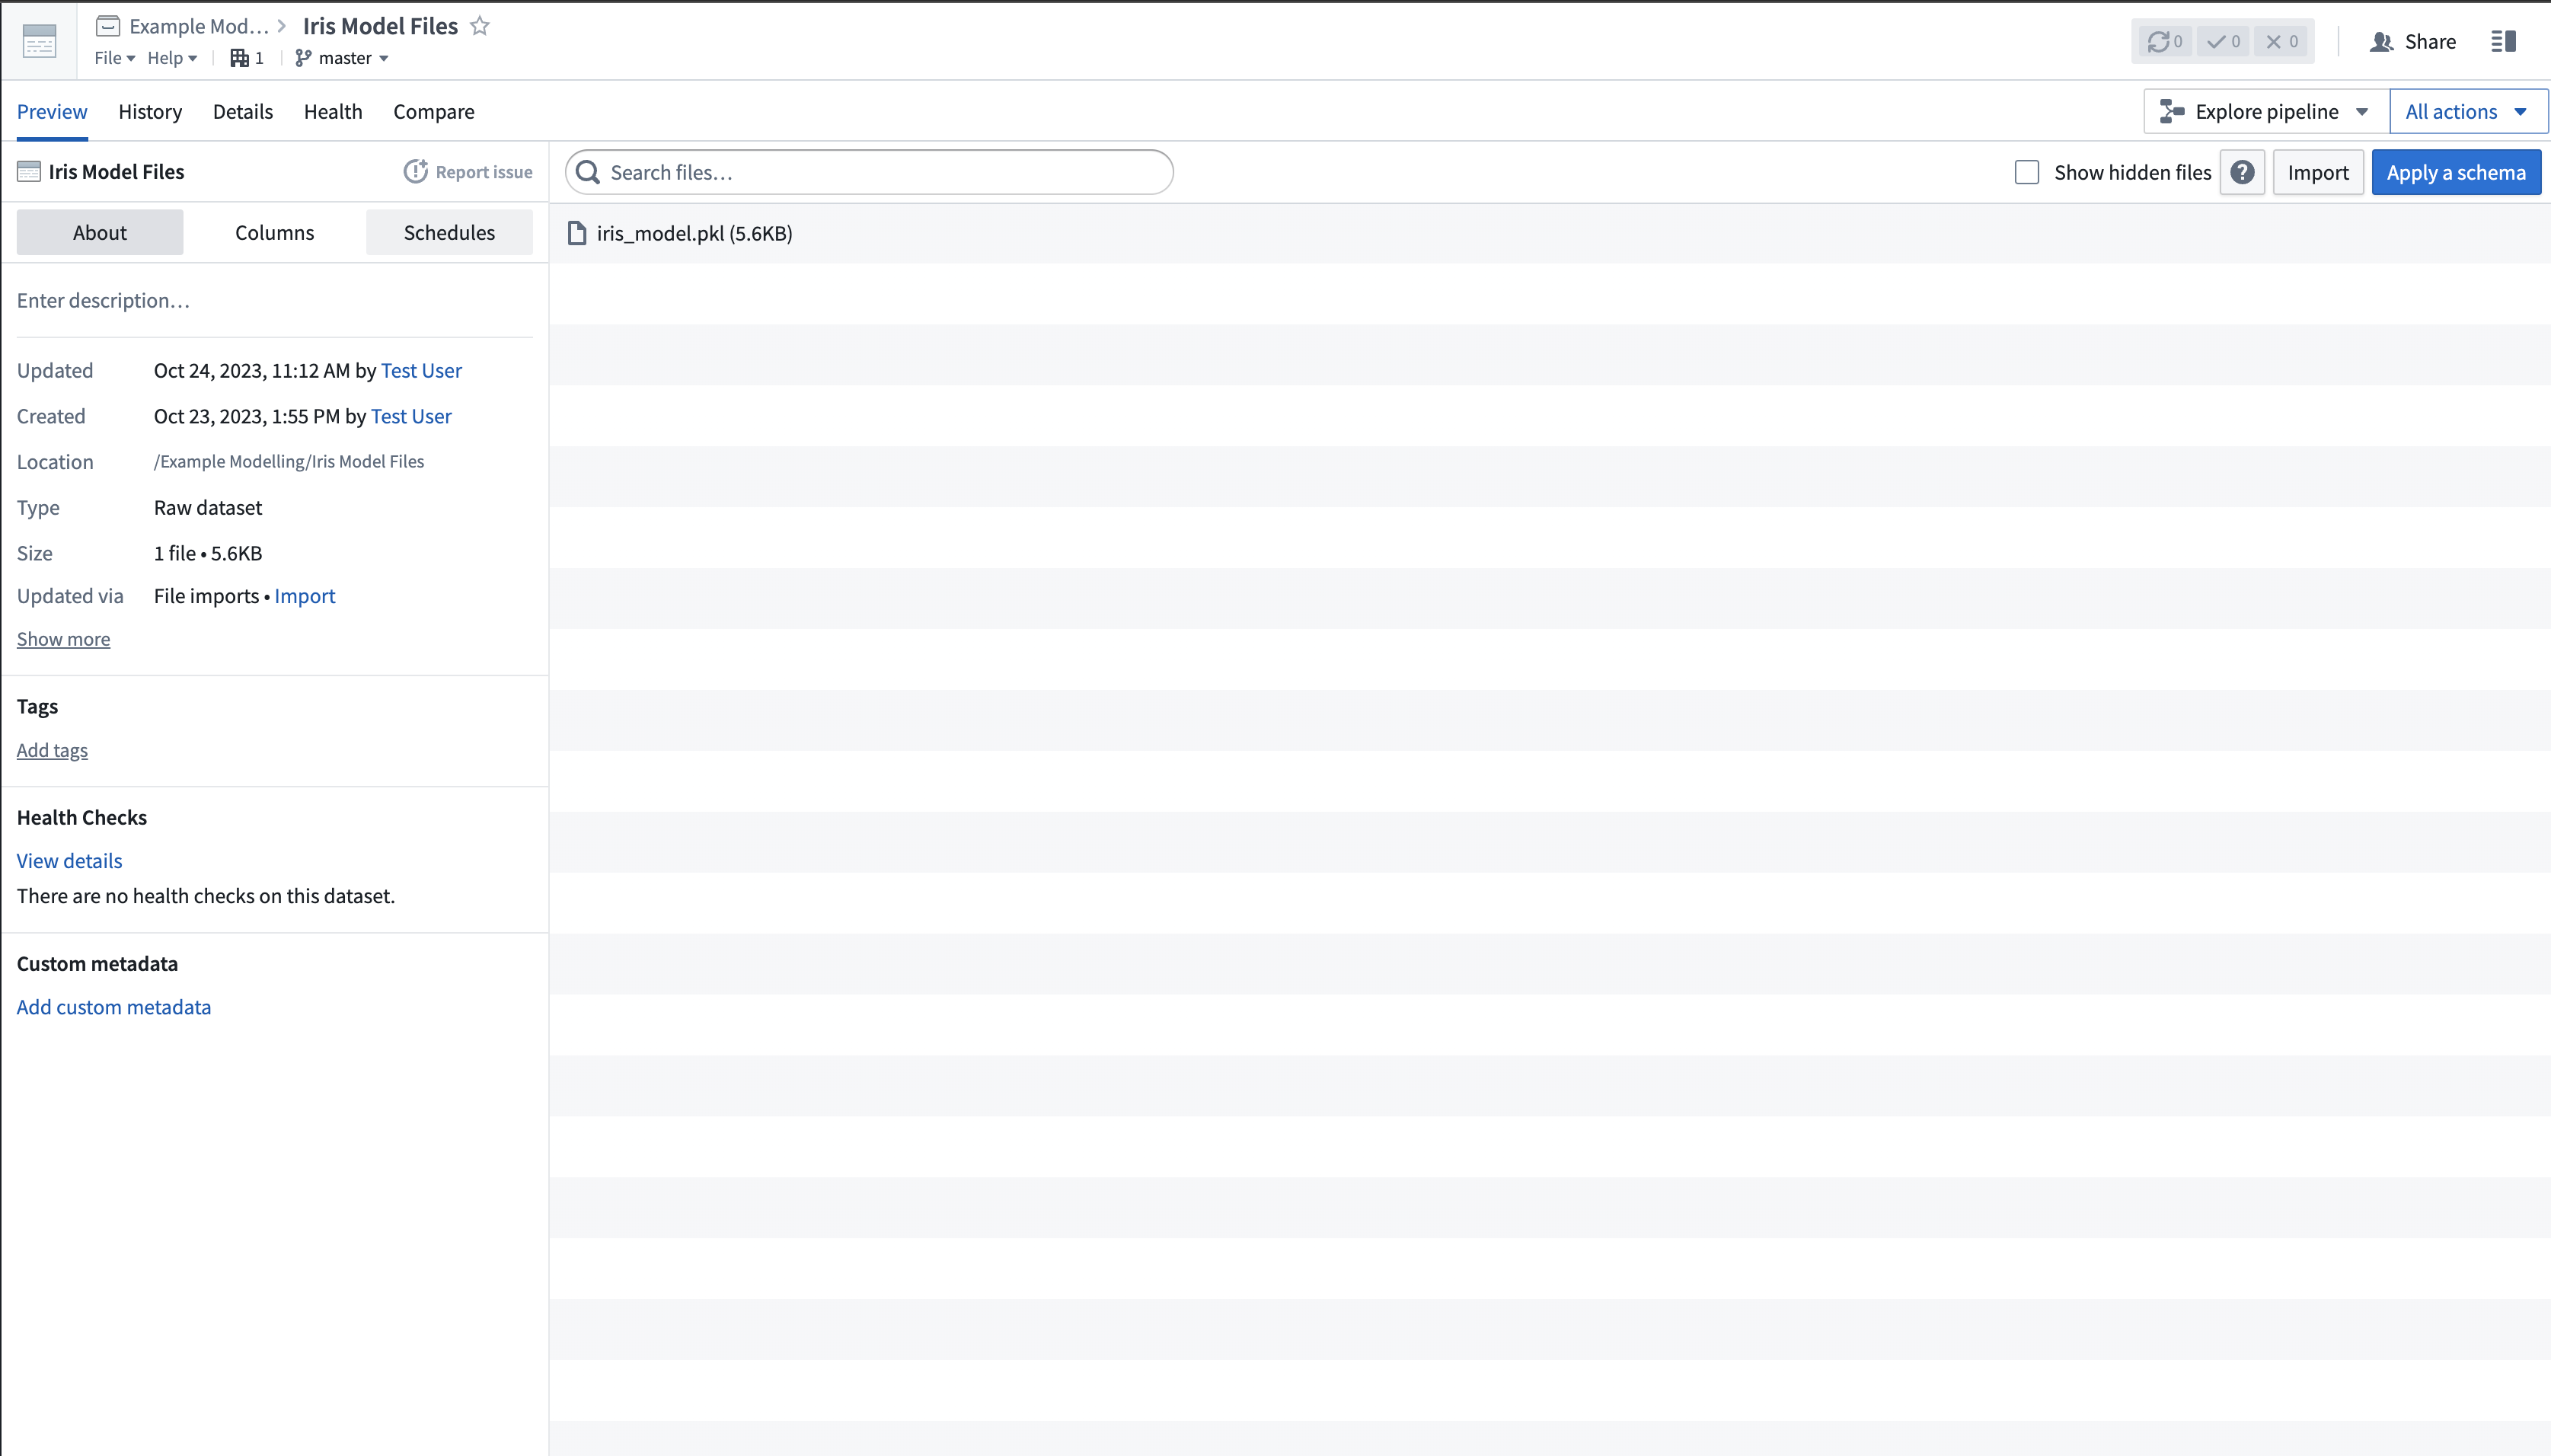
1. モデルファイルを非構造化データセットにアップロードする
scikit-train モデルファイルは、以下の画像に示すように、Palantir へ非構造化データセットとしてアップロードされます。
2. モデルアダプターのロジックを定義するためのモデルトレーニングテンプレートを作成する
Code Repositories アプリケーションで、新たに Model Integration リポジトリを作成し、Model Training 言語テンプレートを使用します。その後、scikit-learn 1.3.2 の依存関係を追加します。モデルファイルを読み込み、モデルを公開するロジックを定義します。
3. モデルファイルをモデルとして公開する
モデルアダプターのロジックが実行されると、モデルはプラットフォームに公開されます。
Copied!1 2 3 4 5 6 7 8 9 10 11 12 13 14 15 16 17 18 19 20 21 22 23 24 25 26 27 28 29 30 31 32 33 34 35 36 37 38 39 40 41 42 43 44 45 46 47 48 49 50 51 52from transforms.api import transform, Input import palantir_models as pm from palantir_models.transforms import ModelOutput from palantir_models_serializers import DillSerializer import pickle import os # モデルのトランスフォームを定義します @transform( model_files=Input("<Your Input Path>"), # 入力パス model_output=ModelOutput("<Your Output path>") # 出力パス ) def compute(model_files, model_output): fs = model_files.filesystem() # ファイルシステムを取得 with fs.open("iris_model.pkl", "rb") as f: # モデルを読み込む model = pkl.load(f) model_adapter = IrisModelAdapter(model, "target") # モデルアダプターを作成 model_output.publish( model_adapter=model_adapter # モデルアダプターを公開 ) # IrisModelAdapter クラスを定義します class IrisModelAdapter(pm.ModelAdapter): # 初期化メソッドを定義します @auto_serialize( model=DillSerializer(), # モデルのシリアライザー prediction_column_name=DillSerializer() # 予測列名のシリアライザー ) def __init__(self, model, prediction_column_name="target"): # 初期化 self.model = model # モデル self.prediction_column_name = prediction_column_name # 予測列名 # APIメソッドを定義します @classmethod def api(cls): column_names = ["sepal_length", "sepal_width", "petal_length", "petal_width"] # 列名 columns =[(name, float) for name in column_names] # 列情報 inputs = {"df_in": pm.Pandas(columns=columns)} # 入力 outputs = {"df_out": pm.Pandas(columns=columns+[("target", int)])} # 出力 return inputs, outputs # 入力と出力を返す # 予測メソッドを定義します def predict(self, df_in): inference_data = df_in # 推論データ predictions = self.model.predict(inference_data.values) # 予測 inference_data[self.prediction_column_name] = predictions # 予測結果を追加 return inference_data # 推論データを返す
4. 公開モデルの利用
モデルが公開されると、プラットフォームで推論のために利用する準備が整います。この例では、新しいモデリングの目的を作成し、モデルを提出します。
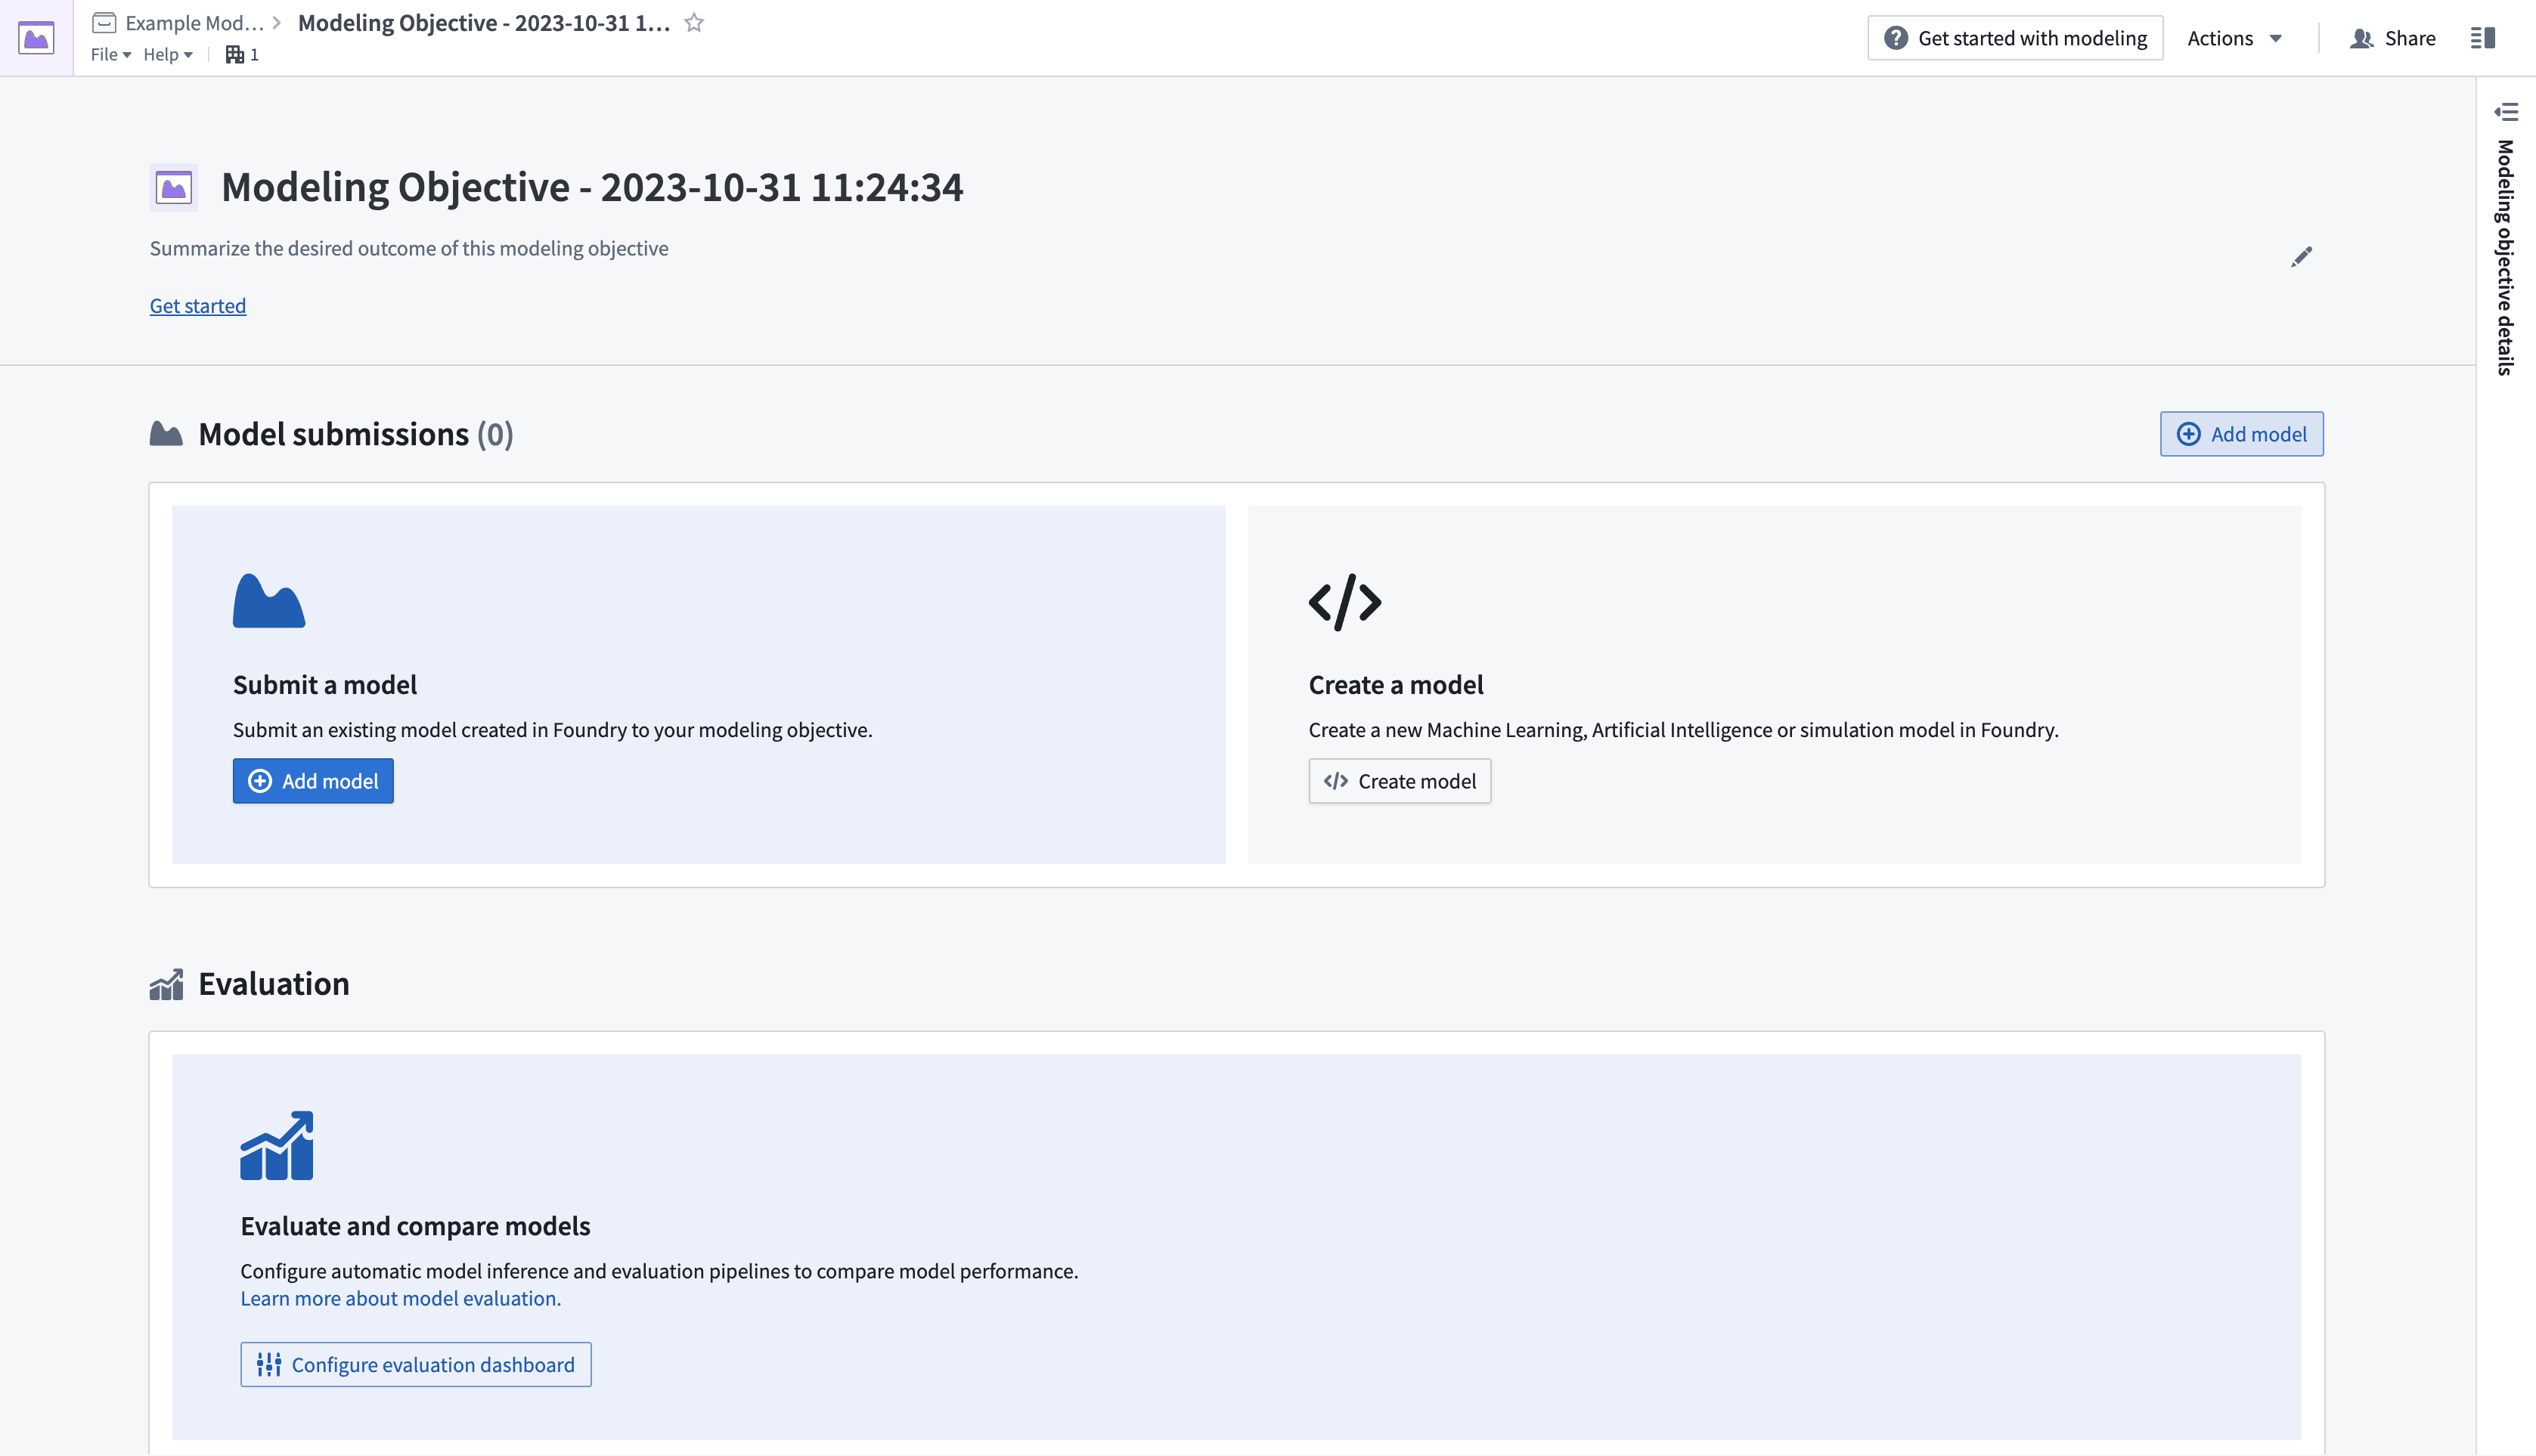
- プロジェクトのフォルダーに移動して、目的を設定したい場所を選び、その後New > Modeling Objectiveを選択して新しいモデリングの目的を作成します。これにより、Modeling Objectives アプリケーションが開きます。
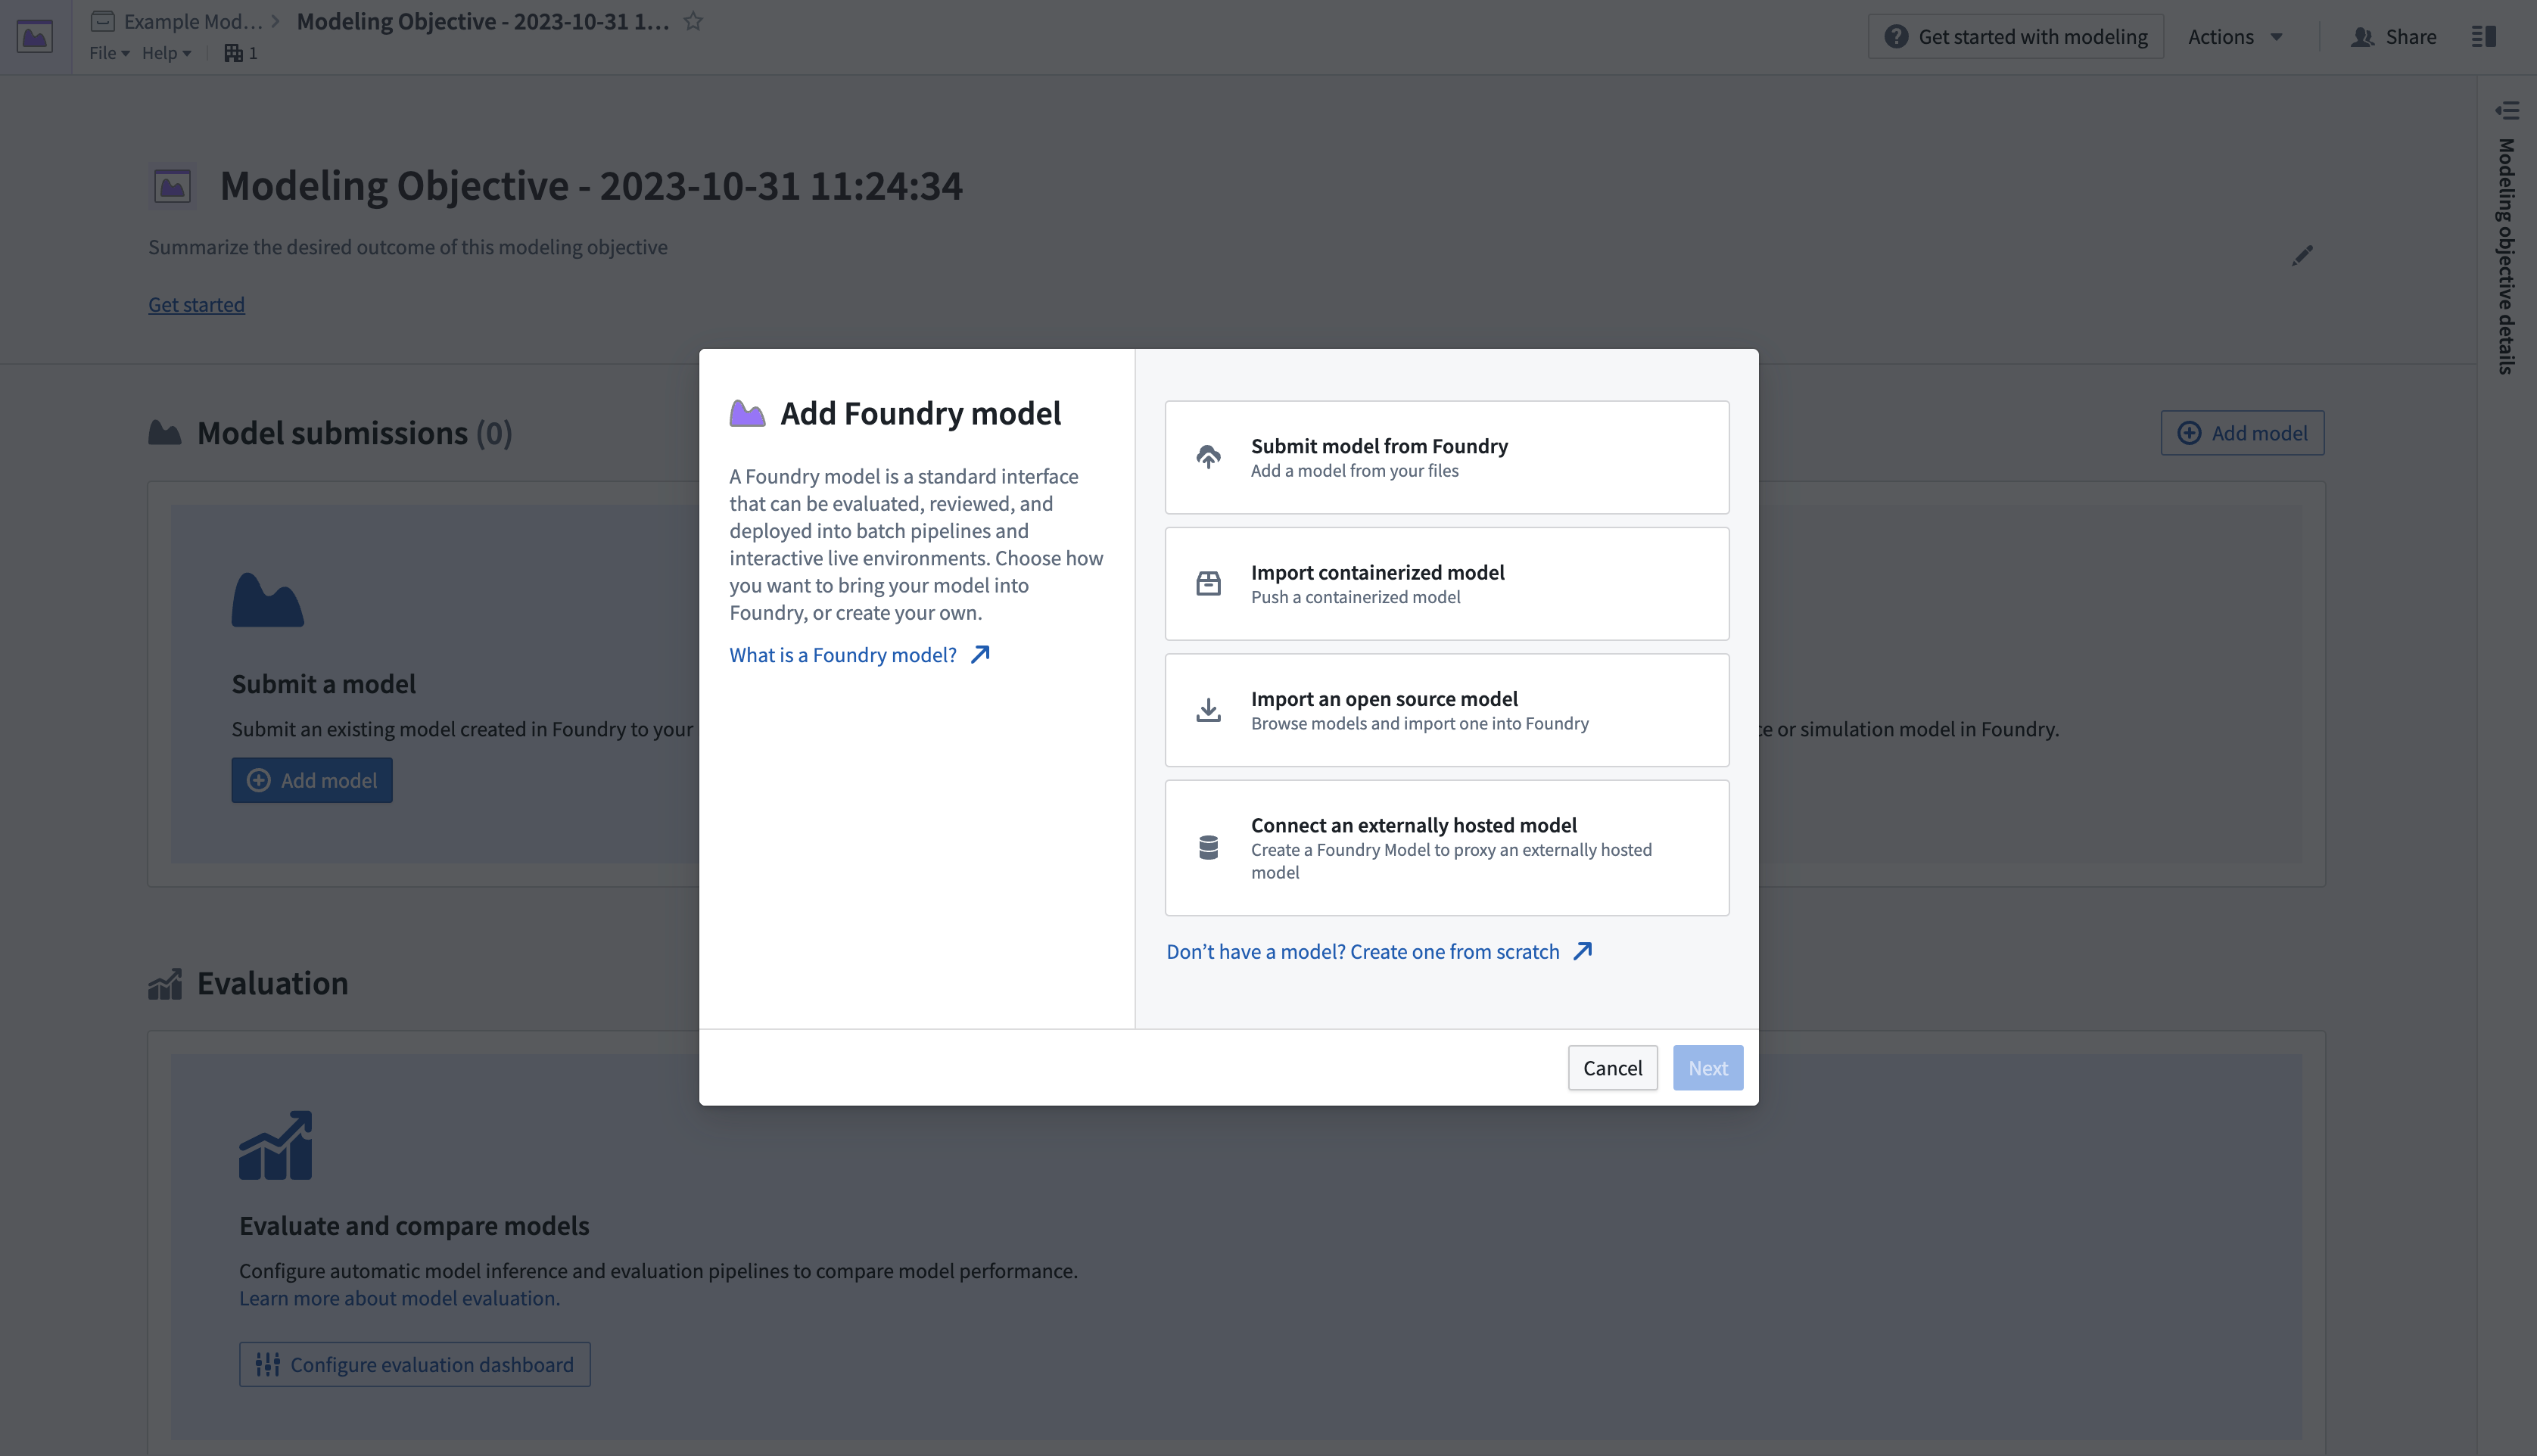
- 次に、目的にモデルを提出します。Model Submissions > Submit a Modelのセクションで、Add Modelを選択してダイアログを開きます。下記のように表示されます。
- Submit model from Foundryを選択し、次にNextを選択してダイアログを開きます。ここでは、プラットフォーム内の指定した場所から公開モデルをロードできます。
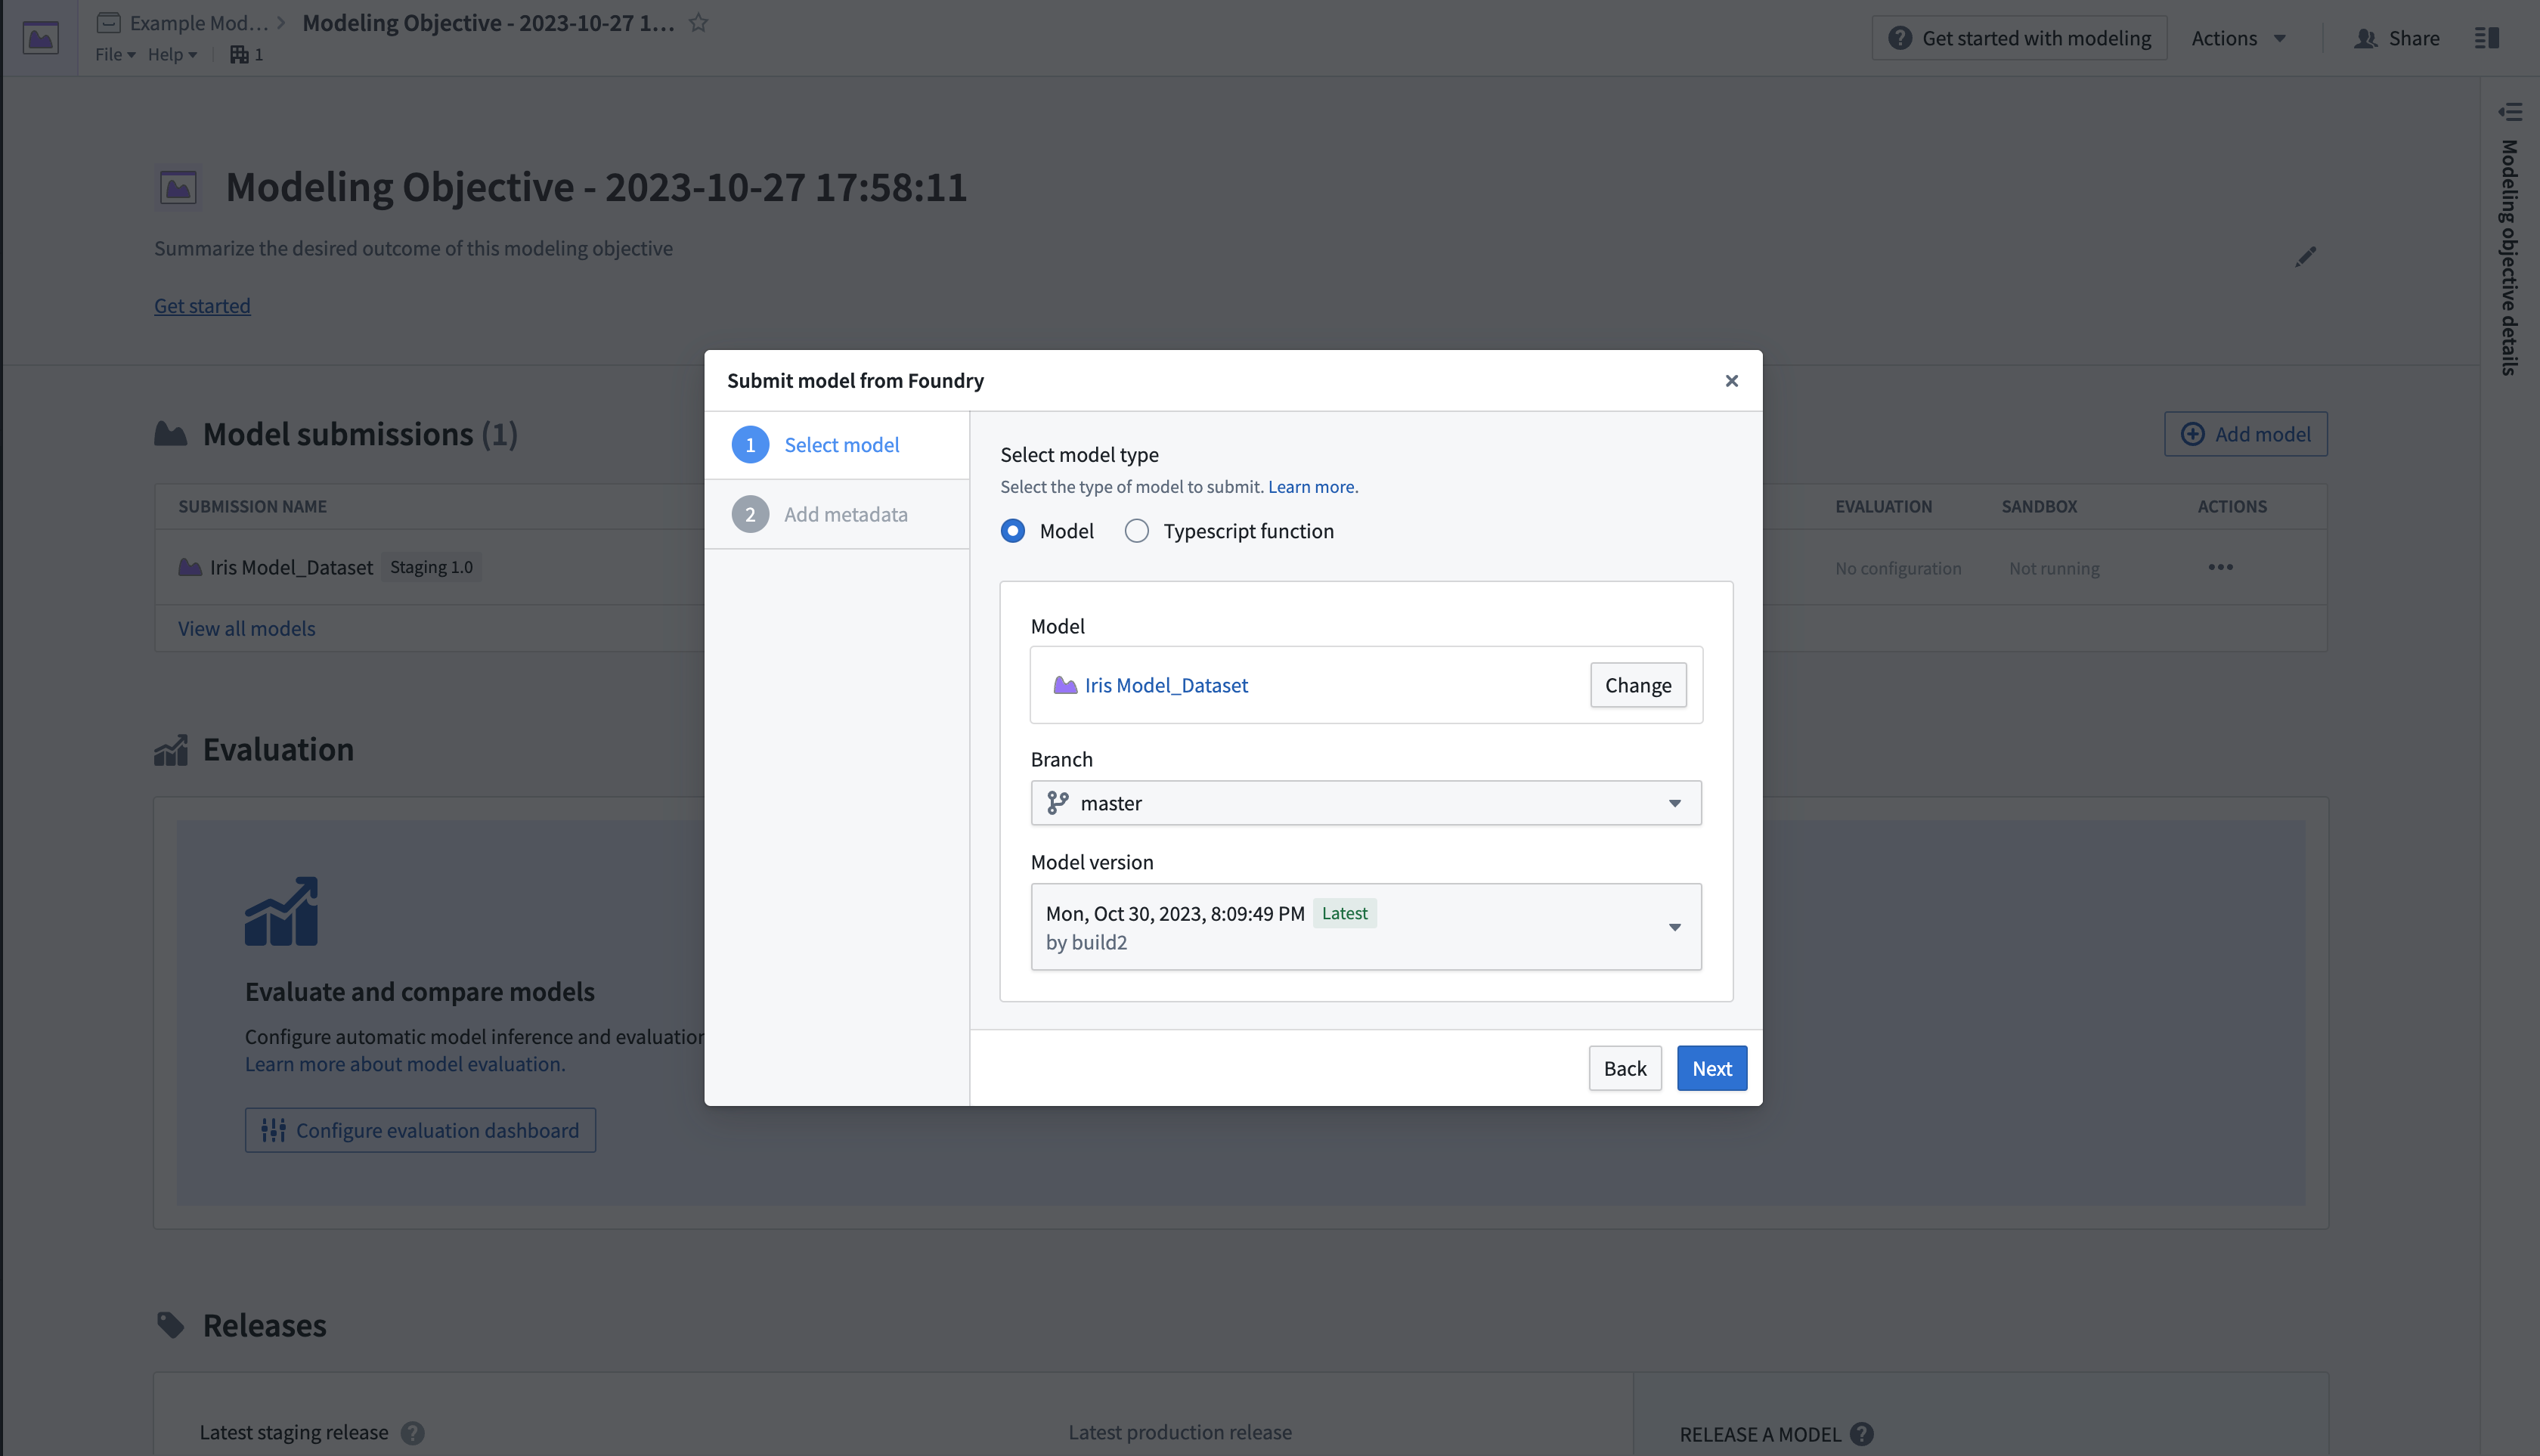
- モデルが提出されると、モデリングの目的の概要ページに戻されます。ここでModel submissionsセクションが表示され、提出に関する情報が表示されます。
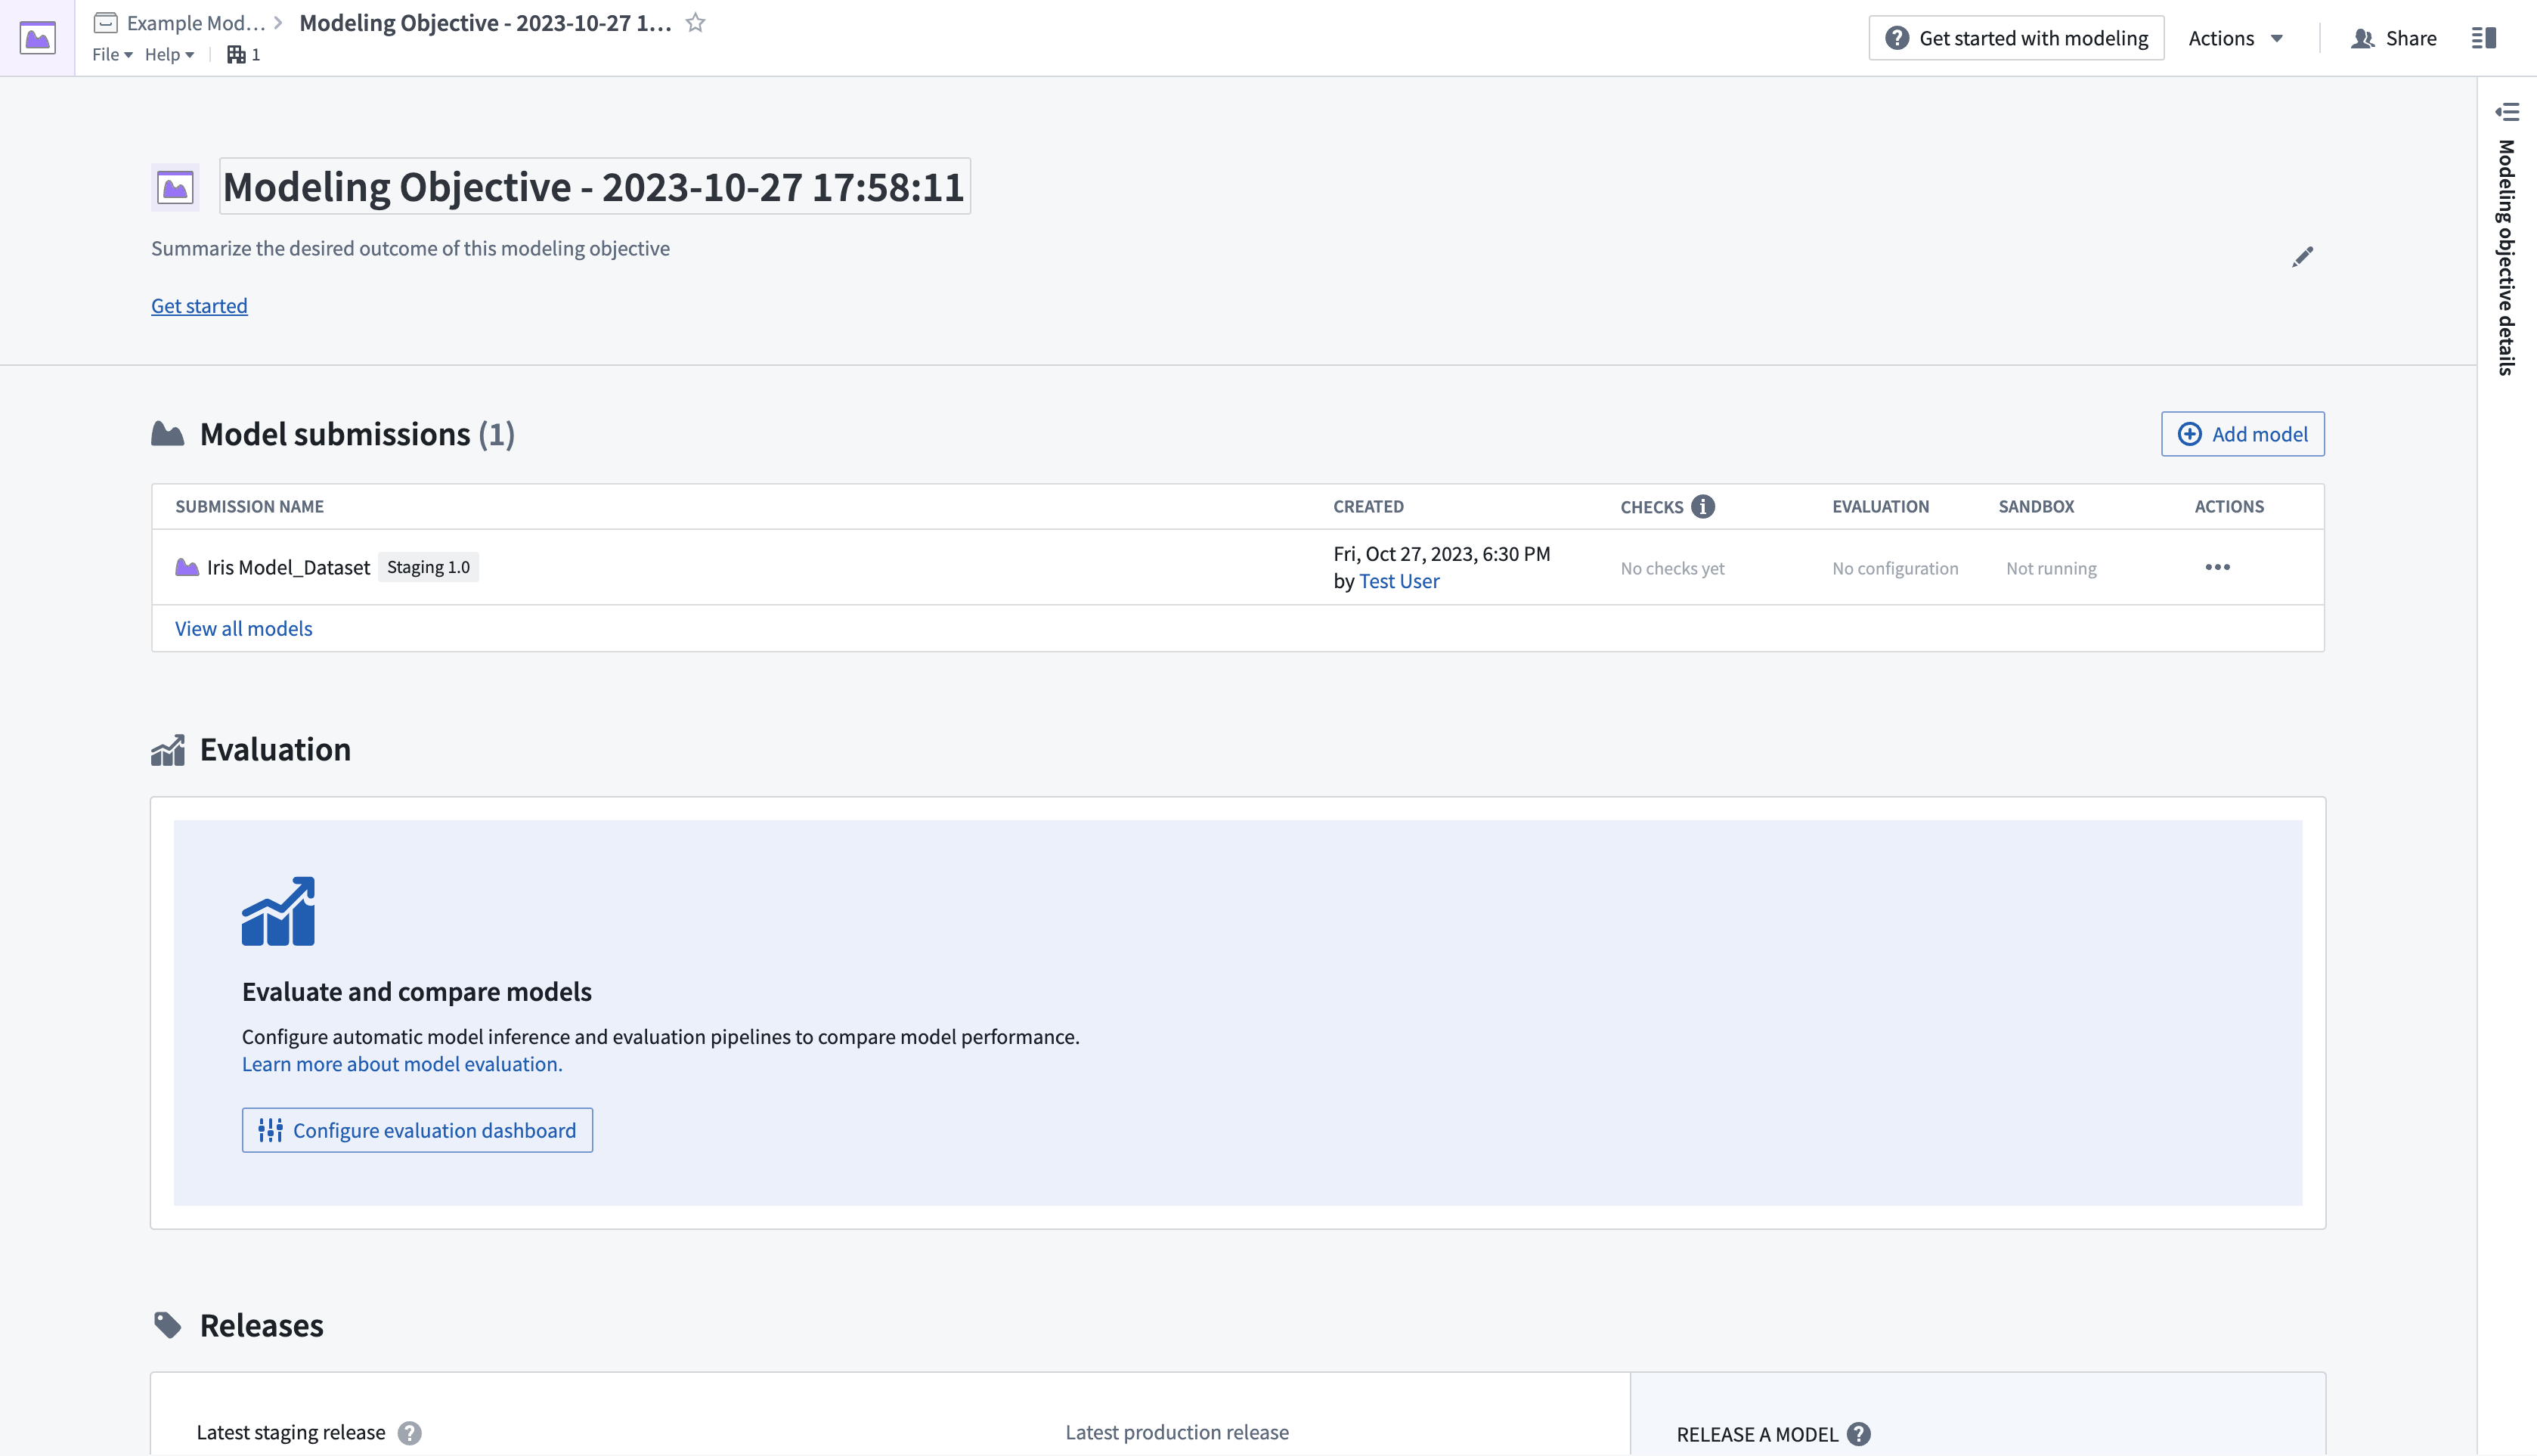
- Model submissionsセクションから新しく提出されたモデルを選択して、モデルページを開きます。
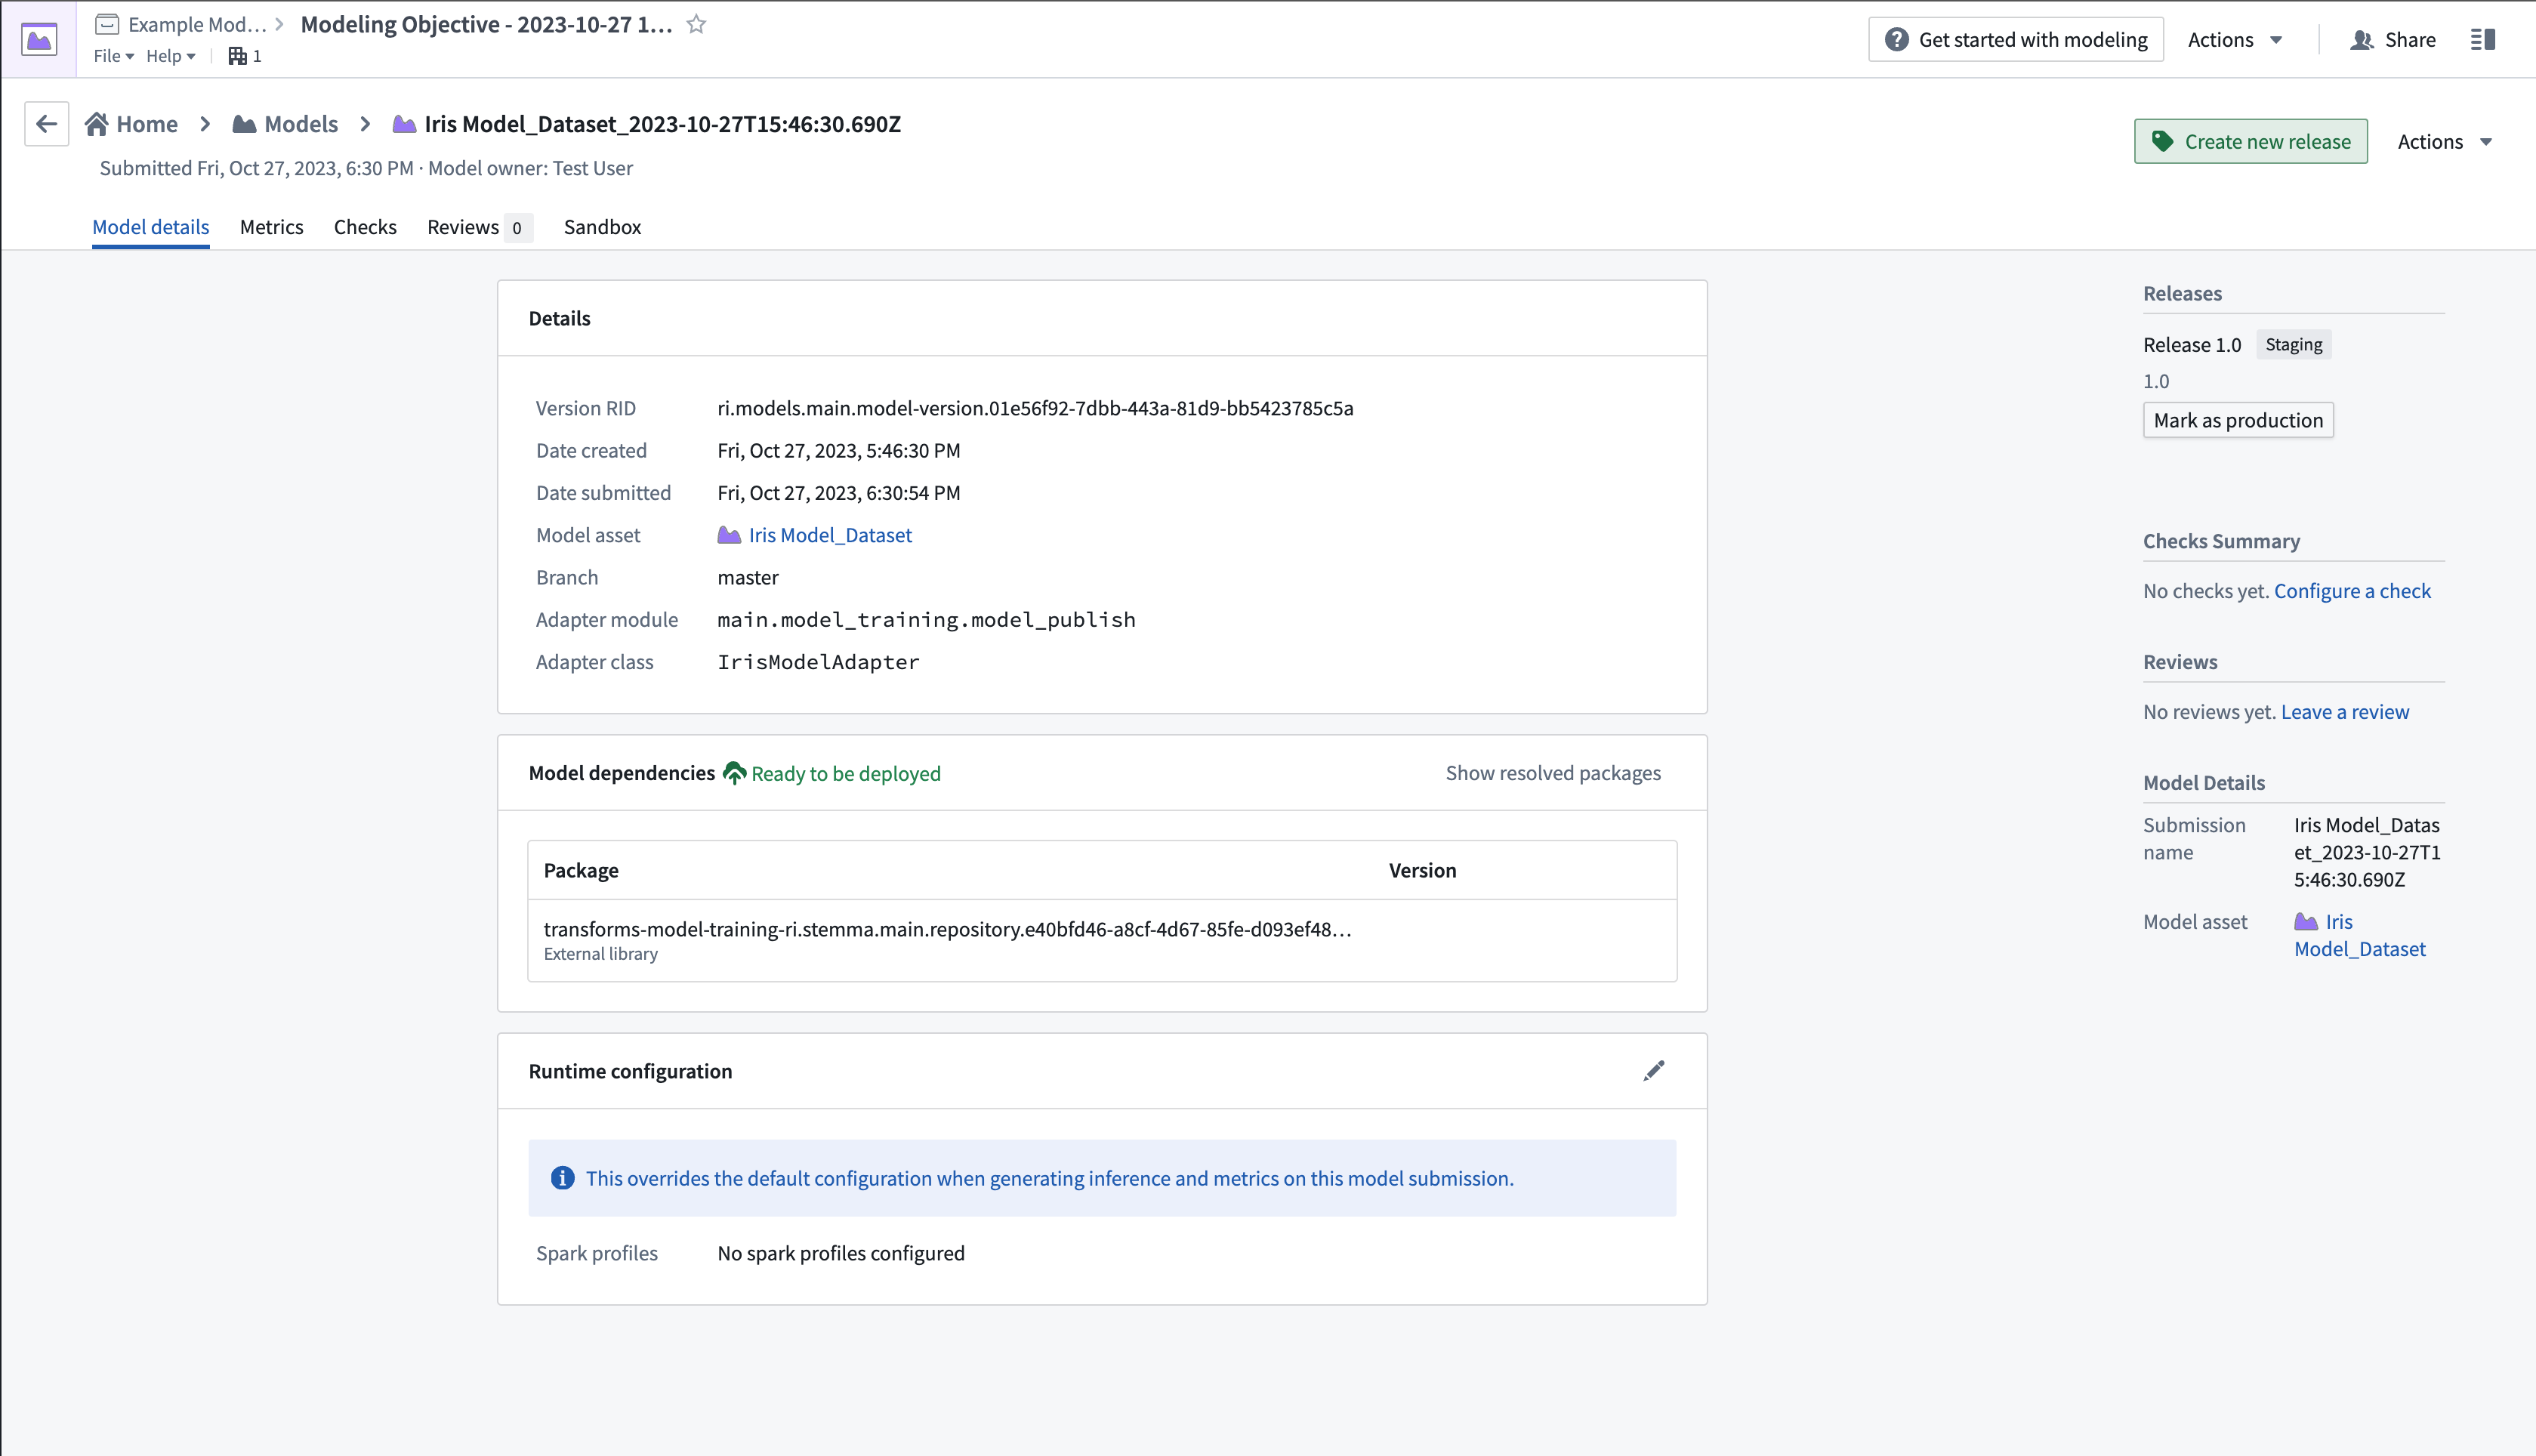
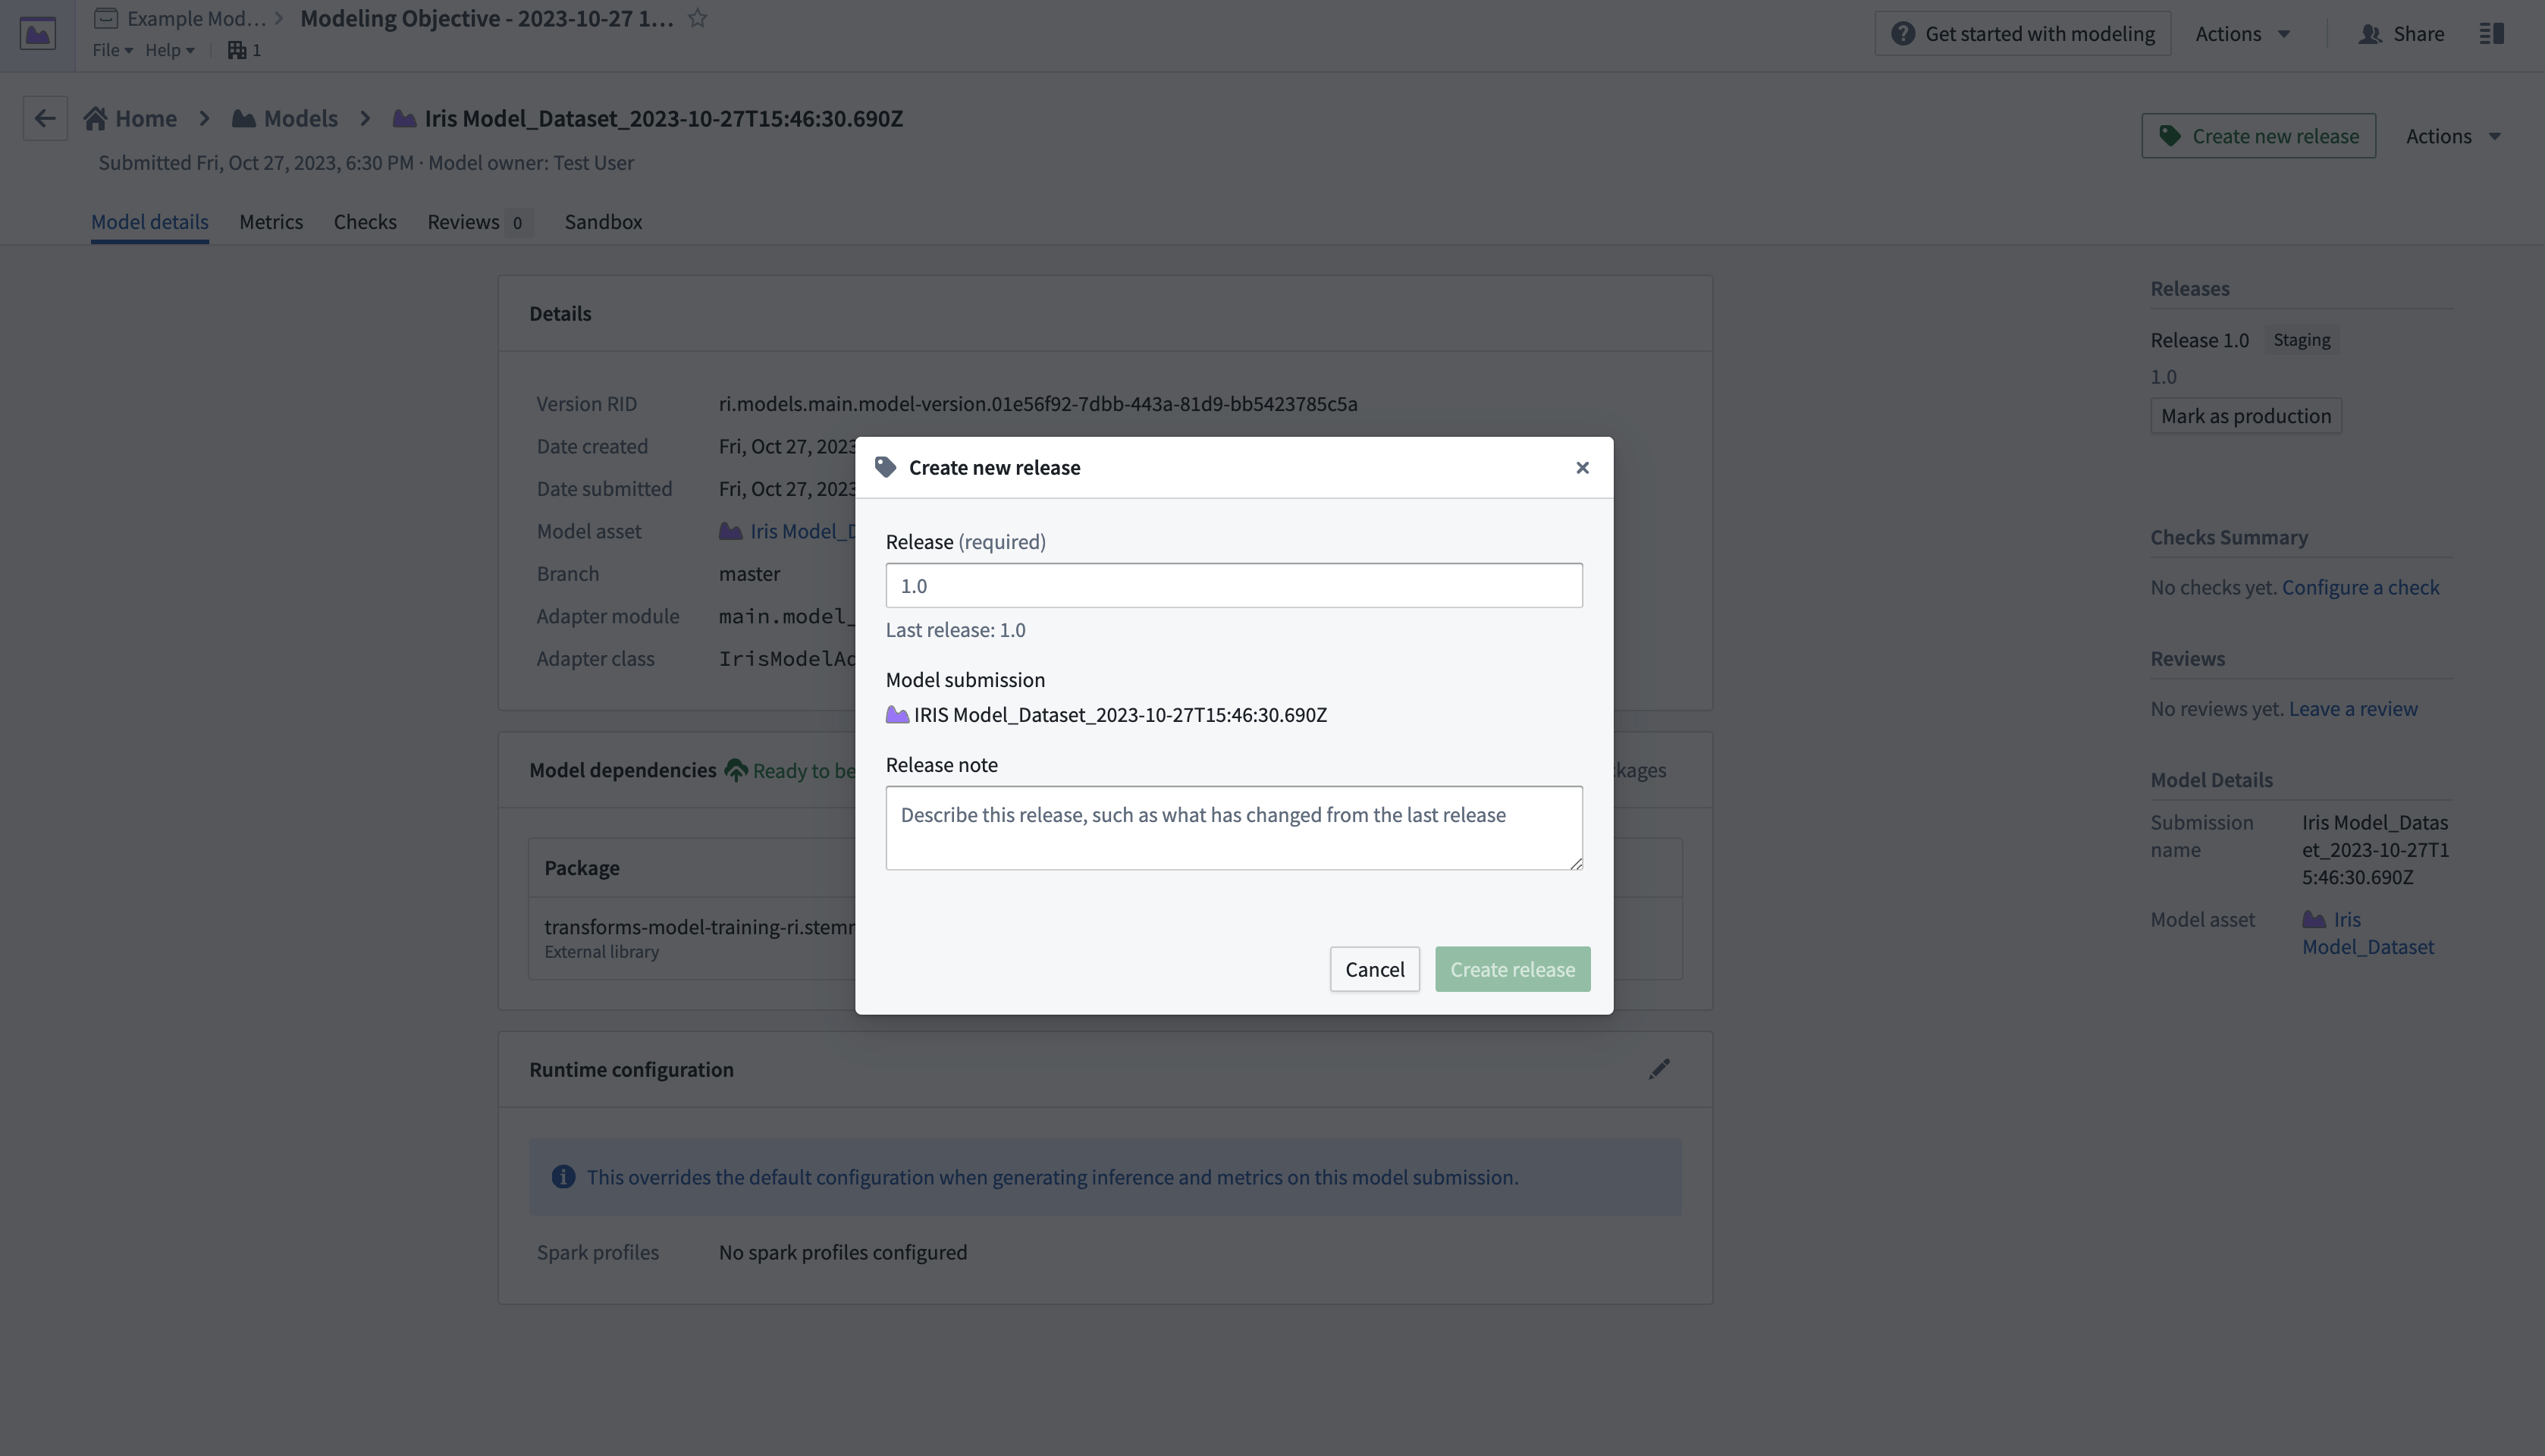
- 右上隅のCreate new releaseを選択して新しいウィンドウを開き、リリースを作成します。
- リリースを作成した後、画面の左上にある名前を選択してモデリングの目的の概要ページに戻ります。Deploymentsまでスクロールダウンし、Create deploymentを選択して別のダイアログウィンドウを開きます。
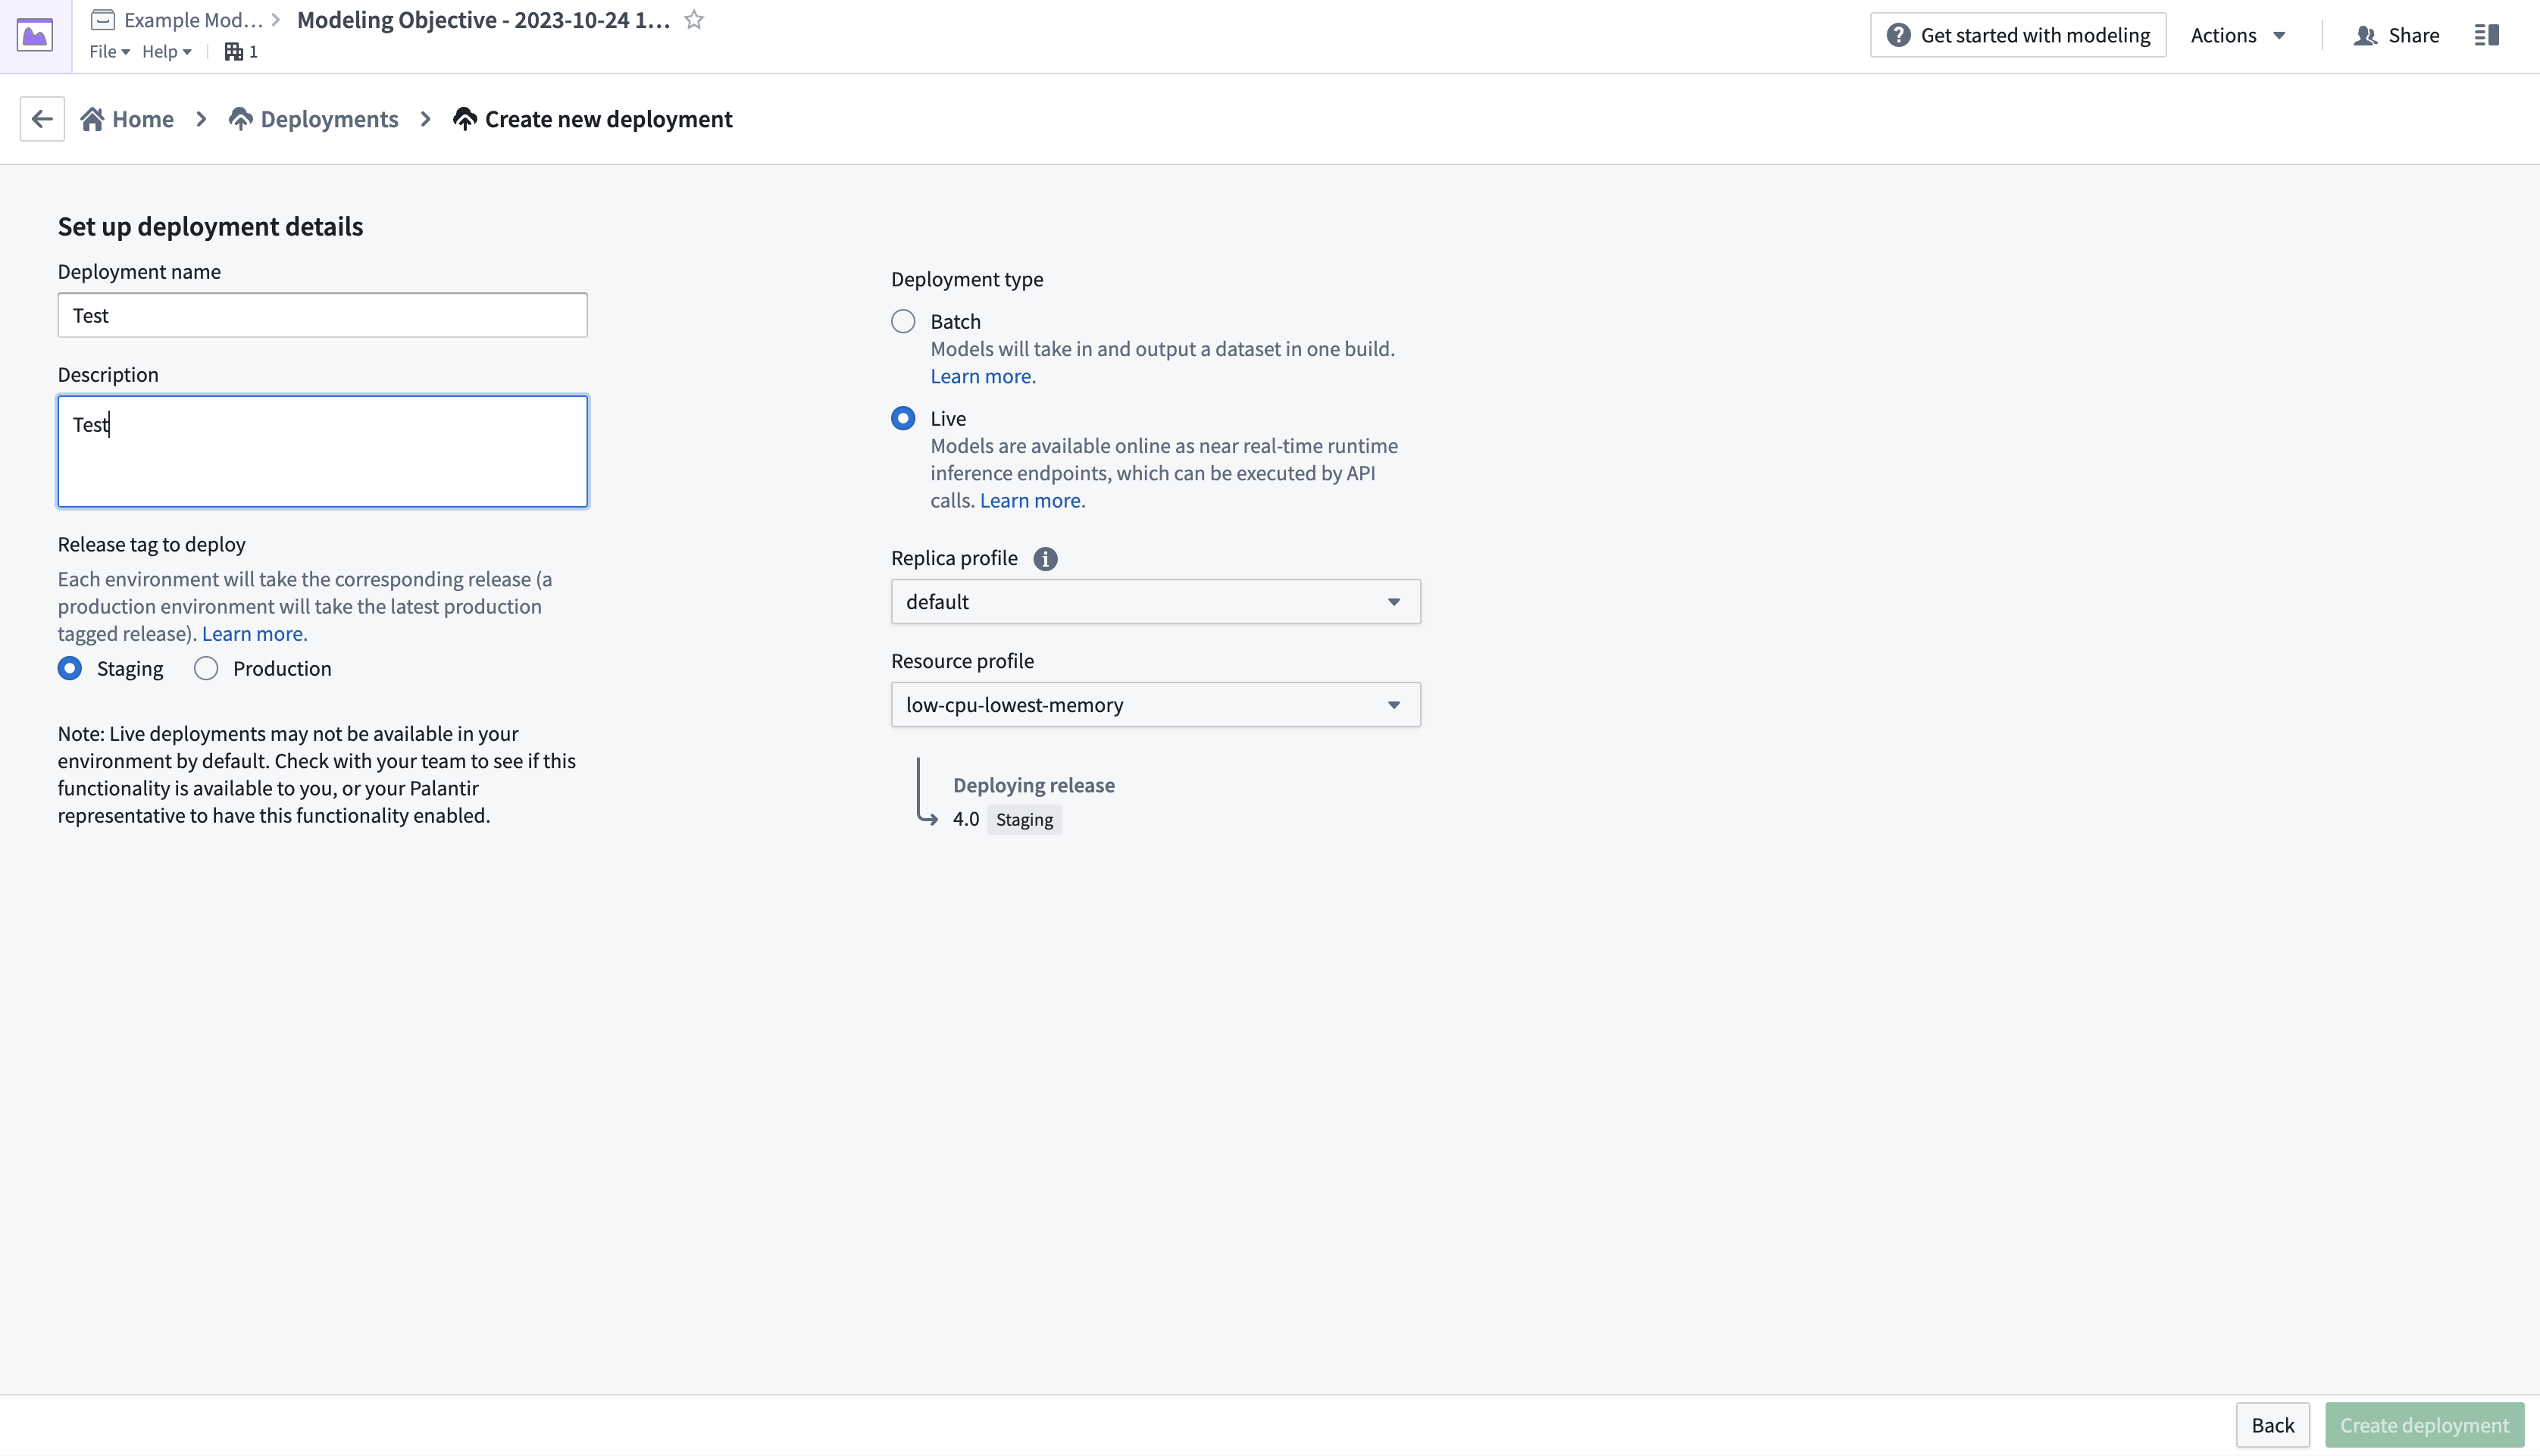
- 設定フォームを完成させ、右下のCreate deploymentを選択します。モデリングの目的の概要に戻り、Deploymentsまでスクロールダウンし、新たにデプロイされたモデルを選択してテストします。
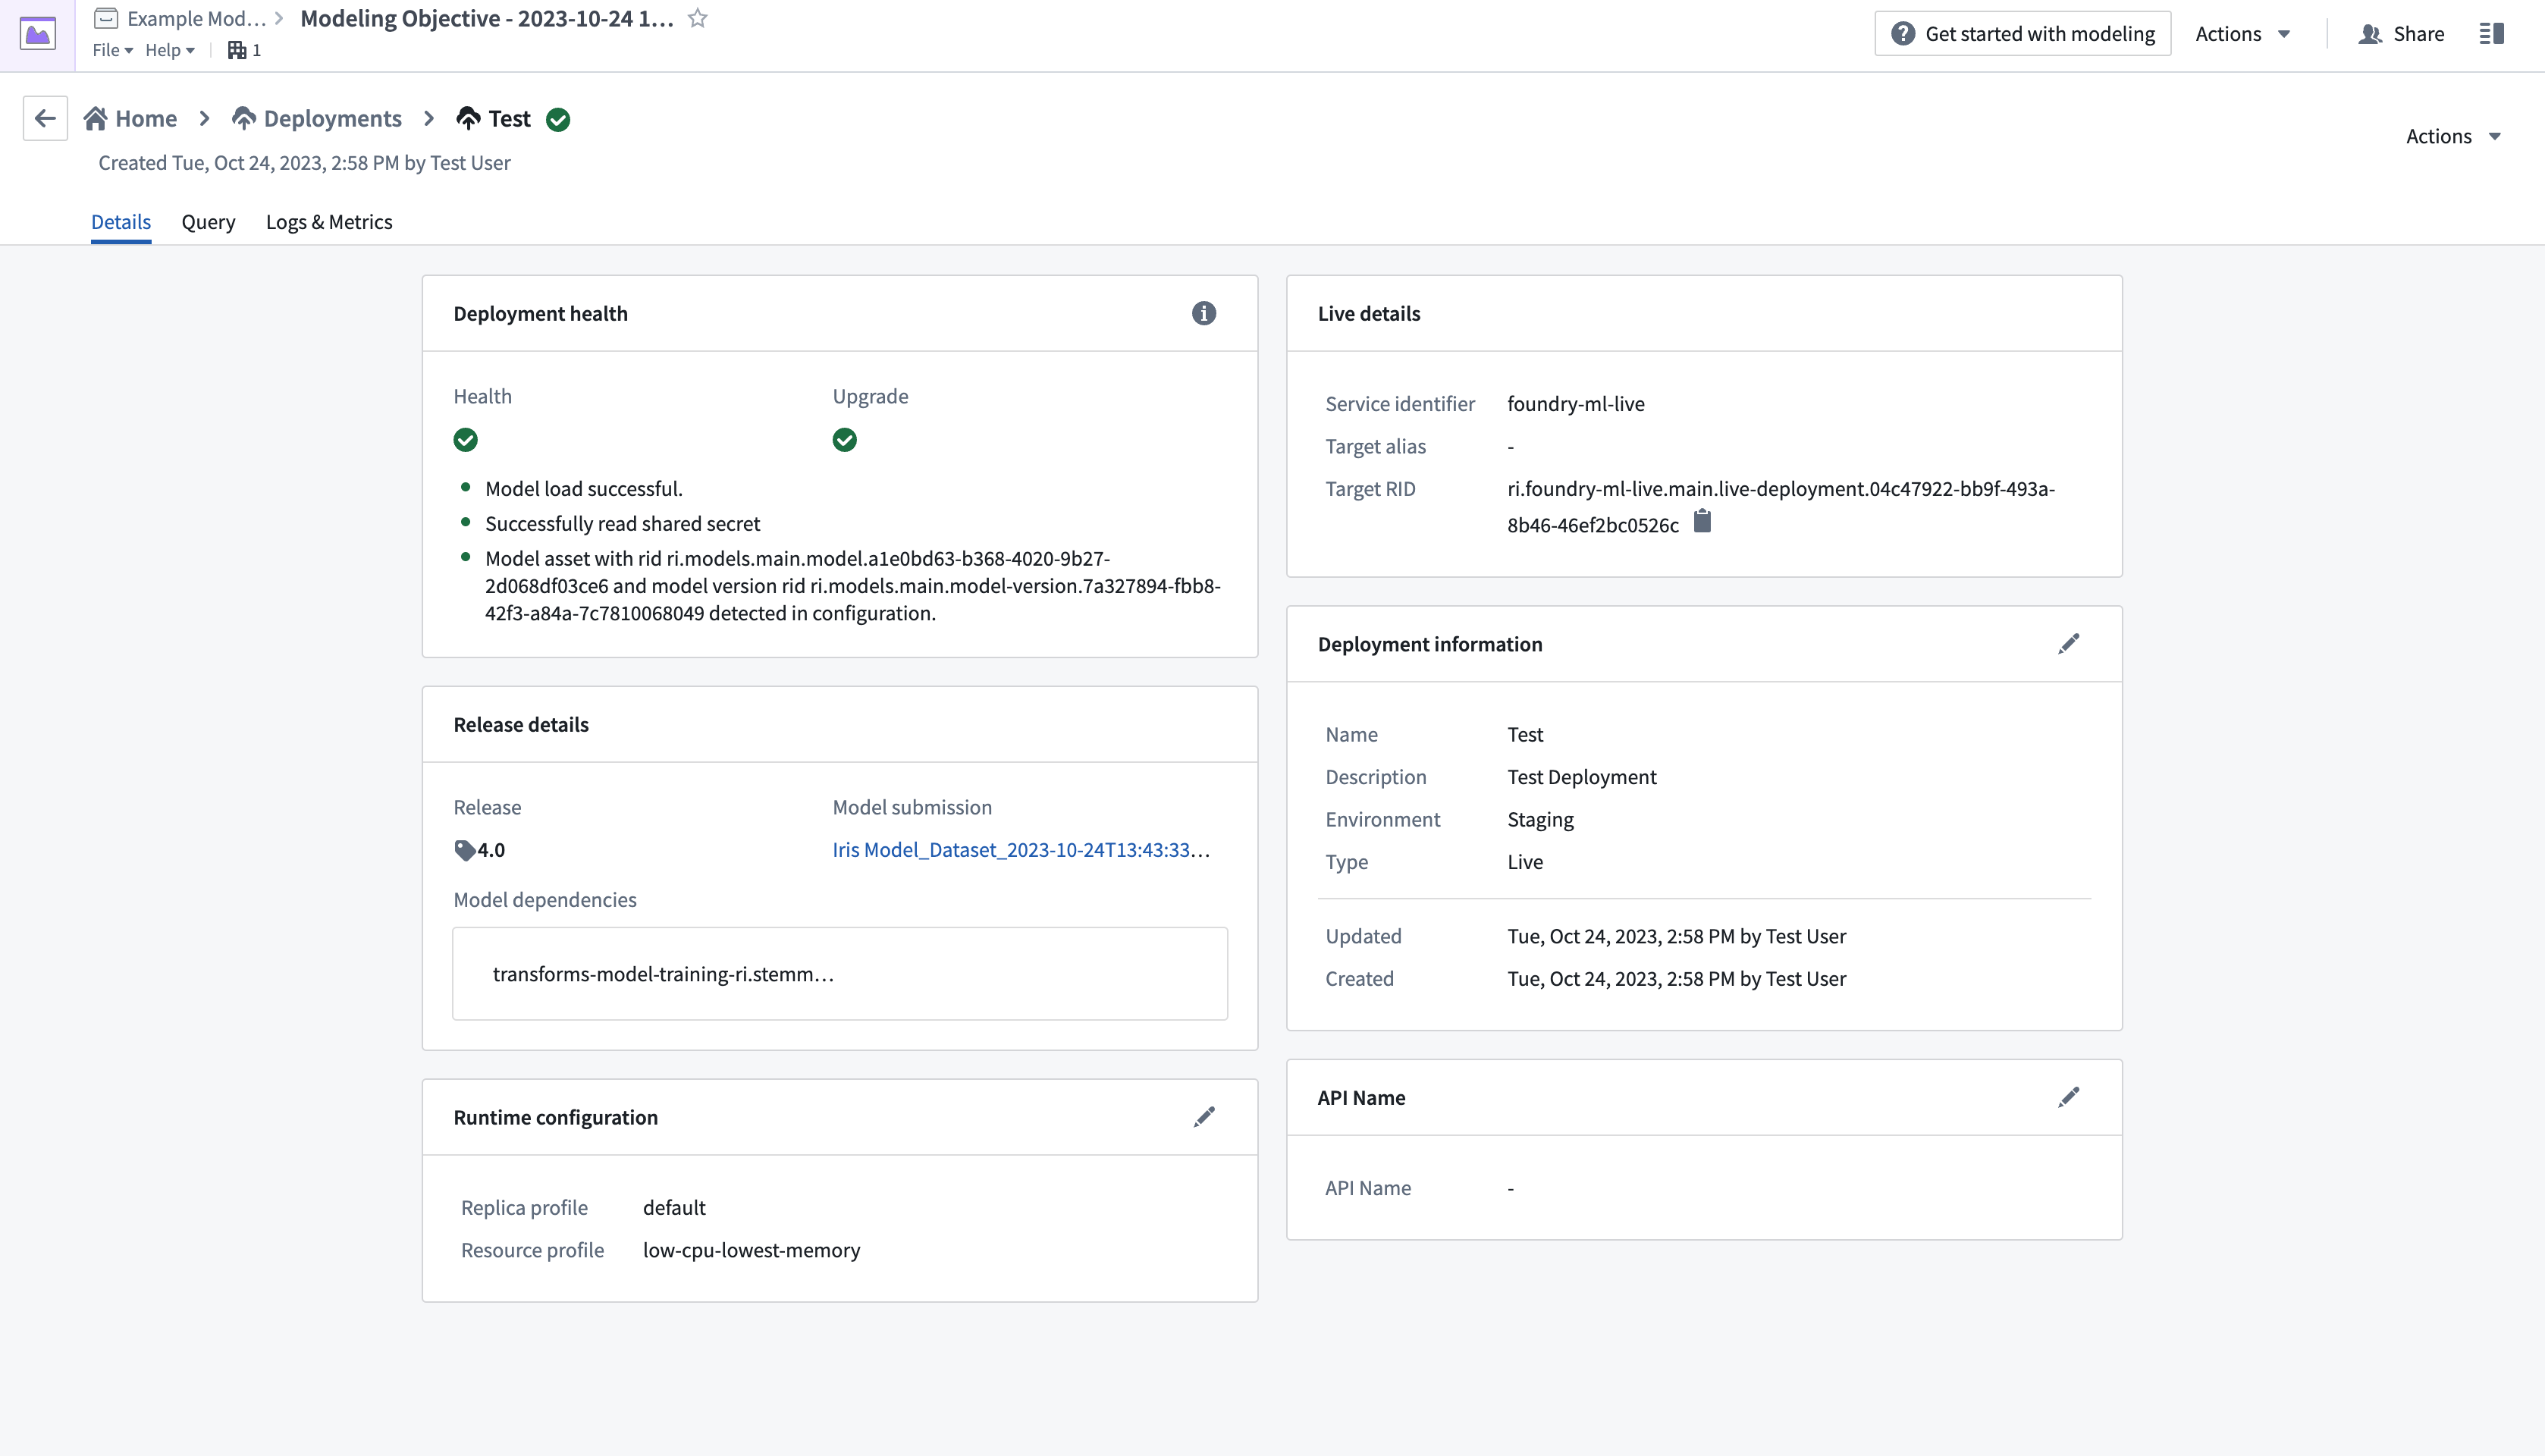
- ページの左上にあるQueryタブから、値を追加して出力を観察することで、モデルをテストします。
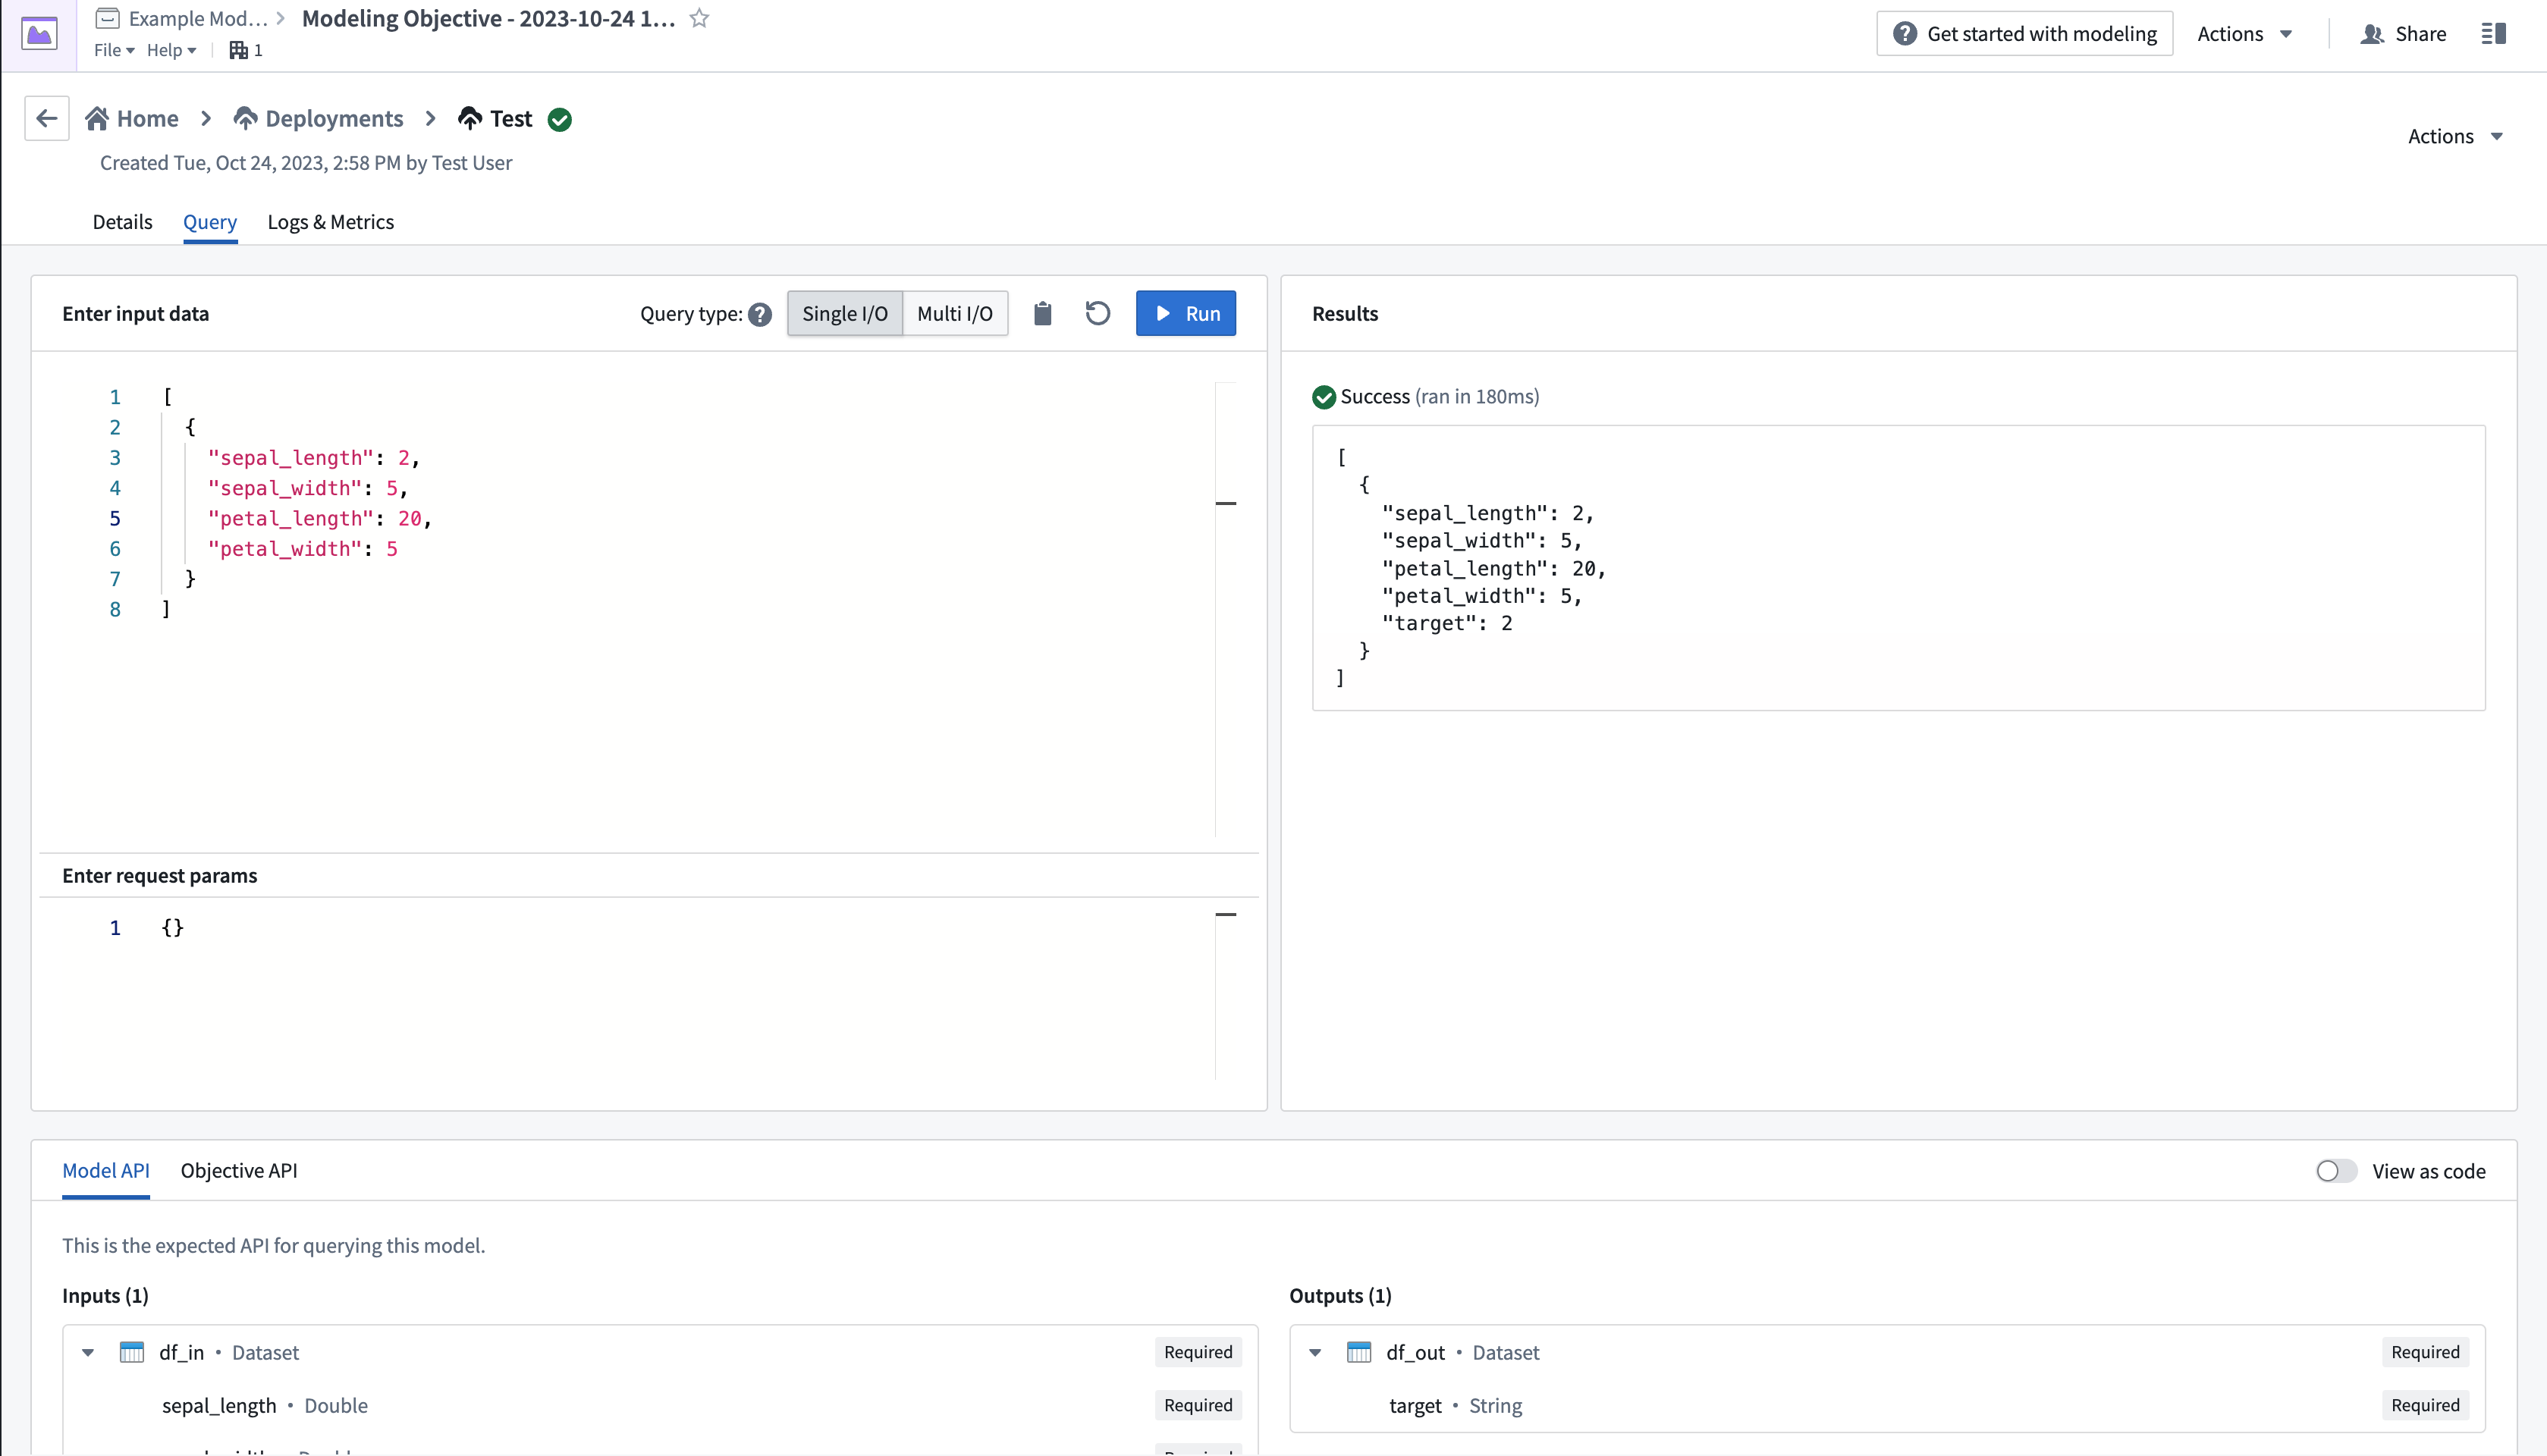
ライブデプロイメントの作成とクエリについての詳細は、ライブデプロイメントのドキュメンテーションで確認できます。