- Capabilities
- Getting started
- Architecture center
- Platform updates
Protecting sensitive data
As you saw in Securing a data foundation, access to data in various projects can be managed by project owners. This is what’s known as discretionary access controls ↗. However, when it comes to sensitive data, a stronger, more centralized access control model is needed.
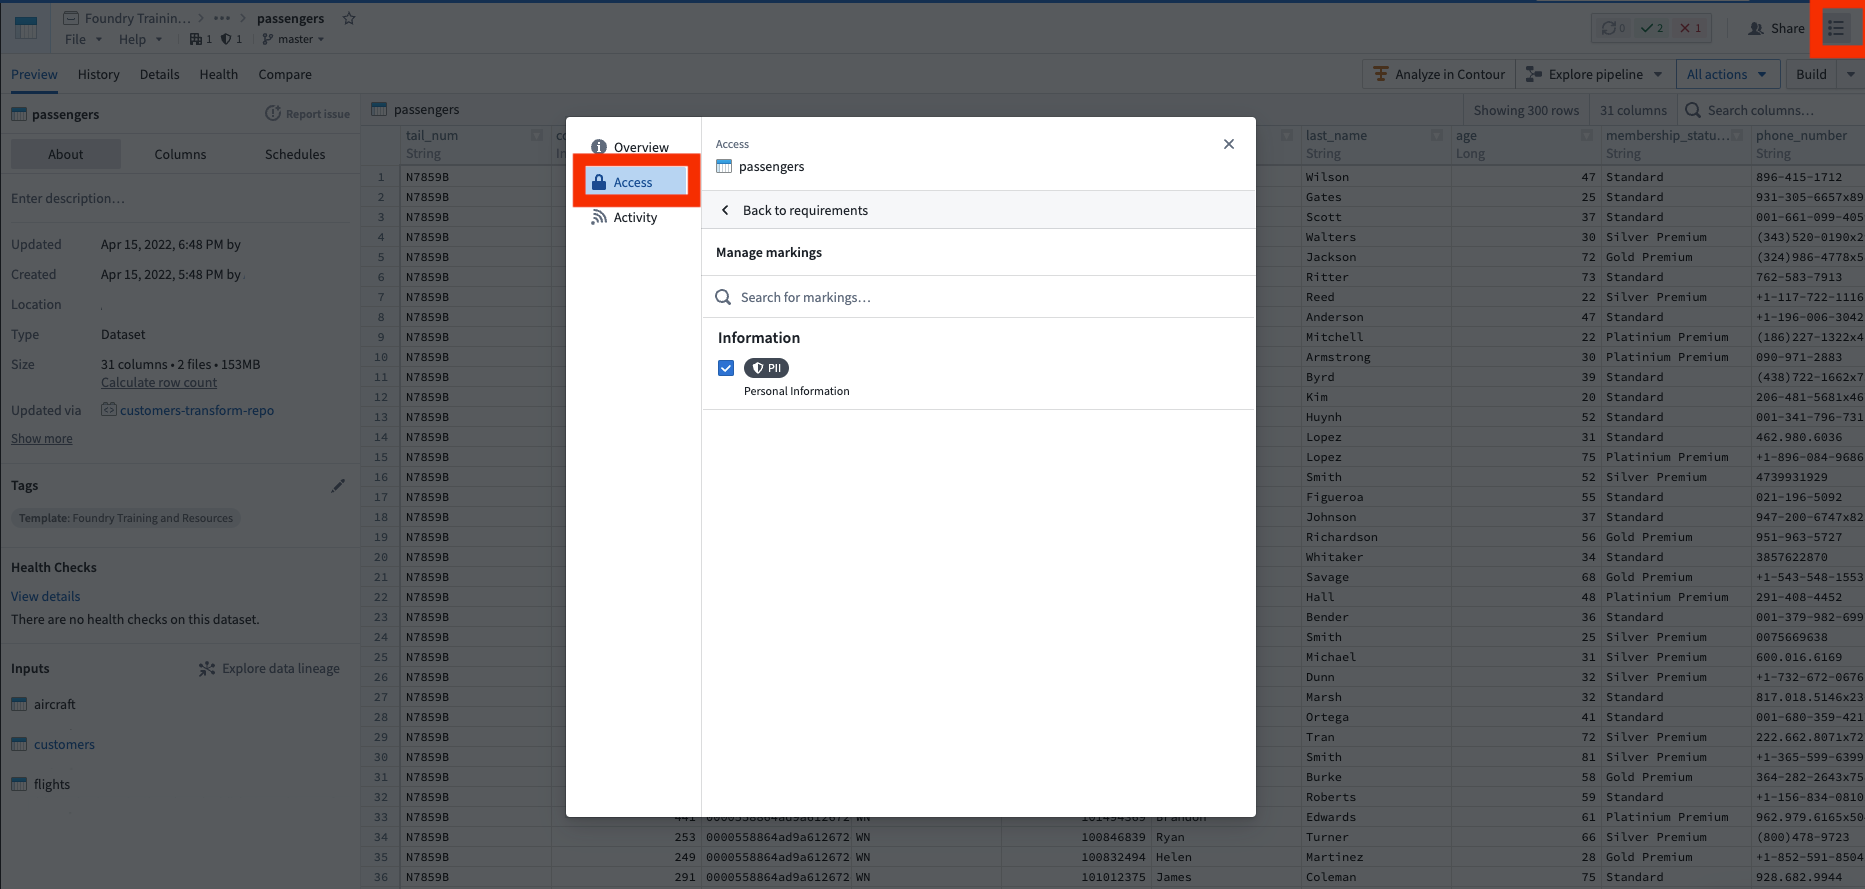
In our example, we have a notional dataset containing passenger birth dates (DOBs), which constitute Personally Identifiable Information (PII). We may want to tightly control this PII, and ensure that this data is only accessible to those who have gone through a PII training. We can solve this using Markings.
Markings are Foundry’s implementation of mandatory access controls ↗. A marking represents a type of data (like PII), to which a specified list of users or groups have access. When a marking is applied to a dataset, users without access to that marking are guaranteed to never be able to access that data, even if the project owner tries sharing it with them. Importantly, this restriction propagates to any data derived from this dataset anywhere in the platform.
This feature is very powerful for data governance, enabling data protection officers to centrally manage and audit exactly who can access a category of data.
Before we introduce our application to our end users, we want to make sure we protect sensitive data. Again, in our example, we have passenger birth dates (DOBs) which we want to lock down in the data pipeline.
Create a marking
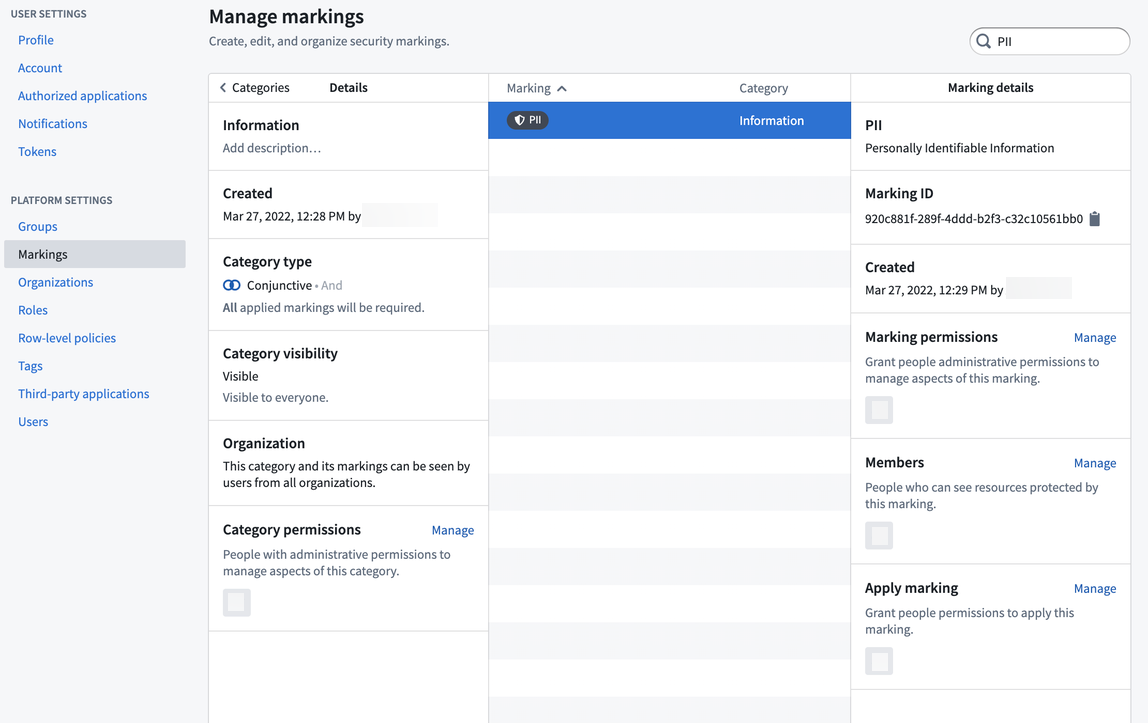
We need to create a marking category, which is a name for a set of markings. In this case, create a marking category of “Information”, since there will likely be other information related markings needed in the future (e.g. Personal Health Information, or PHI). After you create the category, you can create the PII marking. You can then add the people who have permission to see PII data as members of the marking and add the admin team as the managers of the marking.
Simulate our marking change
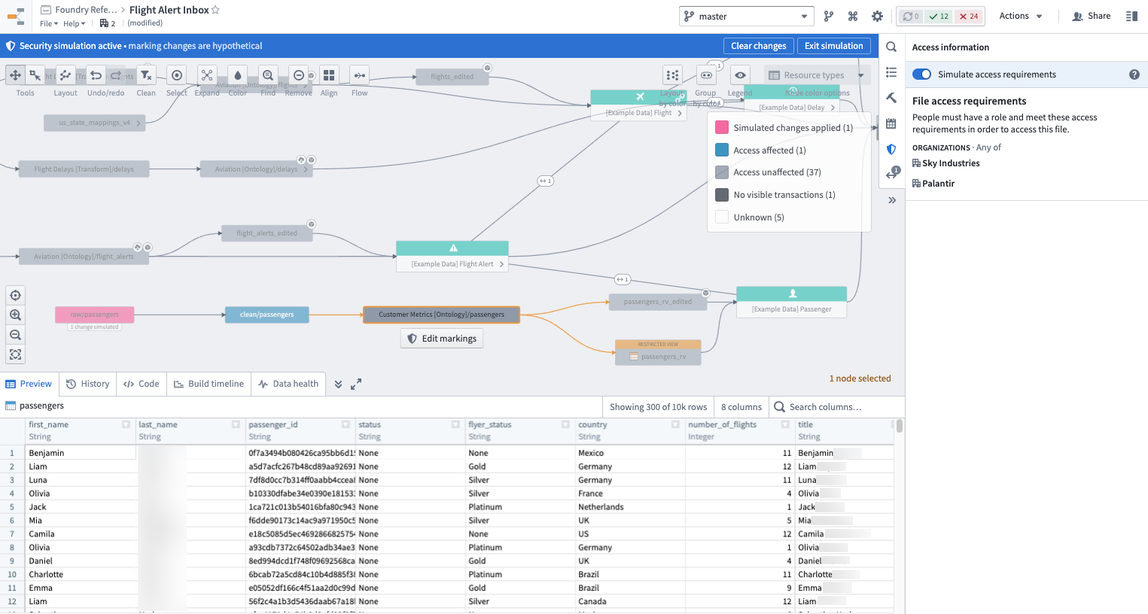
Markings have the powerful behavior of propagating along data lineage. Accordingly, applying a new marking to an existing pipeline can risk locking out downstream users unexpectedly, so it’s best practice to always simulate applying a marking to our pipeline to see where it propagates. To do this, open the data lineage of your pipeline and turn on simulation mode. You can edit the Markings on the raw/passengers dataset and apply the PII Marking you created. You will then see all the datasets downstream that will be affected when the PII marking is applied.
We don’t want all consumers of our data to have to have PII access, so we want to remove the sensitive DOB column at some point in our pipeline. To do this, we should click through the pipeline, reviewing where we think it’s best to remove the PII marking. Typically this is done by opening the preview view in the bottom when selecting a dataset, so we can see the data and columns.
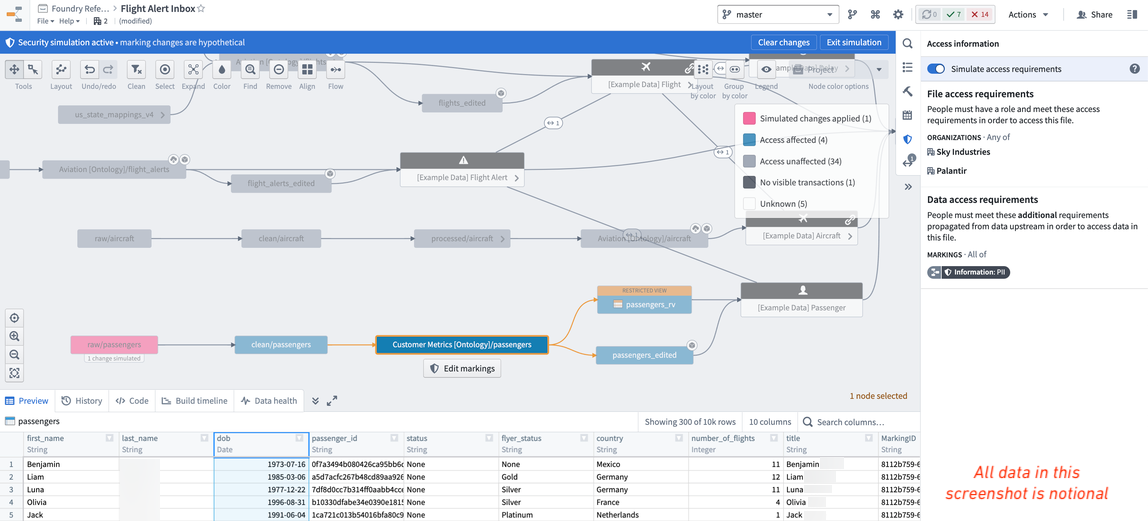
In our notional example, we can see that the PII marking propagates all the way to the ontology dataset, which would lock out all our end-users who don’t have access to PII. Therefore, we decide it was best to keep the sensitive data in the pipeline as long as possible, but remove the “dob” column on the ontology version of the passengers data (i.e. /Sky Industries/Customer Metrics [Ontology]/passengers).
Remove soon-to-be inherited marking
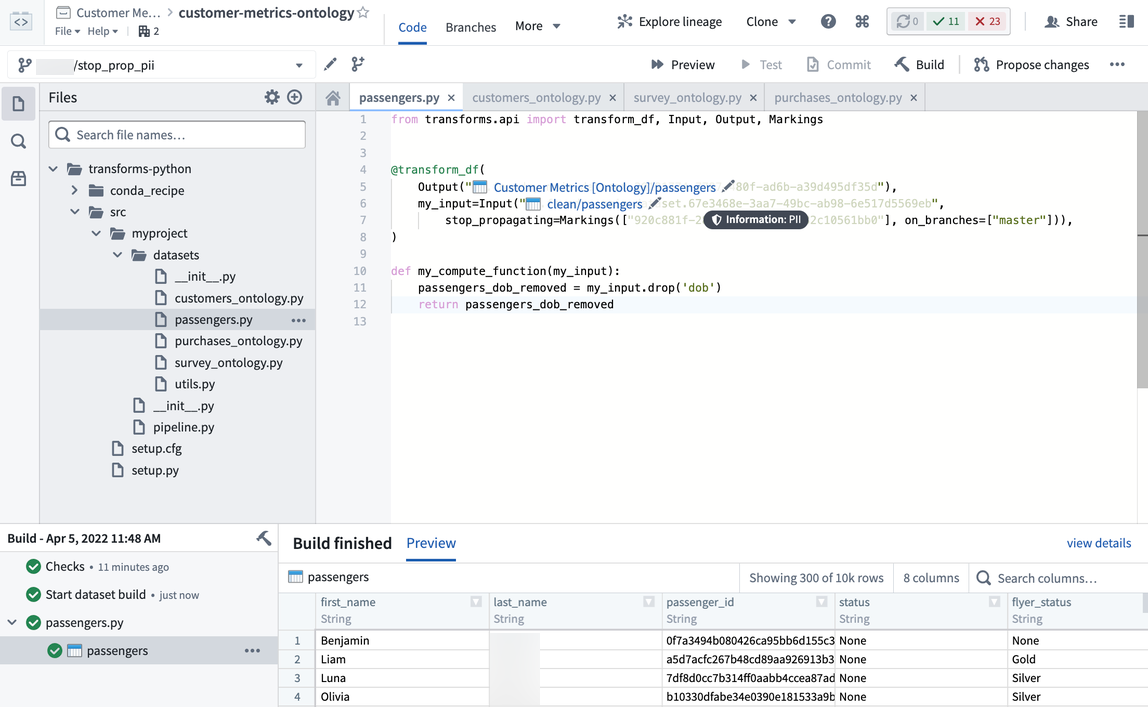
In the data lineage view, click on the Customer Metrics [Ontology]/passengers dataset, click on Code, and click View in repository. This will open up the code repository that was used to create this notional dataset. In the code repository, you will want to 1) create a branch, 2) remove the sensitive column (that is, drop the dob column), 3) remove the soon-to-be inherited PII marking from the input dataset, and then 4) create the pull request. We recommend reviewing the documentation on how to remove inherited markings and organizations.
After our colleague approves the pull request to stop propagating the PII marking, we will need to build this dataset and everything downstream of it so that the latest dataset transactions all “stop propagating” the soon-to-be added marking. Also, there are considerations with APPEND or UPDATE transaction types that require special attention. But in our example, everything is being build as a SNAPSHOT, which is the default transaction type in Foundry.
Apply the marking
Before we apply the marking, we want to double check that it will propagate to the datasets we expect and no others. To do this, open up the data lineage view of the pipeline again, turn on simulation mode, apply the marking on the raw/passenger dataset, and confirm that the ontology/passenger dataset is not affected. This means the stop_propagating logic in the previous section was applied correctly.
Now you are ready to apply the marking, as shown in the screenshot below of notional data. To do this, go to the raw/passenger dataset, open the security helper, and apply the marking. Once you click save, the PII marking is applied immediately and propagates downstream immediately. You can see this by looking at the data lineage and seeing a marking badge on the datasets that now have markings. You have successfully protected your sensitive PII data.