Add content
Add text in a report
If the report is empty
- (If needed) Switch to Editing mode.
- (If needed) In the report body, click on the “Start typing, or” message.
- Start typing.
If the report already has content
- (If needed) Switch to Editing mode.
- Move your cursor above or below any widget or row of widgets.
- Click the
+icon (Widget Creator) element that appears on hover. - Start typing.
Edit text in a report
Report text can be freely formatted while the report is in Editing mode. In particular, text can be styled using both block styles, which affect how an entire text block is formatted, and inline styles, which affect how a particular word or string of text is formatted.
Inline styles
Use inline styles to emphasize snippets of text within a larger block.
Add inline styles
You can apply an inline style in two ways: via a keyboard shortcut or by selecting text and clicking the appropriate button in the formatting toolbar.
Reports supports the following inline styles:
| Style | Keyboard shortcut | Button | Example |
|---|---|---|---|
| Bold | Cmd + B | ||
| Italic | Cmd + I | ||
| Underline | Cmd + U | ||
| Strike through | Cmd + Shift + X | ||
| Code snippet | Cmd + Shift + K | ||
| Link | Cmd + K | ||
| Highlight | None |
Remove inline styles
To remove a particular inline style, click its corresponding button in the toolbar or use the corresponding keyboard shortcut again.
Block styles
Block styles affect how an entire text block is formatted, such as in paragraphs, headings, lists, blockquotes, or code blocks.
Paragraphs
Text blocks are formatted as paragraphs by default. Paragraphs have no special styling other than a bottom margin when other paragraphs follow. To style or restyle a block as a paragraph:
- Select some text.
- Click the block-style button in the inline toolbar.
- Click Paragraph in the menu that appears.
Headings
You can add up to six levels of headings in a report. Headings add visual structure to your report, and they will also appear and indent content in the report Outline. To create a heading:
- Type one of the following at the beginning of a line:
#for Heading 1 (the most prominent)##for Heading 2###for Heading 3####for Heading 4######for Heading 5#######for Heading 6 (the least prominent)
- Use the Spacebar key.
or
- Select some text.
- Click the block-style button in the inline toolbar.
- Click Header one or Header two in the menu that appears.
Although Reports supports six levels of headings, only the first two are shown in the block-style menu.
Lists
Numbered List
To add an ordered/numbered list to a report:
- Type
1.at the beginning of a line. - Use the Spacebar key.
or
- Select some text.
- Click the block-style button in the inline toolbar.
- Click Numbered list in the menu that appears.
Numbered lists will always start at 1.
Bulleted List
To add a bulleted (or “unordered”) list to a report:
- Type
-or*at the beginning of a line. - Use the Spacebar key.
or
- Select some text.
- Click the block-style button in the inline toolbar.
- Click Bulleted list in the menu that appears.
Bulleted lists support up to 11 levels of indentation:
- To indent a bullet, use the Tab key.
- To de-indent a bullet, use the Shift+Tab keyboard shortcut.
Checklist
Use a checklist to track to-do's, follow-ups, and other action items. To create a checklist:
- Type
[]at the beginning of a line. - Use the Spacebar key.
or
- Select some text.
- Click the block-style button in the inline toolbar.
- Click Checklist in the menu that appears.
Blockquotes
Use a blockquote to present quotations, excerpts, and other callouts. To create a blockquote:
- Type
>at the beginning of a line. - Use the Spacebar key.
or
- Select some text.
- Click the block-style button in the inline toolbar.
- Click Blockquote in the menu that appears.
Code block
Use a code block to present multiple lines of code or other fixed-width text. To create a code block:
- Type ``` (three back-ticks) at the beginning of a line.
- Use the Enter key.
or
- Select some text.
- Click the block-style button in the inline toolbar.
- Click Code block in the menu that appears.
Other styling options
Horizontal line
To insert a horizontal line (also known as a horizontal rule or horizontal divider) into a report:
- Type
---on a blank line. - Use the Enter key.
Inline parameters
You may wish to display the current value of a parameter within a block of text (learn more about parameters). To do this:
- Select some text.
- Click the Parameter button in the formatting toolbar to create a new string parameter.
- Merge the new parameter into the desired Contour parameter (learn more about merging parameters).
The current value of the merged parameter will now appear inline when in Viewing mode (in Editing mode, only the name of the parameter will appear inline).
Add a table to a report
Reports supports several different types of tables. Table widgets are the most basic: you can create them inside of a report to format manually inputted information into a simple row-and-column layout.
Table widgets are different from data-backed tables from other Palantir Foundry applications. For instance, a report can also contain:
- Contour Table boards to see a preview of a particular dataset, or
- Fusion spreadsheets to show richly formatted tables optionally backed by a dataset.
Steps
You can add a Table widget to a report at any time. Once you've added a table, you can type freely into its cells and also change its size (for details, see Resize a table in a report).
If the report is empty
-
(If needed) Switch to Editing mode.
-
Click the table icon next to the “Start typing, or” message.

-
Drag out the initial number of rows and columns the table should have.

-
Click to create the table.

If the report already has content
-
(If needed) Switch to Editing mode.
-
Move your cursor above or below any row of widgets, and click the Widget Creator element that appears on hover.

-
Click the table icon next to the “Start typing, or” message.

-
Drag out the initial number of rows and columns the table should have.

-
Click to confirm.

Resize a table in a report
After adding a Table widget, you can easily add or remove rows and columns within it.
Table widgets always have a single header row. You can insert rows above any row except the header row.
Insert rows and columns
Insert a single row or column
Rows and columns can be inserted below or to the right of the currently focused cell.
-
(If needed) Switch to Editing mode.
-
(If needed) Click a cell to clear the current selection.
-
Right-click the cell.
-
Click any of the available insert options to insert a row or column where appropriate:
- Insert column left
- Insert column right
- Insert row above
- Insert row below
Insert multiple rows or columns
You can insert multiple rows or columns by selecting a larger region first. In particular, if there are N rows and M columns in your current selection, then you can insert N rows or M columns at once.
-
(If needed) Switch to Editing mode.
-
Select a region of N rows and/or M columns.
-
Right-click any cell in the selected region.
-
Click any of the available insert options to insert a row or column where appropriate:
- Insert M columns left
- Insert M columns right
- Insert N rows above
- Insert N rows below
Delete rows and columns
Delete a single row or column
- (If needed) Switch to Editing mode.
- (If needed) Click a cell to clear the current selection.
- Right-click the cell.
- Click Delete row or Delete column.
Delete multiple rows or columns
You can delete multiple rows or columns by selecting a larger region first. In particular, if there are N rows and M columns in your current selection, then you can delete N rows or M columns at once.
Table widgets always have a single header row. The header row cannot be deleted.
- (If needed) Switch to Editing mode.
- Select a region of N rows and/or M columns.
- Right-click any cell in the selected region.
- Click Delete N rows or Delete M columns.
Change row and column sizes
Changing row height
Changing row heights is not supported at this time. Table widgets will display only a single line of text per cell.
Changing column width
- (If needed) Switch to Editing mode.
- Move your mouse cursor over the right edge of a column's header cell (the top-most cell in the column).
- Click and drag to resize the column.
- Release the mouse button to save.
Add a new image or video to a report
There are three different ways to add images, video, and other resources to a report:
- Upload media directly to a report. Media will be stored within the report resource and will appear with no additional background, footer, or borders. Only images and video can be uploaded in this way.
- Link to a resource in your files directory. Resources already in Foundry can be added to a report, appearing with a footer linking back to the original resource. For more information on this approach, see Link to a Foundry resource in a report below.
- Upload a resource to Foundry within a report, then link to it. This is an old and outdated approach for adding media to a report. It is functionally identical to linking to a resource, though it has been superseded by 1 above.
Upload to a report
You can upload images and videos directly to a report. With this approach, the images and videos will be “bundled” with the report, so they won't appear as separate files in Foundry.
To upload an image or video directly to a report:
-
(If needed) Switch to Editing mode.
-
Click the image icon next to the “Start typing, or” message.

-
Click the drop zone to choose a file, or drag a file from your computer into the drop zone.

Upload to Foundry and link from a report [Deprecated]
This approach has been deprecated in favor of the approach described above in Upload to a report.
From a report, you can also upload an image and video to Foundry as a standalone resource—and then link to the resource (as described in Link to a Foundry resource in a report below).
To do this:
-
(If needed) Switch to Editing mode.
-
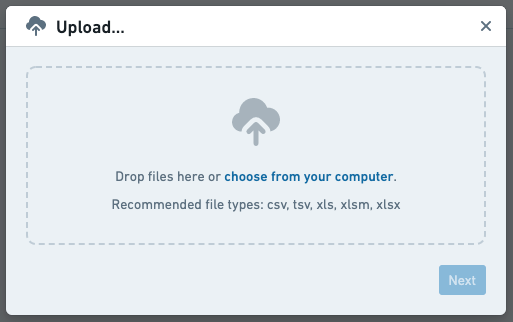
Click the upload icon next to the “Start typing, or” message.

-
Select a file to upload via the dialog that appears.
-
Click Next to upload the image to Foundry. The resource should then appear in the report automatically (if it doesn't appear, you can link to it as described in Link to a Foundry resource in a report).
Supported file types
Images
The following file types are supported for direct image uploads:
- BMP
- GIF
- JPG/JPEG
- PNG
Videos
The following file types are supported for direct video uploads:
- MOV
- MP4
Link to a Foundry resource in a report
You can link to images, videos, and other types of files from your files directory in Foundry. Linked images and videos will appear in the report, whereas other resource types like data sets, PDFs, or DOCX documents will appear as minimal representations (a clickable resource title with a corresponding resource icon).
To link to an image, video, or other resource from your files directory in Foundry:
-
(If needed) Switch to Editing mode.
-
Click the link icon next to the “Start typing, or” message.

-
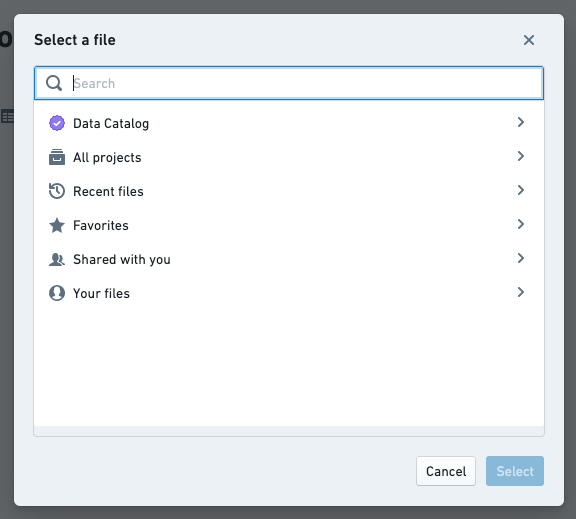
Select a resource from the dialog that appears.
-
Click Select in the dialog to link the resource in your report. Some examples:
-
A Foundry dataset:

-
A Contour analysis:

-
Another report:

-
An image:
-
A video:

-
Duplicate content within a report
You can make a copy of any widget contained in a report (e.g. a block of text, an image, or a Contour table).
To duplicate a widget:
- (If needed) Switch to Editing mode.
- Click the gear icon in the top-right corner of the widget you'd like to duplicate.
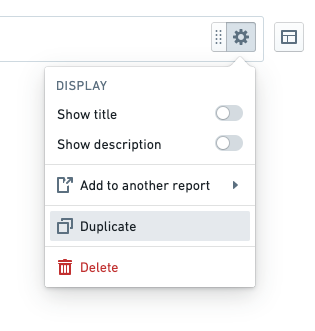
The duplicated widget will be added immediately beneath the original widget.
Add content from another report
You can copy any widget (e.g. a block of text, an image, a Contour table) from one report to another, provided you have edit permissions on both reports.
To copy a widget from one report to another:
-
(If needed) Switch to Editing mode.
-
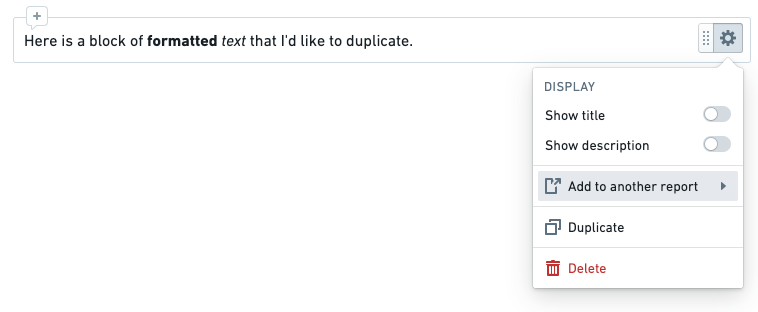
Click the gear icon in the top-right corner of the widget you'd like to duplicate.
-
Click Add to another report in the menu that appears.
-
Select a report from the menu that appears.
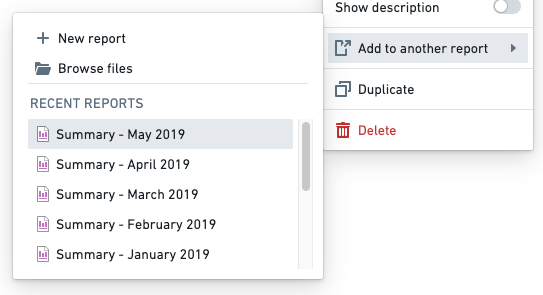
You should see a confirmation toast when the widget has been successfully copied to the report that you selected.

The copied widget will be added to the bottom of the other report.