5 - Making changes to your pipeline logic with branching
This content is also available at learn.palantir.com ↗ and is presented here for accessibility purposes.
📖 Task Introduction
After deploying your pipeline, you receive feedback that the flight_alerts_clean dataset could use some improvements:
- The
rule_idcolumn is not useful in any context and should be removed. - It will be operationally useful to have a
commentandassigneecolumns that can serve as editable properties on Ontology object types backed by this pipeline. These should haveNonevalues by default.
In this task, you’ll branch your clean pipeline, develop and test these changes, and then merge them back into the main branch. The instructions below will prompt you through branching in Pipeline Builder. If you would like to read up on branching in Pipeline Builder, refer to these resources: Pipeline Builder branching documentation: Create a branch → Propose a change → Approve a change
🔨 Task Instructions
-
Open your clean pipeline and create a new branch called
developby clicking the Main ▾ dropdown in the upper right of the screen. -
Introduce a new transform step between your output clean dataset and the
Flight Alert Status Jointransform. -
Label your new transform path
Additional Cleaningand add transforms that:- Drop the
rule_idcolumn - Add a constant column called
commentwith a default string value ofNone - Add a constant column called
assigneewith a default string value ofNone
- Drop the
-
Return to your graph, where your new transform should be automatically connected to your
flight_alerts_cleanoutput. Note that Pipeline Builder has surfaced a schema mismatch; the output is looking forrule_idand is not properly configured to accept the new constant columns. -
In the Pipeline outputs panel on the right, click the Edit button and then on the blue Use updated schema button to re-baseline the schema to match your transform logic.
-
Deploy your pipeline.
-
Right click on your output dataset node and choose Open (click the
↗button to the right to open the dataset in a new tab). -
In the upper left area of the Dataset Preview app, you can see your dataset now exists on two branches: Master (corresponds with Main in your pipeline) and Develop, which you just built (the dataset might actually still be building).
-
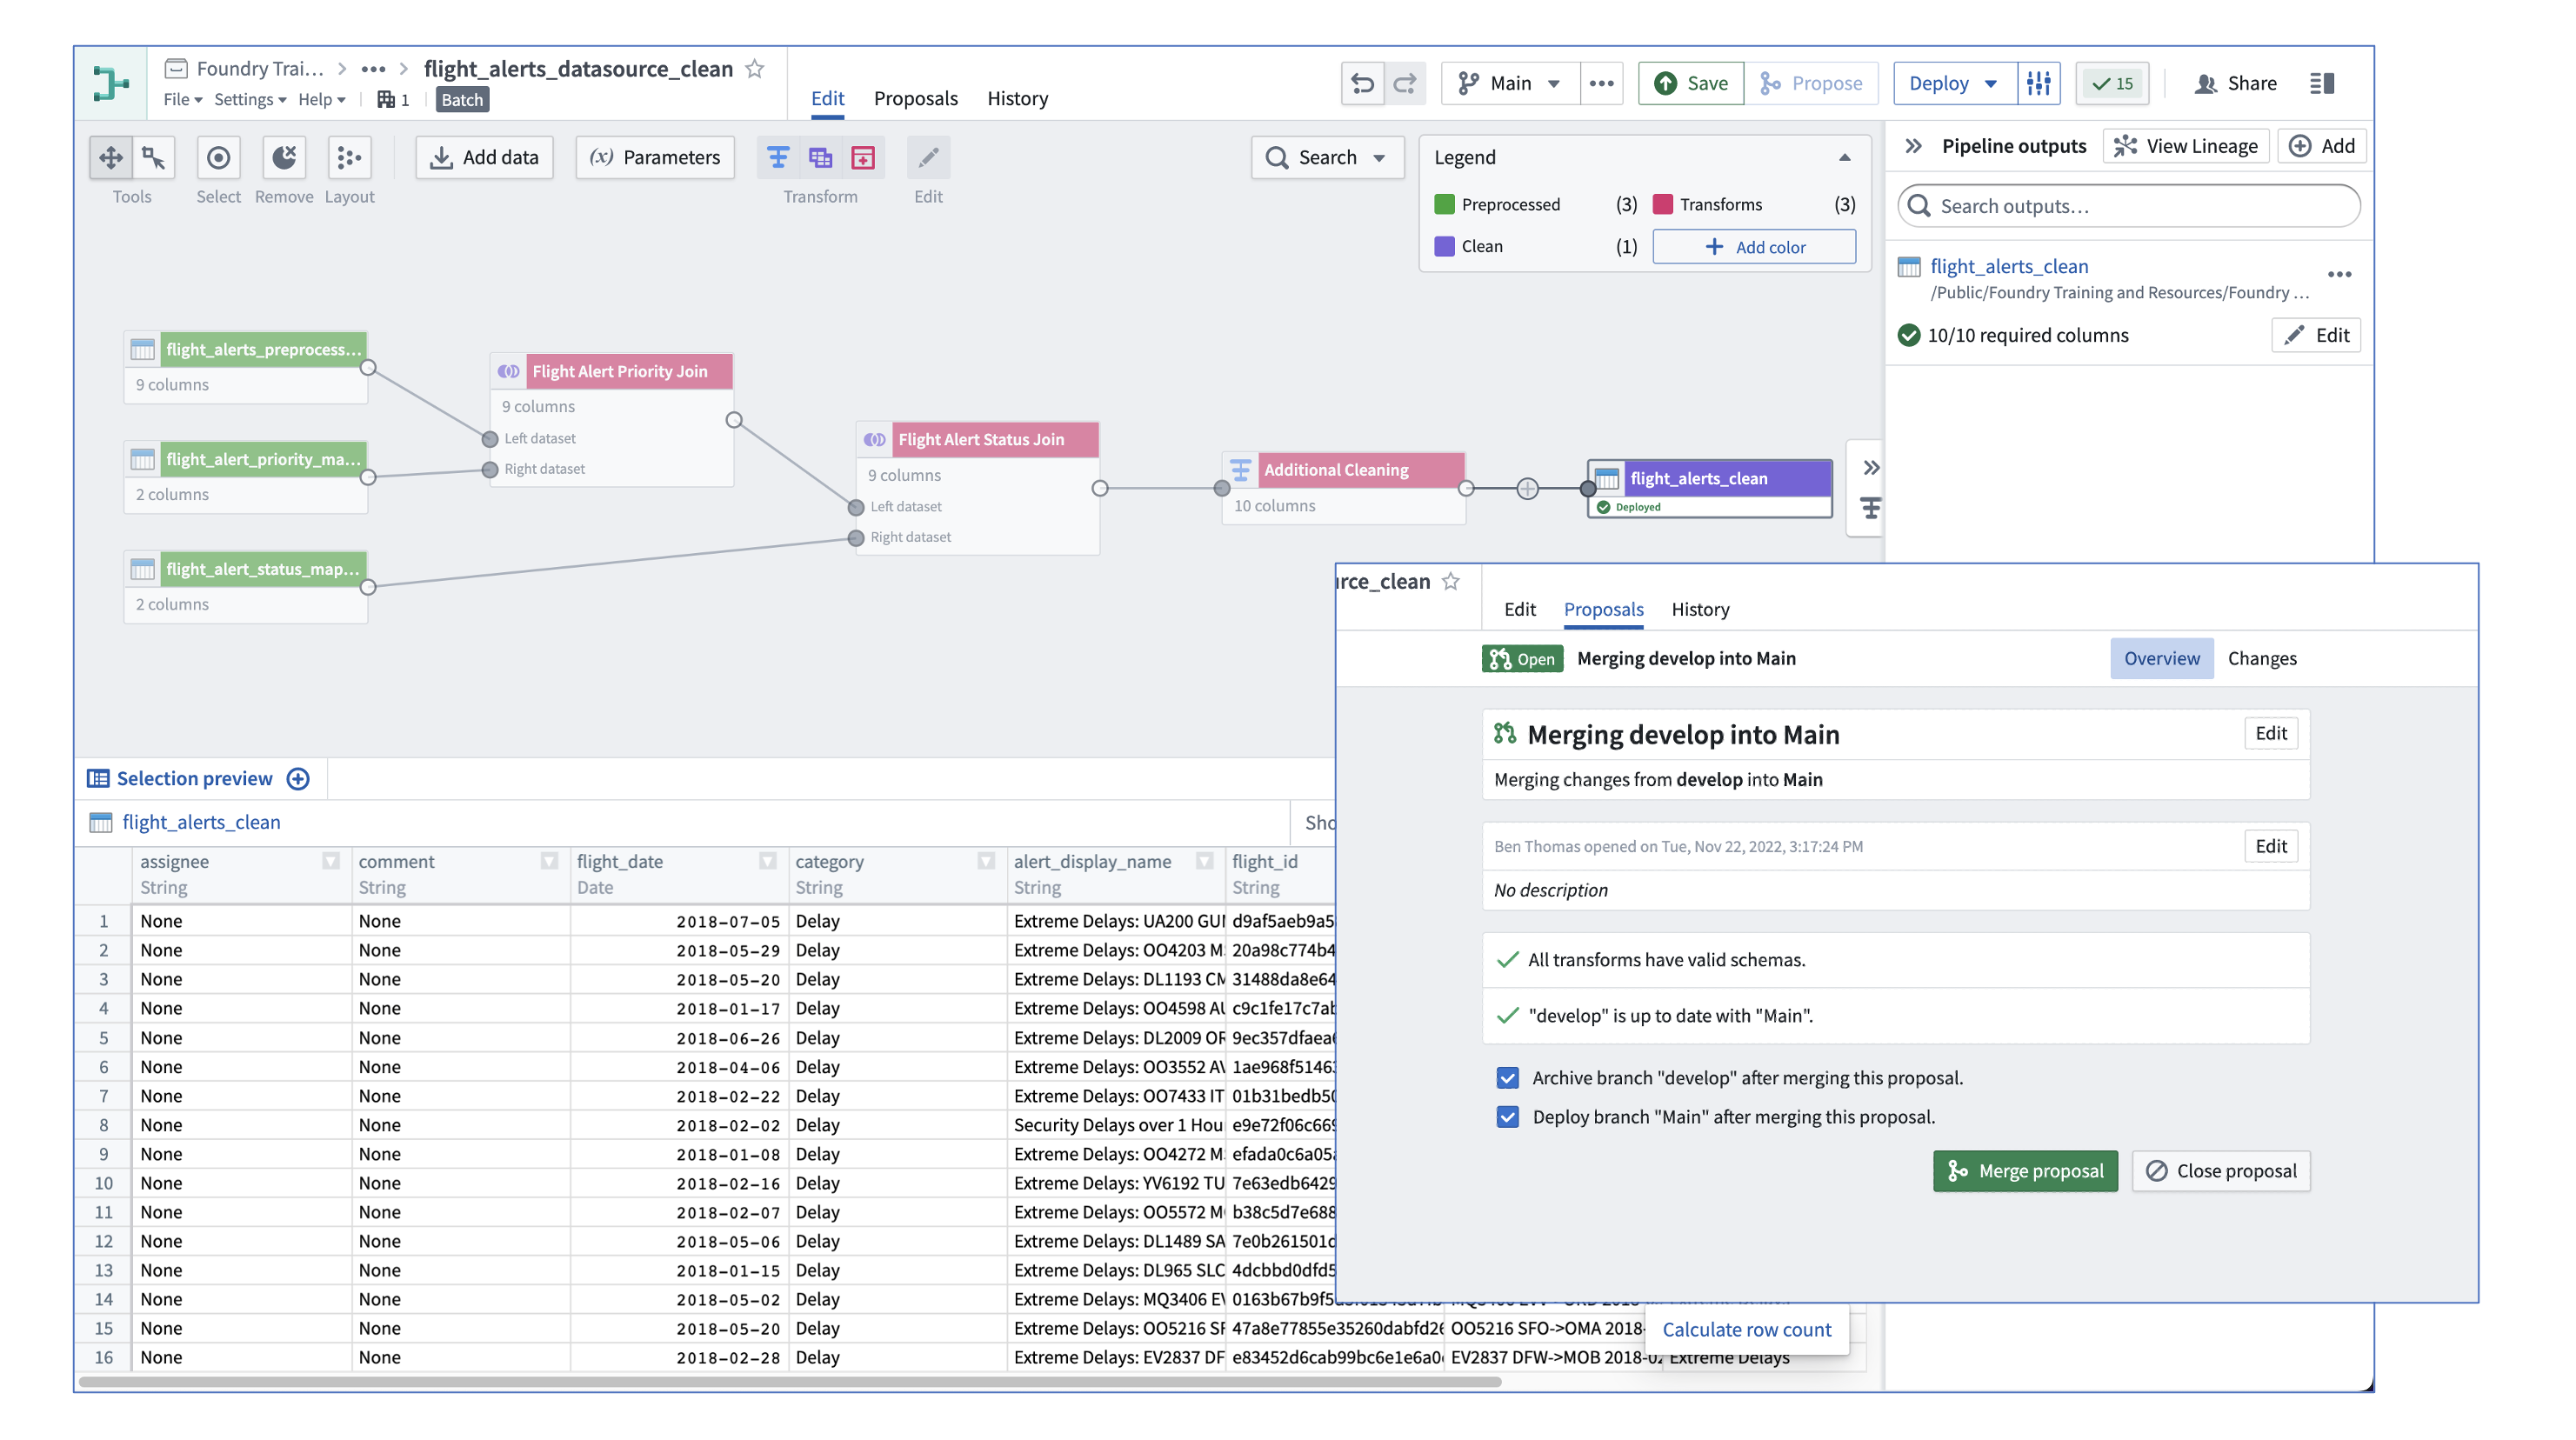
Your changes look good. Return to your pipeline and click the Propose button in the upper right of the screen and follow the prompts to merge your Develop branch into Main. Before merging, be sure to select the option to Deploy branch "Main" after merging this proposal.