- Capabilities
- Getting started
- Architecture center
- Platform updates
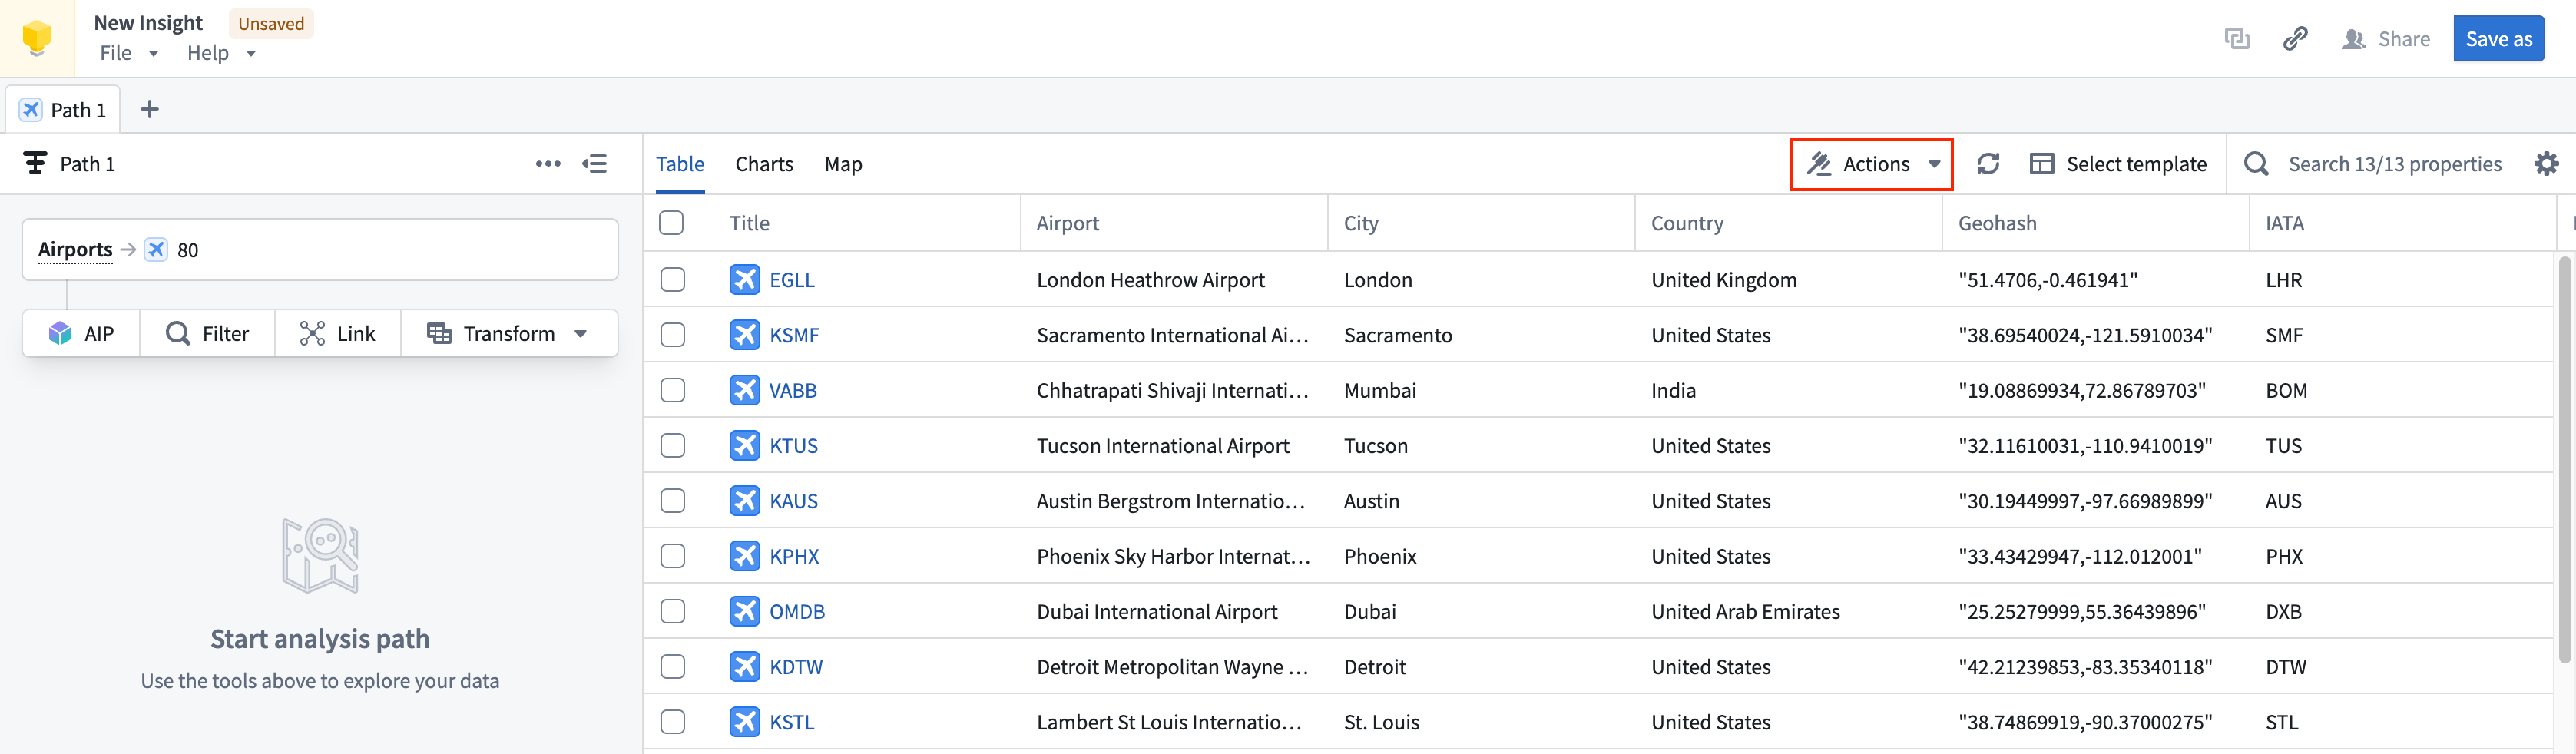
Table
The Table tab in Insight presents analysis objects in a tabular format, with property names as column headers and each row representing an individual object instance.
Selection states
Selecting a row highlights it and opens the object panel view, a condensed version of the full object view.
The following keyboard shortcuts are available in the table:
- Multi-select:
Cmd+Click(macOS) orCtrl+Click(Windows) to select multiple individual rows. - Range select: Select a row, then
Shift+Clickanother row to highlight all rows between them. - Deselect all: Select any row when multiple rows are already selected to deselect all.
The multi-select buttons on the left side of the table allow for selecting multiple objects at once. The multi-select button at the top of the table selects or deselects all rows.
Properties
A property search bar is available in the top right of the table, showing how many properties are currently visible. Properties not shown in the table can be added through the property configuration panel, accessible via the gear icon in the top right corner. Only properties currently in the table can be searched. Matches appear in the dropdown and are highlighted in the table.
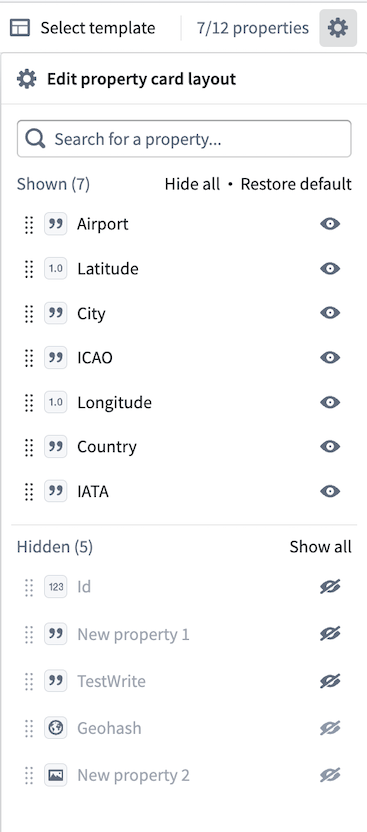
Property configuration
The configuration panel provides access to all object type properties. Properties not currently in the table can be searched and added, and property order can be modified by dragging. The Truncate text in table option is enabled by default. Disabling it displays the full text of longer fields, which may increase row height.
Derived properties
Derived properties are calculated at runtime based on the values of other properties or links on objects. To add a derived property, open the property configuration panel via the gear icon and select + Add derived property at the bottom of the panel. From there, add linked properties or property aggregations as needed.
Multi-object type analysis
If the analysis path contains multiple object types, each object type appears as a selectable header in the table. Each object type can be toggled on or off, and the properties of all visible object types are shown in the table and property configuration panel.
Data operations
Insight allows you to write data back to the Ontology by creating, updating, and deleting objects directly from your analysis results.
Permissions
To perform write operations, you need the following:
- Edit permission on the object type in the Ontology
- Write access to the underlying data source
- Project permissions if the object type is scoped to a project
Contact your Foundry administrator if you need write access.
Select objects
Before performing operations, select the objects to modify. In the results table, select the checkbox next to individual objects, or select the header checkbox to select all visible objects. The selection count appears in the toolbar.
When results span multiple pages, selecting the header checkbox selects all objects matching the applied filters, not just the objects on the current page.
Row actions
The Actions menu in the toolbar provides operations defined for the object type in the Ontology.
- Select one or more objects.
- Select Actions to view available operations.
- Choose an action.
- Complete the action form or workflow.
Available actions depend on your Ontology configuration. Common examples include assigning objects to users, triggering workflows, or updating related objects.
Create objects
- Select Create in the toolbar.
- Select the object type to create.
- Fill in property values.
- Select Create.
The form displays all properties defined on the object type. Required properties are marked.
Update objects
- Select one or more objects.
- Select Edit in the toolbar.
- Modify property values.
- Select Save.
Bulk updates
When multiple objects are selected, you can update shared properties across all of them at once. Only modify the properties you want to change; unmodified properties retain their existing values.