Create a form
Foundry Forms is no longer the recommended approach for data entry or writeback workflows on Foundry. Instead, build user input workflows with the Foundry Ontology, representing the relevant data structures as object types and configuring the writeback interaction with Actions. Learn more in the Forms overview documentation.
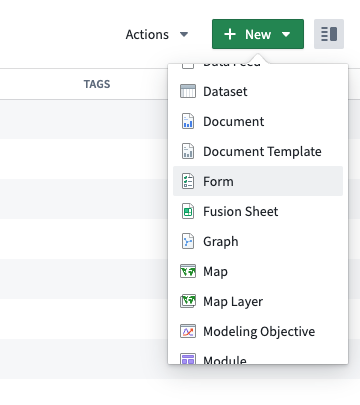
To create a new form, first open the Forms application from the Foundry navigation sidebar. You will be prompted to create a new form or open an existing one. Alternatively, navigate to a Project in the filesystem view, then select + New > Form.
Once you create a new form, you will be prompted to choose a response destination:
- Fusion spreadsheet
- Ontology object type (if permissioned
You may also create a form now and decide the response destination later.
While both destination options write to datasets, Fusion writes directly to the spreadsheet every time a change is made. Object storage in Foundry requires users to schedule a build of the writeback dataset configured in the Ontology. This decision can be changed later.
Create and configure a new form
Complete the following steps to create a simple form:
-
First, navigate to the form creation screen.
-
Next, choose the response destination for your new form.

-
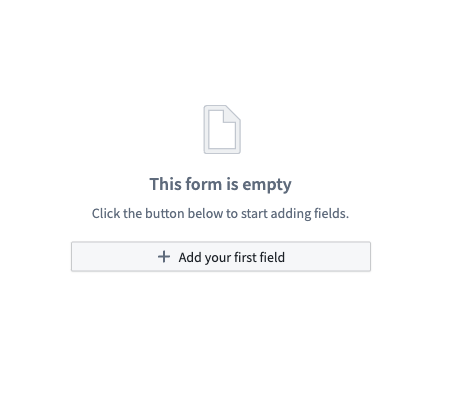
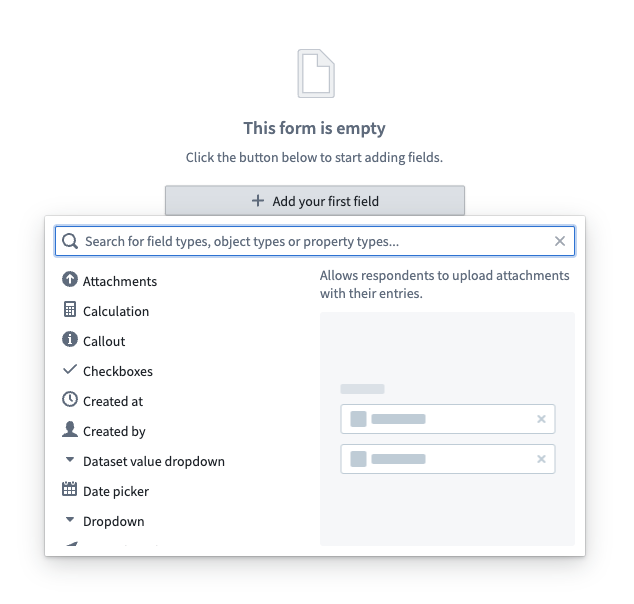
Then, select Add your first field.
-
Select the desired field type from the available list of options.
-
Now, modify the field as needed using the Visual Editor sidebar to the right of the form.
-
Then, select the + above or below an existing field to continue adding more fields.
-
Finally, select the green Save button in the top right to save your form.

Change the response destination
To change the response destination of your form, follow these steps:
-
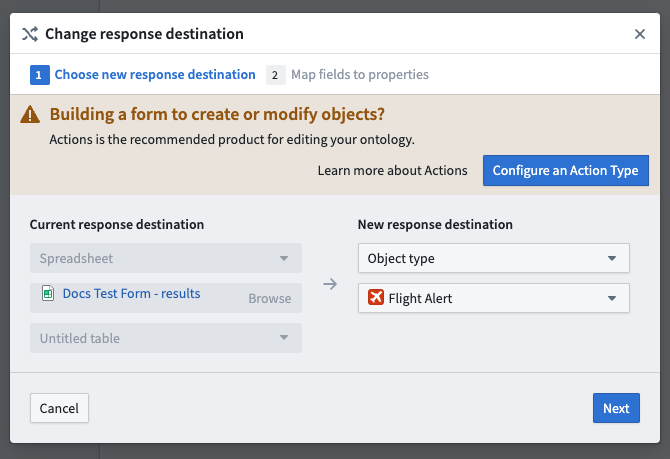
From the Response data tab to the right of your screen, select Change response destination.
-
Choose the new response destination for your form.
-
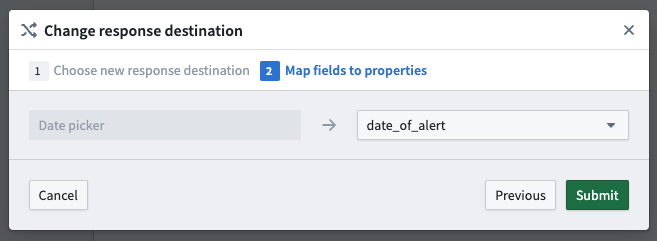
Map any added fields to properties available in the new destination.
-
Select the green Submit button to save.
Sheets and fields
Forms are comprised of sheets and different types of fields:
- Simple fields ask for basic input from the respondent.
- Data-backed fields link a form to data that already exists in Foundry.
- Auto-populating fields allow users to capture metadata about the form, such as who created it and when.
- The Attachments field is a special type of simple field that supplements responses with files.
Modify sheets and fields
To modify an item:
- Open the Visual Editor. This can be done by either:
- Hovering over the item and selecting the gray settings wheel in the top right, or
- Double-clicking the item (for sheets, double-click the header).
- Explore and modify the available configuration options, which are grouped under the tabs:
- Properties
- Validators (for fields only)
- Transforms
- Select the green Save button at the bottom of the panel.
To unlock additional configuration options, use the Code Editor.
Reorder sheets and fields
To reorder an item:
- Hover over the item to be reordered.
- Select either of the arrows in the top left to shift the field up or down one position.
There is also a drag-and-drop handle to the left of the field.
Remove sheets and fields
To remove an item:
- Hover over the item to be deleted.
- Select the red x within a circle in the top right.
- Confirm the deletion by selecting the same icon once more.
A field can also be removed with the Visual Editor:
- Double-click the field to open the Visual Editor.
- From the Properties tab, select Delete sheet/field at the bottom of the panel.
Finally, an item can be drag-and-dropped to the Drop here to delete button at the bottom of the form.