- Capabilities
- Getting started
- Architecture center
- Platform updates
Multi-node templates
Code Workbook supports multi-node templates for templatized workflows. A template can be created from multiple other templates, and you can bind the values of parameters in these templates together.
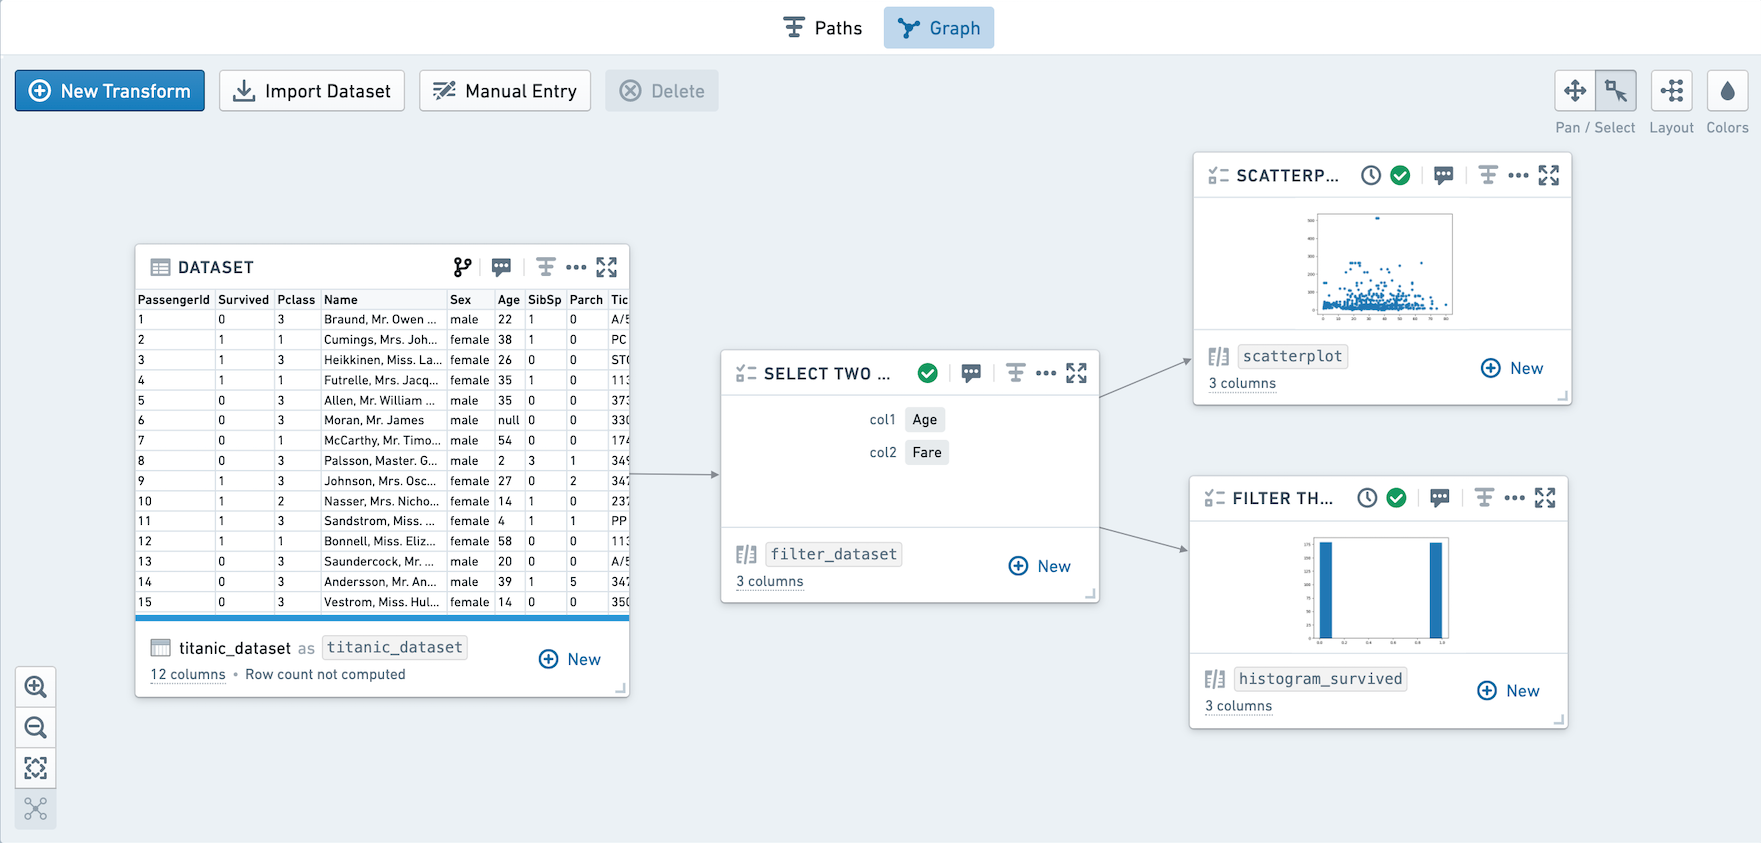
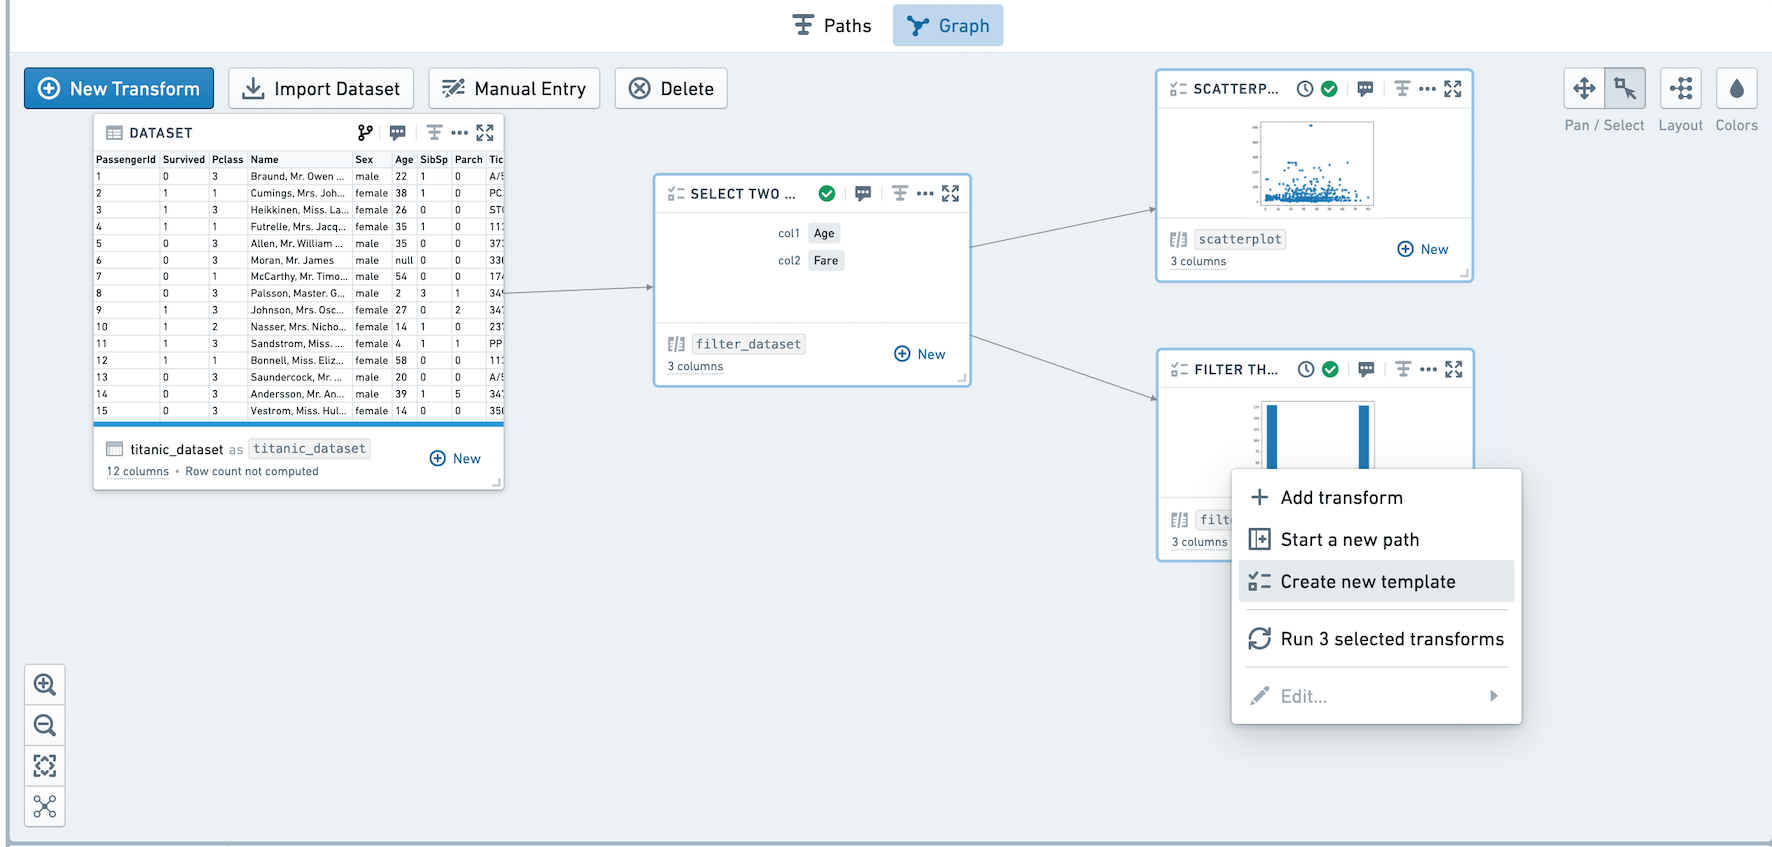
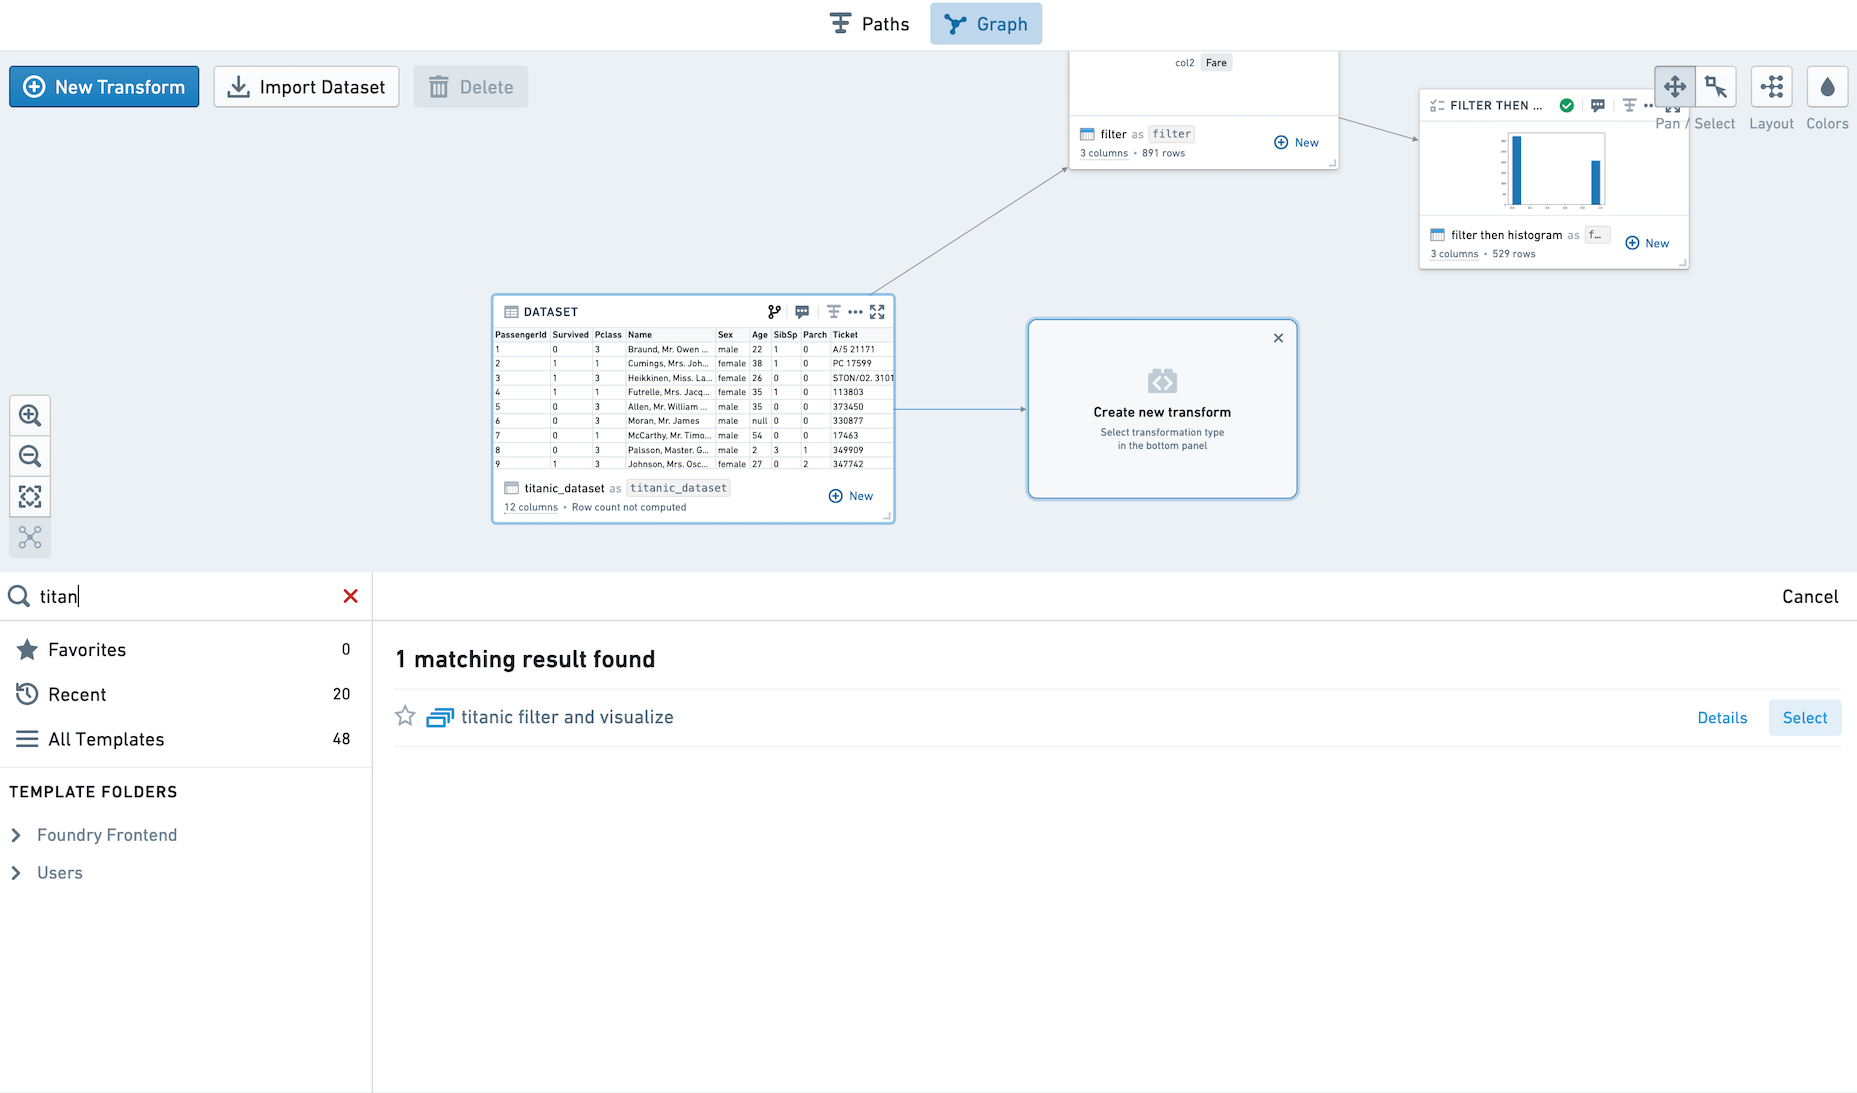
Let's walk through an example using titanic_dataset. We will templatize a workflow selecting two numeric columns and plotting them in two graphs. The first graph is a scatterplot of the two numeric columns. The second plot is a histogram of whether or not the passengers survived, based on filtering on the numeric columns.
Here's a visual overview of the workflow we are templatizing:
Creating Templates
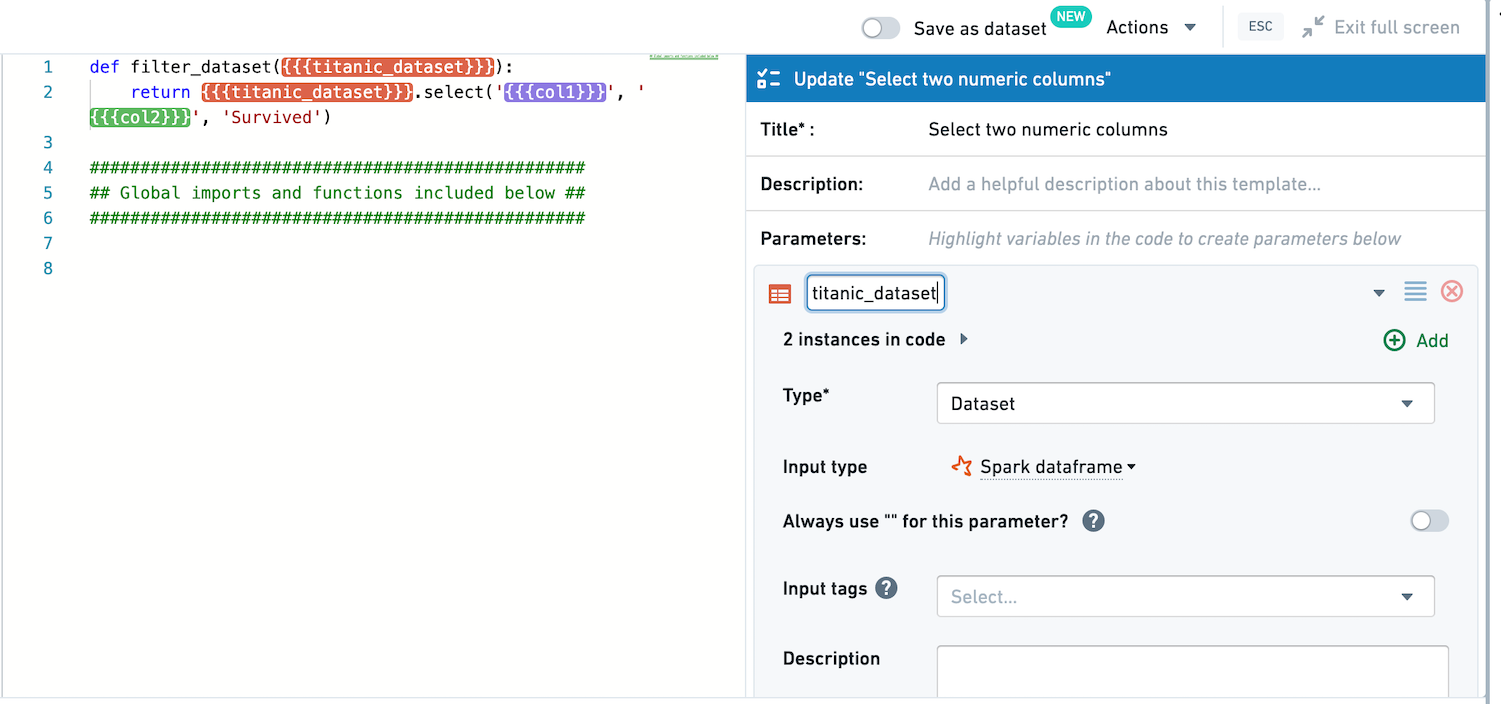
First, create a template selecting two numeric columns from the input dataset, along with Survived. Title this template Filter.
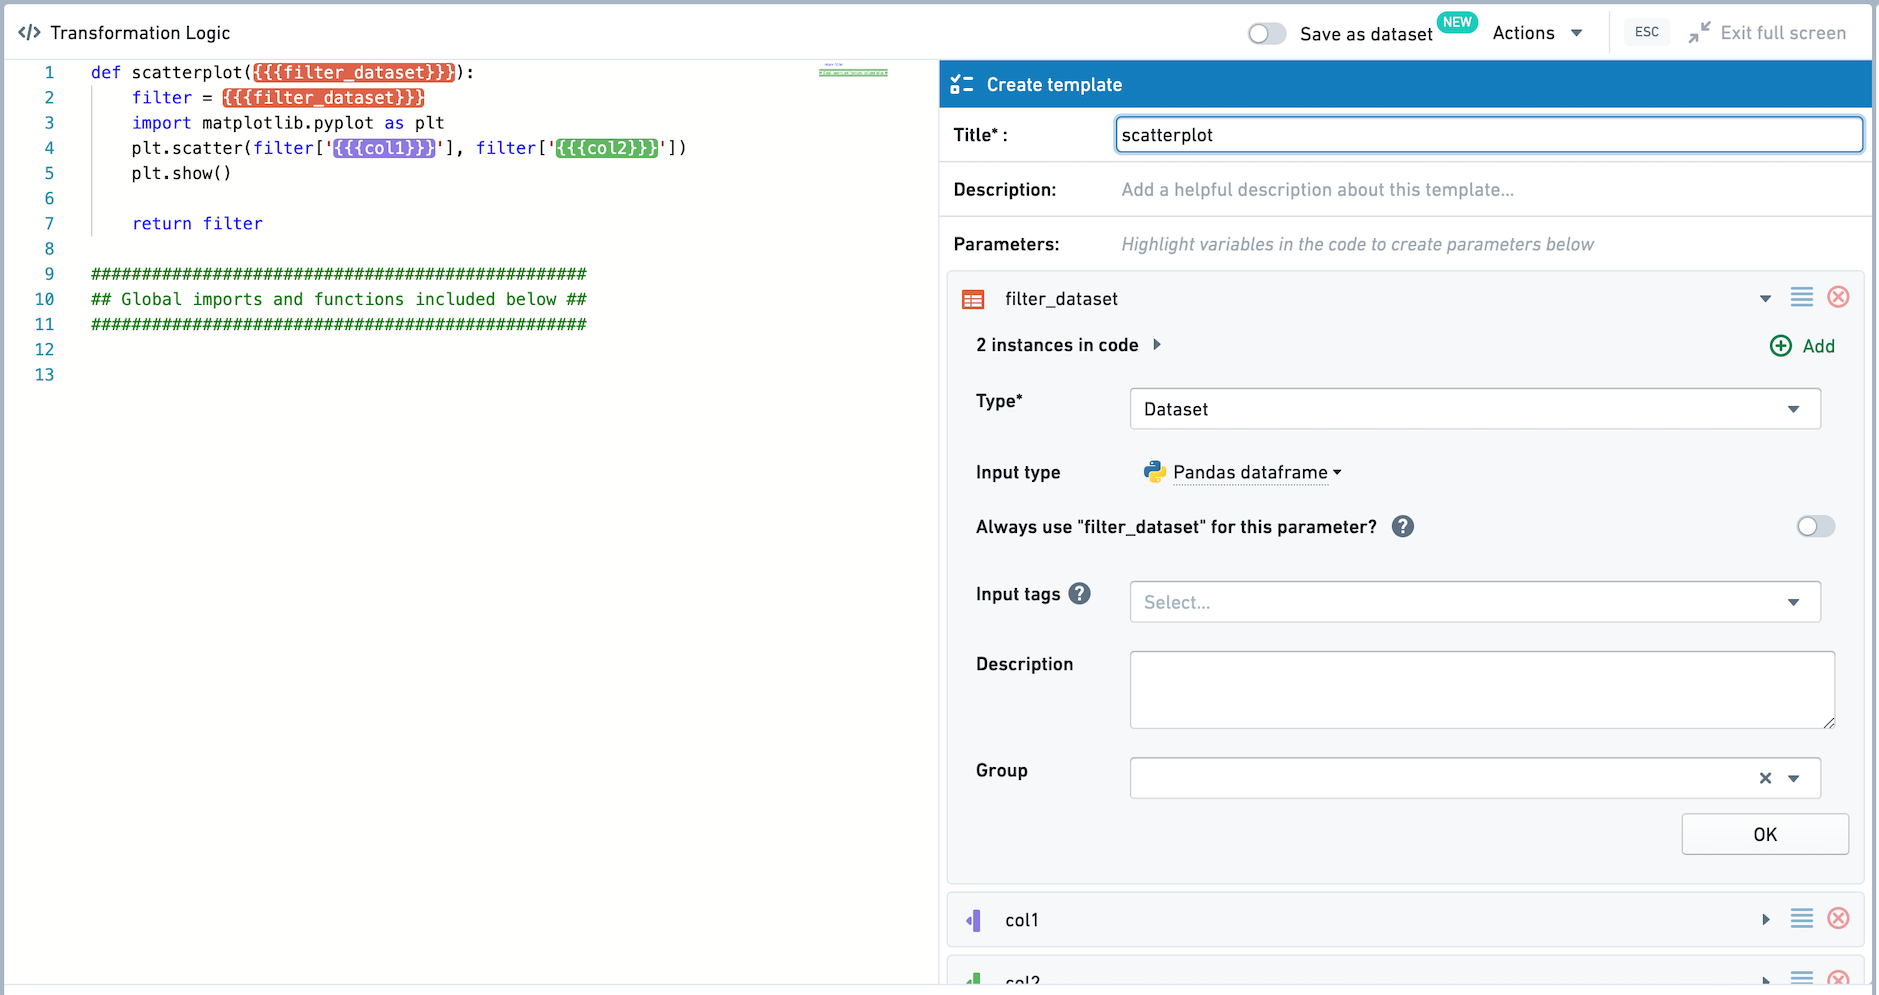
Second, create a template plotting a scatterplot of the two numeric columns. Title this template Scatterplot. Note that the input dataset is set to be read in as a Pandas dataframe.
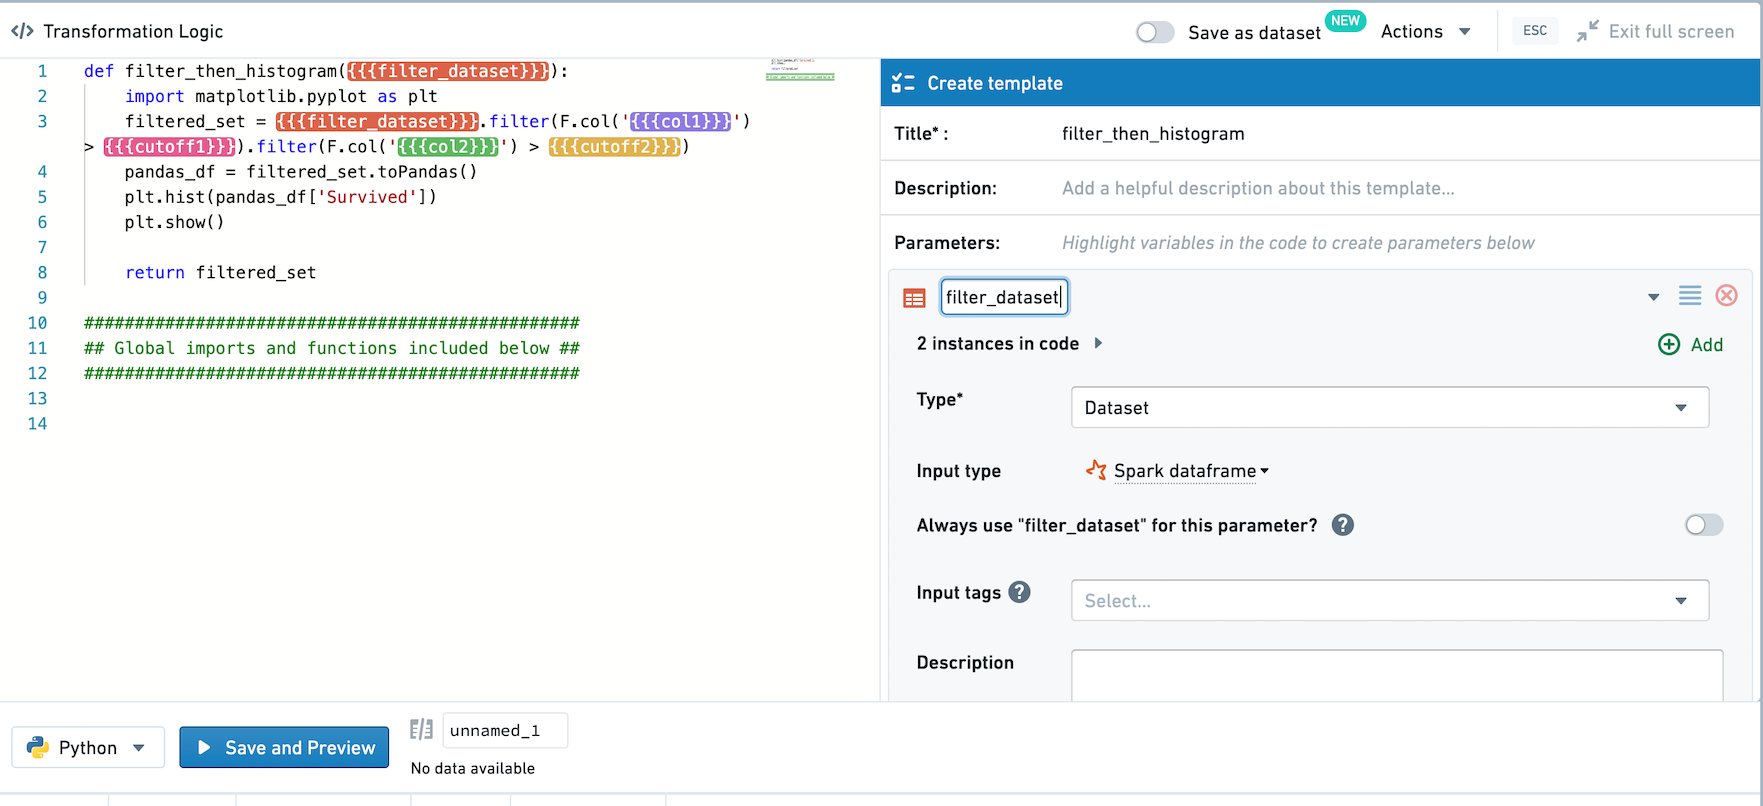
Finally, create a template that filters the input dataset based on the two numeric columns and two templatized inputs. Note that the input dataset is set to be read in as a Spark dataframe.
Creating Multi-Node Templates
Select all three templates and right-click to open the menu, then select Create new template. You should now see the template editor.
We want to link the values of the col1 parameters, and link the values of the col2 parameters. First, click into the Filter template. Click into col1, and select Create shared parameter in the dropdown.
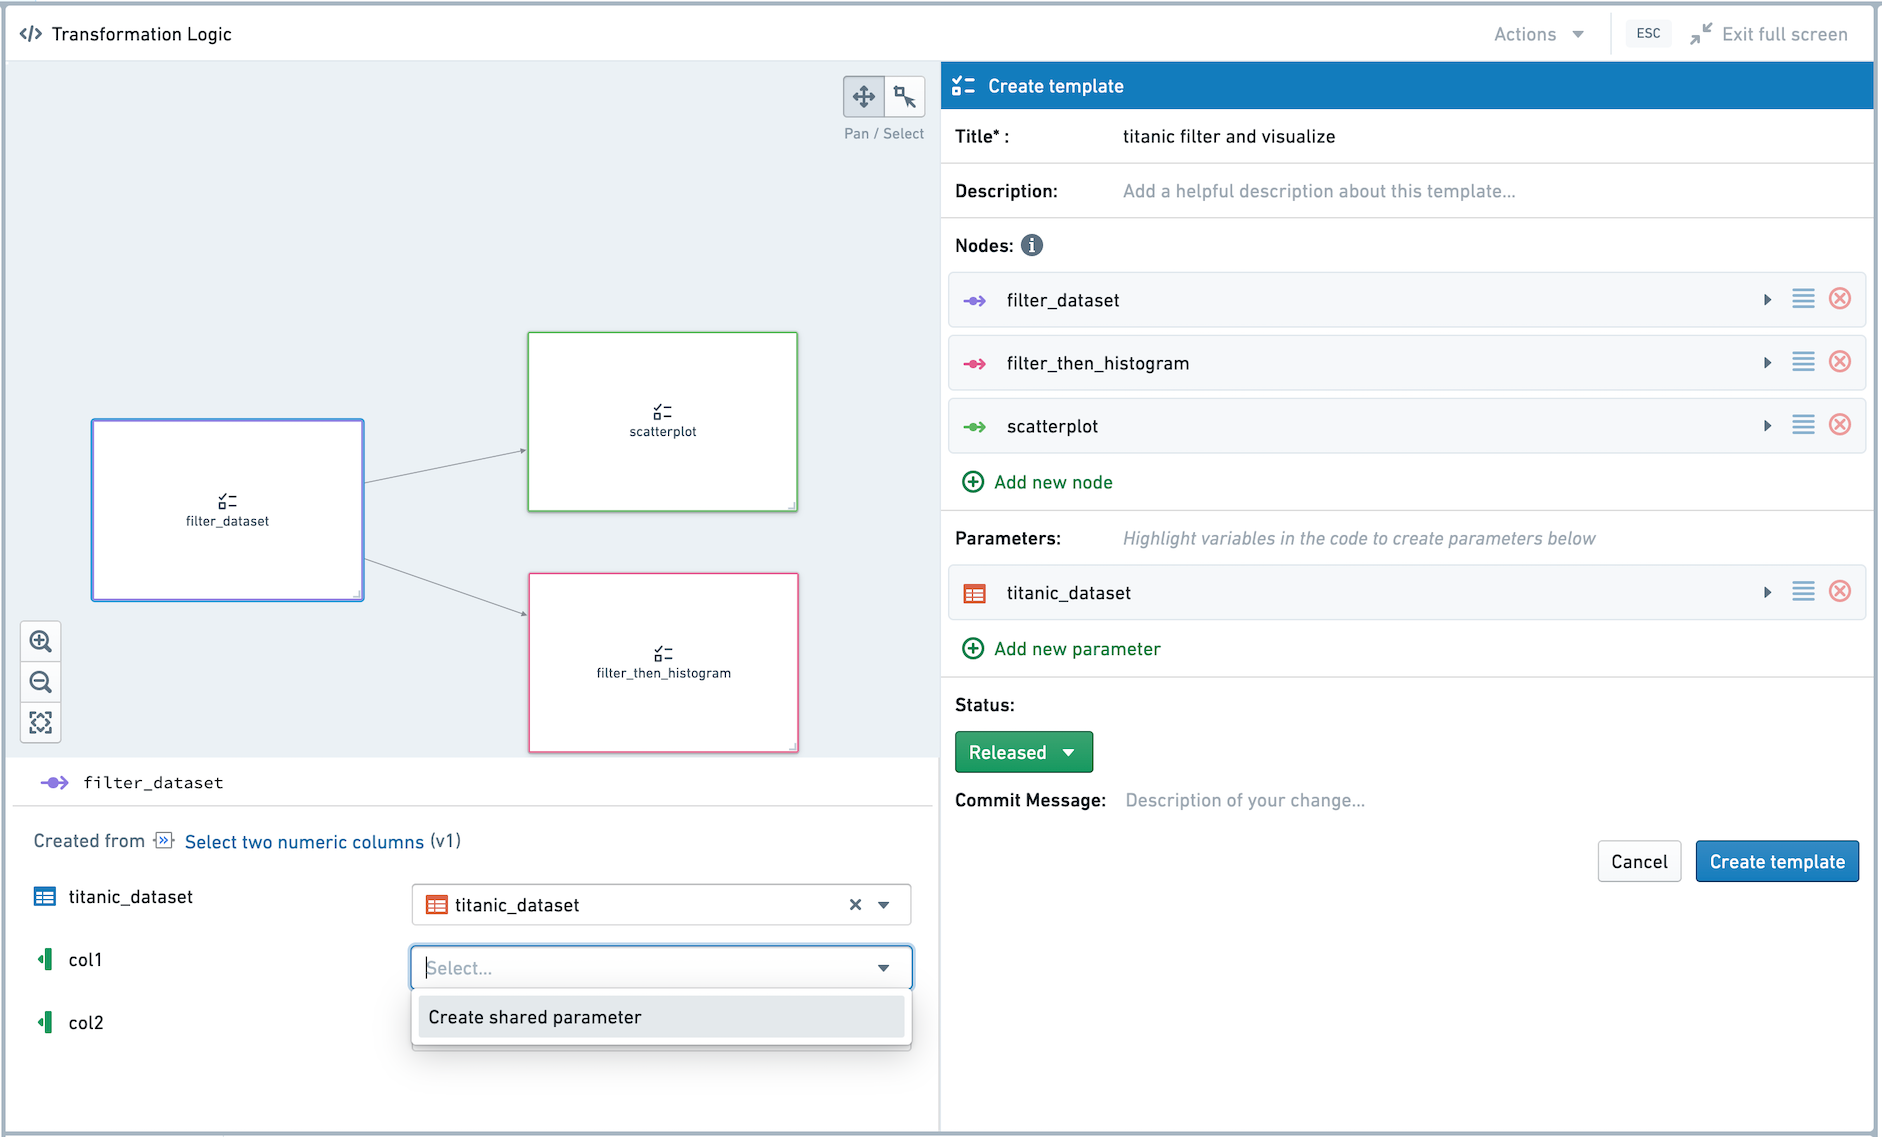
On the right-hand side, a new parameter titled col1 has been created. Select titanic_dataset as the source dataset in the right-hand pane. Then, click into the two other templates and choose to link col1 to the new col1 Multi-Node Template parameter. Repeat for col2, and then save the multi-node template.
Using Multi-Node Templates
The three templates we previously created are now part of a multi-node template.
Click into the Filter template. Next to the col1 and col2 parameters, there is an icon indicating this parameter value is controlled by the multi-node template parameter.
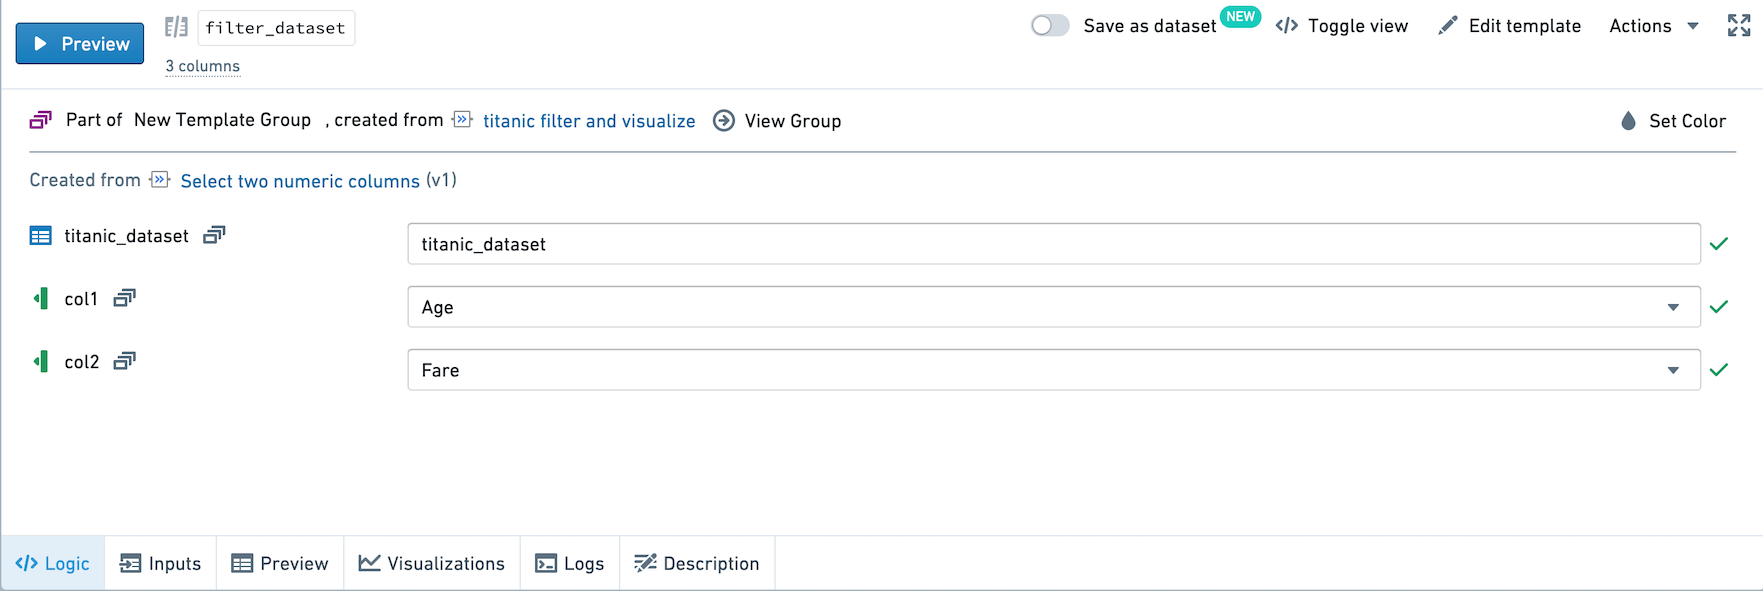
Select View Group at the top of the pane. You now see a view highlighting the nodes in the Multi-Node Template, and listing the shared parameters in the template. You can change the value of col1 and col2 in this view, and all instances in the three nodes will also be changed.
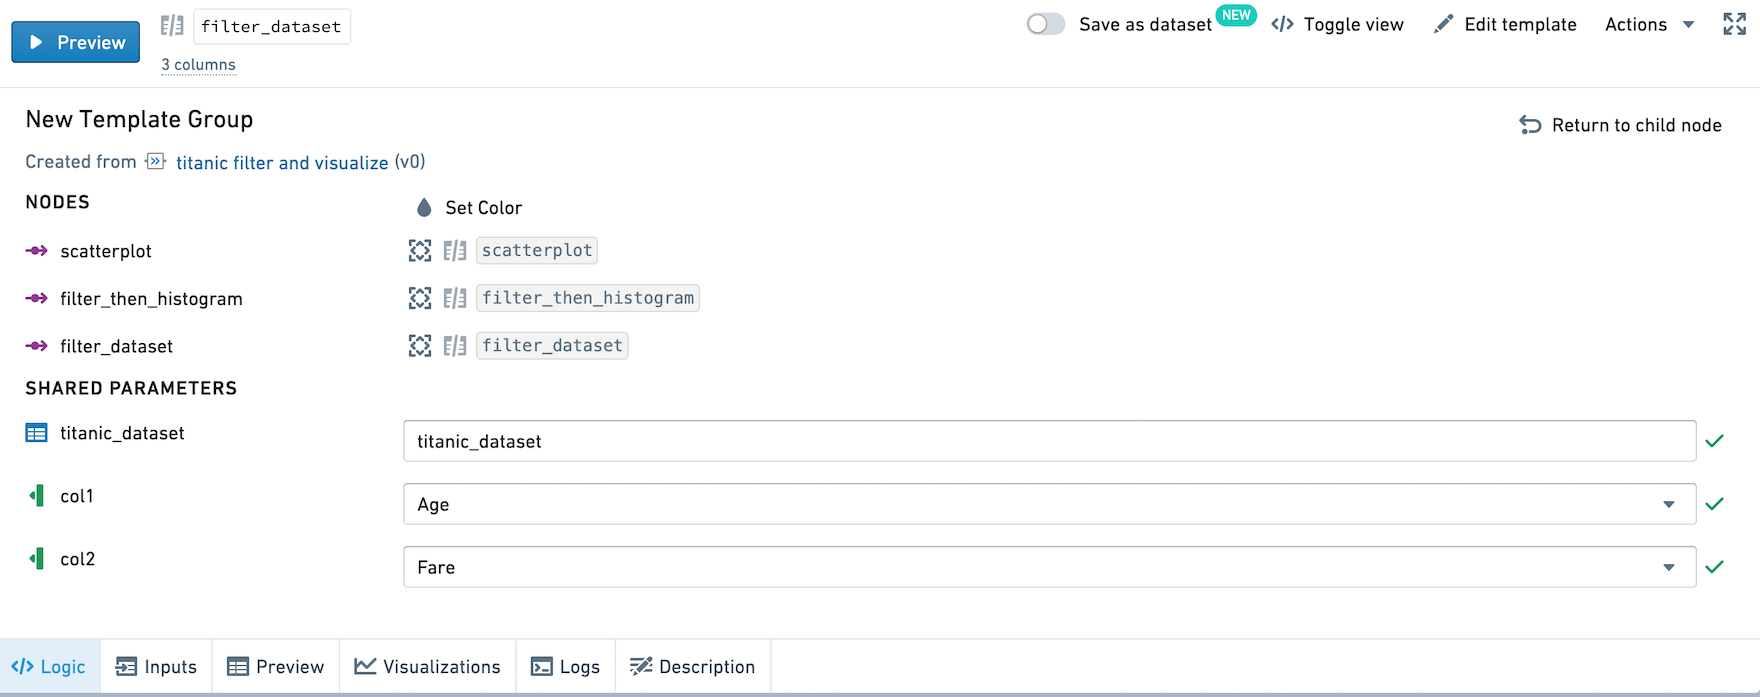
If you change the value of a shared parameter in the child node pane, the value will also be changed for all instances in the multi-node template.
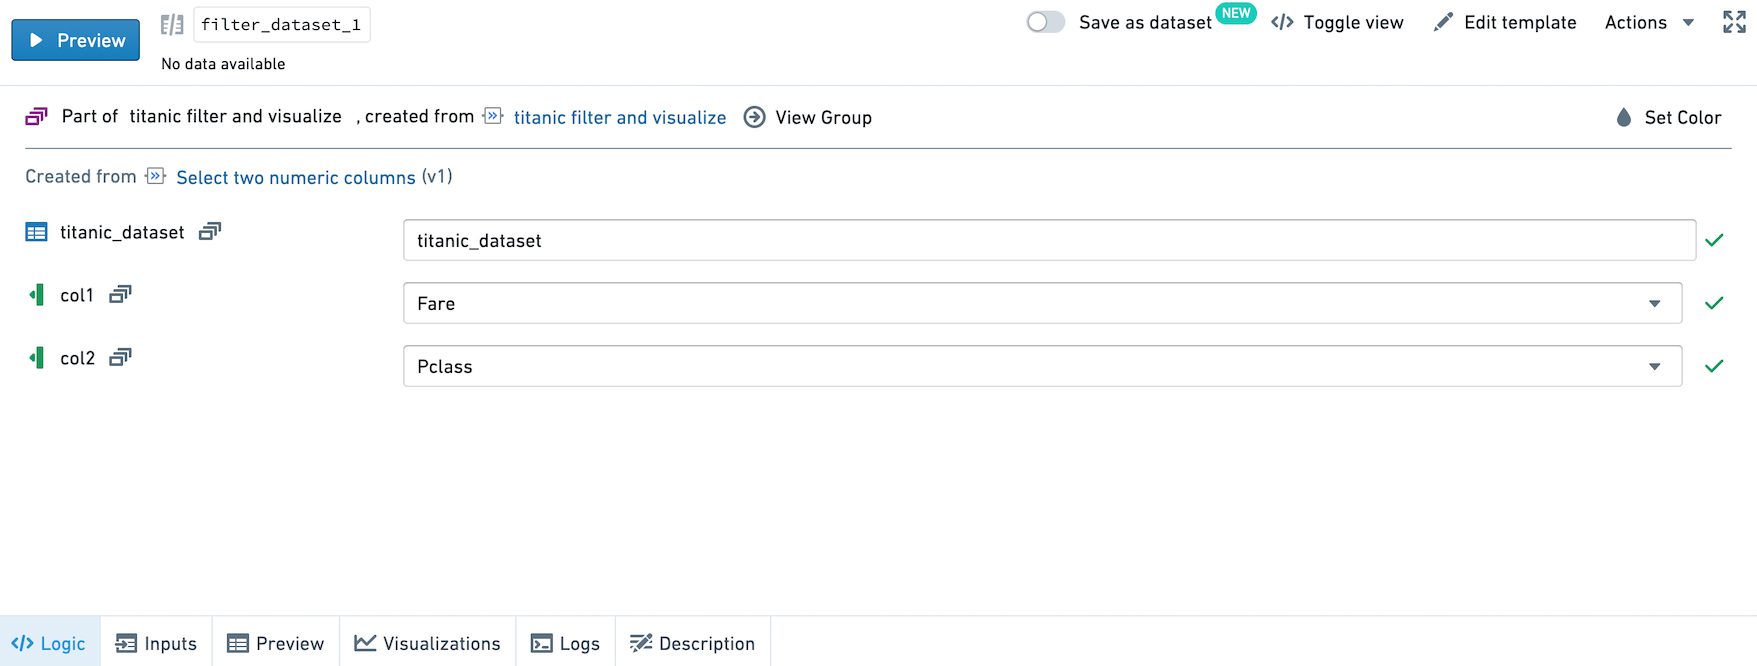
Let's add a new instance of this template.
Let's analyze Fare and PClass. By selecting these two columns in the view for the child node, notice that you're setting the column values across the group.
Then, update the cutoff values in Filter then histogram. Run the templates, and we've now created the same graphs for a different set of numeric columns.