Branching
Version control tools are commonly used in software to allow groups of developers to work together as effectively as possible. The use of version control, along with good development practices, allows engineers to build features quickly while maintaining confidence that the changes they introduce are of high quality.
Branching in Code Workbook provides a version control experience tailored to data transformation, enabling teams to operate on logic and data simultaneously in a Workbook.
Branches
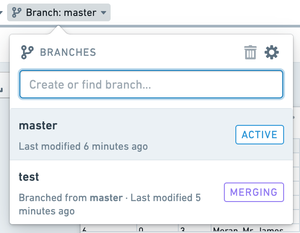
By default, Workbooks are created with a single branch with the same name as the default branch across all of Foundry. Typically, this branch is called master. You can use the branch menu to browse and select a branch, create new branches, and change branch settings.

Creating branches
By default, Code Workbook allows you to create at most 100 branches. If your workbook had over 100 branches before the limit was put in place, all your existing branches will remain, but you will not be able to create additional branches until the number of branches in your workbook is reduced to less than 100.
Type the name of your new branch in the branch menu, then click Create branch or use the Enter key to create your new branch. A new branch will be created in the Workbook with the current branch as its parent.
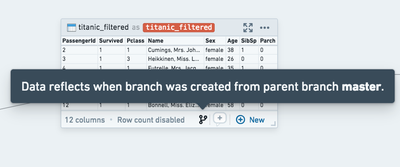
When you create a branch, Code Workbook keeps track of the state of each dataset at the time of branch creation. Any transforms you run on your new branch will use this stored state to load data. This means that changes on the parent branch will not break new branches you have created.

When you run transforms on a branch, Code Workbook creates branches on the associated Foundry datasets so that the results of your logic changes are stored in isolation from other branches. After writing to Foundry has completed, click Open dataset in the Output panel to view your result dataset on your branch.
Deleting branches
To delete a branch, navigate to the branch and click the trash can icon in the top-right of the branch menu. Deleting a branch that still has child branches based on it will re-parent those branches. For example, if you have three branches master -> develop -> feature, deleting develop will result in feature’s parent becoming the master branch.
Merging branches
Once you're done working on your branch, you can merge it back into the parent branch to incorporate your work. Learn more about merges.
Branch settings
To edit branch settings, navigate to a branch and click the gear icon in the top-right of the branch menu. In most Workbooks, you will only need to edit branch settings on the masterbranch.
Branch settings can be used to customize the process for making changes to a branch. Currently, branch settings allow you to set a few options:
- Is the branch protected? If a branch is protected, nobody can make edits to the branch directly. Instead, all changes must be merged in through another branch. Note that if a branch is protected, merging into it requires Owner permissions on the Workbook.
- Does the branch allow running? If a branch is protected and this setting is turned off, datasets on this branch must be materialized using Foundry builds. This ensures that nobody can initiate an interactive run that prevents builds from succeeding.