Create a Release promotion pipeline
Software promotion is a common DevOps concept. In Apollo, Release Channel contributors add Product Releases to Environments using Release Channels. Products can be automatically or manually promoted to these channels once defined criteria are met. Environment editors then subscribe their Environment to a Release Channel to receive Product Releases according to their risk tolerance and feature appetite.
In Apollo, a Release promotion pipeline defines how Releases of your Product should be promoted from one Release Channel to another and the criteria that must be satisfied at each promotion stage. This enables automated, stable rollout of new Releases across your Environments.
In this task you will create a two-stage RELEASE → STABLE pipeline and define basic promotion criteria. You will then subscribe your Environments to receive Product Release upgrades from one of these channels.
For information on Apollo's default Release Channels and how it uses Product version strings to determine a Release's default channel, read the following documentation entries:
Create a new STABLE Release Channel
- Select Settings from the left sidebar.
- Navigate to the Release channels tab and then select Create release channel.
- In the Details tab, name the Release Channel
STABLEand enter a description, for example "Releases ready for production". Then select Next. - In the Requirements tab, you can set label requirements for your Release Channel. You will not set any label requirements in this task, but you can learn more about labels in the Apollo documentation. Some examples of label requirements include ensuring security scans pass, verifying that container images exist, and confirming a certain telemetry value is true.
- In the Permissions tab, you can specify which teams can use or administer the channel. You can leave the defaults for now and select Create channel.
Set up your pipeline
- Navigate to the Product page for either your Helm chart or Nginx. Note the
Not configuredstatus in the Promotion pipeline block. - Select Edit in the Promotion pipeline block.
- Select Add stage to add a promotion stage. Enter
RELEASEfor the source channel andSTABLEfor the target channel. Then enter the following settings. You can hover over the field labels to learn more.- Test environments: Leave blank
- Soak time: 1 hour
- Promotion threshold: 1
- Recall threshold: 1
- Soak ratio: 0.95
- Select Confirm when you are finished.
Test your promotion pipeline
If you have connected more than one Environment, you can set one to receive Releases of a Product on RELEASE and another to receive them on STABLE. Before Apollo promotes the Release from RELEASE to STABLE, it will evaluate a Release according to the promotion evaluation requirements that you defined in the previous section.
If you connected a single Spoke Environment, use the directions below to subscribe it to the RELEASE channel.
It is rare that an Apollo Hub will have only a single connected Environment. In these cases, there may not be a need for Release promotion pipeline because there would be no test environments for promotion evaluation.
Before continuing, note that you can set and change the default Release Channel for your Environment by:
- Opening one of your connected Environments.
- Selecting Set default release channel... from the Actions dropdown.
- Selecting a default Release Channel from the dropdown.
All of the installations of Products in your Environment, called "Entities", will now receive Release upgrades from the default Release Channel. You can specify a different channel for and Entity is a Product is not available on the default channel or you want to encode a different risk tolerance for the installation.
If you have connected more than one Environment, you can follow the below steps to test your pipeline.
- Navigate to the Environment page for one of your Environments, which we will refer to as
Environment 1. - Find either your Product or Nginx in the Entities tab.
- The value in the CHANNEL column should be
RELEASE;Environment 1is already subscribed to receive Releases from theRELEASEchannel. - Navigate to the Environment page for a different Environment, which we will refer to as
Environment 2. Locate your Product or Nginx in the Entities tab. The value in the CHANNEL column is likely to beRELEASE, because that is the default channel for this Environment. We will change the Release Channel for this Entity toSTABLE. - Select the Product, yours or Nginx, in the Entities table to open the Nginx on ${environmentName} Entity page.
- Select Set default release channel... from the Actions dropdown.
- Change the value from
RELEASEtoSTABLEand select Change channel. - Return to the Entities tab for
Environment 2. You may need to refresh your browser. Confirm that the value in the CHANNEL column for your Product or Nginx is nowSTABLE.
Now you can watch your promotion pipeline in action. Create a new Release of the your Product or the Nginx Product using the steps you followed previously. Be sure to use lowercase for the Product and Helm chart names in the config.
You should also increment the version appropriately. For example, if your latest Release was 13.1.5, set the new version to 13.1.6. You can consult Artifact Hub for available Nginx Helm chart versions.
Apollo will automatically install the new Release on Environment 1, because the Environment is subscribed to receive new versions of your Product on the RELEASE channel. Apollo will promote the Release to the STABLE channel and install the new version Environment 2 only after the Release has been evaluated on Environment 1.
You can monitor promotion progress by opening the page for your new Release.
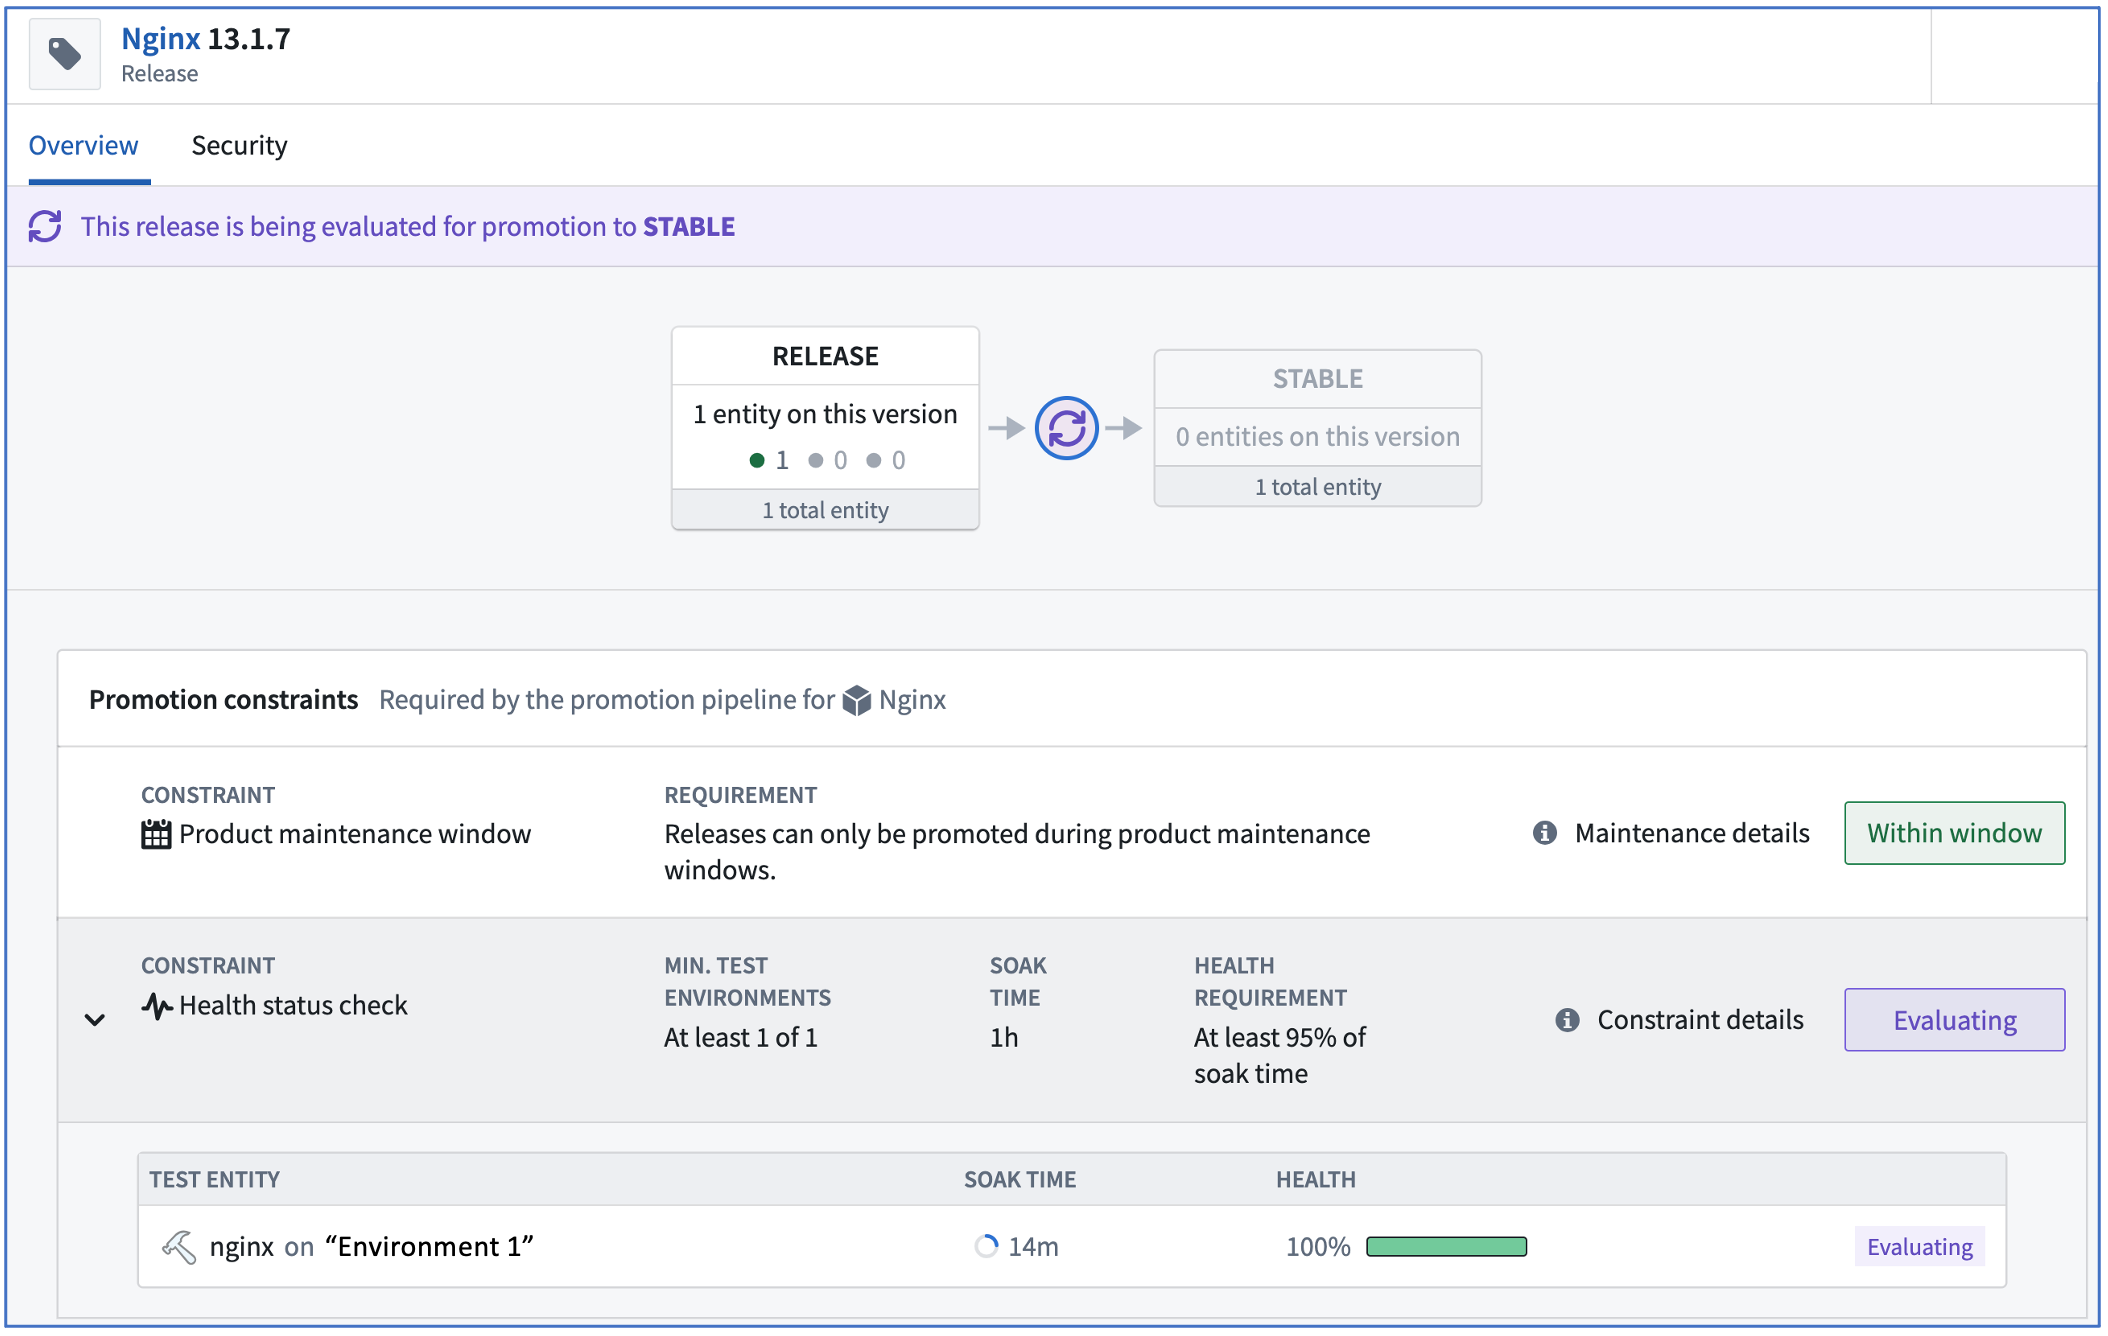
Note that each release stage indicates 1 total entity, meaning one Environment is subscribed to each channel. After the configured one hour of successful soak time, the Release will automatically promote to STABLE and only then will Apollo install the Release on Environment 2.
You can repeat this process for any other Helm charts you may have added to the Product catalog.