Getting started with the Apollo CLI
The Apollo CLI (apollo-cli) is a general-purpose command-line tool for performing actions on an Apollo Hub, such as uploading a new Product or viewing what is installed in an Environment managed by Apollo. This guide will walk through downloading and setting up the Apollo CLI. For more detailed information, see the Apollo CLI documentation.
The main actions supported by apollo-cli are:
product-release: Upload a new Product Release as a distribution or Helm Chart so it can be installed in an Environment.entity: List all installed Products in a given Environment.environment: List metadata about all the Environments managed by Apollo.product: List all the Products currently available in the Apollo Hub (by Apache Maven coordinate).
Initial setup
Download the CLI
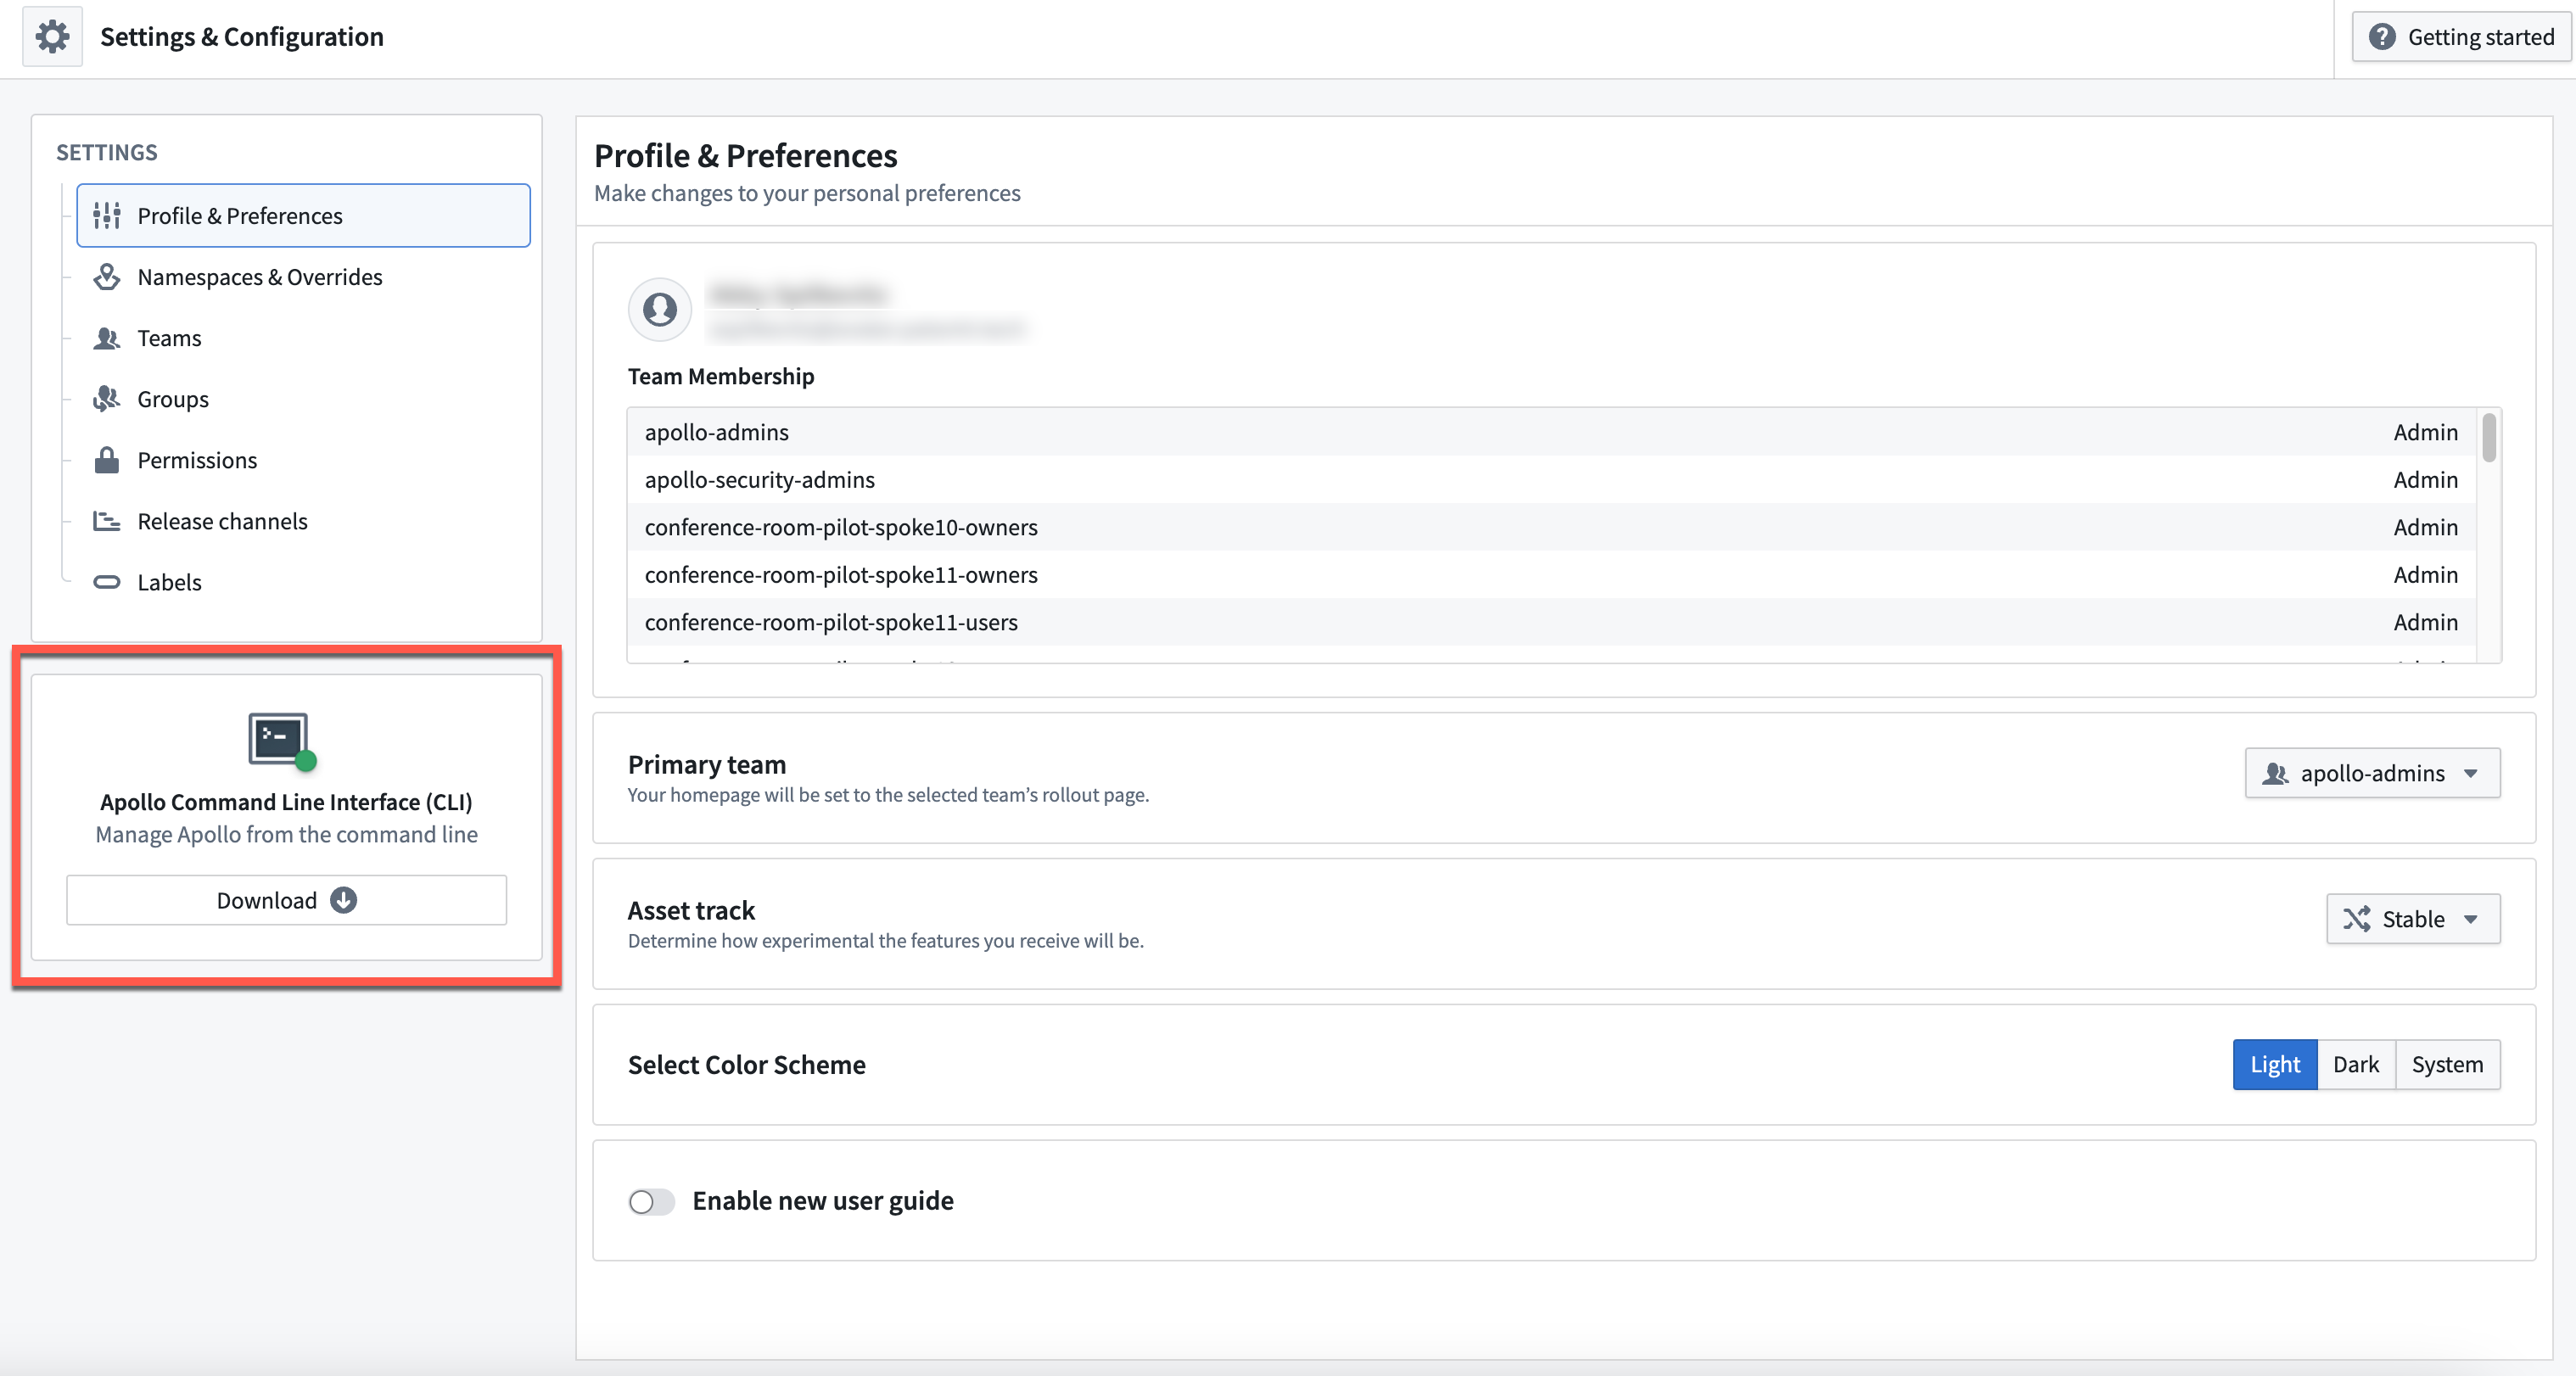
Navigate to Settings in Apollo's left-hand sidebar. Select Download on the left of the Settings & Configuration page to download the Apollo CLI.
A pop-up window will appear with an option to download the CLI based on your operating system.
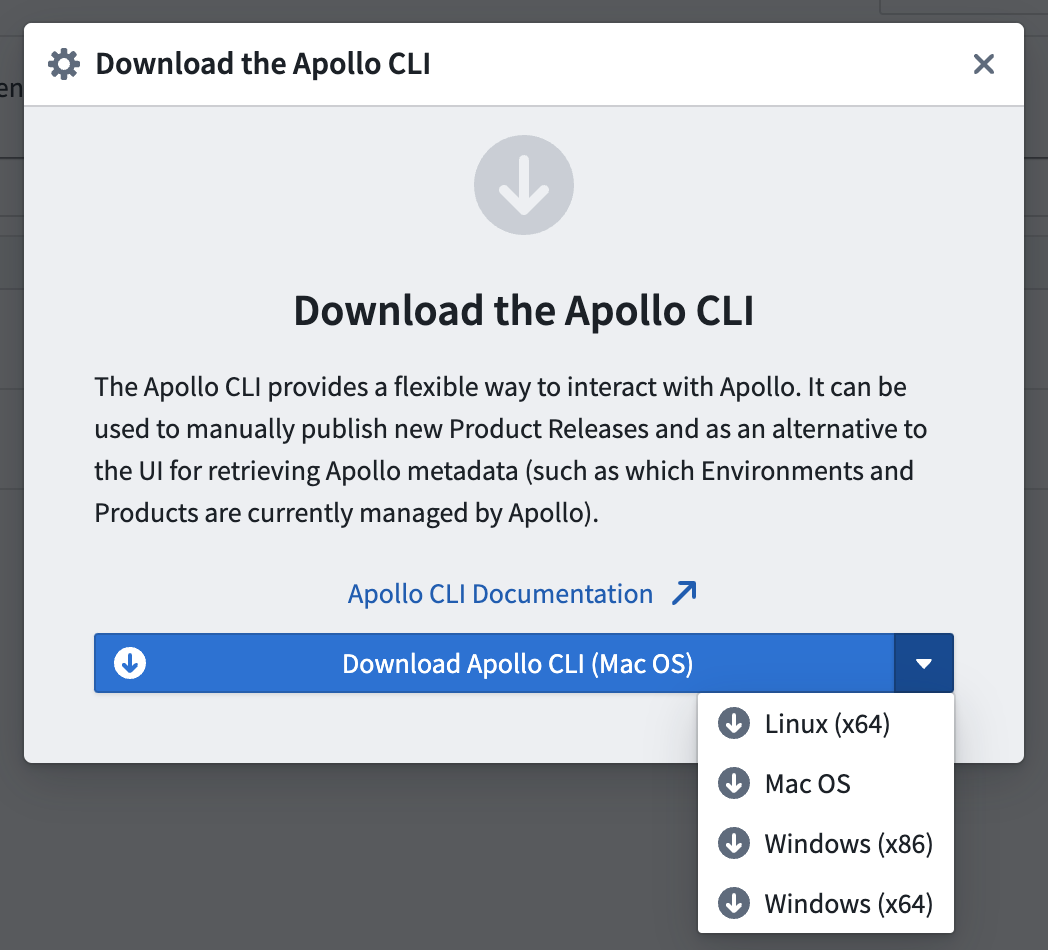
Selecting this will download a compiled binary of the CLI. Once the download is finished, move the file to wherever you would like to host the CLI and change the permissions so you can execute the CLI.
Copied!1$ chmod +x apollo-cli
To use the apollo-cli, invoke the executable and provide it with the desired command and any required flags. Running apollo-cli --help will display a list of available commands with flags and documentation on their usage. The --help or -h flag can be added to any command to get documentation for that particular command and its flags. For example, apollo-cli --help indicates that environment is an available command, and running apollo-cli environment --help will display the usage for the environment command. Then, you can run commands such as apollo-cli environment list.
All the commands in this guide assume that the apollo-cli executable is in the current working directory. We recommend moving the apollo-cli executable to a folder on your $PATH so the CLI can be run from any working directory. For more details, refer to your shell's documentation.
(Optional) Set up CLI command completion
apollo-cli supports command completion for most common shells like bash, fish, powershell, zsh, and more. When command completion support is installed, you can use the Tab key on your keyboard to perform autocomplete for subcommands and flags.
Run the ./apollo-cli completion [shell] --help command for your particular shell to get instructions for how to install completion for your shell. For example, ./apollo-cli completion zsh --help prints instructions for how to enable completion for the zsh shell.
Authentication
To use the Apollo CLI, you will need to provide one of the following:
- An Apollo Bearer Token
- A client ID and client secret for a service account
When you run apollo-cli configure, you can choose an authentication method when prompted for the Apollo token provider. You can enter static to use a Bearer Token or enter service-user to use a service account. You will then be prompted to enter the Bearer Token or the client ID and client secret. If you are using a Bearer Token, you should not enter a client ID and client secret. Similarly, if you are using a service account you should not enter a Bearer Token.
You cannot use both authentication methods simultaneously. You can switch your authentication method by re-running apollo-cli configure. You must replace previous configuration values with empty fields.
Create a Bearer Token
You can generate a Bearer Token by navigating to https://<Hub>.palantircloud.com/multipass/app, where <Hub> is the unique name of your Apollo Hub.
Under the User Settings section in the sidebar menu, select Tokens. Then select + Create token on the upper right and enter a name, brief description, and expiration date for the token.
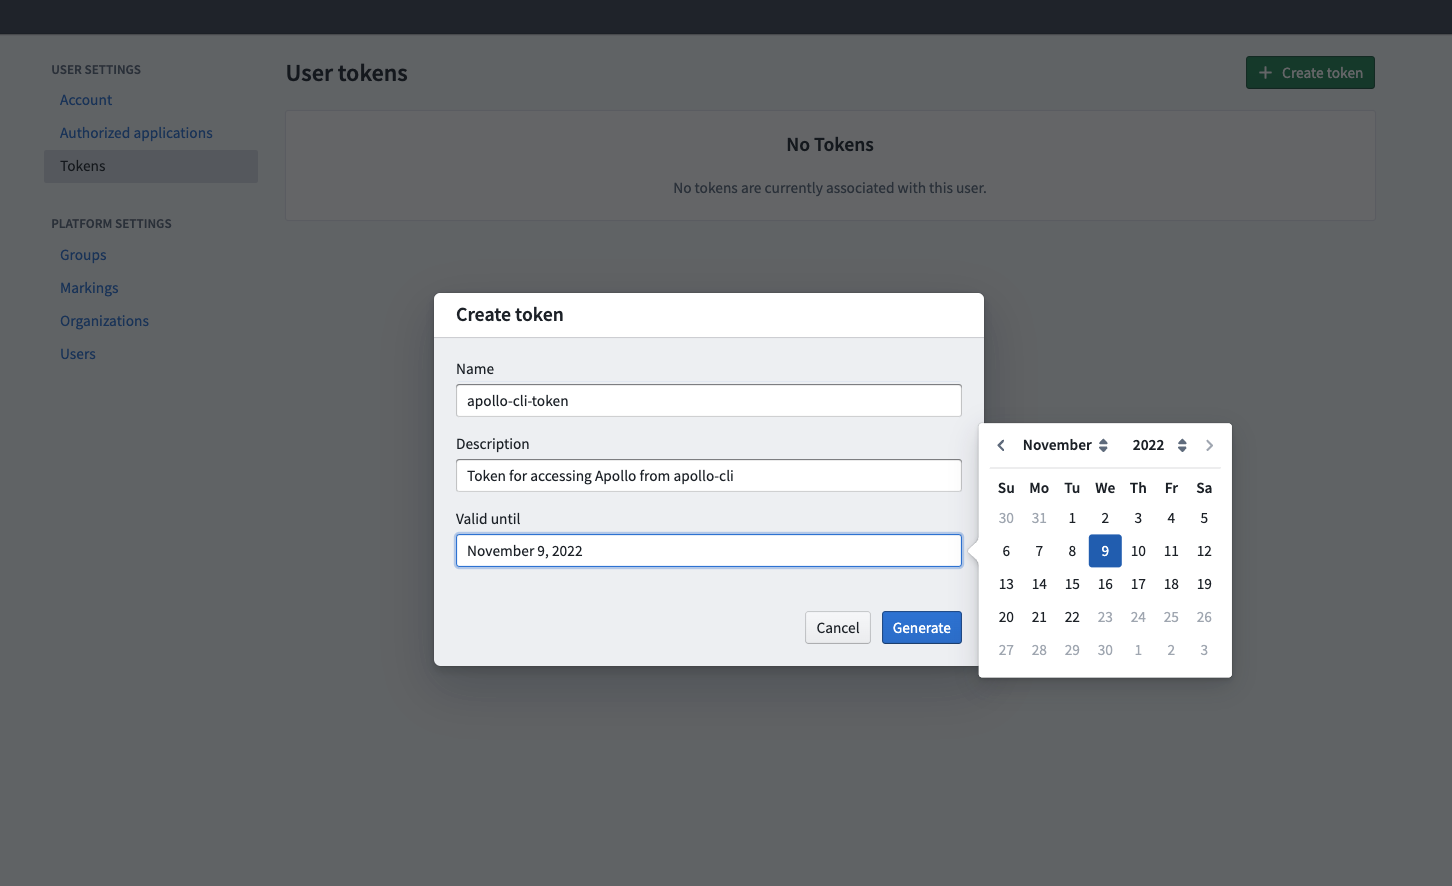
Add the Bearer Token as a secret named APOLLO_TOKEN to your CI pipeline so that the value is available in the CI script.
Set Apollo Hub configuration
Before you interact with an Apollo Hub for the first time, run ./apollo-cli configure to set the configuration necessary for interacting with your Hub. When you run the following you will be prompted to enter values for each variable.
The configure command creates an apollo-cli.config file in your local ~/.palantir/ directory. You can check there to verify the file exists. Values may also be left blank/unspecified.
When the Apollo CLI runs commands that need values specified in the configuration, it will attempt to read them from the configuration file if it exists. However, these values can also be specified as environment variables or as command-line flags.
Copied!1 2 3 4 5 6 7 8 9 10 11 12 13 14 15 16 17 18 19 20$ ./apollo-cli configure Creating new profile "default" Apollo URL [None]: https://<Hub>.palantircloud.com Apollo token provider [auto] {auto|static|service-user|sso}: <Token Provider> Apollo bearer token [None]: <Multipass Bearer Token> Apollo client ID [None]: <Service User Client ID> Apollo client secret [None]: <Service User Client Secret> Default environment [None]: Space ID [None]: Configuring global options (shared across all profiles): V1 experimental commands [enabled] {enabled|disabled}: enabled V1 deprecated commands [enabled] {enabled|disabled}: enabled V2 experimental commands [disabled] {enabled|disabled}: disabled V2 deprecated commands [enabled] {enabled|disabled}: enabled Extra debug tools to enable (enter as comma-separated list) [None]: Mission Manager experimental features [disabled] {enabled|disabled}: disabled Mission Manager deprecated features [disabled] {enabled|disabled}: disabled
The Apollo CLI stores these connection settings in a named profile (default unless you pass --profile). To obtain the following values:
<Hub>: Each Apollo Hub has a unique URL that will be provided as part of Apollo onboarding.<Token Provider>: How the CLI obtains a Bearer Token. Valid values areauto,static,service-user, andsso(defaultauto). Withauto, the CLI usesstaticif a Bearer Token is set,service-userif a client ID and secret are both set, orsso(interactive browser login) otherwise. Setstaticto authenticate with a Multipass Bearer Token, orservice-userto authenticate with a service account.<Multipass Bearer Token>: Your Apollo Bearer Token.<Service User Client ID>: This is the Client ID provided for a service account. If using a Bearer Token, this should be left blank.<Service User Client Secret>: This is the Client Secret provided for a service account. If using a Bearer Token, this should be left blank.Default environmentandSpace ID: Optional defaults for environment- and space-scoped commands. Leave these blank to specify them per command with the--environmentand--space-idflags.
Configure Experimental and Deprecated commands
When prompted, you can choose to enable or disable commands that are marked as Experimental or Deprecated.
Run a command to verify that the configuration is correct
To test that the URL and Bearer Token set above are working, run the following:
Copied!1 2 3$ ./apollo-cli environment list ENVIRONMENT ID ENVIRONMENT NAME CONTACT TEAM DECLARED STATE SOURCE REPORTED STATE SOURCE SPACE ID test-spoke Test Spoke My Team Authoritative Relayed ri.apollo.main.space.aaaaaaaa-bbbb-cccc-dddd-eeeeeeeeeeee
By default, environment list prints a table. To produce machine-readable output, add -o json to return a JSON array of environment objects:
Copied!1 2 3 4 5 6 7 8 9 10 11$ ./apollo-cli environment list -o json [ { "apolloEnvironmentID": "test-spoke", "environmentName": "Test Spoke", "contactTeamName": "My Team", "declaredStateSource": "Authoritative", "reportedStateSource": "Relayed", "spaceID": "ri.apollo.main.space.aaaaaaaa-bbbb-cccc-dddd-eeeeeeeeeeee" } ]
This command prints the Environments managed by your Apollo Hub. If no Environments have been set up, this list may be empty. You can follow the instructions in Creating a new Environment to create an Environment.
If the Apollo URL or Apollo Bearer Token specified in configuration is invalid, the command will fail with an error.
Example 1: Publishing the Traefik Helm Chart to Apollo using the CLI
In this example, we are going to install the open-source Traefik Helm Chart ↗ as a Product in Apollo.
Conceptually, publishing a Product to Apollo requires adding both the Product metadata and its manifest to the Product catalog. The Apollo CLI product-release helm-chart init command takes a standard Helm Chart and creates a new artifact which contains the Apollo-specific metadata and the product manifest. The product-release create command then publishes both those components to the Product catalog.
Every Helm Chart Product that is published to Apollo must specify a Helm Repository URL, chart name, and chart version. When Apollo deploys a Helm Chart Product, Apollo locates the Chart with the specified name and version in the specified repository. This means that even if a Helm Chart Product is published using the CLI, Apollo will not be able to deploy the corresponding Chart unless the Chart's images exist in the Helm Chart Repository (which must be done separately).
Adding a Helm Chart as a Product using the CLI can be done by either specifying the information necessary to locate the Helm Chart directly from a Helm Repository or by specifying a Helm Chart file that exists locally. If your machine is able to access the Helm Repository for the Chart, then publishing the Product based on the Helm Repository information is generally the easier approach.
Option 1: Publish a Helm Chart from a Helm Repository
The following apollo-cli commands obtain version 41.0.2 of the Traefik Helm Chart from the Helm Repository at oci://ghcr.io/traefik/helm. The commands then publish the Product to Apollo using the identifier io.traefik:traefik:41.0.2:
Copied!1 2 3$ ./apollo-cli product-release helm-chart init --as-tgz --name traefik --version 41.0.2 --repository-url "oci://ghcr.io/traefik/helm" --maven-coordinate "io.traefik:traefik:41.0.2" --output-dir "./chart" $ ./apollo-cli product-release create --product-tgz "./chart/traefik-41.0.2.config.tgz"
The --as-tgz flag creates an Apollo Product TGZ that contains the files needed to create a Product Release in Apollo.
See the full documentation for product-release helm-chart init for more options.
Option 2: Publish a Helm Chart from a local Helm Chart file
The CLI also supports publishing a local Helm Chart file directly to Apollo. This can be useful in cases where your machine is unable to communicate with the Helm Repository that hosts the Chart. However, note that when Apollo deploys a Helm Chart, it always does so by locating the chart in the specified Helm Repository using the name and version defined in the Helm Chart metadata. This means that, even if you publish a local Helm Chart file using the CLI, it must be available in the Helm Chart repository for Apollo to deploy it.
The following steps demonstrate how to use the apollo-cli to publish version 41.0.2 of the Traefik Helm Chart downloaded locally.
Download the Traefik 41.0.2 Helm chart with the command:
Copied!1$ helm pull oci://ghcr.io/traefik/helm/traefik --version 41.0.2
This creates a traefik-41.0.2.tgz file. Move it to the same directory as the apollo-cli.
Once the file has been downloaded, unpack it and publish it to Apollo using the CLI with the following commands:
Copied!1 2 3 4 5$ tar -xzf traefik-41.0.2.tgz $ ./apollo-cli product-release helm-chart init --chart-path "traefik-41.0.2.tgz" --repository-url "oci://ghcr.io/traefik/helm" --maven-coordinate "io.traefik:traefik:41.0.2" --output-dir "./chart" $ ./apollo-cli product-release create --manifest "./chart/manifest.yml" --default-config "./traefik/values.yaml" --config-schema "./traefik/values.schema.json"
Because the --chart-path flag is specified, it is not necessary to provide the helm-chart --name or --version: these values are parsed from the metadata in the Helm Chart file. However, the helm --repository-url flag is still required because Apollo always obtains the Helm Chart to deploy from the Helm Repository (this URL is not queried as part of the upload operation performed by the CLI, but will be used by Apollo when deploying the product).
If a Helm Chart includes a schema file ↗, add --config-schema "./<chart-name>/values.schema.json" to the product-release create command.
Installing the Published Traefik Product
The result of either publish operation above is that the Helm Chart Product io.traefik:traefik:41.0.2 has been published to Apollo. If you have also created an Environment, then you can now install Traefik into the Environment.
Navigate to the Settings tab of the Environment page and select Install Entities. You can then select traefik from the Select product dropdown.
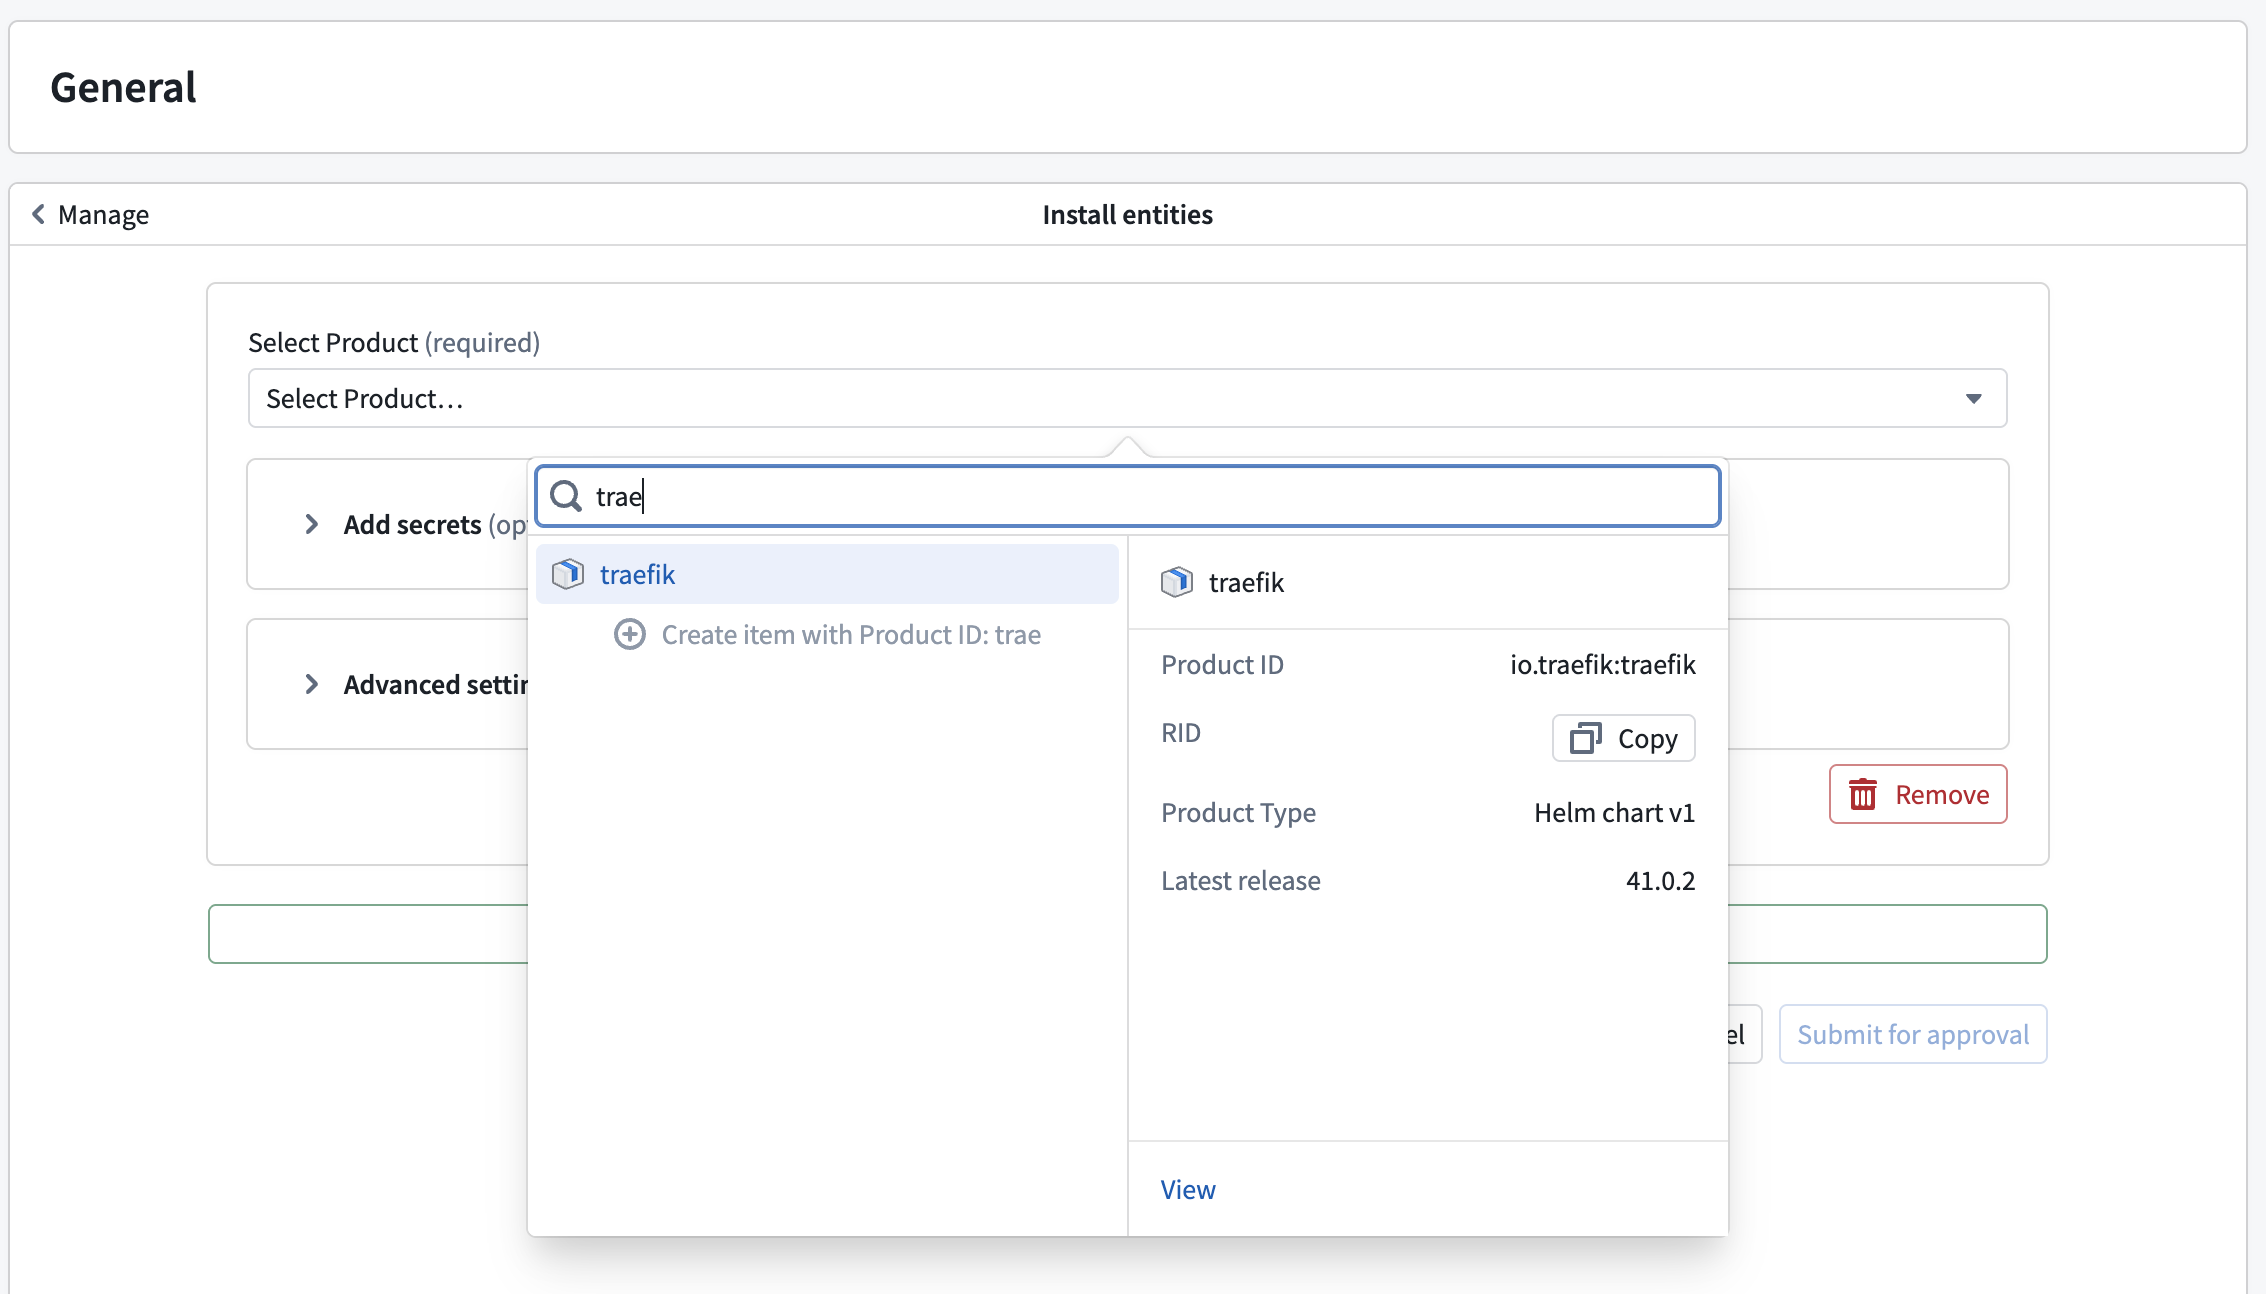
From there, you can configure and deploy the Helm Chart. See Managing Entities with Apollo for more information about this process.
Example 2: Publishing an Asset to Apollo using the CLI
In this example, we are going to publish some custom files as an Asset in Apollo.
Assume that we have a directory called my-product that contains the following files:
Copied!1 2 3 4 5 6$ tree my-product my-product ├── taxi_info.csv └── test_data.zip 1 directory, 2 files
When you create an Apollo Product tarball, it should look like this:
asset-1.2.3  # <product-name>-<product-version>
├── asset  # directory of arbitrary files to include
│   └── ...
└── deployment
    └── manifest.yml
In your manifest.yml, the product-type should be asset.v1.
The following apollo-cli command creates an Asset Product that bundles the my-product directory and then publishes the Product to Apollo using the identifier com.my-org:my-product:0.0.2:
Copied!1 2$ ./apollo-cli product-release asset publish --maven-coordinate "com.my-org:my-product:0.0.2" --asset-path my-product Publishing product release com.my-org:my-product:0.0.2 into Apollo ... done
You can publish an Asset Product with images by adding the --images flag:
Copied!1 2$ ./apollo-cli product-release asset publish --maven-coordinate "com.my-org:my-product:0.0.2" --asset-path my-product --images docker.io/bitnami/postgresql:16.0.0-debian-11-r10 Publishing product release com.my-org:my-product:0.0.2 into Apollo ... done
Complete flag details can be viewed by running ./apollo-cli product-release asset publish --help, but the following is an overview:
--maven-coordinate: The user-chosen Apache Maven coordinate that will act as the address for the Product Release in Apollo. This can be any valid Maven coordinate of the formgroup:product-name:version.--asset-path: Filename or directory for Assets to be published to Apollo.--images: Container image URIs that Apollo will check for availability before recommending an upgrade to a containerized Entity.