Create a sensitive data scan
Both one-time and recurring sensitive data scans are configured via the same user workflow. To begin, navigate to the Sensitive Data Scanner application and select Create new sensitive data scan. This will open an overview page explaining the steps in making a sensitive data scan:
- Select Resources to Scan: This section allows you to specify the datasets you would like to scan. See Selecting resources to scan for more details.
- Select Match Conditions: If the type of sensitive data you need to look for currently is not available as a match condition in your space, you can create a match condition from this section as well. See Create match conditions for more details.
- Select Match Actions: If the action you want Sensitive Data Scanner to take does not exist as an match action in your space, you can create a new match action in this section as well. See Create match actions.
- Review & Run: Final checks before creating a scan.
Selecting resources to scan
Resource types
Use the Resource types section to select one or multiple datasets, virtual tables, or media sets to scan. The Sensitive Data Scanner supports media sets that contain audio, document, or image file formats.

Included datasets and folders
You can explicitly include datasets or folders to scan by selecting Add resource under Included datasets and folders. If you add folders, all datasets within those folders will be scanned, unless they have been explicitly excluded. You must include at least one folder (including spaces/projects) or dataset in this section in order to proceed.
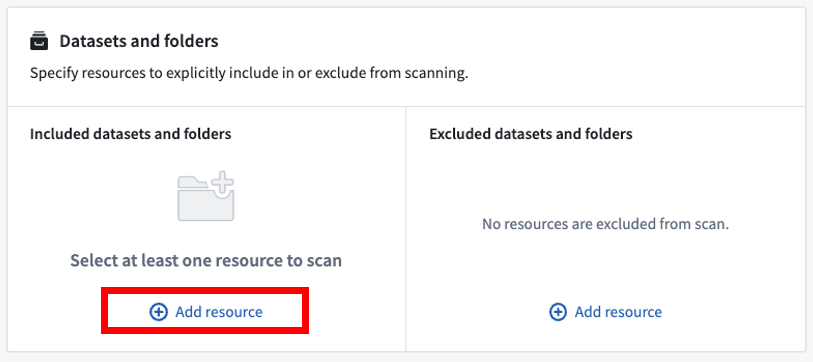
Excluded datasets and folders
Similarly, you can explicitly exclude datasets or folders to scan by selecting Add resource under Excluded datasets and folders. If you add folders, all datasets within those folders will be excluded from the scan unless they’ve been explicitly included. You are not required to explicitly exclude any resources (this section can be left empty).
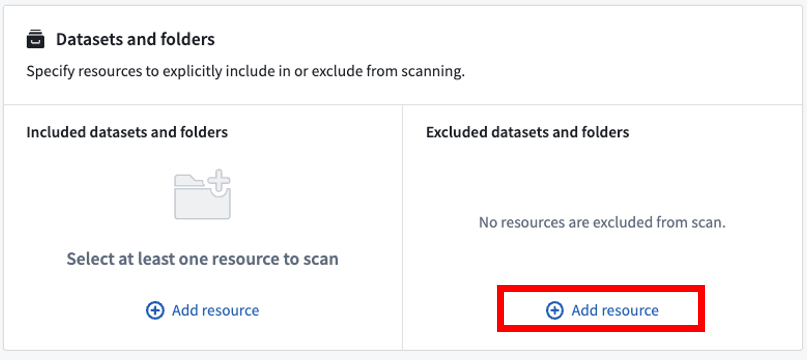
In the rare case where a resource is both included and excluded, the most specific inclusion or exclusion will take precedence. For example, a dataset could be included, but it might be located in an excluded folder. In this case, the dataset (included) is more specific than the parent folder (excluded), so the dataset will be scanned.
Scan strategy
The following scan strategy options allow you to further refine the behavior of your sensitive data scan.
Selected transaction types
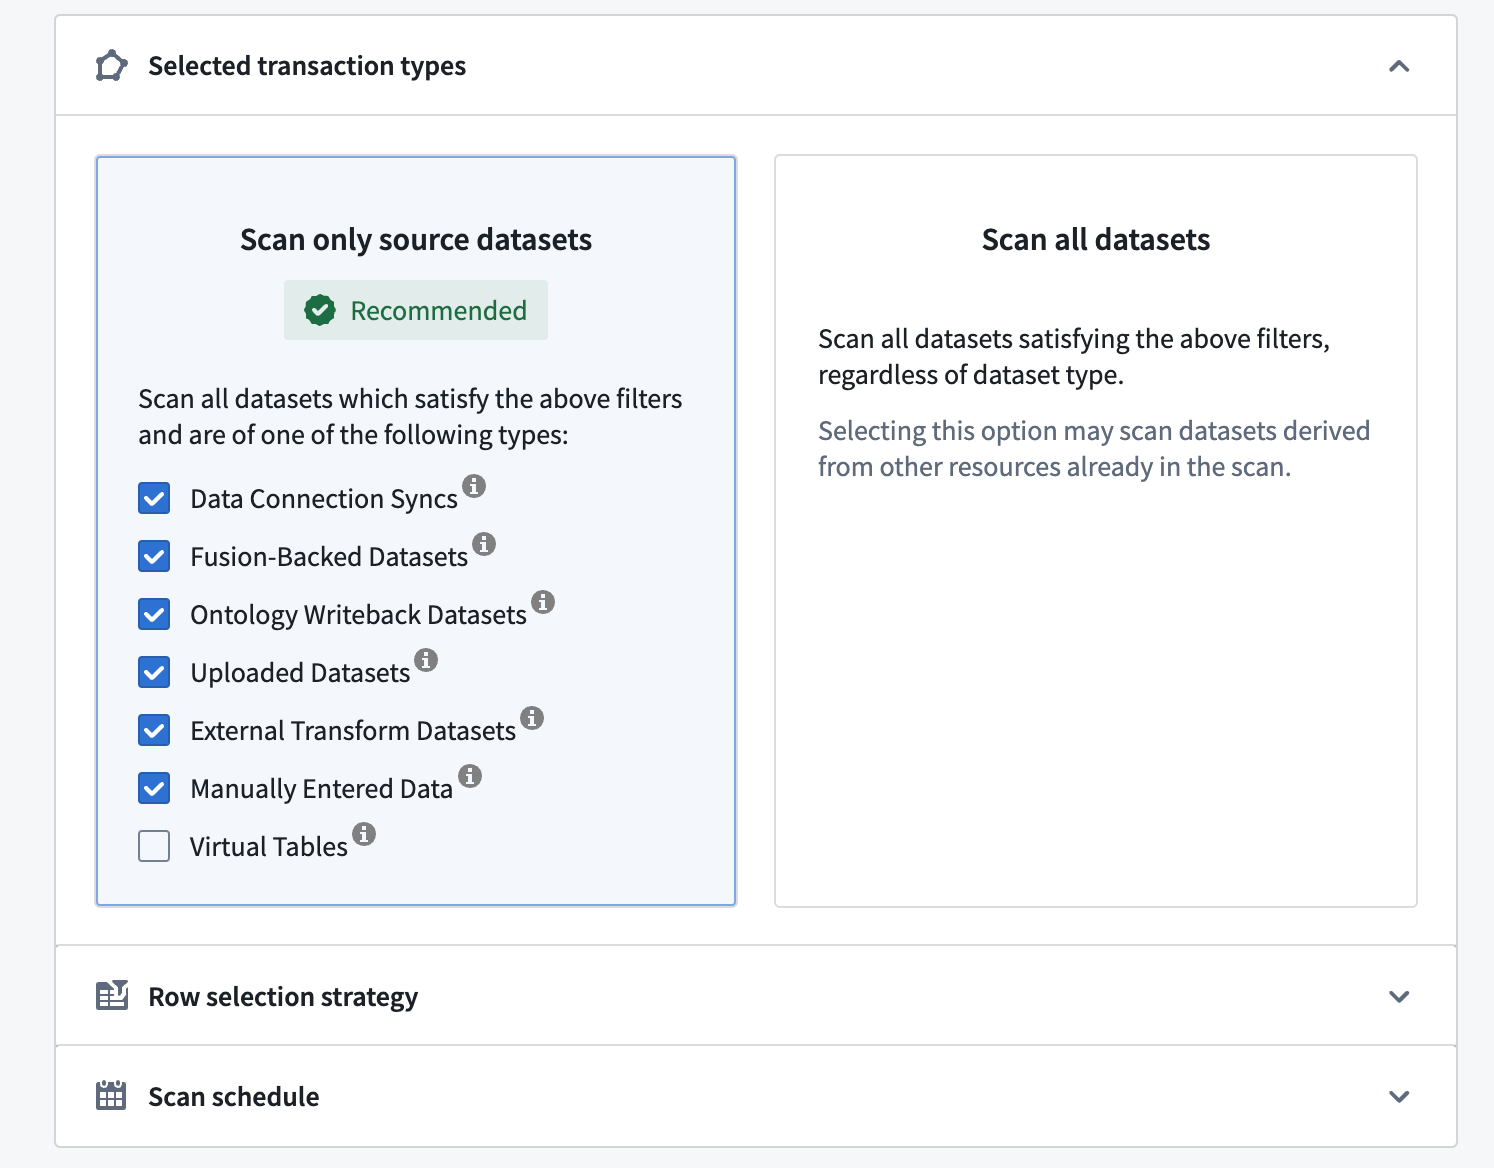
Sensitive Data Scanner allows you to specify which datasets to scan based on certain dataset attributes. There are two options:
- Scan only source datasets: Allows you to scan only the common source dataset types. These datasets generally represent new data in Foundry not derived from other datasets. Scan only source dataset is the recommended option as it allows you to find sensitive data by monitoring the “data boundary” in Foundry, without necessarily scanning all the datasets in your space.
- By (un)checking the checkboxes for the various resource types, you can also narrow down more precisely what types of datasets should/should not be scanned, such as Manually Entered Data, Uploaded Datasets, Data Connection Syncs, and more.
- You can also opt-in to scan virtual tables for PII. Virtual tables are pointers to tables in source systems outside of Foundry; this option enables you to scan federated data for PII. Please note that these source systems must be reachable at the time of the scan in order to succeed.
- Scan all datasets: Scans all datasets, including derived datasets. Since more datasets are scanned, this option requires more computational resources to execute than scanning only source datasets.
In the example below, Sensitive Data Scanner will scan only source datasets within the selected folder(s).
Row selection strategy
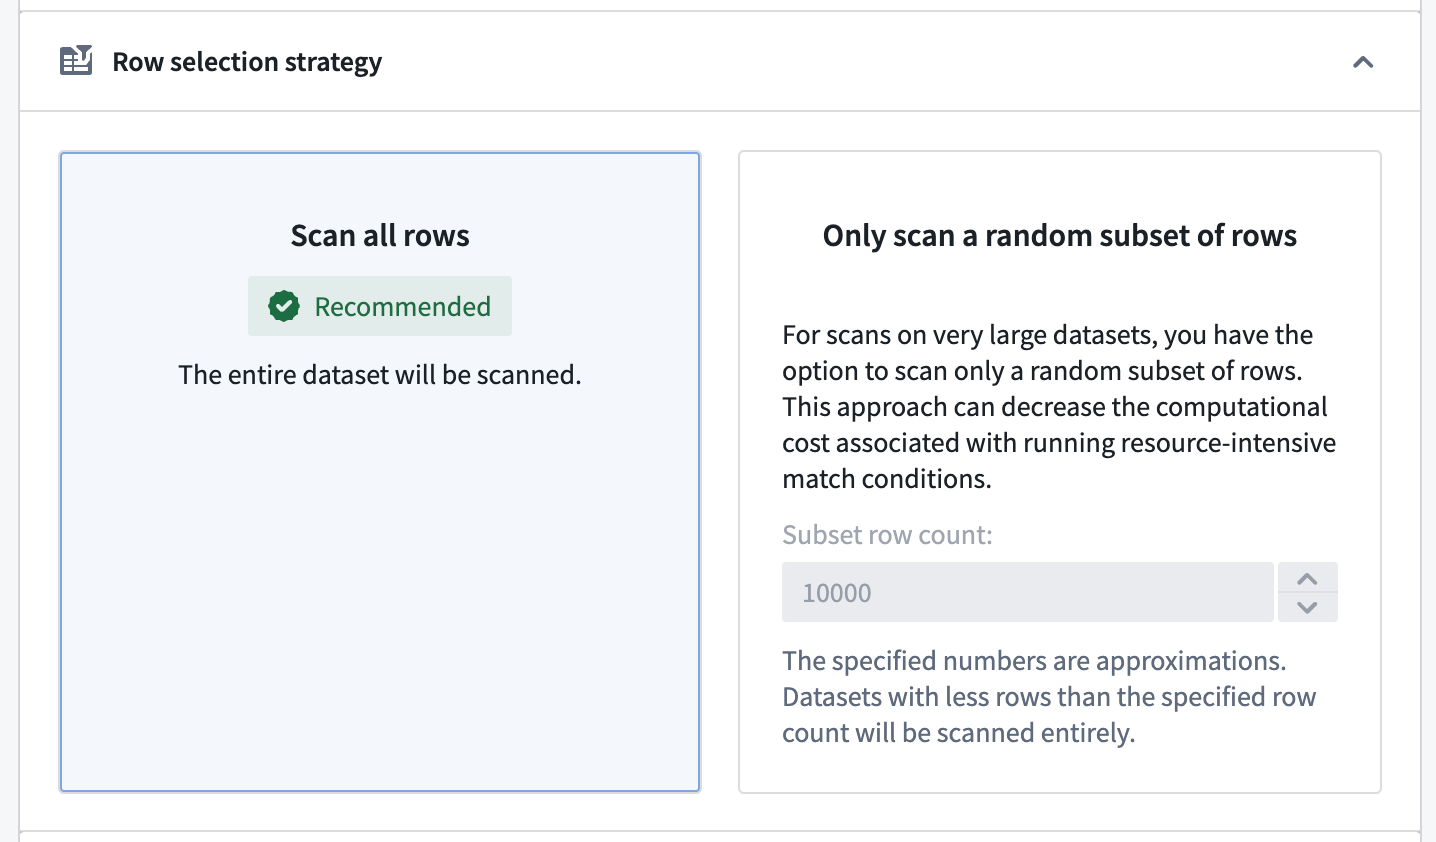
Additionally, you have the option to configure the number of rows to be scanned.
- The Scan all rows option will scan the entire dataset. This is generally the recommended option since only an exhaustive scan can guarantee that the scan result is correct, since all datasets containing values that trigger the selected match condition will be flagged. Note that this option can lead to long scan times, depending on the complexity of the configured match conditions and the size of your scanned datasets.
- The Only scan a random subset of rows option allows you to scan a randomly sampled subset of the rows instead of scanning the entire dataset. This approach can decrease the computational cost associated with running resource-intensive match conditions.
- Note: The specified number is an approximation, and datasets with fewer rows than the specified row count will be scanned entirely.
Scan schedule
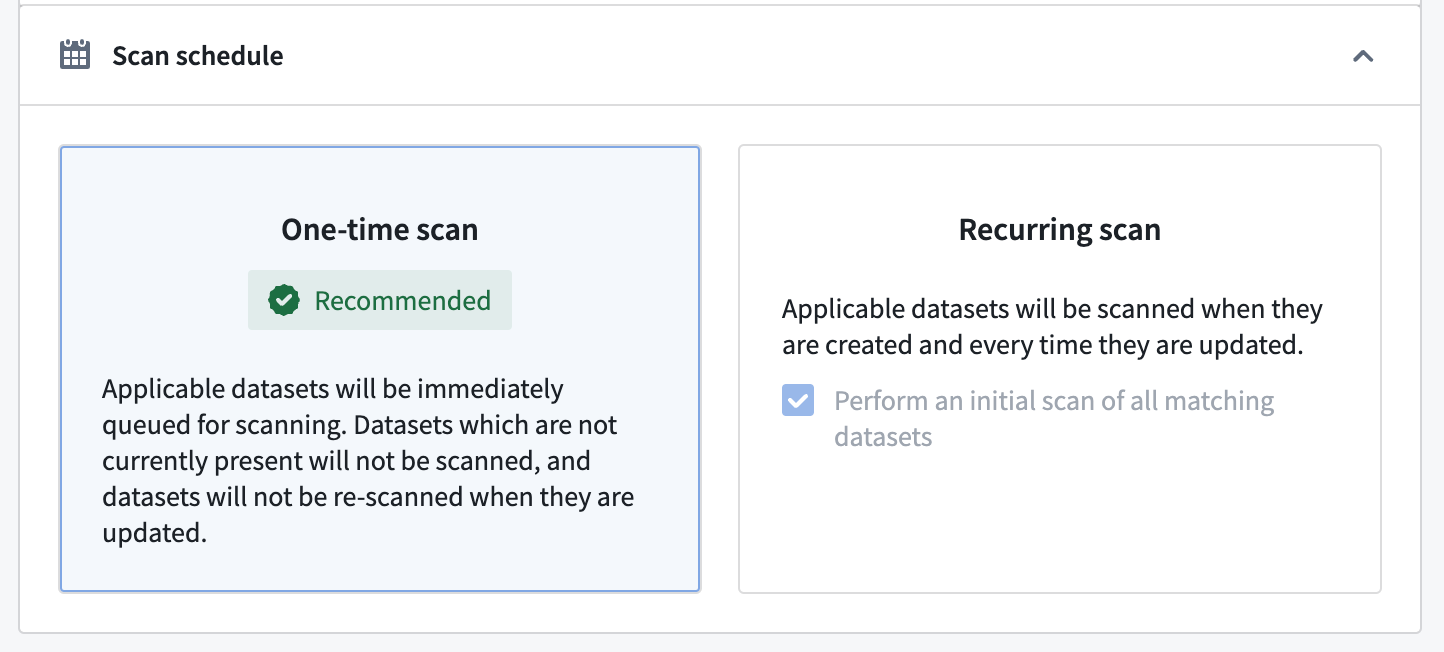
In the Scan Schedule section, you have two options to configure when the scan will run:
- One-time scan: A scan will run immediately on all datasets within the specified resource filter(s). Note that datasets that are updated, created, or added at a later time will not be scanned.
- Recurring scan: A scan will run periodically on all resources within the specified resource filter(s) on the selected schedule:
- Daily: Everyday at 00:00 UTC
- Weekly: Every Tuesday at 00:00 UTC
- Monthly: Every 1st day of the month at 00:00 UTC
- Continuous: Scans a dataset whenever new data is added to a given dataset within the specified resource filter(s).
For recurring scans, you can select Perform an initial scan of all matching datasets to scan all current datasets immediately. This ensures that datasets are scanned even if they are not updated later.
Included and excluded Markings
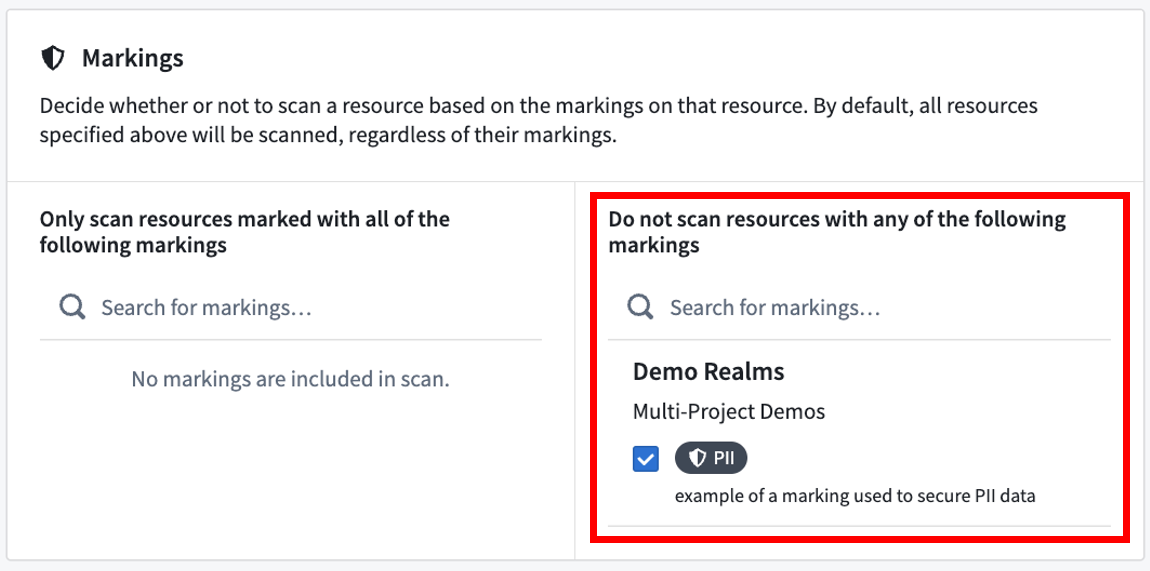
Similar to including and excluding datasets and folders explicitly, you can include and exclude datasets based on the Markings on those datasets. This is an advanced feature that is generally used to exclude datasets that already are protected. For example, in the screenshot below, we see that datasets marked with PII (Personally Identifiable Information) will not be scanned because this PII marking may have been applied after a match in a prior sensitive data scan.
Selecting match conditions
The first steps for creating a sensitive data scan are to select the specific match conditions you would like to look for, followed by the specific match actions that Sensitive Data Scanner should perform if a match is found.
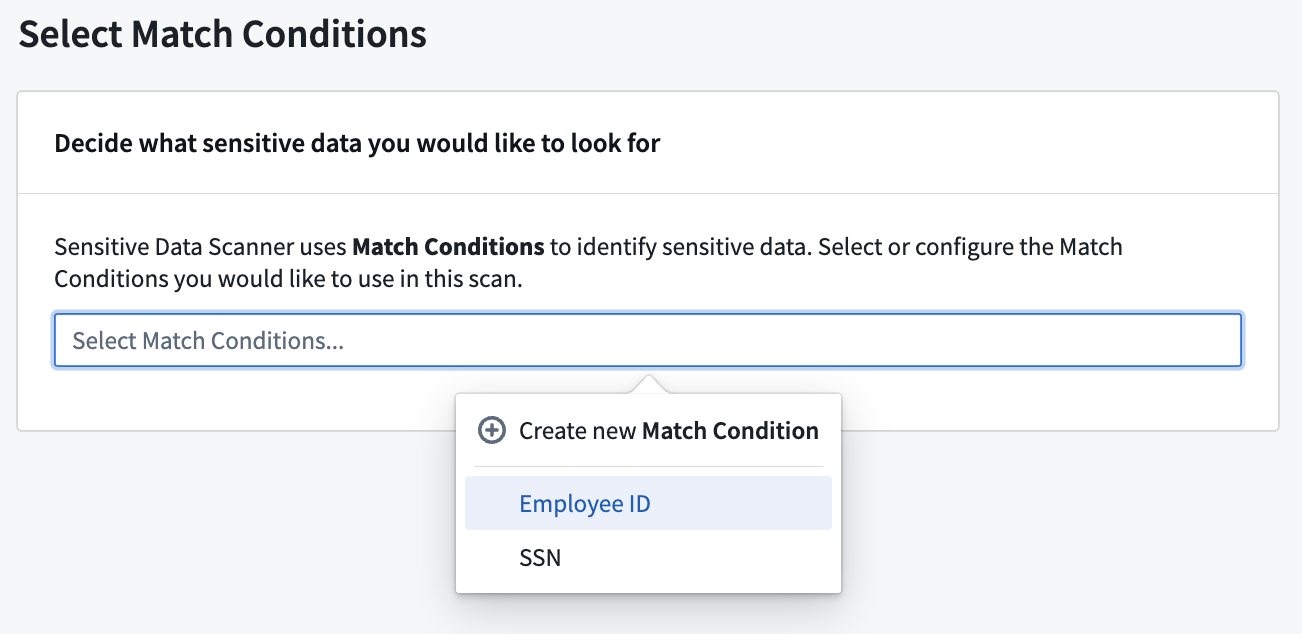
When choosing your match conditions, consider what sensitive data you want to look for and what match conditions are already available for your space. If the desired type(s) of sensitive data do not have a corresponding match condition, you can create a new match condition.
Selecting match actions
When choosing your match actions, consider the appropriate response to detecting your sensitive data: you can choose to apply Markings, which will place access controls on datasets with sensitive data, or create issues, which will inform a specified set of users that sensitive data was found. You can also choose to not apply an match action at all.
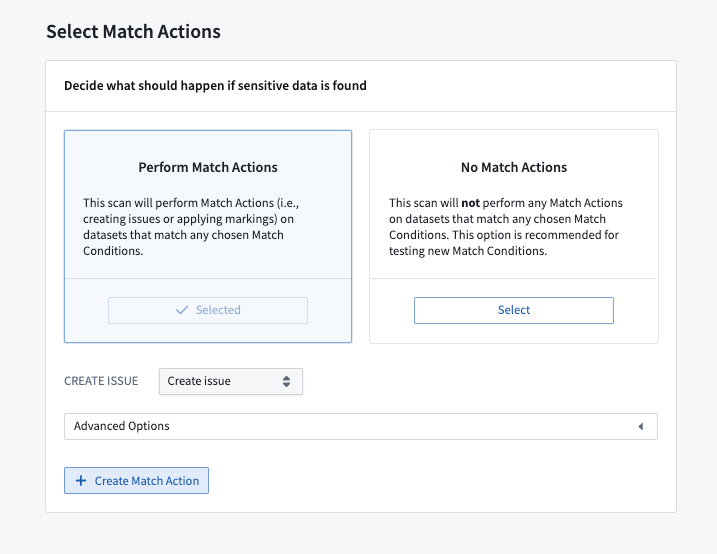
If the appropriate match action does not exist in your space, you can create one. See Create match actions for more details.
If your sensitive data scan involves a substantial number of datasets, it is advisable to test the match conditions before proceeding further. Misconfigured match conditions may generate false positives, leading to unwanted issues or markings on datasets. To test match conditions, select No Match Actions for your scan. Once the scan has finished and you have verified that the match condition aligns with the expected format of data, you can apply additional match actions from the scan's overview page.
Review Applying additional match actions for more details.
Review and run
In the final stage of creating an sensitive data scan, you can review the match conditions, match actions, and resources that you’ve selected for the scan.
At this step, Sensitive Data Scanner will also compute the datasets required for the scan based on the resource filters you chose when tuning your scan.

If you chose a one-time scan schedule, you can trigger the scan by selecting Run One-Time Scan.
If you chose a recurring scan schedule, you will also be able to add a name and description for the scan. You can then save the scan by selecting Save as Recurring Scan.
Applying additional match actions
For inactive scans that were created within the past seven days, you can select additional match actions to apply to the sensitive data discovered by the scan.

For recurring scans, additional match actions will only apply to matches that were identified up until the point at which the additional match action was selected. If the scan is reactivated later, any future sensitive data detected by the recurring scan will not automatically have the previously selected additional match actions applied.
View the status of the application of additional match actions at the bottom of a scan's overview page.

Reversing match actions
For inactive scans that were created within the past seven days, you can reverse match actions that were previously applied to the sensitive data discovered by the scan. For Create issues match actions, this will result in the deletion of issues created by the action. For Apply markings match actions, it will involve removing the markings that were applied by the action.

For recurring scans, only the results of the actions up until the time the match action reversal was performed will be reversed. If the scan is later reactivated, any future sensitive data discovered by the recurring scan will still apply the match action if it was configured in the initial scan setup, even after being reversed. To stop the recurring scan from continuing to perform certain match actions when it is made active again, edit the recurring scan to remove the match action before reactivating the scan.
View the status of the reversal of match actions at the bottom of a scan's overview page.
