3 - Implement a Primary Key Check
This content is also available at learn.palantir.com ↗ and is presented here for accessibility purposes.
📖 Task Introduction
As shown in the image below, the Data Health service has an available check to verify primary key uniqueness—a vital attribute of a reliable dataset.
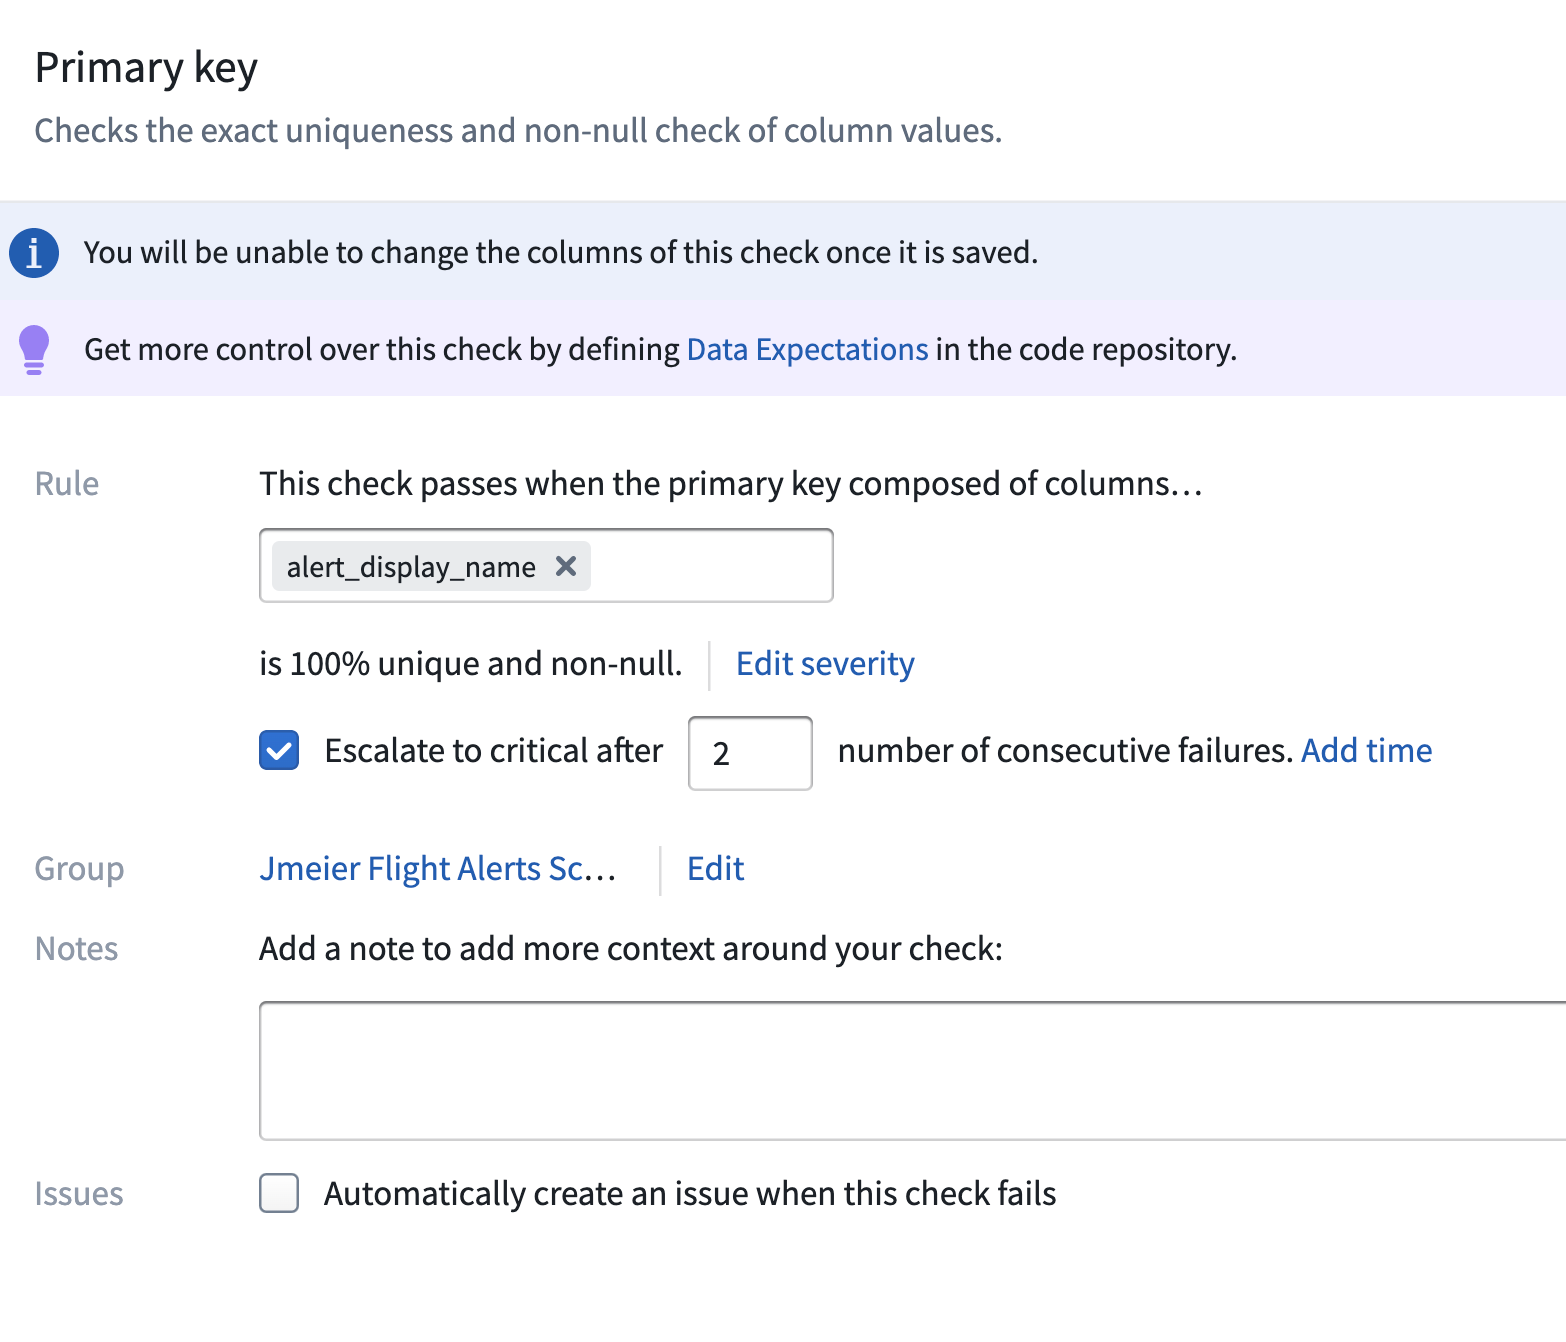
As mentioned, a chief difference between this data health check and its implementation as a data expectation check is that the latter is capable of aborting the job associated with the transform, but the former will merely alert you of the failure. This exercise will walk you through the basic expectations syntax as you add a primary key check to your flight_alerts_clean transform.
Specifically, you’ll be adding the check to the output of the transform, so you’ll be passing it as an argument in the Output item in the @transform_df decorator.
🔨 Task Instructions
-
Update the
Outputline in your@transform_dfdecorator with a second argument (the dataset RID or path being the first argument):checks=Check(E.primary_key('alert_display_name'), 'Primary Key', on_error='FAIL')As you can see, the
alert_display_nameis taken as the primary key column in the output dataset, and on error the job will abort (on_error='FAIL'). We could also choose on_error='WARN' if we simply wanted to be notified of the error. Compare your spacing and syntax against the clickable image below.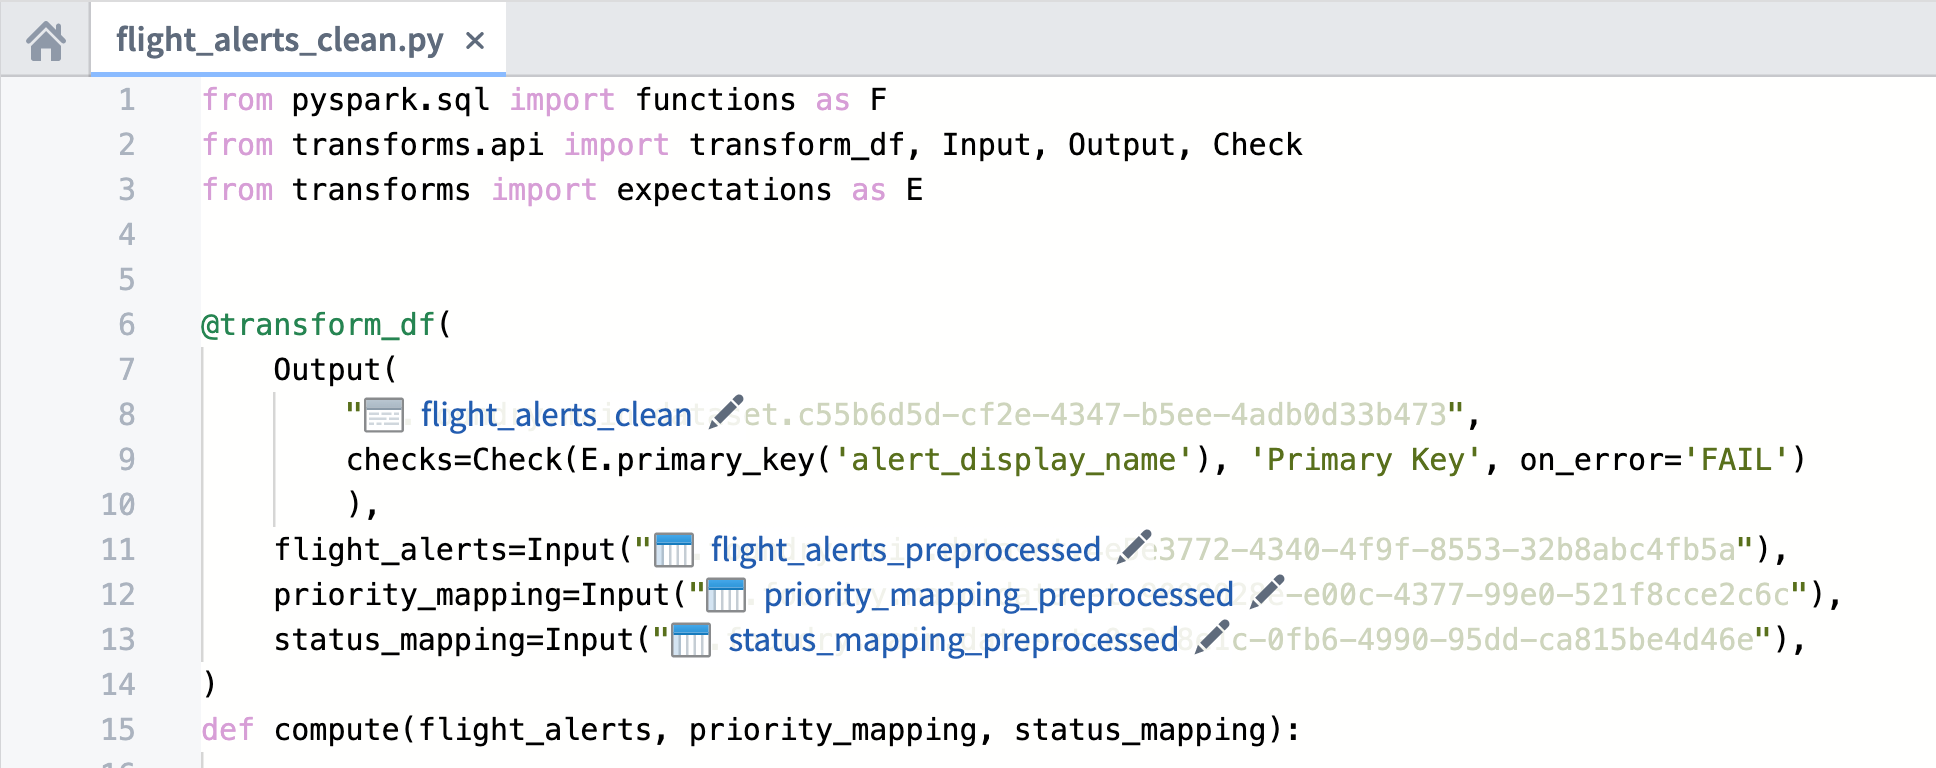
-
Confirm there are no syntax errors, which Code Assist will bring to your attention in the Problems tab. Once your code is cleared, commit your change with a meaningful commit message (e.g., “feature: add primary key expectation”).
-
Once CI checks have passed, build your code on your branch.
-
When the build successfully completes, click the Expectations tab in your repository’s Build helper along the bottom of your screen. The expectation has been met; the primary key column is unique. Let’s now see how these encoded checks also appear in the Data Health application.
-
Open the output dataset —
flight_alerts_clean— on your branch. The most straightforward way to navigate to the output dataset on your branch is to click on the hyperlinked dataset name in theOutputline of your transform (in the@transform_dfdecorator). -
From the Dataset application, click the Health tab, which should show a
1next to the tab name. -
You have a new Status check labeled as Data Expectations Monitor. Click the check to open it.
-
How would you know this is a primary key check? Click the name of the dataset in the Outputs section of the check configuration. Then click the Primary Key item for additional details.
-
Unlike the Data Health checks you configure, you are not automatically subscribed to this check. Click the Watch button to subscribe.
-
Return to your code repository on your branch by clicking the Actions ▾ dropdown in the top right of your screen and clicking directly on the words View code.
-
Merge your branch into
Masterusing the PR process. -
Build your code on
Master. -
Consider adding the check to the yourName Flight Alerts Schedule check group.