2 - Configure Data Health Check Groups
This content is also available at learn.palantir.com ↗ and is presented here for accessibility purposes.
📖 Task Introduction
Data engineers can configure data health checks at key areas of their pipelines to monitor their health and receive in-app and/or email alerts if the checks fail. At scale, this can generate a lot of important signal. Throughout this tutorial, we’ll be configuring over 40 health checks. Foundry enables you to create Check Groups to organize your checks into related sets and batch your notifications. This task will help you to create three check groups—one for each pipeline segment. You’ll then be able to add your individual checks to their respective groups as you configure them.
🔨 Task Instructions
- Expand the Foundry Workspace sidebar and click the View all link in the APPS section.
- Locate and click Data health in the Build & Monitor Pipelines app group.
- In the top right of the Data Health app, click the Check groups link.
- Click the green
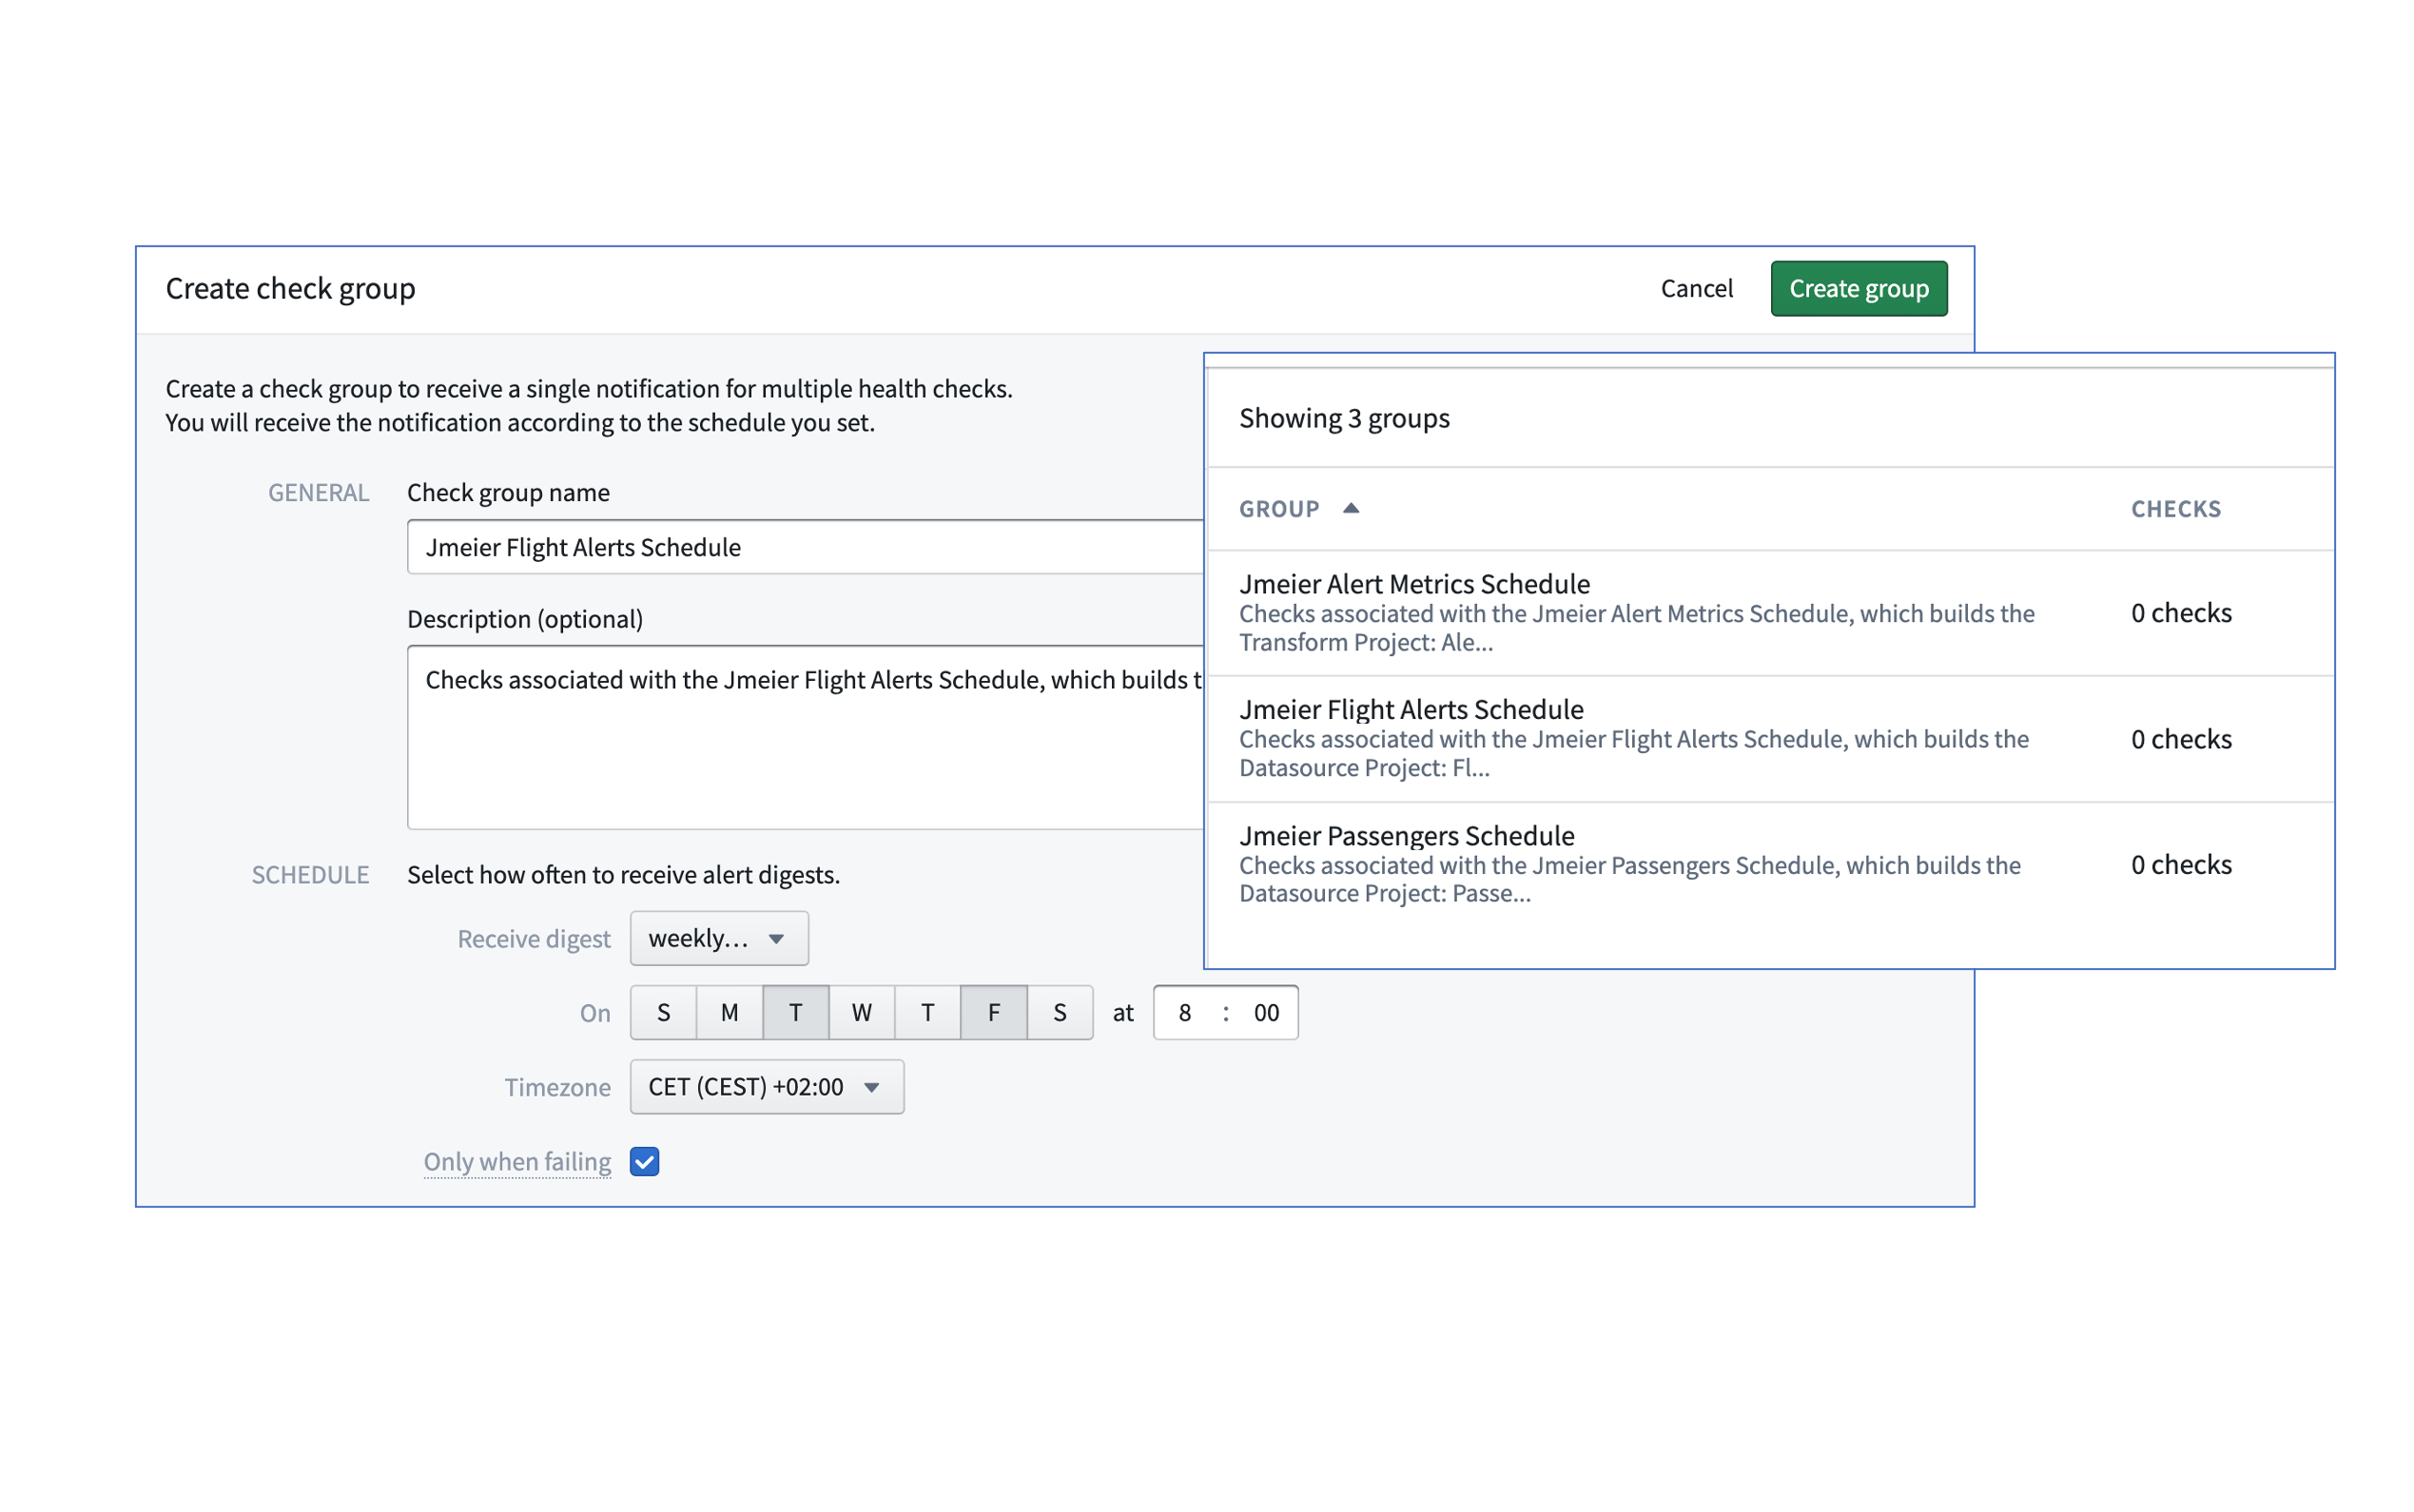
➕ Create groupbutton in the top right. - In the Check group name field, enter yourName Flight Alerts Schedule, which is the name of your pipeline. You can provide any arbitrary name here, but we’ll be creating groups of checks corresponding to the names of our pipeline segments. In this way, we’ll receive a single batched notification for each at the cadence selected below.
- Enter a description. Although it’s marked as “optional” it’s a best practice to complete fields that add additional documentation to your pipeline monitoring logic. Consider something like, “Checks associated with the yourName Flight Alerts Schedule, which builds the Datasource Project: Flight Alerts.”
- For the schedule, set a weekly cadence with digests arriving at 8:00 AM CET on Tuesdays and Fridays.
- Leave the Only when failing box ticked.
- Click the green
Create groupbutton in the top right to save your group (we'll add checks to the group in the next task. - Repeat this process for your other two pipeline segments, creating a check group for each.
📚 Recommended Reading (~2 min read)
Take a moment to read more about Check Group basics.