4 - Multiple Outputs with “Generated” Transforms
This content is also available at learn.palantir.com ↗ and is presented here for accessibility purposes.
📖 Task Introduction
Let’s assume your analyst team has asked you to create distinct flight_alerts_joined_passengers datasets for each passenger country of origin that also applies additional logic to remove personal information. For example, send all rows where the passenger is from the UK to a new dataset called flight_alerts_UK and so forth. One way to do this programmatically is through the use of a generated transform, which essentially uses a for loop that runs your input through your logic and generates outputs. Whenever your generated transform runs, it will dynamically add to or create new datasets, for example, if new passengers are added to the input or new passenger-country combinations are introduced.
🔨 Task Instructions
-
Create a new branch from
MastercalledyourName/feature/generated_transform. -
Right click on your
/outputfolder in your repository Files and add a new file calledflight_alerts_by_country.py. -
Replace the default code in your new Python transform file with the code block below.
from transforms.api import transform_df, Input, Output from pyspark.sql import functions as F """ Define a transform generator function that will create multiple output datasets This function takes an array of strings (countries) as an input """ def transform_generator(countries): # Initialize an empty array to store each individual transform function (one for each output dataset) transforms = [] # Loop through the individual strings in the countries array for country in countries: # For each country, create an output dataset with the name flight_alerts_COUNTRY - scroll to the end of the output line to see formatting @transform_df( Output("/${space}/Temporary Training Artifacts/${yourName}/Data Engineering Tutorials/Transform Project: Flight Alerts by Country/data/output/flight_alerts_{country}".format(country=country)), source_df=Input("${flight_alerts_joined_passengers_RID}"), ) def filter_by_country(source_df, country=country): """ By including "country=country" in the scope of this function we can capture the value of the country variable so that we can use it within the code. In this case we will use it to filter the country column. Note, we are using lowercase strings """ filtered_df = source_df.filter(F.lower(F.col('country')) == country) # Strip columns that won't be needed here. For example, sensitive passenger information filtered_df = filtered_df.select( 'alert_display_name', 'flight_id', 'passenger_id', 'flight_date', F.col('priority').alias('alert_priority'), F.col('status').alias('alert_status'), F.col('comment').alias('alert_comment'), F.col('assignee').alias('alert_assignee'), F.col('flyer_status').alias('passenger_status'), F.col('country').alias('passenger_country'), ) # Return the filtered dataframe to complete our individual transform return filtered_df # Append the completed transform to our transforms array, then move onto the next item in the for loop transforms.append(filter_by_country) # Returns the array of transforms, ready to be run return transforms # Feed this list of countries into our transform_generator function we defined above, then run each one TRANSFORMS = transform_generator([ 'brazil', 'canada', 'france', 'germany', 'mexico', 'netherlands', 'uk', 'us', ]) -
Replace the following lines in your code:
${space}with your space${yourName}with your/Tutorial Practice Artifactsfolder name${flight_alerts_joined_passengers_RID}with the RID of the output from the transformed output from the previous task (this will be in theflight_alerts_joined_passengers.pyfile in your repository).
-
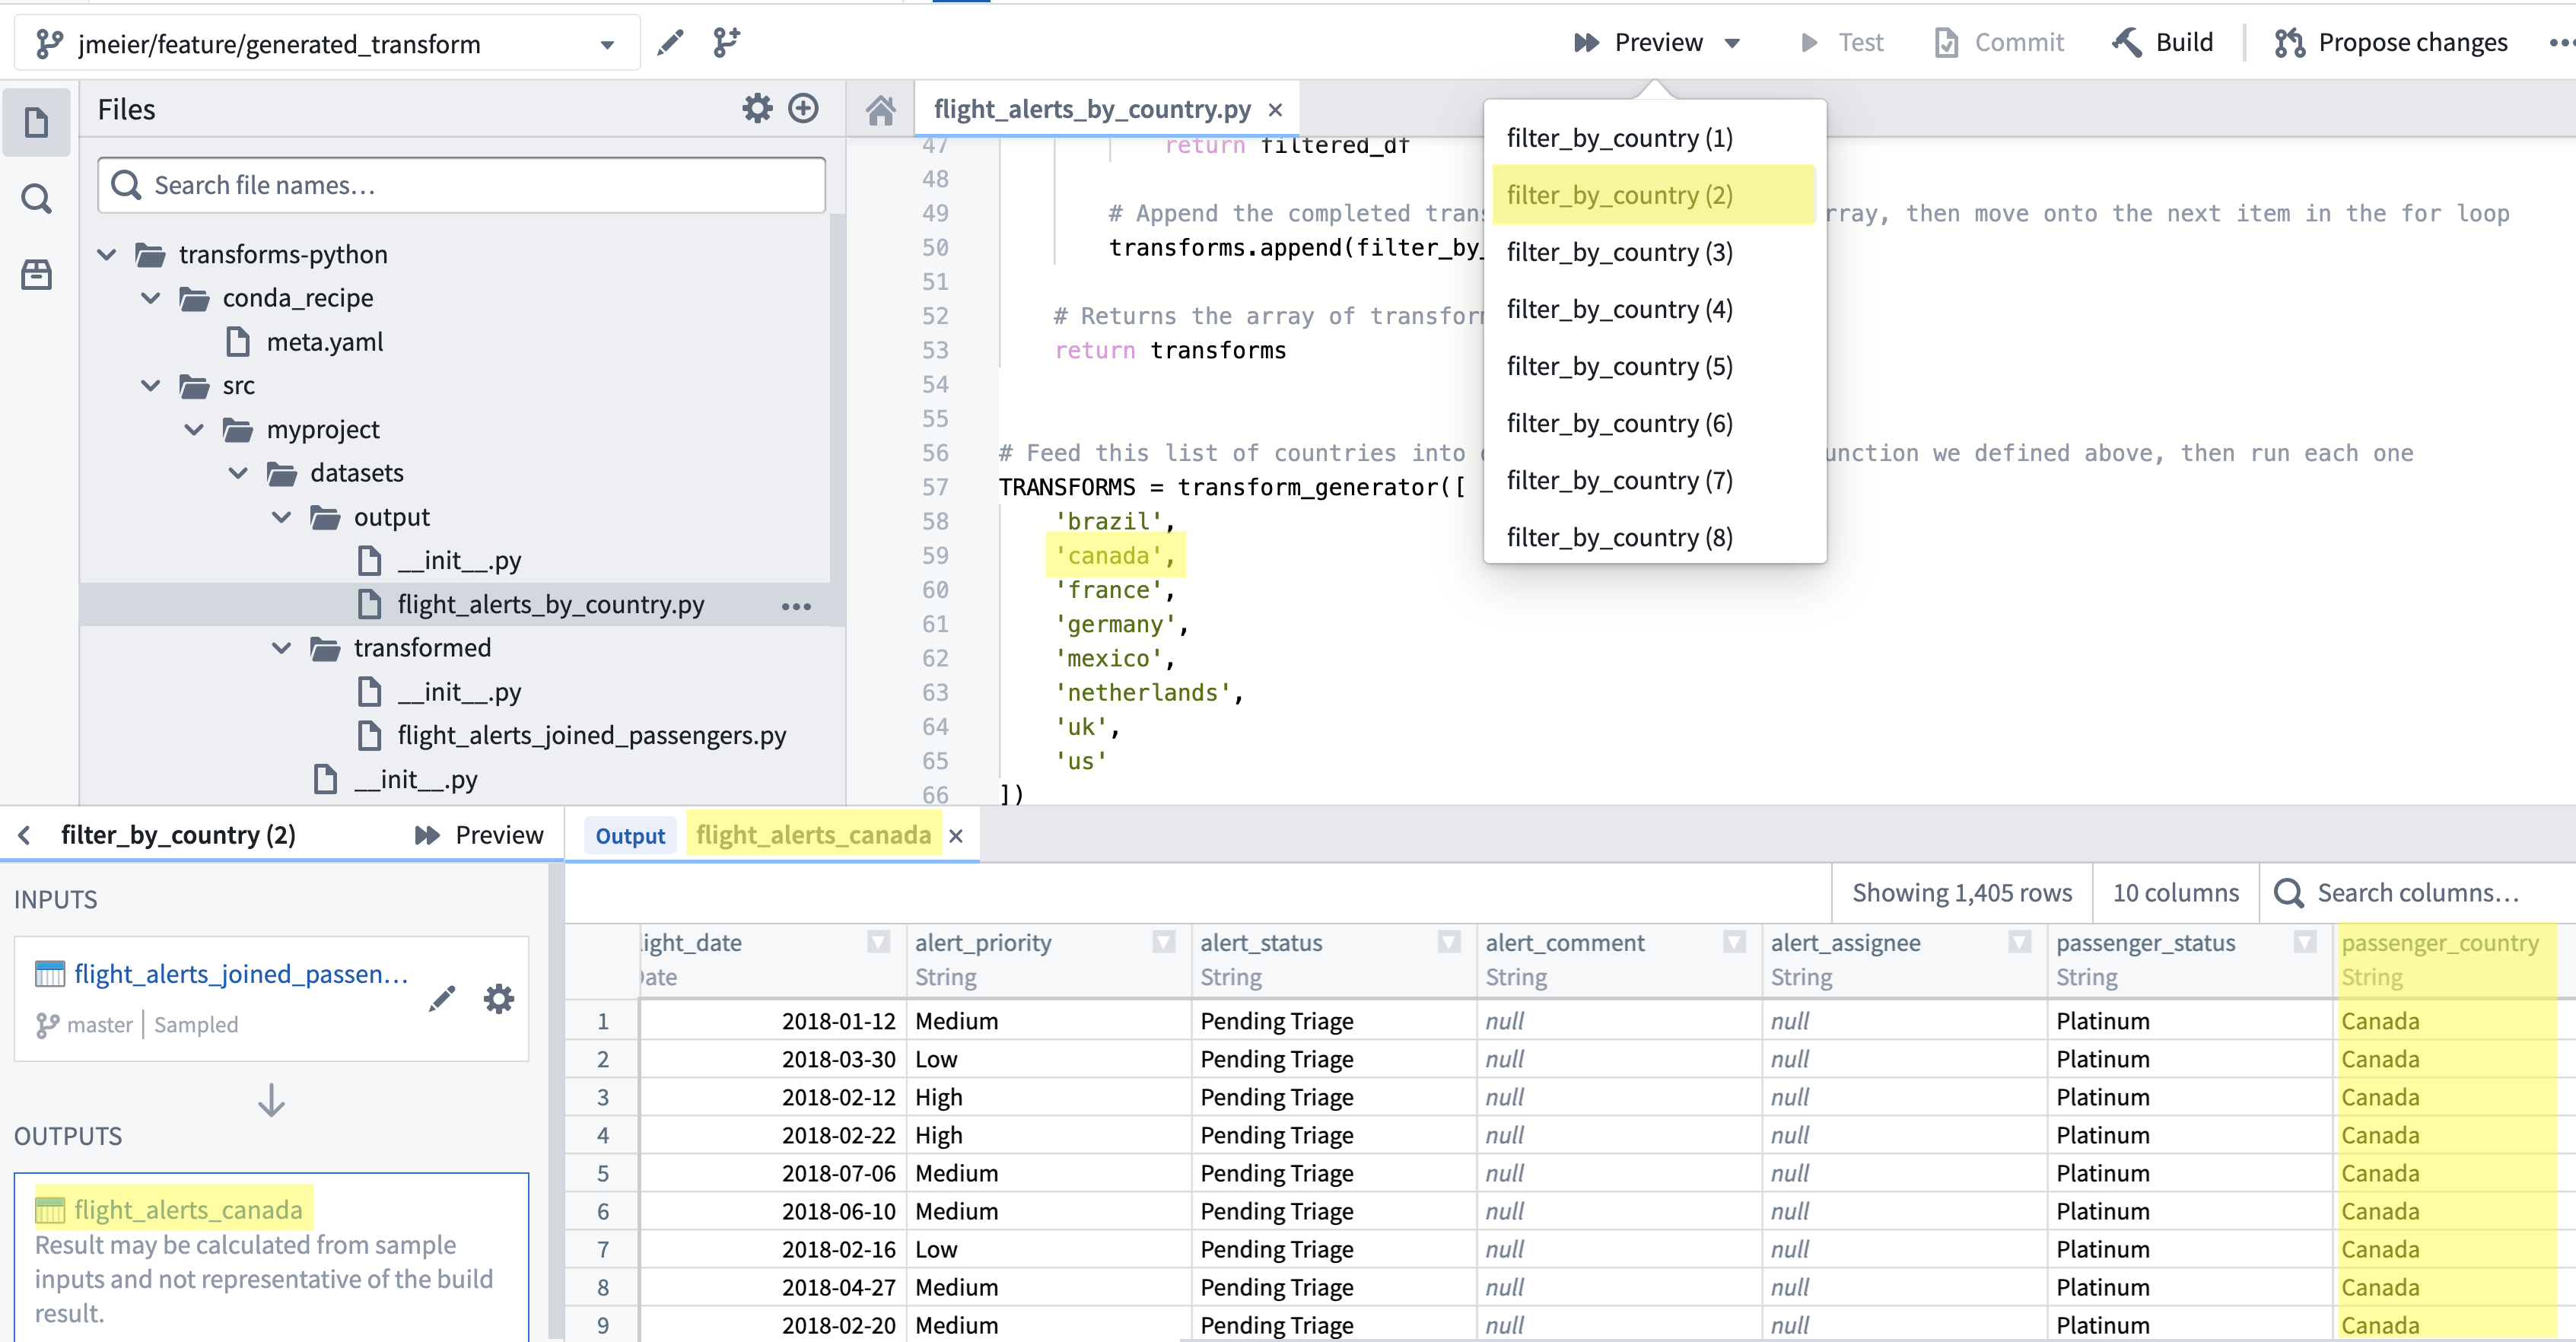
Click the Preview button. Given the structure of your code, your are asked to choose a preview of one of the 8 possible outputs (there are 8 countries defined by the
transform_generatoron line 57 of your code). Select any desiredfilter_by_countryvalue in the dropdown to execute the preview.Confirm the preview results contain only records where the value of
passenger_countryequals the chosenfilter_by_countryvalue. If you chose, for example,filter_by_country (2), the results will correspond to the second value listed in thetransform_generatoron line 57 of your code, which iscanada.ℹ️ In the previous step, you previewed your code on a branch that your input doesn’t exist on —
yourName/feature/generated_transform. Through the concept of fallback branches, the Foundry build process (and the preview option) will "fall back" to theMasterbranch of the input if it cannot find a branch corresponding to your current one. You can also define a sequential fallback branch behavior in your repository's Settings → Branches → Fallback Branches. Read more about fallback branches here. -
Commit your code with a meaningful message (e.g., “feature: add generated output”).
-
Build your code on your branch and confirm that 8 separate datasets—one for each country—are created in your
.../Transform Project: Flight Alert Metrics/datasets/output/folder. -
If your build was successful, complete the PR process and merge your branch into
Master(you may delete you branch after the merge if desired). -
Build your code on the
Masterbranch.

📚 Recommended Reading (~2 min read)
Transform generation is an advanced topic, and we strongly suggest reading through the relevant documentation for additional context.