5 - Add Your Package and Modules
This content is also available at learn.palantir.com ↗ and is presented here for accessibility purposes.
📖 Task Introduction
Several tutorials back, you created two cleaning functions in your flight_alerts_logic repository for preprocessing the simulated raw ingests. As it happens, these functions are also useful for sanitizing your passengers data and may have wider utility at your (notional) organization. You’ll create them in your shared library as the next step in publishing them more broadly.
🔨 Task Instructions
- In your library repository, create a new branch from
MasternamedyourName/feature/tutorial_shared_libraries(e.g.,jmeier/feature/tutorial_shared_libraries). - Expand all files in the
/srcpath in your repository (right click → Expand all). - Rename the
/myprojectfolder to/cleaning_functions(right click → Rename).
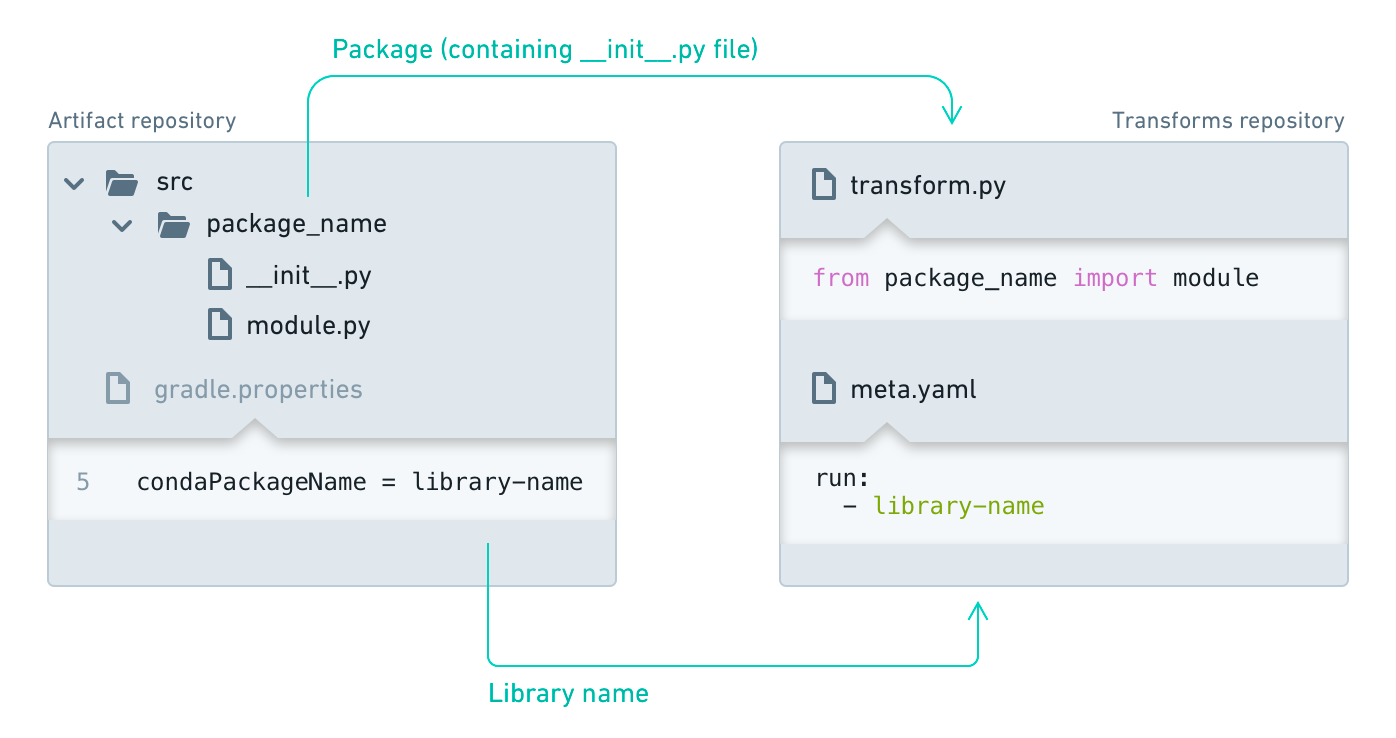
- ℹ️ The names of your library, packages, and modules are important! As described in the image below, any folder in your shared library repository containing an init.py file will be published as a package, and any individual code files you create in the package folder will be published as modules.
- In the
/cleaning_functionsfolder, create two new files: cleaning_utils.py and type_utils.py. - In a separate tab, open your flight_alerts_logic repository in your
.../Datasource Project: Flight Alertsproject folder. - Copy the contents of the cleaning_utils.py and type_utils.py files there into the corresponding files your new shared library repository, replacing the default content of the new files.
- Commit your changes with a brief, meaningful message (e.g., feature: add cleaning and type utils code).
- Once your CI checks pass, merge your branch into
Master.
📚 Recommended Reading (~3 min read)
This documentation entry reviews the steps taken in this task and offers additional context to the package publishing process.