12 - Add a README File to your Source Repository
This content is also available at learn.palantir.com ↗ and is presented here for accessibility purposes.
📖 Task Introduction
There are multiple ways you might consider documenting your pipeline’s scope, expectations, usage parameters, troubleshooting log, and non-standard features. Whatever method you choose, make sure your project team knows where they can find it. In this tutorial, you’ll add documentation as a README file in a code repository.
🔨 Task Instructions
-
Open your
flight_alerts_logiccode repository in your.../Datasource Project: Flight Alerts/folder. -
Since you’ll be adding a new file, create a new branch (from
Master) namedyourName/feature/add_readme. -
Click the ⊕ button just underneath the branch name in the top left of your repository and choose New file.
-
In the New file window, scroll all the way to the left until you reach the root of the repository file structure. Then, click the
\to indicate you want to create a new file in the root folder as shown below.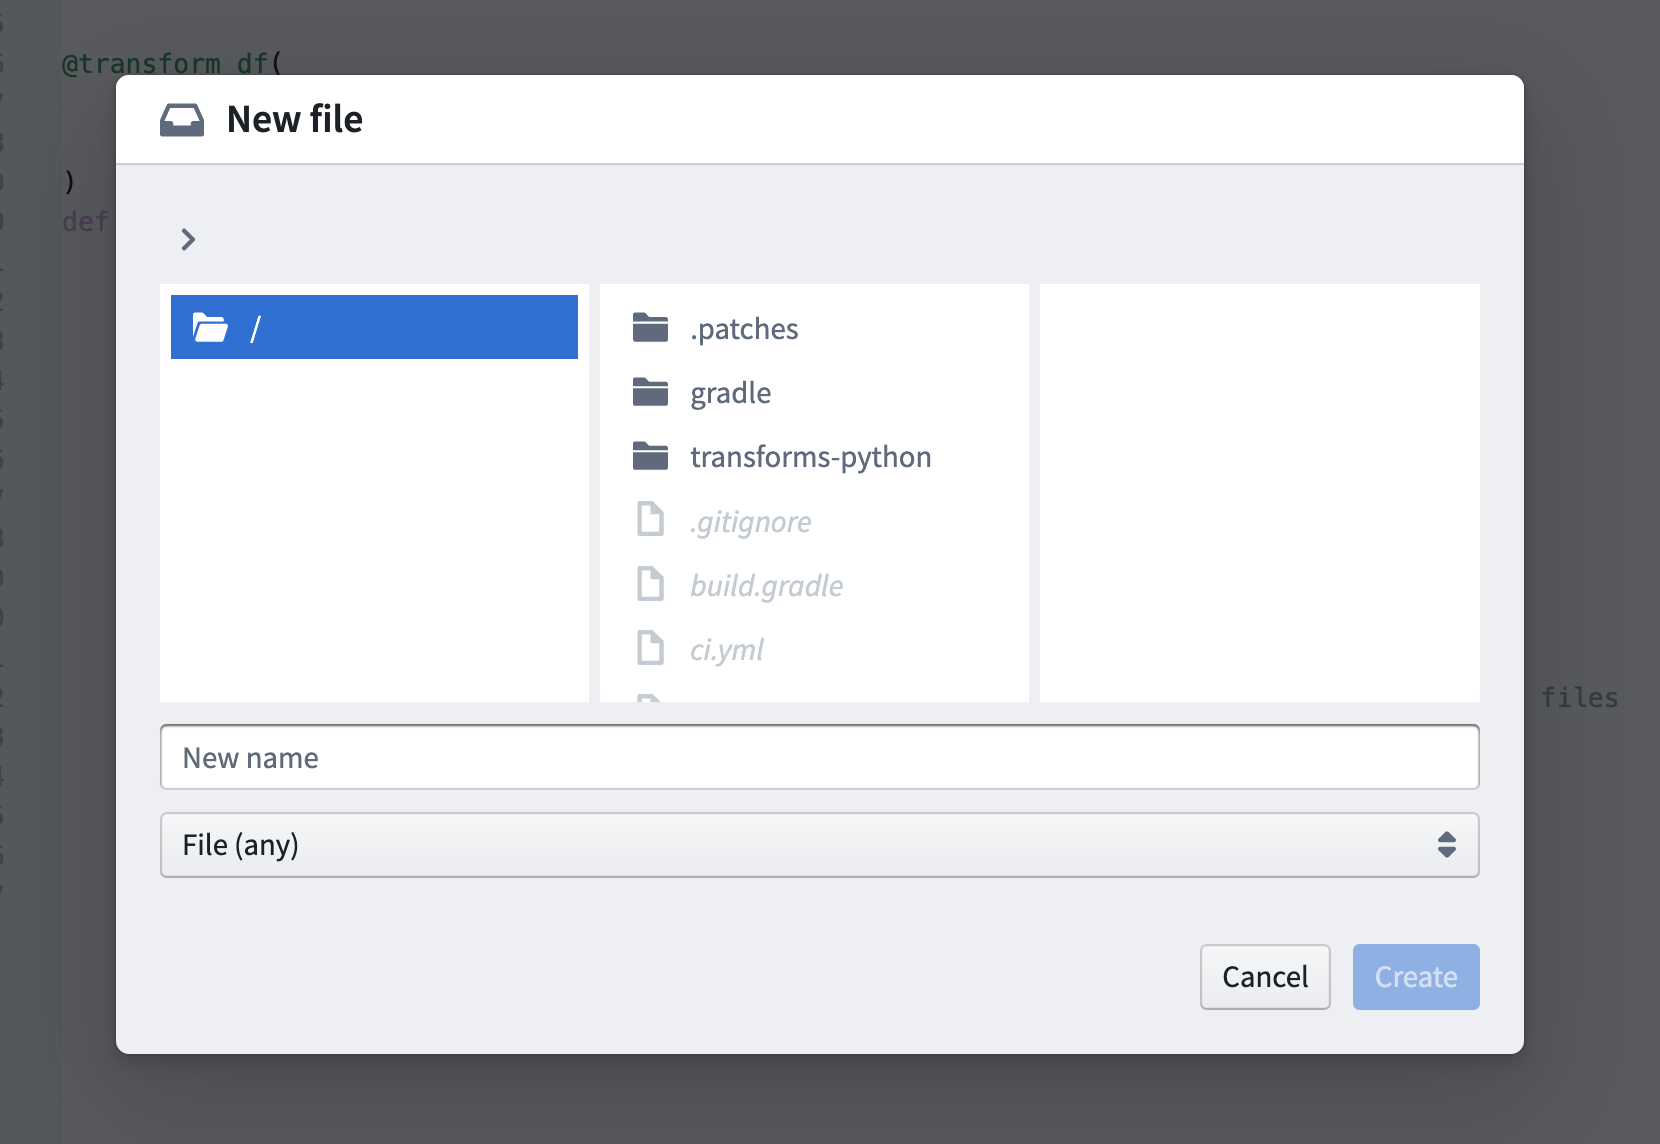
-
Name your file
README.mdand click the blue Create button in the bottom right of the window. (There is no need to specify the file type in the dropdown). -
Open your new file and paste the following block into the editor window:
## Flight Alerts Pipeline

#### Ownership

* Project team: Aviation Data Development

* Project owner: yourName@yourOrganization.com

#### Overview

This pipeline takes raw data ingested from the Flight Alerts datasource and:
1. Normalizes column names and data types across all raw datasets

2. Maps status codes from numbers to strings that represent their human meanings

3. Adds two null string columns (one for assignee, and one for comment) to be used in operational downstream workflows