16 - Applying Utility Files to Preprocess your Data
This content is also available at learn.palantir.com ↗ and is presented here for accessibility purposes.
📖 Task Introduction
Having created these utilities, which are accessible to any file inside this repository, you’ll now apply them to your raw datasets to create preprocessed datasets. This task reprises some of the steps from previous exercises, so the instructions are abbreviated to provide you with an opportunity to practice what you’ve learned with minimal direction.
🔨 Task Instructions
-
Right click on the
/datasetsfolder in the repository's Files panel and choose New folder. -
Name your new folder
preprocessedand click Create in the bottom right of the file creation window. -
Create the following three files in your new
preprocessedfolder:flight_alerts_preprocessed.pypriority_mapping_preprocessed.pystatus_mapping_preprocessed.py
-
In all three files, add the following code snippet on line 2 to enable the reference and use of the utils files in your repository:
from myproject.datasets import type_utils as types, cleaning_utils as clean -
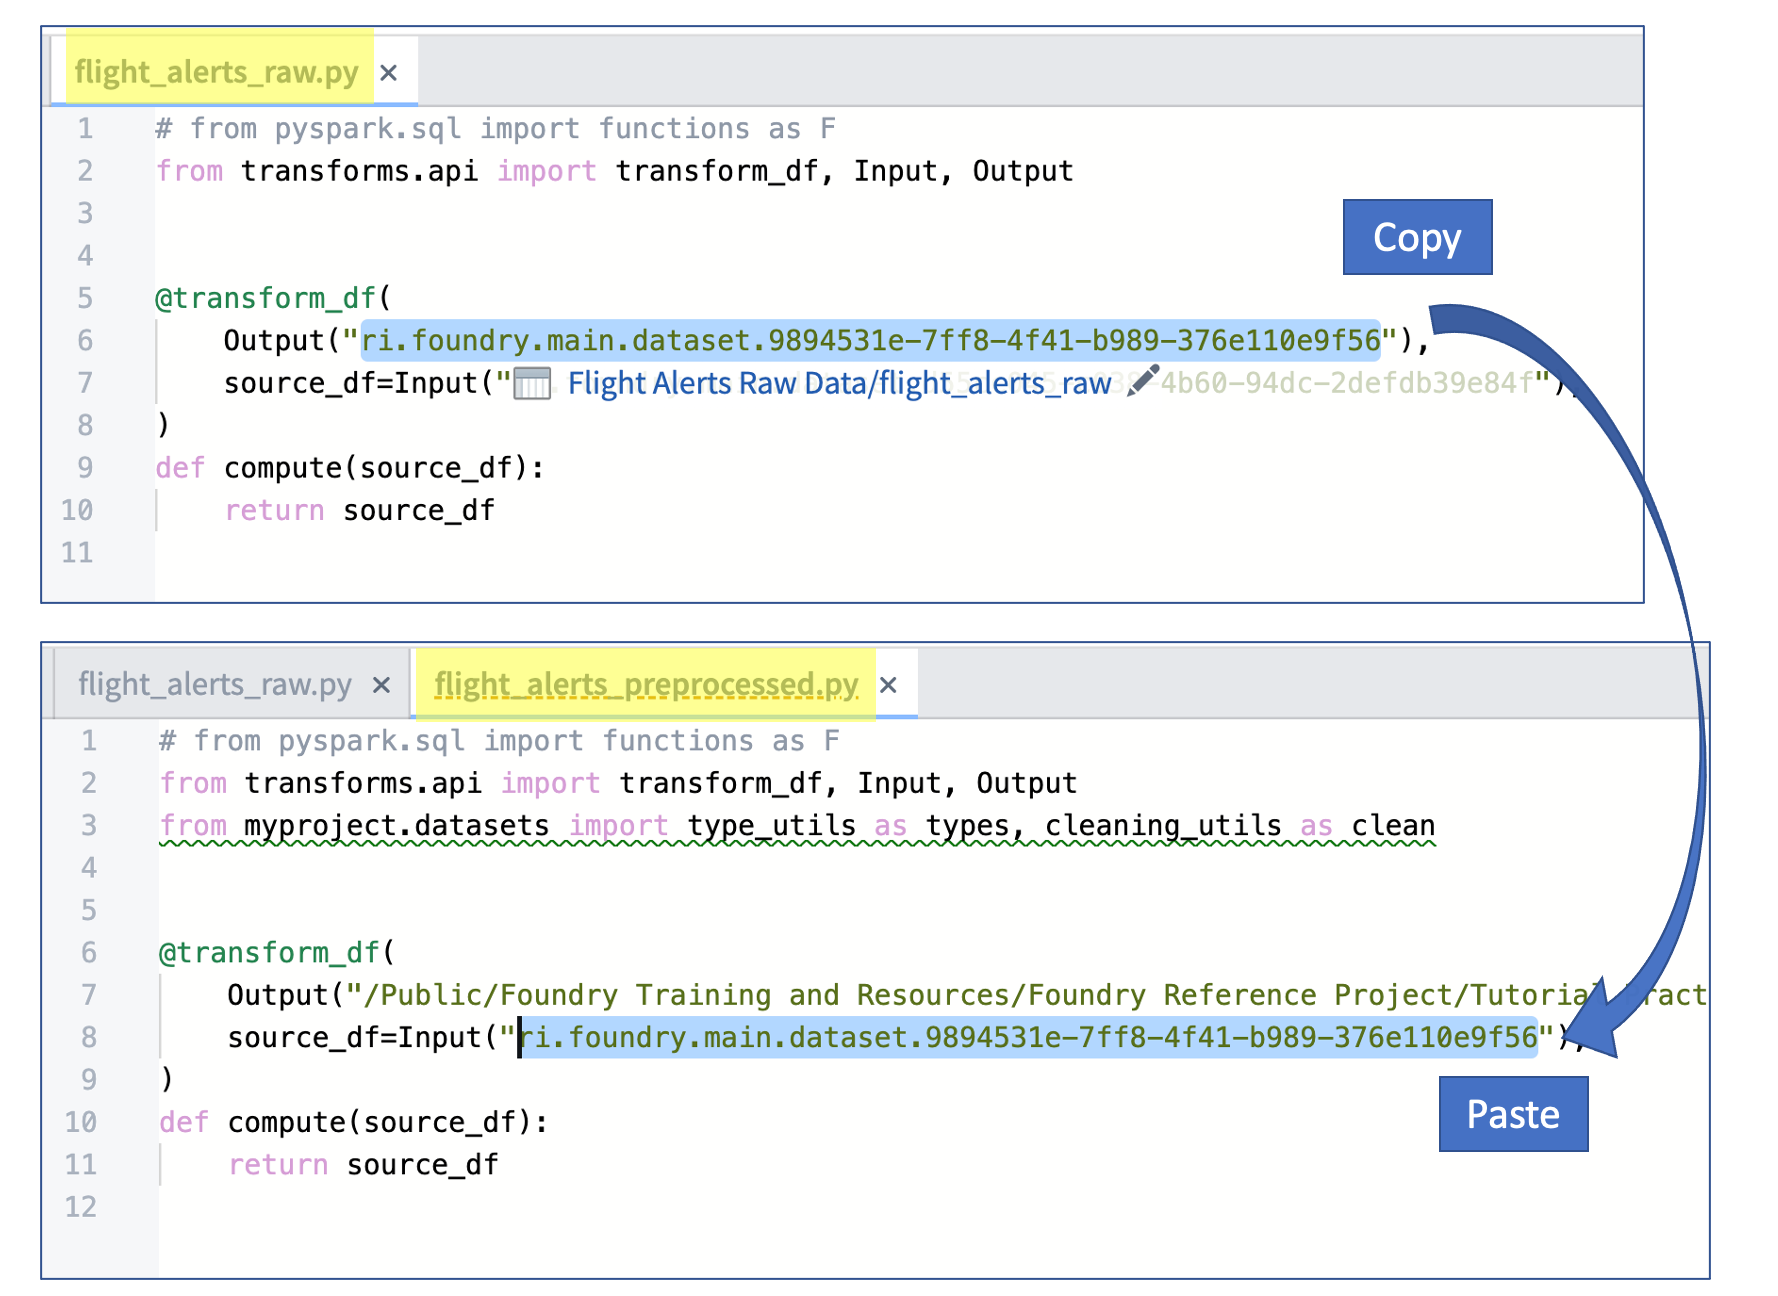
For each of the three new transform files, replace SOURCE_DATASET_PATH with the RID of the raw output files generated the previous exercises. The example image below shows the copy/paste workflow for the
flight_alerts_preprocessed.pyfile.
-
For each of the three new transform files, replace everything on line 10 and below with the corresponding code blocks:
-
See below for the
flight_alerts_preprocessed.pyfile code.def compute(source_df): # define string columns to be normalized normalize_string_columns = [ 'category', ] # define columns to be cast to strings cast_string_columns = [ 'priority', 'status', ] # define columns to be cast to dates cast_date_columns = [ 'flightDate', ] # cast columns to appropriate types using functions from our utils files typed_df = types.cast_to_string(source_df, cast_string_columns) typed_df = types.cast_to_date(typed_df, cast_date_columns, "MM/dd/yy") # normalize strings and column names using functions from our utils files normalized_df = clean.normalize_strings(typed_df, normalize_string_columns) normalized_df = clean.normalize_column_names(normalized_df) return normalized_df -
See below for the
priority_mapping_preprocessed.pyandstatus_mapping_preprocessed.pyfile code (they'll each use the same code block).def compute(source_df): # define string columns to be normalized normalize_string_columns = [ 'mapped_value', ] # define columns to be cast to strings cast_string_columns = [ 'value', ] # cast columns to appropriate types and normalize strings using functions from our utils files normalized_df = types.cast_to_string(source_df, cast_string_columns) normalized_df = clean.normalize_strings(normalized_df, normalize_string_columns) return normalized_df
Review the code comments and syntax to see how the cleaning and type utils are invoked in the preprocessed transforms.
-
-
Test each transform file using the Preview option, noting how the application of the util functions changes the outputs (e.g., the
flightDatecolumn is now a date type and themapped_valuescolumns in the mapping files are properly formatted). -
Commit your code with a meaningful message, such as “feature: add preprocessing transforms”.
-
Once the CI checks have passed,
Buildeach dataset on your feature branch. -
Consider returning to each of your preprocessed transform files and clicking the hyperlinked text: “Replace paths with RIDs” (you may need to refresh your browser first).
-
After validating the output datasets on your branch in the dataset application, (Squash and) merge your feature branch into
Master. -
Delete your feature branch.
-
Build the datasets on the
Masterbranch and verify the outputs in the dataset application.